2
Copyright 2014
All Rights Reserved.
Manual’s first edition:
For the purpose of improving reliability, design and function, the information in this document is subject to
change without prior notice and does not represent a commitment on the part of the manufacturer.
In no event will the manufacturer be liable for direct, indirect, special, incidental, or consequential damages
arising out of the use or inability to use the product or documentation, even if advised of the possibility of
such damages.
This document contains proprietary information protected by copyright. All rights are reserved. No part of
this manual may be reproduced by any mechanical, electronic, or other means in any form without prior
written permission of the manufacturer.
Trademarks
IBOX-1037UA is a registered trademarks; IBM PC is a registered trademark of the International
Business Machines Corporation; Pentium is a registered trademark of Intel Technologies Inc; Award is a
registered trademark of Award Software International Inc; other product names mentioned herein are used
for identification purposes only and may be trademarks and/or registered trademarks of their respective
companies.
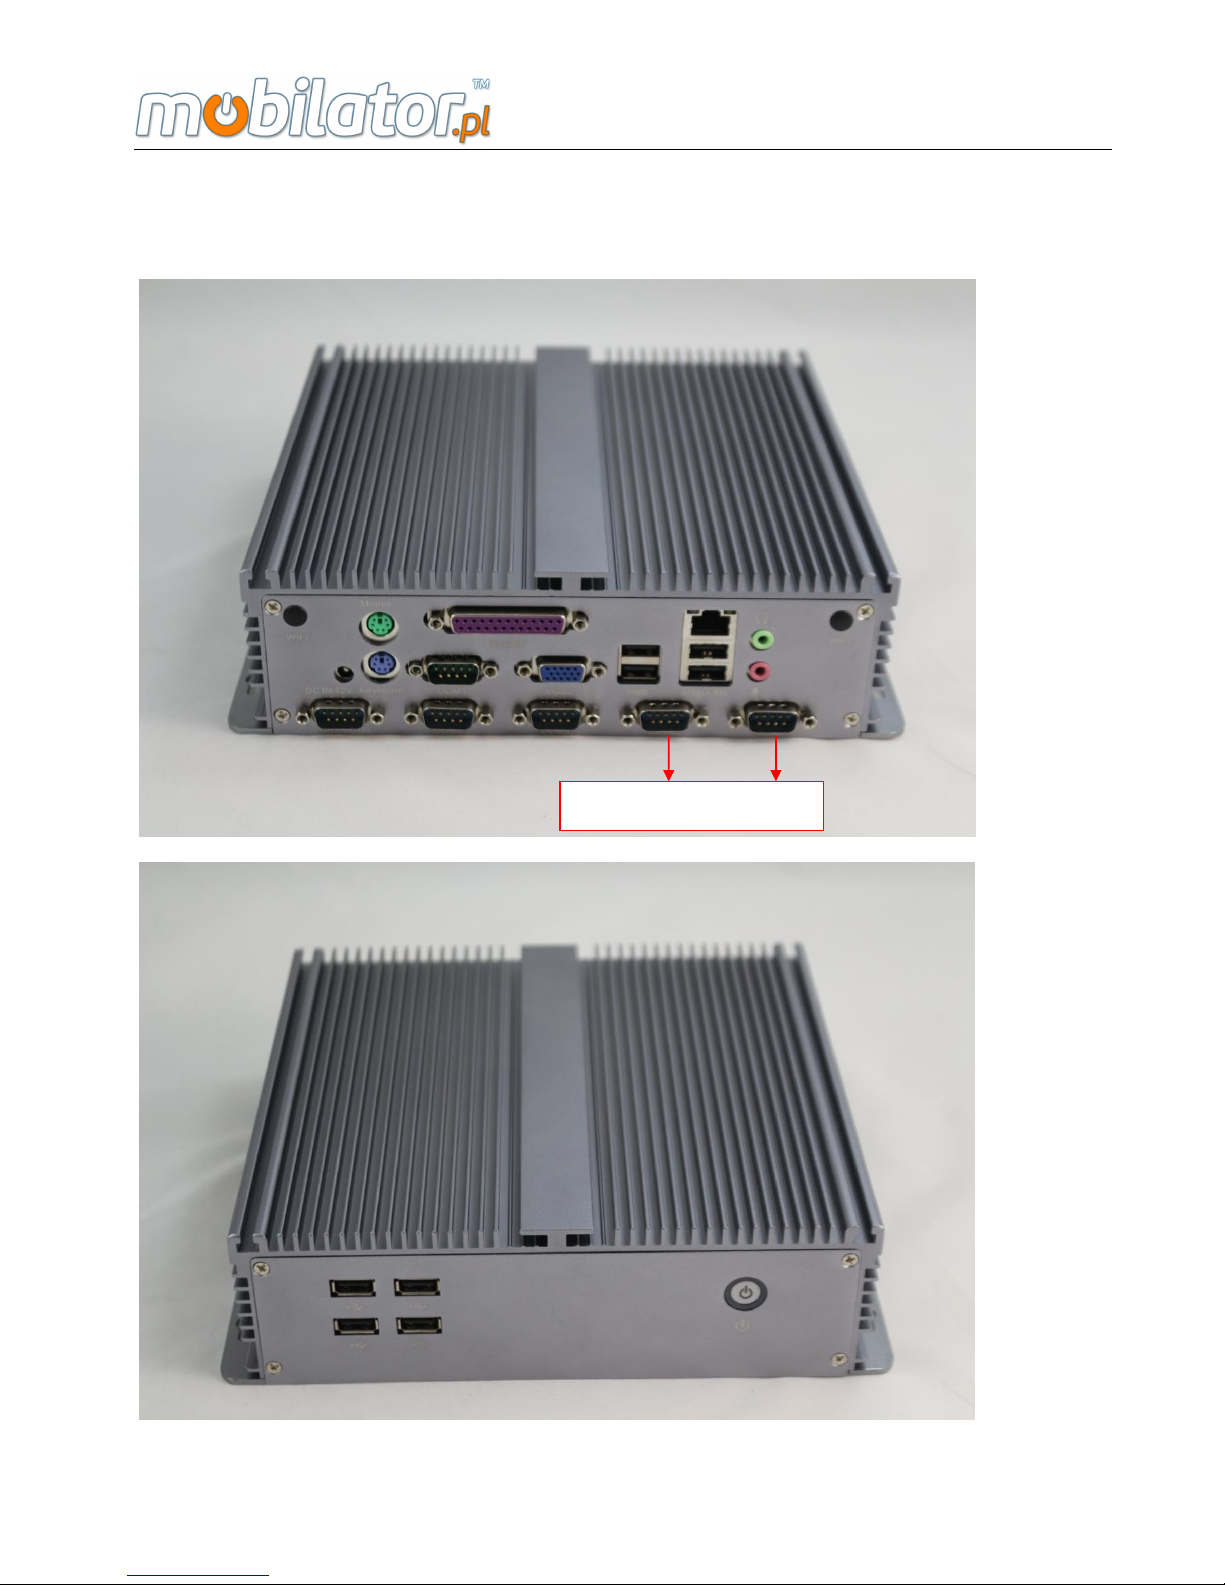
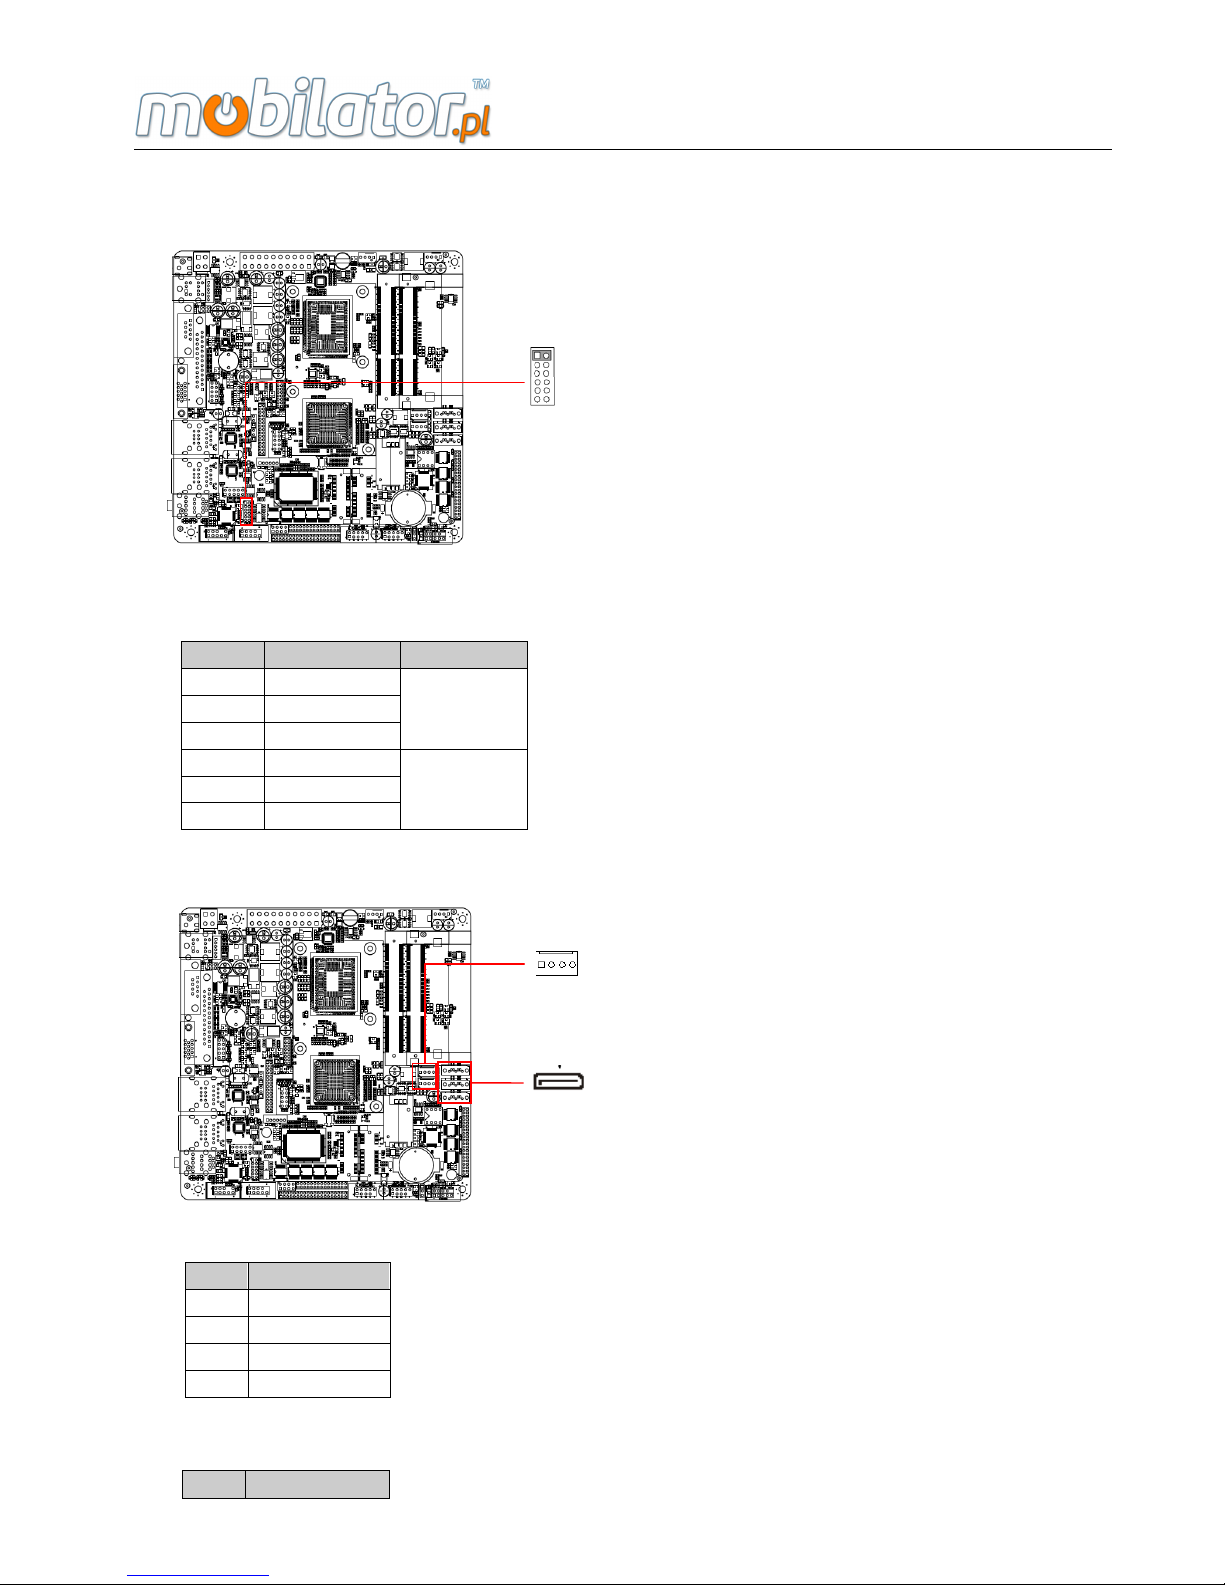
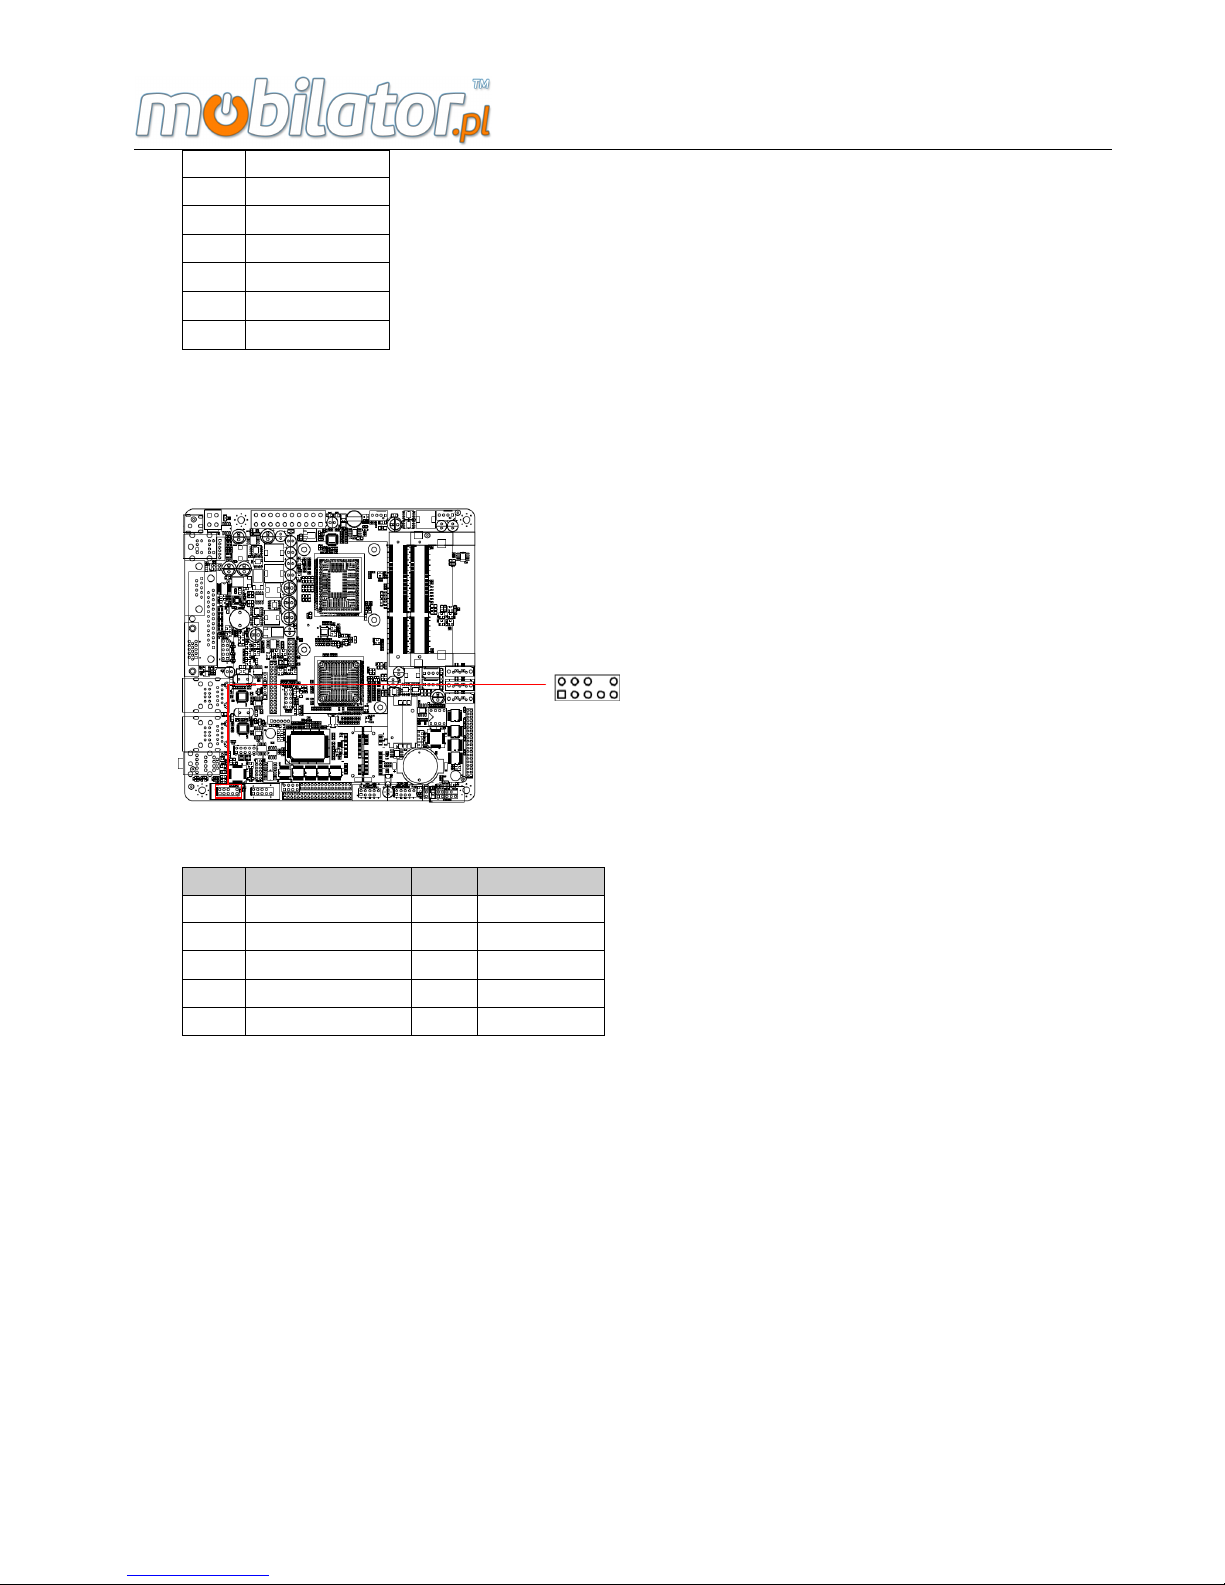
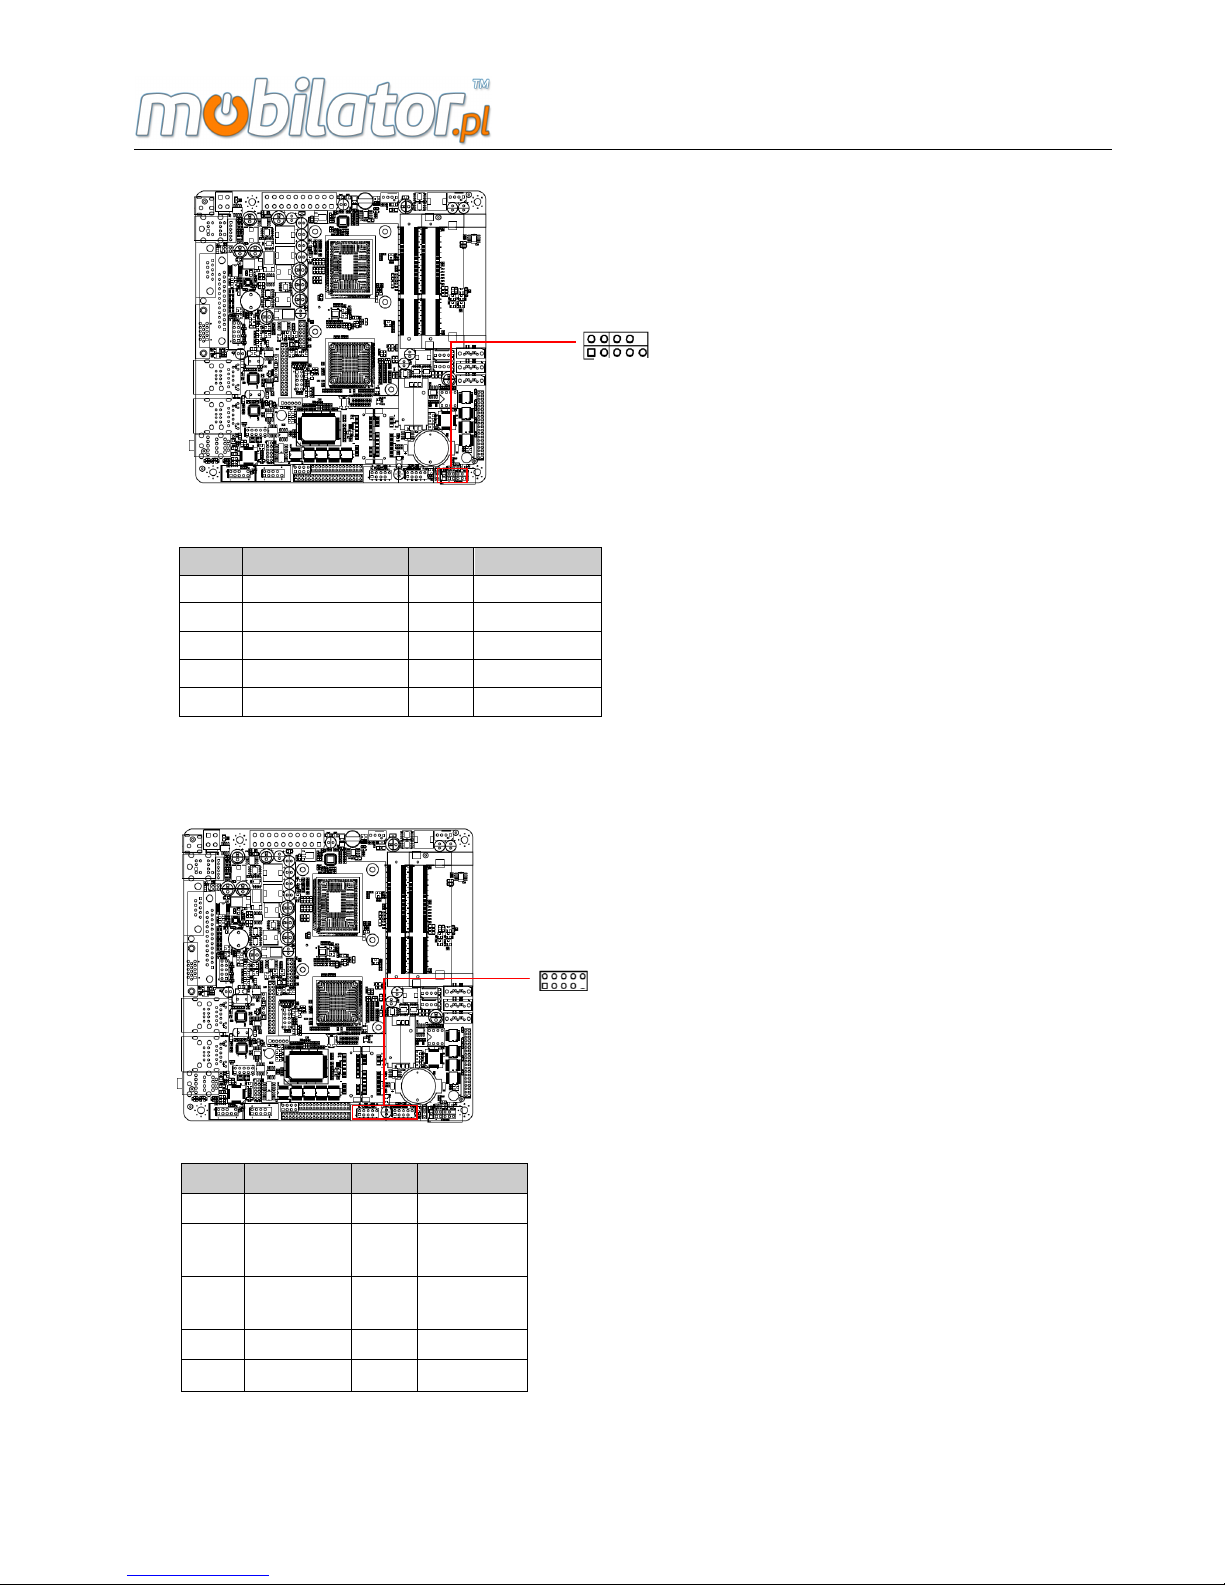
Specifications