Mobile Fidelity Blastmaster Xl-G3 Quick start guide

Owner’s Operation
Instructions
Version 5, 03/2013

!
Like BlastmasterXL on FACEBOOK™
!!!!!!!!!!!!!!!!!!!!!!!!!!!!!!!!!!!!!!!!!!!!!!!!!!!!!!!!!!www.mobilefidelityinc.com (208) 720-6315 OI V5
!
1!
Ownerʼs Operation Instructions
Welcome to your Blastmaster XL –G3 (Generation 3)
The Blastmaster XL™ is a high performance Mobile Sound System. Be
the talk of your friends, the Sound of the Town, Rock your job-site,
promote your company, or provide music entertainment wherever you
may go! The Blastmaster XL™ product line provides Home Stereo/DJ
Quality Sound in a portable self-contained unit.
Safety Instructions
The user shall be aware of the presence of “dangerous electrical
current” within the productʼs enclosure that can constitute a risk of
electric shock to persons. The user shall read and understand the
important Operation Instructions in the literature accompanying the
product.
•Read these instructions. Keep these instructions
•Heed all warnings. Follow all instructions.
•Do not use this apparatus near or in water/wet conditions.
•Do not block any ventilation openings.
•Do not use near any heat sources such as radiators, heat
registers, stoves, or other apparatus that produce heat.
•Do not defeat the safety purpose of the grounding type 120v
charging plug. A grounding type plug has two blades and a
third grounding prong. The wide blade or the third prong are
provided for your safety. If the provided plug does not fit into
your outlet, consult an electrician for replacement of the
obsolete outlet.
•Protect the power cord from being walked on or pinched
particularly at plugs, convenience receptacles and the point
where it exits from the apparatus. Coil and store in storage
sleeve when not in use.
•Unplug this apparatus during lightning storms
•Refer all servicing to qualified service personnel. Servicing is
required when the apparatus has been damaged in any way,
such as power-supply cord or plug is damaged, liquid has been
spilled or objects have fallen into the apparatus, the apparatus
has been exposed to rain or moisture, does not operate
normally, or has been dropped.
WARNING – To reduce the risk of fire or electric shock, do not expose
this apparatus to rain or moisture.
•Do not expose this equipment to dripping or splashing
•Maintain at least 6 inches of unobstructed air space behind the
unit to allow for proper ventilation and cooling of the unit.
•Amplifiers and loudspeaker systems are capable of producing
very high sound pressure levels, which may cause temporary
or permanent hearing damage. Use care when adjusting
volume levels during use. Turn volume of unit upwards slowly
to prevent damage to components. Always start from low
volume levels
•Be sure to place this unit on a level surface.
WARNING – To maintain product safety, batteries shall not be
exposed to excessive heat such as extreme sunshine, fire or the like.
There may be a danger of explosion if the battery is incorrectly
connected/replaced. Replace only with the same or equivalent type
battery specified in the instructions or on the product.
Contents
1. Initial Assembly Required- Getting Started
a. Battery Install
b. Head Unit Initial Set up
c. EQ Unit Initial Set up
2. Components Operation
3. Top of Unit- Alcoves
4. Sides/ Bottom of Unit
5. Back of Unit
6. Transportation
7. Batteries
8. Safe Operation Statement
9. Cleaning/ Finishes
10. PA/Microphone
11. Misc.
12. Trouble Shooting
13. Warranty!

!
Like BlastmasterXL on FACEBOOK™
!!!!!!!!!!!!!!!!!!!!!!!!!!!!!!!!!!!!!!!!!!!!!!!!!!!!!!!!!!www.mobilefidelityinc.com (208) 720-6315 OI V5
!
2!
1.Initial Assembly Required- Getting Started
Your Blastmaster XL will not perform properly unless theese
Initial Assembly Procedures are followed.
Upon your receiving of the Blastmaster XL you will need to acquire the
following battery or batteries and complete the following assembly:
(Tools needed: wrenches 9/16” &1/2, and 7/16”, crescent wrench/
pliers)
a. Battery install-
You will need to get and
install (1 or 2) deep cycle
marine batteries, lead acid
sealed AGM size 34. Be
sure to get from the battery
supplier the complimentary
riser support for series 24
battery tray compatibility
(FIGURE 1). Batteries are
not included- installation is
required. We recommend
starting with one battery
and installing it in the rear/
left end battery
compartment (viewed from
the back of unit). This
weight placement will make
for easier loading and
unloading of your Blastmaster XL into transport
vehicles. Have a professional/knowledgeable person install
this electrical component as a shock risk/ hazard exists. Be
sure to cover battery terminals with provided covers.
Secure battery with
provided bracing system.
ONLY remove the front
bottom nut and rod. Swing
top mounting bar aside,
place your battery in the
tray, and then swing back
upper cross brace(FIGURE
2) and secure. Tighten
back nut (top) and front nut
(bottom) (FIGURE 3)
locations equally for safe
secure attachment of your
battery. Cover battery
terminals with protective
covers after thorough
tightening of terminal
clamps is complete.
(FIGURE 4)
Install provided wagon
carriage handle with
provided through bolt
(temporarily installed in
handle during shipping).
Tighten so that metal side
flanges touch plastic
spacers for a snug,
(FIGURE 5) non-vibrating,
easy/smooth operation of handle. Additional future tightening
may be required after repeated use.
b. Head Unit Initial Set up
The upper round toggle
switch turns on power to
the head unit . The
“Source” button on the
head-unit turns the head
unit on/off and also does
music input selection. The
large round button/dial will
be used for selecting the
following settings for your
initial setup. You will start
with SET UP- YES.
(FIGURE 6).
On the head-unit pushing
and rotating the large
round dial, cycle to the
INITIAL settings section
(FIGURE 7). Rotate dial to set to SP-P/O MODE
(FIGURE8). Then set to
REAR/REAR (FIGURE9) -
this sets the output sound
signal to run to the
external amplifiers.
Proceed using the round
dial and return button to
get to AUDIO setting.
Through the AUDIO
settings (FIGURE 10) get
to the EQ SETTING section (FIGURE 11), set it to
NATURAL(FIGURE 12). This is a good initial setting for the
head unit internal
equalizer.
From this point forward we
suggested that you use
the separate external
equalizer for finer
adjustments- see EQ
section below. You should
read the head-unit
provided owners manual
as you will likely desire to
set up your own custom
internal EQ settings for
optimal sound
performance.
Continue using the round
button and the return
button to go to
LOUDNESS and select
LOW (FIGURE 13). Lastly,
cycle with the buttons to
the S.RTRV screen and
select 2 (FIGURE 14).
FIGURE 1!
FIGURE 2!
FIGURE 6!
FIGURE 7!
FIGURE 8!
FIGURE 9!
FIGURE 10!
FIGURE 11!
FIGURE 3!
FIGURE 4!
FIGURE 5!

!
Like BlastmasterXL on FACEBOOK™
!!!!!!!!!!!!!!!!!!!!!!!!!!!!!!!!!!!!!!!!!!!!!!!!!!!!!!!!!!www.mobilefidelityinc.com (208) 720-6315 OI V5
!
3!
It is important to turn off the head unit and then toggle OFF
the round upper switch (in that order) after every use to
preserve battery life.
You are almost ready to ROCK! You just need to set up the
external/ separate EQ unit.
c. EQ Unit Initial Set up
The front of the EQ has (3) areas that can be adjusted for
finer music playback sound quality control (FIGURE15).
The fader dial should be
set in the vertical position-
12:00 oʼclock and the CD
button in the “in” position.
VOLUME- Set this dial to
the 12:00 oʼclock position
and NEVER adjust this dial
again. The next (4) dials
SUB, LOW MID, HIGH are
all for your 6x9ʼs. Set all of these dials to the 12:00 oʼclock
position initially. Make minor adjustments for your personal
listening preference depending on the music style and sound
recording quality of your sound device and music recordings.
The last (2) dials on the right are the most critical. These are
for the subwoofer. Set the SUB X OVER to 30hz and the
SUB VOL. to the 11:00 oʼclock position. The sub volume dial
will most likely be the dial you will adjust the most. The
position of this dial as suggested covers most music types
through moderate volume playback levels. However, the
demanding BASS of modern sound recordings can
necessitate a lower/less sub volume setting as your playback
volume increases.
These settings have been set initially by us at the factory.
Now you are ready to play the provided demo CD, insert
your own CD or use your own input device. Enjoy!
2. Components Operation
Head unit, primary speakers (subwoofer & 6x9ʼs,120v charger,
equalizer, amplifier etc. all have their respective operating instructions
included in this Owners packet. Follow manufacturerʼs instructions for
proper operation of each component.
Each user has their own sound quality/play back preferences, we
however suggest starting with our suggested settings, and then you
can learn the multitude of finer adjustments. The most likely unpleasant
and possibly damaging performance can result due too playing music
with too much bass, too loudly. Bass signals vary greatly due to
recording levels, and different types of music. We cannot warrant
against excessive playback volumes nor excessive bass play.
Playback devices such as ipod™, iphones™, mp3 players should have
their equalizers set at a neutral setting; our recommendation is on
“classical” setting then the equalizer on your Blastmaster XL for finer
adjustments. You can always call us for a personal discussion of
sound performance adjustments. We also suggest setting your music
MP3/laptop etc. output device to the “sound check” feature to balance
playback levels.
Our preference is to adjust settings for each song like a DJ, and to
make playlists that have similar sound output levels.
The best sound quality is from a direct line in which is the USB cord,
next best is 3.5mm headphone jack and Bluetooth™ (these both have
about 10-15% less sound quality.) For these output devices; set the
volume level on the output device to 7/8. If you have it at full 100%
volume level on the output device this will be a distorted signal.
Start slowly when increasing the volume dial and avoid rapid volume
increases. Work your way up to desired sound output levels, adjust
sound quality options, become informed on component use to protect
the equipment and to achieve optimum sound quality!
Any use that is done that is not within the manufactureʼs instructions is
deemed an occurrence that not only puts you and your equipment at
risk but will void any and all warranties.
3. Top of Unit- Alcoves
The recessed areas of the top of the
Blastmaster XL are provided for
temporary storage areas for items
such as: mp3 players, mobile
phones, beverages, keys etc. Your
items are not intended to be left in
these areas during transport as your
items may be damaged, lost or your
beverages spilled (FIGURE 16).
4. Sides/ Bottom of Unit
There are recessed spring activated
lever handles. These handles are to
assist with the partial lifting, and the
jockeying around of the unit for
transportation (FIGURE 17). These
handles are NOT intended to be the
sole lifting points rather they are
assisting lift points/locations.
The side of the unit -(right side) that has the bottle opener was placed
here to avoid conflict with the steering end of the Blastmaster XL. The
opposite side (front left side) with the steering assembly protruding
beyond the footprint of the Blastmaster XL poses a trip hazard. Use
caution around this protrusion to avoid injury. A clear vinyl sleeve is
placed on the handle shaft to minimize abrasion to the cabinet box.
FIGURE 12!
FIGURE 12!
FIGURE 13!
FIGURE 14!
FIGURE 15!
FIGURE 16!
FIGURE 17!

!
Like BlastmasterXL on FACEBOOK™
!!!!!!!!!!!!!!!!!!!!!!!!!!!!!!!!!!!!!!!!!!!!!!!!!!!!!!!!!!www.mobilefidelityinc.com (208) 720-6315 OI V5
!
4!
There is a sleeve through the cabinet box on the back right corner.
This is for you to add your favorite flag. This drain through sleeve is
also for the Wireless Transmission/ Receiving Mast Systems (optional).
Bottom of Unit-There are protective side valences for the shielding of
the LED lights. These lighting accessories are not designed for
extreme weather exposure- submersion in water, mud or snow.
The steering assembly has been provided with sound deadening
washers to minimize undesirable vibration. Over time you may need to
tighten the appropriate bolts to minimize vibrations.
5.Back of Unit
The battery compartments are separated from the center electronic
compartments and are vented independently due to battery
requirements.
The amplifier alcove has a protective
metal mesh vent cover (FIGURE 18).
The 120v power charging cord is
tucked into the sleeve on the bottom
right fender (FIGURE18). The cord
comes with an attached Velcro™
wrap which is to tightly bundle your
cord for tidy storage in the sleeve.
There is a large vent in the upper
middle of the back that is to provide
cooling for the head unit and EQ.
Sync your Bluetooth™ device while
holding it by the back center grill,
once synced, you can wirelessly play
with your device up to 50ʼaway.
There is a 12v plug in “cigarette
lighter” style (FIGURE 20). This can
be used for charging cell phones,
MP3 players etc. The plug-in cord
accessory is not included.
NEVER cover/ block any of these
rear panel vents as it can damage
the electronics, can create a fire hazard, and or put
you at risk.
6.Transportation
When the Blastmaster XL is being transported in a vehicle the wheels
should be “Chocked” and unit secured as required to transport vehicle
for safe travel. It is your responsibility to provide safe, secure means
and methods of travel for this product as you assume all responsibility
for any damage to you, the unit, or your belongings caused during
transport.
The Blastmaster XL incorporates a “wagon “ style wheel, carriage and
steering assembly. Check your tires air pressure regularly for safe and
easy rolling operation. Follow pressure requirements as stamped on
the tires. While walking/ leading the Blastmaster XL from the transport
vehicle to your final use destination; uneven/ non-level ground can
create a hazard. Depending on the terrain that you are traversing, safe
transport practices may require the assistance of a second individual.
The Blastmaster XL if lifted should done so by two capable persons by
placing hands on bottom of unit cabinet box. OSHA safe lifting
practices shall be implemented when lifting the Blastmaster XL for any
purpose. Rolling up a ramp and or lifting the front then back onto a
receiver hitch carrier(optional accessory) are the recommended
transportation procedures. Never angle lift the unit greater than 30º.
Dead lifting of the unit is NOT recommended.
7. Batteries
It is important to maintain your battery charge level per the
manufacturerʼsinstructions. The required model is a deep cycle AGM
sealed marine battery. It is your choice to purchase certain higher or
lower amp hour designations. The more amp hours the better as this
influences the battery run time. Have your local battery provider install
the battery or batteries into your unit. Using AGM style batteries size
34 will require from your battery supplier the complimentary series 24
tray size lift spacer. This is necessary for allowing the battery to be
secured within the battery tray, cross bar system. Batteries are a
dangerous electronic component that hold an electric charge that may
put you at risk to electric shock. Additionally, batteries contain harmful
acids and emit explosive gases. Follow all manufacturerʼs safe practice
requirements for your batteries.
This type of battery is designed to operate for numerous repeat
discharges. This type of battery however in its use emits
toxic/flammable fumes that must be ventilated from the storage
compartment. Vents are provided for this purpose and MUST not be
blocked. The batteries are a “non lifetime” consumable product. When
the batteries are not performing to intended levels their replacement
shall be done by a trained installer of the new batteries. The batteries
are to be installed in/ secured to specific trays provided. Any steep
tipping of the Blastmaster XL voids your warranty and may put you and
the Blastmaster XL at risk.
The batteries shall be secured with the overhead bolted clamp to the
tray. The rear vertical station is installed opposite of the front post. The
front post is actually to be installed upside down with the nut at the
bottom. This is due to limited access for installing the battery. Securely
tighten both posts to the cross strap.
Battery life of repeat operation is effected by how loud, how long, and
what type of music you play and outside temperature conditions.
Playing music with larger amounts of bass and/or at high volume levels
consume larger amounts of power.
Your Blastmaster XL should be recharged by a 120V source via the
integrated battery charger. It shall be known that any method of
charging takes time and that amount of time is dependent on the level
of battery depletion. The average charge ratio is approximately: (3)
hours charge time for one hour of playback time.
The battery charge Indicator is located on front of unit. The upper
round switch controls this gauge. Charge your unit after every use or at
least weekly; and while charging have the round upper toggle switch/
battery indicator gauge on for the gauge to calibrate percentage of
charge. This visual gauge shows the current status of your batteries
charge. This switch /gauge must be left on for at least (1) minute for an
accurate reading to be established. It is recommended for the
prolonged life of the batteries not to deplete the batteries below 35%
capacity in above freezing temperature conditions and not below 45%
in freezing conditions. The lower the temperature the greater the risk of
battery freezing. The amplifier will begin itʼs safety shut off mode when
battery voltage is too low- causing a clipping/ turning on/off of the
amplifier. This, in addition to the visual battery gauge, will tell you when
FIGURE 18!
FIGURE 19!
FIGURE 20!

!
Like BlastmasterXL on FACEBOOK™
!!!!!!!!!!!!!!!!!!!!!!!!!!!!!!!!!!!!!!!!!!!!!!!!!!!!!!!!!!www.mobilefidelityinc.com (208) 720-6315 OI V5
!
5!
it is utmost time for battery recharging. It is recommended to keep the
unit continually plugged into the 120 v power supply when not in use to
keep the batteries charged and conditioned. This “trickle charge style
battery charging system “IS NOT” capable of charging the system for
direct playback when the batteries are in a low/dead condition. The
batteries are the required power source.
8. Safe Operation Statement
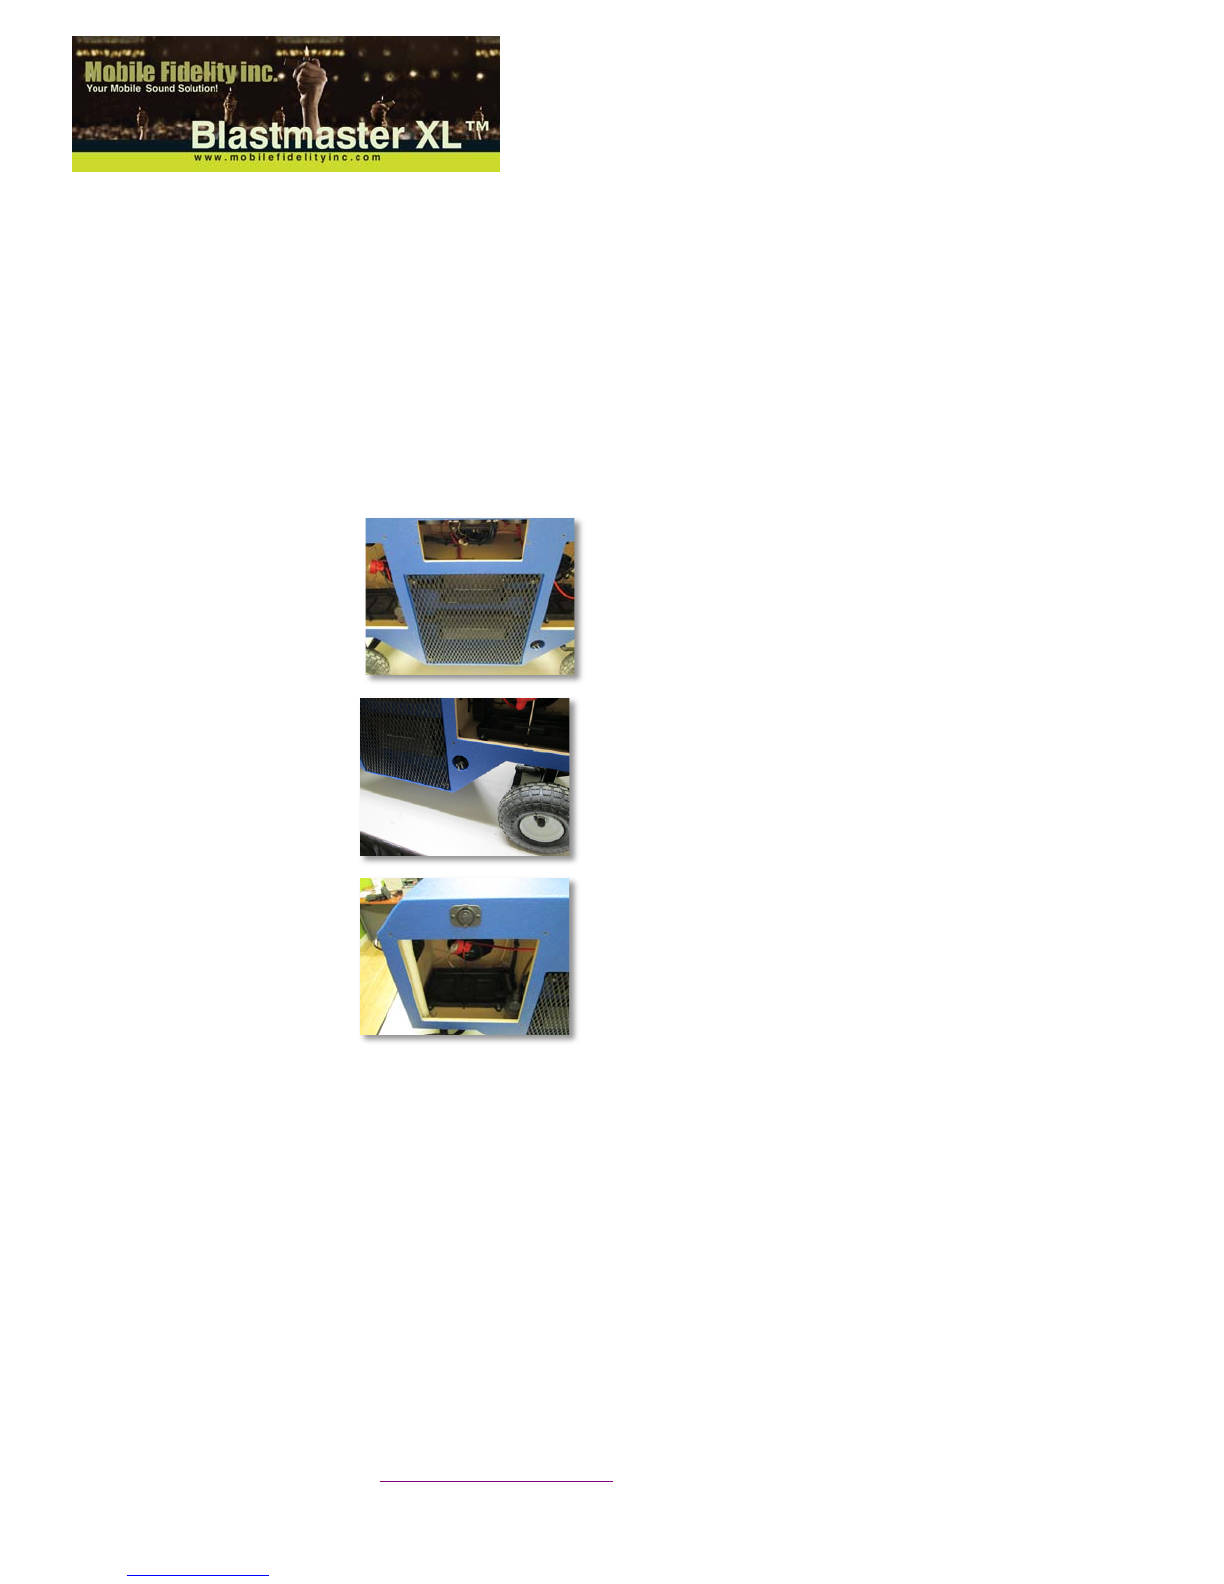
Battery access panels are provided to the only standard replaceable
item(s)- the batteries/ fuses. There are no user/ owner serviceable
items in the other compartments of the Blastmaster XL. Any access to,
or modification of interior wiring / electronics voids your warranty and
may put you and the Blastmaster XL at risk.
Any use that deviates from the intended use by each manufacturer of
components incorporated into your Blastmaster XL will void any
warranty. The Blastmaster XL shall NEVER be used for music
playback un-attended or left unattended during any charging method
(internal 120v or Solar charging system-(optional)). Internal fuses are
provided for equipment safety and your safety. In the event of an
unplanned malfunction; you are solely responsible for the management
of that crisis. This may require the use of an appropriate fire
extinguishing method. Safe operation practices and preparation for the
unexpected are required and are your responsibility.
9. Cleaning/ Finishes
The exterior finishes of the Blastmaster XL are automotive professional
exterior grade finishes. Manufactureʼs product warranty, use, exposure,
are based on intended use. For general dust, dirt etc. cleaning a
sponge with warm soapy water applied and a wipe rinse is a safe
effective cleaning method. Sing a damp but not dripping/ saturated
sponge is required. DO NOT submerge or saturate any of the
electronic components. Do not let water enter or contact any electrical
components. A simple lint free rage with a glass cleaner (without
ammonia) also works well. To clean dust collecting in hard to reach
areas, us canned air carefully (Standard product that is sold for
cleaning electronics and computer keyboards). Do not spray canned
air too close to speaker material inside speakers as damage can occur.
10. PA/Microphone
The only ways we recommend the inclusion of a microphone for PA
use is through an accessory device such as a laptop or a sound mixing
board(there are battery powered/ 12v units available-(Accessory
option)). We use a laptop running a DJ application. DJ Software will
allow music playback simultaneously while mixing in a microphone.
Certain computer applications will allow for the microphone use solely
with music mixing capabilities being limited. Directly plugging in of a
microphone into the head-unit will not work. Mixing boards and laptops
shall have output cordage of 1/8” headphone jacks, or with adapters to
get to this size to plug into the head unit.
11. Misc.
Durable water resistant finishes were chosen to prolong the durability
and longevity of the unit. If you are in inclement weather the
Blastmaster XL shall be moved to a safe, dry location. Any use of the
Blastmaster XL outside of these conditions will put you and the unit at
risk, and will void any warranties. The recommended operating
temperature ranges are from 35º F to 95ºF.
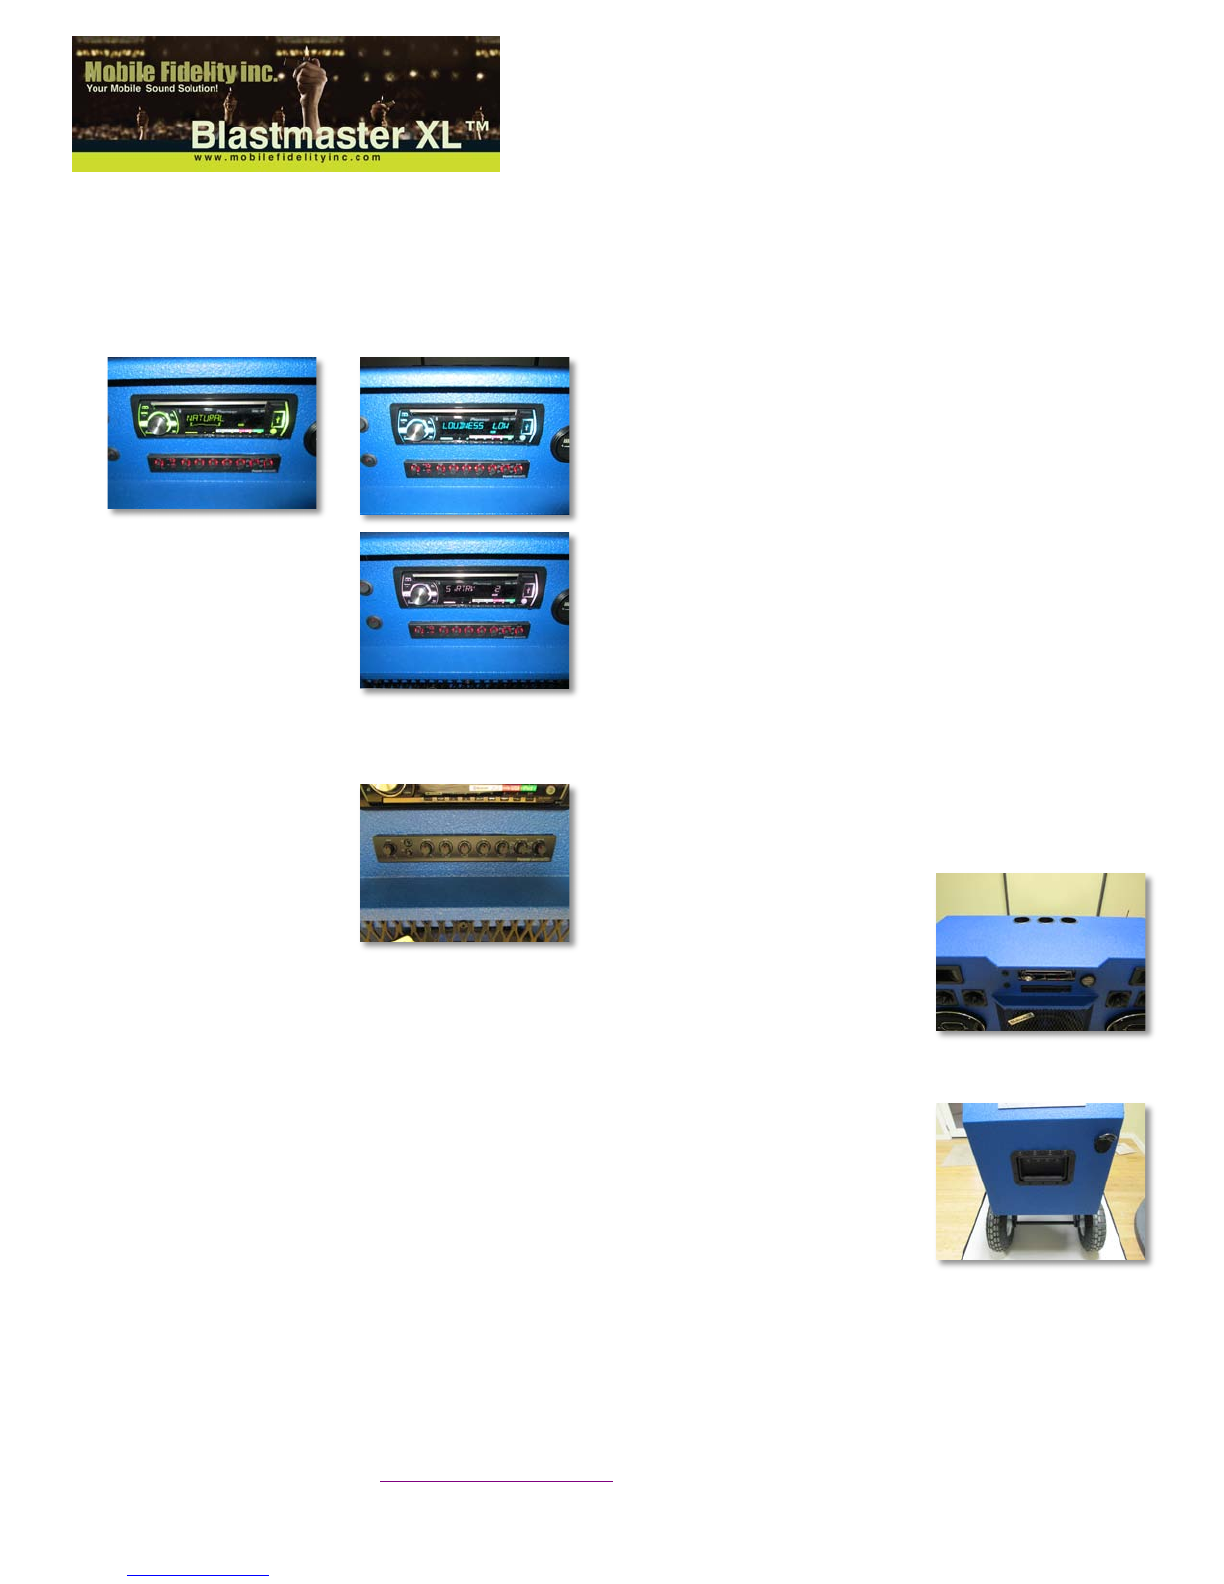
The design of the front / top of the Blastmaster XL is to shield the head
unit, switches, gauges, and equalizer from direct sunlight. The
subwoofer and amplifiers are protected with metal protective mesh.
The several vents on the rear of the Blastmaster XL as well as the
amplifier protective mesh are to ALWAYS remain clear for ventilation
purposes.
Multiple Blastmaster XLʼs can be connected together with “Y” splitters
on 3.5mm cables or with the optional Wireless Transmission/Receiving
System.
12. Troubleshooting
a. Head Unit and EQ do not have power? Make sure the upper
round toggle switch is in the ON position.
b. Sound quality is not good? Follow/reset initial Start up
Procedures. If this does not generate acceptable sound playback, call
us and we will trouble shoot with you & discuss audio control settings.
c. Blastmaster is hard to pull? Check your tires for proper inflation
d. Tires have a rubber smell? Over time this odor will subside with
exposure to UV light and warmer temperatures. This will speed this
odor off-gassing. We suggest storing your Blastmaster XL in a
garage, storage area for the first few months until the “New Car” smell
goes away.
e. How long does it take to charge the battery? On average it
takes (3)+ hours of charge time for every hour of playback time.
f. My battery life is not very long? If you operate your Blastmaster
XL in colder temperatures the battery life can be shortened by up to 3
times or more. The louder you play your music, the battery life is also
lessened. If you desire longer battery life, consider adding the second
battery or buying larger amp hour capacity batteries.
Please give us a call to discuss any issues that you may be having.
NO question is a stupid question!
13.Warranty
This product is warranted against manufacturing defects for the term of
(90) days from the date of purchase. This warranty is not transferable
beyond the original owner/purchaser. Mobile Fidelity inc. will replace
any defective product that does not have included manufacturers
instruction warranty information provided. The name brand items
incorporated, if warranty issues should occur, are your responsibility.
You should contact the manufacturer directly for all performance and
warranty claims. You are responsible for these itemsʼreplacement
installation. Mobile Fidelity inc. at their discretion will replace
defective part/product with a comparable part or product. It is YOUR
responsibility to file/submit ALL warranty registration cards/forms as
provided in your operations packet. If you do not submit these
warranty cards, said products will not be warranted by the related
manufacturer. ALL installation, shipping/ handling etc. is your
responsibility for any warranty claims. Damage resulting from misuse
or accident is not covered by this or any warranty. Mobile Fidelity inc.
assumes no liability for an accident, death, injury caused to you,
others, or your property or any other claim related to or resulting from
the use/misuse of this product. In no case shall Mobile Fidelity inc. be
liable for incidental or consequential damages relating to or resulting
from the use of this product or any of its parts. The Blastmaster XL is
not warranted for water damage or any outdoor conditions damage.
ROCK ON MY FRIENDS- WELCOME TO THE BLASTMASTER
ARMY!

(208) 720-6315
Table of contents