ES COMPACT 1.6
6
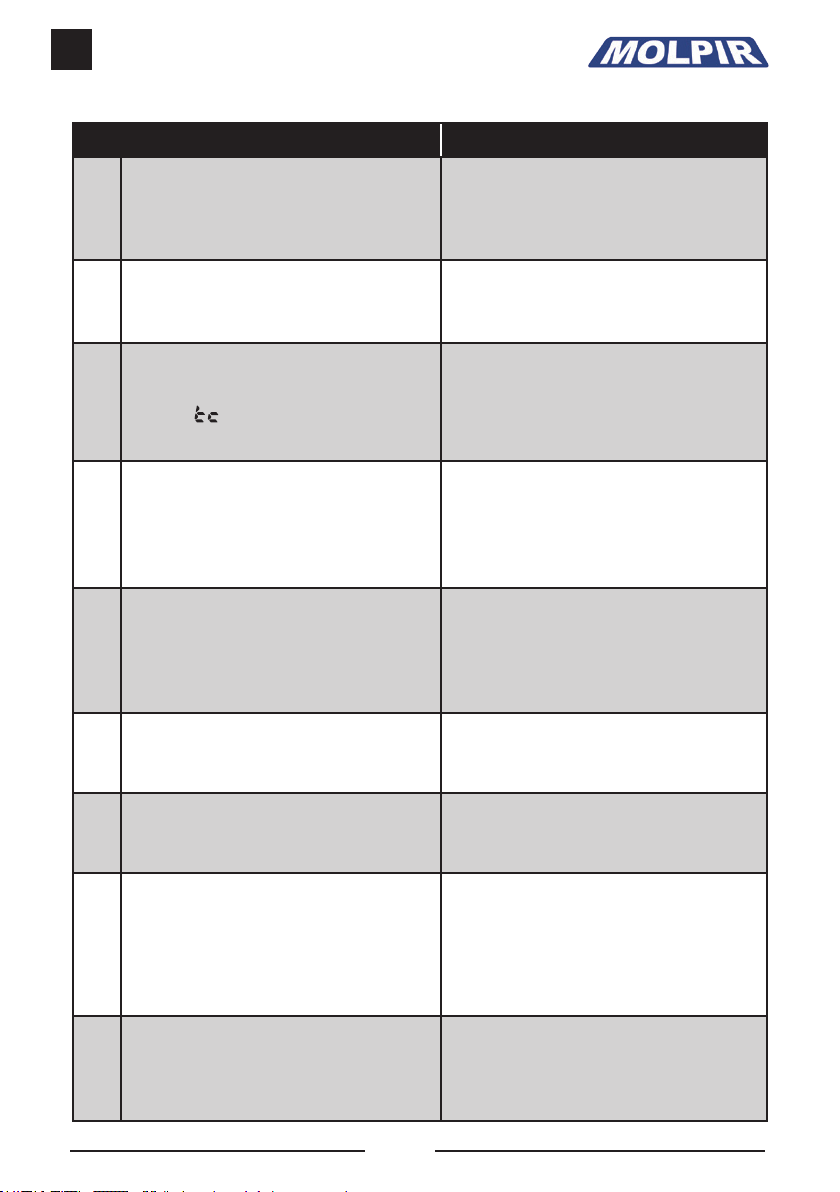
Síntoma Causa Solución
AEl equipo no se enciende.
• Fusible fundido.
• Cable alimentación desconectado o
cortado.
• Sustituir fusible vericando y corrigiendo la causa de la averia.
• Vericar conexiones o posibles roturas corregir o sustituir.
BAl conectar el cable de alimentación del
equipo este emite pitidos intermitentes.
• Cable conexión panel de control y control
electrónico. • Invertir posición del cable de conexión del panel de control y el control eléctrico.
CAparece en el panel de control el
símbolo
• Batería baja.
• Cargar o sustituir batería.
• Comprobar y corregir posibles malos contactos.
DEl equipo no responde al mando a
distancia.
• Mando desprogramado.
• Batería del mando agotada ,no se
enciende el Led.
• Control electrónico averiado.
• Mando defectuoso.
• Reprogramar mando.
• Sustituir pila de mando y volver a programar.
• Sustituir control electrónico.
• Sustituir mando.
EUn compresor no funciona.
• Mala conexión de los terminales.
• Modulo de control defectuoso.
• Compresor averiado.
• Falta de tensión en la batería.
• Conectar correctamente terminales del modulo de control. (según esquema eléctrico anexo).
• Sustituir modulo.
• Sustituir compresor.
• Cargar o cambiar la batería.
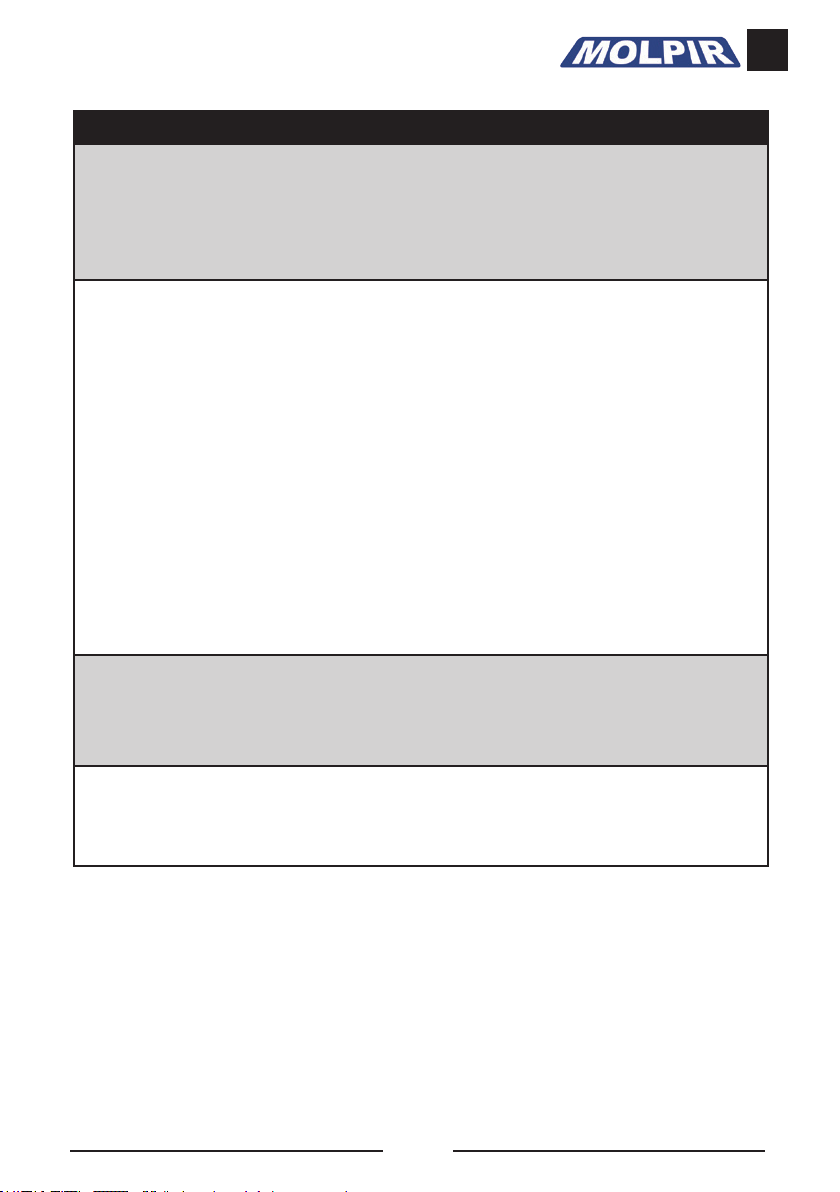
FEn el panel de control aparece E0
parpadeando.
• Mal contacto de cables o terminales del
sensor de aire de retorno.
• Sensor de aire de retorno averiado.
• Comprobar contactos de terminales o cables ,corregir.
• Sustituir sensor de aire de retorno.
GEn el panel de control aparece E6
parpadeando.
• Mal contacto de cables o terminales del
sensor antihielo.
• Sensor antihielo averiado.
• Comprobar contactos de terminales o cables ,corregir.
• Sustituir sensor antihielo.
HEl ventilador del condensador no
funciona.
• Ventilador del condensador bloqueado o
averiado.
• Control electrónico averiado.
• Terminales desconectados.
• Comprobar causas del bloqueo y corregir o sustituir el ventilador del condensador.
• Comprobar salidas de +y - del ventilador del condensador en control electrónico y caso de no
existir sustituir control.
• Conectar terminales en ventilador condensador.
IEl soplador centrífugo no funciona.
• Fallo en el control electrónico.
• Soplador centrífugo defectuoso o
desconectados sus terminales.
• Comprobar salida de corriente en control electrónico , y en caso de no dar salida de + y - sustituir.
• Sustituir soplador centrífugo o conectar terminales.