Monacor PARL-10DMX/UV User manual

BEDIENUNGSANLEITUNG • INSTRUCTION MANUAL • MODE D’EMPLOI
ISTRUZIONI PER L’USO • MANUAL DE INSTRUCCIONES
INSTRUKCJA OBSŁUGI • VEILIGHEIDSVOORSCHRIFTEN
SIKKERHEDSOPLYSNINGER • SÄKERHETSFÖRESKRIFTER • TURVALLISUUDESTA
LED-UV-STRAHLER
UV LED SPOTLIGHT
PROJECTEUR À LEDS UV
PROIETTORE UV A LED
PARL-10DMX/UV Bestellnummer 38.4920

2
wwwwww..iimmggssttaaggeelliinnee..ccoomm
®
Innan du slår på enheten …
Vi önskar dig mycket glädje med din nya “img
Stage Line” produkt. Läs igenom säkerhetsföre-
skrifterna innan enheten tas i bruk för att undvika
skador till följd av felaktig hantering. Behåll
instruktionerna för framtida bruk.
Säkerhetsföreskrifterna återfinns på sidan 30.
Ennen kytkemistä …
Toivomme Sinulle paljon miellyttäviä hetkiä
uuden “img Stage Line” laitteen kanssa. Ennen
laitteen käyttöä pyydämme Sinua huolellisesti
tutustumaan turvallisuusohjeisiin. Näin vältyt
vahingoilta, joita virheellinen laitteen käyttö saat-
taa aiheuttaa. Ole hyvä ja säilytä käyttöohjeet
myöhempää tarvetta varten.
Turvallisuusohjeet löytyvät sivulta 31.
SFIN
Bevor Sie einschalten …
Wir wünschen Ihnen viel Spaß mit Ihrem neuen
Gerät von „img Stage Line“. Bitte lesen Sie diese
Bedienungsanleitung vor dem Betrieb gründlich
durch. Nur so lernen Sie alle Funktionsmöglich-
keiten kennen, vermeiden Fehlbedienungen und
schützen sich und Ihr Gerät vor eventuellen Schä-
den durch unsachgemäßen Gebrauch. Heben
Sie die Anleitung für ein späteres Nachlesen auf.
Der deutsche Text beginnt auf der Seite 4.
Before switching on …
We wish you much pleasure with your new “img
Stage Line” unit. Please read these operating
instructions carefully prior to operating the unit.
Thus, you will get to know all functions of the unit,
operating errors will be prevented, and yourself
and the unit will be protected against any damage
caused by improper use. Please keep the operat-
ing instructions for later use.
The English text starts on page 8.
Avant toute installation …
Nous vous souhaitons beaucoup de plaisir à uti-
liser cet appareil “img Stage Line”. Lisez ce mode
dʼemploi entièrement avant toute utilisation. Uni-
quement ainsi, vous pourrez apprendre lʼensem-
ble des possibilités de fonctionnement de lʼappa-
reil, éviter toute manipulation erronée et vous
protéger, ainsi que lʼappareil, de dommages
éventuels engendrés par une utilisation inadap-
tée. Conservez la notice pour pouvoir vous y
reporter ultérieurement.
La version française se trouve page 12.
Prima di accendere …
Vi auguriamo buon divertimento con il vostro
nuovo apparecchio di “img Stage Line”. Leggete
attentamente le istruzioni prima di mettere in fun-
zione lʼapparecchio. Solo così potete conoscere
tutte le funzionalità, evitare comandi sbagliati e
proteggere voi stessi e lʼapparecchio da even-
tuali danni in seguito ad un uso improprio. Con-
servate le istruzioni per poterle consultare anche
in futuro.
Il testo italiano inizia a pagina 16.
D
A
CH
GB
Antes de la utilización …
Le deseamos una buena utilización para su nue-
vo aparato “img Stage Line”. Por favor, lea estas
instrucciones de uso atentamente antes de hacer
funcionar el aparato. De esta manera conocerá
todas las funciones de la unidad, se prevendrán
errores de operación, usted y el aparato estarán
protegidos en contra de todo daño causado por
un uso inadecuado. Por favor, guarde las ins-
trucciones para una futura utilización.
La versión española comienza en la página 20.
Voor u inschakelt …
Wij wensen u veel plezier met uw nieuwe appa-
raat van “img Stage Line”. Lees de veiligheids-
voorschriften grondig door, alvorens het appa-
raat in gebruik te nemen. Zo behoedt u zichzelf
en het apparaat voor eventuele schade door
ondeskundig gebruik. Bewaar de handleiding
voor latere raadpleging.
De veiligheidsvoorschriften vindt u op pagina 28.
Przed uruchomieniem …
Życzymy zadowolenia z nowego produktu “img
Stage Line”. Dzięki tej instrukcji obsługi będą
państwo w stanie poznać wszystkie funkcje tego
urządzenia. Stosując się do instrukcji unikną
państwo błędów i ewentualnego uszkodzenia
urządzenia na skutek nieprawidłowego użytko-
wania. Prosimy zachować instrukcję.
Tekst polski zaczyna się na stronie 24.
Før du tænder …
Tillykke med dit nye “img Stage Line” produkt.
Læs sikkerhedsanvisningerne nøje før ibrugtag-
ning, for at beskytte Dem og enheden mod ska-
der, der skyldes forkert brug. Gem manualen til
senere brug.
Sikkerhedsanvisningerne findes på side 29.
F
B
CH
I
E
NL
PL
DK

3
DMX INPUT
230 V~ / 50 Hz
POWER LINK OUTPUT
T 500 m AL
3
12
F
U
S
E
DMX OUTPUT
UP
DOWN
ENT
MIC
SENSITIVITY
FUNC
789101112 7
1234 5 6

4
D
A
CH
Auf der ausklappbaren Seite 3 finden Sie alle be-
schriebenen Bedienelemente und Anschlüsse.
1 Übersicht der Bedienelemente
und Anschlüsse
1Montagebügel
2Regler SENSITIVITY für die Ansprechempfind-
lichkeit bei Musiksteuerung über das Mikro-
fon (3)
3Mikrofon zur Musiksteuerung
4Netzbuchse zum Anschluss an eine Steckdose
(230 V~/50 Hz) über das beiliegende Netzkabel
oder zum Anschluss an die Buchse POWER
LINK OUTPUT (10) eines anderen PARL-
10DMX/UV
5Display
6Bedientasten
Taste FUNC zur Auswahl einer Funktion
Tasten UP und DOWN zur Auswahl eines der
beiden musikgesteuerten Programme, zum Ein-
stellen der Helligkeit und zum Einstellen der
DMX-Adresse
Taste ENT (= Enter) zum Aktivieren einer Ein-
stellung oder Funktion
7Feststellschrauben für den Montagebügel (1)
8Halterung für die Netzsicherung
Eine geschmolzene Sicherung nur durch eine
gleichen Typs ersetzen.
9Öse zur Befestigung eines Fangseils
10 Anschluss POWER LINK OUTPUT zur Strom-
versorgung eines weiteren Gerätes
11 DMX-Signal-Eingang (3-pol. XLR) zum An-
schluss eines Lichtsteuergerätes;
Pin 1 = Masse, 2 = DMX
-
, 3 = DMX+
12 DMX-Signal-Ausgang (3-pol. XLR) zum An-
schluss an den DMX-Eingang eines weiteren
DMX-Lichteffektgerätes;
Pin 1 = Masse, 2 = DMX
-
, 3 = DMX+
2 Hinweise für den
sicheren Gebrauch
Das Gerät entspricht allen erforderlichen Richtli-
nien der EU und ist deshalb mit gekennzeichnet.
Beachten Sie auch unbedingt die folgenden
Punkte:
GVerwenden Sie das Gerät nur im Innenbereich
und schützen Sie es vor Tropf- und Spritzwasser,
hoher Luftfeuchtigkeit und Hitze (zulässiger Ein-
satztemperaturbereich 0 – 40 °C).
GStellen Sie keine mit Flüssigkeit gefüllten Ge-
fäße, z. B. Trinkgläser, auf das Gerät.
GNehmen Sie das Gerät nicht in Betrieb oder zie-
hen Sie sofort den Netzstecker aus der Steck-
dose,
1. wenn sichtbare Schäden am Gerät oder am
Netzkabel vorhanden sind,
2. wenn nach einem Sturz oder Ähnlichem der
Verdacht auf einen Defekt besteht,
3. wenn Funktionsstörungen auftreten.
Geben Sie das Gerät in jedem Fall zur Reparatur
in eine Fachwerkstatt.
GZiehen Sie den Netzstecker nie am Kabel aus
der Steckdose, fassen Sie immer am Stecker an.
GVerwenden Sie für die Reinigung nur ein trocke-
nes, weiches Tuch, niemals Wasser oder Chemi-
kalien.
GWird das Gerät zweckentfremdet, nicht sicher
montiert, falsch bedient oder nicht fachgerecht
repariert, kann keine Haftung für daraus resultie-
rende Sach- oder Personenschäden und keine
Garantie für das Gerät übernommen werden.
Soll das Gerät endgültig aus dem Betrieb
genommen werden, übergeben Sie es zur
umweltgerechten Entsorgung einem örtli-
chen Recyclingbetrieb.
WARNUNG Das Gerät wird mit lebensgefährli-
cher Netzspannung versorgt. Neh-
men Sie deshalb niemals selbst Ein-
griffe am Gerät vor und stecken Sie
nichts durch die Lüftungsöffnungen!
Es besteht die Gefahr eines elektri-
schen Schlages.

5
D
A
CH
3 Einsatzmöglichkeiten
Dieser flache LED-UV-Strahler dient zur Effektbe-
leuchtung z. B. auf Bühnen, in Diskotheken und auf
Partys. Als Lichtquelle sind 168 UV-LEDs mit einem
Durchmesser von 10 mm eingesetzt, die einen
Schwarzlichteffekt erzeugen. Die LEDs haben
einen niedrigen Stromverbrauch, eine geringe
Wärmeentwicklung und eine lange Lebensdauer.
Der
LED-UV-Strahler
ist für die Steuerung über
ein DMX-Lichtsteuergerät ausgelegt (1 DMX-Steu-
erkanal). Er kann aber auch allein betrieben wer-
den, die Steuerung erfolgt dann durch auswählbare
Programme.
4 Inbetriebnahme
4.1 Montage
GPlatzieren Sie das Gerät immer so, dass im Be-
trieb eine ausreichende Luftzirkulation gewähr-
leistet ist. Die Lüftungsöffnungen am Gehäuse
dürfen auf keinen Fall abgedeckt werden.
GDer Abstand zum angestrahlten Objekt sollte
mindestens 50 cm betragen.
1. Den UV-Strahler über den Montagebügel (1)
befestigen, z. B. mit einer stabilen Montage-
schraube oder einer Lichtstrahler-Halterung (C-
Haken) an einer Traverse.
Zum Ausrichten des UV-Strahlers die zwei
Feststellschrauben (7) am Montagebügel lösen.
Die gewünschte Neigung des Geräts einstellen
und die Schrauben wieder fest anziehen.
2. Alternativ lässt sich der UV-Strahler auch frei
aufstellen. Dazu den Montagebügel so ausrich-
ten, dass er als Stütze dient, damit ein Umfallen
vermieden wird. Die Feststellschrauben an-
schließend fest anziehen.
4.2 Stromversorgung
Das beiliegende Netzkabel zuerst in die Netzbuchse
(4) stecken und dann in eine Steckdose (230 V~/
50 Hz). Danach ist das Gerät betriebsbereit und
lässt sich über die Bedientasten (6) [Kap. 5.1]
oder ein DMX-Lichtsteuergerät [Kap. 5.3] bedie-
nen. Zum Ausschalten den Netzstecker aus der
Steckdose ziehen.
Werden mehrere PARL-10DMX/UV verwendet,
kann die Buchse POWER LINK OUTPUT (10) des
ersten Gerätes über ein Netzkabel mit einem Kalt-
gerätestecker und einer Kaltgerätekupplung (z. B.
AAC-170/SW aus dem Sortiment von „img Stage
Line“) mit der Netzbuchse (4) des zweiten Gerätes
verbunden werden. Das zweite Gerät kann dann
wieder mit dem dritten Gerät verbunden werden
usw., bis alle Geräte in einer Kette angeschlossen
sind. Auf diese Weise lassen sich maximal 90 Ge-
räte zusammenschalten. Danach muss das 91.
Gerät einen eigenen Netzanschluss erhalten.
Vorsicht: Das Gerät darf nicht über einen Dimmer
an die Netzspannung angeschlossen werden!
Um einen besseren Bedienkomfort zu erhalten, ist
es empfehlenswert, das Gerät an eine Steckdose
anzuschließen, die sich über einen Lichtschalter
ein- und ausschalten lässt.
5 Bedienung
5.1 Betrieb ohne DMX-Steuergerät
Mit der Taste FUNC (6) die gewünschte Funktion
auswählen. Im Display (5) wird diese angezeigt:
…DMX-Steuerung über ein Licht-
steuerpult (Kap. 5.3)
Die LEDs werden langsam heller und wie-
der dunkler gedimmt.
Musikgesteuertes Stroboskop: Bei jedem
Musikimpuls blitzen die LEDs einige Male.
Mit der Taste UP oder DOWN kann auf die
Musiksteuerung umgeschaltet wer-
den, bei der Musikimpulse die LEDs auf
maximale Helligkeit schalten und zwischen
den Musikimpulsen die LEDs langsam
dunkler werden.
Läuft Musik mit deutlichem Rhythmus im
Bassbereich in ausreichender Lautstärke,
werden die LEDs entsprechend über das
Mikrofon (3) gesteuert. Den Regler SENSI-
WARNUNG Blicken Sie nicht direkt in die LEDs,
das kann zu Augenschäden führen.
Beachten Sie, dass sehr schnelle
Lichtwechsel bei fotosensiblen Men-
schen und Epileptikern epileptische
Anfälle auslösen können!
WARNUNG Der UV-Strahler muss fachgerecht
und sicher montiert werden. Wird er
an einer Stelle installiert, unter der
sich Personen aufhalten können,
muss er zusätzlich gesichert werden,
z. B. durch ein Fangseil. Das Fang-
seil durch die Öse (9) führen und so
befestigen, dass der Fallweg des
Gerätes nicht mehr als 20 cm betra-
gen kann.

6
D
A
CH
TIVITY (2) für die Mikrofonempfindlichkeit
so einstellen, dass die LEDs optimal ge-
steuert werden.
Die Helligkeit der LEDs ist fest auf 25 %
vom Maximalwert eingestellt. Mit der Taste
UP oder DOWN lässt sich auch eine Hellig-
keit von 50 %, 75 % und 100 % einstellen.
Nach dem Anwählen einer Funktion blinkt das Dis-
play. Zum Aktivieren der gewählten Funktion die
Taste ENT drücken, das Blinken stoppt.
5.2 Zusammenschalten
mehrerer PARL-10DMX/UV
Es lassen sich mehrere PARL-10DMX/UV zusam-
menschalten (Master-Slave-Betrieb). Das Hauptge-
rät (Master) kann dann alle Nebengeräte (Slave)
synchron steuern.
1) Den Anschluss DMX OUTPUT (12) des Haupt-
gerätes über ein 3-poliges XLR-Kabel (z. B.
Serie MEC-… oder MECN-… aus dem Sorti-
ment von „img Stage Line“) mit dem Anschluss
DMX INPUT (11) des ersten Nebengerätes ver-
binden.
2) Den Anschluss DMX OUTPUT des ersten
Nebengerätes mit dem Anschluss DMX INPUT
des zweiten Nebengerätes verbinden usw., bis
alle Geräte in einer Kette angeschlossen sind.
3) Am Hauptgerät darf am Anschluss DMX INPUT
kein DMX-Signal anliegen. Die Nebengeräte auf
die DMX-Adresse 001 einstellen:
a) Die Taste FUNC (6) so oft drücken, bis im
Display (5) und die Zahl dahinter blinkend
angezeigt werden.
b) Mit der Taste DOWN oder UP die Adresse
001 einstellen.
c) Zum Speichern die Taste ENT drücken.
Sobald an den Nebengeräten die Steuersig-
nale vom Hauptgerät anliegen, werden sie
durch das Hauptgerät gesteuert.
5.3 Bedienung über ein Lichtsteuergerät
Zur Bedienung über ein Lichtsteuergerät mit
DMX512-Protokoll (z. B. DMX-1440 oder DMX-
510USB von „img Stage Line“) verfügt der PARL-
10DMX/UV über einen DMX-Steuerkanal. DMX ist
die Abkürzung für Digital Multiplexund bedeutet
digitale Steuerung von mehreren DMX-Geräten
über eine gemeinsame Steuerleitung. Die Funktio-
nen und die DMX-Werte finden Sie im Kapitel 7.1.
5.3.1 DMX-Anschluss
Für die DMX-Verbindung sind 3-polige XLR-An-
schlüsse mit folgender Kontaktbelegung vorhan-
den:
Pin 1 = Masse, 2 = DMX
-
, 3 = DMX+
Zum Anschluss sollten spezielle Kabel für hohen
Datenfluss verwendet werden. Normale abge-
schirmte Mikrofonkabel mit einem Leitungsquer-
schnitt von mindestens 2 × 0,22 mm2und möglichst
geringer Kapazität sind nur bei einer Gesamtkabel-
länge bis 100 m zu empfehlen. Bei Leitungslängen
ab 150 m wird grundsätzlich das Zwischenschalten
eines DMX-Aufholverstärkers empfohlen (z. B. SR-
103DMX von „img Stage Line“).
1) Den DMX-Eingang (11) mit dem DMX-Ausgang
des Lichtsteuergerätes verbinden.
2) Den DMX-Ausgang (12) mit dem DMX-Eingang
des nächsten Lichteffektgerätes verbinden.
Dessen Ausgang wieder mit dem Eingang des
nachfolgenden Gerätes verbinden usw., bis alle
Lichteffektgeräte in einer Kette angeschlossen
sind.
3) Den DMX-Ausgang des letzten DMX-Gerätes
der Kette mit einem 120-Ω-Widerstand (> 0,3 W)
abschließen: In die Buchse einen entsprechen-
den Abschlussstecker (z. B. DLT-123 von „img
Stage Line“) stecken.
5.3.2 DMX-Adresse einstellen
Um den UV-Strahler mit einem Lichtsteuergerät be-
dienen zu können, muss eine DMX-Adresse einge-
stellt werden. Ist z. B. am DMX-Steuergerät die
Adresse 10 zum Steuern des UV-Strahlers vorge-
sehen, am PARL-10DMX/UV die Adresse 10 ein-
stellen:
1) Die Taste FUNC (6) so oft drücken, bis im Dis-
play (5) und die Zahl dahinter blinkend ange-
zeigt werden.
2) Mit der Taste DOWN oder UP die Adresse ein-
stellen.
3) Zum Speichern die Taste ENT drücken.
Sobald im Display der Punkt hinter dem blinkt, lie-
gen die Steuersignale des Lichtsteuergeräts an
und der UV-Strahler lässt sich mit dem Steuergerät
bedienen. Blinkt der Punkt nicht, ist das Steuerge-
rät ausgeschaltet, defekt oder die Verbindung zum
Steuergerät unterbrochen.

6 Reinigung des Gerätes
Die Kunststoffscheibe vor den LEDs sollte in regel-
mäßigen Abständen, je nach Verschmutzung durch
Staub, Rauch oder andere Schmutzpartikel von
außen gereinigt werden. Nur dann kann das Licht
in maximaler Helligkeit abgestrahlt werden. Zum
Säubern den Netzstecker aus der Steckdose
ziehen. Nur ein weiches, sauberes Tuch und ein
mildes Reinigungsmittel verwenden. Anschließend
die Scheibe trocken wischen.
Zum Reinigen der anderen Gehäuseteile nur ein
weiches, sauberes Tuch benutzen. Auf keinen Fall
eine Flüssigkeit verwenden, die könnte in das
Gerät laufen und Beschädigungen verursachen.
7 Technische Daten
Lichtquelle: . . . . . . . . . 168 UV-LEDs
Durchmesser: . . . . . 10 mm
Wellenlänge: . . . . . 395 – 400 nm
Abstrahlwinkel: . . . . 25°
Stromversorgung: . . . 230 V~/50 Hz
Leistungsaufnahme: . max. 25 VA
Einsatztemperatur: . . . 0 – 40 °C
Abmessungen: . . . . . . 230 × 210 × 105 mm
Gewicht: . . . . . . . . . . . 2,1 kg
7.1 DMX-Werte
Änderungen vorbehalten.
DMX-Wert Funktion
0–7 LEDs aus
8 – 190 dunkel →hell
191 – 195 Musiksteuerung
196 – 200 musikgesteuertes Stroboskop
201 – 247 Stroboskop langsam →schnell
248 – 255 LEDs aus
7
D
A
CH
Diese Bedienungsanleitung ist urheberrechtlich für MONACOR
®
INTERNATIONAL GmbH & Co. KG geschützt.
Eine Reproduktion für eigene kommerzielle Zwecke – auch auszugsweise – ist untersagt.

All operating elements and connections de-
scribed can be found on the fold-out page 3.
1 Operating Elements
and Connections
1Mounting bracket
2Control SENSITIVITY for the response sensitiv-
ity in case of music control via the micro-
phone (3)
3Microphone for music control
4Mains jack for connection to a socket (230 V~/
50 Hz) via the mains cable provided or for con-
nection to the jack POWER LINK OUTPUT (10)
of another PARL-10DMX/UV
5Display
6Operating buttons
Button FUNC to select a function
Buttons UP and DOWN to select one of the two
music-controlled programmes, to adjust the
brightness and to set the DMX address
Button ENT (= ENTER) to activate a setting or a
function
7Locking screws for the mounting bracket (1)
8Support for the mains fuse
Always replace a blown fuse by one of the same
type!
9Eye bolt to attach a safety rope
10 Connection POWER LINK OUTPUT for power
supply of another unit
11 DMX signal input (3-pole, XLR) to connect a
light controller;
pin 1 = ground, 2 = DMX
-
, 3 = DMX+
12 DMX signal output (3-pole, XLR) to connect the
DMX input of another DMX light effect unit;
pin 1 = ground, 2 = DMX
-
, 3 = DMX+
2 Safety Notes
This unit corresponds to all required directives of
the EU and is therefore marked with .
Please observe the following items in any case:
GThe unit is suitable for indoor use only. Protect it
against dripping water and splash water, high air
humidity and heat (admissible ambient tempera-
ture range 0 – 40 °C).
GDo not place any vessel filled with liquid on the
unit, e. g. a drinking glass.
GDo not operate the unit and immediately discon-
nect the mains plug from the socket
1. if the unit or the mains cable is visibly dam-
aged,
2. if a defect might have occurred after the unit
was dropped or suffered a similar accident,
3. if malfunctions occur.
In any case the unit must be repaired by skilled
personnel.
GNever pull the mains cable to disconnect the
mains plug from the socket, always seize the plug.
GFor cleaning only use a dry, soft cloth; never use
water or chemicals.
GNo guarantee claims for the unit and no liability
for any resulting personal damage or material
damage will be accepted if the unit is used for
other purposes than originally intended, if it is not
safely installed, or if it is not repaired in an expert
way.
GImportant for U. K. Customers!
The wires in this mains lead are coloured in ac-
cordance with the following code:
green/yellow = earth
blue = neutral
brown = live
As the colours of the wires in the mains lead of
this appliance may not correspond with the
coloured markings identifying the terminals in
your plug, proceed as follows:
1. The wire which is coloured green and yellow
must be connected to the terminal in the plug
which is marked with the letter E or by the earth
symbol , or coloured green or green and yel-
low.
2. The wire which is coloured blue must be con-
nected to the terminal which is marked with the
letter N or coloured black.
WARNING The unit uses dangerous mains volt-
age. Leave servicing to skilled per-
sonnel only and do not insert any-
thing into the air vents. Inexpert
handling or modification of the unit
may result in electric shock.
8
GB

3. The wire which is coloured brown must be con-
nected to the terminal which is marked with the
letter L or coloured red.
Warning – This appliance must be earthed.
3 Applications
This flat UV LED spotlight is suited for effect light-
ing, e. g. on stage, in clubs and at private parties.
As a light source, 168 UV LEDs with a diameter of
10 mm are used to create a black light effect. The
LEDs feature a low power consumption, a low heat
development and a long life.
The UV LED spotlight is designed for control
via a DMX light controller (1 DMX control channel);
however, it can also be operated on its own. In this
case, it is controlled via programmes to be selected.
4 Putting into Operation
4.1 Installation
GAlways place the spotlight in such a way that a
sufficient air circulation will be ensured during
operation. Never cover the air vents of the hous-
ing.
GThe minimum distance to the illuminated object
should be 50 cm.
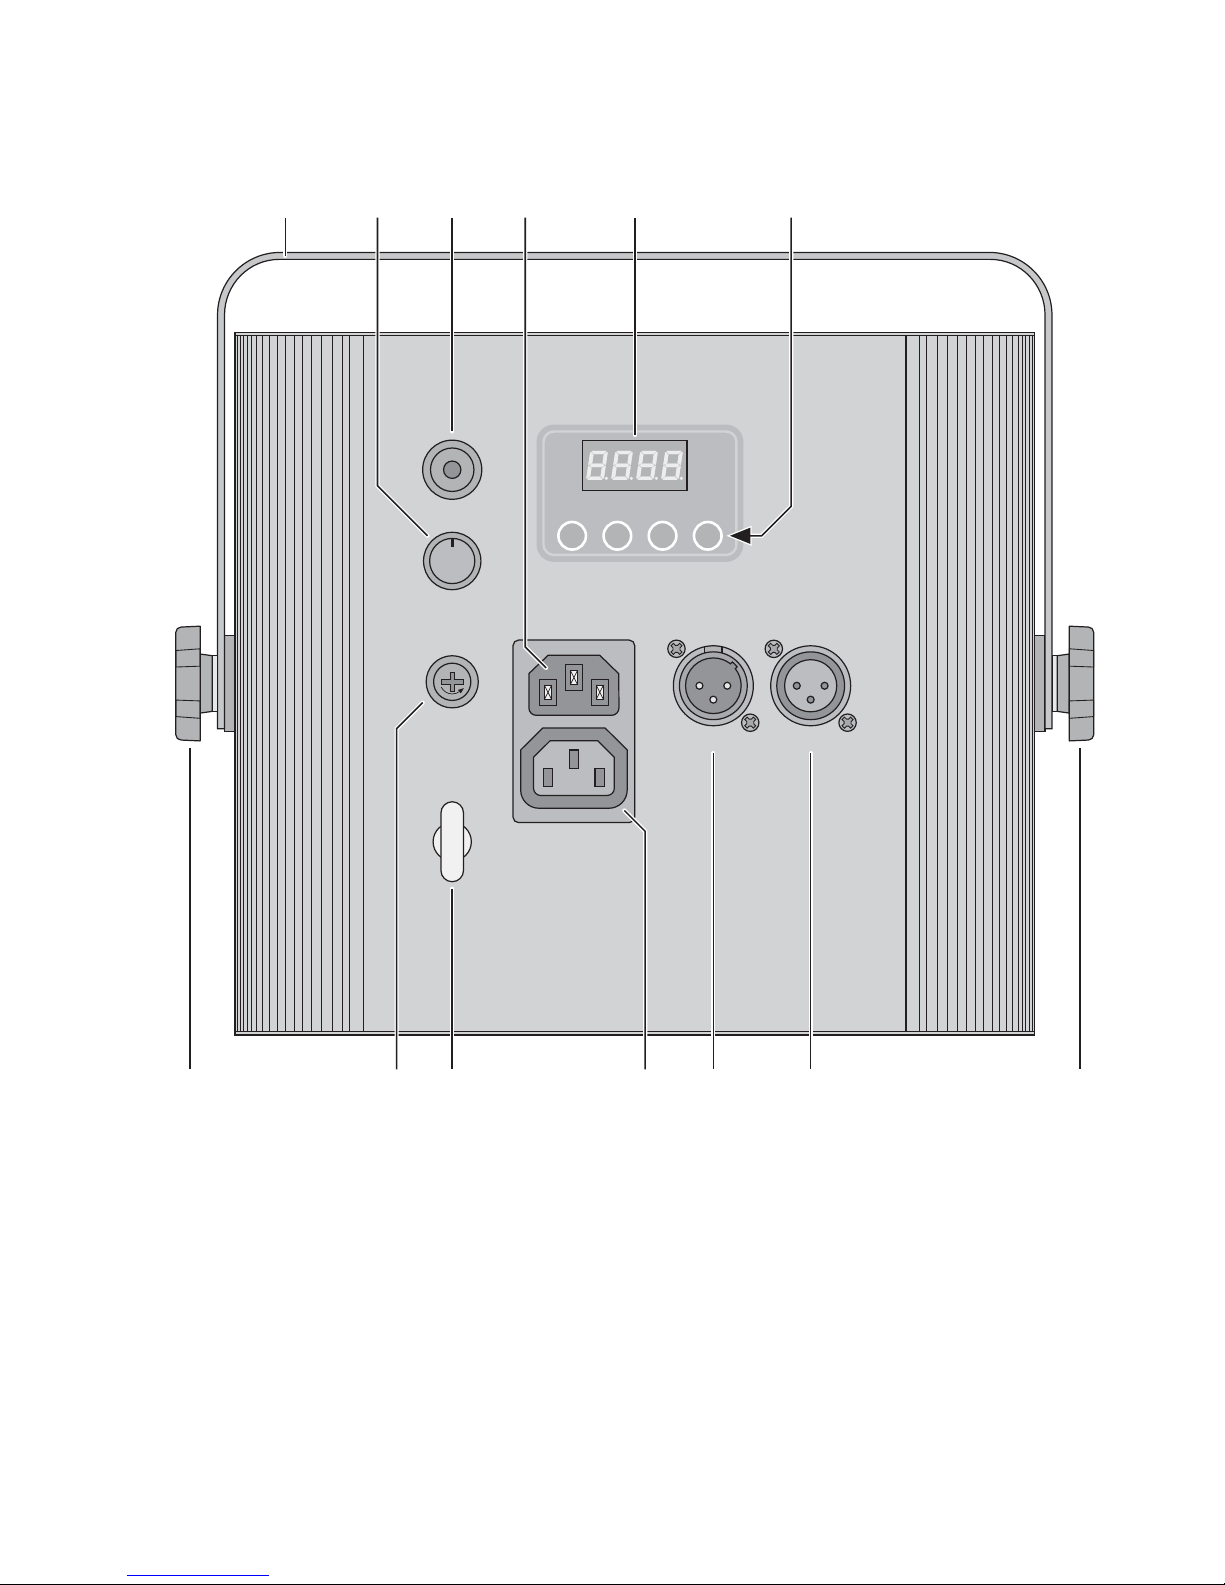
1. Fasten the UV spotlight via the mounting bracket
(1), e. g. with a stable mounting screw or a sup-
port for lighting units (C hook) on a cross bar.
To align the UV spotlight, release the two
locking screws (7) of the mounting bracket.
Adjust the desired inclination of the spotlight,
then fasten the screws.
2. As an alternative, set up the spotlight as desired.
For this purpose, position the mounting bracket
so that it will serve as a support to prevent tilting
over. Then fasten the locking screws.
4.2 Power supply
Connect the mains cable provided to the mains
jack (4) first, then connect it to a socket (230 V~/
50 Hz). Thus, the unit is ready for use and can be
operated via the buttons (6) [chapter 5.1] or via
a DMX light controller [chapter 5.3). To switch
off, disconnect the mains plug from the socket.
When using several PARL-10DMX/UV units, it will
be possible to connect the jack POWER LINK
OUTPUT (10) of the first unit via a mains cable with
IEC plug and IEC inline jack (e. g. AAC-170/SW
from the product range of “img Stage Line”) to the
mains jack (4) of the second unit. Connect the sec-
ond unit to the third unit, etc. until all units have
been connected in a chain. Thus, a maximum of
90 units may be interconnected. After that, the 91st
unit must have a mains connection of its own.
Caution: Do not connect the spotlight to the mains
voltage via a dimmer!
For a more convenient operation, it is recom-
mended to connect the spotlight to a mains socket
which is switched on and off via a light switch.
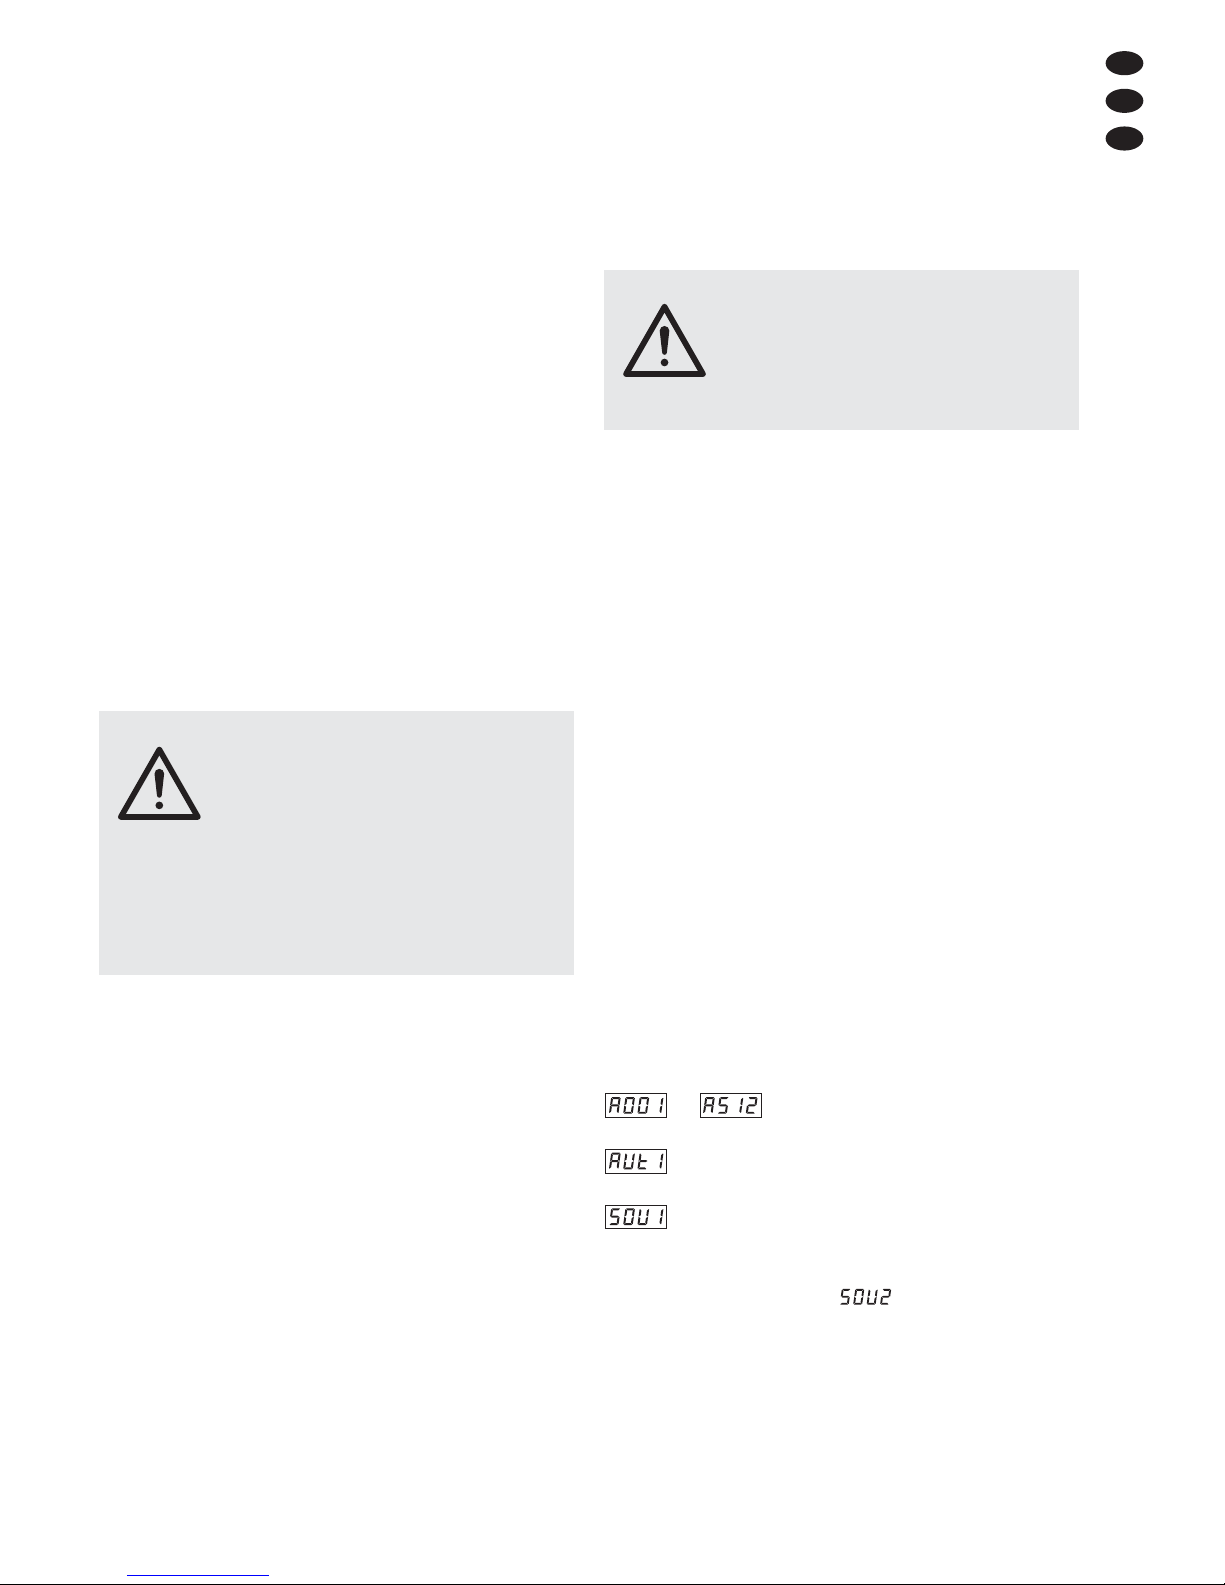
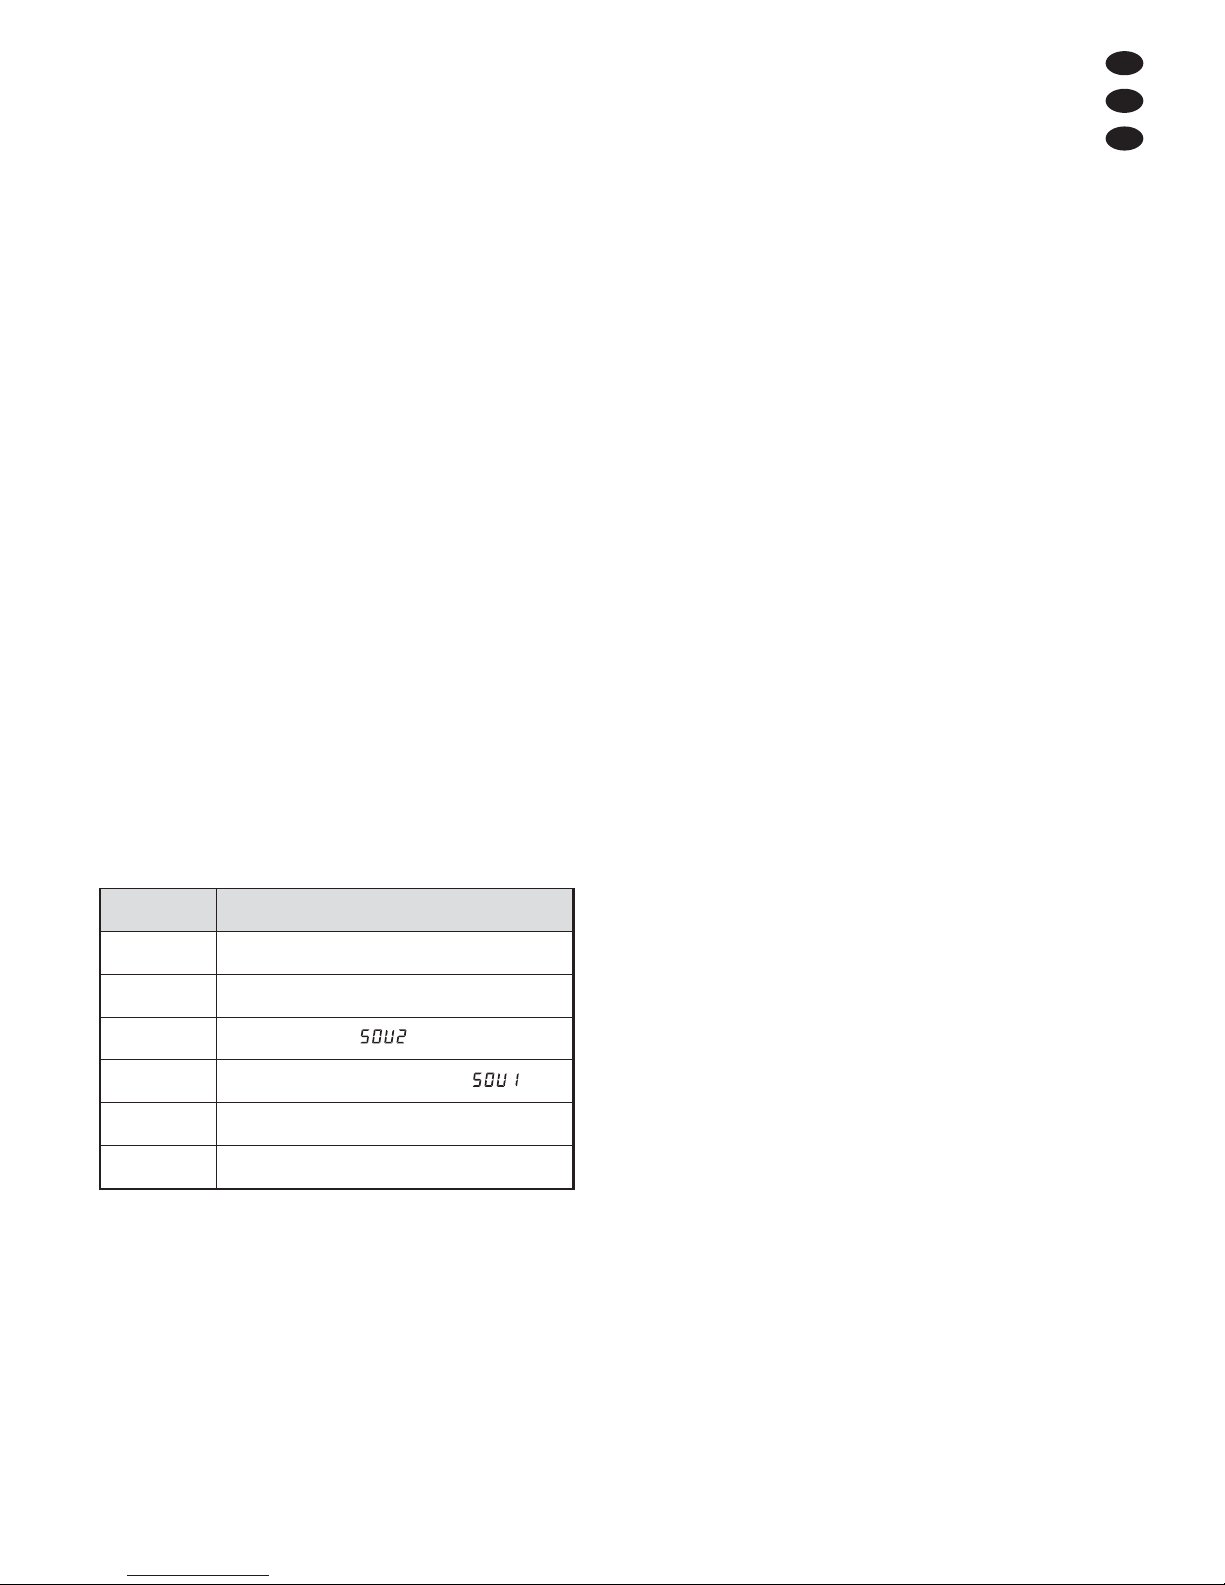
5 Operation
5.1 Operation without DMX controller
Select the desired function with the button FUNC
(6). The function will appear on the display (5):
… DMX control via a light controller
(chapter 5.3)
The brightness of the LEDs will gradually
increase and then decrease.
Music-controlled stroboscope: With each
music pulse, the LEDs will flash a few
times.
Press the button UP or DOWN to switch to
the music control : Music pulses will
switch the LEDs to maximum brightness;
between the music pulses the brightness of
the LEDs will gradually decrease.
If music with a clear rhythm in the bass
range is played at sufficient volume, the
LEDs will be controlled via the microphone
(3) accordingly. Set the control SENSITIV-
ITY (2) for the microphone sensitivity so
that the LEDs will be controlled optimally.
WARNING Never look directly into the LEDs;
this may cause eye damage.
Please note that fast changes in light-
ing, e. g. flashing light, may trigger
epileptic seizures with photosensitive
persons or persons with epilepsy!
WARNING Install the UV spotlight safely and
expertly. If it is installed at a place
where people may walk or sit under
it, additionally secure it, e. g. by a
safety rope. Lead the safety rope
through the eye bolt (9) and attach it
in such a way that, even in the event
of a fall, the maximum falling distance
of the spotlight will not exceed 20 cm.
If the unit is to be put out of operation
definitively, take it to a local recycling plant
for a disposal which will not be harmful to
the environment.
9
GB

The brightness of the LEDs is set to 25 %
of the maximum value. To change the
brightness to 50 %, 75 % or 100 %, press
the button UP or DOWN.
After a function has been selected, the display will
start flashing. To activate the function selected,
press the button ENT; the display will stop flashing.
5.2 Interconnecting several
PARL-10DMX/UV spotlights
Several PARL-DMX10/UV spotlights can be inter-
connected (master/slave mode). Thus, the master
unit will be able to control all slave units in sync.
1) Connect the DMX OUTPUT (12) of the master
unit via a 3-pole XLR cable (e. g. series MEC-…
or MECN-… from the product range of “img
Stage Line”) to the DMX INPUT (11) of the first
slave unit.
2) Connect the DMX OUTPUT of the first slave unit
to the DMX INPUT of the second slave unit, etc.
until all units have been connected in a chain.
3) There must be no DMX signal at the DMX
INPUT of the master unit. Set the slave units to
the DMX address 001:
a) Press the button FUNC (6) repeatedly until
and the number behind it start flashing on the
display (5).
b) Press the button UP or DOWN to set the
address 001.
c) To memorize, press the button ENT. Once the
control signals from the master unit are
applied to the slave units, they will be con-
trolled by the master unit.
5.3 Operation via light controller
For operation via a light controller with DMX512 pro-
tocol (e. g. DMX-1440 or DMX-510USB from “img
Stage Line”), the PARL-10DMX/UV is equipped
with one DMX control channel. DMX is an abbrevi-
ation of digital multiplexand means digital control of
several DMX units via a common control cable. For
the functions and the DMX values see chapter 7.1.
5.3.1 DMX connection
For DMX connection, 3-pole XLR connectors with
the following pin configuration are provided:
Pin 1 = ground, 2 = DMX
-
, 3 = DMX+
For connection, special cables for high data flow
should be used. Standard microphone cables with
screening and a minimum cross section of 2 ×
0.22 mm2and with a capacity as low as possible can
only be recommended for a total cable length of up to
100 m. For cable lengths exceeding 150 m, it is gen-
erally recommended to insert a DMX level matching
amplifier (e. g. SR-103DMX by “img Stage Line”).
1) Connect the DMX input (11) to the DMX output
of the light controller.
2) Connect the DMX output (12) to the DMX input
of the following light effect unit; connect its out-
put again to the input of the following unit, etc.
until all light effect units have been connected in
a chain.
3) Terminate the DMX output of the last DMX unit
in the chain with a 120 Ω resistor (> 0.3 W):
Connect a corresponding terminating plug (e. g.
DLT-123 from “img Stage Line”) to the jack.
5.3.2 Setting the DMX address
For operating the UV spotlight with a light controller,
it is necessary to set a DMX address. If e. g. ad-
dress 10 on the controller is provided for controlling
the UV spotlight, set the address 10 on the PARL-
10DMX/UV:
1) Press the button FUNC (6) repeatedly until
and the number behind it start flashing on the
display (5).
2) Press the button UP or DOWN to set the
address.
3) To memorize, press the button ENT.
When the dot behind the starts flashing on the
display, the control signals of the light controller are
present. It will now be possible to operate the UV
spotlight via the controller. If the dot fails to flash,
the controller is switched off, it is defective or the
connection to the controller has been interrupted.
6 Cleaning the Spotlight
The plastic pane in front of the LEDs should be
cleaned from the outside at regular intervals,
depending on impurities caused by dust, smoke or
other dirt particles. Only this will ensure that light is
emitted at maximum brightness. Before cleaning,
disconnect the mains plug from the socket.
Only use a soft, clean cloth and a mild detergent.
Then wipe the plastic plane dry.
To clean the other parts of the housing, only use
a soft, clean cloth. Never use any liquid; it may leak
into the unit and cause damage.
10
GB

7 Specifications
Light source: . . . . . . . 168 UV LEDs
Diameter: . . . . . . . . 10 mm
Wavelength: . . . . . . 395 – 400 nm
Beam angle: . . . . . . 25°
Power supply: . . . . . . 230 V~/50 Hz
Power consumption: . 25 VA max.
Ambient temperature: 0 – 40 °C
Dimensions: . . . . . . . . 230 × 210 × 105 mm
Weight: . . . . . . . . . . . . 2.1 kg
7.1 DMX values
Subject to technical modification.
DMX value Function
0–7 LEDs off
8 – 190 dark →bright
191 – 195 music control
196 – 200 music-controlled stroboscope
201 – 247 stroboscope slow →fast
248 – 255 LEDs off
11
GB
All rights reserved by MONACOR
®
INTERNATIONAL GmbH & Co. KG. No part of this instruction manual may
be reproduced in any form or by any means for any commercial use.

Ouvrez le présent livret page 3, dépliable, de
manière à visualiser les éléments et branche-
ments.
1 Eléments et branchements
1Etrier de montage
2Réglage SENSITIVITY pour la sensibilité de
réponse en mode gestion par la musique via le
microphone (3)
3Microphone pour la gestion par la musique
4Prise secteur à relier, via le cordon secteur livré,
à une prise 230 V~/50 Hz ou à la prise POWER
LINK OUTPUT (10) dʼun autre PARL-10DMX/UV
5Affichage
6Touches de commande
touche FUNC pour sélectionner une fonction
touches UP et DOWN pour sélectionner un des
deux programmes gérés par la musique, pour
régler la luminosité et lʼadresse DMX
touche ENT (= Enter) pour activer un réglage ou
une fonction
7Vis de blocage pour lʼétrier de montage (1)
8Porte-fusible :
tout fusible fondu doit être remplacé impérative-
ment par un fusible de même type.
9Oeillet pour fixer une élingue de sécurité
10 Branchement POWER LINK OUTPUT pour lʼali-
mentation dʼun autre appareil
11 Entrée signal DMX (XLR 3 pôles) pour brancher
un contrôleur :
Pin 1 = masse, 2 = DMX
-
, 3 = DMX +
12 Sortie signal DMX (XLR 3 pôles) pour brancher
à lʼentrée DMX dʼun autre jeu de lumière DMX
Pin 1 = masse, 2 = DMX
-
, 3 = DMX +
2 Conseils dʼutilisation et de sécurité
Lʼappareil répond à toutes les directives néces-
saires de lʼUnion européenne et porte donc le sym-
bole .
Respectez scrupuleusement les points suivants :
GLʼappareil nʼest conçu que pour une utilisation en
intérieur. Protégez-le de tout type de projections
dʼeau, des éclaboussures, dʼune humidité élevée
de lʼair et de la chaleur (plage de température de
fonctionnement autorisée : 0 – 40 °C).
GEn aucun cas, vous ne devez poser dʼobjet
contenant du liquide ou un verre sur lʼappareil.
GNe faites pas fonctionner lʼappareil ou débran-
chez-le immédiatement du secteur lorsque :
1. des dommages visibles apparaissent sur lʼap-
pareil ou sur le cordon secteur,
2. après une chute ou un cas similaire, vous avez
un doute sur lʼétat de lʼappareil,
3. des dysfonctionnements apparaissent.
Dans tous les cas, les dommages doivent être
réparés par un technicien spécialisé.
GNe débranchez jamais lʼappareil en tirant sur le
cordon secteur ; retirez toujours le cordon secteur
en tirant la fiche.
GPour le nettoyage, utilisez seulement un chiffon
sec et doux, en aucun cas, de produits chimiques
ou dʼeau.
GNous déclinons toute responsabilité en cas de
dommages matériels ou corporels résultants si
lʼappareil est utilisé dans un but autre que celui
pour lequel il a été conçu, sʼil nʼest pas monté
dʼune manière sûre, correctement utilisé ou nʼest
pas réparé par une personne habilitée, en outre,
la garantie deviendrait caduque.
Lorsque lʼappareil est définitivement retiré
du service, vous devez le déposer dans
une usine de recyclage adaptée pour
contribuer à son élimination non polluante.
AVERTISSEMENT Lʼappareil est alimenté par une
tension dangereuse. Ne touchez
jamais lʼintérieur de lʼappareil et
ne faites rien tomber dans les
ouïes de ventilation ! Risque de
décharge électrique.
12
F
B
CH

3 Possibilités dʼutilisation
Ce projecteur plat à LEDs UV permet un éclairage
dʼeffect par exemple sur scène, dans des disco-
thèques ou pour des soirées. Comme source lumi-
neuse, il possède 168 LEDs UV avec un diamètre
de 10 mm créant un effet lumière noire. Elles ont
une faible consommation, un faible dégagement de
chaleur et une longue durée de vie.
Le projecteur à LEDs UV est configuré pour la
gestion via un contrôleur DMX (1 canal de com-
mande DMX). Il peut également fonctionner seul, la
gestion sʼeffectue alors via des programmes sélec-
tionnables.
4 Fonctionnement
4.1 Montage
GPlacez lʼappareil de telle sorte que pendant le
fonctionnement, une circulation dʼair suffisante
soit assurée. Les ouïes de ventilation du boîtier
ne doivent en aucun cas être obturées.
GLa distance avec lʼobjet à éclairer devrait être de
50 cm au moins.
1. Fixez le projecteur UV via lʼétrier de montage (1)
par exemple via une vis de montage solide ou
un support pour projecteur (crochet C) à une tra-
verse.
Pour orienter le projecteur UV, desserrez les
deux vis de blocage (7) sur lʼétrier de montage.
Réglez lʼinclinaison voulue puis revissez les vis.
2. A la place vous pouvez poser le projecteur UV
librement. Orientez l'étrier de montage de telle
sorte qu'il serve de soutien pour éviter que le
projecteur ne se renverse pas. Revissez les vis.
4.2 Alimentation
Reliez le cordon secteur livré tout dʼabord à la prise
(4) et lʼautre extrémité du cordon à une prise sec-
teur 230 V~/50 Hz. Lʼappareil est alors prêt à fonc-
tionner et peut être utilisé via les touches de com-
mandes (6) [chapitre 5.1] ou via un contrôleur
DMX [chapitre 5.3]. Pour éteindre, débranchez
le cordon secteur.
Si plusieurs PARL-10DMX/UV sont utilisés, on
peut relier la prise POWER LINK OUTPUT (10) du
premier appareil via un cordon secteur avec une
fiche IEC et une prise IEC (p. ex. AAC-170/SW de
la gamme “img Stage Line”) à la prise secteur (4)
du deuxième appareil. Le deuxième appareil peut
être relié à nouveau au troisième appareil et ainsi
de suite jusqu'à ce que tous les appareils soient
reliés en une chaîne. On peut ainsi relier jusqu'à
90 appareils ensemble. Le 91ème doit avoir un
branchement secteur propre.
Attention : lʼappareil ne doit pas être relié à la ten-
sion dʼalimentation via un dimmer.
Pour un meilleur confort dʼutilisation, il est recom-
mandé de relier lʼappareil à une prise secteur pou-
vant être allumée et éteinte via un interrupteur.
5 Utilisation
5.1 Fonctionnement sans contrôleur DMX
Sélectionnez la fonction souhaitée avec la touche
FUNC (6), elle est indiquée sur lʼaffichage (5) :
… gestion DMX via un contrôleur
(chapitre 5.3)
les LEDs deviennent lentement plus claires
puis redeviennent plus sombres.
stroboscope géré par la musique :
à chaque impulsion de musique, les LEDs
clignotent plusieurs fois.
Avec la touche UP ou DOWN, on peut
commuter sur la gestion par la musique
; avec les impulsions de musique, les
LEDs commutent sur la luminosité maxi-
male et entre les impulsions de musique,
elles deviennent lentement plus sombres.
Si la musique va à un rythme marqué dans
la plage des graves et à un volume suffi-
sant, les LEDs sont gérées en consé-
AVERTISSEMENT Ne regardez jamais directement
les LEDs, cela pourrait causer
des troubles de la vision.
Nʼoubliez pas que des change-
ments très rapides de lumière
peuvent déclencher des crises
dʼépilepsie chez les personnes
photosensibles et épileptiques.
AVERTISSEMENT Le projecteur UV doit être monté
de manière professionnelle et
sûre. Si lʼappareil est installé à un
endroit sous lequel des per-
sonnes peuvent se trouver, il doit
en plus être assuré, p. ex. par
une élingue de sécurité. Faites
passer lʼélingue via lʼoeillet (9) et
fixez-la de telle sorte que la chute
de lʼappareil ne puisse pas être
supérieure à 20 cm.
13
F
B
CH

quence via le microphone (3). Réglez le
réglage SENSITIVITY (2) pour la sensibi-
lité du micro de telle sorte que les LEDs
soient gérées de manière optimale.
la luminosité des LEDs est réglée de
manière fixe à 25 % de la valeur maximale.
Avec la touche UP ou DOWN, on peut
régler la luminosité à 50 %, 75 % et 100 %.
Une fois la fonction sélectionnée, lʼaffichage cli-
gnote. Pour activer la fonction sélectionnée, ap-
puyez sur la touche ENT, le clignotement cesse.
5.2 Fonctionnement combiné
de plusieurs PARL-10DMX/UV
Il est possible de faire fonctionner ensemble plu-
sieurs PARL-10DMX/UV (mode Master Slave).
Lʼappareil principal (Master) peut gérer de manière
synchrone tous les appareils auxiliaires (Slave).
1) Reliez la connexion DMX OUTPUT (12) de lʼap-
pareil principal via un cordon XLR 3 pôles (par
exemple MEC-… ou MECN-… de la gamme
“img Stage Line”) à lʼentrée DMX INPUT (11) du
premier appareil auxiliaire.
2) Reliez la sortie DMX OUTPUT du premier
appareil auxiliaire à lʼentrée DMX INPUT du
deuxième appareil auxiliaire et ainsi de suite
jusquʼà ce que tous les appareils soient reliés en
une chaîne.
3) Aucun signal DMX ne doit être présent au bran-
chement DMX INPUT sur lʼappareil principal.
Réglez les appareils auxiliaires sur lʼadresse
DMX 001 :
a) Appuyez sur la touche FUNC (6) jusqu'à ce
que sur l'affichage (5) et le nombre derrière
soient affichés en clignotant.
b) Avec la touche DOWN ou UP, réglez
lʼadresse 001.
c) Pour mémoriser, appuyez sur la touche ENT.
Dès que sur les appareils auxiliaires, les
signaux de commande de lʼappareil principal
sont présents, ils sont gérés via lʼappareil
principal.
5.3 Utilisation via un contrôleur
Pour une utilisation via un contrôleur avec proto-
cole DMX512 (par exemple DMX-1440 ou DMX-
510USB de “img Stage Line“), le PARL-10DMX/UV
dispose dʼun canal de commande DMX.
DMX est lʼabréviation de Digital Multiplexet
signifie gestion digitale de plusieurs appareils DMX
via un câble de commande commun. Vous trouve-
rez chapitre 7.1 les fonctions et les valeurs DMX.
5.3.1 Branchement DMX
Lʼappareil possède des prises XLR 3 pôles avec la
configuration suivante pour le branchement DMX :
pin 1 = masse, 2 = DMX -, 3 = DMX +
Pour le branchement, il est recommandé dʼutiliser
des câbles spécifiques pour des flots importants de
données. Lʼemploi de câbles micro usuels avec
blindage et une section de 2 × 0,22 mm2au moins
et la capacité la plus faible possible nʼest recom-
mandé que pour des longueurs de câble de 100 m
maximum. Pour des longueurs de liaison à partir de
150 m, il est recommandé dʼinsérer un amplifica-
teur DMX de signal (par exemple SR-103DMX de
“img Stage Line”).
1) Reliez lʼentrée DMX (11) à la sortie DMX du
contrôleur.
2) Reliez la sortie DMX (12) à lʼentrée DMX du jeu
de lumière suivant. Reliez sa sortie à lʼentrée du
prochain appareil et ainsi de suite jusquʼà ce que
tous les jeux de lumière soient reliés dans une
chaîne.
3) Terminez la sortie DMX du dernier appareil
DMX de la chaîne avec une résistance 120 Ω
(> 0,3 W) : placez un bouchon correspondant
(par exemple DLT-123 de “img Stage Line”)
dans la prise.
5.3.2 Réglage de lʼadresse DMX
Pour pouvoir utiliser le projecteur UV avec un
contrôleur, une adresse DMX doit être réglée. Si par
exemple sur le contrôleur DMX, l'adresse 10 est
prévue pour gérer le projecteur UV, réglez l'adresse
de démarrage 10 sur le PARL-10DMX/UV:
1) Appuyez sur la touche FUNC (6) jusqu'à ce que
sur l'affichage (5) et le nombre derrière soient
affichés en clignotant.
2) Avec la touche DOWN ou UP, réglez lʼadresse.
3) Pour mémoriser, appuyez sur la touche ENT.
Dès que sur lʼaffichage, le point derrière le cli-
gnote, les signaux de commande du contrôleur
sont présents, le projecteur UV peut alors être uti-
lisé via le contrôleur. Si le point ne clignote pas, le
contrôleur est éteint, défectueux ou la liaison avec
le contrôleur est interrompue.
14
F
B
CH

6 Nettoyage de lʼappareil
La vitre plastique devant les LEDs devrait être net-
toyée régulièrement de lʼextérieur, de toute pous-
sière, fumée ou autres particules de salissure. Cʼest
à cette condition que la lumière sera émise avec
une luminosité maximale. Avant le nettoyage,
débranchez la fiche secteur du secteur. Utilisez
uniquement un tissu propre et doux et un produit de
nettoyage doux. Essuyez puis séchez la vitre.
Pour nettoyer les autres éléments du boîtier, uti-
lisez exclusivement un tissu doux et propre. Nʼutili-
sez en aucun cas de liquide, il pourrait couler dans
lʼappareil et créer des dégâts.
7 Caractéristiques techniques
Source de lumière : . . . . . 168 LEDs UV
Diamètre : . . . . . . . . . . 10 mm
Longueur dʼonde : . . . . 395 – 400 nm
Angle de rayonnement : 25°
Alimentation : . . . . . . . . . . 230 V~/50 Hz
Consommation : . . . . . . . 25 VA max.
Température fonc. : . . . . . 0 – 40 °C
Dimensions : . . . . . . . . . . 230 × 210 × 105 mm
Poids : . . . . . . . . . . . . . . . 2,1 kg
7.1 Valeurs DMX
Tout droit de modification réservé.
Valeur DMX Function
0–7 LEDs éteintes
8 – 190 sombre →clair
191 – 195 gestion par la musique
196 – 200 stroboscope géré par la musique
201 – 247 stroboscope lent →rapide
248 – 255 LEDs éteintes
15
F
B
CH
Notice dʼutilisation protégée par le copyright de MONACOR
®
INTERNATIONAL GmbH & Co. KG. Toute repro-
duction même partielle à des fins commerciales est interdite.

A pagina 3, se aperta completamente, vedrete
sempre gli elementi di comando e i collega-
menti descritti.
1 Elementi di comando
e collegamenti
1Staffa di montaggio
2Regolatore SENSITIVITY per la sensibilità di
reazione in caso di comando tramite la musica
per mezzo del microfono (3)
3Microfono per il comando tramite la musica
4Presa per il collegamento con una presa di rete
(230 V~/50 Hz) per mezzo del cavo in dotazione
oppure per il collegamento con la presa POWER
LINK OUTPUT (10) di un altro PARL-10DMX/UV
5Display
6 Tasti funzioni
Tasto FUNC per selezionare una funzione
Tasti UP e DOWN per selezionare uno dei due
programmi comandati dalla musica, per impo-
stare la luminosità e lʼindirizzo DMX
Tasto ENT (= Enter) per attivare unʼimposta-
zione o funzione
7Viti di bloccaggio per la staffa di montaggio (1)
8Portafusibili
Sostituire un fusibile difettoso sempre con uno
dello stesso tipo.
9Asola per fissare una fune di trattenuta
10 Contatto POWER LINK OUTPUT per lʼalimen-
tazione di un ulteriore apparecchio
11 Ingresso del segnale DMX (XLR a 3 poli) per il
collegamento di unʼunità di comando luce;
pin 1 = massa, 2 = DMX
-
, 3 = DMX+
12 Uscita del segnale DMX (XLR a 3 poli) per il col-
legamento con lʼingresso DMX di unʼulteriore
unità di effetti luce;
pin 1 = massa, 2 = DMX
-
, 3 = DMX+
2 Avvertenze di sicurezza
Questʼapparecchio è conforme a tutte le direttive
richieste dellʼUE e pertanto porta la sigla .
Si devono osservare assolutamente anche i
seguenti punti:
GUsare lʼapparecchio solo allʼinterno di locali e pro-
teggerlo dallʼacqua gocciolante e dagli spruzzi
dʼacqua, da alta umidità dellʼaria e dal calore
(temperatura dʼimpiego ammessa fra 0 e 40 °C).
GNon depositare sullʼapparecchio dei contenitori
riempiti di liquidi, p. es. bicchieri.
GNon mettere in funzione lʼapparecchio o staccare
subito la spina rete se:
1. lʼapparecchio o il cavo rete presentano dei
danni visibili;
2. dopo una caduta o dopo eventi simili sussiste
il sospetto di un difetto;
3. lʼapparecchio non funziona correttamente.
Per la riparazione rivolgersi sempre ad unʼoffi-
cina competente.
GStaccare il cavo rete afferrando la spina, senza
tirare il cavo.
GPer la pulizia usare solo un panno morbido,
asciutto; non impiegare in nessun caso prodotti
chimici o acqua.
GNel caso dʼuso improprio, di montaggio non
sicuro, dʼimpiego scorretto o di riparazione non a
regola dʼarte dellʼapparecchio, non si assume
nessuna responsabilità per eventuali danni con-
sequenziali a persone o a cose e non si assume
nessuna garanzia per lʼapparecchio
Se si desidera eliminare lʼapparecchio
definitivamente, consegnarlo per lo smalti-
mento ad unʼistituzione locale per il rici-
claggio.
AVVERTIMENTO Lʼapparecchio funziona con peri-
colosa tensione di rete. Non inter-
venire mai personalmente al suo
interno e non inserire niente nelle
fessure di aerazione! Esiste il
pericolo di una scarica elettrica.
16
I

3 Possibilità dʼimpiego
Questo proiettore piatto UV a LED serve per unʼil-
luminazione a effetto, per esempio per spettacoli,
discoteche o party privati. Come sorgenti luminose
sono integrati 168 LED UV del diametro di 10 mm
che generano un effetto di luce nera. I LED
segnano un consumo basso di corrente, uno svi-
luppo ridotto di calore e una lunga vita.
Il proiettore UV a LED è previsto per il comando
per mezzo di unʼunità di comando DMX (1 canale
di comando DMX). Tuttavia può funzionare anche
autonomamente con comando per mezzo di pro-
grammi selezionabili.
4 Messa in funzione
4.1 Montaggio
GPosizionare lʼapparecchio in modo che durante il
funzionamento sia garantita una circolazione suf-
ficiente dellʼaria. Le aperture di aerazione sul
contenitore non devono essere coperte in nes-
sun modo.
GLa distanza dallʼoggetto irradiato non deve essere
inferiore a 50 cm.
1. Fissare il proiettore per mezzo della staffa
metallica (1), p. es. con una robusta vite di mon-
taggio o su una traversa con un gancio per spot
(gancio a C).
Per orientare il proiettore allentare le due viti
di bloccaggio (7) sulla staffa di montaggio. Impo-
stare lʻinclinazione desiderata dellʼapparecchio
e stringere nuovamente le viti.
2. In alternativa, il proiettore può essere collocato
anche liberamente. In questo caso, girare la
staffa di montaggio in modo tale che serva da
appoggio, escludendo che il proiettore possa
ribaltarsi. Quindi stringere di nuovo le viti di bloc-
caggio.
4.2 Alimentazione
Inserire il cavo in dotazione dapprima nella presa
(4) e successivamente in una presa di rete (230 V~/
50 Hz). Così, lʼapparecchio è pronto per il funzio-
namento e può essere comandato attraverso i tasti
funzione (6) [Cap. 5.1] oppure unʼunità DMX di
comando luce [Cap. 5.3]. Per spegnere, stac-
care la spina del cavo dalla presa.
Se si usano più PARL-10DMX/UV, la presa POWER
LINK OUTPUT (10) del primo apparecchio può es-
sere collegata con la presa di rete (4) del secondo
apparecchio servendosi di un cavo rete con spina
e presa a norma IEC/CEE 22 (p. es. AAC-170/SW
del programma di “img Stage Line”). Quindi colle-
gare il secondo apparecchio con il terzo ecc. finché
tutti gli apparecchi sono collegati formando una
catena. In questo modo è possibile assemblare fino
a 90 apparecchi. Un eventuale 91. apparecchio
invece richiede nuovamente un suo collegamento
con la rete.
Attenzione: Lʼapparecchio non deve essere colle-
gato con la tensione di rete per mezzo di un dimmer!
Per maggiore comodità è consigliabile collegare il
proiettore con una presa comandata da un interrut-
tore di luce.
5 Funzionamento
5.1 Funzionamento senza
unità di comando DMX
Con il tasto FUNC (6) scegliere la funzione deside-
rata. Il display (5) indica la funzione:
…Comando DMX tramite unʼunità
di comando luce (Cap. 5.3)
I LED diventano lentamente più chiari e poi
più scuri.
Stroboscopio comandato dalla musica:
con ogni impulso di musica i LED lampeg-
giano alcune volte.
Con il tasto UP o DOWN si può passare al
comando tramite la musica , dove gli
impulsi della musica portano i LED alla
luminosità massima, mentre nellʼintervallo
fra gli impulsi, i LED diventano lentamente
più scuri.
Se la musica presenta un ritmo chiara-
mente avvertibile e un volume sufficiente
AVVERTIMENTO Non guardare direttamente nei
LED per escludere possibili danni
agli occhi.
Tenete presente che i veloci
cambi di luce possono provocare
attacchi dʼepilessia presso per-
sone fotosensibili o epilettici!
AVVERTIMENTO Il proiettore UV deve essere mon-
tato a regola dʼarte e in modo
sicuro. Se viene installato in un
posto sotto il quale si possono tro-
vare delle persone, è richiesto un
sistema di sicurezza supplemen-
tare, p. es. per mezzo di una fune
di trattenuta. Far passare la fune
attraverso lʼasola (9) e fissarla in
modo tale che la caduta dellʼunità
non possa superare i 20 cm.
17
I

nei bassi, i LED saranno comandati attra-
verso il microfono (3). Impostare il regola-
tore SENSITIVITY (2) per la sensibilità del
microfono per assicurare che i LED siano
comandati in modo ottimale.
La luminosità dei LED è impostata fissa sul
25 % del valore massimo. Con il tasto UP o
DOWN è possibile impostare anche una
luminosità del 50 %, 75 % e 100 %.
Dopo la scelta di una funzione, il display lampeg-
gia. Per attivare la funzione scelta, premere il tasto
ENT, il lampeggio finisce.
5.2 Assemblaggio di più
PARL-10DMX/UV
È possibile assemblare più PARL-10DMX/UV (fun-
zionamento master-slave). Lʼapparecchio princi-
pale (master) è in grado di comandare in sincronia
tutti gli apparecchi secondari (slave).
1) Collegare il contatto DMX OUTPUT (12) dellʼap-
parecchio principale con il contatto DMX INPUT
(11) del primo apparecchio secondario serven-
dosi di un cavo XLR a 3 poli (p. es. serie MEC-…
o MECN-… del programma di “img Stage Line“).
2) Collegare il contatto DMX OUTPUT del primo
apparecchio secondario con il contatto DMX
INPUT del secondo apparecchio secondario
ecc, finché tutti gli apparecchi sono collegati for-
mando una catena.
3) Sullʼapparecchio principale, al contatto DMX IN-
PUT non deve essere presente nessun segnale
DMX. Sugli apparecchi secondari, impostare
lʼindirizzo DMX con 001:
a) Premere il tasto FUNC (6) tante volte finché
sul display (5) si vedono lampeggianti se-
guito da un numero.
b) Con il tasto DOWN o UP impostare lʼindirizzo
001.
c) Per memorizzarlo, premere il tasto ENT. Non
appena sugli apparecchi secondari sono pre-
senti i segnali di comando dellʼapparecchio
principale, saranno comandati dallʼapparec-
chio principale.
5.3 Comando attraverso
unʼunità di comando luce
Per il funzionamento tramite unʼunità di comando
luce con protocollo DMX512 (p. es. DMX-1440 o
DMX-510USB di “img Stage Line”), il PARL-
10DMX/UV dispone un canale di comando DMX.
DMX è lʼabbreviazione per Digital Multiplexe signi-
fica il comando digitale di più apparecchi DMX per
mezzo di una linea comune di comando. Le fun-
zioni e i valori DMX si trovano nel capitolo 7.1.
5.3.1 Collegamento DMX
Per il collegamento DMX sono presenti dei contatti
XLR a 3 poli con la seguente piedinatura:
pin 1 = massa, 2 = DMX
-
, 3 = DMX+
Per il collegamento si dovrebbero usare cavi spe-
ciali per un forte flusso di dati. Lʼimpiego di normali
cavi schermati per microfoni di sezione minima di
2 × 0,22 mm2e con capacità possibilmente bassa è
consigliabile solo nel caso di una lunghezza com-
plessiva inferiore a 100 m. Nel caso di lunghezze
oltre i 150 m si consiglia per principio lʼimpiego di
un amplificatore DMX (p. es. SR-103DMX di “img
Stage Line”).
1) Collegare lʼingresso DMX (11) con lʼuscita DMX
dellʼunità di comando luce.
2) Collegare lʼuscita DMX (12) con lʼingresso DMX
dellʼunità per effetti luci a valle e lʼuscita di que-
stʼultima con lʼingresso dellʼapparecchio succes-
sivo ecc. finché tutte le unità per effetti luce sono
collegate formando una catena.
3) Terminare lʼuscita DMX dellʼultima unità DMX
della catena con una resistenza di 120 Ω
(> 0,3 W): inserire nella presa un terminatore
adatto (p. es. DLT-123 di “img Stage Line”).
5.3.2 Impostare lʼindirizzo DMX
Per poter comandare il proiettore UV con unʼunita di
comando luce, occorre impostare lʼindirizzo DMX.
Se p. es. sullʼunità di comando lʼindirizzo 10 è pre-
visto per il proiettore UV, si deve impostare sul
PARL-10DMX/UV lʼindirizzo 10:
1) Premere il tasto FUNC (6) tante volte finché sul
display (5) si vedono lampeggianti seguito da
un numero.
2) Con il tasto DOWN o UP impostare lʼindirizzo.
3) Per memorizzarlo, premere il tasto ENT.
Non appena sul display il punto dopo lampeggia,
significa che i segnali di comando dellʼunità di
comando luce sono presenti e il proiettore UV può
essere comandato con lʼunità di comando. Se il
punto non lampeggia, significa che lʼunità di
comando è spenta, difettosa oppure che la con-
nessione verso lʼunità di comando è interrotta.
18
I

6 Pulizia dellʼapparecchio
Ad intervalli regolari, a seconda della presenza di
polvere, di fumo o di altre particelle, conviene pulire
di disco di plastica davanti ai LED. Solo allora la
luce può essere irradiata alla massima luminosità.
Per la pulizia, staccare la spina dalla presa.
Usare solo un panno morbido, pulito e un deter-
gente delicato. Quindi asciugare il disco.
Per pulire le altre parti del contenitore, usare
solo un panno morbido, pulito. Non usare in nessun
caso un liquido che potrebbe penetrare nellʼappa-
recchio e causare dei danni.
7 Dati tecnici
Sorgenti luminose: . . . . . 168 LED UV
Diametro: . . . . . . . . . . 10 mm
Lunghezza dʼonda: . . . 395 – 400 nm
Angolo dʼirradiazione: . 25°
Alimentazione: . . . . . . . . 230 V~/50 Hz
Potenza assorbita: . . . . . max. 25 VA
Temperatura dʼesercizio: 0 – 40 °C
Dimensioni: . . . . . . . . . . . 230 × 210 × 105 mm
Peso: . . . . . . . . . . . . . . . 2,1 kg
7.1 Valori DMX
Con riserva di modifiche tecniche.
Valore DMX Funzione
0–7 LED spenti
8 – 190 scuro →chiaro
191 – 195 Comando musica
196 – 200
Stroboscopio comandato dalla musica
201 – 247 Stroboscopio lento →veloce
248 – 255 LED spenti
19
I
La MONACOR
®
INTERNATIONAL GmbH & Co. KG si riserva ogni diritto di elaborazione in qualsiasi forma delle
presenti istruzioni per lʼuso. La riproduzione – anche parziale – per propri scopi commerciali è vietata.

Todos los elementos de funcionamiento y las
conexiones que se describen pueden encon-
trarse en la página 3 desplegable.
1 Elementos de Funcionamiento
y Conexiones
1Soporte de montaje
2Control SENSITIVITY para la sensibilidad de
repuesta en caso de control por música
mediante el micrófono (3)
3Micrófono para el control por música
4Toma de corriente para la conexión a un
enchufe (230 V~/50 Hz) mediante el cable de
corriente entregado o para la conexión a la
toma POWER LINK OUTPUT (10) de otro
PARL-10DMX/UV
5Visualizador
6Botones de funcionamiento
Botón FUNC para seleccionar una función
Botones UP y DOWN para seleccionar uno de
los programas controlados por música, para
ajustar el brillo y la dirección DMX
Botón ENT (= ENTER) para activar un ajuste o
una función
7Tornillos de cierre para el soporte de montaje (1)
8Soporte para el fusible de corriente
¡Cambie siempre un fusible fundido por otro del
mismo tipo!
9Ojal para fijar un cable de seguridad
10 Conexión POWER LINK OUTPUT para la ali-
mentación de otro aparato
11 Entrada de señal DMX (XLR, 3 polos) para
conectar a un controlador;
Pin 1 = masa, 2 = DMX
-
, 3 = DMX+
12 Salida de señal DMX (XLR, 3 polos) para
conectar a la entrada DMX de otro juego de de
luces DMX;
Pin 1 = masa, 2 = DMX
-
, 3 = DMX+
2 Notas de Seguridad
Este aparato cumple con todas las directivas
requeridas por la UE y por lo tanto está marcado
con el símbolo .
Preste atención a los siguientes puntos bajo cual-
quier circunstancia:
GEl aparato está adecuado sólo para utilizarlo en
interiores. Proteja el aparato de goteos y salpica-
duras, elevada humedad del aire y calor (tempe-
ratura ambiente admisible: 0 – 40 °C).
GNo coloque ningún recipiente con líquido encima
del aparato, p. ej. un vaso.
GNo utilice el aparato y desconecte inmediata-
mente la toma de corriente del enchufe si:
1. El aparato o el cable de corriente están visi-
blemente dañados.
2. El aparato ha sufrido daños después de una
caída o accidente similar.
3. No funciona correctamente.
Sólo el personal cualificado puede reparar el
aparato bajo cualquier circunstancia.
GNo tire nunca del cable de corriente para desco-
nectar el enchufe de la toma de corriente, tire
siempre del enchufe.
GUtilice sólo un paño suave y seco para la lim-
pieza; no utilice nunca ni agua ni productos quí-
micos.
GNo podrá reclamarse garantía o responsabilidad
alguna por cualquier daño personal o material
resultante si el aparato se utiliza para otros fines
diferentes a los originalmente concebidos, si no
se instala adecuadamente o no se repara por
expertos.
Si va a poner el aparato fuera de servicio
definitivamente, llévelo a la planta de reci-
claje de la zona para que su eliminación
no sea perjudicial para el medio ambiente.
ADVERTENCIA El aparato utiliza un voltaje peli-
groso. Deje el mantenimiento para
el personal cualificado y no intro-
duzca en las rejillas de ventilación.
El manejo inexperto o la modifica-
ción del aparato pueden provocar
una descarga.
20
E
Table of contents
Languages:
Other Monacor Projector manuals