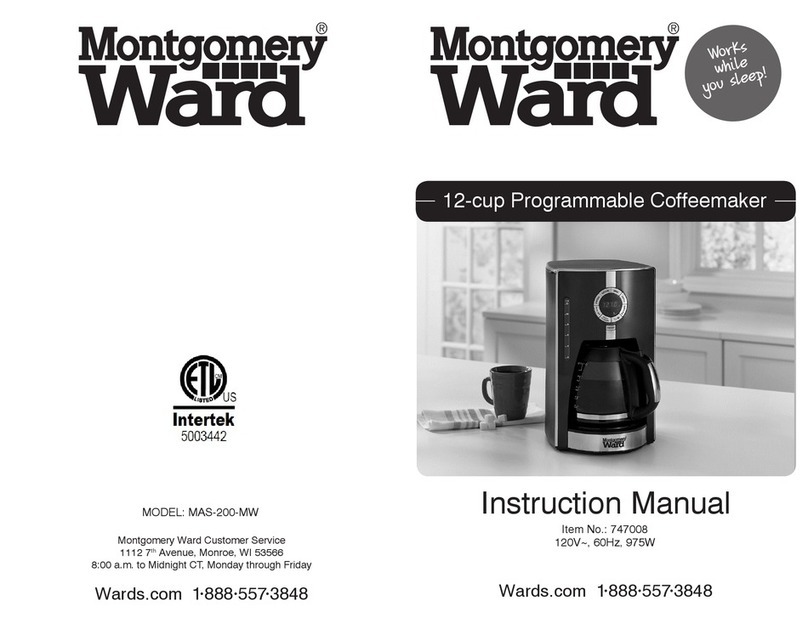
Montgomery Ward Chef TESTED J9761729 User manual

Instruction Manual
ITEM: 761729
Wards.com 1•888•557•3848
Montgomery Ward Customer Service
3650 Milwaukee Street, Madison, WI 53714
8:00 am to Midnight, Monday through Friday
Delicious
coffee!
Wards.com 1•888•557•3848
12-Cup Coffee Maker

Thank you for purchasing your Chef Tested 12-Cup Coee Maker
by Montgomery Ward. Put through the paces by the
experts, we guarantee that it will perform to the highest
standard, time after time, with all the convenience, easy cleanup
and durability you rely on from Wards.
3
Important Safeguards ................... 3
Electrical Safety ...............................4
Specifications.................................... 4
Parts & Features...........................5-6
How to Use..................................... 7-9
Cleaning & Care.............................. 10
Helpful Hints ......................................11
Return Information ........................12
Warranty..............................................13
Thank you
for your
purchase!
Table of Contents
21•888•557•3848
Wards.com
Important Safeguards
READ CAREFULLY BEFORE USING AND SAVE THESE INSTRUCTIONS!
• FOR HOUSEHOLD USE ONLY. Do not use this appliance for other than its
intended use.
• REMOVE all packaging materials and labels before first use. Please dispose
of the packaging materials via the appropriate recycling system, in an
environmentally friendly manner.
• WASH all removable parts before first use. See Cleaning & Care.
• A SHORT CORD is provided to reduce the hazards resulting from
entanglement or tripping. Do not drape the cord over the counter or tabletop,
where it can be pulled on or tripped over. Never wrap the cord tightly around
the appliance, as this could cause the cord to fray or break.
• We DO NOT recommend using an extension cord with this appliance. However,
IF AN EXTENSION CORD IS USED, the marked electrical rating should be at
least as great as the electrical rating of this appliance.
• CLOSE SUPERVISION is necessary when using this appliance near CHILDREN.
• A fire may occur if this appliance is used near FLAMMABLE MATERIALS,
including curtains, towels, walls, etc. Do not place any paper, plastic, or other
non-food items in the appliance. DO NOT place the appliance or its cord on or
near a heated surface, or in a heated oven.
• This appliance should always be used on a STABLE, DRY, HEAT-RESISTANT
SURFACE. DO NOT use near water.
• DO NOT use an accessory or attachment not recommended by the
manufacturer, as this may cause injury, or damage the appliance.
• Always use OVEN MITTS when handling hot food or appliances. DO NOT
attempt to move an appliance when it is hot or has hot contents.
• DO NOT use outdoors.
• Do not use the appliance if the carafe shows any sign of cracks.
• Turn OFF AND UNPLUG this appliance when not in use.
• NO SERVICEABLE PARTS INSIDE THIS APPLIANCE.
• DO NOT USE AN APPLIANCE WITH A DAMAGED CORD OR PLUG, OR AFTER
THE APPLIANCE MALFUNCTIONS, OR HAS BEEN DAMAGED IN ANY MANNER.
• Appliances/tools contain valuable materials that can be recycled. Please
dispose of your old appliances/tools using appropriate collection systems.

Parts & Features
Specifications
Electrical Safety
41•888•557•3848
Wards.com
45
This appliance is equipped with a polarized plug in which one prong is wider
than the other. This is a safety feature to reduce the risk of electrical shock. The
plug will fit into a polarized outlet only one way. If you are unable to insert the plug
into the outlet, try reversing the plug. If it still does not fit, contact a qualified
electrician. Do not attempt to modify the plug in any way. Montgomery Ward can
not accept any liability for damage or injury resulting from failure to observe these
safety procedures.
POWER RATING 60Hz, 120V, 1000W
CAPACITY 64 Oz.
CORD LENGTH 24"
DIMENSIONS 7½"L x 9"W x 14"H
MODEL SLO-094
1. Water Tank Lid
2. Digital Display Window
3. Control Panel (more detail on page 6)
4. Carafe
5. Hot Plate
6. Water Gauge
7. Water Tank
8. Filter Basket Slot (2)
9. Filter Basket Pin (2)
10. Filter Basket
11. Filter Basket Holder
1
10
9
8
7
6
5
4
3
2
11

1•888•557•3848
Wards.com 7
6
Part & Features (cont.) How to Use
A. Digital Display Window
B. Brew Indicator Icon
C. Aroma Indicator Icon
D. Prog/Auto Indicator Light
E. Prog/Auto Button
F. Hour Button
G. Minute Button
H. Aroma Button
I. On/O Button
J. On/O Indicator Light
K. Auto Set Indicator Icon
L. Clean Indicator Icon
L
H
G
F
I
E
JD
C
B
K
A
WARNING: The lid may become hot during use and hot steam may escape
from top of the unit. DO NOT open the water tank lid while the
coffee maker is on.
Note: The coee maker can be used without setting the clock, but the clock has
to be set for AUTO SET (delay brew timer) to work.
SETTING THE CLOCK
1. Plug the cord into an outlet. The display will light up blue and 12:00 will flash.
2. Press HOUR and MINUTE to set the time. Please note the AM/PM indicators in
the display window, to the left of the time.
3. After a short period of time, the blue display will automatically go out. The clock
is now set.
Note: To remove any remaining residue from the manufacturing process, we
recommend running a brew cycle for the first time using WATER
ONLY. When the brew cycle is finished, discard the water.
BREWING COFFEE
1. Open the water tank lid. Ensure the filter basket is in place (pins aligned with
slots) and place a #4 paper cone filter in the basket. Add the desired amount
of coee to the filter.
2. Using the glass carafe, fill the water tank with the desired amount of COLD water
(which correlates to the amount of coee you are using). DO NOT FILL LESS
THAN 4 CUPS OR MORE THAN 12 CUPS ON THE WATER GAUGE.
3. Close the water tank lid and place the empty carafe on the hot plate.
4. Press ON/OFF. The on/o indicator light will turn on and the brew indicator icon
will show on the display window. (To cancel, press ON/OFF again.)
5. When the brewing process is complete the coee maker will automatically begin
the keep warm time. The brew icon will go out but the on/o indicator light
will remain on.
6. The hot plate will remain on keep warm for 2 hours, then the coee maker
will shut-o automatically.

1•888•557•3848
Wards.com
89
How to UseHow to Use
AUTO SET (DELAY BREW TIMER)
The clock has to be set for auto set (delay brew timer) to work.
1. Follow steps 1–3 under Making Coee on page 7.
2. Press and hold PROG/AUTO until 12:00 flashes and the display lights blue. The
prog/auto indicator light will flash and the auto set indicator icon will show
in the display window.
Note: PROG/AUTO will exit if no button is pressed within 10 seconds.
3. Press HOUR and MINUTE to select the time you want your coee maker to
automatically start brewing. Please note the AM/PM indicators in the display
window, to the left of the time.
4. Press PROG/AUTO 2 times to set the timer and to exit PROG/AUTO. The
delay time will be displayed briefly, then it will revert to clock setting. The
prog/auto indicator light will be on and the auto set indicator icon will show
in the display window. The timer is now set.
5. To cancel the timer, press PROG/AUTO again (the prog/auto indicator light
will go out and the auto set indicator icon will no longer show in the display
window.
6. When the programmed time is reached, the coee maker will start to brew the
coee. The auto set indicator icon will no longer show in the display window, the
prog/auto indicator light will go out and the on/o indicator light will come on.
KEEP WARM
The coee maker will continue to keep warm for 2 hours, then it will shut o
automatically.
AROMA
This feature slows the brew cycle slightly to provide a richer flavor, if desired.
1. The aroma feature can only be set when the coee maker is on or auto set
(delay brew timer) is set.
2. Press AROMA to turn the feature on. The aroma indicator icon will show in the
display window.
3. Press AROMA again to cancel the feature.
CLEAN INDICATOR
1. The clean indicator icon will show in the display window when the coee maker
requires descaling. (Coee can still be brewed when this indicator is on.)
2. When ready to descale, follow the instructions on page 10.
3. The clean icon will be displayed until the coee maker is reset by unplugging
the coee maker from the electrical outlet.
DIGITAL DISPLAY WINDOW
The blue display light can be set to be continuously on by pressing and holding
HOUR and MINUTE simultaneously for approximately 5 seconds. Press and hold
HOUR and MINUTE simultaneously again for approximately 5 seconds to turn the
light o.

1•888•557•3848
Wards.com
10 11
Cleaning & Care
• This coee maker is fitted with an anti-drip function, allowing you to
remove the carafe at any time, even when coee is still dripping from the
filter. Take the carafe from the hotplate and pour the desired amount of
coee. Replace the carafe on the hot plate and allow the remainder of the
coee to brew.
• Let the carafe cool before adding cold water to a warm carafe when brewing
multiple pots of coee.
• If using a finely ground coee, you may see some residue at the bottom of the
carafe. Use a medium grind to avoid this.
• Use freshly ground coee for the best flavor.
• The snapping lid is a safety feature.
Helpful Hints
Tips R
DAILY CLEANING
1. Turn o and unplug the appliance.
2. Always allow the appliance to cool completely before cleaning.
3. Using the handle, remove the basket and discard the used coee grounds and
paper filter.
4. Wash the carafe and the basket in hot, soapy water. Dry and replace. DO NOT
use abrasive brushes or pads, or harsh cleaning solutions. The carafe and basket
are also dishwasher safe.
5. Wipe the exterior of the coee maker with a damp cloth.
6. Do not immerse any electrical appliance, its cord, or its plug, into water.
DESCALING
If the appliance is used in an area with hard water, we recommend descaling the
coee maker occasionally. The clean indicator icon will show in the display
window when the coee maker needs descaling. Use a commercial descaling
agent for coee makers (follow the directions on the bottle), or use water and
vinegar as follows:
1. Fill the water tank with water to the 12-cup mark. Add 1–2 Tbsp. white vinegar.
2. DO NOT add coee to the basket. Press ON/OFF to run a brew cycle.
3. When finished, discard the used water and repeat the procedure with fresh
water only.

1•888•557•3848
Wards.com
12 13
If any item, for any reason, does not meet your expectations, just
return it to us. We’ll gladly either:
• Refund your merchandise amount
• Credit your account
• Send a replacement
You can return any unused item in its original packaging within 60
days of its receipt for a full refund of the purchase price (excluding
shipping and handling charges).
Please send returns to:
Montgomery Ward, Inc.
Attn: Customer Returns
2000 Harrison Suite 100
Clinton, IA 52732-6676
When returning an item:
• Use the original packaging and pack it securely.
• Please adequately insure your item in case you need to
make a claim with the carrier you choose for returning your
item.
• Include your order number and reason for return.
• We recommend keeping the receipt for 4 weeks.
Montgomery Ward, Inc. warrants this Chef Tested product
to be free from defects in material and workmanship
for one year from provable date of purchase.
Within this warranty period, Montgomery Ward will repair
or
replace, at its option, defective parts of this Chef Tested
product at no charge, provided the product is returned,
freight prepaid with proof of purchase to
Montgomery Ward.
Allow 2–4 weeks for return shipping.
This warranty does not cover improper installation, misuse,
abuse or neglect on part of the owner. Warranty is also
invalid in any case that the product is taken apart or
serviced by an unauthorized service station.
This warranty gives you specific legal rights and they may
vary from state to state.
THE FOREGOING WARRANTIES ARE IN LIEU OF ALL
OTHER WARRANTIES AND CONDITIONS,
EXPRESS OR IMPLIED, INCLUDING
BUT NOT LIMITED TO THOSE OF MERCHANTIBILITY
OR FITNESS FOR A PARTICULAR PURPOSE.
1 Year Limited Warranty
Montgomery Ward Customer Service
8:00 am to Midnight CST, Monday through Friday
Wards.com 1•888•557•3848
Returns

15
14
This manual suits for next models
1
Table of contents
Other Montgomery Ward Coffee Maker manuals