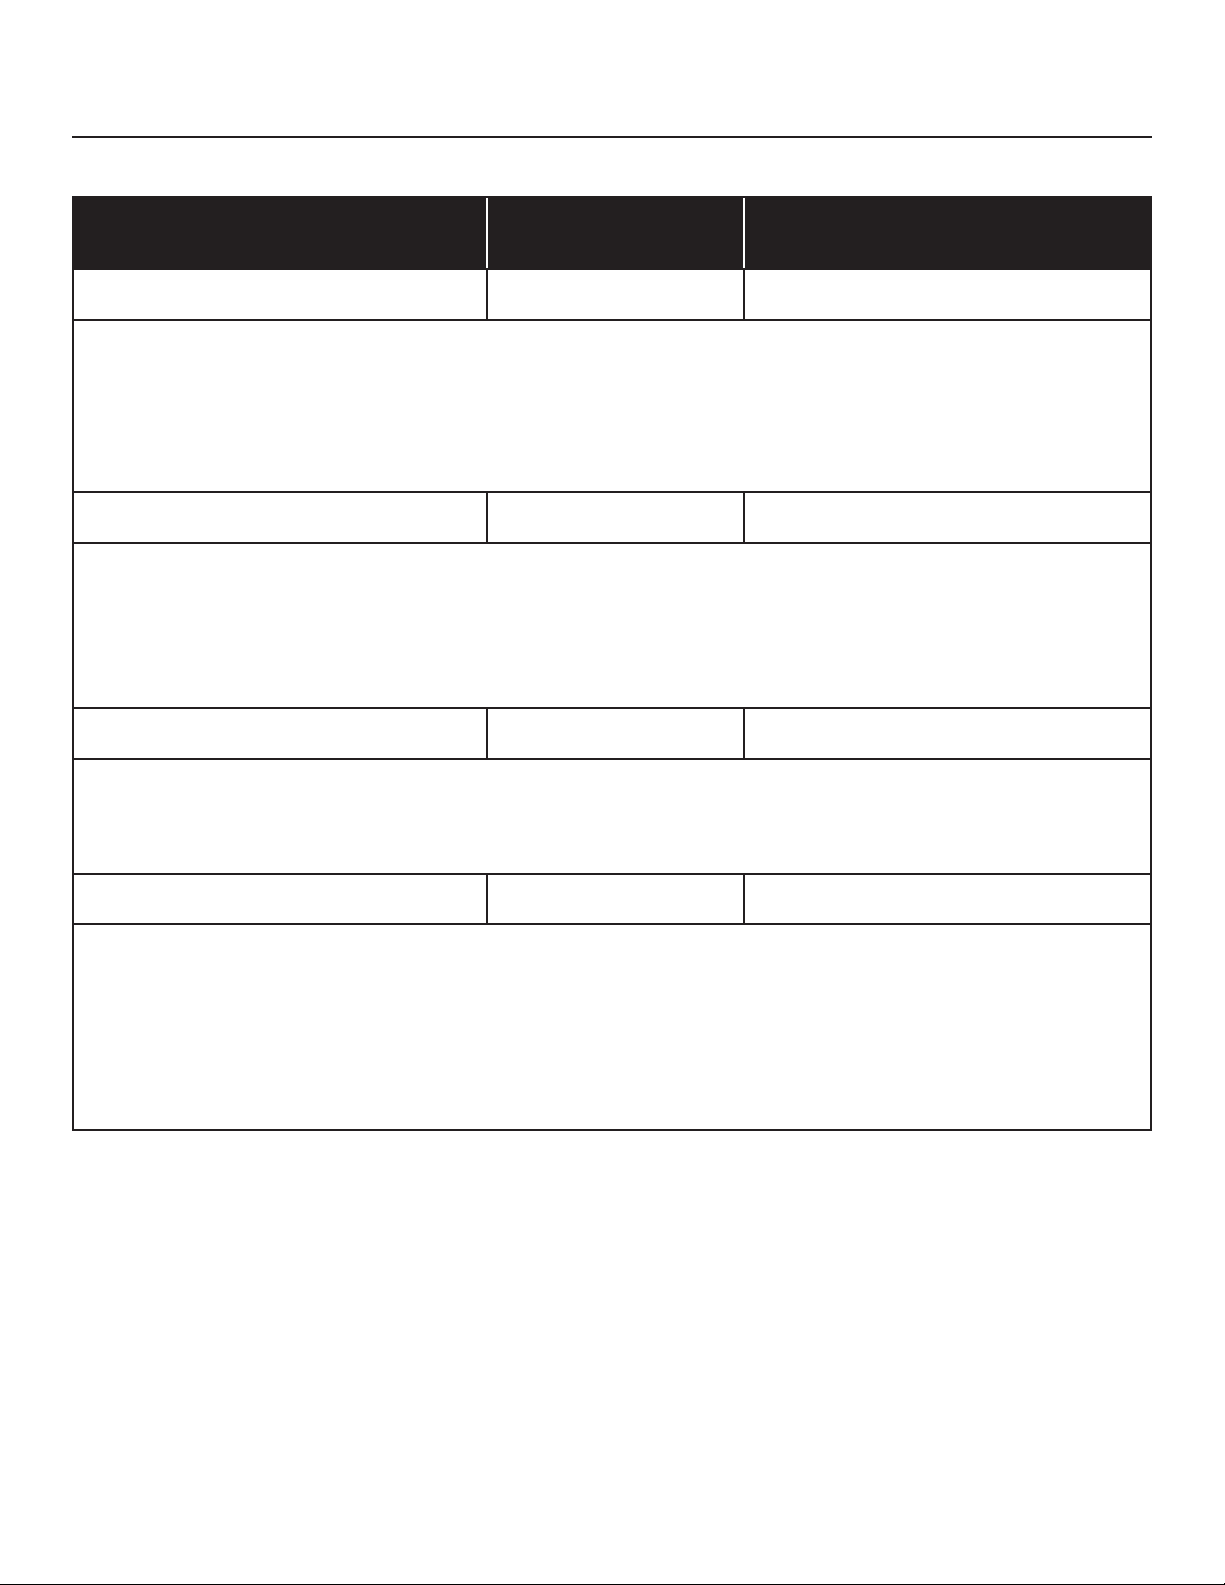
EDITING PARAMETERS USING MIDI SYSEX MESSAGES
You can edit the global and some panel parameters using MIDI System Exclusive (SysEx) messages. The template for
these SysEx messages is shown below.
TO SET A PARAMETER TO A VALUE:
F0 04 16 23 [Parameter ID], [value MSB], [value LSB], 00 00 00 00 00 00 00 00 [Unit ID] F7
• Values above are shown in hexadecimal format.
• If the intended parameter value is less than 128, then [value MSB] is 0 and [value LSB] is the intended parameter
value. If the intended parameter value is 128 or higher, then the value MSB is the intended value divided by 128, and
the value LSB is the remainder (intended value modulo 128).
• The Unit ID byte must be set to match the Unit ID of the synth you want to edit (all synths are set to Unit ID 0 by
default; this value will be 0 unless you change it) or set the Unit ID value to 0x7F to address any Unit ID, or multiple
units with different IDs sharing the same MIDI port.
• Note: The byte before Unit ID (byte 14 if counting from F0 = 0) must be set to zero or the message will be
ignored. This is because the same kind of SysEx message is output by the unit in reply to a request to get
the value of a parameter (see below). Replies output by the unit have the byte before Unit ID set to 1,
to avoid getting stuck in a MIDI feedback loop if these messages are echoed back to the unit.
TO REQUEST A PARAMETER VALUE:
F0 04 16 3E [Parameter ID] 00 00 00 00 00 00 00 00 00 00 [Unit ID] F7
• Values above are shown in hexadecimal format.
• Unit ID must match the Unit ID of the Grandmother, or set Unit ID = 7F (all).
• Grandmother will reply with a “set parameter” SysEx message for the requested Parameter ID with its current value,
with the byte before the Unit ID (byte 14 if counting from F0 = 0) set to 1 to indicate that the message is a reply
coming from Grandmother.
Global parameters for sysex editing (values below are shown in decimal format):
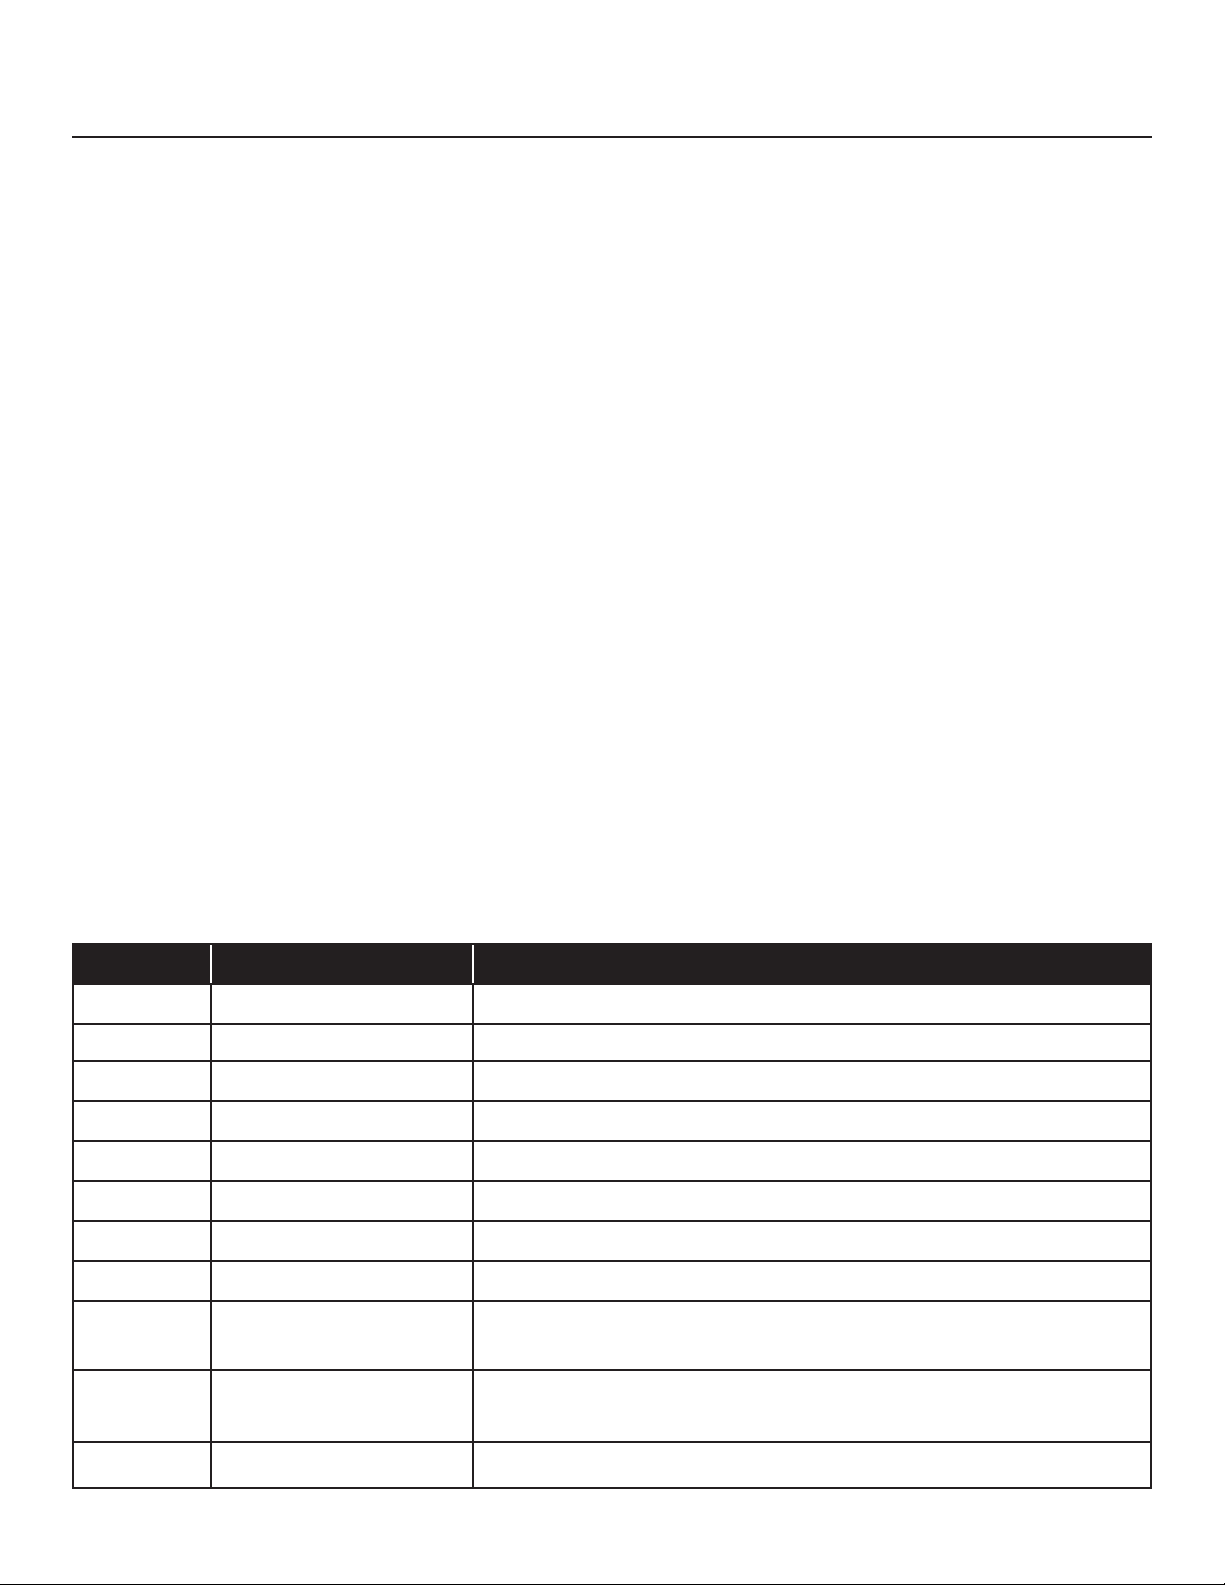
V1.1.0 RELEASE NOTES
Parameter ID Parameter Name Values
0Unit ID 0-15 (Default: 0)
1Tuning Scale 0-31 (Default: 0 / 12-TET)
2Knob Mode 0 = Snap, 1 = Pass-Thru, 2 = Relative (Default: 2 / Relative)
3Note Priority 0 = Low, 1 = High, 2 = Last Note (Default: 2 / Last Note)
4Transmit Program Change 0 = Off, 1 = On (Default: 0 / Off)
5Receive Program Change 0 = Off, 1 = On (Default: 1 / On)
6MIDI Input Ports 0 = none, 1 = DIN only, 2 = USB only, 3 = Both (Default: 3 / Both DIN and USB)
7MIDI Output Ports 0 = none, 1 = DIN only, 2 = USB only, 3 = Both (Default: 3 / Both DIN and USB)
8MIDI Echo USB In 0 = Off, 1 = Echo USB In to DIN Out, 2 = Echo USB In to USB Out, 3 =
Echo USB In to Both DIN and USB Out (Default: 0 / Off)
9MIDI Echo DIN In 0 = Off, 1 = Echo DIN In to DIN Out, 2 = Echo DIN In to USB Out, 3 =
Echo DIN In to Both DIN and USB Out (Default: 0 / Off)
10 MIDI Channel IN 0-15 = MIDI Channel 1-16 (Default: 0 / MIDI Channel 1)