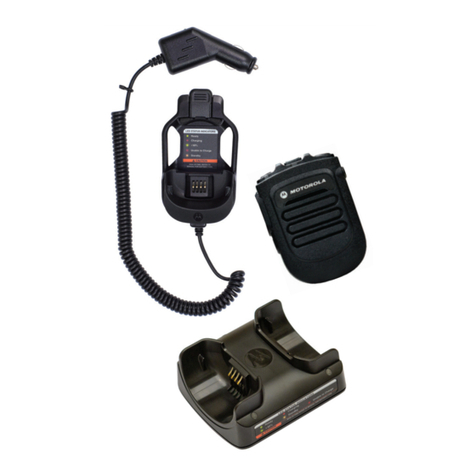
Motorola solutions Impres PMLN5729 User manual

IMPRES
EAR MICROPHONE
SYSTEM
PMLN5729
USER GUIDE
en-US
zh-CN
ko-KR
de-DE
es-ES
fr-FR
it-IT
nl-NL
pt-PT
ru-RU


1
English
FOREWORD
Product Safety and RF Exposure
Compliance
ATTENTION!
This ear microphone, when attached to the
radio, is restricted to occupational use only to
satisfy FCC/ICNIRP RF energy exposure
requirements.
ACOUSTIC SAFETY
Exposure to loud noises from any source for
extended periods of time may temporarily or
permanently affect your hearing. The louder
the radio’s volume, the less time is required
before your hearing could be affected.
Hearing damage from loud noise is
sometimes undetectable at first and can have
a cumulative effect.
To protect your hearing :
• Use the lowest volume necessary to do
your job.
• Turn up the volume only if you are in noisy
surroundings.
• Turn down the volume before connecting
headset or earpiece.
Before using this product, read the
operating instructions for safety
usage contained in the Product
Safety and RF Exposure booklet
enclosed with your radio.

2
English
• Limit the amount of time you use headsets
or earpieces at high volume.
• When using the radio without a headset or
earpiece, do not place the radio’s speaker
directly against your ear.
DESCRIPTION
The Bone Conduction Ear Microphone
PMLN5729 is equipped with a high
performance bone conduction microphone
and receiver built into the ear piece. Unlike
the conventional boom microphone, the bone
conduction microphone picks up your voice
directly from the ear canal, so ambient noise
is minimized to its lowest level.
Figure 1: Ear Microphone Overview
Ear piece
Eartip
Isolator
Receiver Bone
conduction
microphone
PTT
Connector

3
English
PERFORMANCE
To minimize interference and optimize the
Bone Conduction Ear Microphone
performance, make sure the accessory cable
does not coil around the radio antenna during
use. The PTT has a rotating clip to secure it to
clothing at preferred position.
OPERATION
1. Always turn the radio OFF before
connecting the Bone Conduction Ear
Microphone.
2. Attach the accessory connector to the
mating radio side connector.
Figure 2: Secure the accessory connector
1
2
3

4
English
3. Ear mic fitting guide.
Figure 3: Place earpiece
in ear.
Figure 5: Route the cable
behind the ear. This step
helps to hold the earpiece
in place.
Figure 4: Push earpiece
fully into ear canal. Make
sure the earpiece sits
comfortable and snug
inside your ear.
Figure 6: Test earpiece
on radio. Audio clarity
may differ for different
users depending on the
earpiece fitting.
Ear canal

5
English
4. Turn the radio ON.
Note: Once the kit has been installed, the
radio microphone and the radio
speaker will be disabled. The user
must use the Bone Conduction Ear
Microphone to transmit and receive
calls.
5. Press accessory PTT button to transmit
(the radio-in-transmission light (LED) will
be illuminated) and release the button to
receive.
6. Always turn the radio OFF before
disconnecting the kit.
Figure 7: Remove the accessory connector
Do not set the volume level
too loud.
3
2
1

6
English
ADDITIONAL FEATURES
This Bone Conduction Ear Microphone has a
programmable button.
Using the Programmable Button
The Accessory No Dot button is
programmable through the radio’s Customer
Programming Software (CPS). Your radio
user guide contains full description of the
programmable functions that are available
through this button. Check with your local
dealer for more information supporting the
programmable button.
SERVICE
The replacement and alternative parts shown
in Table 1 are available for the Bone
Conduction Ear Microphone kit. Please
contact your local Motorola Solutions
Representative or Dealer for details.
Accessory No Dot/
Programmable
button

7
English
EARTIP REPLACEMENT
There are two sizes of eartip available. The
Bone Conduction Ear Microphone is shipped
with a size M eartip, while a size S eartip is
included separately in the package.
Detach
Position the ear piece so that
it points up. Remove the
eartip in a turning motion and
pull.
Attach
Insert the eartip to the ear
piece.
Note: Ensure that the eartip
is properly attached
to the ear piece. Even
a slight gap
diminishes
performance quality.
Part Description Part Number
Eartip size M PMLN5510
Eartip size S PMLN5511
Isolator PMLN5512
Table 1. Replacement Parts

8
English
Note: Take extra caution
not to lose the
sound tube attached
to the ear piece
when removing the
eartip. Without it, the
microphone may not
function properly.
MOTOROLA, MOTO, MOTOROLA SOLUTIONS and the Stylized M logo
are trademarks or registered trademarks of Motorola Trademark
Holdings, LLC and are used under license. All other trademarks are the
property of their respective owners.
© 2011 and 2021 Motorola Solutions, Inc. All rights reserved.
Sound tube

1
简
体
中
文
前言
产品安全与无线射频暴露
符合要求
注意!
将耳机麦克风连接对讲机时只限于职业使用,
方可满足 FCC/ICNIRP 的射频能量暴露要求。
声学安全
长时间暴露于来自任何声源的巨大噪声中,可
能会对您的听力造成暂时或永久性的影响。对
讲机的音量越大,听力就越快受到影响。巨大
噪声所导致的听力损害有时在一开始不易被发
觉,而且可能具有累积效应。
若要保护您的听力:
• 工作时有必要使用最小音量。
• 仅在嘈杂环境中才增大音量。
• 在连接耳机前,将音量关小。
• 限制在较高音量情况下的耳机使用时间。
• 在使用没有耳机的对讲机时,不要将对讲机
的扬声器直接放在耳朵上。
使用本产品之前,请先阅读您的对讲机
内附的 “ 产品安全与无线射频暴露 ” 手
册中的安全使用操作指示。

2
简
体
中
文
说明
骨传导耳机麦克风 PMLN5729 配备了内置在
耳机中的高性能骨传导麦克风和接收器。与传
统的悬臂式麦克风不同,骨传导麦克风直接从
耳道内拾取语音,从而使环境噪声减弱到最低
水平。
图1: 耳机麦克风概览图
耳机
耳帽
隔离件
接收器
骨传导麦克风
PTT
连接器

3
简
体
中
文
性能
为了最大限度地减少干扰和优化骨传导耳机麦
克风的性能,请确保在使用过程中不让附件线
缆缠绕在对讲机天线上。 PTT 拥有旋转夹,
可用于将其固定在衣服上的首选位置。
操作
1. 在连接骨传导耳机麦克风之前请关闭对
讲机。
2. 将附件连接器连接至对讲机侧面的相配接
口上。
图2: 固定附件连接器
1
2
3

4
简
体
中
文
3. 耳麦佩戴指南。
图3: 将耳机放入耳中。
图5: 将耳机线绕到耳朵
后面。这样有助于将耳机
固定到位。
图4: 将耳机完全推入耳
道。在让耳朵感到舒适的
同时确保耳机不松动。
图6: 用对讲机测试耳机。
视耳机的佩戴情况而定,
对讲机的清晰度可能会因
人而异。
耳道

5
简
体
中
文
4. 打开对讲机。
注意: 一旦安装完套件,对讲机麦克风和
扬声器就会被禁用。用户必须使用
骨传导耳机麦克风发送和接收呼叫。
5. 按下附件 PTT 按钮可发射信号 (对讲机传
输状态灯 (LED) 将会亮起),松开该按钮可
接收信号。
6. 请务必在关闭对讲机后,再断开套件连接。
图7: 移除附件连接器
不要将音量设置过高。
3
2
1

6
简
体
中
文
附加功能
此骨传导耳麦设有一个可编程按钮。
使用可编程按钮
Accessory No Dot 按钮可通过对讲机的客户编
程软件 (CPS)编程。您的对讲机用户指南
中包含有关可通过此按钮执行的可编程功能的
详细描述。请向您当地的经销商咨询有关此可
编程按钮的详情。
维修
在±Ì 1 中显示的更换和备用部件可用于骨传导
耳机麦克风套件。更多详情,请与当地的摩托
罗拉销售代表或经销商联系。
部件说明 部件号
耳帽 (尺寸 M)PMLN5510
耳帽 (尺寸 S)PMLN5511
隔离件 PMLN5512
表
1.
更换部件
Accessory No Dot/
可编程按钮

7
简
体
中
文
更换耳帽
提供了两种尺寸的耳帽。骨传导耳机麦克风
附带了尺寸为 M 的耳帽,另外在包装中提供
了尺寸为 S 的耳帽。
取下
使耳机朝上放置。旋转并拔出
耳帽。
安装
将耳帽套在耳机上。
注意: 确保将耳帽严丝合缝
地安装在耳机上。
即使微小的缝隙也
会使性能质量受损。
注意: 取下耳帽时需格外
小心,以免丢失耳
机上连接的发音管。
如果没有发音管,
麦克风将无法正常
工作。
MOTOROLA、MOTO、MOTOROLA SOLUTIONS 和独特的 M 标志均为
Motorola Trademark Holdings,LLC 的商标或注册商标,且获得使用授
权。所有其他商标均为其各自所有者的财产。
版权所有 © 2011 和2021 Motorola Solutions, Inc。保留所有权利。
发音管

1
한국어
머리말
제품 안전 및RF 노출
규정 준수
유의 사항 !
무전기에 이어 마이크를 연결하는 경우 FCC/
ICNIRP RF 에너지 노출 요건을 벗어나지 않는
범위 내의 작업에만 사용하여야 합니다 .
청력 관련 주의사항
장시간 큰소음에 노출될 경우 일시적으로 또
는영구적으로 청력에 영향이 갈수있습니다.
라디오 볼륨이 클수록 청력이 영향을 받는데
걸리는 시간이 단축될 수있습니다 . 큰소음에
의한 청력 손상은 바로 알수없는 경우가 있기
때문에 그영향이 누적될 수있습니다 .
청력을 보호하려면
• 최저 볼륨으로 작업합니다 .
• 주변이 시끄러울 때만 볼륨을 높입니다 .
• 헤드셋이나 이어피스를 연결할 때는 먼저
볼륨을 낮춥니다 .
• 헤드셋이나 이어피스를 높은 볼륨으로 사용
하는 시간을 제한합니다 .
제품을 사용하시기 전에 무전기와 함
께제공된 제품 안전 및RF 노출 안내
의안전사용 지침을 읽어보시기 바랍
니다 .
ⷦ##ⱂ

2
한국어
• 헤드셋이나 이어피스 없이 라디오를 사용
할때는 라디오 스피커를 귀에 직접 대지 마
십시 .
설명
골도 이어 마이크 PMLN5729에는 고성능 골도
마이크와 리시버가 내장된 이어폰이 장착되어
있습니다. 골도 마이크는 기존의 붐마이크와
달리 귓속에서 직접 음성을 포착하므로 주변
소음이 최소 수준으로 줄어듭니다.
그림 1: 이어 마이크 개요
이어피스
귀마개
절연장치
수신기 골전도
마이크
PTT
커넥터

3
한국어
성능
간섭을 최소화하고 골도 이어 마이크의 성능
을최적화하려면 사용 중액세서리 케이블이
무전기 안테나에 감기지 않도록 하십시오.
PTT에는 회전 클립이 있어 의복의 원하는
위치에 고정할 수있습니다.
사용 방법
1. 골도 이어 마이크를 연결하기 전에 반드시
무전기 전원을 끕니다.
2. 액세서리 커넥터를 해당 무전기 쪽커넥터
에부착합니다.
그림 2: 액세서리 커넥터를 고정합니다
1
2
3
Table of contents
Languages:
Other Motorola solutions Microphone System manuals