Mountfield K201 User manual

DEUTSCH D
8217-3046-02
Mountfield
Quiet Shredder 2200W
Owner’s Manual

Read these
instructions
for use care-
fully.
Warning!
Keep specta-
tors away.
Beware of
objects being
flung out.
Warning! Do
not put hands
or feet under
the cover of
the machine
when it is run-
ning.
Warning -
rotating
blades!
Remove the
plug from the
wall socket
before carry-
ing out any
kind of main-
tenance.
The blades
will con-
tinue to
rotate after
the machine
has been
switched off.
Wear safety
gloves, safety
goggles and
hearing pro-
tection.
STOP
EC declaration of
conformity
Product Electric compost shredder
model Mountfield Quiet Shredder 2200W
Type K201
Article No. 17-2651-80
Serial No. See machine
Motor Sumec M1E-2200
Measured sound power level 93,2 dB(A)
Guaranteed sound power level 94 dB(A)
Manufacturer GGP Sweden AB, P.O. Box 1006
573 28 Tranås, Sweden
The product conforms with:
- Low voltage directive 73/23/EEC
- Electromagnetic Compatibility directive 89/336/EEC.
- Machine directives 98/37/EEC with special reference to the directive's Annex
1 regarding essential health and safety requirements in association with
manufacturing.
- Noise Emission Directive 2000/14/EC
Issued at Tranås,
2004-11-12 Truels Nielsen / General Manager

4
SVENSKA
S
4.
2.
1.
3.
4.
5
SVENSKA S
7.
5.
8.
9.
6.
10.

5
ENGLISH GB
SAFETY INSTRUCTIONS
This symbol indicates WARNING.
Personal injury and/or damage to property
may result if the instructions are not
followed carefully.
GENERAL
• Study the warning stickers on the machine.
Replace damaged or illegible warning stickers.
• Please read through these instructions carefully.
Learn all the controls and the correct use of the
machine. Keep these instructions.
• Never use the machine if others, particularly
children or animals, are in the vicinity. Anyone
who is not aware of these regulations may not use
the machine. Never let children use the machine.
• The user is responsible for accidents that happen
to other people or their property.
PREPARATIONS
• Wear protective gloves, protective glasses and
hearing protectors. Avoid loose clothing.
• Always stand steadily and in balance. Do not
stretch towards the machine. Never stand at a
higher level than the machine during use.
• During use, the machine should be flat and on a
firm surface.
• Ensure that all screws and nuts are properly
tightened before use.
• Only use the machine in dry conditions and never
outdoors when it is raining.
• Never use the machine with damaged safety
devices or without protection.
USING THE MACHINE
• Hard objects such as stones, bottle, cans or pieces
of metal must not be fed into the feeding hopper.
This can cause damage to the machine.
• If the machine becomes blocked, stop the motor
and disconnect the plug. Pull out any objects and
check for damage.
• Do not tug on the connection cable. Do not hold
the cable taught. This can cause damage in the
plugs or in the cable’s insulation. Such damage is
invisible but can be dangerous.
• Always keep the connection cable away from the
machine. Disconnect the plug from the electric
socket and check the cable regularly for signs of
damage or ageing. Do not use the machine with a
damaged connection cable.
• If the cable is damaged, it must be replaced by an
authorised service dealer in order to avoid a
hazard.
• If the fuse blows or if the overload protection is
triggered, this is a sign that the machine is
overloaded and/or that two many appliances are
connected to the same lead. Check the cause and
remedy. Do not install a more powerful fuse.
• Keep hands, other parts of your body and clothing
away from the feeding hopper and the discharge
chute. Never wear loose clothing or clothes with
belts or straps when using the machine.
• Keep away from the discharge zone when starting
the motor.
• Do not allow the pile of processed material to
build up inside the discharge chute. This blocks
new material and can cause the machine to change
its direction of rotation.
• Keep your face and the rest of your body away
from the feeding hopper.
• Never move the machine by pulling the cable.
The machine must not be moved with the motor
running.
• Do not leave the machine unsupervised, but first
switch off the motor and disconnect the plug.
MAINTENANCE AND STORAGE
• During cleaning and maintenance, wear
protective gloves to avoid injury.
• Switch off the motor and disconnect the plug
before carrying out checks or maintenance on the
machine.
• If a foreign object comes into contact with the
spiral cutter or if the machine produces an
abnormal noise level or abnormal vibrations,
switch off the motor immediately. Disconnect the
plug and check for any damage.
• The manufacturer’s obligations and liability
(according to the Product Liability Act) only
apply on the condition that only spare parts
approved by the manufacturer are used.
• Store the machine in a dry place.
• When, after many years of service, your machine
needs to be replaced or is no longer required, we
recommend that the machine is returned to your
distributor for recycling.

6
ENGLISH
GB
ASSEMBLY
Always disconnect the plug from the
electric socket before assembly. Always
wear protective gloves to avoid injury.
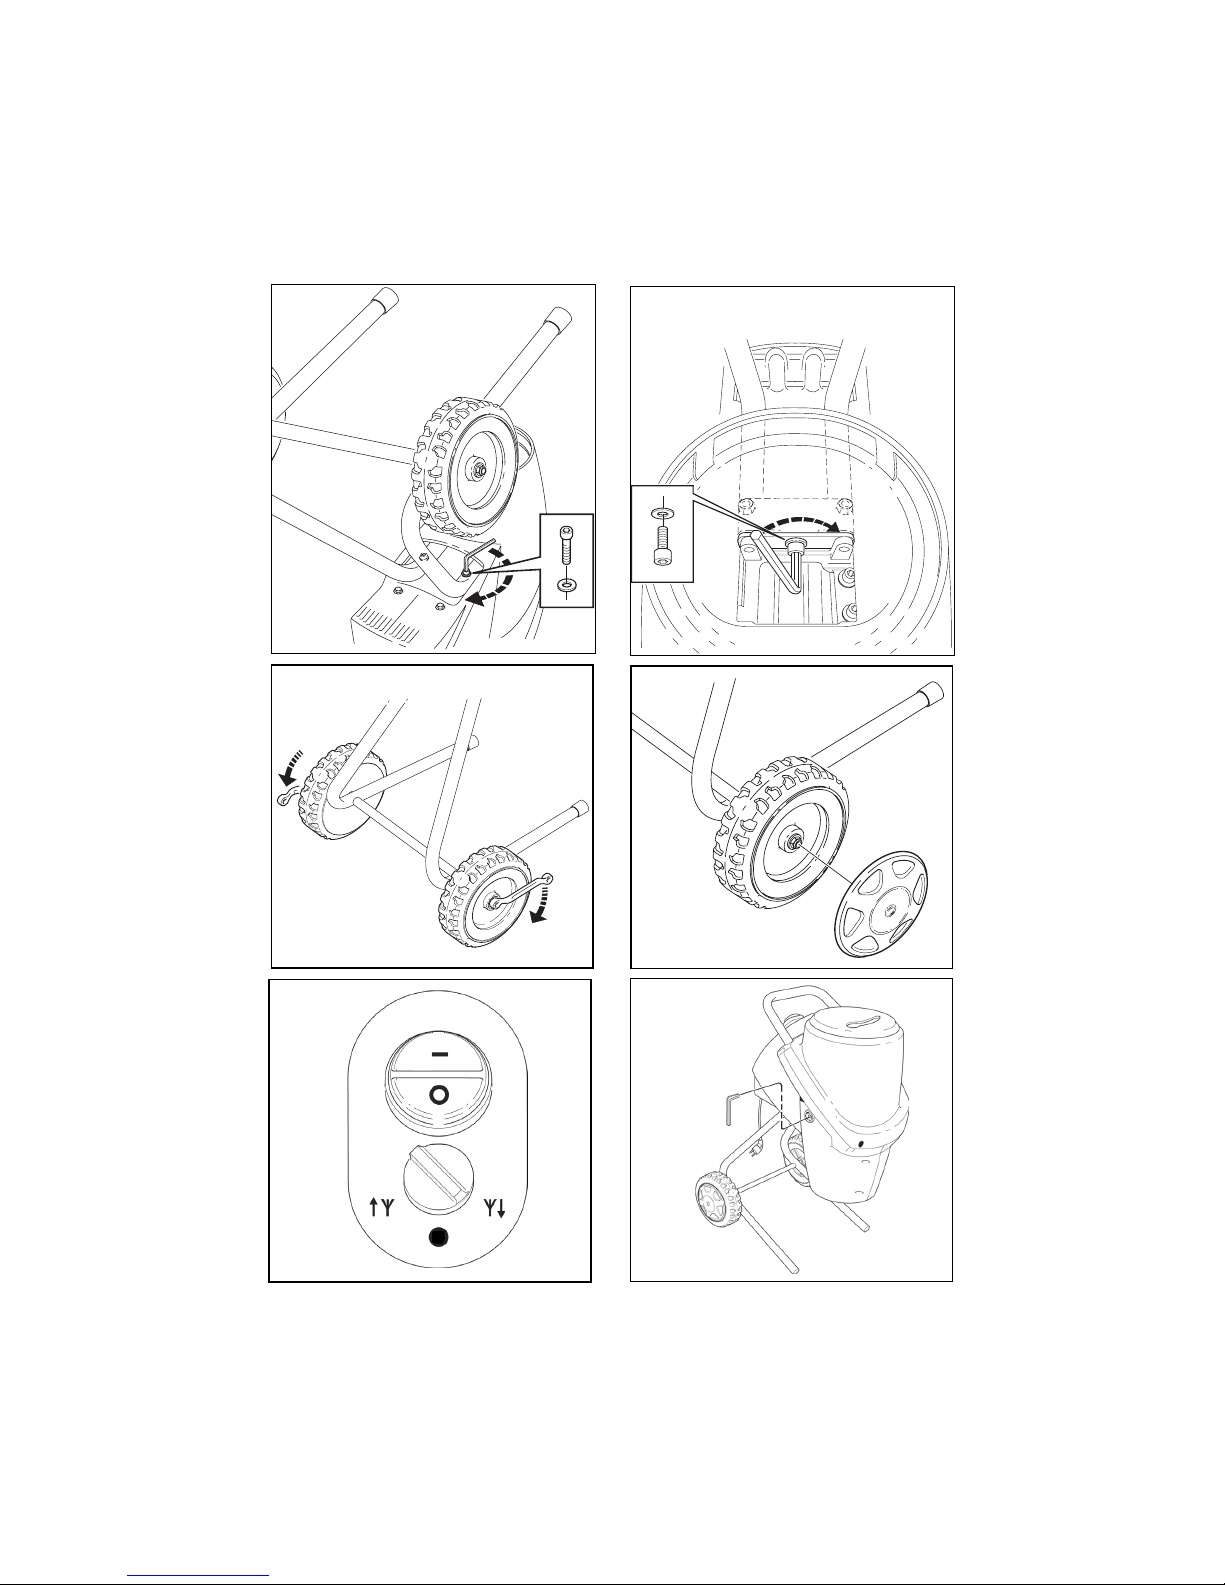
LEGS
1. The legs are different on the left and right sides.
Check that the legs are assembled so that they
are angled outwards (fig. 1).
2. Thread the wheel axle through the holes in the
legs and through the tube (fig. 2).
3. Install the wheels on the wheel axle with wash-
ers, spacers and nuts (fig. 3). Do not tighten the
nuts yet.
4. Screw the mounting plate into the front holes on
the leg frame using washers and long screws
(fig. 4). Tighten properly.
5. Turn the motor housing upside down.
6. Insert the leg frame in the opening and ensure
that the front nut heads go down into the holes
in the motor plate.
7. Secure the leg frame to the machine with wash-
ers and long screws (fig. 5). Do not tighten the
screws yet.
8. Insert your hand in the discharge opening and
screw the short screw and the washer into the
hole (fig. 6). Tighten properly.
9. Tighten the long screws properly.
10.Turn the shredder and place it on a flat surface.
11.Tighten the wheels by putting your weight on
the other wheel (fig. 7). Screw each wheel ap-
proximately the same amount.
12.Press the wheel caps onto the wheels (fig. 8)
USING THE MACHINE
GENERAL
This machine is only intended for private use, not
to be used professionally.
The compost shredder is designed to shred organic
material such as dry plant residue, twigs, sticks and
branches.
TRANSPORT
Take great care during transport and when the
machine is to be lifted. Lift the machine by taking
a firm grip of the legs by the mounting to the motor
housing, under the compost shredder, and lift
carefully. Never lift the machine using the cover.
ELECTRICAL CONNECTION
Only use the machine with the cable supplied with
your shredder.
If the cable is damaged, it must be replaced by an
authorised service dealer.
Connect the machine to a single phase electric
socket with a protective conductor (earth). The
electric circuit should be fused with a 10A inert
fuse.
You are recommended to use an earth leakage
circuit breaker which interrupts the current in the
event of something happening to the machine or
connection cable.
If a portable earth leakage circuit breaker is used,
it should always be placed between the electric
socket and the connection cable.
Even if an earth leakage circuit breaker is used,
safety cannot be guaranteed. Always follow the
safety instructions provided. Ideally wear shoes
with thick rubber soles.
Test the operation of the earth leakage circuit
breaker before each use.
In the event of unfavourable electrical mains
conditions, brief voltage drops can occur when you
start the apparatus which can affect other
appliances (e.g. causing lights to flicker).
With a mains impedance of Zmax < 0,30+j0,19
ohm, such disturbances are unlikely.
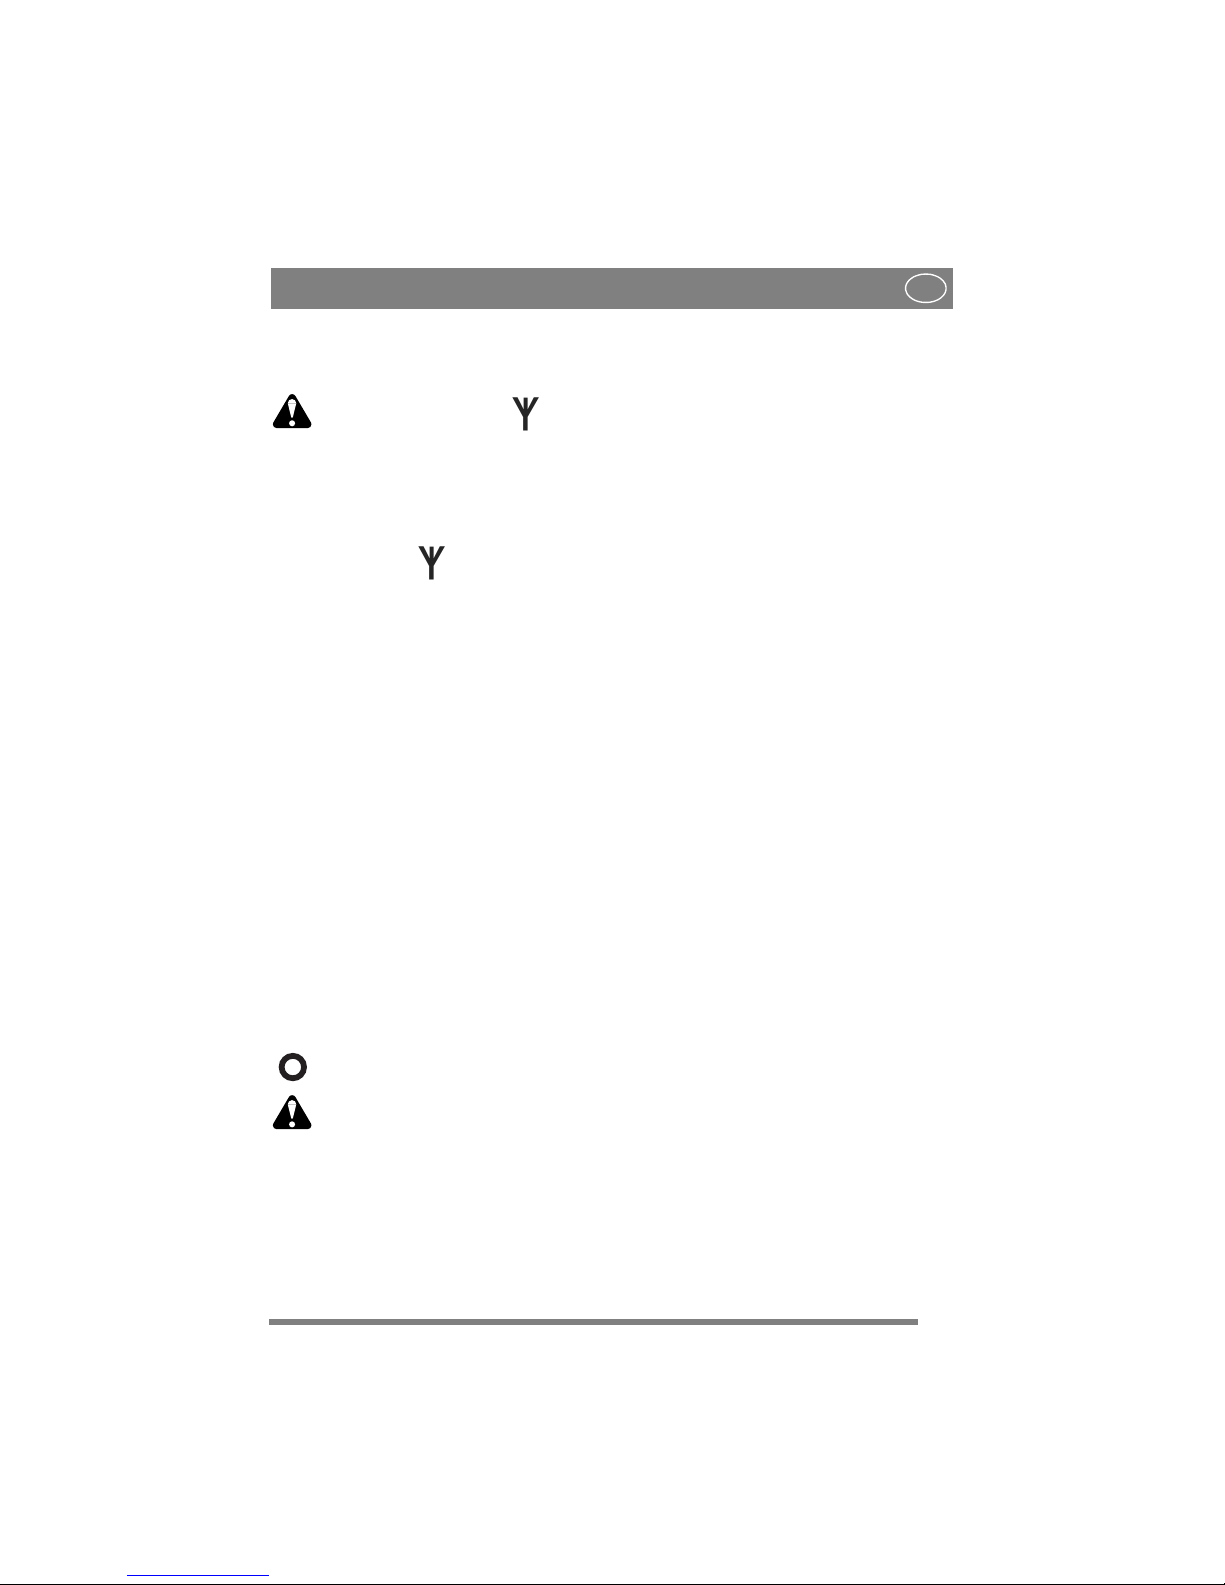
STARTING THE MOTOR
Ensure that the shredder is empty
before starting the motor.
Start the motor by first turning the control
anti-clockwise and then turning on the
main switch (1) (fig. 9).
7
ENGLISH GB
CHANGING DIRECTION OF
ROTATION
Never turn the twist switch when
the motor is running!
Change the direction of rotation as below.
See fig. 9:
1. Stop the motor by pushing the red knob “0”.
2. Wait until the spiral cutter has stopped.
3. Set the twist switch in the desired position.
4. Start as above.
MOTOR PROTECTION
The shredder is equipped with a built-in motor
protection which prevents the motor being
overloaded.
In the event of overloading, the main switch is
turned off automatically. The current is broken.
After 5 minutes of cooling, the motor can be
started again.
AUTOMATIC CHANGE IN
DIRECTION OF ROTATION
In the event of a sudden blockage, the machine can
automatically change the direction of rotation.
This causes the material to be fed back.
• switch off the machine.
• wait until the spiral cutter has stopped
• start the machine again and use material which
can be processed more easily.
STOPPING THE MOTOR
Stop the motor by pushing the red knob
“0”. See fig. 9.
Do not feed in any material after the
motor has been stopped. This will get
caught in the machine and can make
restarting impossible.
Disconnect the plug if the machine is to be left
unsupervised.
EMERGENCY STOP
In order to stop the machine quickly, e.g. in an
emergency, press the 0button on the main switch.
DISCONNECT SWITCH
The machine is equipped with a disconnect switch.
This means that the main switch is automatically
disconnected in the event of a loss of current. The
machine can be started again by reconnecting the
plug and turning on the main switch.
SHREDDING
The following types of material can be shredded in
the compost shredder:
- twigs and branches
- waste from cutting bushes.
- waste from hedge-trimming.
- plant parts and other garden waste which is
suitable for shredding.
Examples of materials which are not suitable for
shredding include:
- glass, paper, metal, plastic bags, stones, fabric,
earth-covered roots.
- waste that does not have a firm consistency, e.g.
kitchen waste.
To prevent damage to the machine, you are
recommended not to exceed the following
maximum sizes of twigs and branches:
< 40 mm in diameter.
Feel free to stand the shredder on a tarpaulin or
similar before shredding. This will catch the
shredded material and make removal easier.
The material that is to be shredded is fed into the
feeding hopper and, assuming it is not too bulky,
automatically pulled down through the slowly
rotating spiral cutter to the blades.
Branches and twigs should be shredded shortly
after being cut. They become extremely hard when
they dry out, and the maximum diameter of what
can be shredded is reduced.
A large proportion of garden waste contains a lot
of water and therefore sticks easily. Such material
should be allowed to dry for a few days before
being processed.
Store the shredder indoors in a dry place.
8
ENGLISH
GB
COMPOSTING
The processed material can be composted in
various ways:
- The material can be placed in a heap directly on
the ground (cold composting).
- The material can be placed in a plastic
container, wooden crate, skeleton container or
similar (cold composting).
- The material can be placed in an insulated
compost holder. The heat is then held for longer
and the rotting process also continues during
the winter. This method produces faster results
(warm composting).
- The material can be spread directly onto the
garden (surface composting).
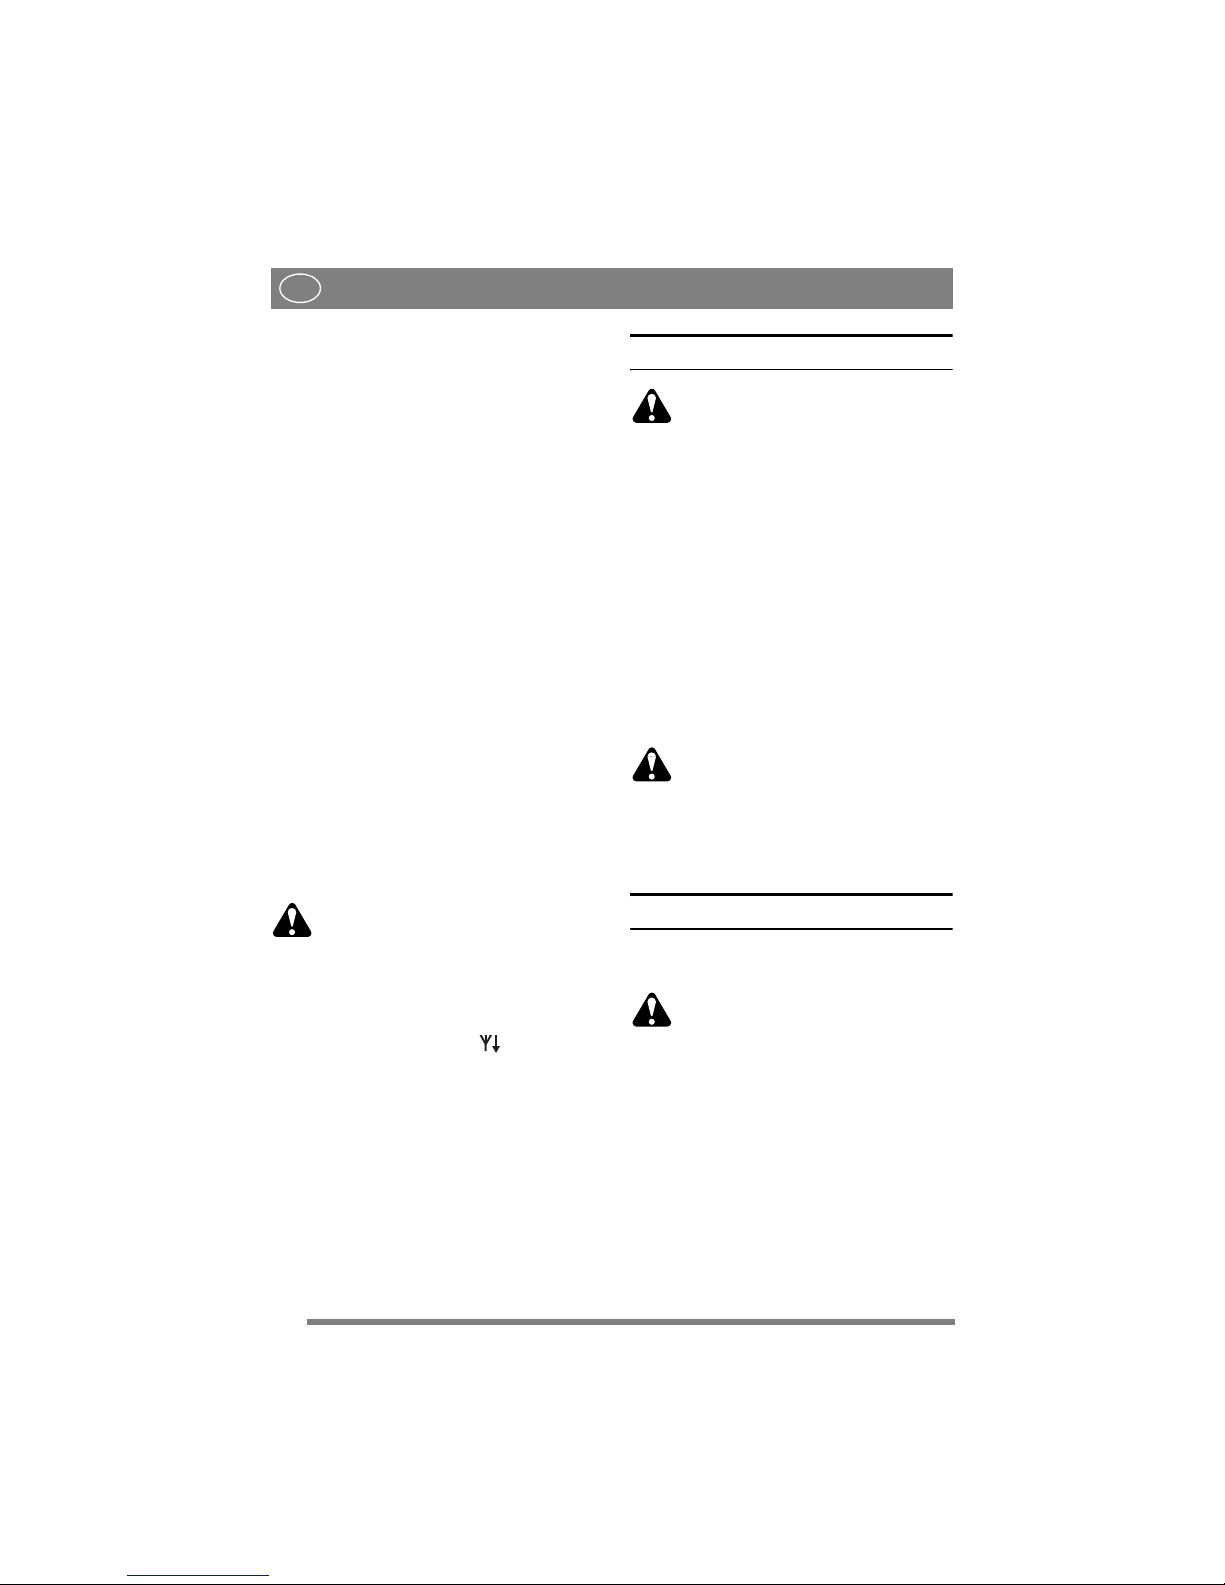
ADJUSTMENT OF COUNTERHOLD/
BLADE
The cutting mechanism comprises a rotating blade
and a counterhold. For optimum grinding, the gap
between blade and counterhold should be 0 mm.
The gap is adjusted during manufacture and does
not need to be adjusted when the machine is used
for the first time.
If the grinding results deteriorate after a period of
use, the counterhold can be adjusted as described
below.
The engine should always be running
when adjusting the counterhold.
The machine should always be feeding
downwards when adjusting the counter-
hold.
Adjusting the counterhold:
1. Angle the auger downwards and start the
machine.
2. See fig. 10. Turn the adjusting screw slowly
clockwise using the Allen key supplied.
3. Stop turning when a scraping sound starts to be-
come audible and fine aluminium shavings drop
out through the discharge opening.
4. The gap between blade and counterhold is now
0 mm again and optimum grinding results will
be achieved.
MAINTENANCE
Always disconnect the plug from the
electric socket before any maintenance.
Always wear protective gloves to avoid
injury.
Generally speaking, compost shredders require
very little maintenance. In order to maintain the
efficiency of the machine and to achieve a long
service life, observe the following:
• keep the air openings clean and free of obstructing
material.
• check the customer-installed nuts and screws
(tighten if necessary).
• spray the spiral cutter after each use with an
environmentally-friendly, biodegradable spray oil
to protect against corrosion.
CLEANING
Always clean the compost shredder after each use.
Never use a high-pressure washer or
running water when cleaning the
shredder!
Brush away dirt and plant residue which may be
caught in the spiral cutter. Wipe clean the outside
of the shredder with a cloth which has been
moistened with a mild detergent and water.
SERVICE
Authorised service stations carry out repairs and
servicing. They use genuine spare parts.
Under no circumstances may parts
other than genuine spare parts be used.
This is a requirement stipulated by the
Testing Authority. The machine is
approved and tested with these parts.
If the machine requires servicing,
repairs or maintenance which entail
dismantling of the cover, this must be
performed by an authorised service
station.
The manufacturer reserves the right to make
alterations to the product without prior
notification.

9
ENGLISH GB
PURCHASE TERMS
A full warranty is issued against manufacturing
and material defects. The user must carefully
follow the instructions given in the enclosed
documentation.
Warranty period
For consumer use: two years from the purchase
date.
Exceptions
The guarantee does not cover damage due to:
- Neglect by the user to acquaint themselves with
accompanying documentation
- Carelessness
- Incorrect and non-permitted use or assembly
- The use of non-genuine spare parts
- The use of accessories not supplied or approved
by GGP
Neither does the guarantee cover:
- wearing components such as blades, belts,
wheels and cables
- Normal wear
- Motors. These are covered by the motor
manufacturer’s warranties, with separate terms
and conditions.
The purchaser is covered the national laws of each
country. The rights to which the purchaser is
entitled with the support of these laws are not
restricted by this warranty.

NOTES
10
....................................................................................................................................................................
....................................................................................................................................................................
....................................................................................................................................................................
....................................................................................................................................................................
....................................................................................................................................................................
....................................................................................................................................................................
....................................................................................................................................................................
....................................................................................................................................................................
....................................................................................................................................................................
....................................................................................................................................................................
....................................................................................................................................................................
....................................................................................................................................................................
....................................................................................................................................................................
....................................................................................................................................................................
....................................................................................................................................................................
....................................................................................................................................................................
....................................................................................................................................................................
....................................................................................................................................................................
....................................................................................................................................................................
....................................................................................................................................................................
....................................................................................................................................................................
....................................................................................................................................................................
....................................................................................................................................................................
....................................................................................................................................................................
....................................................................................................................................................................
....................................................................................................................................................................
....................................................................................................................................................................
....................................................................................................................................................................
....................................................................................................................................................................
....................................................................................................................................................................
....................................................................................................................................................................
....................................................................................................................................................................
....................................................................................................................................................................
....................................................................................................................................................................
....................................................................................................................................................................
....................................................................................................................................................................

NOTES
11
....................................................................................................................................................................
....................................................................................................................................................................
....................................................................................................................................................................
....................................................................................................................................................................
....................................................................................................................................................................
....................................................................................................................................................................
....................................................................................................................................................................
....................................................................................................................................................................
....................................................................................................................................................................
....................................................................................................................................................................
....................................................................................................................................................................
....................................................................................................................................................................
....................................................................................................................................................................
....................................................................................................................................................................
....................................................................................................................................................................
....................................................................................................................................................................
....................................................................................................................................................................
....................................................................................................................................................................
....................................................................................................................................................................
....................................................................................................................................................................
....................................................................................................................................................................
....................................................................................................................................................................
....................................................................................................................................................................
....................................................................................................................................................................
....................................................................................................................................................................
....................................................................................................................................................................
....................................................................................................................................................................
....................................................................................................................................................................
....................................................................................................................................................................
....................................................................................................................................................................
....................................................................................................................................................................
....................................................................................................................................................................
....................................................................................................................................................................
....................................................................................................................................................................
....................................................................................................................................................................
....................................................................................................................................................................

Manufactured by GGP Sweden AB
This manual suits for next models
1
Table of contents
Other Mountfield Paper Shredder manuals


