Mr. Beams MB10024 User manual
USER MANUAL
Customer Support
Mailing Address
Mr Beams U.S.
600 Beta Drive, Unit 100
Mayfield Village, OH 44143
www.mrbeams.com
9 a.m. - 5 p.m. EST
(877) 298-9082
customerservice@mrbeams.com
1 YEAR WARRANTY AGAINST DEFECTS
All Mr Beams products are guaranteed against defects in workmanship and
materials for 1 year from purchase. Warranties implied by law are subject to the
same time period limitation. Some states do not allow limitations on how long an
implied warranty lasts, so this time limitation may not apply to you. If the product
fails due to a manufacturing defect during normal use, return the product and dated
sales receipt to the store where purchased for replacement OR send the product
and the dated sales receipt to Mr Beams' mailing address. Not covered – Bulbs are
not covered by this warranty. Repair service, adjustment and calibration due to
misuse, abuse or negligence are not covered by this warranty. Unauthorized service
or modification to this product or of any furnished components will void this
warranty in its entirety. This warranty does not include reimbursement for
inconvenience, installation, setup time, loss of use, postage, unauthorized service,
or other products used in conjunction with, but are not supplied by, Wireless
Environment. This warranty gives you specific legal rights, and you may also have
other rights which vary from state to state.
Register your light to extend your warranty to two years at
mrbeams.com/register
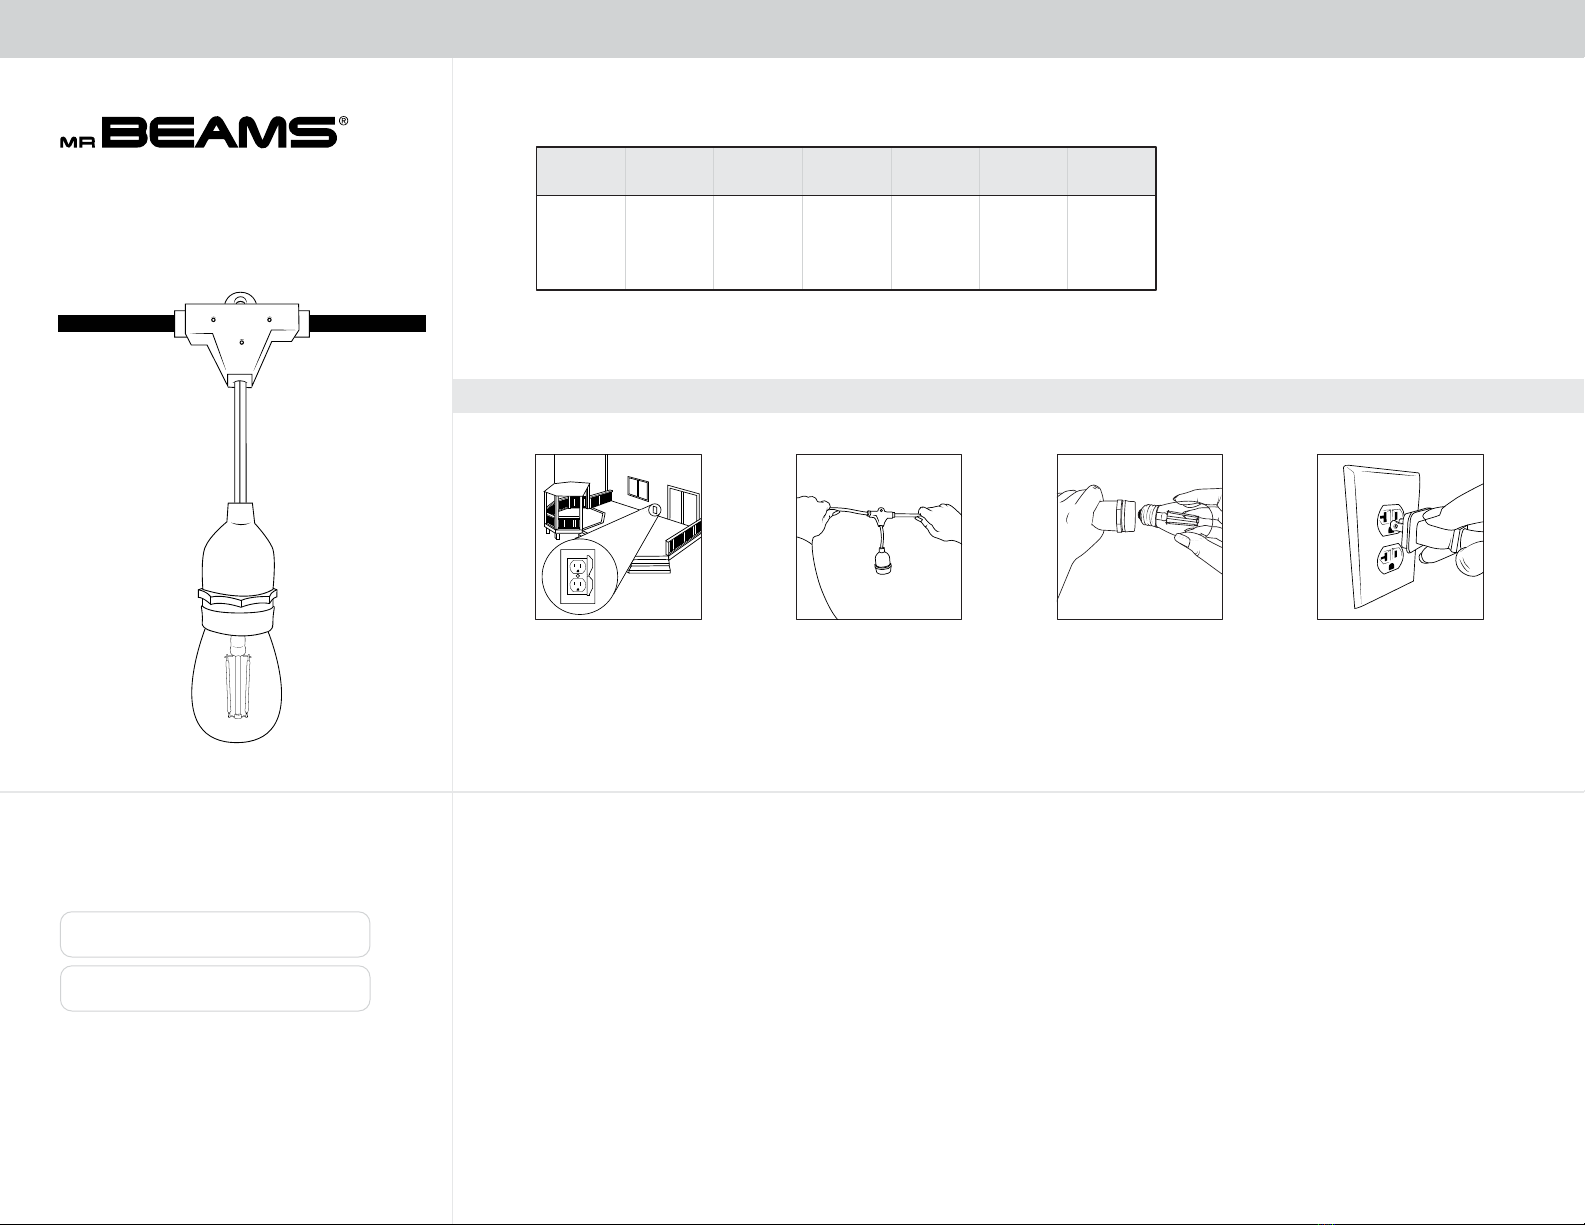
INSTALLATION
3. Screw the bulbs into the
sockets along the cord.*
4. Plug the cord into an outlet
to power the lights.
1. Identify the desired location
within reach of an outlet to
mount the lights. We recommend hanging the string
before connecting the bulbs to avoid
any possible damage to the bulbs
during the mounting process.
*
2. Hang the string as desired.
MB10024
LED STRING LIGHTS, S14
Cord
Length Wattage Bulb
Type Dimmable IP
Rating
Operating
Temp
Bulb
Base
24 ft
48ft 2S14 IP65 -13ºF
to 140ºF
E26 Yes
TIPS
Lights should be supported at socket mounting clips. Use suspension cable
(not included) if no structure is available. Mount the lights with the bulbs facing
down and do not cluster the bulbs. Lights should hang with a minimum of 3
inches from the nearest object.
SEE REVERSE SIDE FOR IMPORTANT SAFETY INSTRUCTIONS

IMPORTANT SAFETY INSTRUCTIONS
When using electrical products, basic precautions should always be followed including the following:
READ AND FOLLOW ALL SAFETY INSTRUCTIONS.
Do not use these products outdoors unless marked suitable for indoor and outdoor use. When products are used in outdoor applications, connect the product to a Ground Fault Circuit Interrupting (GFCI) outlet. If one is not provided, contact a
qualified electrician for proper installation.
Do not mount or place near gas or electric heaters, fireplaces, candles or other similar sources of heat.
Do not secure the wiring of the product with staples or nails, or place on sharp hooks or nails. Install only using the mounting means provided.
Do not let lamps rest on the supply cord or on any wire.
Do not use this product for other than its intended use.
Do not hang objects from cord, wire, or light string.
Do not close doors or windows on the product or extension cords as this may damage the wire insulation.
Do not cover the product with cloth, paper or any material not part of the product when in use.
This product has a polarized plug (one blade is wider than the other) as a feature to reduce the risk of electric shock. This plug will fit in a polarized outlet only one way. If the plug does not fit fully in the outlet, reverse the plug. If it still does not fit,
contact a qualified electrician. Do not use with an extension cord unless plug can be fully inserted. Do not alter or replace the plug. It is acceptable to omit this item if the product does not employ a polarized plug.
This product employs overload protection (fuse). A blown fuse indicates an overload or shortcircuit situation. If the fuse blows, unplug the product from the outlet. Also unplug any additional strings or products that may be attached to the product.
Replace the fuse as per the user servicing instructions (follow product marking for proper fuse rating) and check the product. If the replacement fuse blows, a short-circuit may be present and the product should be discarded. It is acceptable to omit
this item if the fuse is not replaceable or where overload protection is not required.
Read and follow all instructions that are on the product or provided with the product.
SAVE THESE INSTRUCTIONS
CAUTION: RISK OF FIRE. KEEP LAMPS AWAY FROM ANY COMBUSTIBLE SURFACE.
•
•
•
•
•
•
•
•
•
•
•
•
•
Other Mr. Beams Outdoor Light manuals


Popular Outdoor Light manuals by other brands

LIGMAN
LIGMAN LIGHT LINEAR PT-X 15 installation manual

Safavieh
Safavieh LIT4451A quick start guide

Leader Light
Leader Light LL STREET PS60 user manual

Beachside Lighting
Beachside Lighting MB-SERIES quick start guide

Designplan
Designplan ALDER 400 manual

HEPER
HEPER LL2023.865-US Installation & maintenance instructions


