8
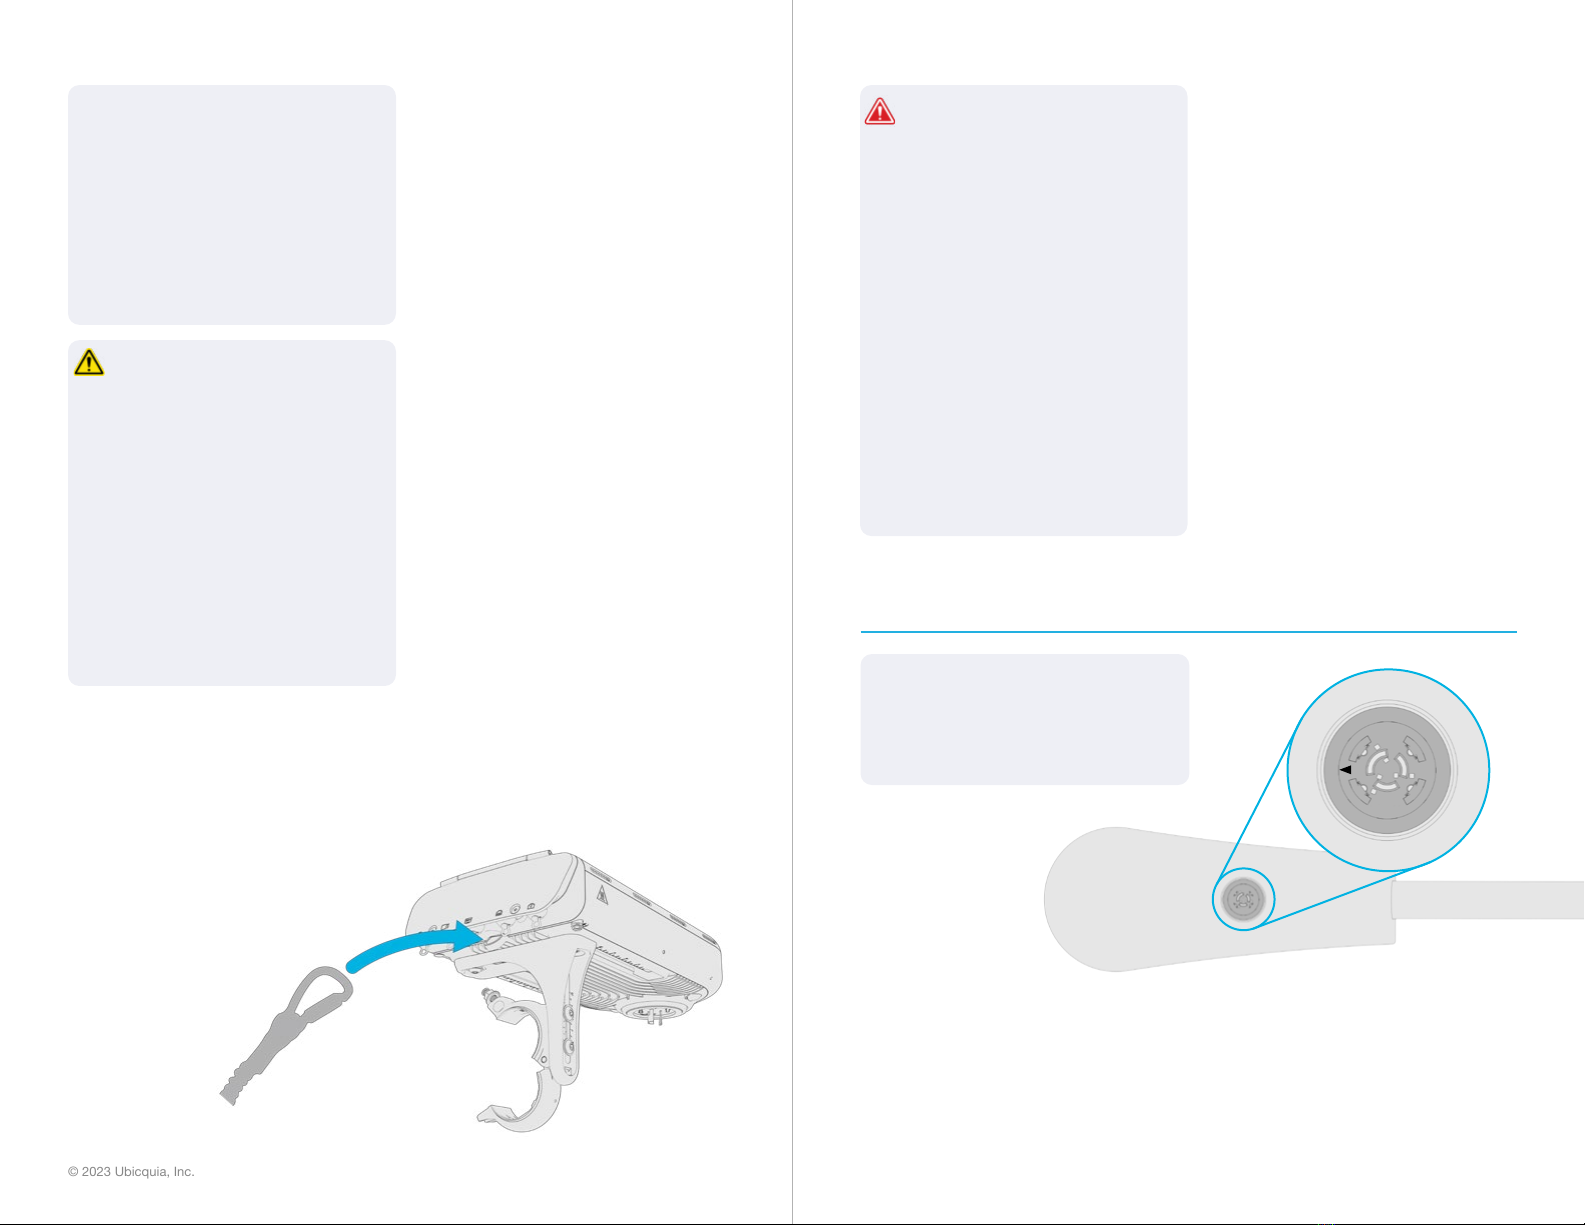
If your NEMA socket orientation
does not match the image, then
you will need to adjust the NEMA to
match.
ES: Verique que el receptáculo
NEMA de la luminaria esté
orientada en la dirección correcta.
La indicación del Norte en el
receptáculo NEMA (N >) debe estar
orientada hacia el otro lado del
poste de la luminaria.
Si la orientación de su receptáculo
NEMA no coincide con la imagen,
entonces tendrá que ajustar el
receptáculo NEMA para que
coincida.
EN: NOTE: The UbiHub works with
3, 5, and 7 pin NEMA options.
ES: NOTA: El UbiHub funciona con
opciones NEMA de 3, 5 y 7 pines.
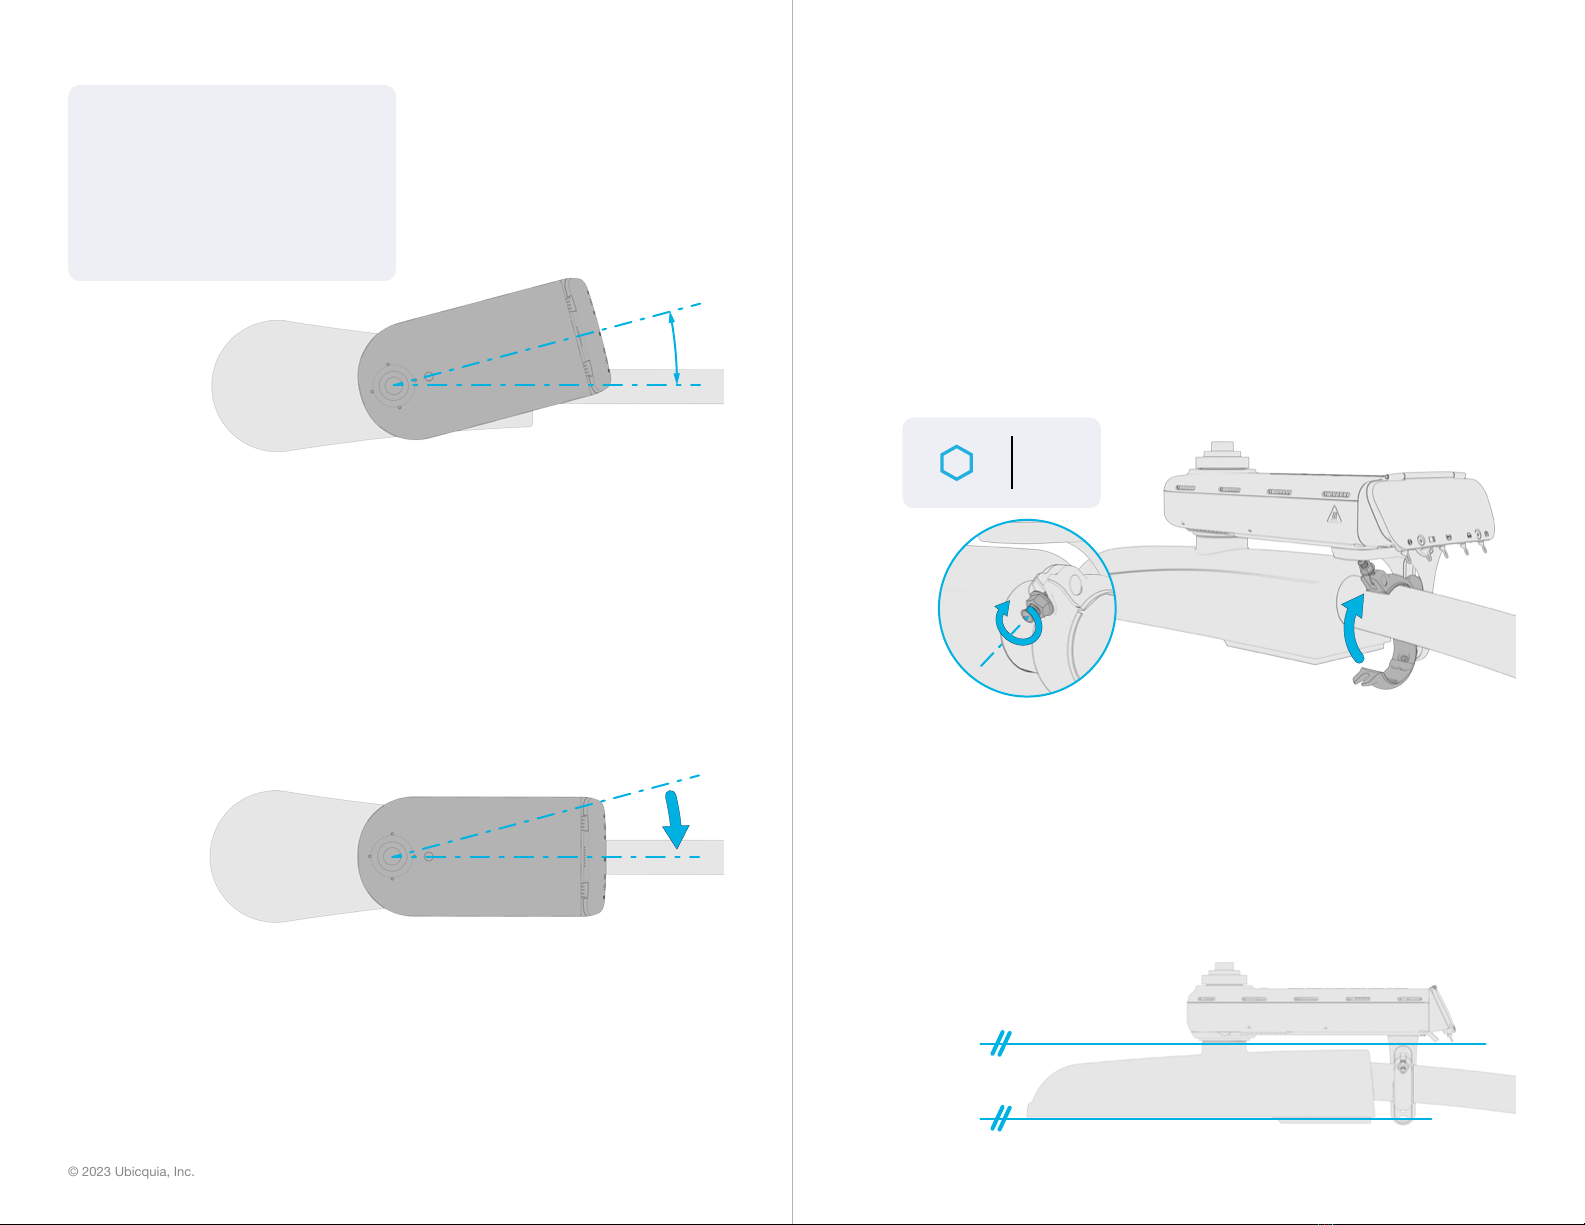
6.2 EN: Follow the instructions below
that match the type of NEMA
socket on the luminaire to adjust
the orientation:
A. Use a screwdriver to remove the
two screws. Once removed, lift and
turn the NEMA socket until the (N>)
is positioned correctly (pointed
away from the luminaire pole).
Replace the two screws to secure
the socket is in position.
B. Loosen but do not fully remove
the two side screws. Then use a
standard screwdriver to rotate the
inner portion of the NEMA socket
so that the (N>) is positioned
correctly (pointed away from the
luminaire pole). When oriented,
tighten the two side screws.
EN: NOTE:CREExtures/NEMA
will need to be locked in.
ES: NOTA: Las luminarias CREE/
NEMA tendrán que jarse.
6.3 EN: Line up the bottom male NEMA
plug on the UbiHub with the NEMA
socket on the luminaire and plug
in the unit. The UbiHub should be
slightlyo-angleoftheluminaireby
15 degrees once inserted.
ES: Alinee la clavija NEMA inferior
del UbiHub con el receptáculo
NEMA de la luminaria y conecte
la unidad. El UbiHub debe estar
ligeramente desviado de la luminaria
en 15 grados una vez colocado.
ES: Siga las siguientes instrucciones
que corresponden al tipo de
receptáculo NEMA de la luminaria
para ajustar la orientación:
A. Utilice un destornillador para
retirar los dos tornillos. Una
vez retirado, levante y gire el
receptáculo NEMA hasta que la
(N>) esté colocada correctamente
(apuntando hacia fuera del poste de
la luminaria). Vuelva a colocar los
dos tornillos para asegurar la toma
de corriente está en posición.
B. Aoje, pero no retire del
todo los dos tornillos laterales.
A continuación, utilice un
destornillador estándar para girar
la parte interior del receptáculo
NEMA, de modo que la (N>) quede
colocada correctamente (apuntando
hacia el exterior del poste de
la luminaria). Una vez que esté
orientada, apriete los dos tornillos
laterales.