MRV Communications OptiSwitch-100 User manual

OptiSwitch-100/100F
High Density 10/100/1000Mbps Switch
Installation and User Guide
ML43843 Rev.05
MRV Communications, Inc. URL: http://www.mrv.com

OptiSwitch-100/100F
Standards Compliance
UL 1950; CSA 22.2 No 950; FCC Part 15 Class A; CE-89/336/EEC, 73/23/EEC
FCC Notice
WARNING: This equipment has been tested and found to comply with the limits for a Class A digital device,
pursuant to Part 15 of the FCC Rules. These limits are designed to provide reasonable protection against harmful
interference when the equipment is operated in a commercial environment. This equipment generates, uses, and
can radiate radio frequency energy and, if not installed and used in accordance with the instruction manual, may
cause harmful interference to radio communications. Operation of this equipment in a residential area is likely to
cause harmful interference in which case the user will be required to correct the interference at his own expense.
The user is cautioned that changes and modifications made to the equipment without approval of the manufacturer
could void the user’s authority to operate this equipment
It is suggested that the user use only shielded and grounded cables when appropriate to ensure compliance with
FCC Rules.
CE Mark
The CE mark symbolizes compliance with the EMC directive of the European Community. Such marking is
indicative that the specified equipment meets or exceeds the following technical standards:
•EN 55022 - Limits and Methods of Measurement of Radio Interference Characteristics of Information
Technology Equipment
•EN 50081-1- Electromagnetic compatibility - of Radio Interference Characteristics of Information
Technology Equipment Generic Emission standard Part 1 – Residential commercial and light industry
environment
•EN 50082-1 - Electromagnetic compatibility -- Generic immunity standard Part 1: Residential, commercial
and light industry environment
•EN61000-4-2 (previously IEC 1000-4-2) - Electromagnetic compatibility for industrial-process measurement
and control equipment Part 4: Section 2 - Electrostatic discharge requirements
•EN61000-4-3 (previously IEC 1000-4-3) - Electromagnetic compatibility for industrial-process measurement
and control equipment Part 4: Section 3 - Radiated electromagnetic field requirements
•EN61000-4-4 (previously IEC 1000-4-4) - Electromagnetic compatibility for industrial-process measurement
and control equipment Part 4: Section 4 - Electrical fast transient/burst requirements
•EN61000-4-5 - Electromagnetic compatibility for industrial-process measurement and control equipment
Part 4: Section 5 – Surge Immunity requirements
•EN61000-4-6 - Electromagnetic compatibility for industrial-process measurement and control equipment
Part 4: Section 6 – Immunity to conducted disturbances induces by radio frequency fields
•EN61000-4-8- Electromagnetic compatibility for industrial-process measurement and control equipment
Part 4: Section 8– Power frequency magnetic field immunity requirements
•EN61000-4-11 – Electromagnetic compatibility for industrial-process measurement and control equipment
Part 4: Section 11 – Voltage dips short interruptions and voltage variations immunity requirements
•EN61000-3-2 – Harmonic standard
•EN61000-3-3 – Voltage Fluctuation and Flicker standard
• CISPR 22 - Radiated and Line-conducted Class A
•EN 60950 - ITE Safety
A ‘Declaration of Conformity’, in accordance with the above standards, has been made and is on file at MRV.
This document and the information contained herein are proprietary to MRV and are furnished to the recipient
solely for use in operating, maintaining and repairing MRV equipment. The information within may not be utilized
for any purpose except as stated herein, and may not be disclosed to third parties without written permission from
MRV. MRV reserves the right to make changes to any technical specifications in order to improve reliability,
function or design.
©2001 MRV Inc.
i

OptiSwitch-100/100F
Table of Contents
INTRODUCTION .................................................................................................................................. 1
FEATURE SUMMARY.............................................................................................................................. 1
Feature / Configuration....................................................................................................................1
Management .....................................................................................................................................2
APPLICATIONS....................................................................................................................................... 2
TYPICAL CONFIGURATION..................................................................................................................... 2
TECHNICAL SPECIFICATIONS .................................................................................................................3
Additional Standards Compliance.................................................................................................... 3
INSTALLATION ................................................................................................................................... 5
INSTALLING THE OPTISWITCH-100/F .................................................................................................... 5
Rack Mounting..................................................................................................................................5
Front Panel....................................................................................................................................... 5
Rear Panel........................................................................................................................................ 6
INSTALLING MODULES IN THE OPTISWITCH-100/F ............................................................................... 6
The OptiSwitch-100/F Modules........................................................................................................ 7
CONNECTING POWER ............................................................................................................................ 7
Input Supply...................................................................................................................................... 8
Grounding.........................................................................................................................................8
Module Screws..................................................................................................................................8
CONNECTING ETHERNET DEVICES ........................................................................................................8
Network Connections........................................................................................................................ 8
GETTING STARTED............................................................................................................................ 9
CONVENTIONS USED IN THIS MANUAL.................................................................................................. 9
CONNECTING TO THE MANAGEMENT PORT ........................................................................................... 9
LOGGING INTO THE COMMAND LINE INTERFACE .................................................................................. 9
SETTING THE IP ADDRESS ................................................................................................................... 10
VERIFYING THE INSTALLATION ........................................................................................................... 10
ACCESSING THE COMMAND LINE INTERFACE REMOTELY ...................................................................11
COMMAND LINE INTERFACE....................................................................................................... 12
COMMAND STRUCTURE....................................................................................................................... 12
ENTERING COMMANDS ....................................................................................................................... 13
SYSTEM COMMANDS ...................................................................................................................... 15
COMMANDS SUMMARY ....................................................................................................................... 15
Viewing System Status ....................................................................................................................15
Viewing the Self-Test Status............................................................................................................16
Enabling / Disabling the Self Test .................................................................................................. 16
Warm-Resetting the Device ............................................................................................................17
Cold-Resetting the Device ..............................................................................................................17
Getting the Last Error ....................................................................................................................17
Resetting to Factory Default Configuration ...................................................................................17
Viewing the Software Filename ...................................................................................................... 17
Setting the Software File Name ......................................................................................................19
Viewing the TFTP Server IP Address............................................................................................. 19
Setting the TFTP Server IP Address...............................................................................................19
Setting the TFTP Server Mode ...................................................................................................... 19
Getting the TFTP Download Mode ................................................................................................ 20
Downloading the Software ............................................................................................................. 20
BASIC CONFIGURATION ................................................................................................................ 21
CONSOLE COMMANDS......................................................................................................................... 21
Accessing Keyboard Help............................................................................................................... 21
ii

OptiSwitch-100/100F
Displaying the Logo........................................................................................................................22
Clearing the Screen ........................................................................................................................ 22
Logging In ...................................................................................................................................... 22
Logging Out.................................................................................................................................... 22
Setting the Page Size....................................................................................................................... 22
Setting the Command Line Prompt.................................................................................................22
Setting the Prompt Attributes.......................................................................................................... 23
Setting the Display Message Attributes ..........................................................................................23
Setting the Text Display Attributes .................................................................................................23
Setting the Password ......................................................................................................................23
IP COMMANDS ....................................................................................................................................24
Viewing Current IP Address........................................................................................................... 24
Viewing Current IP Configuration ................................................................................................. 25
Setting an IP Address ..................................................................................................................... 25
Setting IP Configuration................................................................................................................. 25
Erasing the IP Configuration .........................................................................................................26
Configuring a Gateway .................................................................................................................. 26
Viewing the Gateway Address.................................................................................................................... 26
Setting the Gateway Address ...................................................................................................................... 27
ADDRESS RESOLUTION PROTOCOL...................................................................................................... 28
Deleting ARP Table Entries ...........................................................................................................28
Adding an ARP Table Entry ...........................................................................................................28
Viewing ARP Statistics ................................................................................................................... 28
Enabling or Disabling the BOOTP.................................................................................................29
Setting the Bootp............................................................................................................................. 29
PORT CONFIGURATION ........................................................................................................................29
Viewing the Port Configuration......................................................................................................31
Setting the Port Configuration........................................................................................................31
Setting the Port Speed and Mode................................................................................................................ 31
Configuring the Giga Ethernet Redundant port ............................................................................. 32
Displaying the Gigabit Ethernet Redundant port ........................................................................................ 32
Setting the Gigabit Ethernet Redundant port .............................................................................................. 32
Setting the Port State .................................................................................................................................. 32
Flow Control ..................................................................................................................................32
Viewing Flow Control ................................................................................................................................ 33
Setting Flow Control................................................................................................................................... 33
Port Priority ................................................................................................................................................ 33
PORT TRUNKING ................................................................................................................................. 33
Etherchannel...................................................................................................................................34
Definitions: ................................................................................................................................................. 34
3 Main rules for the EC............................................................................................................................... 34
CLI commands ........................................................................................................................................... 34
Head of Line Block..................................................................................................................................... 35
MAC-SECURITY................................................................................................................................. 36
COMMANDS SUMMARY ....................................................................................................................... 36
Setting the Security Port Configuration..........................................................................................36
Displaying the Port Configuration ................................................................................................. 36
Setting the MAC Security Level ......................................................................................................37
Getting the MAC Security Level .....................................................................................................37
Getting the Security Entries............................................................................................................ 37
Getting the MS Entry ...................................................................................................................... 37
Searching for a MAC Security Address .......................................................................................... 38
Adding a MAC Security Entry ........................................................................................................39
Deleting a MAC Security Entry ......................................................................................................39
Clearing a MAC Security Entry...................................................................................................... 39
Modifying a MAC Security Entry ................................................................................................... 39
Saving a MAC Security Table......................................................................................................... 40
SPANNING TREE PROTOCOL (STP)............................................................................................. 41
HOW THE STP TOPOLOGY STABILIZES................................................................................................ 41
iii

OptiSwitch-100/100F
SPANNING TREE PARAMETERS ............................................................................................................ 42
ROOT BRIDGE...................................................................................................................................... 42
MANUALLY DESIGNATING A ROOT BRIDGE ........................................................................................ 42
SELECTING A DESIGNATED SWITCH/BRIDGE....................................................................................... 42
TOPOLOGY CHANGE NOTIFICATION BPDU......................................................................................... 42
USING STP TO MANAGE REDUNDANT LINKS...................................................................................... 44
SPANNING TREE AND VLAN RESTRICTIONS....................................................................................... 44
SPANNING TREE COMMANDS .............................................................................................................. 44
Enabling / Disabling STP ...............................................................................................................44
Viewing the Spanning Tree State.................................................................................................... 46
Viewing the Bridge Parameters...................................................................................................... 46
Configuring the Bridge................................................................................................................... 46
Modifying the Bridge Priority .................................................................................................................... 46
Setting the Time Between Messages .......................................................................................................... 48
Setting the Hello Time................................................................................................................................ 48
Setting the Forward Delay .......................................................................................................................... 48
Viewing STP Port Configuration.................................................................................................... 48
Setting Ports Configuration............................................................................................................ 49
Setting the Port priority............................................................................................................................... 49
Enabling/Disabling Spanning Tree On a Port ............................................................................................. 49
Changing the Path Cost............................................................................................................................... 50
SWITCHING DATABASE ................................................................................................................. 51
LEARNING TABLE................................................................................................................................51
Aging Configuration.......................................................................................................................51
Viewing the Aging Time ............................................................................................................................ 51
Setting the Aging Time............................................................................................................................... 52
Viewing an Individual Learning Table Entry .................................................................................52
Viewing a Range of Learning Table Entries................................................................................... 53
Deleting an Individual Learning Table Entry.................................................................................55
Deleting Learning Table Entries for a Port.................................................................................... 55
Deleting a MAC Address From the Learning Table....................................................................... 56
Adding Static Entries...................................................................................................................... 56
VIRTUAL NETWORKING................................................................................................................ 57
Getting a VLAN Matrix...................................................................................................................58
Viewing the VLAN Mode ................................................................................................................58
Setting the VLAN Mode ..................................................................................................................58
INTER-SWITCH VLAN......................................................................................................................... 59
IMPORTANT CONSIDERATIONS ............................................................................................................ 59
Tag Field Format ...........................................................................................................................59
Principles of ISVLAN......................................................................................................................59
Viewing the ISVLAN Mode .............................................................................................................60
Setting a Tagged Port.....................................................................................................................60
Modifying the VLAN Tag................................................................................................................61
Removing a Tagged Port ................................................................................................................61
Modifying the VLAN Ports ............................................................................................................. 61
Server Port......................................................................................................................................61
Creating a Server Port ................................................................................................................... 61
Removing a Server Port..................................................................................................................62
VLAN................................................................................................................................................. 62
Creating VLAN ...............................................................................................................................62
Viewing VLAN Configuration......................................................................................................... 63
Viewing an Individual VLAN Entry ................................................................................................63
Deleting a VLAN............................................................................................................................. 63
Modifying a VLAN Name................................................................................................................ 65
MANAGEMENT VLAN ........................................................................................................................ 65
Viewing the Management Tag ........................................................................................................65
Modifying the Management Tag..................................................................................................... 66
Deleting the Management from a VLAN......................................................................................... 66
Creating a New VLAN Which Includes the Management Port....................................................... 66
iv

OptiSwitch-100/100F
Setting a Switch Priority Policy...................................................................................................... 67
Viewing the Switch Priority Policy.................................................................................................67
Modify the VLAN priority ...............................................................................................................67
SAMPLE CONFIGURATION – VLAN/SERVER-PORT/TRUNKING PORT .................................................. 68
Physical Configuration Schema .....................................................................................................68
VLAN Server Port Configuration ...................................................................................................68
VLAN configuration........................................................................................................................69
Payroll VLAN Configuration ..................................................................................................................... 69
Finance VLAN Configuration .................................................................................................................... 69
Checking the Configuration............................................................................................................ 69
VIRTUAL BROADCAST DOMAIN.................................................................................................. 70
VBC MODE......................................................................................................................................... 70
Viewing the VBC Mode...................................................................................................................70
Setting the VBC Mode.....................................................................................................................70
Creating VBC Domains.................................................................................................................. 70
Viewing the VBC Table...................................................................................................................71
Deleting a VBC............................................................................................................................... 72
UTILITIES............................................................................................................................................ 73
PING COMMANDS ................................................................................................................................73
Starting Ping................................................................................................................................... 73
STOPPING PING.................................................................................................................................... 74
PORT MIRRORING................................................................................................................................74
Setup ............................................................................................................................................... 74
Setting the Monitoring Port ........................................................................................................................ 74
Monitoring a Port........................................................................................................................................ 74
Saving the Configuration ............................................................................................................................ 75
Stopping Monitoring................................................................................................................................... 75
Viewing the NVRAM Configuration.......................................................................................................... 75
Erasing the NVRAM Configuration ........................................................................................................... 75
FRAME GENERATOR ............................................................................................................................ 75
Setting the Frame Generator.......................................................................................................... 75
Starting Frame Generation ............................................................................................................77
Stopping Frame Generation ........................................................................................................... 77
SNMP..................................................................................................................................................... 78
NBASE-XYPLEX SNMP SUPPORT .......................................................................................................78
SNMP BASIC CONFIGURATION........................................................................................................... 78
SNMP Community String Commands............................................................................................. 78
Viewing the Community String .................................................................................................................. 79
Setting the Read or Write Community........................................................................................................ 79
SNMP TRAPS...................................................................................................................................... 80
Setting Authentication Traps .......................................................................................................... 80
Viewing the Authentication Trap Status ..................................................................................................... 80
Enabling/Disabling the Authentication Trap............................................................................................... 81
Configuring the Trap Stations ........................................................................................................81
Viewing the Stations List............................................................................................................................ 81
Adding a Station to the List ........................................................................................................................ 81
Deleting a Station From the List................................................................................................................. 83
STATISTICS ........................................................................................................................................ 84
CLEARING THE SWITCH COUNTERS..................................................................................................... 84
VIEWING STATISTICS ON A PARTICULAR PORT.................................................................................... 84
GETTING COLLISIONS ON A PORT ........................................................................................................ 85
RMON STATISTICS ............................................................................................................................... 85
Viewing Rmon Statistics Group for a Port ................................................................................................. 85
Getting the Packet Size Distribution........................................................................................................... 86
Viewing the Management Counters............................................................................................................ 86
TROUBLESHOOTING....................................................................................................................... 88
CONTACTS........................................................................................................................................... 88
v

OptiSwitch-100/100F
APPENDIX A: CONSOLE COMMAND LINE QUICK REFERENCE ........................................ 89
Commands Groups .........................................................................................................................89
Console Commands ........................................................................................................................89
System Commands ..........................................................................................................................90
IP Commands .................................................................................................................................90
Ping Commands..............................................................................................................................90
Address Resolution Protocol ..........................................................................................................92
SNMP..............................................................................................................................................92
Switching ........................................................................................................................................ 92
Virtual Networking .........................................................................................................................93
Port Monitoring.............................................................................................................................. 94
EtherChannel Command ................................................................................................................94
MAC Security..................................................................................................................................94
Port Configuration .........................................................................................................................95
Statistics.......................................................................................................................................... 95
Spanning Tree Protocol (STP)........................................................................................................96
APPENDIX B: SYSTEM DEFAULT VALUES ................................................................................ 97
console............................................................................................................................................ 97
system ............................................................................................................................................. 97
snmp................................................................................................................................................97
switch-db ........................................................................................................................................ 97
port configuration...........................................................................................................................97
spanning tree .................................................................................................................................. 97
APPENDIX C: FIRMWARE DOWNLOAD VIA TFTP................................................................ 101
DOWNLOADING ‘CLIENT MODE’.......................................................................................................101
DOWNLOADING ‘SERVER MODE’ ...................................................................................................... 101
TFTP RECOVERY - BREAKING INTO THE BOOTROM........................................................................ 101
vi

OptiSwitch-100/100F
Introduction
The OptiSwitch-100/F is a robust switch platform, representing the next generation in
switching technology. It boasts a combination of cutting-edge hardware architecture, a rich set
of Virtual LAN (VLAN) options and advanced network management features.
The functional difference between the OptiSwitch-100 and the OptiSwitch-100F is that the
latter supports one high density fiber optic module in the free slot and is slightly taller.
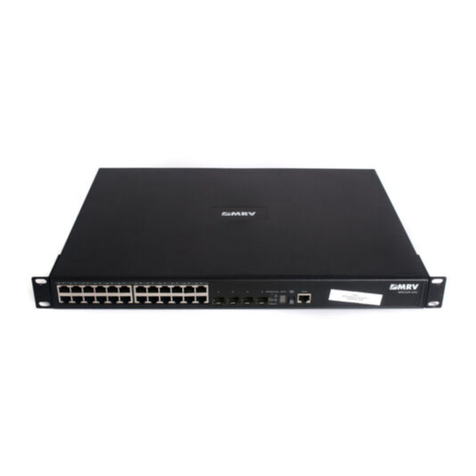
Figure 1: General view OptiSwitch-100/F
Feature Summary
Feature / Configuration
• 24 switched 10/100Mbps ports and a slot (dport) to accommodate one of the following
uplink modules:
Single Gigabit Ethernet port (MM,SM)
•
•
•
•
•
Dual Gigabit Ethernet ports (MM,SM)
8 10/100 auto-negotiation ports module
2,4 or 8 100Base-FX ports (MM,SM)
2,4 Ethernet module
• The highest common port speed is automatically set with when connecting any standard
compliant (802.3u Auto-negotiation) network device or station
• Each 10/100Base port operates in half duplex mode, for shared networks, or in a dedicated
full duplex link, running at up to 200Mbps
• All ports support auto-polarity detection and correction
• Store-and-Forward switching
• Flow Control (IEEE 802.3x) provides effective packet loss protection under heavy load
conditions, minimizing delays and retransmission of data, thus improving network
performance
• Port-Trunking/ Etherchannel (available in the next software release) which enables
multiple ports to combine their bandwidth and operate as a single logical link. These
features can be used to create a high speed backbone connection between switches
• Supports the creation of up to 2000 Virtual LAN
• Supports the Inter-Switch VLAN tagging standard which enables the creation of multiple
groups across the network (IEEE 802.1q)
• MAC address table (up to 12K unicast entries)
• Maximum wire speed throughput on all ports simultaneously
1

OptiSwitch-100/100F
• Supports RMON (groups 1,2,3,9), Telnet for rapid fault detection and isolation
• Port Mirroring
• Spanning Tree Algorithm prevents broadcast loops
Management
• Fully managed through the comprehensive MRV MegaVision
Network Management System, or any SNMP-based management platform
• Extensive Command Line Interface (CLI) management provides out-of-
band administration.
• Supports MRV’s private MIB, Ethernet MIB and bridge MIB.. The
status of each port is displayed by a LED on the front panel,
indicating active and link status.
Applications
A switch boosts network performance by segmenting a single large collision domain into
smaller, separate collision domains. It also provides dedicated connections for heavily loaded
networks using work stations and servers. In addition, the Full Duplex capability of Ethernet
switches permits long distance connectivity for backbone applications or high throughput for
high-performance dedicated servers. The OptiSwitch-100/F combines 10/100Mbps switched
ports with a slot (dport) for accommodating an optional module.
Typical Configuration
The OptiSwitch-100/F switch can connect up to twenty-four 10/100Mbps ports and with a slot
(dport) for accommodating an optional module Figure 2 illustrates various connection
possibilities: Two OptiSwitch-100/F switches ,with Gigabit Ethernet uplink modules, located
in different buildings can be connected via MM or SM fiber optic cable to a Gigabit Ethernet
backbone. VLAN Tagging allows the creation of one logical VLAN across all switches.
Additional connections include dedicated 10/100Mbps workgroup connections and 100Mbps
dedicated servers.
Figure 2: Various Application Possibilities Of The OptiSwitch-100/F
2

OptiSwitch-100/100F
Technical Specifications{xe "Technical
Specifications"}
OptiSwitch-100/F OptiSwitch-100/FF
Compatibility IEEE802.3z (Gigabit Ethernet), IEEE802.3u (Fast Ethernet),
IEEE802.1d (Bridge/Spanning tree), IEEE 802.1q (Vlan
Tagging), IEEE802.1p (Priority Queuing), IEEE802.3x (Flow
Control), Ethernet MIB, Bridge MIB, RMON (4 Groups)
Input Voltage (V) 100-240 VAC ± 10%
AC Line Frequency (Hz) 50-60 Hz 50-60 Hz
Min. Power Consumption (W) 40 40
Max. Power Consumption (W) 65 65
Physical Height 1U 1.5U
Size W x D x H (mm) 443 x 312 x 44.5 443 x 362 x 66.5
Size W x D x H (inches) 17.4 x 12.3 x 1.8 17.4 x 14.2 x 2.6
Weight (kg) 2.0kg 3.2kg
Weight (lbs.) 4.4lbs 7.7lbs
Operating Temperature (C ) 0°C - 40°C 0°C - 40°C
Operating Temperature (F) 32°F - 104°F 32°F - 104°F
Storage Temperature ( C) -10°C - 50°C -10°C - 50°C
Storage Temperature (F) 14°F - 122°F 14°F - 122°F
Humidity 85% maximum, non-condensing
Diagnostic LEDs Per Port LEDs: Port Activity, Link status ; Per Unit LEDs:
Power Status, Management
Mounting 19-inch rack mount EIA RS-310C standard
Standards Compliance UL-1950, TUV, CSA-22.2 No. 950 ; VCCI ; FCC Part 15, Class
A, CE
Additional Standards Compliance
* The OptiSwitch-100/F contains a built-in SNMP agent running on the SNMP Processor
Board. This allows each unit to be managed from a centralized management station via
any SNMP-compliant NMS.
The SNMP agent software complies with the following standards:
• RFC 1155 - The Structure of Management Information (SMI) for TCP/IP Based Internets,
May 1990
• RFC 1212 - The Management Information Base I (MIB I)
• RFC 1213 - The Management Information Base II (MIB II), March 1991.
• RFC 1284 - The Ethernet MIB
• RFC 1286 - The Bridge MIB
• RFC 1757 - The RMON MIB
The OptiSwitch-100/F also supports two MRV private MIBs: switch mib and gswitch.mib.
The SNMP agent utilizes UDP/IP (RFC 768, RFC950, RFC1071 and RFC791) as OSI layers
3 and 4 protocols, ICMP (RFC792) and ARP (RFC826) to complete the UDP/IP protocol
suite.
3

OptiSwitch-100/100F
The UDP/IP stack implementation conforms to:
• RFC 1122 - Requirements for Internet hosts - communication layers.
• RFC 1123 - Requirements for Internet hosts - application and support
The OptiSwitch-100/F may be managed by any SNMP Manager that conforms to the above
standards. It may be fully managed by MegaVision, MRV’s multi-platform network
management system. For more information on MegaVision, view our web site, or contact
MRV for a data sheet.
The OptiSwitch-100/F implements an MRV Enterprise MIB and an MRV Product MIB that
may be provided upon request.
4

OptiSwitch-100/100F
Installation
The OptiSwitch-100/F can operate as a stand-alone unit or in conjunction with any of MRV’s
other Ethernet offerings. Switch management is through MRV MegaVision software, any
SNMP-compatible NMS, or through the Command Line Interface (CLI).
Installing the OptiSwitch-100/F{xe "NH2064:installing
the"}
This section outlines the installation and operation of the OptiSwitch-100/F.
The OptiSwitch-100/F comes as a 19” rack-mountable unit. However, it can be placed either
in a rack mount, using the enclosed rack-mount brackets, or on a secure flat surface. Ensure
that the unit is within reach of the necessary connections (i.e. power outlet, Ethernet
connections, and if the OptiSwitch-100/F will be monitored via the serial port, a PC, UNIX
workstation, or modem). The unit is powered by a wide-range power supply for either 110 or
220 VAC operation.
WARNING!
Free airflow must be maintained in order to permit adequate cooling of the unit. Do NOT
block any of the unit’s ventilation holes!
Rack Mounting{xe "Rack Mounting"}{xe "NH2064:rack
mounting"}
If rack mounted units are installed in a closed or multi-unit rack assembly, they may require
further evaluation by Certification Agencies. The following items must be considered.
1. The ambient within the rack may be greater than room ambient. Installation should
be such that the amount of air flow required for safe operation is not compromised.
The maximum temperature for the equipment in this environment is 50C.
Consideration should be given to the maximum rated ambient.
2. Installation should be such that a hazardous stability condition is not achieved due to
uneven loading.
Front Panel{xe "Front Panel"}
The front panel of the OptiSwitch-100/F is illustrated below in Figure 3. The table below
describes its various components, LED indications and their functions.
Figure 3: Front Panel View OptiSwitch-100
5

OptiSwitch-100/100F
OptiSwitch-100/F Front Panel Table{xe "NH2064 Front Panel Table"}
1. Module Panel One of eight module slots
2. DB-9 Connector RS-232 connection for Command Line Interface
management
3. Global LEDs
PWR Green ON = power up
OFF = power down
MGMT Green
Rear Panel{xe "Rear Panel"}
The rear panel of the OptiSwitch-800/R, which houses the power connection and ON/OFF
switch, is illustrated in Figure 4. Fan holes are located on the left side of the unit (MUST NOT
OBSTRUCTED).
Figure 4: Rear Panel View OptiSwitch-100/F
Installing Modules in the OptiSwitch-100/F{xe
"NH2064:installing the modules"}
The modules are field-installable modules. Follow the procedure below to ensure proper
installation:
1. Power OFF the OptiSwitch-100/F switch.
2. Carefully slide an OptiSwitch-100/F module into a free slot and press firmly to insert.
3. Tighten the thumb screws securely.
4. Power ON the OptiSwitch-100/F switch.
6

OptiSwitch-100/100F
The OptiSwitch-100/F Modules
All modules fit in all the chassis except for the 2GE which only compatible with the
OptiSwitch-800.
Connecting Power {xe "Power Connection"}
The power cord should be plugged into an easily accessible outlet. A built-in power supply
automatically adjusts to any outlet providing between 90 VAC and 264 VAC at 50/60 Hz.
For a 115 volt configuration, the power cord to be used is minimum type SJT (SVT) 18/3,
rated 250 Volts AC, 10 Amps with a maximum length of 15 feet. One end is terminated in an
IEC 320 attachment plug, the other in a NEMA 5-15P plug.
The power cord to be used with a 230 Volt configuration is minimum type SJT (SVT) 18/3,
rated 250 Volts AC, 10 Amps with a maximum length of 15 feet. One end is terminated in an
IEC 320 attachment plug. The other end is terminated as required by/ the country where it will
be installed.
FRANÇAIS
Utilisez uniquement un câble secteur adapté à 230 volts, de type SJT (SVT) 18/3 minimum, 250 volts AC
nominal, 10 Amps, et d’une longueur maximale de 4.5m. l’une des extrêmités étant raccordée à un
connecteur Type IEC320, tandis que l’autre extrêmité correspondra aux spécifications du pays
concerné.
DEUTSCH
Das Netzkabel ist das hauptsachliche Diskonnektionsmittel, es sollte in eine leicht erreichbare steckdos
gesteckt werden. Das Netzkabel kann mit einer 230 Volts Konfiguration verwonder werden vom typ:
Minimum VDE or HAR, 3 X 1.00 mm2, 250 VAC, 10 Amps, maximal 4.5m long. Ein Ende ontspriche
dem Stecker IEC 320. Das andere Ende entspricht den Anfoderungen des entsprechenden Landes.
7

OptiSwitch-100/100F
Input Supply{xe "Input Supply"}
Check nameplate ratings to assure there is no overloading of supply circuits that could have an
effect on overcurrent protection and supply wiring.
Grounding
Reliable earthing of this equipment must be maintained. Particular attention should be given
to supply connections when connecting to power strips, rather than direct connections to the
branch circuit.
Module Screws
Securely tighten all screws to a minimum of 4.5 in-lb.
Connecting Ethernet Devices{xe "Connecting the
Ethernet Devices"}
For optimum performance, the Ethernet segments connected to the OptiSwitch-100/F must be
configured carefully. Generally, the segments should be configured so those machines on a
given port communicate primarily among themselves; i.e. most traffic does not need to cross
the switch. However, this is not the best configuration for certain situations.
Network Connections{xe "Network Connections"}
The cable connections to the 10/100BaseTX ports can be UTP or STP Category 5 and above,
and cable length is limited to 100 meters on each port. STP cable carries a higher quality of
signal and is less sensitive to environmental noise. The RJ-45 ports of the switch are defined
as MDI-X ports.
The 10/100BaseTX ports on the OptiSwitch-100/F are designed to be connected directly to a
workstation, using a standard straight through patch cable. In order to cascade switches or
connect a hub to the switch, a crossover cable must be used.
Figure 5: Straight cable connection between a OptiSwitch-100/F and a workstation
Figure 6: Crossover cable connection between an OptiSwitch-100/F and a hub
8

OptiSwitch-100/100F
Getting Started
Conventions Used in this Manual
The following are conventions used to explain command usage in this manual:
• Enter commands by typing the command name followed by one or more parameters (if
required) and pressing the Enter key. For example, typing banner
and pressing the
Enter key at the command prompt displays the Administrative Interface banner.
• Items printed in the Courier bold font
are to be typed exactly as they appear.
• The is used to show examples of CLI screen output.
• The Courier Italicized font represents command variables (arguments) and
values. For example, IP address
represents an IP address in dotted decimal notation as
123.1.2.3.
Courier font in a box
• Items in {} and separated by | represent alternatives for the argument.
Example :
get-comm { read | write | *}
This means you can type one of the following:
get-comm read
get-comm write
get-comm *
Connecting to the Management Port{xe "management
port:connecting to"}
With the product we supply a management cable. You can use it to get access to the
management port.
To configure the serial ports do the following items:
• Connect the cable provided to the management port and communication interface (COM1
or COM2) of your PC.
• Start Windows HyperTerminaland create a new connection with the property set to
9600 bits per second, 8 bits per character and no flow control.
Start HyperTerminal session and then type Enter to get the login prompt.
Logging into the Command Line Interface{xe
"command line interface:logging into the"}
The Command Line Interface (CLI) is protected with a login name and password.
To access the CLI the Network Administrator has to provide his name and a password.
Please Login
username: don
password: (not echoed)
The factory default password is a null string. To log in just press the Enter key. Once you are
logged into the CLI, you may change the password to avoid unauthorized access.
9

OptiSwitch-100/100F
Setting the IP Address{xe "IP Address:setting the"}
To manage the MegaSwitch using an SNMP Network Management Application or to use the
ping command to test the switch, it is necessary to assign an IP Address, a netmask and a
broadcast address. The Network Administrator should assign the IP address in accordance
with the existing IP addressing schema.
set-ip-cfg
Set the IP configuration with the set-ip-cfg command. automatically set to defaults
according to the IP address class.
SYS_console> set-ip-cfg?
set-ip-cfg set IP addres, Netmask, Broadcast
[arg #0] IP address
[arg #1] Netmask
[arg #2] Broadcast
An example of this is the following:
SYS_console> set-ip-cfg 192.1.1.64 255.255.255.0 255.255.255.255
NOTE:
If the switch has no IP Address, then the provided IP Configuration will change the running parameters
as well as the NVRAM-based database. If the switch was already configured, the command will only
change the NVRAM database. Consequently, to use the new parameters you should reset the Switch,
using the warm-reset command.
set-ip
You can also use the simplified command. In this particular case, the mask and broadcast are
automatically set to defaults according to the IP address class.
SYS_console> set-ip?
set-ip set IP address
[arg #0] IP address
An example of this is the following:
SYS_console> set-ip 192.1.1.64
Verifying the Installation{xe "Installation:testing the"}
After the installation is complete and the IP Address configured, use the utility ping to test the
connectivity (For information on ping, refer to the utilities chapter).
ping
The ping command sends an echo request to the host specified in the command line. For
example, to test connectivity from the Switch to a workstation with an IP Address of
192.1.1.1, use the following command:
10

OptiSwitch-100/100F
SYS_console>ping?
ping ip traffic generator
[arg #0] destination IP address
[arg #1] Number of packets to send or 0 for less ping
An example of this is the following:
SYS_console> ping 192.1.1.1 100
Accessing the Command Line Interface Remotely{xe
"Accessing the Command Line Interface Remotely"}
When the switch has an IP address, the administrative interface can be accessed by remote
through Telnet. All commands work exactly as if the serial interface were being used. Please
note that only one console session may be active at any given time. This means that after the
first Telnet session is established, all other Telnet connections are refused until the current
session is closed.
11

OptiSwitch-100/100F
Command Line Interface
The CLI provides the following: {xe "command line interface (CLI)"}
• Configuration of system parameters, including the serial line and / or the console’s
parameters
• Configuration of the switch’s SNMP Agent parameters
• Configuration of the ports’ parameters.
• Network performance monitoring.
• Virtual LANs operations
• Statistics operations
• Spanning Tree operations
Command Structure{xe "command line
interface:command structure"}
The CLI has several categories of commands:
• Console related commands: help, banner, console parameters setup, etc.
• System related commands: reset commands, download commands, initialize the NVRAM
with defaults, etc.
• IP commands: parameter setup, parameter and information display, etc.
• SNMP agent related commands: parameter setup, management and traps options
• Switching Database related commands: aging time management and Switching Database
entry management
• Virtual LAN commands
• Port Configuration related commands
• Switching statistics commands
• Spanning Tree related commands
See the quick reference at the end of this manual for the command list sorted by subject.
Typing ?at the CLI prompt displays a list of all the available command topics and a short
explanation about each. Typing in one of the names off this list yields a list of the commands
under that topic.
SYS_console>?
Commands groups are:
-----------------------
console Console related commands
system System related commands
ip IP related commands
snmp SNMP related commands
switch-db Switching Database related commands
vlan Virtual LANS related commands
echannel EtherChannel Commands
mac-security MAC security related commands
port-cfg Port Configuration related commands
statistics Switching Statistics related commands
sp-tree Spanning Tree related commands
-----------------------------------------------------------------------------
use ! for previous cmd, ^U to clear line, ^W to clear previous word
-----------------------------------------------------------------------------
Note: ^ = CTRL key
12

OptiSwitch-100/100F
Entering Commands{xe "command line
interface:entering commands"}
Enter commands by typing the command name followed by one or more parameters (if
required) and pressing the Enter key. For example, typing banner
and pressing the Enter
key at the command prompt displays the Administrative Interface banner.
If a command is entered incorrectly, a message is displayed indicating the type of error that
occurred. For example, typing a nonexistent command gives the following message:
SYS_console> pin
command <pin> not found
If the command exists but the number of parameters is incorrect, the following message is
displayed:
SYS_console> ping
too few arguments <0 <2
To get the syntax and explanation of a command, type a question mark
?
After the command
name:
SYS_console> ping ?
ping IP traffic generator
[arg #0] destination IP address
[arg #1] number of packets to send or 0 for endless ping
SYS_console> ping _
Note that the command is repeated after the prompt, and you have only to add the necessary
parameter/s. If you add a question mark after the first parameter, the same explanation is
provided and the previous command is redisplayed, including the provided parameters.
SYS_console> ping 129.1.1.7 ?
ping IP traffic generator
[arg #0] destination IP address
[arg #1] number of packets to send or 0 for endless ping
SYS_console> ping 129.1.1.7 0
The CLI provides a history of the last commands. Type
!
or Ctrl-
P
at the prompt to recall the
last command in the command history.
To correct a command line, use the following special keys (see the
help-kbd
command):
!
or CTRL - P - call the previous command
CTRL - W - delete the previous word
CTRL - U - erase the entire line
When a command has more than one screen-full of text to print, you can continue to scroll or
stop the process.
The Courier Italicized font represents command variables (arguments) and values.
For example, Ipaddress
represents an IP address in dotted decimal notation as 123.1.2.3.
Items in {} and separated by | represent alternatives for the argument.
Example :
get-comm { read | write | *}
This means you can type one of the following:
13
This manual suits for next models
1
Table of contents
Other MRV Communications Switch manuals