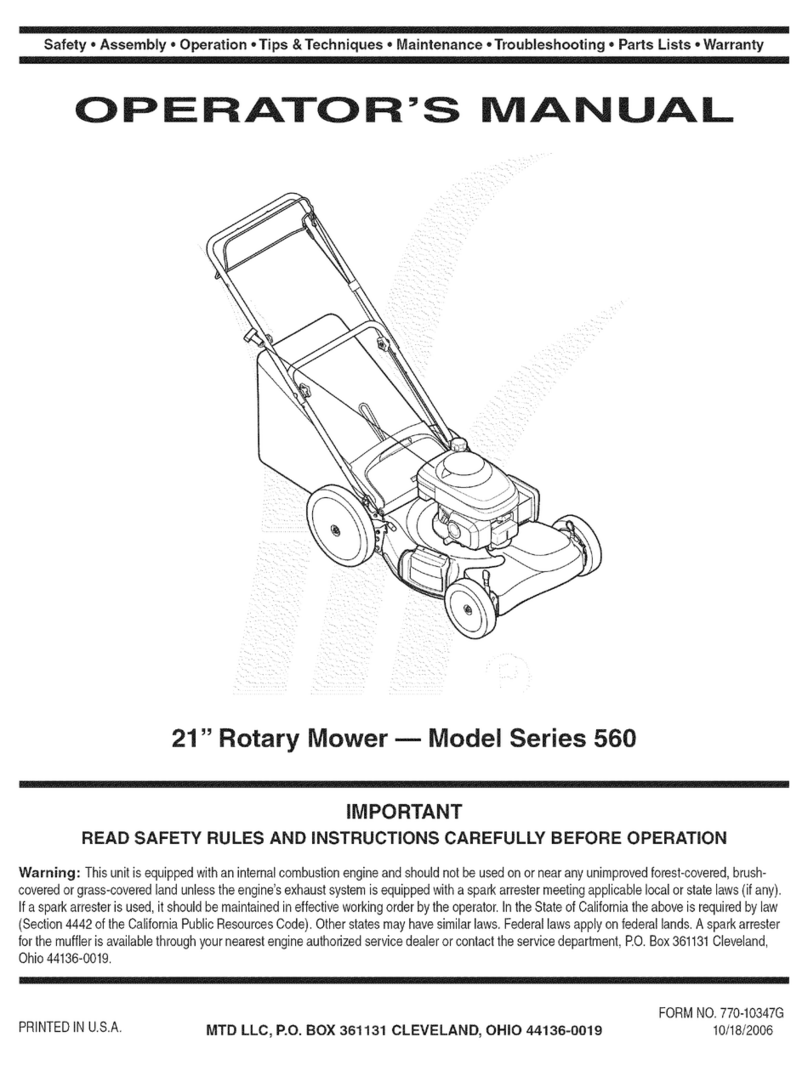
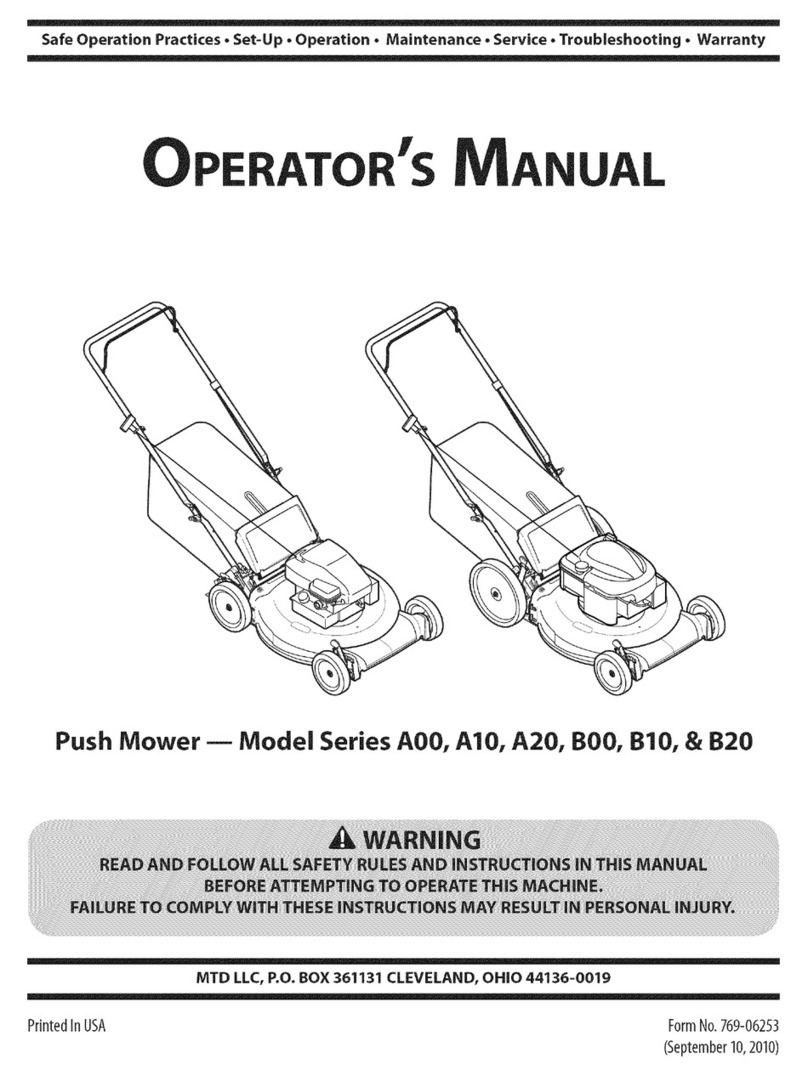
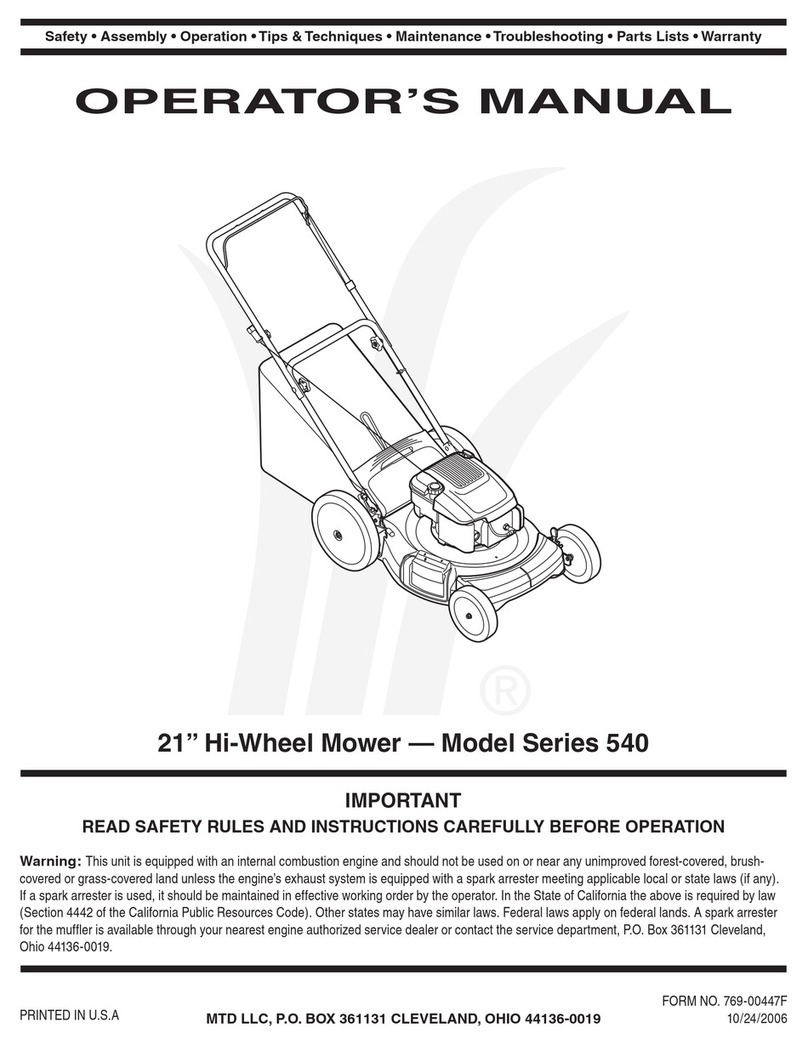
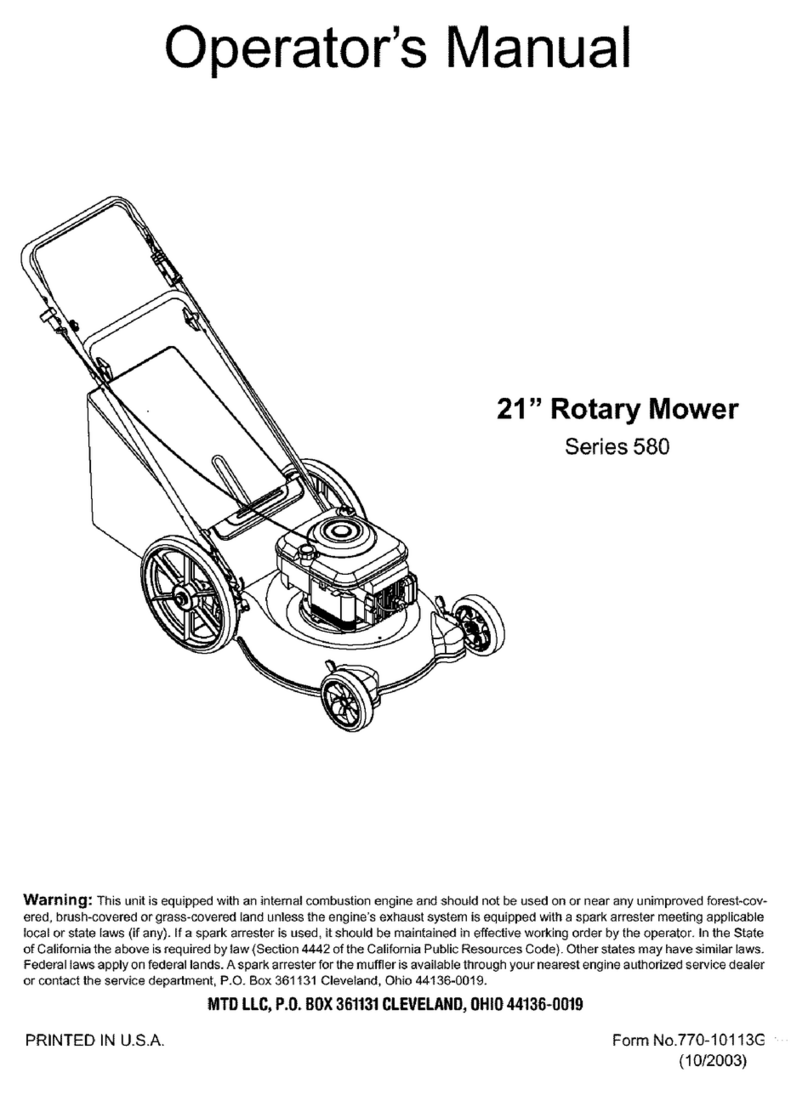
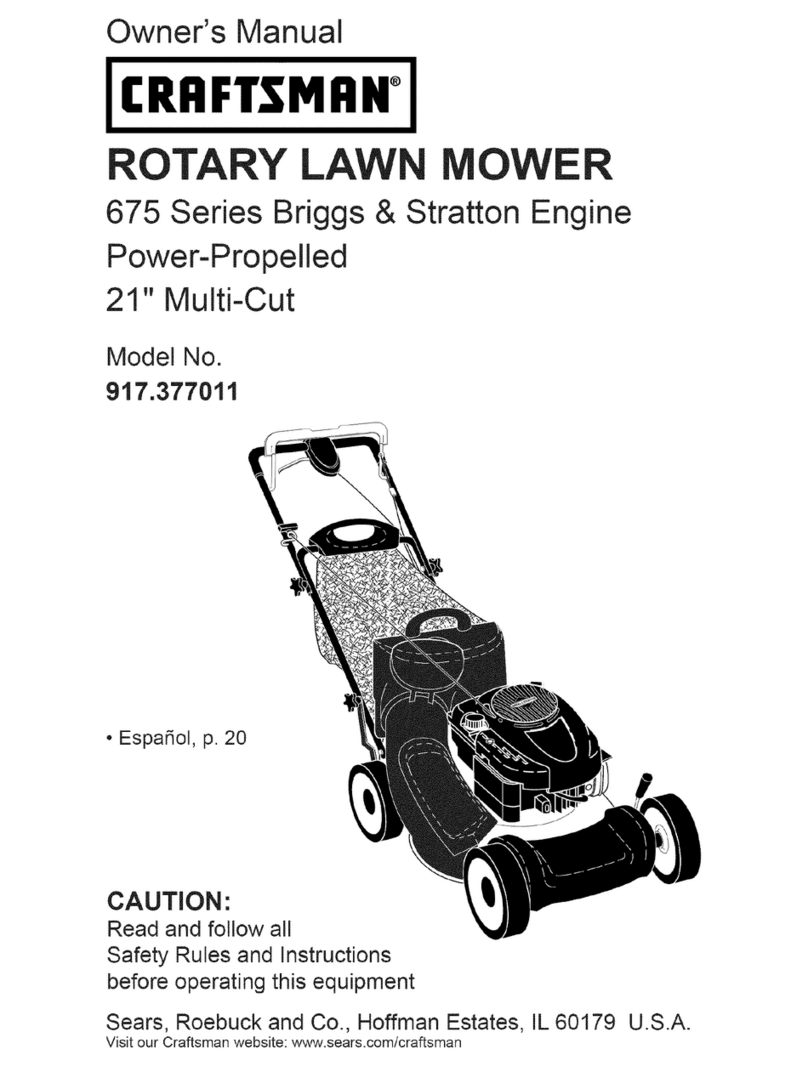
MTD 44M User manual

Safety • Assembly • Operation • Tips &Techniques • Maintenance • Troubleshooting • Parts Lists • Warranty
OF AOAL
21" Rotary Mower- Model 44M
iMPORTANT
READ SAFETY RULES AND iNSTRUCTiONS CAREFULLY BEFORE OPERATION
Warning: Thisunitisequippedwithan internalcombustionengineandshouldnotbeusedon or nearanyunimprovedforest-covered,brush-
coveredor grass-coveredlandunlesstheengine'sexhaustsystemisequippedwitha sparkarrestermeetingapplicablelocalor statelaws(if any).
If a sparkarresterisused,it shouldbemaintainedineffectiveworkingorderbytheoperator.IntheStateofCaliforniatheaboveisrequiredbylaw
(Section4442oftheCaliforniaPublicResourcesCode).Otherstatesmayhavesimilarlaws.Federallawsapplyonfederallands.A sparkarrester
forthemufflerisavailablethroughyournearestengineauthorizedservicedealeror contacttheservicedepartment,RO.Box361131Cleveland,
Ohio44136-0019.
PRINTEDIN U.S.A. MTD LLC, P.O. BOX 361131 CLEVELAND, OHIO 44136-0019 FORMNO.769-03023
12/19/2006

This Operator's Manual is an important part of your new lawn mower, it will help you assemble,
prepare and maintain the unit for best performance. Please read and understand what it says.
Table of Contents
Slope Gauge ........................................................ 3
Safe Operation Practices ................................... 4
Setup and Adjustment ....................................... 6
Operating Your Lawn Mower .............................. 8
Maintaining Your Lawn Mower ......................... 10
Trouble Shooting .............................................. 12
Off Season Storage and Safety Labels ........... 13
Engine Appendix .............................................. 14
Engine Safe Operation Practices ................. 14
Operating Your Engine .................................. 16
Maintaining Your Engine ............................... 18
Parts List ........................................................... 22
Warranty ............................................. Back Cover
MTDLLCreservestherighttochangeproductspecifications,designs,andequipmentwithoutnoticeandwithoutincurringobligation.
Finding and Recording Model Number
BEFOREYOUBEGINTOASSEMBLEYOURNEW
EQUIPMENT,pleaselocatethe modelplateon the
equipmentandcopythe informationto thesample
modelplateprovidedto the right.Youcan locatethe
modelplatebystandingat theoperatingpositionand
lookingdownatthe rearofthe deck.Thisinformation
willbe necessaryto usethe manufacturer'sweb
site,to obtainassistancefromthe CustomerSup-
portDepartment,or whencontactingan authorized
servicedealer.
Model Number Serial Number
MTD LLC
P.O= BOX 361131
CLEVELAND, OH 44136
330-220-4683
www.mtdproducts.com 800-800-7310
Customer Support
Please do NOTreturn the unit to the retailer from which it was
purchased, without first contacting Customer Support.
Ifyou havedifficultyassemblingthisproductor haveanyquestionsregardingthe controls,operation,or
maintenanceof this unit,you canseek helpfromtheexperts.Choosefromthe optionsbelow:
= Visitwww.mtdproducts.com
• Calla CustomerSupportRepresentativeat 1-800-800-7310.
2

z_
d_
o9
_D
_D
O
O
E
=5
O
d_ o6
d_ o3
o -5
O9 C5
d_ O3
C
_ o
_D o_
E
O
_D
C5
c_ 0
o3
c_ _,_
c'_ _
!i!_i!il< Sightandholdthis levelwith a verticaltree...
_ or a cornerof a building...
I
I__ or a fence post
I
I I
-- fir_e (repros
_ _ er_ts a 15o
15°
_0

WARNING
Thissymbolpoints
out importantsafety
instructionswhich,if
notfollowed,could
endangerthe personal
i safetyand/or property
I ofyourselfand others.
Readandfollowall
instructionsinthis
manualbeforeat-
temptingto operate
i this machine.Failure
I to complywith these
instructionsmay result
i in personalinjury.When
youseethis symbol.
i HEED ITS WARNING!
i Your Responsibility
Restrictthe use
ofthis powermachine
to personswho read.
i understand
andfollow thewarnings
and instructions
I. =nthis manual
and onthe machine.
WARNING: EngineExhaust,some of its constituents,and certain vehiclecompo-
nentscontain or emit chemicals knownto Stateof Californiato cause cancer and
birth defectsor other reproductiveharm.
DANGER: This machine was builtto be operatedaccordingto the rulesfor safe operation in this
manual.As with anytypeof powerequipment,carelessnessor erroronthe part ofthe operator
can resultin serious injury.This machineis capable of amputatinghandsand feet and throwing
objects. Failureto observethe following safety instructionscouldresult in seriousinjury or death.
Children
Tragicaccidentscanoccurifoperatorisnotalertto presence
ofchildren.Childrenareoftenattractedtomowerand mowing
activity.Theydonot understandthe dangers.Neverassume
thatchildrenwill remainwhereyoulastsawthem.
1. Keepchildrenoutofthe mowingareaand underwatchful
careofa responsibleadultotherthanthe operator.
2. Bealertandturnmoweroffif achildentersthearea.
3. Beforeand whilemovingbackwards,lookbehindanddown
forsmallchildren.
4. Useextremecarewhenapproachingblindcorners,
doorways,shrubs,trees,or otherobjectsthatmayobscure
yourvisionofachildwhomayrunintothe mower.
5. Keepchildrenawayfromhotor runningengines.Theycan
sufferburnsfroma hotmuffler.
6. Neverallowchildrenunder14yearsoldto operateapower
mower.Children14yearsoldandovershouldreadand
understandoperationinstructionsandsafetyrulesinthis
manualandshouldbetrainedandsupervisedbyaparent.
General Operation
1. Readthis operator'smanualcarefullyin its entiretybefore
attemptingtoassemblethismachine.Read,understand,
andfollowall instructionsonthe machineandin the
manual(s)beforeoperation.Becompletelyfamiliarwith
thecontrolsandthe properuseofthis machinebefore
operatingit. Keepthis manualin a safeplaceforfuture
andregularreferenceandfor orderingreplacementparts.
2. Thismachineisaprecisionpieceof powerequipment,
nota plaything.Therefore,exerciseextremecautionat all
times.Yourunithas beendesignedto performonejob: to
mowgrass.Do notuseit for anyotherpurpose.
3. Neverallow childrenunder 14yearsoldto operatethis
machine.Children14yearsoldand overshouldreadand
understandthe instructionsinthis manualandshould
betrainedand supervisedbya parent.Onlyresponsible
individualswhoarefamiliarwiththeserulesofsafe
operationshouldbeallowedto usethismachine.
4. Thoroughlyinspectthe areawherethe equipmentisto
beused.Removeall stones,sticks,wire,bones,toys
andotherforeignobjects,whichcouldbetrippedoveror
pickedupandthrownbythe blade.Thrownobjects can
causeseriouspersonalinjury.Planyourmowingpattern
toavoiddischargeofmaterialtowardroads,sidewalks,
bystandersandthe like.Also,avoiddischargingmaterial
againsta wallor obstruction,whichmaycausedischarged
materialto ricochetbacktowardthe operator.
5. Tohelpavoidbladecontactorathrownobjectinjury,
stayinoperatorzonebehindhandlesandkeepchildren,
bystanders,helpersandpetsatleast75feetfrom mower
whileit is inoperation.Stopmachineifanyoneenters
area.
6. Alwayswearsafetyglassesor safetygogglesduringopera-
tionandwhile performinganadjustmentor repairtoprotect
youreyes.Thrownobjectswhich ricochetcancauseserious
injurytothe eyes.
7. Wearsturdy,rough-soledworkshoesand close-fitting
slacksandshirts. Shirtsandpantsthatcoverthe armsand
legsandsteel-toedshoesarerecommended.Neveroperate
this machinein barefeet,sandals,slipperyor light-weight
(e.g.canvas)shoes.
8. Do notputhandsorfeet nearrotatingpartsor undercutting
deck.Contactwithbladecanamputatehandsandfeet.
9. Amissingor damageddischargecovercancauseblade
contactor thrownobject injuries.
10.Manyinjuriesoccurasa resultofthe mowerbeingpulled
overthefoot duringa fall causedby slippingor tripping.
Do notholdontothe mowerifyouare falling;releasethe
handleimmediately.
11.Neverpullthe mowerbacktowardyouwhileyouare
walking.If youmust backthe mowerawayfroma wallor
obstructionfirstlookdownand behindtoavoidtrippingand
thenfollowthesesteps:
a. Stepbackfrommowertofully extendyourarms.
b. Besureyouarewellbalancedwithsurefooting.
c. Pullthe mowerbackslowly,no morethanhalfway
towardyou.
d. Repeatthesestepsas needed.
12.Do notoperatethe mowerwhileunderthe influenceof
alcoholordrugs.
13.Do notengagetheself-propelledmechanismon unitsso
equippedwhilestartingengine.
14.Thebladecontrolhandleisasafetydevice.Neverattempt
tobypassitsoperation.Doingso makesthe safetydevice
inoperativeandmayresult in personalinjurythrough
contactwiththe rotatingblade.Thebladecontrolhandle
mustoperateeasily in bothdirectionsandautomatically
returntothe disengagedpositionwhenreleased.
15.Neveroperatethe mowerinwetgrass.Alwaysbesureof
yourfooting. A slipand fall cancauseseriouspersonal
injury.If youfeelyouarelosingyourfooting,releasethe
bladecontrolhandleimmediatelyand the bladewillstop
rotatingwithinthreeseconds.
16.Mowonlyin daylightor goodartificiallight.Walk,neverrun.
17.Stopthe bladewhencrossinggraveldrives,walksor roads.
18.If the equipmentshouldstartto vibrateabnormally,stopthe
engineand checkimmediatelyfor the cause.Vibrationis
generallya warningoftrouble.
4

19.Shutthe engineoffandwaituntilthe bladecomestoa
completestopbeforeremovingthe grasscatcherorunclog-
gingthe chute.
Thecuttingbladecontinuesto rotatefora few secondsafter
the engineisshutoff. Neverplaceany partofthe body in
the bladeareauntilyouaresurethe bladehasstopped
rotating.
20.Neveroperatemowerwithoutpropertrailshield,discharge
cover,grasscatcher,bladecontrolhandleorothersafety
protectivedevicesin placeand working.Neveroperate
mowerwith damagedsafetydevices.Failureto doso can
resultin personalinjury.
21.Mufflerandenginebecomehotandcancausea burn.Do
nottouch.
22.Only usepartsandaccessoriesmadeforthis machineby
manufacturer.Failuretodoso can resultin personalinjury.
23. Ifsituationsoccurwhicharenotcoveredinthis manual,
usecareand goodjudgment.Contactyourdealerfor
assistance.
Slope Operation
Slopesare amajorfactorrelatedtoslip andfall accidents,which
canresultinsevereinjury.Operationonslopesrequiresextra
caution.If youfeeluneasyona slope,do notmowit. Foryour
safety,usetheslopegaugeincludedaspartofthis manualto
measureslopesbeforeoperatingthis uniton aslopedorhilly
area.Ifthe slopeisgreaterthan15degrees,donotmowit.
Do:
1. Mowacrossthefaceofslopes;neverupand down.Exercise
extremecautionwhenchangingdirectiononslopes.
2. Watchfor holes,ruts,rocks,hiddenobjects,or bumps
whichcancauseyouto slipor trip. Tallgrasscan hide
obstacles.
3. Alwaysbesureofyourfooting.A slipand fallcan cause
seriouspersonalinjury.Ifyoufeel youarelosingyour
balance,releasethe bladecontrolhandleimmediately,and
the bladewill stoprotatingwithin3 seconds.
Do Not:
1. Do notmowneardrop-offs,ditchesor embankments,you
could loseyourfootingor balance.
2. Do notmowslopesgreaterthan 15degreesas shownon
the slopegauge.
3. Do notmowonwet grass.Unstablefootingcouldcause
slipping. Service
Safe Handling Of Gasoline:
1. Toavoidpersonalinjuryor propertydamageuseextreme
carein handlinggasoline.Gasolineisextremelyflammable
and thevaporsareexplosive.Seriouspersonalinjury can
occurwhengasolineisspilledonyourselfor your clothes,
which canignite.Washyourskin andchangeclothes
immediately.
2. Use onlyan approvedgasolinecontainer.
3. Neverfillcontainersinsideavehicleor ona truckortrailer
bedwitha plasticliner.Alwaysplacecontainersonthe
groundawayfromyourvehiclebeforefilling.
4. Removegas-poweredequipmentfromthe truckor trailer
and refueliton theground.Ifthisisnot possible,then refuel
suchequipmenton atrailer withaportablecontainer,rather
thanfroma gasolinedispensernozzle.
5. Keepthe nozzlein contactwiththe rimofthe fueltankor
containeropeningatall timesuntilfuelingiscomplete.Do
not usea nozzlelock-opendevice.
6. Extinguishallcigarettes,cigars,pipesandothersources
ofignition.
7. Neverfuel machineindoorbecauseflammablevaporswill
accumulatein thearea.
8. Neverremovegascap oradd fuelwhileengineishot or
running. Allowengineto coolatleasttwo minutesbefore
refueling.
9. Neveroverfillfueltank. Filltankto nomorethanY2inch
belowbottomoffiller neckto provideforfuelexpansion.
10.Replacegasolinecapandtightensecurely.
11.If gasolineis spilled,wipe itoff theengineand equipment.
Moveunittoanotherarea.Wait5minutesbeforestarting
engine.
12.Neverstorethe machineorfuel containernearanopen
flame,sparkor pilotlightas ona waterheater,space
heater,furnace,clothesdryeror othergasappliances.
13.Toreducefire hazard,keepmowerfreeofgrass,leaves,
orother debrisbuild-up.Cleanupoil orfuelspillageand
removeanyfuel soakeddebris.
14.Allowamowertocoolat least5 minutesbeforestoring.
GeneralService:
1. Neverrun anengineindoorsorin a poorlyventilatedarea.
Engineexhaustcontainscarbonmonoxide,anodorless
anddeadlygas.
2. Beforecleaning,repairing,or inspecting,makecertainthe
bladeandall movingpartshavestopped.Disconnectthe
sparkplugwireandgroundagainstthe engineto prevent
unintendedstarting.
3. Checkthe bladeandenginemountingboltsatfrequent
intervalsfor propertightness.Also,visuallyinspectblade
fordamage(e.g.,bent,cracked,worn)Replacebladewith
theoriginalequipmentmanufacture's(O.E.M.)bladeonly,
listedin thismanual."Useof partswhichdo notmeetthe
originalequipmentspecificationsmayleadto improper
performanceand compromisesafety!"
4. Mowerbladesaresharpandcancut.Wrapthebladeor
weargloves,anduseextracautionwhenservicingthem.
5. Keepallnuts,bolts,andscrewstightto besurethe equip-
mentis insafeworkingcondition.
6. Nevertamperwithsafetydevices.Checktheirproper
operationregularly.
7. Afterstrikingaforeignobject,stopthe engine,discon-
nectthesparkplugwireandgroundagainsttheengine.
Thoroughlyinspectthe mowerfor anydamage.Repairthe
damagebeforestartingandoperatingthe mower.
8. Neverattemptto makea wheelor cuttingheightadjust-
mentwhilethe engineisrunning.
9. Grasscatchercomponents,dischargecover,andtrail
shieldaresubjecttowear anddamagewhichcould
exposemovingpartsor allowobjectstobethrown.For
safetyprotection,frequentlycheckcomponentsand re-
placeimmediatelywithoriginalequipmentmanufacturer's
(O.E.M.)partsonly,listedin thismanual."Useofparts
whichdo notmeetthe originalequipmentspecifications
mayleadtoimproperperformanceand compromise
safety!"
10.Do notchangetheenginegovernorsettingor over-revthe
engine.Thegovernorcontrolsthe maximumsafeoperating
speedoftheengine.
11.Maintainor replacesafetylabels,asnecessary.
12.Observeproperdisposallawsandregulations.Improper
disposaloffluidsandmaterialscanharmtheenvironment.
Practices
WARNING
This symbol points
out importantsafety
instructions,which if
notfollowed,could
endangerthe personal
safety and/or property
of yourselfand others.
Readand followall
instructions inthis man-
ual beforeattemptingto
operatethis machine.
Failureto comply with
these instructionsmay
result in personalinjury.
Whenyousee this
symbol.
HEED iT'S WARNING!
Your Responsibility
Restrictthe use
of this powermachine
to personswho read.
understand
and followthe warnings
and instructions
in this manua
and onthe machine.
5

NOTE:Standbehind
themowerasifyou
weregoingtooperate
it.Yourrighthandcor-
respondstotheright
sideofthemower;your
lefthandcorresponds
totheleftsideofthe
mower.
NOTE:Forshipping
purposesyourmower
issetwiththewheels
inalowcuttingheight
position.Forbest
I resultsraisethecutting
positionuntilitisdeter-
minedwhichheightis
bestforyourlawn,refer
toAdjustmentsection
forinstructions.
iMPORTANT
Thisunitisshipped
withoutgasolineoroil
intheengine.Fillup
gasolineandoilas
i instructedintheengine
operationsection
BEFOREoperating
i yourmower.
Figure3-1:Unfoldhandleandtightenhardware.
HardwarePack
Wing Nuts (2) CarriageBolts (2)
1. Followthestepsbelowto positionthe handle.
a. Lifttheupperhandleupfromthefoldedposition
andpullit backtotheextendedposition.See
Figure3-1.Donotcrimpcables.Thehandle
shouldclickintothisposition.
b. Makesurethecarriageboltisseatedproperlyin
thehandle.Tightenstarknobstosecureupper
handletothelowerhandle.
2. Followthesestepsto securethe handle:
a. Removethe hairpinclipfromthepivotrod.Usinga
pairofpliers,inserthairpinclipintotheotherhole
onthe rod.Repeaton otherside.SeeFigure3-2.
b. Inserta carriageboltfromthehardwarepackinto
theupperholeonthehandlemountingbracket.
Securewithone plasticwingnut,alsoincludedin
thehardwarepack.Repeaton otherside.
3. Theropeguideisattachedtotherightsideofthe
upperhandle.Loosenthewingnutwhichsecuresthe
ropeguide.RefertoFigure3-3.
a. Holdthebladecontrolagainstupperhandle.
b. Pullstarterropeoutoftheengine.Releasethe
bladecontrol.
.
c. Slipstarterropeintoropeguide.
d. Tightenwingnut.
Securecablestothelowerhandleusingthecable
ties.See Figure3-4.insertpostsoncabletiesinto
holesprovidedonthelowerhandle.Pullcableties
tightandtrimexcess.
Figure3-2:Securehandletohandlemountingbrackets.
Figure3-3:Pullrecoilstarterthroughropeguideandtighten.
!
Figure3-4:Usecabletiestosecurecablestolowerhandle.
6

5. Followstepsbelowtoassemblethegrasscatcher:
a. Placebagoverframesothat itsblackplasticside
is atthebottom.Checkthatthebagisturnedright
sideoutbeforeassembling(warninglabelwillbe
on theoutside).SeeFigure3-5.
b. Slip plasticchannelofgrassbagoverhooksonthe
frame.Alltheplasticchannelsexceptcentertopof
bagattachfromoutsideofbag.
c. Attachcentertopofbagfrominsideofbag.
6. Toattachthegrasscatcher:
a. Liftreardischargedoor.SeeFigure3-6.
b. Placegrasscatcheron thepivotrod.Letgo
ofdischargedoorsothat itrestson thegrass
catcher.
Adjustments
Cutting Height
An adjustingplateandthumbleverateachwheel
providescuttingheightadjustment.Eachlevermustbe
movedtothesamepositionto ensureanevencut.
1. Pulltheleveroutandawayfromthe mower.See
Figure3-7.
2. Movetheleverforwardor backfordesiredcutting
height.
3. Releaselevertowardsmowerdeck.
Figure3-5:Assemblethe grasscatcher(ifneeded)
ustment
WARNING
nless the hooks on
;grass catcher are
rrnly seated onthe
pivot rod and the rear
discharge door rests
firmly against top of
the grass catcher,
Figure3-6:Attachthegrasscatcher.
Figure3-7:Useleverateachwheeltoadjustcuttingheight.
7
cuTTING HEIGHT:
Forroughoruneven
lawnsl movethe height
adjustment leverto a
higher positionl Thiswill
help prevent scalping of

i _._ :_i_ii_\!_i_ii_i ¸
WARNING
Thebladecontrolisa
safetydevice. Never
attempttobypass its
operations.
Use extremecare
when handling
gasoline. Gasoline is
extremely flammable
ithemachineindoors
iorwhiishotorrunning.letheengine
Extinguishcigarettes,
cigars,pipesand
othersourcesof
ignition.
i
iKeep hands and feet
_ away from thechute
i areaon cutting deck.
Referto warning
label ontheunit.
Drive
Control
Recoil Starter
Blade Control
Control
Cutting
Height
Adjustment
Lever(one at
eachwheel)
J
Figure4-1:Themaincomponentsonthemower.
Nowthatyouhavesetupyourlawnmower,it'simportantto becomeacquaintedwith itscontrolsand features.
Blade Control
Thebladecontrolisattachedtothe upperhandleof
themower,Depressand squeezeitagainsttheupper
handletooperatetheunit, Releaseittostopengineand
blade.
_ aWARNING:safetydevice.Neverattempt toThisbladecontrolmechaniSmbypassitsiS
operations.
Drive Control
Thedrivecontrolislocatedontheundersideofthe
upperhandleand isusedtoengagethedrive.Squeeze
itagainsttheupperhandleto engagethedrive; release
ittoslowdownor stopmowerfrompropelling.
Cutting Height Adjustment Levers
Oneadjustmentleverislocatedat eachwheelandis
usedtoadjustthecuttingheight.All fourleversmustbe
movedtothesamepositiontoensurea uniformcut.
Recoil Starter
Therecoilstarterisattachedtotherightupperhandle.
Standbehindtheunitand pullthe recoilstarterropeto
startthe unit.
Choke Control
Thechokecontrolislocatedontheleft sideofthehandle
andwhenactivated,closesthechokeplateon the
carburetorandaidsin startingtheengine,
Gas and Oil Fill-Up
1. Addoilprovidedbeforestartingunitforthefirsttime
outdthebox.Followengineoperationsectionfor
this.See Figure44 aboveforlocationdtheoilfill.
2. Servicetheenginewithgasolineasinstructedinthe
engineoperationsection. SeeFigure4-1abovefor
locationdgasfill.
,_ WARNiNG:gasoline.GasolineUSeextremeisextremelyCarewhenhandlingflammaMe
and thevapors are explosive. Neverfuel the machine
indoors or while the engine is hot or running. Extin-
guish cigarettes, cigars, pipes andother sources of
ignition.
8

_ARNING:The operationof any lawnmower
can result inforeign objects beingthrown
intothe eyes,whichcandamageyoureyesseverely.
Alwayswearsafetyglasseswhileoperatingthe
mower,or whileperforminganyadjustmentsor
repairson it.
Starting Engine
_ WARNING:Be sureno one otherthanthe op-
erator isstandingnearthe lawnmowerwhile
startingengineoroperatingmower.Never
runengineindoorsor in enclosed,poorly ventilated
areas.Engine exhaustcontainscarbon monoxide,an
odorlessand deadly gas. Keephands,feet, hairand
looseclothing awayfrom any movingpartson engine
and lawnmower.
,d_! WARNING:Alwayskeephandsand feet clear
of equipmentmoving parts.Donot use apres-
surized starting fluid. Vaporsareflammable.
1. Pulloutthechokeknoblocatedon theleftsideof the
upperhandle,See Figure4-2,
NOTE:Useofthechokeis notnecessaryiftheengineis
warmortheairtemperatureis high.
2. Standingbehindthe mower,depressthebladecontrol
and holditagainsttheupperhandle.
3. Pullthestartergriplightlyuntilresistanceisfelt,
thenpullrapidlytoovercomecompression,prevent
kickbackandstartengine.Repeatifnecessary.See
Figure4-2.
IMPORTANT:Donotallowthestartergriptosnap
backagainsttheropeguide.Returnitgentlytoprevent
damagetothe starter.
4. Whenenginewarmsup,pushinthechokeknob.See
Figure4-2.
Stopping Engine
1. Releasebladecontroltostoptheengineand blade.
Using Your Lawn Mower
_ik ARNING:Neveroperateyourmower without
either the rear door or the entire grass catcher
assembly firmly secured.
Besurelawnisclearof stones,sticks,wire,or other
objectswhichcoulddamagelawnmowerorengine.
Suchobjectscouldbe accidentlythrownbythemower
in anydirectionandcauseseriouspersonalinjurytothe
operatorandothers.
Figure4-2:Stepstostartmower.
_ARNING:ifyou strikeaforeign object,
stopthe engine.Removewirefrom the spark
plug,thoroughly inspectmower for anydamage,
and repair damagebefore restarting and operating.
Extensive vibration of mowerduring operation isan
indicationof damage.The unit should be promptly
inspectedand repaired.
1. Oncetheengineisrunning,squeezethedrive
controltopropelmower.Forbestresults,do notcut
wetgrassand nevercutoff morethanone-thirdof
thetotallengthof thegrass.
Using as Mulcher
Formulchinggrass,removethegrasscatcherfromthe
mower.Thereardischargedoorshouldbeclosed.
• Foreffectivemulching,do notcut wetgrass.
• Newor thickgrassmayrequirea narrowercut.
Adjustgroundspeedaccordingtoconditionoflawn.
•ifthegrasshasbeenallowedto growinexcessof
fourinches,mulchingis notrecommended.Usethe
grasscatchertobagclippingsinstead.
Using Grass Catcher
Youcanusethegrasscatchertocollectclippingswhile
youareoperatingthemower.
1. Attachgrasscatcherfollowinginstructionsinthe
Setupsection.Grassclippingswillautomatically
collectin bagasyourunmower.Operatemowertill
grassbagisfull.
2. Stopenginecompletelybyreleasingtheblade
control.Makesurethattheunithascometoa
completestop.
3. Liftdischargedoorandpullgrassbagup andaway
fromthe mowertodisposeofthegrassclippings.
WARNING
The operation of
any lawn mower
can result in foreign
objects being thrown
intothe eyes, which
can damage your
eyes severely.
Always wear safety
glasses while operat-
ing the mower, or
while performing
any adjustments or
repairs on it.
Be sure no one other
than the operator is
standing nearthe
lawn mower while
starting engine or
operating mower.
Never run engine in-
doors or in enclosed,
poorlyventi-
lated areas. Engine
exhaust contains
carbon monoxide, an
odorless and deadly
gas. Keep hands,
feet, hair and loose
clothing away from
any moving parts
on engine and lawn
mower.
9

Your Lawn
WARNING
A ,vaysstopeng,"e;
disconnectspark
plug, andground
against engine before
cleaning,lubricating
or doing any kind of
maintenanceonyour
machinel
NOTE: Do notuse a
pressureWasheror
garden hose t0 clean
y0ur uniLThesemay
cause damage to
electriccomponents;
spindles pulleys bear:
ings 0rthe enginelThe
useofWate[will result
in shortened life and
reduce serviceability.
Lubrication
• Lubricatepivotpointson thebladeanddrivecontrol
atleastoncea seasonwithlightoil.Thecontrolsmust
operatefreelyinbothdirections.SeeFigure5-1.
• Lubricatethewheelsatleastoncea seasonwith
lightoil (ormotoroil). If wheelsareremovedforany
reason,lubricatesurfaceofthepivotarmandinner
surfaceof thewheelwithlightoil.
Lubricatethetorsionspringandpivotpointontherear
dischargedoorperiodicallywithlightoil toprevent
rust.
• Thetransmissionis pre-lubricatedand sealedatthe
factoryanddoesnotrequirelubrication.
Followtheenginemaintenancesectionforlubrication
scheduleandinstructionforenginelubrication.
Figure5-1:Areasto lubricateonmower. Deck Care
J
Figure5-2:Cutwireto removerearflap.
,_ WARNING:Nevertip the mower morethan 90°
in anydirection and do not leavethe mower
tipped for any length of time. Oil can drain intothe
upper partof the engine causing a starting problem.
1. Disconnectsparkplugwire.Draingasolinefromlawn
mower,or placea pieceof plasticunderthegascap.
2. Tipmowersothat itrestsonthe housing.Keepthe
sidewiththeair cleanerfacingup.Holdmowerfirmly.
3. Scrapeand cleantheundersideofthedeckwitha
suitabletool.Donotspraywithwater.
4. Putthemowerbackonits wheelsontheground.If
youhad putplasticunderthegascapearlier,make
sureto removeitnow.
General Recommendations
• Alwaysobservesafetyruleswhenperforming
anytypeof maintenance.
• Thewarrantyon thislawnmowerdoesnotcover
itemsthathavebeensubjectedtooperatorabuse
ornegligence.Toreceivefullvaluefromwarranty,
operatormustmaintainthelawnmoweras
instructedhere.
• Changingofengine-governedspeedwillvoid
enginewarranty.
• Alladjustmentsshouldbecheckedat leastonce
eachseason.
• Periodicallycheckallfastenersand makesurethese
aretight.
Engine Care
• Maintainoil levelasinstructedin theenginemainte-
nancesection.
Serviceaircleanerevery25 hoursundernormal
conditions.Cleaneveryfewhoursunderextremely
dustyconditions.Refertotheenginemaintenance
section.
Cleansparkplugand resetthegaponcea season.
Checktheenginemaintenancesectionforcorrect
plugtypeandgapspecifications.
• Cleanengineregularlywitha clothorbrush.Keepthe
coolingsystem(blowerhousingarea)cleantopermit
properaircirculation.Removeall grass,dirtand
combustibledebrisfrommufflerarea.
_1 ARNING:Alwaysstop engine,disconnect
sparkplug,and groundagainst engine
before performinganytype of maintenanceon your
machine.
Replacing Rear Flap
1. Toremoverearflap,cutoff theflatendofthewirerod
whichsecuresittothedeck.SeeFigure5-2.
2. Attachthenewflapand newrodtodeck,bendingthe
endsofthenewrodovertosecuretodeck.
10

=,
Blade Care
_ARNING:Whenremovingcuttingblade
for sharpeningor replacement,protectyour
handswith a pairof heavygloves or usea heavyrag
to holdblade.
1. Disconnectsparkplugwirefromsparkplug.Turn
moweron itssidemakingsurethattheairfilterand
thecarburetorareup.
2. Removebolt,bellbladesupport,blade,andblade
adapterfromtheenginecrankshaft.SeeFigure5-3.
3. Thebladecanbe sharpenedwitha fileor on a
grindingwheel.Donotattempttosharpentheblade
whileit isstillon themower.Whensharpeningblade,
followoriginalangleofgrind.Removemetalfromthe
heavysideandgrindcuttingedgesequallyto keep
bladebalanced.Balancethebladeona roundshaft
screwdrivertocheckforbalance.
_ARNING:Anunbalanced bladewill cause
excessivevibrationwhen rotating at high
speeds.It may causedamageto mower,and could
break causingpersonalinjury.
4. Lubricatetheenginecrankshaftandtheinnersurface
ofthebladeadapterwithlightoil.Slidetheblade
adapterontotheenginecrankshaft.Placetheblade
on theadaptersuchthatthesideoftheblademarked
"Bottom"(orwithpartnumber)facesthegroundwhen
themowerisin theoperatingposition.Makesurethat
bladeisalignedandseatedon bladeadapterflanges.
5. Placebladebellsupportonthe blade.Alignnotches
on thebladebell supportwith smallholesinblade.
Replacehexboltandtightenhexboltto torque:450
in.Ibs.rain.,600 in.Ibs.max.
Toensuresafeoperationofyourmower,periodically
checkthebladeboltforcorrecttorque.
Changing the Belt
1. Removetwoshoulderscrewssecuringfrontdrive
covertomowerdeck.Referto Figure5-4.Press
inwardonsidesoffrontdrivecoverand releasetabs
that secureittotheheightadjusterbrackets.Remove
drivecoverfrommower.
.
.
.
Loosenscrewholdingbelttensionspringto
transmission.SeeFigure5-4.Donotremovescrew
completely.Asyouloosenit,tensiononthebeltwillbe
released.
Pushtransmissionup a littleandslidebeltoffthe
transmissionpulley.Lift mowertoaccessbeltfrom
undersideofmower.Slidebeltoff ofenginepulleyand
aroundtheblade.SeeFigure5-5.
Replacewithnewbelt,workingaroundblade.Make
surebeltisfirmlyseatedon enginepulleywhilepulling
fromtheothersideand slidingit aroundthetransmis-
sionpulley.Tightenscrewloosenedearliertosecure
belttensionspringtothetransmission.Reassemble
frontdrivecover.
f
J
Figure5-3:Removebladeandrelatedhardware.
Figure5-4:Removecoverandloosentransmissionscrew.
f
Figure5-5:Removebeltfromaroundblade.
WARNING
When removing
the cutting blade
for sharpeningor
replacementor
when slidingthe belt
around it, protect
your handswith a
pairof heavy gloves
or usea heavy rag to
hold the blade.
An unbalanced blade
will causeexcessive
vibrationwhen rotat=
ing at high speeds. It
may cause damage
to mower, and could
break causing per-
sonal injury.
11

Trouble
For repairs beyond
the minor adjust'
ments listed here,
contact an authorized
service
i¸
Problem Cause Remedy
Enginefals to stat'l r 1....Bade contro d sengaged 1 Engagebade contro
2. Sparkplugbootdisconnected• 2. Connectwiretosparkplug•
3. Fue tankemptyor stalefuel. 3. Filltankwithclean,freshgasoline•
4. CHOKEnotactivated, 4. Chokeengineas instructedin
"OperatingYourLawnMower•
5 Faultysparkplug. 5• Clean,adjustgap,or replace•
6, Blockedfuel line. 6. Cleanfuelline.
7. Engineflooded• 7, Waita fewminutestorestart•
Engineruns erratic 1. Sparkplugbootloose. 1. Connectand tightenspark
plugboot.
2. Blockedfuellineor stalefuel. 2. Cleanfuelline;fill tankwithclean,
freshgasoline.
3. Ventingascapplugged. 3. Clearvent.
4. Waterordirt infuelsystem. 4. Drainfueltank.Refillwith
freshfuel.
5. Dirtyaircleaner. 5. Refertoenginemaintenance
section.
6. UnitrunningwithCHOKEapplied. 6. PushCHOKEknobin.
Engine overheats I 1, Engineoil levellow. 1. Fillcrankcasewithproperoil.
Occasional skips 1. Sparkpluggaptooclose. 1. Adjustgapto.030".
(hesitates)at
highspeed
Idles oorl 1 Sparkpug foued fauty or gap 1 Resetgapto 030" or repace
P Y • . .
toowide. sparkplug.
I 2. Dirtyaircleaner. 2. R:;_rotnO"enginemantenance
Excessive 1. Cuttingbladelooseor unbalanced. 1. Tightenbladeandadapter.
Vibration Balanceblade.
2. Bentcuttingblade. 2. Seean authorizedservicedealer.
Mower will not I 1. Wetgrass. 1. Donotmowwhengrassiswet;
mulch grass(If I waituntillatertocut
Equipped) 2. Excessivelyhighgrass. 2. Mowonceata highcuttingheight,
thenmowagainatdesiredheight
I or makea narrowercuttingpath•
3 Dullblade
• " 3. Sharpenor replaceblade•
Unevencut 1. Wheelsnotpositionedcorrectly. 1. Placeall fourwheelsinsame
heightposition.
2. Dullblade. 2. Sharpenor replaceblade.
Mowerw not 1. Beltnotinstalledproperly. 1. Checkbeltfor properpulleyinstal-
If r I atonand movement
se pope 2. Debriscogging driveoperation, 2. Stopengine,disconnectsparkplug
bootandcleanoutdebris•
' 3. Damagedorworn belt. 3. Inspectand replacebelt.
12

S".............
Off=Season Storage 4. Coatmower'scuttingbladewithchassisgreaseto
Thefollowingstepsshouldbetakentoprepareyourlawn
mowerforstorage.
1. Cleanandlubricatemowerthoroughlyasdescribedin
thelubricationinstructions.
2. Wedonotrecommendtheuseofa pressurewasher
or gardenhosetocleanyourunit.
3. Refertoenginemanualforcorrectengine
storageinstructions.
preventrusting.
5. Storemowerina dry,cleanarea.Donotstorenext
tocorrosivematerials,suchas fertilizer.
Whenstoringanytypeof powerequipmentin a poorly
ventilatedor metalstorageshed,careshouldbetaken
torust-prooftheequipment.Usinga lightoil or silicone,
coattheequipment,especiallycablesandall moving
partsofyourlawnmowerbeforestorage.
Safety Labels Found On Your Lawn Mower
REPLACEIMMEDIATELY.
J Engines emit carbon monoxide. DO NOT run in enclosed |
• _',3_ Jaroa. ,)
WARNING
DO NOTremove safety
(or any) labelsfrom
mower for any reason.
13

WARNING
Gasolineanditsvapors
areextremelyflammable
andexplosive. Fireor ex-
plosioncancausesevere
burnsordeath. Ifgasoline
isspilledonyourselfor
yourclothes,washyour
skinand changeclothes
immediately.
Startingenginecreates
sparking.Sparkingcart
ignitenearbyflammable
gases.Explosionand fire
couldresult.
Unintentional sparking
canresult infire or elec-
tric shock. Unintentional
start-upcanresultin
Ientanglement,traumatic
amputation, or laceration.
WARNING: Gasoline and itsvaporsare extremelyflammableand explosive.Fireor
explosioncancause severeburns ordeath. Ifgasoline isspilled onyourselforyour
clothes,wash yourskin and change clothes immediately.
Gasolineand its vapors are
extremely flammable and
explosive.Fire or explosioncan
cause severe burns or death. If
gasoline isspilled on yourself
or yourclothes, wash your skin
and change clothes immediately.
o
o
o
Whenaddingfuel,turnengineOFFandletengine
coolat least2 minutesbeforeremovinggascap.
Fillfueltankoutdoorsor inwellventilatedarea.
Useonlyanapprovedgasolinecontainer.
Neverfillcontainersinsideavehicleor ona truckor
trailerbedwitha plasticliner.Alwaysplacecontain-
ersonthegroundawayfromyourvehiclebefore
filling.
• If possible,removegas-poweredequipmentfromthe
truckor trailerandrefueliton theground.Ifthis is
notpossible,thenrefuelsuchequipmentona trailer
witha portablecontainer,ratherthanfroma gasoline
dispensernozzle.
Keepthenozzlein contactwiththerimof thefuel
tankorcontaineropeningat alltimesuntilfuelingis
complete.Donotusea nozzlelock-opendevice.
Donotoverfillfueltank.Filltanktoapproximately
2 cmbelowlowestportionof necktoallowforfuel
expansion.
Keepgasolineawayfromsparks,openflames,pilot
lights,heat,andotherignitionsources.
Neverfuelequipmentindoorsbecauseflammable
vaporswillaccumulatein thearea.
Extinguishallcigarettes,cigars,pipes,andother
sourcesofignition.
Checkfuelline,tank,cap,andfittingsfrequentlyfor
cracksor leaks.Replaceif necessary.
Whenstartingengine,makesuresparkplug,muffler,
fuelcapandaircleanerarein place.
Donotcrankenginewithsparkplugremoved.
If fuelspills,wait untilitevaporatesbeforestarting
engine.
Whenoperatingequipment,donottipengineor
equipmentatanglewhichcausesgasolinetospill.
Donotchokecarburetorto stopengine.
Whentransportingequipment,transportwithfueltank
EMPTY.
Whenstoringgasolineorequipmentwithfuelin tank,
storeawayfromfurnaces,stoves,waterheatersor
otherappliancesthathavepilotlightorotherignition
sourcebecausetheycanignitegasolinevapors.
,_ Starting engine creates spark-
ing. Sparking can ignite nearby
__ flammable gases. Explosion and
fire could result,
If thereisa naturalor LPgasleakagein area,donot
startengine.
• Donotusepressurizedstartingfluidsbecausevapors
areflammable.
_ ngines give off carbon mon-
oxide, an odorless, colorless,
poisonous gas. Breathing carbon
monoxide can cause nausea,
fainting, or death.
Startandrunengineoutdoors.
Donotstartor runenginein enclosedarea,evenif
doorsor windowsare open.
_ nintentional sparking can result
infire or electric shock. Unin-
tentional start-up can result in
entanglement, traumatic amputa-
tion, or laceration.
• Beforeperformingadjustmentsor repairs,disconnect
sparkplugwireand keepitawayfromsparkplug.
• Whentestingforspark,useapprovedsparkplug
tester.
Donotcheckforsparkwithsparkplug removed.
14

Runningengineproduces heat.
Engineparts, especially muffler,
become extremely hot. Severe
thermal burns canoccur on
contact. Combustibledebris,
suchas leaves,grass, brush, etc.,
cancatchfire.
• Allowmuffler,enginecylinder,andfinstocoolbefore
touching.
• Keepchildrenawayfromhotor runningengines.They
cansufferburnsfroma hotmuffler.
Removeaccumulatedcombustiblesfrommufflerand
cylinderarea.
_ Rotating engine partscan
contactor entangle hands, feet,
hair, clothing,or accessories.
Traumaticamputation or severe
lacerationcan result.
Operateequipmentwithguardsin place.
Keephandsandfeetawayfromrotatingparts.
SafetyAlert
• Tieuplonghairand removejewelry.
Donotwearloose-fittingclothing,danglingdraw-
stringsor itemsthatcouldbecomecaught.
_ apid retractionof starter cord
(kickback) will pull hand and
arm toward engine faster than
you can let go. Brokenbones,
fractures, bruisesor sprains
could result.
•Whenstartingengine,pullcordslowlyuntilresis-
tanceisfelt,thenpullrapidly.
•Removeall externalequipment/engineloadsbefore
startingengine.
•Directcoupledequipmentcomponentssuchas, but
notlimitedtoblades,impellers,pulleys,sprockets,
etc.,mustbesecurelyattached.
Safety Label Location
Thislabelwarnsyouofpotentialhazardsthat can
causeseriousinjury.Readitcarefully.Referto Figure
8-1forexplanationofsymbols.If thelabelcomesoff or
becomeshardto read,contactthedealerforreplace-
ment.
International Symbols and Meanings
A
HotSurface ToxicFumes GasolineIs
Flammable
ReadOwner's UnleadedFuel Start Run
Manual
Figure8-1:Internationalsymbolsandmeanings.
15
WARNING
Running engine produces
heat.Engineparts,es-
peciallymuffler, become
extremely hot. Severe
thermal burns canoccur
on contact.Combustible
debris,suchas leaves,
grass,brush, etc., can
catchfire.
Rotatingengine parts
cancontactor entangle
hands,feet, hair,clothing,
or accessories. Traumatic
amputation or severe
laceration canresult.
Rapidretractionofstarter
cord(kickback) willpull
handand armtoward
enginefaster thanyou
cartletgo.Broken bones,
fractures, bruises or
sprainscouldresult.

IMPORTANT:This
engineis shpped
without gasolineoroil
in the engine. Running
theenginewith insuf-
ficient oilcan cause
seriousenginedamage
andvoid the engine
warranty.
IMPORTANT:Using
non-detergentoil or 2-
strokeengineoil could
shorten the engine's
service life.
Be sureto checkthe
engineon a level
surface withthe engine
stopped.
Know Your Engine
Fuel Cap
Starter
Gri
Air Cleaner
Oil Fill Ca
Oil Drain----_
Muffle_
Figure9-1:Themajorcomponentsoftheengine.
Spark Plug
Readthissectionbeforestartingyourlawnmowerengine.Comparetheillustrationin Figure9-1withyourlawnmower
enginetofamiliarizeyourselfwiththelocationofvariouscontrolsandadjustments.
Pre-Operation Check
Oil Recommendations
iMPORTANT:This engineisshippedwithout gaso-
line or oil inthe engine.Runningthe enginewith
insufficientoil can causeseriousenginedamage
and void the enginewarranty.
• Beforestartingengine,fillwithoil. Donotover-fill.Oil
capacityisabout20oz.
Usea 4-stroke,oran equivalenthighdetergent,
premiumqualitymotoroilcertifiedtomeetorexceed
U.S.automobilemanufacturer'srequirementsforservice
classificationSG,SE MotoroilsclassifiedSG,SFwill
showthis designationon thecontainer.
SAE10W-30is recommendedforgeneral,alltem-
peratureuse.If singleviscosityoil isused,selectthe
appropriateviscosityfortheaveragetemperaturein your
areafromthecharttotheright.
__ lOw
___ 20w
m__ 20
mmu30
40 IIm_
I
20w40, 20w50 ____mh_,
I v
15w40, 15w50______
®,10w40 _____mhk,
10w30 _____1
.L
("C)-30 ° -20 ° -10° 0° 10° 200 300 400
(°F)-20 ° 0° 200 400 600 800 100°
Ambient Temperature
1. SingleViscosity
2. MultiViscosity
iMPORTANT:Usingnon detergent oilor 2-stroke
engineoilcouldshortenthe engine'sservicelife.
16

Check Oil Level
iMPORTANT:Besure to checkthe engine onalevel
surfacewith theengine stopped.
1. Removetheoil fillercapandwipethedipstickclean.
SeeFigure9-2.
2. Insertthedipstickintotheoil fillerneck,butdo not
screwitin.
3. If thelevelislow,slowlyaddoil totheupperlimiton
thedipstick.SeeFigure9-2inset.
4. Tightendipstickfirmlybeforestartingengine.
IMPORTANT:Donot overfill. Overfilling with oil may
causesmoking,hardstarting, spark plugfouling, or
oil saturation of air cleaner.
Fuel Recommendations
Useautomotivegasoline(Unleadedor lowleadedto
minimizecombustionchamberdeposits).Neverusean
oil/gasolinemixtureor dirtygasoline.Avoidgettingdirt,
dust,or waterinthefueltank.
,_bl= WARNING:Gasoline isextremelyflam-
mableand isexplosiveunder certain
conditions.
Refuel in a well-ventilatedarea with theengine
stopped. Donot smoke or allow flames or sparks
inthe areawhere the engine isrefueledor where
gasoline isstored.
Donot overfill thefuel tank (thereshould be no fuel
inthe filler neck). Afterrefueling, makesure thetank
cap isclosed properlyand securely.
Be careful not to spill fuel when refueling. Spilled
fuel or fuel vapormayignite.If anyfuel isspilled,
makesure the areaisdry beforestarting the engine.
Avoidrepeatedor prolongedcontact with skin or
breathing of vapor.
Check Fuel Level
1. Cleanaroundfuelfill beforeremovingcaptofuel.
2. Filltankto approximately1-inchbelowlowestportion
ofnecktoallowforfuelexpansion.Becarefulnotto
overfill.
iMPORTANT:Beforerefueling,allow engineto cool
2 minutes.
Starting The Engine
,__1i= WARNING:Alwayskeephandsand
feet clearofequipmentmoving parts.
Donot usea pressurizedstarting fluid.
Vaporsare flammable.
Oil Fill Cap/ _ .
Dipstick
J
Figure9-2:Checkingtheoil level.
Figure9-3:Startingthemower.(Yourmowermaydifferfromthat
shown)
2. Standingbehindthemower,depressthebladecontrol
handleandholditagainsttheupperhandle.
3. Pullthe startergrip lightlyuntilresistanceisfelt,
thenpull rapidlytoovercomecompression,prevent
kickback,andstartengine.Repeatif necessary.See
Figure9-3.
IMPORTANT:Donot allow thestarter gripto snap
back against the ropeguide. Return itgently to
preventdamageto the starter.
4. Whenenginewarmsup,pushinthechokeknob.See
Figure9-3.
Stopping The Engine
1. Pulloutthechokeknoblocatedontheleft sideof 1. Releasethebladecontrol.
theupperhandle.SeeFigure9-3.Useofthechoke
maynotbe necessaryiftheengineiswarmortheair
temperatureishigh.
17
Always keephands and
feet clearofequipment
moving parts.Donot use
apressurizedstarting
fluid. Vaporsare flare,
mable.
i
IMPORTANT:Do not
allowthe starter gripto
snap backagainstthe
engine. Return itgently
to preventdamageto
the starter.

WARNING
Shut off the engine
beforeperforming
type ofmaintenance,
ro.roveo ,oo!doo o!
start-upidisconnect
t,e parkpboot:
Beforetipping engine
drain oil, drain fuel
from tank by running
engine untilfuel tank
is empty;
iMPORTANT:Besure
to check engineona
levelsurfaceWth the
engine stopped Drain i
the oilwhile the engine
isstillwarm to assure
rapidand complete
draining:
i
WARNING:Shut off theengine before
performingany maintenance.To
preventaccidental start-up, disconnect
the spark plugboot.
IMPORTANT:Ifenginemustbe tippedtotransport
equipmentorto inspector removegrass,keepspark
plugsideofengineup.Transportingor tippingengine
sparkplugdownmaycausesmoking,hardstarting,
sparkplugfouling,or oil saturationofaircleaner.
Maintenance Schedule
Periodicinspectionandadjustmentof theengineis
essentialifhighlevelperformanceisto bemaintained.
Regularmaintenancewillalsoensurea longservicelife.
Therequiredserviceintervalsandthekindofmainte-
nancetobe performedare describedin thetablebelow.
Followthehourlyor calendarintervals,whicheveroccur
first.Morefrequentserviceis requiredwhenoperatingin
adverseconditions.
Tasks
ChangeEngine
Oil
ServiceAir
Cleaner
First5 hours
v"
ServiceSpark
Plug
CleanFinger ........
Guard
Eachuseor
every5 hours
CleanAround
Muffler
Everyseason
or 25hours Everyseason
or50 hours
v"
Everyseason
or 100hours
v"
Service Dates
1-Servicemorefrequentlywhenusedindustyareas.
ff Ifoperatingunderheavyloador highambienttemperature.
fOil FillCap
P
Drain
Figure10-1:Changingtheoil.
Oil Service
•Checkoil levelregularly.
J
Besurecorrectoil levelismaintained.Checkevery
fivehoursordailybeforestartingengine.Seeoil
checkingprocedureintheOperationsection.
Oil Change
IMPORTANT:Be suretocheckengineona levelsurface
withtheenginestopped.Draintheoilwhiletheengineis
stillwarmto assurerapidandcompletedraining.
Removeoilfillcapanddrainoilbyeitherremoving
drainplugor turningmoweron itsside(aircleanerside
up)andallowingoil todrainintoa suitablecontainer.
SeeFigure10-1.
WARNING:Beforetipping engineor
equipmentto drain oil, drain fuel from
tank byrunningengine until fuel tank is
empty.
2. Reinstallthedrainplug(if removed),andtightenit
securely.
3. Refillwiththe recommendedoil (seeOperation
section)andchecktheoil level.See Figure10-1.
4. Reinstalltheoilfillcapsecurely.
18

IMPORTANT:Usedmotoroilmaycauseskincancer
if repeatedlyleft incontactwiththeskinforprolonged
periods.Althoughthisisunlikelyunlessyouhandleused
oilon a dailybasis,itis stilladvisabletothoroughlywash
yourhandswithsoapandwaterassoonaspossible
afterhandlingusedoil.
NOTE:Pleasedisposeofusedmotoroil in a mannerthat
iscompatiblewiththeenvironment.Wesuggestyoutake
itin a sealedcontainertoyourlocalservicestationfor
reclamation.Donotthrowit inthetrashor pouriton the
ground.
PaperElement
Air Cleaner Service
Adirty aircleanerwillrestrictairflowtothecarburetor.
Topreventcarburetormalfunction,servicetheaircleaner
regularly.Servicemorefrequentlywhenoperatingthe
enginein extremelydustyareas.
__k ARNING:Neveruse gasolineorlow
flash pointsolventsfor cleaningthe
air cleanerelement.Afire or explosion
couldresult.
IMPORTANT:Neverruntheenginewithouttheair
cleaner.Rapidenginewearwillresult.
1. Removethewingboltandtheaircleanercover.
Removetheelementsandseparatethem.SeeFigure
10-2.Carefullycheckbothelementsforholesortears
andreplaceifdamaged.
2. Foamelement:Washtheelementin a solutionof
householddetergentandwarmwater,thenrinse
thoroughly,or washin nonflammableorhighflash
pointsolvent.Allowtheelementtodrythoroughly.
Soaktheelementin cleanengineoil andsqueezeout
theexcessoil.Theenginewillsmokeduringinitial
start-upif toomuchoil isleft inthefoam.
3. Paperelement: Taptheelementlightlyseveraltimes
ona hardsurfaceto removeexcessdirt,or blow
compressedair throughthefilterfromtheinsideout.
Nevertry tobrushthedirtoff; brushingwillforce
dirtintothefibers.Replacethepaperelementifit is
excessivelydirty.
Foam Element
Figure10-2:Servicingtheaircleaner.
Spark Plug
Spark Plug
Figure10-3:Thesparkplugandboot.
Spark Plug Service
__i= ARNING:DONOTcheck for spark
with spark plugremoved. DONOTcrank
enginewith spark plugremoved.
Toensureproperengineoperation,thesparkplugmust
beproperlygappedandfreeofdeposits.
1. Removethesparkplugbootandusea sparkplug
wrenchto removetheplug.See Figure10-3.
,_ WARNING:ifthe engine hasbeen
running, the muffler will be very hot. Be
carefulnot to touch the muffler.
2. Visuallyinspectthesparkplug.Discardthesparkplug
ifthereisapparentwear,or iftheinsulatoriscracked
orchipped.Cleanthe sparkplugwitha wirebrushif it
istobe reused.
WARNING
Never usegasoline
or lowflash point sol-
vents for cleaningthe
air cleaner element.
Afire or explosion
could result.
DONOTcheck for
spark with spark plug
removed. DO NOT
crank engine with
spark plug removed.
if the engine has
been running, the
muffler will be very
hot. Be careful not to
touch the muffler.
19

Maintaining
WARNING
Accumulation of
debris around muffler
cause afire:
Inspect and clean
b fo ooveryo
IMPORTANT:DOnot
sprayengineWithwater
to clean becausewater
could contaminatefuel
Using agarden hose
orpressureWashing
equipment Canaso
force waterintothe
aircleaner ormuffler
opening:Water in the
air cleane! will soak
the paper e!emen
and water that Passes
throughthe element
or muffler canenter
the cylinder;causing:
damage: i
f
Electrode
--,,- *-- 0.030 in.
Figure10-4:Measurethepluggapwithafeelergauge.
3. Measurethepluggapwitha feelergauge.Correct
asnecessarybybendingsideelectrode.SeeFigure
10-4.Thegap shouldbe setto0.030in.
4. Checkthat thesparkplugwasherisingoodcondi-
tionandthreadthesparkpluginbyhandto prevent
cross-threading.
5. Afterthe sparkplugisseated,tightenwitha spark
plugwrenchtocompressthewasher.
NOTE:Wheninstallinga newsparkplug,tighten1/2
turnafterthesparkplugseatsto compressthewasher.
Whenreinstallinga usedsparkplug,tighten1/8-1/4turn
afterthesparkplugseatstocompressthewasher.
IMPORTANT:Thesparkplugmustbe securelytight-
ened.Animproperlytightenedsparkplugcanbecome
veryhotand maydamagetheengine.
Clean Engine
If theenginehasbeenrunning,allowit tocoolforat
leasthalfan hourbeforecleaning.Periodicallyremove
grassanddirt build-upfromengine.Cleanfingerguard
andaroundmuffler.Cleanwitha brushor compressed
air.
Storage
Enginesstoredover30 daysneedtobedrainedoffuel
topreventdeteriorationandgumfromforminginfuel
systemor onessentialcarburetorparts.Ifthegasolinein
yourenginedeterioratesduringstorage,youmayneedto
havethecarburetor,andotherfuelsystemcomponents,
servicedor replaced.
1. Removeallfuelfromtankby runningengineuntilit
stopsfromlackoffuel.
2. Changeoil.SeeOilChangesection.
3. Removesparkplugandpourabout1/2anounceof
engineoil intocylinder.Replacesparkplugandcrank
slowlytodistributeoil.
4. Cleangrassanddebrisfromaroundengine,under
fingerguard,and under,aroundandbehindmuffler.
Touchupanydamagedpaint,andcoatotherareas
thatmayrustwitha lightfilmofoil.
5. Storeina clean,dryandwellventilatedareaawayfrom
anyappliancethatoperateswithaflameor pilotlight,
suchasafurnace,waterheater,or clothesdryer.Also
avoidanyareawitha sparkproducingelectricmotor,
orwherepowertoolsare operated.
6. If possible,alsoavoidstorageareaswithhighhumidity,
becausethat promotesrustandcorrosion.
7. Keeptheenginelevelin storage.Tiltingcancausefuel
oroil leakage.
Removing From Storage
1. Checkyourengineasdescribedin thePre-Operation
Checksectionofthis manual.
2. If thefuelwasdrainedduringstoragepreparation,fill
thetankwithfreshgasoline.Ifyoukeepa container
ofgasolineforrefueling,makecertainitcontainsonly
freshfuel.Gasolineoxidizesanddeterioratesover
time,causinghardstarting.
3. If thecylinderwascoatedwithoil duringstorage
preparation,theenginewillsmokebrieflyatstartup.
Thisisnormal.
IMPORTANT: Do not spray engine with water to clean
because water could contaminate fuel. Using a garden
hose or pressure washing equipment can also force
water into the air cleaner or muffler opening. Water in
the air cleaner will soak the paper element, and water
that passes through the element or muffler can enter the
cylinder, causing damage.
__lk ARNING:Accumulationof debris
around muffler could causea fire.
Inspect and cleanbefore every use.
2O
Other manuals for 44M
1
Other MTD Lawn Mower manuals

MTD
MTD 120-462R000 User manual

MTD
MTD 500 Thru 509 User manual

MTD
MTD 588Q User manual

MTD
MTD 13AX615H730 User manual

MTD
MTD Yard-Man 12A-559K402 User manual

MTD
MTD 19A70020OEM Service manual

MTD
MTD 020 Series User manual

MTD
MTD 132-620A User manual

MTD
MTD 127-362-000 User manual

MTD
MTD 690 through 699 User manual