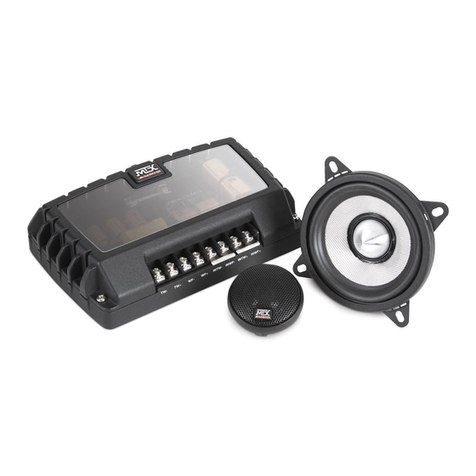
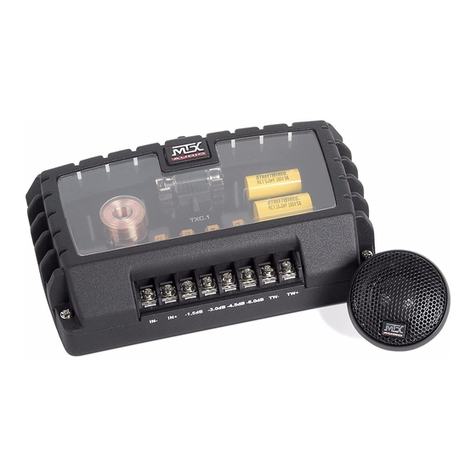
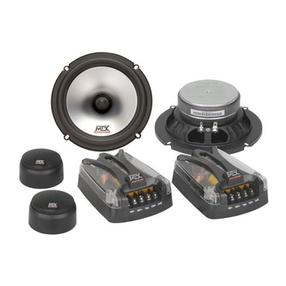
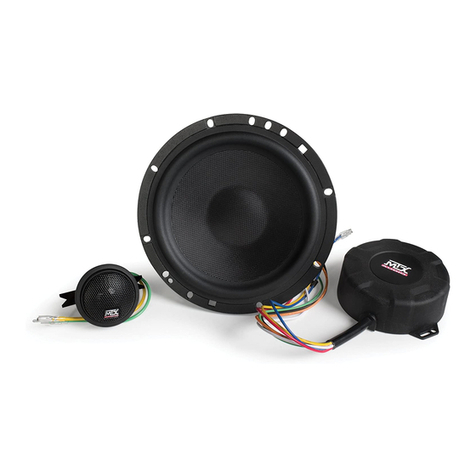
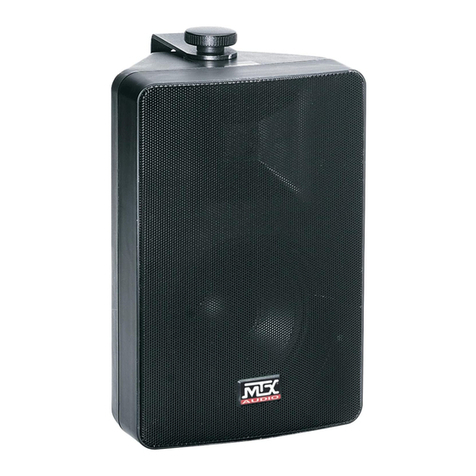
MTX Thunder AXE TXC4-1 User manual

OWNER’S MANUAL
MTX.COM
MTX002045 TXC.1 Owners Manual.indd 1MTX002045 TXC.1 Owners Manual.indd 1 4/18/05 8:05:35 AM4/18/05 8:05:35 AM

MTX
.
.
COM
SPECIFICATIONS
Model TXC4.1 TXC5.1 TXC6.1 TXC6.0 TXC.1
Description 4”
Components 5-1/4”
Components 6-1/2”
Components 6-1/2”
Woofer 25mm
Tweeter
Midbass Cone
Glass
Fiber with
Aluminum
Deposition
Glass
Fiber with
Aluminum
Deposition
Glass
Fiber with
Aluminum
Deposition
Glass
Fiber with
Aluminum
Deposition
N/A
Tweeter Teteron
Dome Teteron
Dome Teteron
Dome N/A Teteron
Dome
Impedance 4 Ohm 4 Ohm 4 Ohm 4 Ohm 4 Ohm
Frequency
Response 50Hz-25kHz 45Hz-25kHz 43Hz-25kHz 43Hz-250Hz 3.5kHz-25kHz
Power (Watts RMS) 100 125 150 150 75
Peak Music Power 200 250 300 300 150
Sensitivity @ 2.83V 88dB 90dB 91dB 91dB 91dB
Voice Coil 1.25” 1.5” 1.5” 1.5” 25mm
X-Max 2.5mm 4.8mm 4.8mm 4.8mm N/A
Woofer Mounting 1-3/4” 2-1/4” 2-1/4” 2-1/4” N/A
Woofer Cut-out Dia. 3-1/2” 4-1/2” 5-19/32” 5-19/32” N/A
Tweeter Mounting
Depth 1” 1” 1” N/A 1”
Tweeter Cut-out
Dia. 1-7/8” 1-7/8” 1-7/8” N/A 1-7/8”
Tweeter Mounting
Options Angle, Flush,
Surface Angle, Flush,
Surface N/A Angle, Flush,
Surface
CrossoverAdjustable
Tweeter Level (dB) 0, -1.5, -3,
-4.5, -6 0, -1.5, -3,
-4.5, -6 0, -1.5, -3,
-4.5, -6 N/A 0, -1.5, -3,
-4.5, -6
Off-axis
Compensation 0˚, 30˚, 60˚ 0˚, 30˚, 60˚ 0˚, 30˚, 60˚ N/A N/A
Bi-amp Inputs Yes Yes Yes Yes N/A
INTRODUCTION
Thankyoufor choosing MTXtohelp reach yourultimategoal with yourvehicle.MTX TXC.1 tweetershave
exceptionalhighfrequency handling andwillgreatly increase soundqualityin any system.Addingthem to a
fullTXCHigh-end Component systemanda matching MTXamplifierwithStreetWires connectionswillput
youina better positiontohear,feel,and experienceallofthe musictheartistintended.
TheTXC.1tweeters are partofthe TXC seriesofcomponent speakers whicharethe best intheMTX offering
offull-rangespeakers. They offermanyadded features thataredesigned for thedistinguishedlistener. Five
levelsoftweeter attenuation, ateterondome, and threemountingoptions are justsomeof the TXC.1features
thathelpreproduce the musicwithexceptional dynamics anddetailregardless on mountinglocationand
positionwithinthe vehicle. TheTXCseries also offerscompletecomponent systems andanadd-on mid-bass
driverthatfurther define themusicalexperience.The TXC6.0isanadditional wooferthatcanchange a2-way
systemintoa true 3-waysystemand add yetanotherdimension to theimaging.Call 1-800-CALL-MTX for
moreinformation.
BEFORE STARTING
MTXrecommendsthat you haveyournew speakers installedbyan authorized MTXretailer,preferably
MECPcertified.If you dodecideto do ityourself,make sure youhaveread the instructionscarefullyand that
youhavethe following tools:
•Electricdrill
•Phillipsbit or screwdriver
•1/8”bit
•Doorpanel puller
•Wirecutters/crimpers
•Metalcutting tool
•Safetyglasses
•X-actoknife
Throughoutinstallation,keep in mindtheultimate objective ofcreatingan ideal soundstageandexceptional
imaging.Thisrefers to theexperienceyou get whenyousit in yourseatwith your headupand shoulders
straight,closeyour eyes, andlisten.Where does themusicseem to becomingfrom? In anidealworld, you
wouldhearall music fromfrontand center,meaning itsoundslikea bandisperformingon yourhood.Raising
thesoundstageis a veryimportantprocess and everyoptionshould be consideredinorder to haveyour
soundasup and infrontas possible.
Removingthe Door Panel
Pleasebeaware that today’s carshavedoorpanels thatarenotdesigned tocomeaparteasily; theyare
designedbythe factory tosittight against thedoorand not rattle.Itis important tonotethat if theproper
proceduresarenot followed, thedoorpanels can easilybecomedamaged and makethemfit improperly
whenyou’retrying to reinstallthem.
Useadoor panel pullertoremove the doorpanel,and be awarethereare often hiddenscrewsthat, if
overlooked,cancause the paneltocrack or breakwhenforce is appliedtoremove door panel.Itmight be a
goodideato do someresearchon your specificcartobe suretheyareall removedbeforecontinuing.Even
anewcar owner needstobe aware ofthispotential issue. Buyinganew door panelisan expensive process
sopleasetake note ofthepotential for damage.
Withthedoor panel off,itis a perfecttimeto add sounddampener.Themaingoal ofsounddampenersis to
addmassto the metalinthe door,causing lessrattleand“ring” whichwillhelpto improvetheoverallsound
ofyournew speakers. Italsohelps prevent againstoutsidenoise by addinginsulation.Sound dampening
materialcanbe purchased fromyourlocal retailer andisavailable in manydifferentforms, and kits,formany
differentapplications.Please make sureyoupurchase the correcttypefor your specificproject.
Note:Before cutting anything, pleaseuse common sense andmake sure that nowires or glass willinter-
ferewith cutting tools. ALWAYS WEARPROPERSAFETY GLASSES. Besureall wires areclearof moving
partssuch as window crankmechanisms and trunk hinges.Use rubber grommets whenrunning wires
throughsharp edged metal holes,which may wear throughthe wire’sinsulation.
Donotmount speakers wheretheycould come incontactwith:
•Thedoor’swindowglass
•Thewindow crank handleorgear assembly whenrotated
•Thetrunk springs, shocktowers,or trunk lid
•Thegas tank orfuellines
TWEETER MOUNTING
MTX002045 TXC.1 Owners Manual.indd 2-3MTX002045 TXC.1 Owners Manual.indd 2-3 4/18/05 8:05:36 AM4/18/05 8:05:36 AM

MTX
.
.
COM
Whenpositioningthe tweeter forthebest imaging, aimthepassenger side tweetertowardwhere the driver’s
headwillbe. The sameprocessshould also becompletedon the driver’s sidetweeterbutthis timeyou’llaim
thetweetertoward where thepassenger’sheadwillbe. Positioningthetweetersin thismannerwillhelp to
setupa very solidsoundstage.
SurfaceMounting
•Selectmounting location. Markwirehole and screwlocationsusing the surfacecupas a template.
•Drillholes for tweeterwiresand mounting screws
•Usingthe supplied screws,attachthe surface cuptosurface
•Runtweeter wires throughthehole and twistthetweeter into thecup
•Connectthe tweeter wirestothe supplied crossover
Flushand Angle Mounting
•Selectmounting location andmarka 1-7/8” diameterholewith supplied template
•Cutout the 1-7/8”hole(a hole sawisrecommended for metalandhard plastic surfaces;anX-acto knife for
anyothersurface)
•Placethe supplied bevelheadedscrews through theflush/anglecupand threadintothemounting clip,but
donottighten
•Take theassembledflush/anglecup andmountingclipand placethemintothe 1-7/8”diameterhole,making
surethemountingclip goescompletelythroughthe hole
•Tightenthescrew inthebaseof theflushcupuntil thecupiscompletely tight
•Splittweeter wires andrunthrough the holesandtwist the tweeterinto thecup
CROSSOVER MOUNTING
Whenchoosingthe mounting locationofthe crossover,accessibility isimportant.Adjustmentsto theon-/off-
axissettingand tweeter attenuationareto be madeafterthe components havebeeninstalled, so convenient
positioningofthe crossover iscrucial. Also,the crossover haselectroniccomponents that mustbemounted
soitdoes not comeincontact with moisture.
WIRING
Wheninstallingthese tweeters considertheage of thefactorywiring and gauge(size)of wire. Ifthevehicle
isanolder model orwaspre-wired with smallwire(18 gauge orless),running new highperformancewire
(http://www.streetwires.com/products/speakerCable/microUltraCable.cfm)will benecessary.Thespeaker
wireshouldrun from theamplifier’soutputterminals,under the carpetandthrough the factoryrubberboot
(loom)thatprotects the wiresinthe inner doorjam.If the factorybootcannot be used,takeother measures
toprotectthese wires asbestyou can. Sometimesthedoor has tobecompletely removed tousethe factory
boot.Ifthis is somethingthatyou do notfeelcomfortable doing, pleaseaska professional tohelpyou. The
wiresshouldoriginate from theamplifierandattach tothecrossoverinputs.
CROSSOVER CONNECTIONS
Includedwitheach TXC.1 tweetersystemis a 1-way18dBper octave separatecrossovernetwork. The
crossovernetworkallows each tweetertoindependently recreate frequencieswithina precisely-designed
rangesothat they donotbecome distorted bytryingto reproduce frequenciesthatthey are notphysically
ableto.Basically,itensuresthatthe tweeterdoesnotreceive lowbassnoteswhich coulddamageit.The
18dBperoctave design complementsthetweeter to providegreatermusical detail.
Note:Pay close attention tothe markings on thecrossover to be certainthe speakers are inthe correct
outlet.If the tweeter isaccidentally connected to thewrong crossover terminal, itwill be damaged.
TWEETER ATTENUATION ADJUSTMENT
SURFACE MOUNT
ANGLE MOUNT
1 "
7
/
8
FLUSH MOUNT
1 "
7
/
8
INSTALLATION KEY
MTX002045 TXC.1 Owners Manual.indd 4-5MTX002045 TXC.1 Owners Manual.indd 4-5 4/18/05 8:05:36 AM4/18/05 8:05:36 AM
MTX
.
.
COM
Whensettingthe attenuation ofyourtweeter,youare goingtowantto adjustthislevelby thedistancefrom
tweetertolistener as wellaspersonal preferences. The attenuationhasfivelevels thatrangefrom0dB to
–6dB.Generally,thiswouldbesetup with0dBbeingfurtheraway,and–6dBbeingcloser,tothelistener’sear.
Ifyouhave the attenuationsetat 0dB andthespeakers seem toobright,adjust the leveldownwarduntil it
matchesyourpersonal taste. Ifthespeakers seem toodimor quiet, adjustthetweeter upward.
TXC.1attenuationadjustments are ontheconnection terminals ofthecrossover.Beginby connectingthe
amplifier’s negativewiretothe IN-terminal;thiswill stayconnectednomatter whattweeterattenuation
worksbestforyour specificneeds.Ifyou connecttheamplifier’spositivewireto theIN+terminal,the tweeter
attenuationisset at 0dB.Ifyou connect ittothe –1.5dB terminal,thatwill be thetweeterattenuation. Testall
thetweeterattenuations from 0dBto–6.0dB in ordertosee what soundsbestfor your particularsituation.
Note:Adding the TXC.1 tweetersto a full TXCcomponent system can dramaticallyaffect the balance
betweenyour existing TXC tweeterand the 0, 30,and 60 degree settingof your midrange.Aftersetting the
TXC.1tweeter to a comfortablelevel, you may needto readjust the tweeterattenuation and midrange off-
axisadjustment on your fullTXC component system toachieve the optimum balance.See the TXC6.1, 5.1,4.1
Owner’s Manualforinstructions on howtomake these adjustments.
MTX002045 TXC.1 Owners Manual.indd 6-7MTX002045 TXC.1 Owners Manual.indd 6-7 4/18/05 8:05:37 AM4/18/05 8:05:37 AM

© 2005 MTX. All rights reserved. MTX, Thunder, Axe and StreetWires are trademarks of Mitek.
Designed and Engineered in the U.S.A.
Due to continual product development, all specifications are subject to change without notice.
MTX Audio, 1 Mitek Plaza, Winslow, IL 61089 U.S.A. MTX002045 RevA 4/05 21A8049
WARRANTY STATEMENT
MTXAudioThunder Axe High-EndComponentspurchased in theUnitedStates from anauthorizedMTX
Audiodealerare guaranteed againstdefectsin material andworkmanshipfor a periodofONE YEAR from
thedatepurchased by theenduser,andlimited totheoriginalretail purchaseroftheproduct. Productfound
tobedefective during thatperiodwill be repairedorreplaced by MTXAudioat no charge.Thiswarranty is
voidifit is determinedthatunauthorized parties haveattemptedrepairs or alterationsofany nature. Warranty
doesnotextend to cosmeticsorfinish.Before presumingadefect is presentinthe product, becertainthat
allrelatedequipment and wiringisfunctioning properly.MTXAudiodisclaims anyliabilityforother incurred
damagesresultingfrom product defects.Anyexpenses incurred intheremoval and reinstallationofproducts
arenotcovered by thiswarranty.MTXAudio’stotal liabilitywillnotexceed thepurchasepriceof theproduct.
Ifadefect is present,yourauthorized MTX Audiodealermay be abletoeffect repairs. Proofofpurchase
isrequiredwhen requesting service.Pleaseretain your salesreceiptand take amomentto register your
productonline at mtx.com.
MTX002045 TXC.1 Owners Manual.indd 8MTX002045 TXC.1 Owners Manual.indd 8 4/18/05 8:05:37 AM4/18/05 8:05:37 AM
This manual suits for next models
4
Table of contents
Other MTX Speakers manuals

MTX
MTX RNGRPOD65 User manual

MTX
MTX Blueprint 620WE User manual

MTX
MTX 620CE User manual

MTX
MTX T5512-44 User manual

MTX
MTX Blueprint 520C User manual

MTX
MTX MUD65PL User manual

MTX
MTX Blueprint 512C User manual

MTX
MTX Blueprint 620CE User manual

MTX
MTX Road Thunder RT8PT User manual

MTX
MTX MP41B User manual