Muarah MU-2 User manual

1
User manual
MU-2 Tube Phono Preamplifier
Our mission is to make sorrounding reality inspiring for eyes and for
ears. Our goal is to offer novel, luxury things –things with a bit of
creator’s soul as a contrast to pervasive trumpery and mediocrity. Using
those special things shall be inspiring and nice. Our inspiration are
audio and automotive worlds seemingly outlying but in fact having a lot
in common. When you read about our turntable design you will notice
it clearly.
So, relax and spend a while with us…
Jacek Siwiński & Wiesław Zawada
Muarah
www.muarah.pl
muarah@muarah.pl
V1.2

Muarah
MU-2 TUBE PHONO PREAMPLIFIER
USER MANUAL
v1.2
2
MU-2 Tube Phono Preamplifier
High end MU-2 tube phono is designed to preamplify subtle signal from turntable cartridge and make
necessary frequency correction (low frequency signals are recorded on vinyl records with smaller
amplitude than high frequencies). It’s a must-have Hi-Fi component for every vinyl lover.

Muarah
MU-2 TUBE PHONO PREAMPLIFIER
USER MANUAL
v1.2
3
MU-2 features
MM (Moving Magnet) and MC (Moving Coil) cartridges support
Input impedance matching in range 50Ω-1kΩ for MC carts.
„On the fly” input impedance change during music listening with automatic mute function
Warm-up function: signal is attached to outputs with delay mandatory to stabilize tubes
operating points.
Immediate outputs detach when device is switched off or in case of AC mains is down.
Physical separation of left and right channel path to decrease stereo channels cross talk
High quality resistors (1% tolerance) and capacitors (1% and 5% tolerance) in audio path for high
stability and accuracy of RIAA frequency correction curve.
Microprocessor controlled circuit
Connection
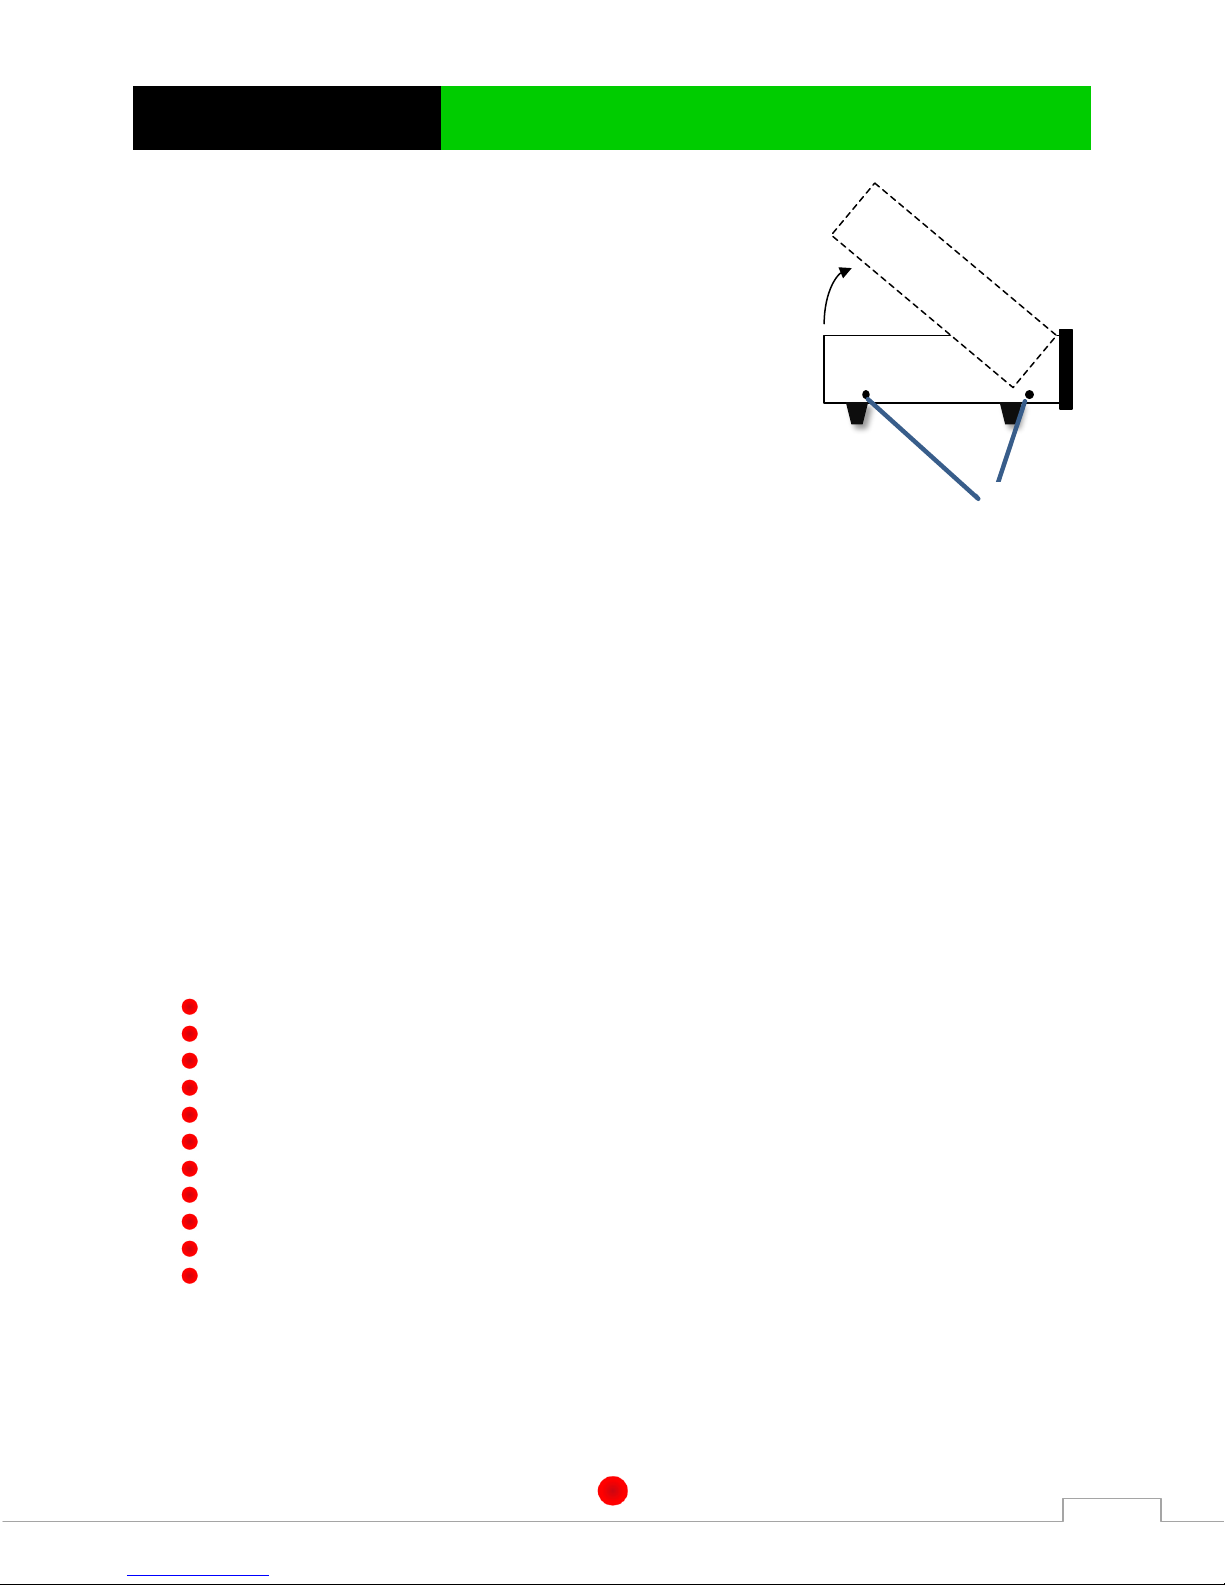
1) Carefully take MU-2 out of the shipping carton and plastic bag. Use soft gloves if possible to
avoid fingerprints on stainless steel cover. Do not hold glass front panel by hand.
2) Place preamplifier in proper distance (minimum 10cm) from other electrical equipment like
amplifier to avoid electromagnetic
interferences. Take care about proper
ventilation because preamplifier generates
heat.
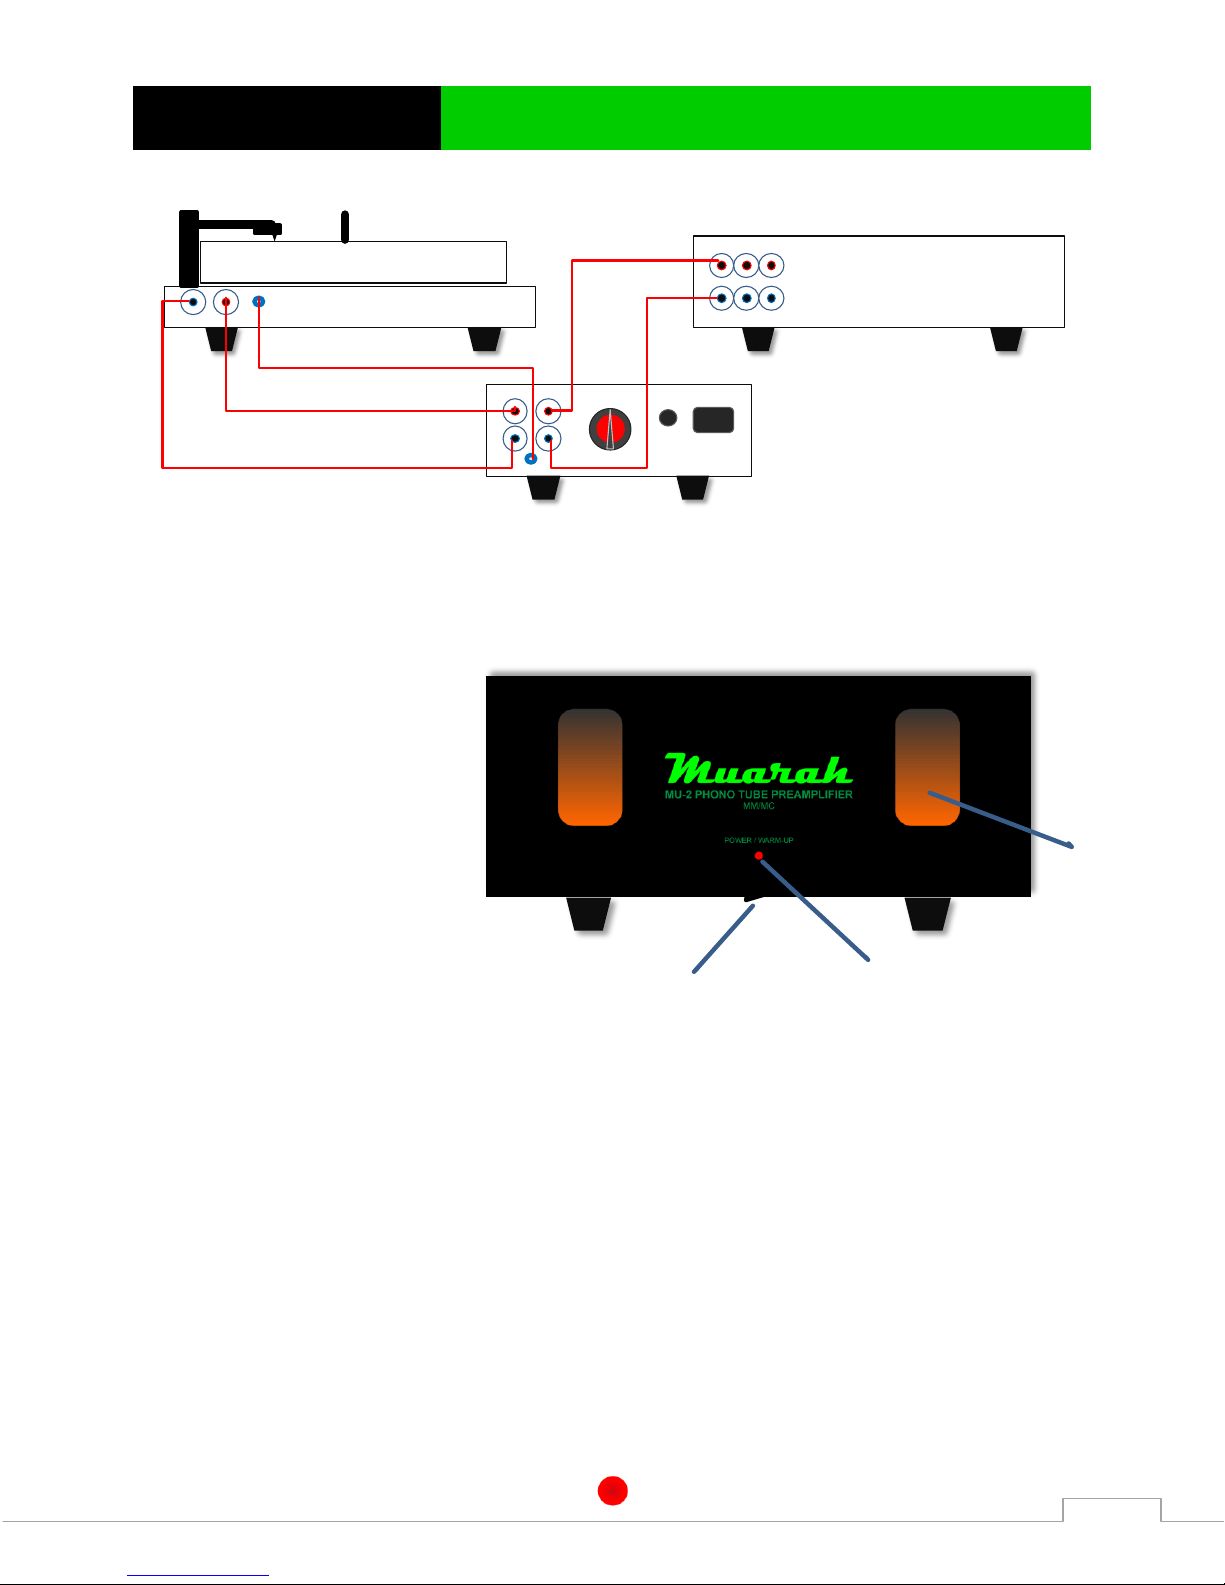
3) Connect RCA cables from turntable to RCA
inputs of MU-2. If turntable tonearm is
equipped with grounding cord connect it
to GND socket.
4) MU-2 outputs connect to high level inputs
of integrated amplifier or line preamplifier
(inputs marked AUX, CD, DVD etc..).
WARNING! Do not connect MU-2 to input
marked PHONO unless it’s Muarah MU-4 integrated amplifier.
5) Connect AC main power. WARNING! Main AC Power going to MU-2 should not be applied until
all the system components are connected together. AC mains power cord has to be connected
to MU-2 first and then to AC outlet.
20cm
10cm10cm

Muarah
MU-2 TUBE PHONO PREAMPLIFIER
USER MANUAL
v1.2
4
MU-2 Operation
1) Before MU-2 power on set the rear rotary knob in proper position adequate to used phono
cartridge. If MC cart is used set the proper input impedance level according to phono cart
supplier recommendation.
2) After power on by switch
(a) located at the bottom
preamplifier starts warm
up phase indicated by red
POWER/WARM-UP diode
(b) blinking.
3) Warm up phase takes 40
seconds. After that tubes
(c) operating points are
stable and audio signal is
attached to RCA outputs.
Now listener can enjoy music recorded on vinyl records.
4) It’s highly recommended to experiment with input impedance settings for MC carts during
music listening. Each time you change the rear knob position audio signal is detached from RCA
outputs for 2 seconds to avoid loud pops unpleasant for ears and dangerous for power amplifier
and speakers.
Tubes replacement
1) MU-2 tubes have to be replaced every 2000 hours of operation. Assuming listening one vinyl
record per day tubes have to be replaced after 6 years so it’s quite long time. High frequencies
degradation in sound is clear notification that tubes have to be replaced.
b)
a)
c)
AUX
Integrated amplifier or line preamplifier
MU-2
Turntable
L
L
L
R
R
R
GND
GND
IN OUT

Muarah
MU-2 TUBE PHONO PREAMPLIFIER
USER MANUAL
v1.2
5
2) WARNING! Before starting tube replacement procedure unplug
AC mains power from MU-2 and accompanying equipment and
wait 15 minutes.
3) To avoid fingerprints on stainless steel parts of the cover use soft
gloves during procedure.
4) Unscrew four bolts (d) on both sides of MU-2 cover using 2mm
Allen key.
5) Carefully remove cover starting from lifting its back (see attached
picture).
6) Carefully remove tubes using two fingers. Pull each tube up
moving gently sideways. Thin rubber coated gloves can help
during this and next procedure steps.
7) Install brand new tubes (matched in pair if possible) in sockets pushing them down and moving
gently sideways. Properly installed tubes have their pins entirely stuck in sockets. Tubes should
be in ideal vertical position. Any fingerprints on tube glass should be wiped out using soft cotton
cloth soaked with spirit.
8) Install MU-2 cover back and power on preamplifier. Typically new tubes don’t require extra
warming up procedure to reach nominal sound quality.
Maintenance
Stainless steel MU-2 cover should be regularly dusted off. Gently wipe fingerprints from the surface by
soft cotton cloth soaked with spirit. Front glass panel can be wiped using soft cotton cloth and glass
cleaner.
Parameters
Frequency response +0,5dB/-0,5dB
10Hz-50kHz
RIAA curve accuracy in band 20Hz-20kHz
+0,5dB/-0,5dB
MC gain
51dB
MM gain
41dB
Inputs/Outputs
RCA unbalanced
MM input impedance
47kΩ
MC input impedance
Switched: 50Ω, 100Ω, 200Ω, 500Ω, 1kΩ
Tubes
2x6DJ8 (or ECC88, E88CC)
Dimensions (width/length/height)
21cm/35cm/11cm
Weight
4kg
Power consumption
<30VA
MU-2 supports most of MM and MC carts available on the market but due to limited gain we
recommend to use MC carts with output level 0,4mV or higher. In case of doubts please consult it with
your dealer or Muarah company directly.
d)
Table of contents
Other Muarah Amplifier manuals