The setting required will vary according
to the thickness, quality and moisture
content of the bread as well as the room
temperature.
Toasting 2 slices of bread will toast the side
closer to the middle of the toaster a darker
color than when toasting 1 slice of bread.
Bread that has been sliced at home may
burn easily so turn the browning control
dial to ‘1’. Also, be aware that bread that
has been cut on a slant may result in
uneven toasting.
Toasting bread continuously may result
in changes in the color of the toast.
6
How to Use
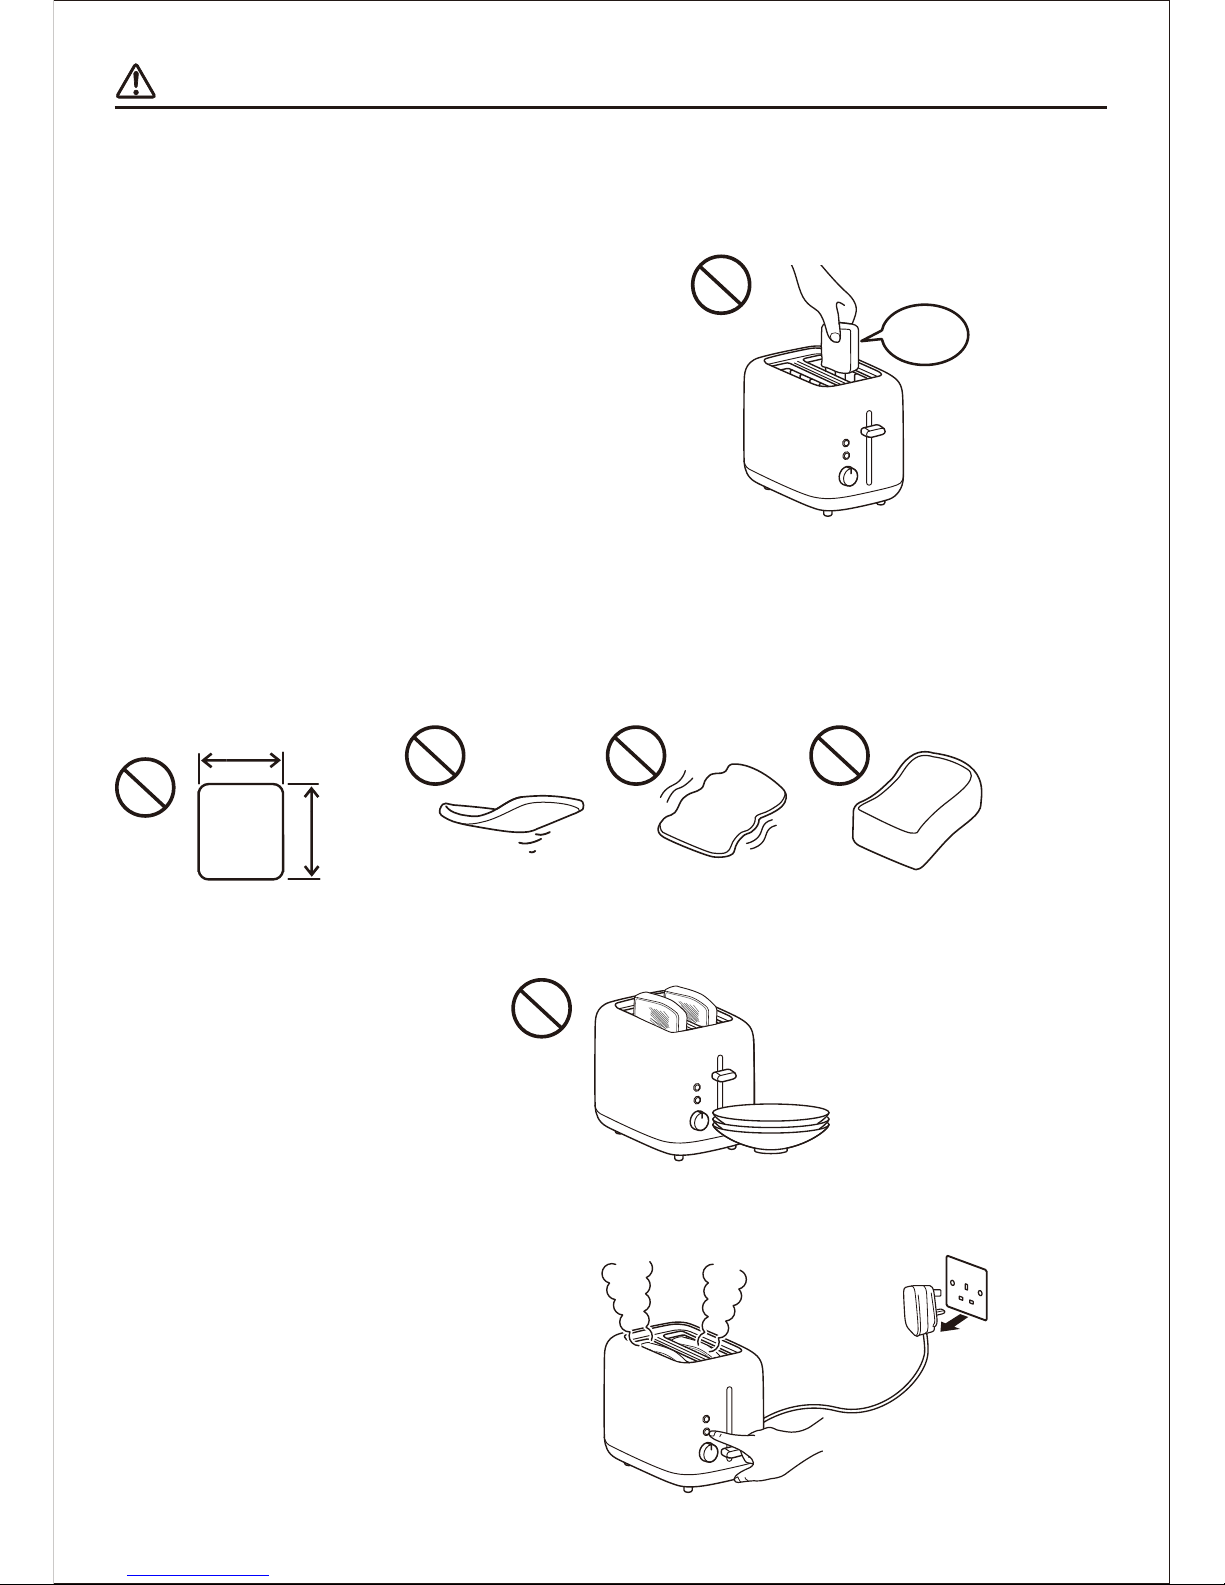
• When the toaster is first used, it may emit smoke or an unusual smell, this will
gradually lessen during usage.
Features and Functions
Power plug
Power cord
Bread slot
Toaster
Control lever
<Extra Lift function>
Browning control dial
Press each button after pressing down the control lever.
Pressing buttons before the control lever is pushed down will have no effect.
Note:
Crumb tray
This function enables bread
to be lifted up higher.
If it is difficult to remove the
bread from the toaster, this
Extra Lift function will make
it easier.
For instructions on how to
use, refer to “Toasting
completed” (page 7).
DEFROST button CANCEL button
Thick bread which is covered in
frost may not defrost thoroughly.
In such cases, defrost the bread
naturally first before toasting.
Press the lever all the way
down to commence toasting.
The control lever will not
stay down unless the
toaster is plugged in.
The crumb tray
accumulates crumbs.
Never operate the
toaster without the
crumb tray fitted.
Too thick bread
Too small
Do not toast the following type of bread
Thickness of bread
15-30mm
(0.59-1.18inch)
Bread Size
1. Insert the power plug into the socket.
2. Select the desired browning
Plug in completely.
Power outlet rated
15A or more.
<If you want a lighter color>
Turn the dial to ‘1’.
<If you want a darker color>
Turn the dial to ‘6’.
The first time the toaster is
used, we recommend
setting the control between
1 - 3, and after toasting a
few times, it can be set to
your preferred level.
Width of bread more than 100mm (3.94inch)
less than 125mm (4.92inch)
Length of bread
more than 100mm
(3.94inch)
less than 125mm
(4.92inch)
Less than
100mm
(3.94inch)
Less than
100mm(3.94inch)
• Bread that is flimsy or unusually-shaped
• Bread that is too small or thin
• Bread that is over 30mm (1.18inch) thick
• Bread that has been spread with butter or jam
Flimsy bread
Too thin bread
<When toasting for the first time>
This allows the level of browning to
be selected.
1 - 6 does not indicate 1 - 6
minutes, the amount of
toasting time.
It shows the level of browning,
from [1] lightest to [6] darkest.
Press this button to defrost bread that
has been frozen in the freezer.
This will toast bread for a longer period.
When you press the DEFROST button,
it will light up.
Use this button to cancel the
toasting process and remove
the bread.