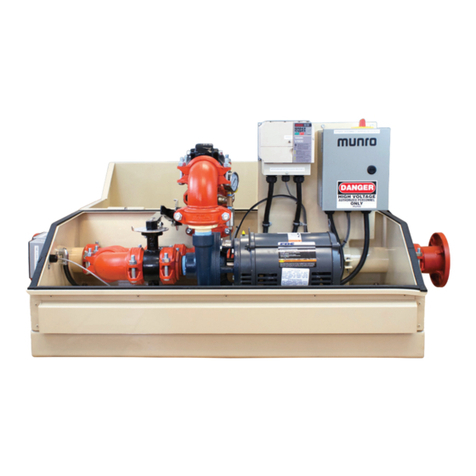
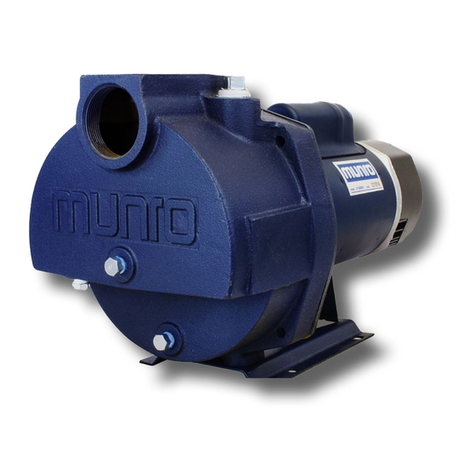
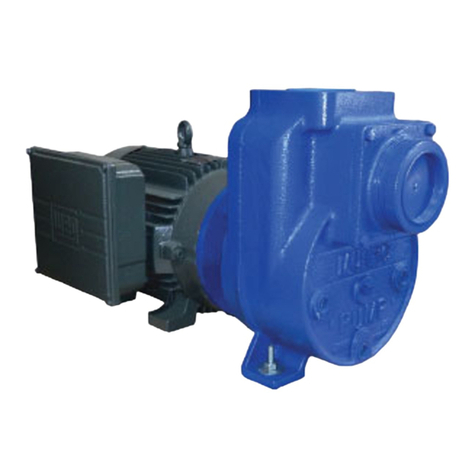
Munro Complete PRO II User manual

CP01R8 0421 © 2021 MUNRO COMPANIES INC., ALL RIGHTS RESERVED
OWNER’S MANUAL
Self-Cleaning Basket Strainers
PARTS - DRAWINGS - DIMENSIONS - SPECIFICATIONS


1
3Complete PRO II Assembly Guide
10 Munro LP Series Pump Operation & Maintenance
18 Munro SmartBox Reduced Incoming Amperage
21 Warranty Statement
22 Enclosure Dimensions
TABLE OF CONTENTS


3
UNIVERSAL PRO ENCLOSURE
Pressure Gauge & Sensor
Assembly Discharge Assembly
Suction Assembly
1 1/2” DISCHARGE HOSE ASSEMBLY
LP PUMP
PARTS
PRE-INSTALLED PARTS
TOOLS RECOMMENDED FOR ASSEMBLY
Phillips Head
Screwdriver
Teon Tape or Pipe Dope
Hammer Pliers Pipe Wrench
CONSIDERATIONS BEFORE BEGINNING ASSEMBLY
Before beginning assembly, consider how you will want to congure your pump station. The pump station comes congured for a
right-facing pump installation. If you need to change the direction of the pump, be sure to begin with the “changing the direction of
the pump” instructions (p.4).
Socket Wrench
with 7/16” Socket
(used for changing
conguration)
1” Box Wrench
(used for changing
conguration)
electrical outlet assembly
PSR control box
sensor wire and boot
(stored inside outlet
housing)
1 1/2” aluminum male cam and
PVC female cam x slip tting
discharge assembly
pressure gauge &
sensor assembly
side discharge
knockouts (2)
bottom discharge
knockouts (2)
temp sensor
Temp Sensor Sensor Wire & Boot
suction assembly
1 1/2” aluminum female cam
Munro Complete PRO ll ASSEMBLY GUIDE

4
Step 1 – Preparing the enclosure for irrigation system access knockouts
1. Using a hammer and pliers, remove the appropriate discharge
knockout from the CP unit – concentrating on the two
metal tabs.
2. Orient the enclosure to match to the irrigation inlet.
Bottom Knockout
Side Knockout
Step 2 – Setting and finalizing the pump
b). If using a side knockout – place Universal Pro Enclosure
so irrigation inlet pipe aligns with side knockout. Remove the
PVC female cam x slip tting from the hose assembly and
glue the slip tting to inlet pipe. Hose will feed through the
sidewall to pair with irrigation inlet pipe.
3. a) If using a bottom knockout – place Universal Pro
Enclosure so irrigation inlet pipe enters the enclosure
through bottom knockout hole. Remove the PVC female
cam x slip tting from the hose assembly and glue the slip
tting to inlet pipe. Hose will pair to irrigation inlet inside
the enclosure.
1. Remove the packing board from bottom of the pump.
2. Set the pump into the pump enclosure with the suction
ttings facing the suction pass-through panel
3. Push the threaded end of the suction tting through the
suction pass-through panel to connect to water source. We
recommend threading this tting to a valve for
isolation purposes.
Suction pass-through panel
Munro Complete PRO ll ASSEMBLY GUIDE

5
4. Locate the sensor wire and boot inside the electrical outlet
assembly.
5. Connect the quick disconnect ttings, closest to the rubber
boot, to the pressure sensor. Cover this connection with the
boot by sliding it into place.
6. Connect the remaining quick disconnect ttings over the
spade terminals of the temperature sensor.
7. Attach the female end of the discharge hose assembly to the
90˚ elbow of the discharge assembly and the male end to the
irrigation inlet tting.
8. Plug the electrical cord into the electrical outlet.
1. The pump control is prewired to the electrical outlet assembly.
2. To wire the pump control to your irrigation controller, refer to
the wiring diagram inside the control panel.
Wire motor for correct voltage. See
“Motor & Electrical” section of this
manual and motor nameplate.
Ground motor before connecting to
power supply.
Meet National Electrical Code,
Canadian Electrical Code, and local
codes for all wiring.
Follow wiring instructions in this
manual when connecting motor to
power.
Step 2 – Setting and finalizing the pump (Continued)
Step 3 – Wiring the pump control to the irrigation controller
Munro Complete PRO ll ASSEMBLY GUIDE

6
Changing the direction of the pump
To meet your installation requirements, you can change the side through which the electrical and
suction enter the enclosure.
Step 1 – Remove the suction pass-through panel
1. Remove the nuts and bolts holding the suction pass-through
panel in place and slide the suction pass-through panel up
and out of the enclosure. Set the panel aside.
Use caution. Some edges may be sharp!
Step 2 – Remove the electrical assembly
1. Remove the screws on the front of the pump control box to
remove the front cover.
2. Remove the time delay device (if supplied) by gently rocking
and pulling from the socket.
3. Loosen all connected wires from the relay, ground screw and
time delay socket.
4. Unscrew the chase nipple on the inside bottom of the pump
control box and SLB to disconnect the SLB from the box. Use
1” box wrench to loosen the chase nipple.
Munro Complete PRO ll ASSEMBLY GUIDE

7
Munro Complete PRO ll ASSEMBLY GUIDE
9. On the bottom of the enclosure, remove the 4 nuts and bolts
holding the control box brace in place.
10. Remove the 6 bolts that hold the electrical pass-through panel
in place, 4 are shared with the control box brace.
11. With the control box still attached, remove the outside braces.
Slide the electrical pass-through up and out of the enclosure.
5. Using a screwdriver, remove the cover plate from the SLB.
6. Out of the bottom, pull the wires from the pump control box
through the chase nipple and SLB.
7. On the outside of the pump enclosure, unscrew the SLB from
the pipe nipple on the electrical outlet assembly. Pliers may be
needed.
8. Feed the outlet assembly, wires and pipe nipple through the
round hole on the electrical pass-through panel, to the inside
of the enclosure.
Step 2 – Remove the electrical assembly (Continued)
Step 3 – Replacing the suction pass-through panel
Step 4 – Reconnecting the electrical assembly on the opposite side
1. Slide the suction pass-through panel into place on the
opposite side of the enclosure, ensuring that the suction hole
is aligned to the pump suction height. Replace the nuts and
bolts to secure the suction pass-through panel.
1. Holding the pump control box brace, with pump control
attached, place on the outside of the enclosure and secure the
nuts and bolts into place.

8
Step 4 – Reconnecting the electrical assembly on the opposite side (Continued)
2. With the electrical outlet assembly on the inside, feed the
outlet assembly wires and pipe nipple through the round hole
on the electrical pass-through panel of the enclosure.
3. On the outside of the pump enclosure, thread the wiring
through the round opening on the end of the SLB. Screw
the SLB to the pipe nipple on the electrical outlet assembly.
Ensure that the other round opening is facing up, toward the
control box, and the uncovered access is facing down.
4. Screw the chase nipple through the knockout hole on the
bottom of the pump control box and into the SLB to secure
the SLB to the bottom of the pump control box. Use 1” box
wrench to tighten the chase nipple on the SLB.
5. Thread the wiring from the SLB into the pump control box,
passing through top SLB hole and chase nipple. Replace SLB
cover plate.
6. Rewire the control panel using the instructions found on the
inside of the box lid. Replace time delay device (if supplied).
Step 5 – Changing the pump direction
Remove Forward Plug
1. Remove front plug at the top of the pump.
2. Using a pipe wrench, remove top discharge assembly from top
of pump.
Munro Complete PRO ll ASSEMBLY GUIDE

9
Step 5 – Changing the Pump Direction (Continued)
Pressure Gauge and Pressure Sensor
3. Use a wrench to remove the pressure gauge and sensor
assembly from back-side opening.
4. Relocate the gauge and pressure sensor assembly to the
opposite (now front facing) side of the pump, ending parallel
to pump motor.
Discharge Fittings
5. Reinstall the discharge assembly in the top discharge port.
6. In most cases, the open end of 90 elbow should be pointing to
the back of the pump.
Note: Pipe dope or Teon tape is needed at each connection point. Fully tighten
each connection with a pipe wrench.
Final Appearance
7. The installation of pump ttings should be complete and
appear as pictured.
drainage assembly
Munro Complete PRO ll ASSEMBLY GUIDE

READ AND FOLLOW SAFETY
INSTRUCTIONS!
This is the safety alert symbol. When you see this
symbol on your pump or in this manual, look for one
of the following signal words and be alert to the potential for
personal injury.
warns about hazards that WILL cause serious
personal injury, death or major property damage if ignored.
warns about hazards that CAN cause serious
personal injury, death or major property damage if ignored.
warns about hazards that WILL or CAN cause
minor personal injury or property damage if ignored.
The label NOTICE indicates special instructions which are
important but not related to hazards.
MOTOR AND ELECTRICAL:
Carefully read and follow all safety instructions in this manual
and on pump.
GENERAL SAFETY – ELECTRICAL
1. Every time work is to be performed on a pump,
the power supply should be terminated at the breaker box.
2. Follow all local electrical and safety codes,
including the National Electrical Code (NEC) and the
Occupational Safety and Health Act (OSHA).
3. Replace damaged or worn cords immediately.
4. Ground motor before connecting to power supply.
5. Use extreme caution around an operating pump
and motor – it may be hot enough to cause serious burns.
GENERAL OPERATION – ELECTRICAL
1. Refer to motor nameplate to verify that supply voltage and
motor wiring is the same.
2. Verify motor phase against supply power phase.
GENERAL SAFETY – MOTOR
1. Disconnect the main power before handling the
unit for ANY REASON.
2. An operating motor can run between 250°F and
311°F depending on insulation rating. Never touch a motor
without rst determining the housing temperature.
3. Keep pump motor ventilated to reduce damage due to heat.
4. Motor is not waterproof and should never be
submersed into any liquid.
5. Motor is designed to work with up to a 15 degree angle of
water impact. Do not allow water to spray directly onto
motor. External motor protection should be used to eliminate
environmental concerns.
6. To reduce the risk of electric shock, the motor must be
securely and adequately grounded. Refer to National
Electric Code (NEC Article 250 – Grounding) for additional
information.
7. When in doubt, call a licensed electrician. High voltage
can shock, burn or cause death.
WIRING CONNECTION:
ROTATION
1. When facing the suction tapping, all Munro pumps run in a
Counter-Clockwise (CCW) rotation only. Rotation from the
motor end perspective is Clockwise (CW) and is marked as
such on the motor nameplate. Tampering with, or reversing,
the rotation will damage your pump and void the warranty.
CHECK MOTOR ROTATION – 3 PHASE
1. A fractional second application of power should be applied to
all 3-phase motors to verify rotation of shaft as described
above. This is sometimes referred to as “bumping
the motor”.
2. Improper rotation can cause catastrophic pump failure
and voids the warranty.
3. Reversing two of the three power wires makes the motor run
in the opposite direction.
GENERAL WIRING INFORMATION
1. Refer to the connection diagram located on the nameplate
of the motor.
GROUNDING
1. Grounding the motor can be achieved by securing the
motor to a metal raceway system. Alternately a separate
grounding wire connected to bare metal on the motor
frame, or to the green grounding screw located inside the
motor terminal box, or other suitable means is acceptable.
(Refer to NEC Article 250 – Grounding for specics.)
2. Verify motor grounding provision on the nameplate before
connecting any wires to the motor.
MOTOR PROTECTION
1. Fuses and circuit breakers are used as a safety device for
the wire circuit. They do NOT offer motor protection.
2. Consult local or national electric codes for proper fuse
protection based on the motor data located on the motor
nameplate.
THERMAL OVERLOAD
1. All motors must be thermally protected – either within the
motor or externally.
2. The internal overload is usually automatic and resets itself
once the temperature has dropped to a safe point.
3. Overload helps protect the motor from burnout from
overload of low voltage, high voltage and other causes.
4. Frequent tripping of the overload indicates motor or power
problems. Immediate professional attention is
recommended.
5. NEVER examine, make wiring changes or touch
the motor before disconnecting the electrical supply.
Thermal overload protectors automatically reset and can
close the electrical circuit without warning.
6. The overload should never be tampered with
or removed.
DANGER
Electric pump motors can be
hazardous if not properly installed.
Call a licensed electrician if unsure of
any electrical connection.
DANGER
10
Munro LP Series Pump OPERATION & MAINTENANCE

11
PUMP:
GENERAL SAFETY – PUMP
1. An operating pump, with a blocked discharge, will
heat the water and pump housing. Allow pumps to cool
before handling.
2. High temperature sensors can help protect plastic plumbing
from disguring and/or expanding.
3. Running a pump without water may cause damage to
the seal.
GENERAL OPERATION – PUMP
1. Locate the pump as close to the water source as is practical.
2. Total suction lift (vertical lift plus any friction loss in suction
line) should not exceed 10’ for optimal performance. Suc
tion lift of 15’ is attainable depending on elevation, water
temperature, and atmospheric condition. Pump performance
is affected when suction lift exceeds 15’.
3. Fill the pump case and suction pipe with water to expel as
much air as possible prior to start-up. Running a pump dry
may cause damage to the seal and void warranty.
4. Pump and pipe must be drained if there is any danger
of freezing.
PIPE CONNECTION
1. Plastic or galvanized steel pipe are most commonly used.
Support pipe as needed.
2. Keep suction and discharge lines as large as possible. Pipe
should not be smaller than the corresponding suction
and discharge holes.
3. Avoid excess ttings when possible. Use straight runs when
possible.
4. All joints and connections should have pipe-specic sealing
compound applied and be completely tightened.
5. Isolation valves or unions on suction and discharge allow
for easy pump removal with multi-pump or positive inlet
pressure applications.
6. Suction pipe should never have a higher elevation than
the pump.
OPERATION:
INITIAL PRIMING
1. Remove one priming plug from pump housing and ll the
pump body and suction line completely with water.
2. Normal system start-up will take a few minutes for air to
expel from system and water to begin to cycle – depending
on suction lift. If no water is owing after a few minutes, turn
the pump off and refer to troubleshooting guide (p.8). Do
NOT run pump dry for any period of time.
3. Unit must be full of liquid before operating. Never run dry.
Running a pump dry may cause damage to the seal and void
the warranty.
4. Do not run against a closed discharge for more than a
few minutes.
ROTATION
1. Single phase motors are pre-wired for CCW, as viewed from
suction tapping, and should never be reversed.
2. Three phase motors must be veried at job site.
MAINTENANCE – LUBRICATION
1. No lubrication is required. The ball bearings are
permanently lubricated and sealed at the factory.
MAINTENANCE – FREEZING
1. Drain the entire system if there is a danger of freezing.
2. Drain plugs are provided in both upper and lower pump
case chambers.
3. Filling the pump with non-toxic Munro Freeze Defeat and
replacing the plugs, will reduce the oxidation in the case over
the winter. Before spring start-up, drain the Munro Freeze
Defeat from the case.
RECOMMENDED OPTIONAL EQUIPMENT:
1. Strainer – Use of strainers prevent large debris from entering
pump system through suction line.
2. Pressure Gauge – Use of a pressure gauge helps to
troubleshoot and identify a pump or system issue.
3. Discharge Valve – Use of a gate or ball valve on the
discharge side of a pump allows pump isolation for removal.
4. Foot Valve – Use of a foot valve (or check valve) can aide
the priming of a centrifugal pump. If suction lines are kept
full, the pump does not have to evacuate the air before
pumping water.
ROTARY SEAL ASSEMBLY REPLACEMENT:
Make certain the power supply is disconnected
before attempting to service the unit!
SEAL REMOVAL
1. Remove the case bolts and separate pump case from
motor assembly.
2. Remove diffuser bolts and diffuser from motor assembly.
3. Insert an open-end 9/16” (LP075B, LP100B, LP150B, LP200B,
LP300B) or a 5/8” (LP1502B) wrench into the side of the
mounting ring, slowly turning the impeller until the wrench
seats itself onto the ats of the shaft. Once properly seated,
the wrench will keep the shaft from turning. LP3005B model
uses keyed shaft and sleeve. Removal of these impellers
may require high heat to remove the shaft sleeves.
4. Expose the seal assembly by spinning the impeller
counter-clockwise to unthread it from the motor shaft.
5. The seal spring will release as the impeller is removed.
6. Being careful not to damage the motor shaft, remove the seal
head, seat and rubber from the seal pocket. The use of a
screwdriver or similar tool may be necessary.
7. Should the seal be difcult to remove, the mounting ring
can be completely removed for easier access by taking out
the mount ring bolts.
8. Once the seal is removed, clean the pocket removing all
debris.
The rotary seal assembly must be handled
carefully to avoid damaging the precision lapped faces of the
sealing components.
SEAL INSTALLATION
NOTICE: It is recommended to only install new seals. Do not
install used or dirty seals.
NOTICE: Application of a light coat of multi-purpose chassis
grease to the outer diameter of the rubber gasket may make
installation easier. Be certain the seat is kept clean and free of
dirt and/or grease at all times.
1. Insert the seal seat rubber gasket into the recessed area
of the mount ring.
2. Slip the seal head assembly onto the motor shaft.
3. Using uniform pressure, be sure the seal’s seat or mounting
ring has completely bottomed-out in recessed area.
4. After placing the spring, install the impeller and bolt the
diffuser onto the motor assembly.
5. Replace and bolt the pump body to the motor assembly.
Call Munro technical support for any questions relating to
start-up or operation of this pump.
Toll Free: 1.800.942.4270
Munro LP Series Pump OPERATION & MAINTENANCE

PUMP PERFORMANCE
PUMP CURVES
LP1502
LP Series 3/4 HP - 3 HP
LP3005
HP
Capacity - U.S. Gallons per Minute
Discharge Pressure (PSI) at 5’ Suction Lift Shut Off
Pressure
PSI
Suction
Pipe
Tap
Discharge
Pipe
Tap
Max ▲
Suction
Lift
20 25 30 35 40 45 50 55 60 65 70
3/4 63 53 43 33 25 45 2” 1-1/2” 15 Ft.
1 73 65 57 47 35 18 47 2” 1-1/2” 15 Ft.
1-1/2 75 70 68 60 48 35 49 2” 1-1/2” 15 Ft.
2 102 98 92 82 74 61 52 40 60 2” 1-1/2” 15 Ft.
3 115 114 112 105 100 88 72 56 30 61 2” 1-1/2” 15 Ft.
▲ Suction lift varies, depending upon elevation (altitude) and water temperatures.
MAXIMUM CASE PRESSURE --- 150 PSI
HP
Capacity - U.S. Gallons per Minute
Discharge Pressure (PSI) at 5’ Suction Lift Shut Off
Pressure
PSI
Suction
Pipe
Tap
Discharge
Pipe
Tap
Max ▲
Suction
Lift
Model
Number
20 25 30 35 40 45 50 55 60 65 70
5 -- -- 145 137 132 123 110 98 85 67 47 75 3” 3” 15 Ft. LP3005B
5 -- -- -- -- -- 120 110 98 85 67 47 75 3” 3” 15 Ft. LP3005B3
5 -- 160 154 145 135 130 116 107 95 84 63 78 3” 3” 15 Ft. LP3005B3B
▲ Suction lift varies, depending upon elevation (altitude) and water temperatures.
MAXIMUM CASE PRESSURE --- 100 PSI
HP
Capacity - U.S. Gallons per Minute
Discharge Pressure (PSI) at 5’ Suction Lift Shut Off
Pressure
PSI
Suction
Pipe
Tap
Discharge
Pipe
Tap
Max ▲
Suction
Lift
20 30 40 50 60 70 80 90
2.5 -- -- 75 67 56 38 0 0 80 2” 1-1/2” 15 Ft.
▲ Suction lift varies, depending upon elevation (altitude) and water temperatures.
MAXIMUM CASE PRESSURE --- 100 PSI
12
Munro LP Series Pump OPERATION & MAINTENANCE

13
HP Type Volts/Amps Hz RPM
Motor Voltage
(Factory)
Connected
Service Factor Motor Amps Max
Liquid
Temperature
Single Phase Three Phase
115V 208V 230V 208V 230V 460V
3/4
Single
Phase
115/208-230
60 3450 230V
11.6 5.8 5.8
180˚F
1 16.6 8.5 8.3
1-1/2 23 12.5 11.5
2208-230 -- 13 12
3 -- 18 17
3/4
Three
Phase 208-230/460 60 3450 230V -- -- --
2.6 2.8 1.4
180˚F
1 -- 3.6 1.8
1-1/2 5.4 5.2 2.6
2 6.8 6.6 3.3
3 -- 9.2 4.6
Motor info subject to change without notice, please consult motor nameplate.
HP Type Volts/Amps Hz RPM
Motor Voltage
(Factory)
Connected
Service Factor Motor Amps Max
Liquid
Temperature
Single Phase Three Phase
115V 208V 230V 208V 230V 460V
2.5 Single Phase 230 60 3450 208/230V -- 15.7 16 -- -- -- 180˚F
2.5 Three Phase 60 3450 230/460 -- 8.75 4.35 180˚F
Motor info subject to change without notice, please consult motor nameplate.
HP Type Volts/Amps Hz RPM
Motor Voltage
(Factory)
Connected
Service Factor Motor Amps Max
Liquid
Temperature
Single Phase Three Phase
115V 208V 230V 208V 230V 460V
5 Single Phase 230 60 3450 230V -- 27 24.5 -- -- -- 180˚F
5 Three Phase 208-230/460 60 3450 230V -- -- -- -- 14 7 180˚F
*5 Three Phase 230/460 60 3450 230/460V -- -- -- -- 17.2 8.6 180˚F
Motor info subject to change without notice, please consult motor nameplate. * Phase Conversion Compatible
PUMP SPECIFICATIONS
LP Series 3/4 HP - 3 HP
LP1502
LP3005
WIRING SIZE CHART
Motor
Rating Circuit
Size
Fuse
Size
Full
Load
Amps
Copper Wire Size
Volts HP Phase KW 12 10 8 6 4 2
120
(1ø)
1/4
1
20
10
5.8
0.186
291
464
692
1171
1863
2350
1/3
1
20
10
7.2
0.246
230
365
546
924
1471
2338
1/2
1
20
15
9.8
0.373
171
272
407
689
1096
1742
3/4
1
20
15
13.8
0.559
130
207
310
524
834
1326
1
1
20
20
16
0.746
99
157
236
399
635
1009
1-1/2
1
30
25
20
1.12
128
192
325
515
822
240
(1ø)
1/4
1
20
5
2.9
0.186
1166
1853
2769
4685
7453
11850
1/3
1
20
5
3.6
0.246
920
1462
2186
3699
5884
9355
1/2
1
20
8
4.9
0.373
685
1090
1629
2756
4384
6970
3/4
1
20
8
6.9
0.559
522
829
1240
2098
3337
5305
1
1
20
10
8
0.746
397
631
944
1597
2540
4039
1-1/2
1
20
15
10
1.12
269
427
639
1081
1720
2734
2
1
20
20
12
1.49
259
411
615
1041
1656
2633
2-1/2
1
30
20
11.6
1.9
220
344
522
885
1407
2238
3
1
30
25
17
2.24
184
292
437
739
1176
1871
5
1
40
30
28
3.73
198
296
502
798
1269
Motor
Rating Circuit
Size
Fuse
Size
Full
Load
Amps
Copper Wire Size
Volts HP Phase KW 12 10 8 6 4 2
208
(3ø)
1-1/2
3
20
10
6.6
1.12
530
843
1340
2131
3389
5385
2
3
20
15
7.5
1.49
407
648
1031
1639
2607
4145
2-1/2
3
20
15
9.0
1.9
346
551
876
1393
2216
3523
3
3
20
15
10.6
2.24
289
459
731
1162
1849
2939
5
3
30
25
16.7
3.73
181
289
459
730
1162
1847
240
(3ø)
1-1/2
3
20
10
6
1.12
641
1019
1522
2576
4098
6516
2
3
20
10
6.8
1.49
492
783
1170
1979
3148
5006
2-1/2
3
20
15
8.2
1.9
418
666
995
1682
2676
4255
3
3
20
15
9.6
2.24
354
563
841
1423
2264
3600
5
3
30
20
15.2
3.73
243
386
577
977
1555
2472
480
(3ø)
1-1/2
3
20
5
3
1.12
2693
4280
6396
2
3
20
5
3.4
1.49
2019
3210
4797
8116
2-1/2
3
20
10
4.0
1.9
1716
2729
4077
6899
3
3
20
10
4.8
2.24
1615
2568
3837
6492
10328
5
3
20
10
7.6
3.73
973
1547
2311
3911
6221
9891
Values are for estimating purposes only and may not meet NEC code. Design should be veried.
Munro LP Series Pump OPERATION & MAINTENANCE

14
P
HP Discharge Suction A B C D E F G H I J K L M
3/4 1 1/2” 2” 19 3/4” 3 5/8” 4 1/4” 8 1/2” 7 1/2” 9 1/2” 10 7/8” 9 1/2” 2 3/8” 4 3/4” 2 5/8” 5 1/4” 6”
1 1 1/2” 2” 19 3/4” 3 5/8” 4 1/4” 8 1/2” 7 1/2” 9 1/2” 10 7/8” 9 1/2” 2 3/8” 4 3/4” 2 5/8” 5 1/4” 6”
1 1/2 1 1/2” 2” 19 3/4” 3 5/8” 4 1/4” 8 1/2” 7 1/2” 9 1/2” 10 7/8” 9 1/2” 2 3/8” 4 3/4” 2 5/8” 5 1/4” 6”
2 1 1/2” 2” 21 3/8” 3 5/8” 4 1/4” 8 1/2” 7 1/2” 9 1/2” 10 7/8” 9 1/2” 2 3/8” 4 3/4” 2 5/8” 5 1/4” 6”
3 1 1/2” 2” 20” 3 5/8” 4 1/4” 8 1/2” 7 1/2” 9 1/2” 10 7/8” 9 1/2” 2 3/8” 4 3/4” 2 5/8” 5 1/4” 6”
HP Discharge Suction A B C D E F G H I J K L M
2.5 1 1/2” 2” 20 7/8” 4 1/4” 7.95” 14” 9 1/4” 11 1/4” 13 1/2” 11 1/2” 3” 5 3/4” 4” 7” 8”
HP Discharge Suction A B C D E F G H I J K L M N O P
5 3” 3” 21 3/4” 4” 4 1/2” 6 1/2” 13 1/2” 9 1/2” 12 5/8” 11” 3 1/8” 5 5/8” 7 1/2” 8 1/2” 2 1/2” 4 1/4” 7 1/2” 1 1/2”
P
LP Series 3/4 HP - 3 HP
1502
LP3005
PUMP DIMENSIONS
Munro LP Series Pump OPERATION & MAINTENANCE

15
PARTS BREAKDOWN
ITEM SINGLE
PHASE
HORSEPOWER 3/4 1 1 1/2 2 3
MODEL NO. LP075B LP100B LP150B LP200B LP300B
DESCRIPTION PART NO.
1
▲
Motor, Nema J - 1 Phase
Motor Access Cover
Screw, Access Cover
MLP119370 MLP119399 MLP119219 MLP26452 MLP26453
2
▲
3
4
Mounting Ring
Hex hd. cap screws 3/8 x 3/4”
Square Cut Gasket
Seal, Rotary w/Spring
MLP1300
MLPB909
MLPG001
SCC800
1
4
1
1
1
4
1
1
1
4
1
1
1
4
1
1
1
4
1
1
5
6
▲
7
Impeller, Brass “B” Models
Diffuser
Hex HD. Cap Screws 1/4 x 1 1/4”
Rubber Diffuser Gasket
MLP1201
MLPB903
MLPG002
MLP1407
1
2
1
MLP1410
1
2
1
MLP1415
1
2
1
MLP1420
1
2
1
MLP1430
1
2
1
8
▲Pump Body
Hex HD. Cap Screws 7/16 x 1” MLP1100
MLPB912 1
41
41
41
41
4
9
▲
▲
10
▲
Base - 48 Y-Frame Motor
Base - 56 J-Frame Motor
Hex HD. Cap Screws 3/8 x 1/2”
Drain Valve 1/4” NPT
3/4” Priming Plug
1/4” Sensor Port
MLP1548
MLP1556
MLPB907
MLP913
•
•
1
--
2
2
2
1
1
--
2
2
2
1
1
--
2
2
2
1
--
1
2
2
2
1
--
1
1
2
2
1
(•) Standard hardware Item ---- (▲) Not Shown
Items SINGLE PHASE HORSEPOWER 2
MODEL NO. LP1502B
DESCRIPTION PART NO.
1
▲
Motor, Nema J - 1 Phase
Motor Access Cover
Screw, Access Cover
MLP33344 1
2
▲
3
4
5
Mounting Ring
Hex HD. Cap Screws 3/8 x 3/4”
Gasket, Square Cut
Seal, Rotary W/Spring
Impeller, Brass “B” Models
MLP2300
MLPB909
MLPG003
PACSC309
MLP2402
1
4
1
1
1
6
▲
7
8
Diffuser
Hex HD. Cap Screws 1/4 x 1 1/4”
Diffuser Gasket
Pump Body
MLP2200
MLPB903
MLPG004
MLP2100
1
2
1
1
▲
9Hex HD. Cap Screws 7/16 x 1”
Base MLPB912
MLP2500 4
1
▲
▲
10
▲
Hex HD. Cap Screws 3/8 x 1/2”
Drain Valve 1/4” NPT
3/4” Priming Plug
1/4” Sensor Port
MLPB907
MLP913
•
•
2
2
2
1
(•) Standard hardware Item ---- (▲) Not Shown
LP Series 3/4 HP - 3 HP
LP1502
Munro LP Series Pump OPERATION & MAINTENANCE

16
PARTS BREAKDOWN
LP3005
ITEM SINGLE PHASE HORSEPOWER 5
MODEL NO. LP3005B
DESCRIPTION PART NO.
1 Motor, NEMAJ - 1 Phase MLP131641 1
▲
2
3
▲
4
5
6
Slinger, Washer
Shaft Sleeve
Mount Ring
Hex HD Cap Screws 3/8” x 3/4”
Gasket, Square Cut
Seal, Rotary W/Spring
Retaining Clip
MLPG005
MLP60010
MLP3300
MLPB909
MLPG003
PACSC185
MLP30001
1
1
1
4
1
1
1
7
8
9
▲
10
▲
Impeller, Brass “B” model
Flat Impeller Washer
Beveled Impeller Washer
Impeller Bolt - Hex HD Cap Screw 1/4” x 1”
Diffuser
Diffuser Bolt - Hex HD Cap Screws 5/16” x 1 1/2”
MLP3405
MLP3WASH
MLP3CONE
MLPB906
MLP3200
MLPB910
1
Part Retired, 2018
1
1
1
2
11
12
▲
13
▲
Gasket, Diffuser
Pump Body
1/4” Drain Valve
3/4” Priming Plug
1/4” Sensor Port Plug
MLPG004
MLP3100
MLP913
•
•
1
1
2
2
1
(•) Standard hardware Item ---- (▲) Not Shown ---- (*)3 Phase Only
Munro LP Series Pump OPERATION & MAINTENANCE

17
SYMPTOM POSSIBLE CAUSE(S) CORRECTIVE ACTION
Little or no discharge 1. Casing not initially lled with water to prime pump
2. Total head too high
3. Suction lift too high, or too long
4. Impeller plugged
5. Hole or air leak in suction line
6. Foot valve too small
7. Impeller damaged
8. Foot valve or suction line not submerged deep
enough in water
9. Insufcient inlet pressure or suction head
10. Suction piping too small
11. Motor wired incorrectly
12. Casing gasket leaking
13. Suction or discharge line valves closed
1. Fill pump casing
2. Shorten suction lift and/or change head
3. Lower suction lift, install foot valve and prime
or shorten length of suction line
4. Clean impeller
5. Repair or replace suction line, use pipe sealing
compound.
6. Match foot valve to piping or install one size
larger foot valve
7. Replace impeller
8. Submerge lower in water
9. Increase inlet pressure by adding more water to
tank or increasing back pressure
10. Increase to pump inlet size or one size larger
11. Check wiring diagram for correct wiring
12. Replace Gasket
13. Open suction and/or discharge lines
Pump will not deliver water or develop
pressure
1. No priming water in casing
2. Mechanical seal is leaking
3. Leak in suction line
4. Discharge line is closed and priming air has no
where to go
5. Suction line (or valve) is closed
6. Poor pump performance
7. Foot valve is leaking
8. Suction screen is clogged
1. Fill pump casing
2. Replace seal (See Rotary Seal Replacement
on p.2)
3. Repair or replace
4. Open discharge line
5. Open suction line or valve
6. Replace worn parts
7. Replace foot valve
8. Clean or replace screen
Loss of suction 1. Air leak in suction line
2. Suction lift is too high
3. Insufcient inlet pressure or suction head in
booster system
4. Clogged foot valve or strainer
1. Repair or replace suction line
2. Lower suction lift, install foot valve and prime
3. Increase inlet pressure by adding more water to
tank or increasing back pressure
4. Unclog
Pump vibrates and/or makes excessive
noise
1. Mounting plate or foundation not rigid enough
2. Foreign material in pump
3. Impeller damaged
4. Worn motor bearings
5. Suction lift too high
1. Reinforce
2. Disassemble pump and clean
3. Replace impeller
4. Replace bearings
5. Lower suction lift, install foot valve and prime
Pump will not start or run 1. Improper wiring
2. Blown fuse or open circuit breaker
3. Loose or broken wiring
4. Stone or foreign object lodged in impeller
5. Motor shorted out
6. Thermal overload has opened circuit
1. Check wiring diagram on motor
2. Replace fuse or close circuit breaker
3. Tighten connections, replace broken wiring
4. Disassemble pump and remove foreign object
5. Replace motor
6. Allow unit to cool, restart after reason for over
load has been determined
Pump leaks at shaft 1. Worn mechanical shaft seal 1. Replace rotary seal (See Rotary Seal
Replacement on p.2)
TROUBLESHOOTING GUIDE
Munro LP Series Pump OPERATION & MAINTENANCE

18
Munro SmartBox Reduced Incoming Amperage OPERATION & MAINTENANCE
Typical SmartBox Installation
Step 1Step 2Step 3Step 4Step 5Step 6Step 7
Turn Breaker “On”
Wire Power Supply
• Run power supply wires from breaker box (110 v or 220 v).
• Attach GREEN grounding wire to grounding screw.
• Attach BLACK HOT to L2 on contactor.
• Attach WHITE Neutral (110 v) / second HOT (220 v) to L1 on contactor.
Wire Contactor to Pump
• Refer to wiring diagram on motor plate for proper voltage and wire
placement.
• Refer to NEC wire cable chart for proper size of wire. Undersized wire
can affect pump performance.
Wire Sensor(s)
• Wire sensor(s) to RED & BLUE leads in the SmartBox, secure with
wire nuts.
*Temperature sensor is wired in parallel with pressure sensor.
NOTE - RED & BLUE lead wires can be placed on either terminal of the pressure sensor
and high temperature sensor.
NOTE:
Refer to specic wiring diagram located on inside cover
of enclosure.
Plumb for Sensors
• Pressure Sensor - 1/4” NPT
• Install on discharge side of the pump, as close to the pump as is
practical, making sure the sensor is installed before a check valve.
• High Temperature Sensor - 1/4” NPT
• Install directly on pump case or within 12” of the pump.
Turn Breaker “OFF”
• Never work with electrical wiring on a live circuit.
Wire Lawn Controller
• Locate the Master Valve (MV) and Common (COM) inside Lawn Controller.
• Wire MV to BLACK wire lead in SmartBox, secure with wire nuts.
• Wire COM to WHITE wire lead in SmartBox, secure with wire nuts.
DO NOT ATTEMPT TO REWIRE OR ALTER WIRING IN THE SMARTBOX OR WARRANTY WILL BE VOIDED.
DO NOT WIRE POWER DIRECTLY TO THE PRESSURE OR TEMPERATURE SENSOR. PRESSURE SENSOR WILL WORK WITH 24 VOLT ONLY.
WARNING
Other Munro Water Pump manuals
Popular Water Pump manuals by other brands

WAGNER
WAGNER PP25S Translation of the original operating manual

Edwards
Edwards HT10 instruction manual

GORMAN-RUPP PUMPS
GORMAN-RUPP PUMPS PAH Series Installation, operation and maintenance manual

Vim Solution
Vim Solution Aria user manual

Utilitech
Utilitech PPSU33 user manual

Profi-pumpe
Profi-pumpe BRUNNEN-STAR 370-5 operating instructions