◈MXN22CW Camera
◈KENMERKEN ◈TECHNISCHE SPECIFICATIES
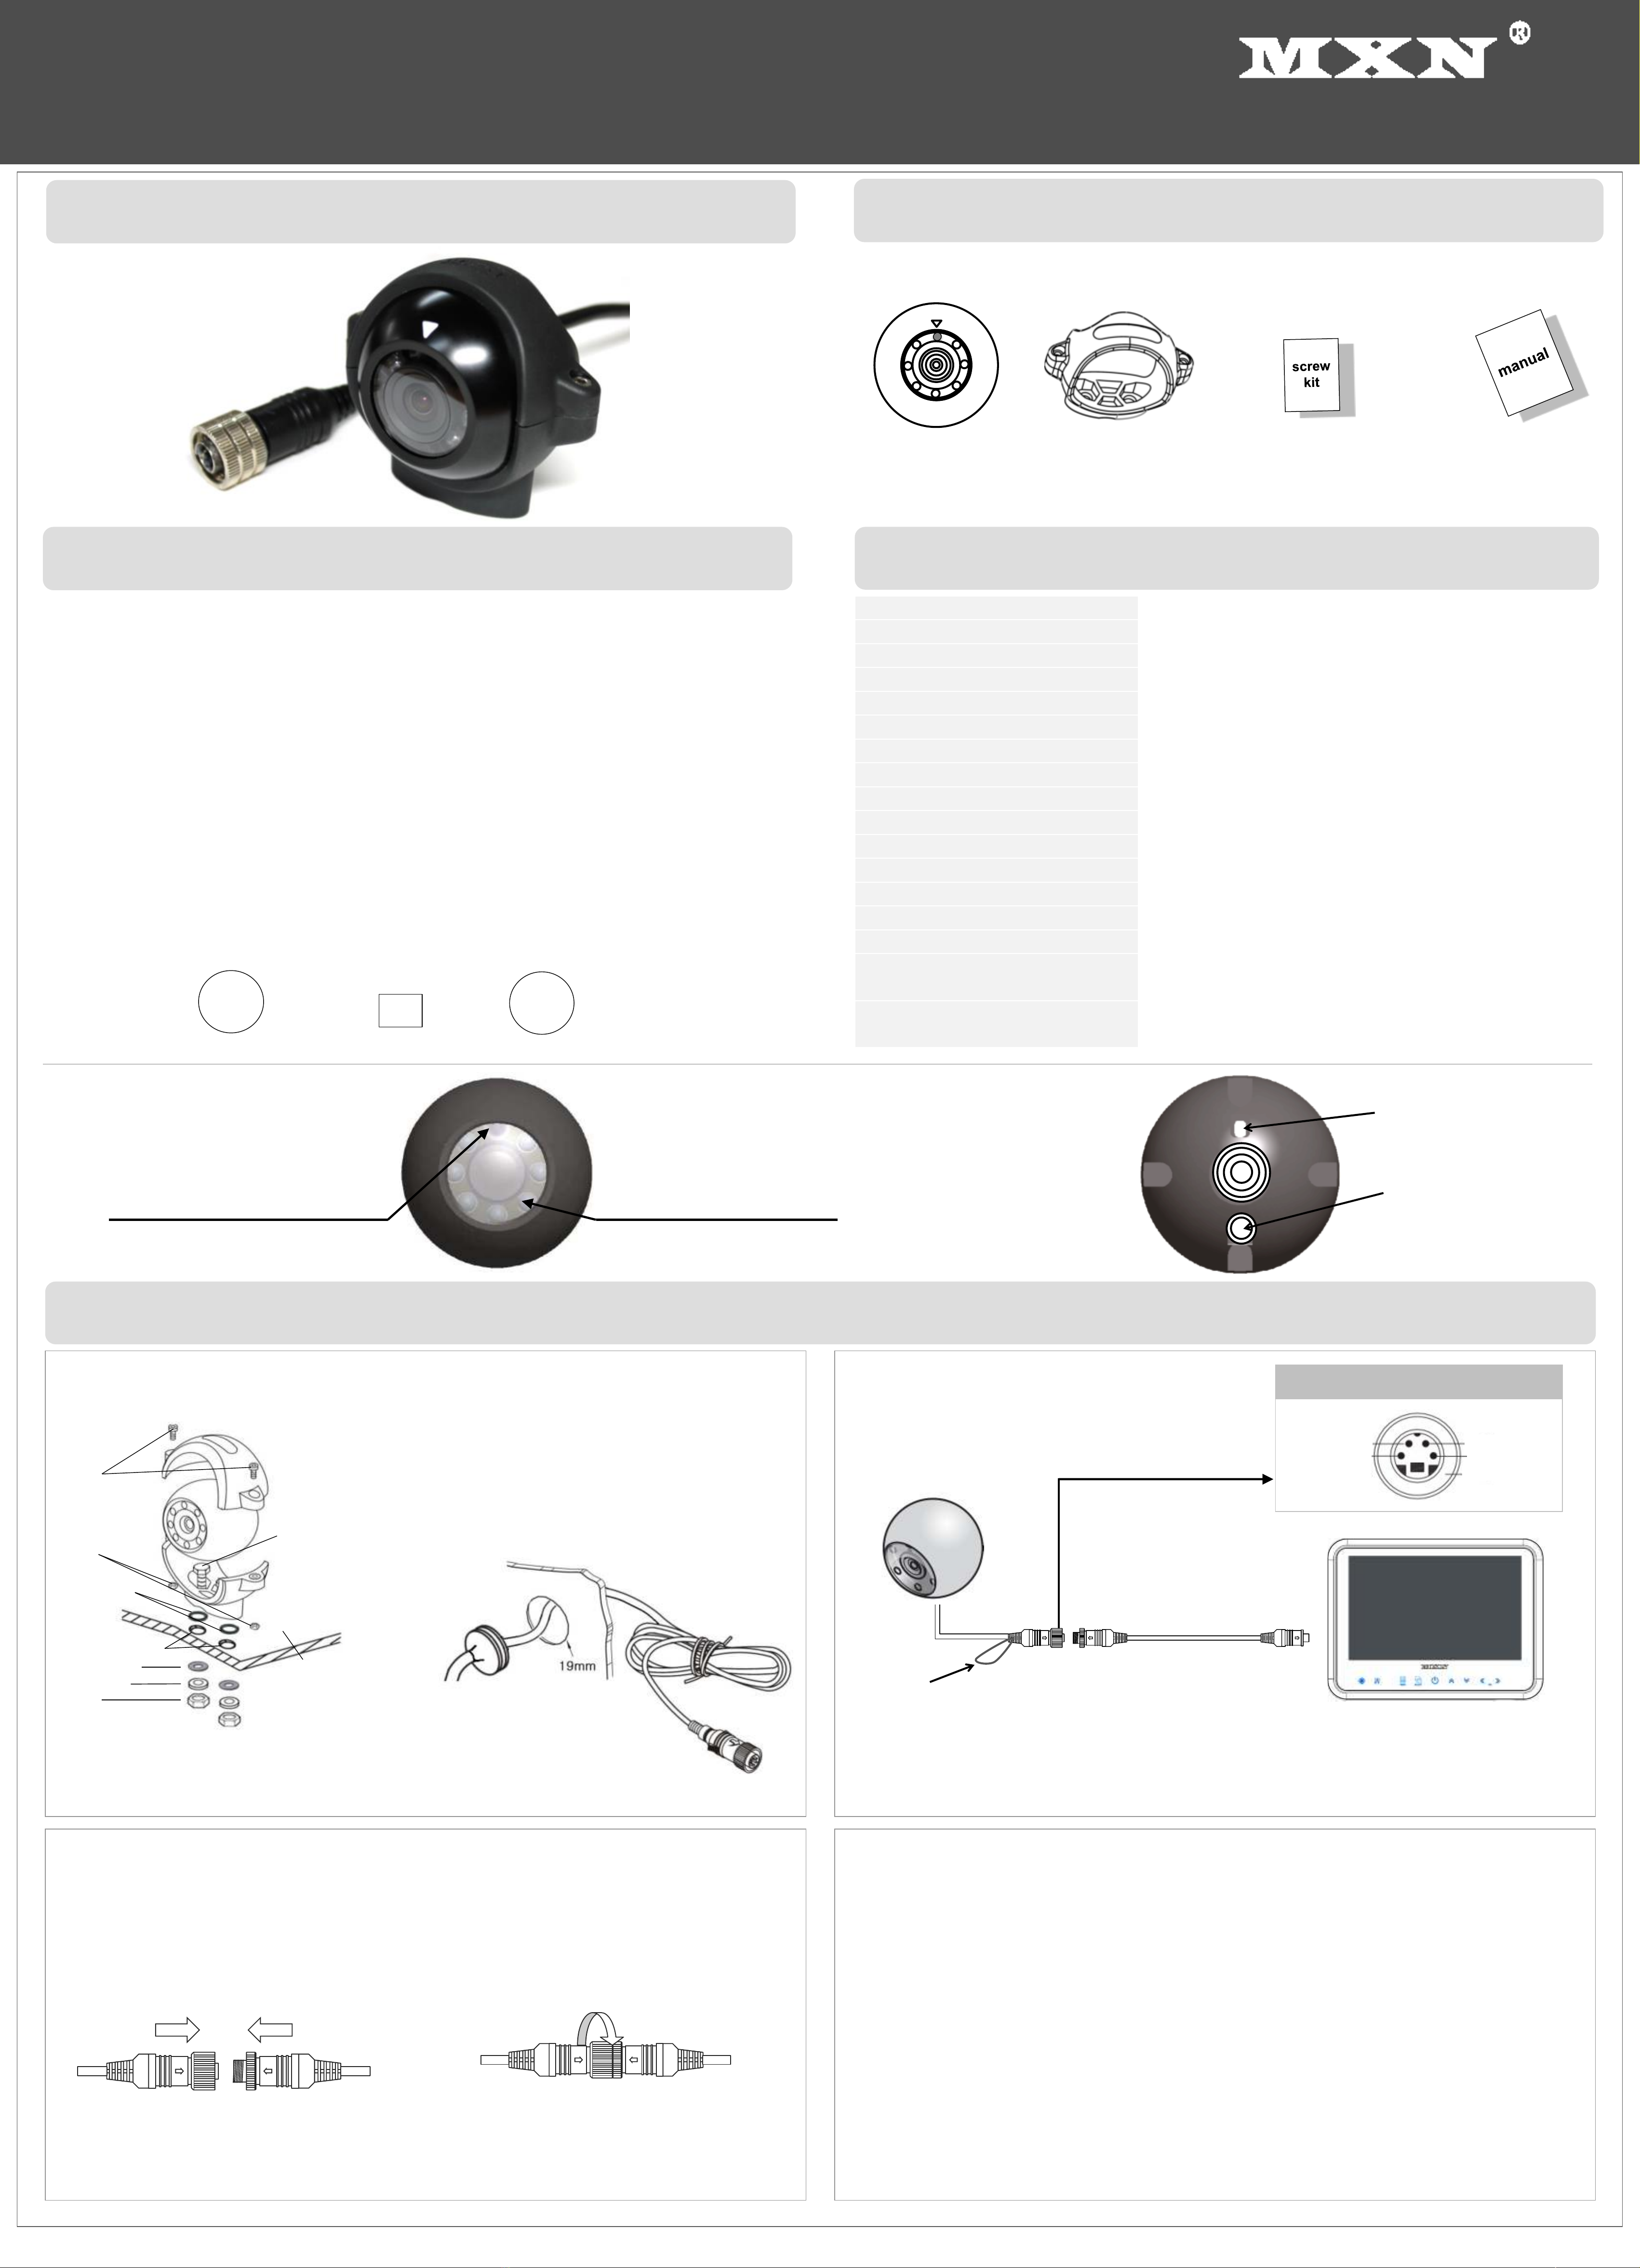
▪VOORAANZICHT ▪ACHTERAANZICHT
Camera bracket x 1 Handleiding x 1
Camera x 1 Boutjes/schroefjes set x 1
Infra-rood LEDs
Dag/Nacht sensor
Installatie Handleiding
160 Graden, Automatisch verwarmde, kleuren Camera
MXN22CW
Ingebouwde microfoon
Normaal-/Spiegelbeeld
schakelaar
◈INHOUD
▪1/3.2” CMOS, hoge resolutie kleuren Bal Camera. (1.23 Mega pixels)
▪IP69K waterdicht
▪Ingebouwde Infra Rood LEDs
▪IR LED ON-OFF function (via loop wire)
▪Diagonaal 160˚ lenshoek
▪Normaal-/Spiegelbeeld omschakelbaar
▪Ingebouwde microfoon
▪Geschikt voor diverse toepassingen (frontzicht, zijzicht, achterzicht, bewaking, etc)
▪Ingebouwde verwarming met thermostaat (schakelt AAN onder +10˚C)
▪3-Laags anti-corrosie coating
▪Te gebruiken bij -40˚C ~ +80˚C
▪Schokbestendig (10G)
▪ECE R10.05 gecertificeerd (EMC)
▪R46 en 2003/97/EC gecertificeerd voor indirect zicht (alleen in combinatie met een
beperkt aantal modellen MXN monitoren)
10R-05-6368
E9
E4
S
044327
e4
S
03*4327
◈INSTALLATIE
* Ontwerp en specicaties kunnen zonder voorafgaande kennisgeving gewijzigd worden.
1. Maak de min-pool van de accu los om kortsluiting te voorkomen, voordat u de
verbindingen tot stand brengt.
2. Voor een juiste werking van de unit dienen de connectoren zorgvuldig met
elkaar verbonden te worden.
3. Een beschadigde kabel kan de werking van de camera beïnvloeden en zelfs een
defect van de camera en/of monitor tot gevolg hebben; voorkom dit!
4. Bescherm de kabel d.m.v. het gebruik van een geleidebuis/ leiding en/ of door
de kabel zo veel mogelijk binnen het voertuig door te halen. Let op! Voorkom
kabelbreuken door de kabel in natuurlijke vormen te installeren.
5. Gebruik bij voorkeur een zuurvrije vaseline tussen de schroefverbindingen in
de kabel en draai deze verbindingen stevig aan.
▪Let op!!
▪Camera montage
▪Kabelverbinding
NB!
Garantie wordt uitgesloten indien het probleem te wijten valt aan vocht/corrosie in de connector.
1. Bevestig de camera bracket op de gewenste plek van het voertuig.
2. Voeg de camera en bracket samen volgens bovenstaande tekening.
3. Bepaal de kijkrichting van de camera en draai de M3 boutjes stevig aan.
1. Houd de pijlmarkeringspunten in
één lijn en druk de connectoren
rechtlijnig in elkaar.
2. Draai de moer van de cameraconnector
met de klok mee aan, terwijl u gelijktijdig
de pijlmarkeringspunten stevig naar
elkaar toe gedrukt houdt.
3. Draai deze verbinding stevig aan ter
voorkoming van inwatering!
Boor op de juiste locatie een gat (circa Ø 19mm) en
plaats hierin de rubber kabeldoorvoer. Zodra de
bekabeling definitief gepositioneerd is, pas vervolgens
preventief een geschikte afdichtende kit (sealer) toe,
tussen het gat en het rubber en tussen de kabel en het
rubber.
▪Rubber kabeldoorvoer
Beeld Sensor : 1/3.2” kleuren SONY CMOS (Exmor)
Aantal Pixels : PAL, 1.23 Mega pixels (1280 x 960)
Resolutie : 750 TV Lijnen
Signaal-ruisverhouding : Minimaal 45dB (tijdens AGC uit)
Licht benodigdheid : 0 Lux (IR LEDs AAN)
Voeding : DC 9 ~ 48V
Verbruik : DC 12V, 265mA (verwarming AAN)
DC 12V, 165mA (verwarming UIT)
Werkt bij : -40ºC tot +80ºC
Lenshoek : 160˚(Diagonaal) x 115˚(Horizontaal) x 86˚(Verticaal)
Diameter, afmeting camera : Ø52mm, 72(B) x 52(D) x 63(H) incl. bracket
Gewicht : Ca. 215g
Accessoires : Camera bracket (1)
M6 x 25mm bout + M6 moer, RVS (2 + 2)
M3 x 12mm bout + M3 moer, RVS (2 + 2)
M4 x 16mm parker, RVS (2)
Rubber ring + metalen ring, RVS (2 + 2)
Rubber O-ring (2)
Inbussleutel 3mm (1)
M3 bout
M6 moer
Metalen ring
Rubber ring
Rubber O-ring
M3 moer
M6 bout
Installatie oppervlak
Ø6mm Boorgat
▪Kabel naar de monitor
Verwarming
(9~12V DC) Audio out
Video out Voeding (9~48V DC)
Massa
Camera pin configuratie
Leid de kabel van de camera naar de
monitor.
Verlengkabel
(optioneel)
Monitor
* Groene lus-draad intact: IR LED functie => AAN / Standby
* Groene lus-draad doorgeknipt: IR LED functie => permanent UIT
De IR LED functie kan naar wens AAN of UIT via de groene lus-draad:
▪IR LED AAN/UIT functie


