Nasaco WSP1500BK User manual

WEATHER STATION /
BLUETOOTH SPEAKER
WSP1500BK
Manuel d’utilisation
User manual
Bedienungsanleitung
Manual de usuario disponible en:
Manuale utente disponibile su:
Manual do usuário disponível em:
Gebruikershandleiding beschikbaar op:
Instrukcja obsługi dostępna na stronie:
Felhasználói kézikönyv elérhető a:
Uživatelská příručka k dispozici na:
Руководство пользователя доступно по адресу:
www.gtcompany.fr/en/customer-support/

LIRE ATTENTIVEMENT TOUTES LES INSTRUCTIONS DE LA PRESENTE NOTICE, EN
RESPECTANT LES CONSIGNES D’UTILISATION ET DE SECURITE. CONSERVER CETTE
NOTICE POUR CONSULTATION ULTERIEURE ET EN AVISER LES UTILISATEURS POTENTIELS.
EDITION : FR
STATION MÉTÉO /
ENCEINTE BLUETOOTH
REF : WSP1500BK
CONSIGNES DE SÉCURITÉ
- Cet appareil a été conçu pour un usage domestique uniquement,
toute utilisation professionnelle, non appropriée ou non conforme
au mode d’emploi, n’engage ni la responsabilité, ni la garantie
du fabricant.
- Placer l’appareil sur une surface plane, rigide et stable.
- Ne pas utiliser l’appareil à l’extérieur.
- Conserver un espace libre d’au moins 10 cm tout autour de
l’appareil pour une ventilation susante.
- Ne pas installer l’appareil sur une surface molle, comme un
tapis ou une couverture, qui pourrait bloquer les orices de
ventilation.
- Ne pas placer l’appareil en plein soleil, à proximité d’un appareil
de chauage ou de toute source de chaleur, dans un endroit
soumis à une poussière excessive ou à des chocs mécaniques.
- Cet appareil peut être utilisé par des enfants à partir de 8
ans et plus ainsi que par des personnes ayant des capacités
physiques, sensorielles ou mentales réduites ou un manque
d’expérience et de connaissances, à condition qu’elles aient
reçu une supervision ou des instructions concernant l’utilisation
de l’appareil en toute sécurité et qu’elles comprennent les dangers
encourus.

- Il convient de surveiller les enfants pour s’assurer qu’ils ne
jouent pas avec l’appareil.
- Cet appareil n’est pas un jouet, ne pas laisser son utilisation
à des enfants sans surveillance.
- Ne jamais laisser les enfants introduire des objets étrangers
dans l’appareil.
- Débrancher l’appareil de l’alimentation :
• s’il reste inutilisé pendant une longue période,
• en cas d’orage,
• s’il ne fonctionne pas normalement.
- Sous l’inuence de phénomènes électriques transitoires
rapides et/ou électrostatiques, l’appareil peut présenter des
dysfonctionnements et nécessiter l’intervention de l’utilisateur
pour une réinitialisation.
- Pour réduire le risque de choc électrique, ne pas ouvrir l’appareil,
il n’y a aucune partie à l’intérieur destinée à l’utilisateur. Ne
coner les réparations qu’à une personne qualiée.
- Tout entretien, en dehors du nettoyage et de l’entretien usuel
par l’usager, doit être fait par un service après-vente autorisé.
- Cet appareil est conçu pour fonctionner avec le réseau électrique local.
- Cet appareil est conçu pour fonctionner avec l’adaptateur fourni. En cas
de remplacement, utiliser un autre adaptateur de sécurité ayant les mêmes
caractéristiques assignées.
- Le câble souple externe de l’adaptateur ne peut pas être remplacé. En
cas d’endommagement du cordon, il convient de mettre l’adaptateur au rebut.
- Dans le cas où une rallonge est nécessaire, prendre toutes les précautions
an d’éviter tout risque de chute.
- Ne pas brancher ou débrancher l’adaptateur avec les mains humides.
- L’adaptateur ne doit pas être exposé à des égouttements d’eau ou des éclaboussures.
- Pour déconnecter complètement l’appareil de l’alimentation électrique,
l’adaptateur doit être entièrement débranché de la prise murale.
- L’adaptateur ne doit pas être bloqué et doit être accessible en cours d’utilisation.
UTILISATION AVEC ADAPTATEUR

INFORMATIONS CONCERNANT LES PILES
- Pour fonctionner correctement, l’appareil doit être équipé des piles prévues
à cet eet.
- Seules les piles du type recommandé doivent être utilisées.
- Les piles doivent être mises en place en respectant le sens de polarité.
- Les bornes des piles ne doivent pas être mises en court-circuit.
- Ne pas mélanger des piles neuves et des piles usagées.
- Ne pas mélanger des piles alcalines, des piles standard (carbone-zinc) et
des batteries rechargeables (nickel-cadmium).
- Ne pas recharger les piles ni tenter de les ouvrir.
- Ne pas jeter les piles au feu.
- Retirez les piles de l’appareil en cas de non-utilisation prolongée.
- Remplacez toutes les piles en même temps par des piles neuves identiques
entre elles.
- Si le liquide qui sort de la pile entre en contact avec les yeux ou la peau,
lavez la zone atteinte immédiatement et minutieusement à l’eau claire et
consulter un médecin.
- Ne pas exposer les piles à une chaleur excessive telle que rayon solaire,
feu ou assimilé.
ATTENTION
RISQUE DE CHOC ELECTRIQUE
NE PAS OUVRIR
ATTENTION : Pour réduire le risque de choc électrique, ne pas ouvrir
l’appareil, il n’y a aucune partie à l’intérieur destinée à l’utilisateur. Conez
toutes les réparations à un personnel qualié.

18 17
16
15
14
19
20
21 22
23
25
24 26
DESCRIPTION
CARACTÉRISTIQUES TECHNIQUES ET FONCTIONS PRINCIPALES
ARRIÈRE DEVANTDESSUS
DESSOUS 2 SONDES
110 11 12 13
3
4
2
6
5789
11 : Bouton volume -
12 : Bouton volume +
13 : Bouton réglage / radio
14 : Indicateur Alarme 1 / Alarme 2
15 : Indicateur répétition alarme
16 : Indicateur fonction sommeil
17 : Horloge (heures, minutes)
18 : Jour de la semaine
19 : Indicateur Bluetooth
20 : Indicateur radio
21 : Date / Mois / Année
22 : Indicateur météo
23 : Taux d’humidité
24 : Température extérieure
25 : Indicateur signal sonde
26 : Température intérieure
27 : Compartiment à pile
28 : Socle
29 : LED
30 : Compartiment à piles
31 : Orice de xation murale
1 : Station météo
2 : Boutons
3 : Haut-parleur
4 : Prise pour adaptateur secteur
5 : Bouton lecture / répétition alarme
6 : Bouton °C /°F
7 : Bouton alarme / Bt / radio
8 : Bouton intensité de l’écran
9 : Bouton piste précédente
10 : Bouton piste suivante
27
29
28
30 31
- Heure : 12H / 24H
- Calendrier : JJ / MM / AA , Jour de la semaine
- Radio FM : 88.8 à 108MHz (10 stations
mémorisables)
- Fonction réveil (2 alarmes)
- Achage de la météo : soleil, éclaircies,
nuages, pluie
- Achage de la température intérieure et
extérieure
- Achage du taux d’humidité
- Haut-parleur : 1x3W + 1 membrane passive
- Fréquence du haut-parleur : 165Hz-14.0KHz
- Portée maximale des sondes sans l : 10
mètres
- Connexion Bluetooth: distance maximale 10
mètres
- Alimentation station météo : 100-240V~,
50/60Hz, DC 5V
- Sauvegarde de l’horloge : 1 pile CR2025
(fournie)
- Alimentation sondes extérieures : 2 piles
LR03 (AAA) 1,5V (non fournies)

1 - UTILISATION DE LA STATION MÉTÉO
STATION MÉTÉO
Posez la station météo sur une surface plane horizontale.
SONDES
Les sondes peuvent être installées :
- soit au mur à l’aide d’une vis (non fournie). Accrochez les sondes par l’orice (31) situé au dos.
- soit horizontalement
Pour de meilleurs résultats :
- N’exposez pas les sondes en plein soleil ou à l’humidité.
- Ne mettez pas les sondes à plus de 10 mètres de la station météo.
- Minimisez les obstacles (portes, murs et meubles) entre les sondes et la station météo.
- Éloignez les sondes des objets métalliques ou électroniques.
TEMPÉRATURES ET HUMIDITÉ
La station météo ache les informations suivantes :
- Température intérieure (26) relevée par la station météo
- Température (24) et humidité (23) extérieures provenant des sondes
CHOIX UNITÉ TEMPÉRATURE
- Pressez le bouton (6) pour sélectionner l’unité de
température : °C (Celsius) ou °F (Fahrenheit).
INDICATEUR MÉTÉO
À la mise en marche de l’appareil, la station météo indique
les conditions de l’environnement sous forme d’icônes :
ALIMENTATION
ADAPTATEUR DE LA STATION MÉTÉO
- Utilisez l’adaptateur en intérieur uniquement, dans des pièces à l’abri de l’humidité.
- Connectez l’adaptateur secteur dans la prise (4) située au dos de l’appareil.
- Puis branchez l’adaptateur sur le secteur.
INSTALLATION DES PILES (SAUVEGARDE DE L’HORLOGE)
Retirez la languette transparente coupe contact située sous le compartiment à pile (27) pour
activer la pile.
Pour eectuer le remplacement de la pile :
- Retirez le couvercle du compartiment à pile (27).
- Insérez une pile de référence CR2025 en respectant les polarités (+/-).
- Replacez le couvercle.
REMARQUE : Utilisez uniquement le type de pile spéciée dans cette notice.
SONDES SANS FIL (piles non fournies)
- Ouvrez le couvercle du compartiment à piles (30) situé au dos de chaque sonde.
- Insérez 2 piles de référence LR03 (AAA) de 1,5V en respectant le sens de polarité indiqué.
- Refermez le couvercle du compartiment à piles.
INSTALLATION / UTILISATION

CONNEXION DES SONDES EXTÉRIEURES AVEC LA STATION MÉTÉO
Les sondes extérieures se connectent automatiquement après 1 minute.
Sinon, connectez les appareils manuellement :
- Pressez le bouton (5) durant 3 secondes, le voyant (25) clignote.
- Lorsque la station météo détecte les sondes, la température extérieure s’ache (24).
- Les données des sondes sont envoyées automatiquement toutes les 3 minutes environ.
CHOIX D’AFFICHAGE DES SONDES
Pour alterner entre les données provenant des sondes :
- Utilisez le bouton (5) pour la sélection (CH1 / CH2).
2 - RÉGLAGE DE L’HEURE ET DE LA DATE
- Pressez le bouton (13) durant 3 secondes pour entrer dans le mode de réglage heure & date.
- Utilisez les boutons (9) et (10) pour ajuster les valeurs. Maintenez les boutons appuyés pour
accélérer le délement des valeurs.
- Appuyez sur le bouton (13) pour valider le chire sélectionné.
- Le jour de la semaine est aché automatiquement (18).
- Sans action sur les boutons pendant le réglage, l’appareil revient à l’achage normal au bout de 15 secondes.
3 - RÉGLAGE DE L’ALARME
RÉGLAGE ET ACTIVATION DE L’ALARME
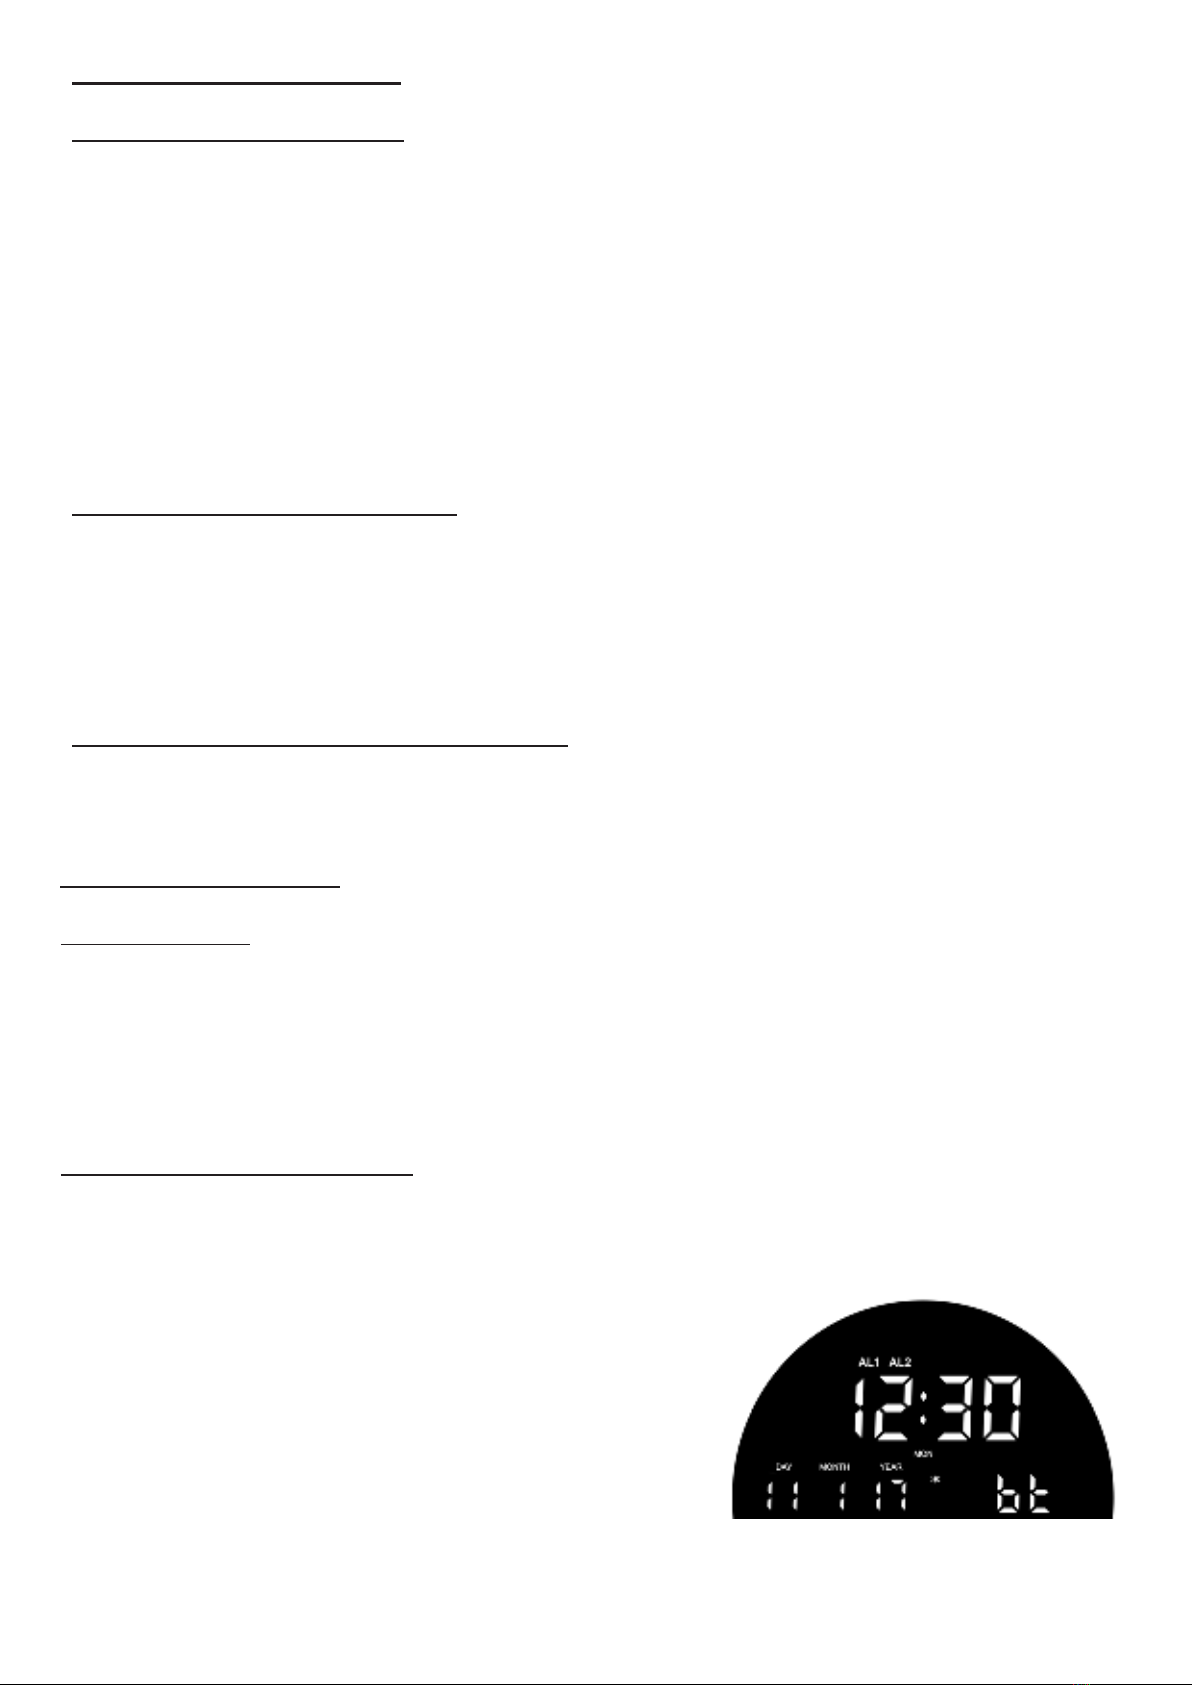
- Pressez le bouton (7) durant 3 secondes. Le symbole « AL1 » s’ache à l’écran.
- Utilisez les boutons (9) et (10) pour régler l’heure de l’alarme. Pressez le bouton (7) pour valider.
Le chire des minutes clignote.
- Utilisez les boutons (9) et (10) pour régler les minutes de l’alarme. Pressez le bouton (7) pour valider.
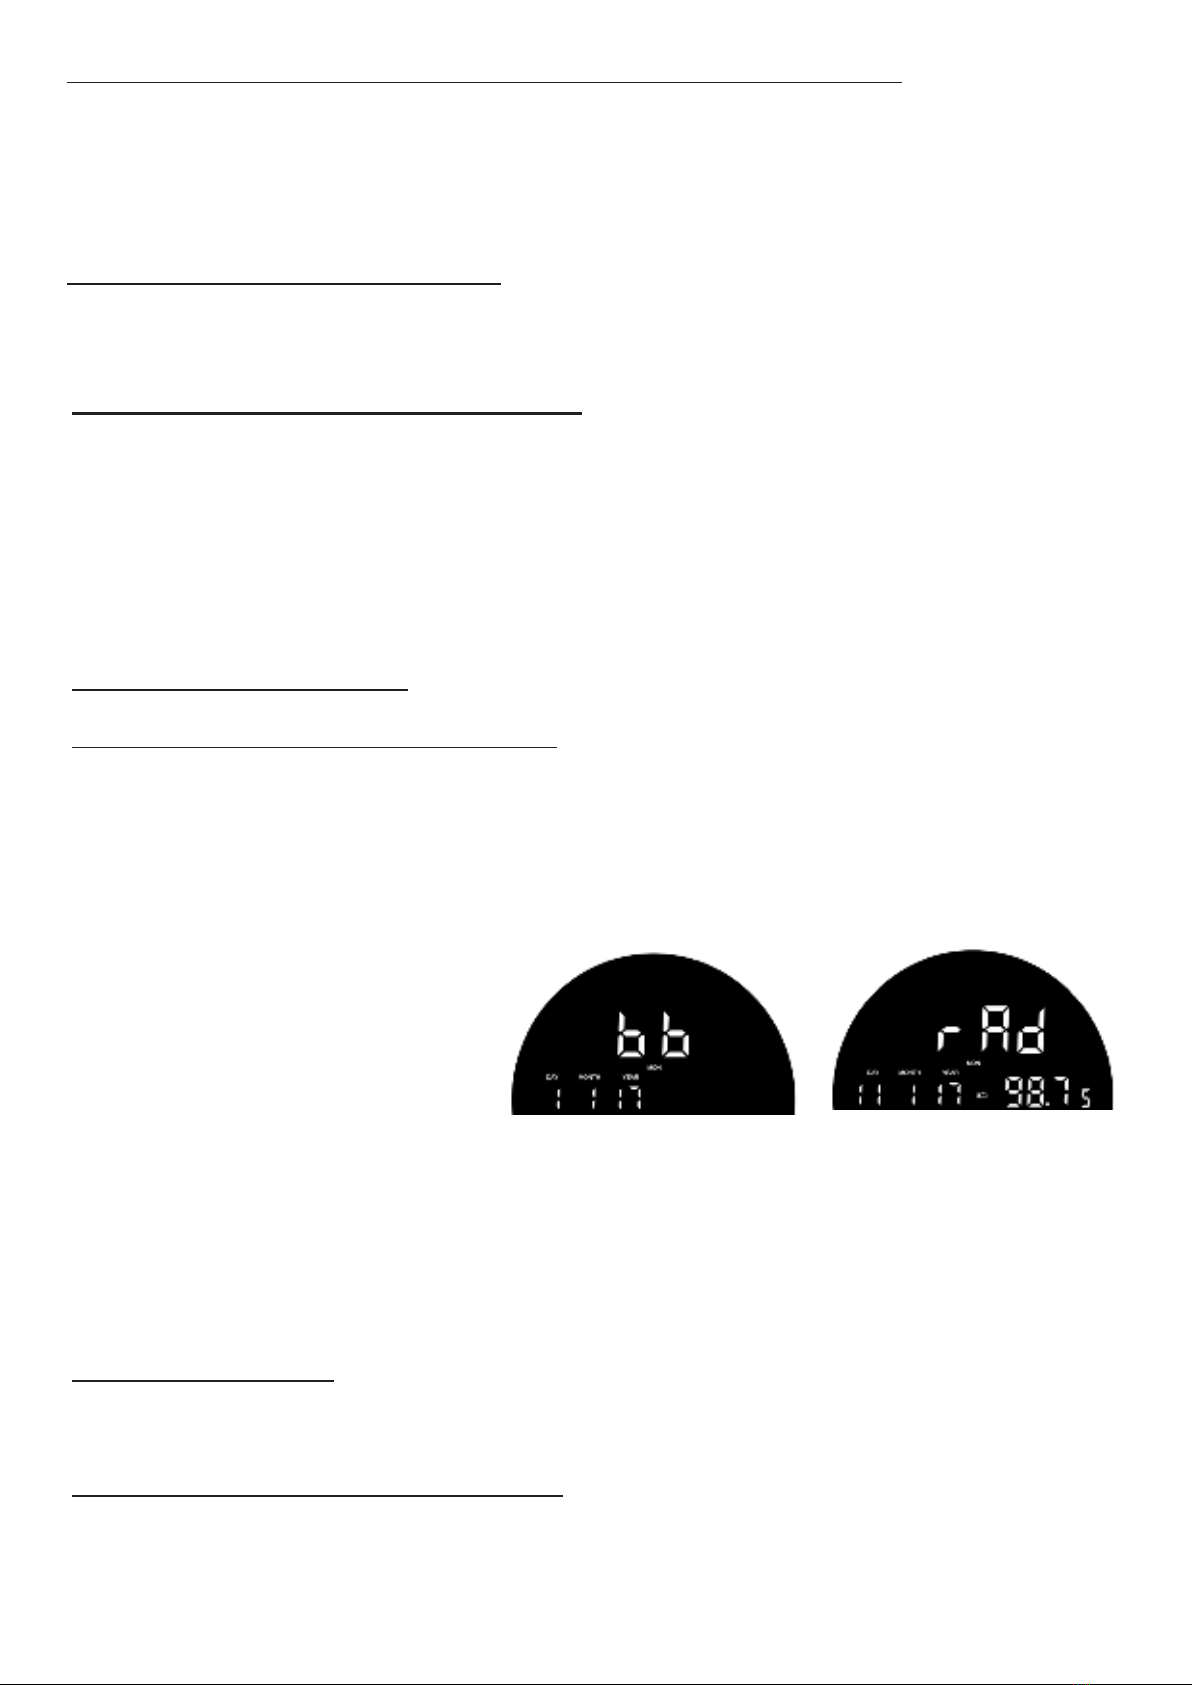
- Sélectionnez le mode réveil (Bip / radio) à l’aide des boutons (9) et (10).
● Réveil par Bip : Le symbole « bb »
apparait sur l’écran.
● Réveil par Radio : Le symbole « rAd »
apparait sur l’écran. L’alarme se
déclenchera sur la dernière station
écoutée.
- Pressez le bouton (7) pour valider.
- Le symbole « AL2 » s’ache sur l’écran et clignote.
- Procédez de la même façon que pour l’alarme 1.
- Pour sélectionner une des 2 alarmes, pressez le bouton (7).
- L’écran achera consécutivement les symboles « AL1 », « AL2 » puis les 2.
- Pressez à nouveau le bouton (7) pour désactiver les alarmes (aucun symbole ne s’ache).
ARRÊT DE L’ALARME
L’alarme se déclenche à l’heure programmée. Pour arrêter l’alarme, pressez le bouton (7), celle-ci
retentira à nouveau le lendemain à la même heure.
RÉVEIL AVEC RÉPÉTITION DE L’ALARME
- Lorsque la sonnerie retentit, touchez SNOOZE (5) : le symbole ZZclignote et l’alarme s’interrompt.
- La sonnerie retentira à nouveau après 9 minutes.
- La fonction Répétition d’alarme est active tant que le symbole clignote à l’écran.
- Pour annuler la fonction Répétition d’alarme, pressez le bouton (7) ou le bouton (13).

4 - RÉGLAGE DE LA RADIO
SÉLECTION DES STATIONS
- Déployez le l de l’antenne pour une meilleure réception des stations FM.
- Pressez successivement le bouton (13) pour mettre l’appareil en marche et (7) pour sélectionner la
fonction Radio
- L’indicateur radio (20) s’ache ainsi que la fréquence.
- Pour sélectionner manuellement une station radio, appuyez sur le bouton (9) ou (10) jusqu’à acher
la fréquence de la station.
- Pour lancer une recherche automatique des stations, pressez longuement le bouton (9) ou (10) jusqu’à
ce que la fréquence commence à déler. La recherche s’arrête lorsqu’une station radio est correctement
captée. La recherche automatique peut-être interrompue en pressant le bouton (9) ou (10).
- Réglez le volume sonore à un niveau d’écoute correct. Par la suite, ajustez le volume sonore avec
les boutons (11) et (12).
MÉMORISATION DES STATIONS
- Pour sélectionner une station radio, appuyez sur le bouton (9) ou (10) jusqu’à acher la fréquence de la station.
- Maintenez appuyé le bouton (6). P01 s’ache et clignote.
- Pour sélectionner un enregistrement, appuyez sur le bouton (9) ou (10)
- Ré-appuyez sur le bouton (6) pour conrmer le réglage, le numéro de la mémoire cesse de clignoter.
- Procédez comme ci-dessus pour régler d’autres stations de radios. Vous pouvez régler jusqu’à 10
stations de radios.
ÉCOUTER DES STATIONS MÉMORISÉES
- Appuyez sur le bouton (13), la dernière fréquence radio apparait.
- Appuyez sur le bouton (6) puis sur le bouton (9) ou (10) pour sélectionner la mémoire (P01 à P10).
5 - MODE BLUETOOTH
INFORMATIONS
- La portée opérationnelle entre cet appareil et un périphérique Bluetooth est d’environ 10 mètres.
- Avant de connecter un périphérique Bluetooth à cet appareil, familiarisez-vous avec les fonctionnalités
Bluetooth de ce périphérique.
- La compatibilité avec tous les périphériques Bluetooth n’est pas garantie.
- Tout obstacle présent entre cet appareil et un périphérique Bluetooth peut réduire la portée opérationnelle.
- Maintenez cet appareil éloigné des autres appareils électroniques pour éviter les interférences.
ACTIVATION DU BLUETOOTH
- Pressez successivement le bouton (13) pour mettre l’appareil
en marche et (7) pour sélectionner la fonction Bluetooth, le symbole
(bt) clignote.
- Lancez la recherche des prols Bluetooth depuis le périphérique
audio source.
- Sélectionnez le prol SW274 pour synchroniser.
les deux appareils (le symbole (19) se ge).
- Lancez la musique depuis le périphérique audio source.
- Pressez le bouton (5) pour mettre en pause.
- Pressez à nouveau pour reprendre la lecture.
- Pressez le bouton (9) pour passer à la piste suivante.
- Pressez le bouton (10) pour revenir à la piste précédente.
- Réglez le volume sonore à un niveau d’écoute correct. Par la suite, ajustez le volume sonore avec
les boutons (11) et (12).

6 - UTILISATION AVANCÉE
FONCTION SOMMEIL
- Sélectionnez une station de radio ou un périphérique Bluetooth.
- Appuyez sur le bouton (8) durant 3 secondes pour activer la fonction sommeil « SLEEP ».
- Appuyez successivement sur le bouton (8) pour sélectionner un délai de mise en veille automatique
120min 90min 60min 30min 15min 10min 05min OFF.
- Pour annuler la mise en veille automatique et éteindre la radio/périphérique Bluetooth, appuyez
sur la touche (13), le voyant « SLEEP » disparait.
RÉGLAGE INTENSITÉ LUMINEUSE DE L’ÉCRAN
- Par défaut, la station météo est réglée sur un achage intensif de l’écran.
- Pour diminuer l’intensité lumineuse, appuyez sur le bouton (8).
- Appuyez une seconde fois pour éteindre l’écran.
7 - ENTRETIEN ET NETTOYAGE
- Retirez les piles en cas de non-utilisation prolongée.
- Débranchez l’appareil avant de le nettoyer.
- Nettoyez si nécessaire l’extérieur de l’appareil avec un chion doux.
- Ne pas utiliser de produit d’entretien agressif ni d’éponge abrasive.
- Ne jamais utiliser d’alcool pour nettoyer l’appareil.
ATTENTION : Ne jamais plonger l’appareil dans l’eau ou dans un quelconque liquide.
DÉCONNEXION DU BLUETOOTH
- Pressez le bouton (13) pour arrêter l’appareil et pour déconnecter le périphérique Bluetooth.
REMARQUE :
L’appareil ne peut pas recevoir de la musique provenant de deux périphériques audio Bluetooth simultanément.
Il faut déconnecter au préalable la fonction Bluetooth du périphériques associé, puis faire une nouvelle
recherche du périphérique Bluetooth à synchroniser. Validez le prol Bluetooth SW274 trouvé
depuis le périphérique audio source.

PLEASE READ ALL THE DIRECTIONS IN THIS MANUAL CAREFULLY AND FOLLOW
THE OPERATING AND SAFETY INSTRUCTIONS. KEEP THIS MANUAL FOR FUTURE
REFERENCE AND SHOW IT TO POTENTIAL USERS.
VERSION : EN
WHEATHER STATION /
BLUETOOTH SPEAKER
REF : WSP1500BK
SAFETY INSTRUCTIONS
- This unit has been designed for domestic use only. The
manufacturer cannot be held responsible, and the guarantee
will not apply, for any professional use that is not appropriate or
does not comply with the instructions.
- Place the unit on a at, rigid and stable surface.
- Do not use the unit outdoors.
- Keep at least 10 cm of free space around the unit for adequate
ventilation.
- Do not install the unit on a soft surface, such as a carpet or
blanket, which may block the vents.
- Do not place the unit in direct sunlight, near a heater or any
heat source, or in a location with excessive dust or where it is
likely to get bumped.
- This unit may be used by children aged 8 years and over and
by anyone with reduced physical, sensory or mental capabilities
or a lack of experience and knowledge, provided that they have
been given supervision or instructions about how to use the unit
safely and that they understand the hazards involved.
- Children should be supervised to make sure that they do not
play with the unit.

- This appliance is not a toy, do not leave it unattended near
children.
- Never allow children to insert foreign objects into the unit.
- Unplug the unit from the power supply:
• if it remains unused for a long period of time,
• if there is a storm,
• if it is not working properly.
- If there are passing electrical or electrostatic surges, then the
device may malfunction and need the user to reset it.
- To reduce the risk of electric shock, do not open the unit,
there are no user-serviceable parts inside. Only allow repairs
to be carried out by a qualied person.
- All maintenance, apart from the usual cleaning and servicing
by the user, must be carried out by an authorised service centre.
- This unit is designed to work with the local power supply.
- This unit is designed to work with the adapter it comes with. If you need to
replace it, use another safety adapter with the same rated characteristics.
- The transformer’s external exible cable cannot be replaced. If the cord is
damaged, the transformer must be disposed of.
- If an extension cord is required, take all necessary precautions to avoid
the risk of a fall.
- Do not connect or disconnect the adapter with wet hands.
- The adapter should not be exposed to dripping water or splashing and no
liquids should be placed on the unit.
- To completely disconnect the unit from the power supply, the adapter
must be completely unplugged from the wall socket.
- The adapter must not be blocked and must be easily accessible during
use.
USE WITH ADAPTER

BATTERY INFORMATION (BATTERIES NOT SUPPLIED)
- To function properly, the sensor must have the appropriate batteries
inserted.
- Only the recommended type of batteries should be used.
- The batteries must be inserted the right way round.
- The battery terminals must not be short-circuited.
- Do not mix new and used batteries.
- Do not mix alkaline, standard (carbon-zinc) and rechargeable (nickel -
cadmium) batteries.
- Do not recharge the batteries or attempt to open them.
- Do not dispose of batteries in re.
- Replace all batteries at the same time with new, identical batteries.
- If the liquid from a battery comes into contact with your eyes or skin, wash
the aected area immediately and thoroughly with clean water and seek
medical attention.
- Do not expose batteries to excessive heat such as sunlight, re or similar.
CAUTION:
RISK OF ELECTRIC SHOCK
DO NOT OPEN
CAUTION: To reduce the risk of electric shock, do not open the unit, there
are no user-serviceable parts inside. All repairs should be carried out by a
qualied person.

DESCRIPTION
TECHNICAL CHARACTERISTICS AND MAIN FUNCTIONS
BACK FRONTTOP
BOTTOM 2 SENSORS
110 11 12 13
3
4
2
6
5789
11 : Volume down button
12 : Volume up button
13 : Setting / radio button
14 : Alarm 1 / Alarm 2 indicator
15 : Snooze indicator
16 : Sleep function indicator
17 : Clock (hours, minutes)
18 : Day of the week
19 : Bluetooth indicator
20 : Radio indicator
21 : Date / Month / Year
22 : Weather indicator
23 : Humidity rate
24 : Outdoor temperature
25 : Sensor signal indicator
26 : Indoor temperature
27 : Battery compartment
28 : Base
29 : LED
30 : Batteries compartment
31 : Wall mounting hole
1 : Weather station
2 : Buttons
3 : Speaker
4 : AC adapter socket
5 : Play / snooze button
6 : °C /°F button
7 : Alarm / Bluetooth / radio button
8 : Screen intensity button
9 : Previous track button
10 : Next track button
18 17
27
29
16
28
30
15
14
19
20
21 22
23
25
24 26
31
- Time display: 12H / 24H
- Calendar: DD / MM / YY, Day of the week
- FM radio: 88.8 to 108MHz (10 station
memory)
- Alarm clock function (2 alarms)
- Weather display: sunny, sunny spells,
cloudy, rainy
- Indoor and outdoor temperature display
- Humidity rate display
- Speaker: 1x3W + 1 passive membrane
- Speaker frequency: 165Hz-14.0KHz
- Maximum range of the wireless sensors: 10
metres
- Bluetooth connection: maximum distance 10
metres
- Weather station power supply: 100-240V~,
50/60Hz, DC 5V
- Clock backup: 1 x CR2025 battery (supplied)
- Outdoor sensors power supply: 2 x LR03
(AAA) 1,5V batteries (not supplied)

1 - USE OF THE WHEATHER STATION
WEATHER STATION
Place the weather station on a at horizontal surface.
SENSORS
The sensors can be installed:
- either on the wall using a screw (not included). Hang the sensor through the hole (31) on the back.
- or horizontally
For best results:
- Do not expose the sensors to direct sunlight or moisture.
- Do not place the sensors more than 10 metres away from the weather station.
- Minimize obstacles (doors, walls and furniture) between the sensors and the weather station.
- Keep the sensors away from metal or electronic objects.
TEMPERATURES AND HUMIDITY
The weather station displays the following information:
- Indoor temperature (26) measured by the weather station
- Outdoor temperature (24) and humidity rate (23) from the sensors
CHOICE OF TEMPERATURE UNIT
- Press button (6) to select the temperature unit:
°C (Celsius) or °F (Fahrenheit).
WEATHER INDICATOR
When the unit is turned on, the weather station
will show the weather conditions in the form of icons:
POWER SUPPLY
AC ADAPTOR OF THE WHEATHER STATION
- Use the adapter indoors only, in rooms protected from moisture.
- Connect the AC adapter to the AC adapter terminal (4) on the back of the unit.
- Then connect the adapter to the mains.
INSTALLING THE BATTERY (CLOCK BACKUP)
Remove the clear tab on the bottom of the battery compartment (27) to activate the battery.
To replace the battery:
- Remove the battery compartment cover (27).
- Insert a CR2025 battery, respecting the polarity indicated.
- Replace the cover.
NOTE: Use only the battery type specied in this manual.
WIRELESS SENSORS (batteries not included)
- Open the batteries compartment cover (30) on the back of each sensor.
- Insert 2 x 1,5V LR03 (AAA) batteries, respecting the polarity indicated.
- Close the batteries compartment cover.
INSTALLATION / UTILISATION
Sunny
DESCRIPTIONICON
Sunny spells
Cloudy
Rainy

CONNECTION OF THE OUTDOOR SENSORS WITH THE WEATHER STATION
The outdoor sensors connect automatically after 1 minute. Otherwise, you can connect the devices
manually:
- Press button (5) for 3 seconds, the indicator (25) ashes.
- When the weather station detects the sensors, the outdoor temperature will be displayed (24).
- The sensors data are sent automatically about every 3 minutes.
CHOICE OF SENSOR DISPLAY
To toggle between the data from the sensors:
- Use button (5) for selection (CH1 / CH2).
2 - SETTING THE TIME AND DATE
- Press button (13) for 3 seconds to enter the time and date setting mode.
- Use buttons (9) and (10) to adjust the values. Hold the buttons down to speed up scrolling.
- Press button (13) to validate the selected digit.
- The day of the week is displayed automatically (18).
- If the buttons are not pressed, the unit returns to the normal display after 15 seconds.
3 - SETTING THE ALARM
SETTING AND ACTIVATING THE ALARM
- Press button (7) for 3 seconds. The symbol «AL1» appears on the screen.
- Use buttons (9) and (10) to set the alarm hour. Press button (7) to confirm. The minute digit
flashes.
- Use buttons (9) and (10) to set the alarm minutes. Press button (7) to conrm.
- Select the alarm mode (Beep / Radio) using buttons (9) and (10).
● Beep alarm: the symbol «bb»
appears on the screen.
● Radio alarm: the symbol «rAd»
appears on the screen.
The alarm will activate the last
station listened to.
- Press button (7) to conrm.
- The «AL2» symbol appears on the screen and ashes.
- Proceed in the same way as for alarm 1.
- To select one of the two alarms, press button (7).
- The screen will display consecutively the symbols «AL1», «AL2» then the 2.
- Press button (7) again to deactivate the alarms (no symbol is displayed).
SWITCHING OFF THE ALARM
The alarm will go o at the programmed time. To stop the alarm, press button (7). It will sound again
the next day at the same time.
SNOOZE FUNCTION
- When the alarm sounds, press SNOOZE (5): the symbol ZZ ashes and the alarm stops.
- The alarm will sound again after 9 minutes.
- The snooze function is active as long as the symbol ashes on the display.
- To cancel the snooze function, press button (7) or (13).

4 - RADIO MODE
STATIONS SELECTION
- Extend the antenna wire for better reception of FM stations.
- Press button (13) successively to switch on the device and (7) to select the Radio function.
- The Radio indicator (20) is displayed along with the frequency.
- To manually select a radio station, press button (9) or (10) until the station’s frequency is displayed.
- To initiate an automatic station search, press and hold button (9) or (10) until the frequency starts
to scroll. The search stops when a radio station is found. The automatic search can be interrupted
by pressing button (9) or (10).
- Adjust the sound volume to a correct listening level. Then adjust the sound volume with buttons
(11) and (12).
STATION SAVING
- To select a radio station, press button (9) or (10) until the station frequency is displayed.
- Keep button (6) pressed. P01 will be displayed.
- To select a saved station, press button (9) or (10).
- Press button (6) again to conrm the setting, the saving number stops ashing.
- Proceed as above to save other radio stations. You can set up to 10 radio stations.
LISTENING TO A SAVED STATION
- Press button (13), the last radio frequency appears.
- Press button (6) and then button (9) or (10) to select a saving (P01 to P10).
5 - BLUETOOTH MODE
INFORMATIONS
- The operational range between this device and a Bluetooth device is approximately 10 metres.
- Before connecting a Bluetooth device to this unit, familiarize yourself with the Bluetooth features of
that device.
- Compatibility with all Bluetooth devices is not guaranteed.
- Any obstruction between this device and a Bluetooth device may reduce the operational range.
- Keep this device away from other electronic devices to avoid interference.
BLUETOOTH ACTIVATION
- Press button (13) successively to switch on the device and (17) select the Bluetooth function, the (bt)
symbol will ash (10).
- Start the Bluetooth prole search from the source audio device.
- Select the SW274 prole to synchronize the two devices
(the Bluetooth (19) no longer ashes).
- Playback music from the source audio device.
- Press button (5) to pause.
- Press again to resume playback.
- Press button (9) to move to the next track.
- Press button (10) to return to the previous track.
- Adjust the sound volume to a correct listening level.
Then adjust the sound volume with buttons (11) and (12).

6 - ADVANCED USE
SLEEP FUNCTION
- Select a radio station or a Bluetooth peripheral.
- Press button (8) for 3 seconds to activate the sleep function.
- Successively press button (8) to select an automatic sleep time
120min 90min 60min 30min 15min 10min 05min OFF.
- To cancel the automatic sleep and turn o the radio/Bluetooth peripheral, press button (13), and
the “SLEEP” indicator disappears.
LIGHT INTENSITY ADJUSTMENT
- By default, the intensity of the weather station display is set to high.
- To decrease the light intensity, press button (8).
- Press a second time to turn o the display.
7 - MAINTENANCE AND CLEANING
- Remove the batteries when left unused for a long period.
- Unplug the unit before cleaning.
- If necessary, clean the exterior of the unit with a soft cloth.
- Do not use harsh cleaning agents or abrasive sponges.
- Never use alcohol to clean the unit.
CAUTION: Never immerse the unit in water or any other liquid.
DISCONNECTING THE BLUETOOTH
- Press button (13) to turn o the unit and disconnect the Bluetooth device.
NOTE:
The device cannot receive music from two Bluetooth audio devices simultaneously. You must rst
disconnect the Bluetooth function from the associated device and then search again for the
Bluetooth device to be synchronized. Validate the SW274 Bluetooth prole found from the
source audio device.

LESEN SIE ALLE ANWEISUNGEN IN DIESER BEDIENUNGSANLEITUNG SORGFÄL-
TIG DURCH UND BEACHTEN SIE DIE ANWENDUNGS- UND SICHERHEITSHINWEISE.
BEWAHREN SIE DIESE BEDIENUNGSANLEITUNG FÜR ZUKÜNFTIGE ZWECKE AUF
UND INFORMIEREN SIE POTENZIELLE BENUTZER.
VERSION : DE
WETTERSTATION /
BLUETOOTH-LAUTSPRECHER
REF : WSP1500BK
SICHERHEITSHINWEISE
- Dieses Gerät wurde nur für den Hausgebrauch entwickelt.
Für eine professionelle Nutzung, die ungeeignet ist oder nicht
der Bedienungsanleitung entspricht, übernimmt der Hersteller
weder Haftung noch Garantie.
- Stellen Sie das Gerät auf eine ebene, feste und stabile Unterlage.
- Verwenden Sie das Gerät nicht im Freien.
- Halten Sie um das Gerät herum einen Freiraum von mindestens
10 cm für eine ausreichende Belüftung ein.
- Installieren Sie das Gerät nicht auf einer weichen Oberäche, wie z.
B. einem Teppich oder einer Decke, da diese die Lüftungsönungen
blockieren können.
- Stellen Sie das Gerät nicht in direktem Sonnenlicht, in der Nähe
einer Heizung oder einer Wärmequelle oder an einem Ort auf, der
übermäßigem Staub oder mechanischen Stößen ausgesetzt ist.
- Dieses Gerät kann von Kindern ab 8 Jahren sowie von Personen
mit eingeschränkten körperlichen, sensorischen oder mentalen
Fähigkeiten oder mangelnder Erfahrung bzw. fehlendem Wissen
benutzt werden, sofern sie beaufsichtigt werden oder bezüglich
des sicheren Gebrauchs des Geräts unterwiesen wurden und über
die Gefahren informiert sind. Kinder sollten nicht unbeaufsichtigt
mit dem Gerät spielen.

- Dieses Gerät ist kein Spielzeug, lassen Sie es nicht in der
unbeaufsichtigten Reichweite von Kindern.
- Lassen Sie Kinder niemals beliebige Gegenstände in das
Gerät einführen.
- Trennen Sie das Gerät vom Stromnetz:
• wenn es über einen längeren Zeitraum unbenutzt bleibt,
• bei Stürmen,
• wenn es nicht ordnugsgemäß funktioniert.
- Unter dem Einuss schneller elektrischer Transienten und/
oder elektrostatischer Phänomene kann es zu Fehlfunktionen
des Geräts kommen, die ein Eingreifen des Benutzers zur
Rückstellung erfordern.
- Um die Stromschlaggefahr zu mindern, önen Sie das Gerät
nicht. Im Inneren benden sich keine Teile, die für die Bedienung
durch den Nutzer bestimmt wären. Lassen Sie Reparaturen nur
von einer qualizierten Person durchführen.
- Alle Wartungsarbeiten, abgesehen von den üblichen
Reinigungs- und Wartungsarbeiten durch den Benutzer,
müssen von einer autorisierten Servicestelle durchgeführt werden.
- Dieses Gerät ist für den Betrieb mit dem lokalen Stromnetz ausgelegt.
- Dieses Gerät ist für den Betrieb mit einem mitgelieferten Adapter ausgelegt.
Verwenden Sie im Falle eines Austauschs einen anderen Sicherheitsadapter
mit den gleichen Nenneigenschaften.
- Das externe exible Kabel des Transformators kann nicht ausgetauscht
werden. Wenn das Kabel beschädigt ist, muss der Transformator entsorgt
werden.
- Falls ein Verlängerungskabel erforderlich ist, treen Sie alle nötigen
Vorkehrungen, damit das Gerät nicht herunterfällt.
- Das Netzteil nicht mit nassen Händen anschließen oder abziehen.
- Der Adapter darf keinem Tropf- oder Spritzwasser ausgesetzt werden und
es dürfen keine Behälter mit Flüssigkeiten auf das Gerät gestellt werden.
- Um das Gerät vollständig vom Stromnetz zu trennen, muss der Adapter
komplett aus der Steckdose gezogen werden.
- Das Netzteil darf nicht blockiert werden und muss während des Betriebs
leicht zugänglich sein.
NETZBETRIEB

INFORMATIONEN ZU DEN BATTERIEN (NICHT IM LIEFERUMFANG ENTHALTEN)
- Damit der Sensor korrekt funktioniert, muss er mit den passenden Batterien
ausgestattet sein.
- Es sollten nur die empfohlenen Batterietypen verwendet werden.
- Die Batterien müssen mit der richtigen Polarität eingelegt werden.
- Die Batterieklemmen dürfen nicht kurzgeschlossen werden.
- Mischen Sie keine neuen und gebrauchten Batterien.
- Mischen Sie keine Alkali-, Standard- (Kohle-Zink) und wiederauadbaren
(Nickel-Cadmium) Batterien.
- Laden Sie die Batterien nicht auf und versuchen Sie nicht, sie zu önen.
- Werfen Sie die Batterien nicht ins Feuer.
- Ersetzen Sie alle Batterien gleichzeitig durch identische neue Batterien.
- Sollte die Flüssigkeit aus der Batterie mit Ihren Augen oder Ihrer Haut in
Berührung kommt, waschen Sie den betroenen Bereich sofort gründlich mit
sauberem Wasser und suchen Sie einen Arzt auf.
- Setzen Sie die Batterien nicht starker Hitze wie Sonnenlicht, Feuer o. Ä.
aus.
ACHTUNG!
STROMSCHLAGGEFAHR!
NICHT ÖFFNEN
ACHTUNG: Um die Stromschlaggefahr zu mindern, önen Sie das Gerät
nicht. Im Inneren benden sich keine Teile, die für die Bedienung durch
den Nutzer bestimmt wären. Überlassen Sie sämtliche Reparaturen einer
qualizierten Fachkraft.
Table of contents
Languages:
Other Nasaco Weather Station manuals