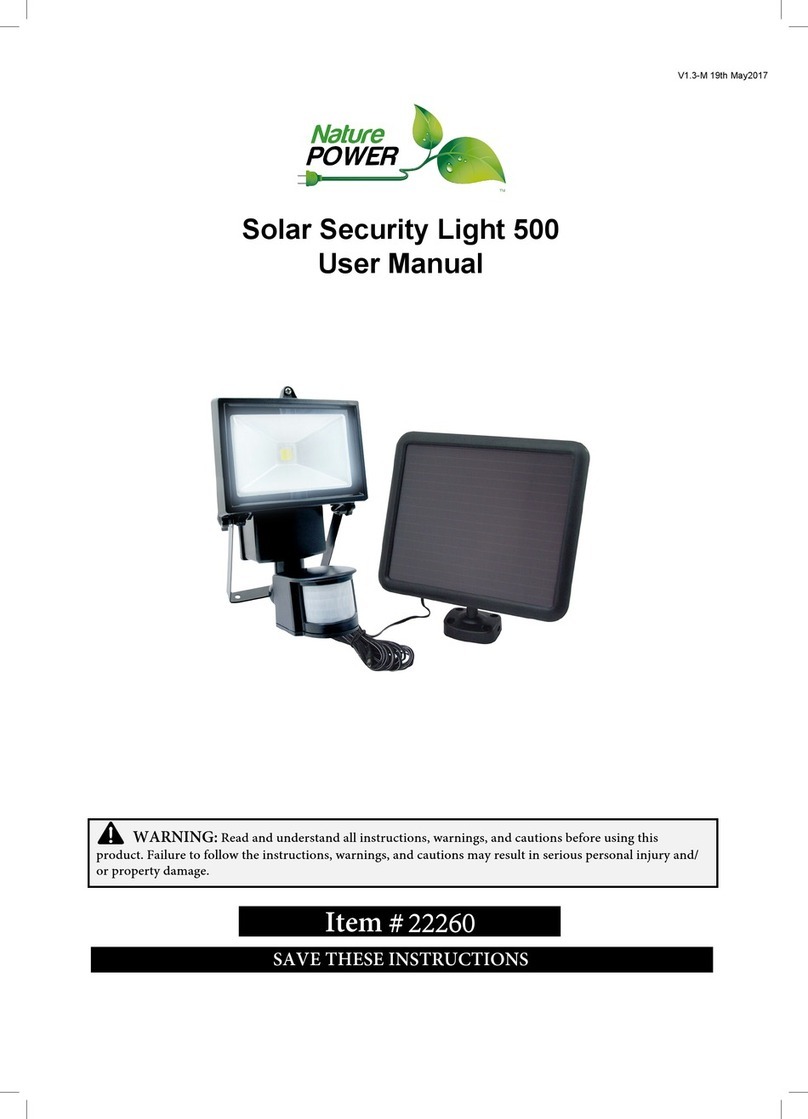
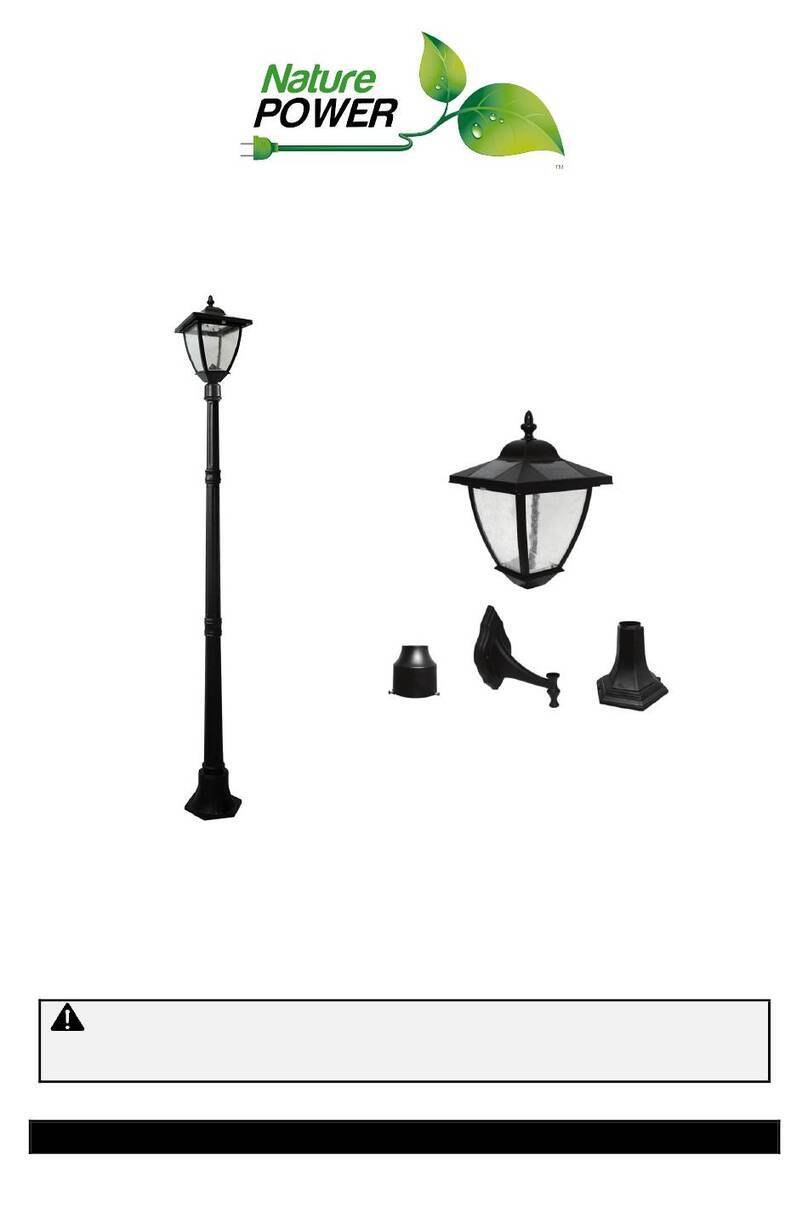
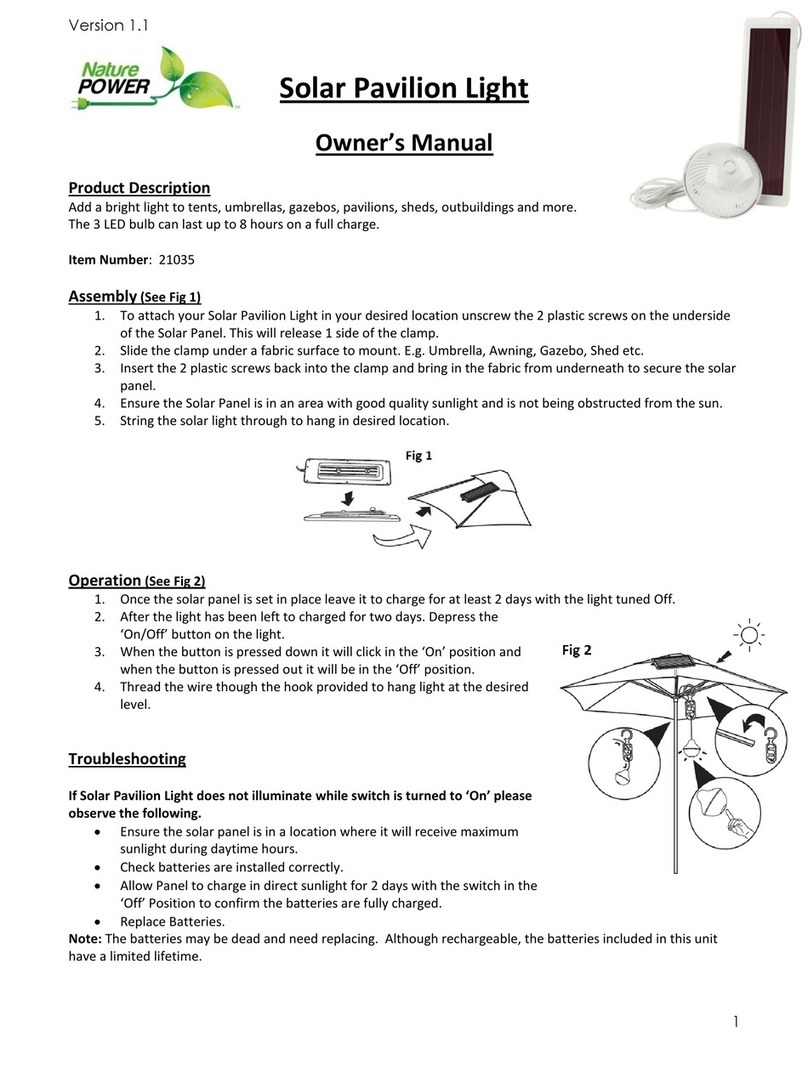
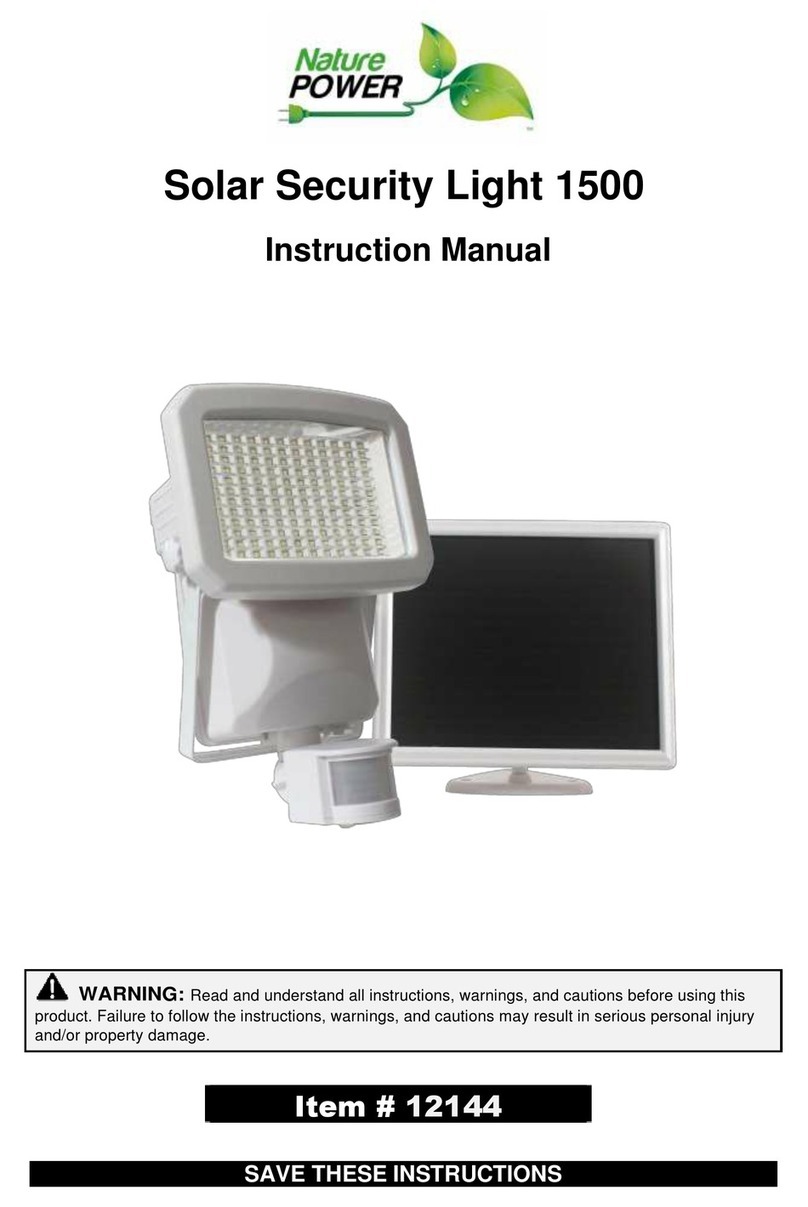
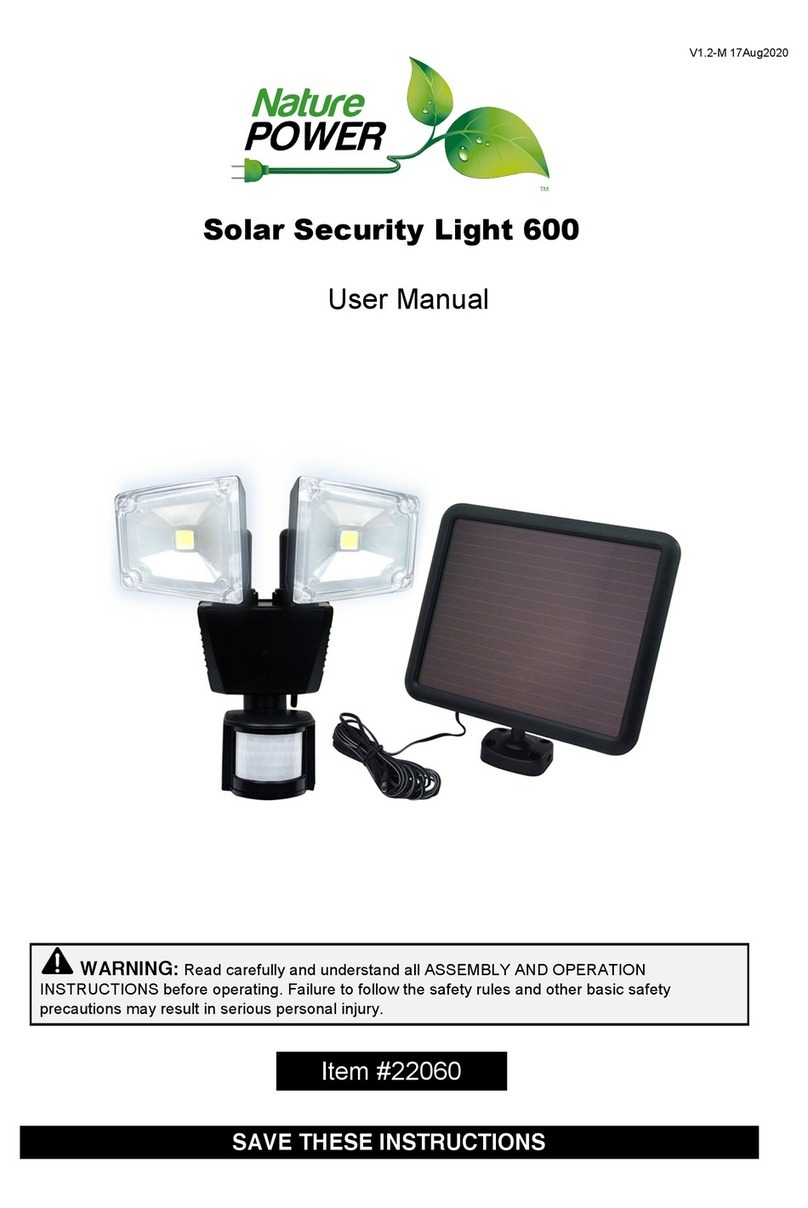
Nature Power Solar Security Light 600 User manual

SINGLE COLOR
(Used for background colors other than Black or White)
White
(Used for black or dark grey background color)
Version 1.5
FRANÇAIS PG. 07
ENGLISH PG. 01
ESPAÑOL PG. 13
Solar Security Light 600
Version 1.6

Page 2
Page of 6
2
ThankyouverymuchforchoosingaNaturePowerProduct!Forfuturereference,pleasecompletethe
owner’srecordbelow:
Model:_______________ PurchaseDate:_______________
Save the receipt and these instructions. It is important that you read the entire manual to become
familiarwiththisproductbeforeyoubeginusingit.
Thismachineisdesignedforcertainapplicationsonly.Thedistributorcannotberesponsibleforissues
arisingfrom modification.We stronglyrecommendthismachinenotbemodifiedand/orused forany
applicationotherthanthatforwhichitwasdesigned.Ifyouhaveanyquestionsrelativetoaparticular
application,DONOTusethemachineuntilyouhavefirstcontactedthedistributortodetermineifitcan
orshouldbeperformedontheproduct.
Fortechnicalquestionspleasecall18005880590.
GENERALSAFETYRULES
WARNING:
ReadcarefullyandunderstandallASSEMBLYANDOPERATIONINSTRUCTIONSbeforeoperating.Failuretofollow
thesafetyrulesandotherbasicsafetyprecautionsmayresultinseriouspersonalinjury.
CAUTION:DonotallowpersonstooperateorassemblethisSolarLightuntiltheyhavereadthis
manualandhavedevelopedathoroughunderstandingofhowtheSolarLightworks.
WARNING:Thewarnings,cautions,andinstructionsdiscussedinthisinstructionmanualcannot
coverallpossibleconditionsorsituationsthatcouldoccur.Itmustbeunderstoodbytheoperatorthatcommon
senseandcautionarefactorswhichcannotbebuiltintothisproduct,butmustbesuppliedbytheoperator.
SAVETHESEINSTRUCTIONS
FEATURES
YourCOBSecurityLightistheperfectsystemforthefollowing:
•Entrance
•Garage
•Porch
•Eaves
•Emergency

Page 3
Page of 6
3
PARTSLIST
USEANDCARE
•DonotmodifytheSolarLightinanyway.Unauthorizedmodificationmayimpairthefunctionand/orsafety
andcouldaffectthelifeoftheequipment.TherearespecificapplicationsforwhichtheSolarLightwas
designed.
•AlwayscheckfordamagedorwornoutpartsbeforeusingtheSolarLight.BrokenpartswillaffecttheSolar
Lightoperation.Replaceorrepairdamagedorwornpartsimmediately.
•StoreidleSolarLight.WhenSolarLightisnotinuse,storeitinasecureplaceoutofthereachofchildren.
Inspectitforgoodworkingconditionpriortostorageandbeforereuse.
ASSEMBLY
1. LampUnitInstallation
•Mountingyourlightrequiresascrewdriver,penciland(insomecircumstances)apowerdrill.
•Placethemountingbracketonthesurfaceyouwishtomountto.
•Markwithapencilthepositionofthemountingbracketscrewholes.Thiswillenableyoutopredrill
yourscrewholes.
•Oncethemountingbracketisinstalled,ensuringallscrewsaretight,youarereadytopositionyourCOB
SecurityLight.
•Carefullyroutethewirefromthesolarpaneltothelampandplugitintothepowersocket.
•Adjustthemotionsensortoyourdesiredposition.YourCOBSecurityLightisnowinstalledandreadyto
charge.
Note:Lampunitshouldbemounted6.5~9.8ftfromthegroundtoensuremotiondetectionisoptimized.
2. SolarPanelWallorRoofMountedInstallation
•Chooseanareathatreceivesthemaximumamountofsunlightpossible.
•Use the holes located on the solar panel mounting bracket to mark the mounting surface for
installation.
•Set the bracket on the surface you have chosen and secure it in place with thescrews and anchors
provided.
•AdjusttheangleoftheSolarPaneltoensureitreceivesoptimumsunlight.
Note:TheSolarPanelisequippedwitha5ft.wire.Themaximumdistancebetweenthelampunitandsolarpanel
canbe5ft.
Part#DescriptionQty.
1 Lamp 1
2 SolarPanel(5mWire) 1
3 ScrewsandAnchors 1
4 MountingBracket 1
5 Manual 1

Page 4
Page of 6
4
ASSEMBLYDIAGRAM
Part
Description
Part
Description
1
Lamp
7
AUTO/OFF/ONSwitch
2
SolarPanel(5ft.wire)
8
SolarPanelMountingBracket
3
Screws&Anchors
9
LUXAdjustingKnob
4
COBLED’s
10
SENSAdjustingKnob
5
BatteryHousing
11
TIMEAdjustingKnob
6
MotionDetectorHead
12
MountingBracket

Page 5
Page of 6
5
OPERATION
1. BeforetheSolarMotionLightcanoperatetoitsfullcapacity,theSolarPanelneedstobeinsunlightfor3days
tofullychargetheincludedbattery.Chargingshouldbedonewiththeunitinthe“OFF”position.
2. LocatedatthebottomoftheBatteryHousing(5)thereisaswitchwiththreepositions:
•Turn the switch to “AUTO” position, the light will turn on automatically at nightwhen motion is
detectedbytheMotionDetectorHead(6).
•Turntheswitchto“ON”position,thelightcanbeusedasastandardlightforconstantillumination.
•Turntheswitchto“OFF”position,thelightwillremainoffandwillnotdetectanymovement.
HOWTOUSECONTROLDIALS
TheSolarMotionLighthas3differentcontroldialswhichcontrolthelight’sduration,
sensitivitytolightandsensitivitytomotion.
LUX(LIGHTLEVEL)
1. The LUX Adjusting dial (9) tells the sensor the level of darkness that must be
reachedbeforethelightturnson.
2. Ifsettothemaximum level,thelightwillgoonindaylight.
3. Ifsettotheminimumsetting thesensorwillonlytriggerthelighttoturnonatduskorwhenitisdark
out.Thisistheidealpositionforgeneralusage.
TIME
1. TheTIMEAdjustingdial(11)setsthedurationofilluminationtime.
2. The TIME is adjustable from 8 seconds to 2 minutes. Rotating the dial clockwise will increase the
illuminationtime.
SENS(SENSITIVITY)
Thisdeterminestherangeofmotiondetection:
1. Minimumposition–LowRange.
2. MidPositionNormalsetting.
3. MaximumpositionMaximumrange.
LOCATIONOFSOLARLIGHT
For best results, please locate the Solar Panel from your
COB SolarLightin a position where it can absorb direct
sunlightonthesolarpanel,andgenerallyfreefromcover
andshade.
TROUBLESHOOTING
IftheSolarMotionLightdoesnotilluminatewhenmovementinfrontofthesensorisobvious,pleaseobserve
thefollowing:
•Ensurethesolarpanelisinalocationwhereitwillreceivemaximumsunlightduringdaytimehours.
•Ensurethelampheadisawayfromotherlightsources.Otherlightsourcesatnightwillpreventthe

Page 6
Page of 6
6
unitfromturningon.
•Ensureswitchissetto“AUTO”or“ON’position.
•Checkbatteriesareinstalledcorrectly.
•Allow the solar panel to charge the batteries in direct sunlight for 3 days with the switch in the
“OFF”position.
•ReplaceBatteries.Rechargeablebatteriesmaylastupto600charges.Forbestperformancereplace
batteriesevery12months.
BATTERYREPLACEMENT
1. TheBatteryPackislocatedintheBatteryHousing(5).
2. TurntheSwitch(7)tothe“OFF”position.Removethe fourscrewsfromthe BatteryHousing(5).Separate
theBatteryPackconnector.RemoveoldBatteryPack.ReplaceonlywithidenticalrechargeableBatteryPack.
3. Checkcorrectpolarityofbatteryreplacement.
4. ReplacethecoveroftheBatteryHousing(5).Secureitwiththefourscrews.
MAINTENANCE
MaintainyourSolarLight.ItisrecommendedthatthegeneralconditionofanySolarLightbeexaminedbeforeit
isused.CleanthesolarmodulewithadamptoweltoinsureoptimumperformanceoftheSolarLight.Donotuse
anytypeofsolventforcleaningandbecarefulnottoputtoomuchpressureonthemodulewhilecleaning.
LIMITEDWARRANTY
NaturePowerwarrantsourproductstotheoriginalpurchaserthatthisproductisfreefromdefectsinmaterials
andworkmanshipfortheperiodofoneyearfromdateofpurchase.Inthecaseofproductdefect,contactNature
Powercustomerservicetoreceivetroubleshooting.Ifdefectivepartorunitshouldbereturned,aReturn
AuthorizationNumbermustbeissuedbyNaturePowerandthedefectivepartorunitshouldbereturnedtothe
authorizedlocationatthepurchasers’expense.Adatedproofofpurchaseisrequiredtoreceivewarrantyservice.
Oncereceivedatauthorizedlocationanddefectprovestobetheresultofdefectivematerialandworkmanship,
thedefectivepartorunitwillbereplacedatwarrantors’optionandreturnedtotheoriginalpurchaserat
warrantors’expense.Norefundswillbegrantedbythewarrantor,intheeventofbuyer’sremorsepleasecontact
yourpointofpurchasewithinandinadherencetotheirreturnpolicy.Refundsaregrantedattheretailers’
discretions.
DatedProofofPurchaseisrequired.
PleasecontactNaturePowerProductstoacquiremoreinformation:
18005880590
info@naturepowerproducts.com
www.naturepowerproducts.com

Version 1.5
LampesolaireDeSecurites600
Manueld'instructions
Article#22060
français pg. 07
English pg. 01
español pg. 13
SINGLE COLOR
(Used for background colors other than Black or White)
White
(Used for black or dark grey background color)

Page 8
Page de 6
2
Mercid'avoirchoisiNaturePower!Pourréférenceultérieure,veuillezcompléterlesinformationscidessous:
Modèle:_________________Dated'achat:_______________________
Conservezvotrereçuetcesinstructions.Ilestimportantquevouslisiezlemanuelenentierpourvousfamiliariseravecceproduitavantde
commenceràl'utiliser.
Ceproduitfutconçupourapplicationsspécifiques.Ledistributeurneserapastenuresponsablepourproblèmesdécoulantdemodifications
duproduit.Nousrecommandonsfortementdenepasmodifierceproduit,nid'utiliserceproduitd'unemanièreautrepourlequelilfutconçu.
Sivousavezdesquestionsreliéesàl'utilisationduproduit,veuillezSVPcontactervotredistributeuretNEPASutiliserceproduitavantavoir
confirméqueceproduitpeutêtreutilisécommeprévu.
LIGNESDIRECTRICESPOURVOTREDESÉCURITÉ
AVERTISSEMENT:
VeuillezlirelesinstructionsD'ASSEMBLAGE/MONTAGEETDEMODED'EMPLOIaucompletavantl'utilisation.Veuillezlirelesavertissements
etprécautionsdesécuritépourévitertouteblessuregravepotentielle.
AVERTISSEMENT:
Personnenedoitinstallerniutiliserceproduitavantavoirbienluetbiencompriscesinstructions,ainsiquetouteslesfonctionnalitésdu
produit.
AVERTISSEMENT:
Lesinstructionsetavertissementsdanscemanuelnecouvrentpastouteslessituationspossibles.Danscescas,l'utilisateurdoitutiliserson
bonjugementetprendrelesprécautionsnécessaires.
VEUILLEZCONSERVERCESINSTRUCTIONS
UTILISATIONLISTEDESPIÈCES
Votrelampesolaireavecdétecteurdemouvementestidéalepour:
•Entrées
•Garages
•Terrasses
•Corniches/avanttoits
•Emplacementsdesécurité/d'urgence
Batterieincluse
PRÉCAUTIONSETENTRETIEN
•Nepasmodifierceproduitenaucunefaçon.Toutemodificationnonapprouvéepourraitnuireaufonctionnementetréduireladuréede
vieduproduit.Cettelampesolairefutconçuepourapplicationsspécifiques.
•Assurezvoussurunebaserégulièrequ'iln'yaaucunepièceendommagéeouuséeavantl'utilisation.Lespiècesendommagéeauront
unimpactsurlaperformanceet/oulefonctionnementdelalampesolaire.Remplacezouréparezlespiècesuséesouendommagées
immédiatement.
Pièce
Description
1
Lampe
2
Panneausolaire(aveccâblede16pieds)
3
Visetancrages
4
Supportdemontage
5
Manuel

Page 9
Page de 6
3
ASSEMBLAGE/MONTAGE
1. Installationdelalampe
•Outilsrequis:Tournevis,crayonetperceuseélectrique(pourcertainessurfaces).
Remarque:Lalampedevraitêtreinstalléeàunehauteurde6,5à9,8piedsdusolpourassurerunchampdedétection
demouvementoptimal.
•Placezlesupportdemontagesurlasurfacechoisie.
•À l'aide d'un crayon, tracez lespositions des trous pour lesvis (3) du support, vous permettant ainside percer vos trous à
l'avance.
•Fixezlesupportaveclesvisens'assurantquetouteslesvissontbienserrées.Lalampeestmaintenantprêteàinstaller.
•Branchezlecâbleprovenantdupanneausolaireàlaprisedelalampe.
•Réglezle capteur de mouvement à la position désirée. Votre lampe solaire à 120 DELavec détecteur de mouvementest
maintenantinstalléeetprêteàcharger.
2. Installationdupanneausolairesurmursoutoits
•Choisissezunendroitquirecevraunmaximumdelalumièredusoleil.
Remarque: Le panneau solaire comprend un câble de 16 pieds. La distance maximale entre la lampe et le panneau
solaireestdonclimitéeà16pieds.
•Àl'aided'uncrayon,tracezlespositionsdestrousdusupportdemontagedupanneausolairesurlasurfacechoisie.
•Placezlesupportsurlasurfaceetfixezleàl'aidedes3visetancragesfournis.
•Réglezl'angledupanneausolairepourassureruneréceptionmaximaledelalumièredusoleil.

Page 10
Page de 6
4
SCHÉMADESPIÈCES
MODE
D'EMPLOI
1. Avantd'utiliservotrelampesolaire avecdétecteurde mouvement, vousdevezcharger la batterieen exposantle panneausolaireen
pleinsoleilpendant3jours.Lecommutateurdoitêtreàlaposition«OFF»pendantlacharge.
2. Dès la charge complétée, réglez le commutateursitué au bas du boîtier à batterie (11), à la position appropriée comme décrite
Partie
Description
Part
Description
1
Lampe
7
InterrupteurAUTO/OFF/ON
2
Panneausolaire(cablede1,5m/5pi)
8
Plaquedefixationdepanneausolaire
3
Visetbridesd’ancrage
9
BoutondereglageLUX(luminosite)
4
DELapucesembarquees
10
BoutondereglageSENS(sensibilite)
5
Pile
11
BoutondereglageTIME(temps)
6
Tetededetectiondemouvements
12
Plaquedefixation

Page 11
Page de 6
5
cidessous:
•Lorsquelecommutateurestàlaposition«AUTO»,lalampes'allumeraautomatiquementlanuitlorsqu'unmouvementest
détecté.
•Lorsquelecommutateurestàlaposition«ON»,lalamperesteraalluméepourêtreutiliséeentantquesourced'éclairage
continu.
•Lorsquelecommutateurestàlaposition«OFF»,lalampedemeureraéteinteetnedétecteraaucunmouvement.
3. Vouspouvezréglerlestêtesetbrasdelampes:
•Lesbraspeuventêtrerégléssur180ºversl'avantetl'arrière.
•Lesjointsd'accouplementpeuventêtrerégléssur180ºhorizontalement.
•Lesdeuxtêtesdelampespeutêtrerégléessur180ºàgaucheetàdroite.Régleztousces
élémentspourobtenirvotreéclairageauxendroitsdésirés.
4. Lapositiondudétecteurdemouvementestréglable:
•Réglezledétecteuràtraverssonjointd'accouplementsur180ºverslehautetverslebas.
•Réglezlejointprovenantduboîtieràbatteriesur180ºàgaucheetàdroite.Réglezces
jointspourobtenirl'angleetlechampdedétectionsouhaité.
•
REMARQUE:Lecapteurphotoélectriqueintégrépourraêtreréglépourallumerlalampeenconditionsvariéesdeluminosité.
RÉGLAGESPRINCIPAUX
Lalampesolairedisposede3réglagesprincipaux(réglagedeladuréed'éclairage,réglageduchampdedétectionetréglage
sebasantsurl'heuredelajournée/luminositéexterne).
LUX(NIVEAUDELUMINOSITÉEXTERNE)
•Ceréglagereprésenteleniveaudeluminosité(ounoirceur)atteintavantquelalampes'allume
•Sirégléàlapositionmaximale,lalampes'allumeralaplupartdutempsallantdelalumièredujouraucrépuscule.
•Sirégléàlapositionminimum,lalampes'allumeraseulementlanuit(ennoirceur).Ceréglageestidéalpourunfonctionnement
tardensoiréeetpendanttoutelanuit.
TIME(DURÉED'ÉCLAIRAGE)
•Ceréglagedétermineraladuréed'éclairageaprèsunmouvementdétecté.
•Laduréed'éclairagepeutêtrerégléede8secondesjusqu'à2minutes.
•Entournantleboutondanslesenshoraire,laduréed'éclairageseraprolongée.
SENS(RÉGLAGEDUCHAMPDEDÉTECTION)
•Réglageà50%–Réglagenormal
•Positionmaximale–Augmentelechampdedétectionjusqu'à5mètresou16,4pieds(voirlesfigurescidessous).

Page 12
Page de 6
6
EMPLACEMENTDUPANNEAUSOLAIRE
Pourdemeilleursrésultats,placezlepanneausolaireoùilyauralalumière
directedusoleilenétantloind'ombresetd’abris
DÉPANNAGE
Si votre lampe solaire ne s'allume pas lorsque qu’un mouvement se
produitdanslechampducapteur,suivezlesétapessuivantes:
•Assurezvousquelepanneausolaireestdansunendroitoùilrecevraunmaximumdelumièresolairependantlajournée.
•Assurezvous quela tête de la lampe est loind'autres sources de lumière. Les autres sources de lumière durant lanuit
empêcherontlalampedes'allumer.
•Assurezvousquelecommutateurestàlaposition«AUTO».
•Vérifiezquelesbatteriessontcorrectementinstallées.
•Allouez3joursdechargeenplaçantlepanneausolaireenpleinelumièredusoleiletenréglantlecommutateurdelalampe
àlaposition«OFF».
•Remplacezlesbatteries.
Remarque:Lesbatteriesrechargeablespeuventsupporterjusqu'à600charges.Pourdemeilleursrésultats,remplacezlesbatteriesunefois
parannée.
ENTRETIEN
Gardezvotrelampeenbonétat.Ilestrecommandédetoujoursvérifierl'étatdelalampeavantsonutilisation.Nettoyezlepanneausolaire
avecunchiffonhumidepourassurerlefonctionnementoptimaldelalampe.Nepasutiliserdesolvantspournettoyerlepanneausolaireetne
pasappliquerdepressionexcessivependantlenettoyage.
REMPLACEMENTDESBATTERIES
1. Labatterieestsituéedansleboîtieràbatterie(11).
2. Placez lecommutateur(8)à la position «OFF».Retirezles4vis du boîtier à batterie (11).Retirezle connecteur de batterie.Retirez
l'anciennebatterie.Remplacezlabatterieavecunebatterierechargeabledumêmetype(16).
3. Assurezvousquelabatterieestinséréecorrectement(bonsensdepolarité)
4. Insérezlecouvercleduboîtieràbatterie(11).Fixezlecouvercleavecles4vis.
GARANTIELIMITÉE
NaturePowergarantitàl'acheteuroriginalqueceproduitserasansdéfautsdematériauxoudemaind’œuvrepourunepérioded'unanà
compterdeladated'achat.Preuved'achatrequise.
VeuillezcontacterLesProduitsNaturePowerpourobtenirplusd'informationsoudusoutientechnique:
18005880590
info@naturepowerproducts.com
www.naturepowerproducts.com

( )
FRANÇAIS PG. 07
ENGLISH PG. 01
ESPAÑOL PG. 13
SINGLE COLOR
(Used for background colors other than Black or White)
(Used for black or dark grey background color)
Page 1 of 6
Versión 1.5
( )
Version 1.6
LAMPARA SOLAR DE SEGURIDAD

Page 14
Page of 6
2
GraciasporescogerunproductoNaturePower!Parareferenciafutura,porfavorcompleteelregistrodepropietarioacontinuación:
Modelo:_______________ Fechadecompra:_______________
Guarde la factura y estas instrucciones. Es importante que Usted lea el manual completo para familiarizarse con este productoantes de
comenzarautilizarlo.Esteequipohasidodiseñadoparaciertasaplicacionessolamente.Eldistribuidornosehaceresponsableporproblemas
quesurjandemodificacionesalmismo. Recomendamosqueesteequiponoseamodificadoy/outilizadoparacualquierotraaplicaciónque
noseaparalacualfuediseñado. SiUstedtienepreguntasrelacionadasconunusoparticular,NOopereelequipohastaquehayacontactado
aldistribuidorparadeterminarsiesopuedeodeberealizarseconelproducto.
REGLASDESEGURIDADGENERALES
ADVERTENCIA:
Leacuidadosamenteyentiendatodaslasinstruccionesdeensamblajeyoperaciónantesdeutilizarelequipo.Noseguirlasreglasdeseguridad
yotrasprecaucionesdeseguridadbásicaspuedeocasionardañospersonalesserios.
CUIDADO:
No permita que personas operen o ensamblen este reflector solar hasta que ellas hayan leído este manual y comprendido a fondo como
trabajaelreflectorsolar.
ADVERTENCIA:
Las advertencias, precauciones e instrucciones discutidas en este manual de instrucciones no cubren todas las posibles condiciones o
situacionesquepuedenocurrir.Eloperadordebeentenderqueelsentidocomúnylaprecauciónsonfactoresquenopuedenserincluidos
enesteproducto,sinoquedebenseraportadosporeloperador.
GUARDEESTASINSTRUCCIONES
CARACTERÍSTICASLISTADEPARTES
SuReflectorSolarconSensordeMovimiento
eselsistemaperfectoparalosiguiente:
•Entrada
•Garaje
•Porche
•Cornisas
•EmergenciaBateríaincluidacomounaccesorio.
USOYCUIDADO
•Nomodifiqueelreflectorsolardeningúnmodo.Lasmodificacionesnoautorizadaspuedenimpedirelfuncionamientoy/olaseguridad
ypuedenafectarlavidadelequipo.Elreflectorsolarfuediseñadoparadeterminadosusos.
•Antesdeusarelreflectorsolarrevisequenotengadañosopartesfaltantes. Laspartesrotaspuedenafectarelfuncionamientodel
reflectorsolar. Reemplaceoreparelaspartesdañadasodesgastadasinmediatamente.
ENSAMBLAJE
1. Instalacióndelalámpara
Parte
Descripción
1
Reflector(lámpara)
2
PanelSolar(Cablede16pies)
3
Tornillosyanclajes
4
Soportesparamontaje
5
Manual

Page 15
Page of 6
3
•Paramontarsureflectorrequieredeundestornillador,unlápizy(enalgunoscasos)untaladro.
•ColoquelossoportesdemontajesobrelasuperficieenlaqueUstedquieremontarlo.
•Marque con un lápiz la posición de los huecos de los tornillos de los soportes de montaje (3). Esto le permitirá taladrar
previamenteloshuecosdelostornillos.
•Una vez instalados los soportes de montaje, asegúrese que todos los tornillos estén apretados. Ya está listo para colocar sus
reflectoresconsensordemovimientode120LEDs.
•Llevecuidadosamenteelcabledelpanelsolarhastalalámparayconécteloenlatomaparaelenchufe.
•Ajuste el cabezal del sensor de movimiento a la posición deseada. Su Reflector Solar Dual de 120 LEDs Ultrabrillante está
instaladoylistoparacargar.
Nota:Lalámparadebeserinstaladaentre6.5y9.8piesdelsuelopataasegurarunadeteccióndemovimientoóptima.
2. InstalacióndelPanelSolarenlaparedoeneltejado.
3. Escojaunáreaquerecibalamáximacantidadposibledeluzsolar.
4. Utiliceloshuecoslocalizadossobreelsoportedemontajedelpanelsolarparamarcarlasuperficieparalainstalación.
5. Coloqueelsoporteenlasuperficieescogidayasegúrelaenellugarconlos3tornillosylosanclajessuministrados.
6. AjusteelángulodelPanelSolarparaasegurarquerecibaluzsolaróptima.
Nota:ElPanelSolarestáequipadoconuncablede16pies.Lamáximadistanciaentrelalámparayelpanelsolarpuedeser16pies.
DIAGRAMA DE
ENSAMBLAJE
Partie
Description
Part
Description
1
Lampara
7
InterruptordeAUTO/OFF/ON
2
Panneausolare(cablede1.5m/5pies)
8
Soportedemontajedelpanelsolar
3
Tornillosyanclajes
9
PerilladeajustedelLUX
4
DELapucesembarquees
10
PerilladeajustedeSENS
5
Bateria
11
PerilladeadjustedeTIEMPO
6
Cabezadedetecciondemovimiento
12
Soportedemontaje

Page 16
Page of 6
4
OPERACIÓN
1. Antes de operar el reflector solar
a su máxima capacidad, el Panel
Solar debe recibir la luz solar por
tres días para que la batería
incluidasecarguecompletamente.
La carga debe efectuarse
colocandolaunidadenlaposición
deapagado“OFF”.
2. Enlaparteinferiordelacajadela
batería(11) seencuentra ubicado
uninterruptordetresposiciones:
•Al colocar el interruptor en
laposición“AUTO”,laluzse
encenderá
automáticamente en la
nochecuandoelcabezalde
deteccióndemovimientodetectemovimiento(6).
•Alcolocarelinterruptorenlaposición“ON”,laluzpuedeserutilizadacomounaluzestándarparailuminaciónconstante.
•Alcolocarelinterruptorenlaposición“OFF”,laluzpermaneceráapagadaynodetectarámovimiento.
3. Loscabezalesybrazosdelalámparasonajustables.
•Ambosbrazospuedenrotarse180ºalfrenteyatrás.

Page 17
Page of 6
5
•Losejesdeacoplepuedenserrotados180ºhorizontalmente.
•
•Amboscabezalespuedenserrotados180ºalaizquierdayaladerecha.
Ajusteestaspartesyconexionesparaalcanzarelóptimoánguloyrango
deiluminación
.
4. ElCabezaldedeteccióndemovimientoesajustable:
•Elejedeacoplepuedeserrotado180ºhaciaarribayhaciaabajo.
•Launiónqueconectalacajadela
batería puede ser rotada 180º de
izquierda a derecha. Ajuste estas
uniones para alcanzar elmáximo
ánguloyrangodedetección
Nota:Laluzfuncionarácuandoelfotosensordetectemínimaluz
COMOUTILIZARLOSCONTROLES
Elreflectorsolarconsensordemovimientotiene3perillasdeajustediferentesquecontrolanladuraciónde
laluzylasensibilidadalaluzyalmovimiento.
LUX(NIVELDELUZ)
•Esteeselniveldeoscuridadalcanzadoantesdequelalámparaencienda.
•Sisecolocaenelmáximonivel(símbolodesol),elsensorencenderálaluzconmedianaluzdeldía.
•Sisecolocaenelnivelmínimo(símbolodemedialuna)elsensorsoloencenderálaluzcuandoestéoscuro.Estaeslaposiciónideal
parausogeneral.
TIME(TIEMPO)
1. LaperillaTIMEestableceladuracióndeltiempodeiluminación.
2. El TIME es ajustable desde 8 segundos hasta 2 minutos. Al Girar la perilla en la dirección de las agujas del reloj se incrementará el
tiempodeiluminación.
SENS(SENSIBILIDAD)
Estaperillacontrolaelrangodedeteccióndemovimiento:
1. PosiciónmediaEslaposiciónnormal.
2. Posiciónmáxima–Eselmáximorango(5Metros[16.4FT])
LOCALIZACIONDELPANELSOLAR
Para mejores resultados, por favor ubique su Panel Solar en una a
posicióndondepuedarecibirdirectamentelaluzsolarsobreelmismo,
yqueseencuentrelibredecubiertaydesombra.
DETERMINACIÓNYCORRECCIÓNDEFALLAS

Page 18
Page of 6
6
Sielreflectorsolarnoiluminacuandohaymovimientoobvioenfrentedelsensor,porfavorreviselosiguiente:
•AsegúresequeelPanelSolarseencuentraenunaubicacióndonderecibirálamáximaluzsolardurantelashorasdeldía.
•Asegúresequeelcabezaldedeteccióndemovimientoseencuentrafueradelalcancedeotrasfuentesdeluz.Otrasfuentes
deluznocturnapuedenprevenirquelaunidadseencienda.
•Asegúresequeelinterruptorseencuentreenlaposición“AUTO.
•Revisequelasbateríashayansidoinstaladascorrectamente.
•PermitaqueelPanelSolarcarguelasbateríasenluzsolardirectapor3díasconelinterruptorenlaposición“OFF”.
•ReemplacelasBaterías.
Nota:Lasbateríasrecargablespuedendurarhastapara600cargas.Paramejordesempeñoreemplacelasbateríascada12meses.
MAINTENIMIENTO
Mantengasureflectorsolar.Serecomiendarevisarlascondicionesgeneralesdecualquierreflectorsolarantesdeutilizarlo.Limpieelmodulo
solarconuntrapohúmedoparaasegurarelóptimodesempeñodelreflectorsolar. Noutiliceningúntipodesolventeparalimpiarloysea
cuidadosodenoponermuchapresiónenelmódulomientraslolimpia.
REEMPLAZODELABATERÍA
1. Elpaquetedebateríasseencuentraubicadoenlacajadelabatería(11).
2. Coloque el interruptor (8) en la posición “OFF”. Retire los 4 tornillos de la caja de la batería (11). Separe el conector de la bacteria.
Retireelpaquetedebateríasviejo.Reemplácelosolamenteconunpaquetedebateríasidéntico(16).
3. Revisequelapolaridaddelpaquetedebateríaderepuestosealacorrecta.
4. Coloquenuevamentelacubiertadelacajadelabatería.(11).Asegúrelaconlos4tornillos.
GARANTÍALIMITADA
NaturePowergarantizaalcompradororiginaldeesteproductoqueelmismoestálibrededefectosensusmaterialesymanodeobraporun
periododeunañoapartirdelafechadecompra.Uncomprobantedecompraesrequerido.
Paramásinformaciónosoportetécnico,porfavorcontáctenos:
18005880590
info@naturepowerproducts.com www.naturepowerproducts.com

Page 19
Notes

Page 20
Notes
This manual suits for next models
1
Table of contents
Languages:
Other Nature Power Outdoor Light manuals
Nature Power
Nature Power 23101 User manual

Nature Power
Nature Power BAYPORT 23106 User manual

Nature Power
Nature Power 21035 User manual

Nature Power
Nature Power 22260 User manual

Nature Power
Nature Power Solar Security Light 450 User manual

Nature Power
Nature Power 1500 User manual

Nature Power
Nature Power 21035 User manual

Nature Power
Nature Power Lifetime Series User manual

Nature Power
Nature Power 22060 User manual
Nature Power
Nature Power BAYPORT 23106 User manual