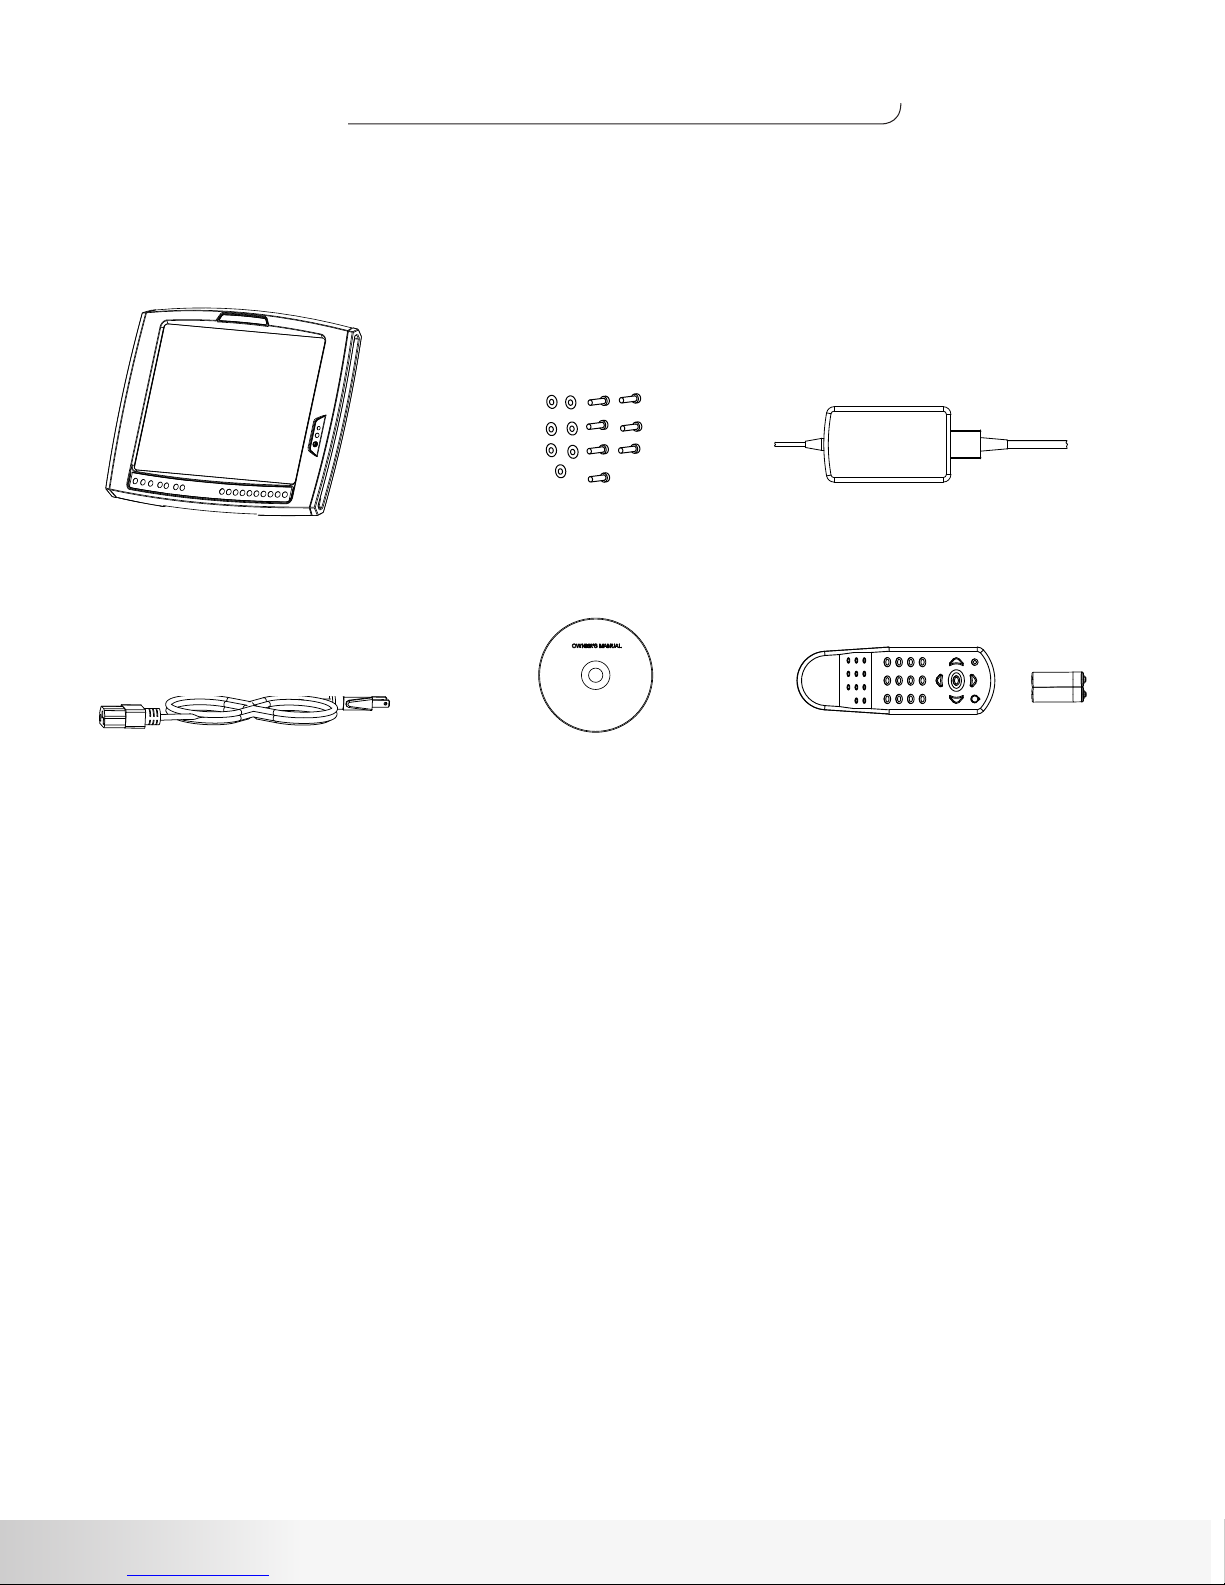
Nautilus Be Strong. NV915 User manual

Be Strong.™
Model: NV
915
P/N:
001-7167
Rev A (
08/10/2007
)
Users Manual
NV 915 LCD Digital Monitor (NTSC)

2
FCC Information
This equipment has been tested and found to comply with limits for a
class B digital device, pursuant to Part 15 of the FCC Rules. These
limits are designed to provide reasonable protection against harmful
interference in a residential installation.
This equipment can generate, uses, and radiates radio frequency
energy and, if not installed and used in accordance with the
instructions, may cause harmful interference to radio communications.
However, there is no guarantee that interference will not occur in a
particular installation.
If this equipment does cause unacceptable interference to radio and
television reception, which can be determined by turning the
equipment off and on, the user is encouraged to try to correct the
interference by one or more of the following measures.
• Reorient or relocate the receiving antenna.
• Increase the separation between the equipment and receiver.
• Connect the equipment to an outlet on a circuit different from that
to which the receiver is connected.
• Consult the dealer or an experienced Radio/TV technician for assistance.
• Any changes or modifications in construction of this device which are not expressly approved by the party responsible
for compliance could void the user’s authority to operate the equipment.
A T T E N T I O N
FCC Information

3
Nautilus®LCD Users Manual
Table of Contents
Safety Precautions ...................................................................... 4
Components ................................................................................ 5
Product Specifications ................................................................ 6
Safety warning labels ................................................................. 7
Connections ................................................................................. 8
Using Remote Control ................................................................12
LCD Menus ..................................................................................14
LCD Monitor Controls ................................................................ 25
Replacing Headphone Jack ....................................................... 26
Replacing Keypad ....................................................................... 27
Troubleshooting .......................................................................... 29
Warranty Terms ........................................................................... 30
Important Contact Numbers ..................................................... 31

4
Important Safety Precautions
W A R N I N G
IMPORTANT! To reduce the risk of fire, electrical shock or
other injuries, follow these safety precau-
tions when installing, using and maintain-
ing your NV915 LCDTV Monitor.
• Any changes or modifications in construction of this device which are not expressly approved by the party responsible
for compliance could void the users authority to operate the equipment.
A T T E N T I O N
• Always disconnect the power before installing or servicing the equipment.
• Disconnect the power cable and signal cable when thunder or lightning is present.
• Do not touch the power cord with wet hands. Make sure the electrical connectors are clean and dry before use.
• Disconnect the power cord when not in use for extended periods of time.
• Do not use if power cord is damaged.
• Do not install LCD Monitor close to heating sources.
• Do not place heavy articles on, or step on the LCD Monitor.
• The product should be installed in a clean and dry place.
• If you detect any smoke, unusual noise or smell, disconnect the electric power and contact service.
• Avoid contact with liquids or beverages.
• Do not use or place any combustible or flammable substances close to the LCD Monitor.
• Do not place the power cord close to any heating devices/sources.
• Do not apply any twisting forces or excess pressure to the LCD Monitor.
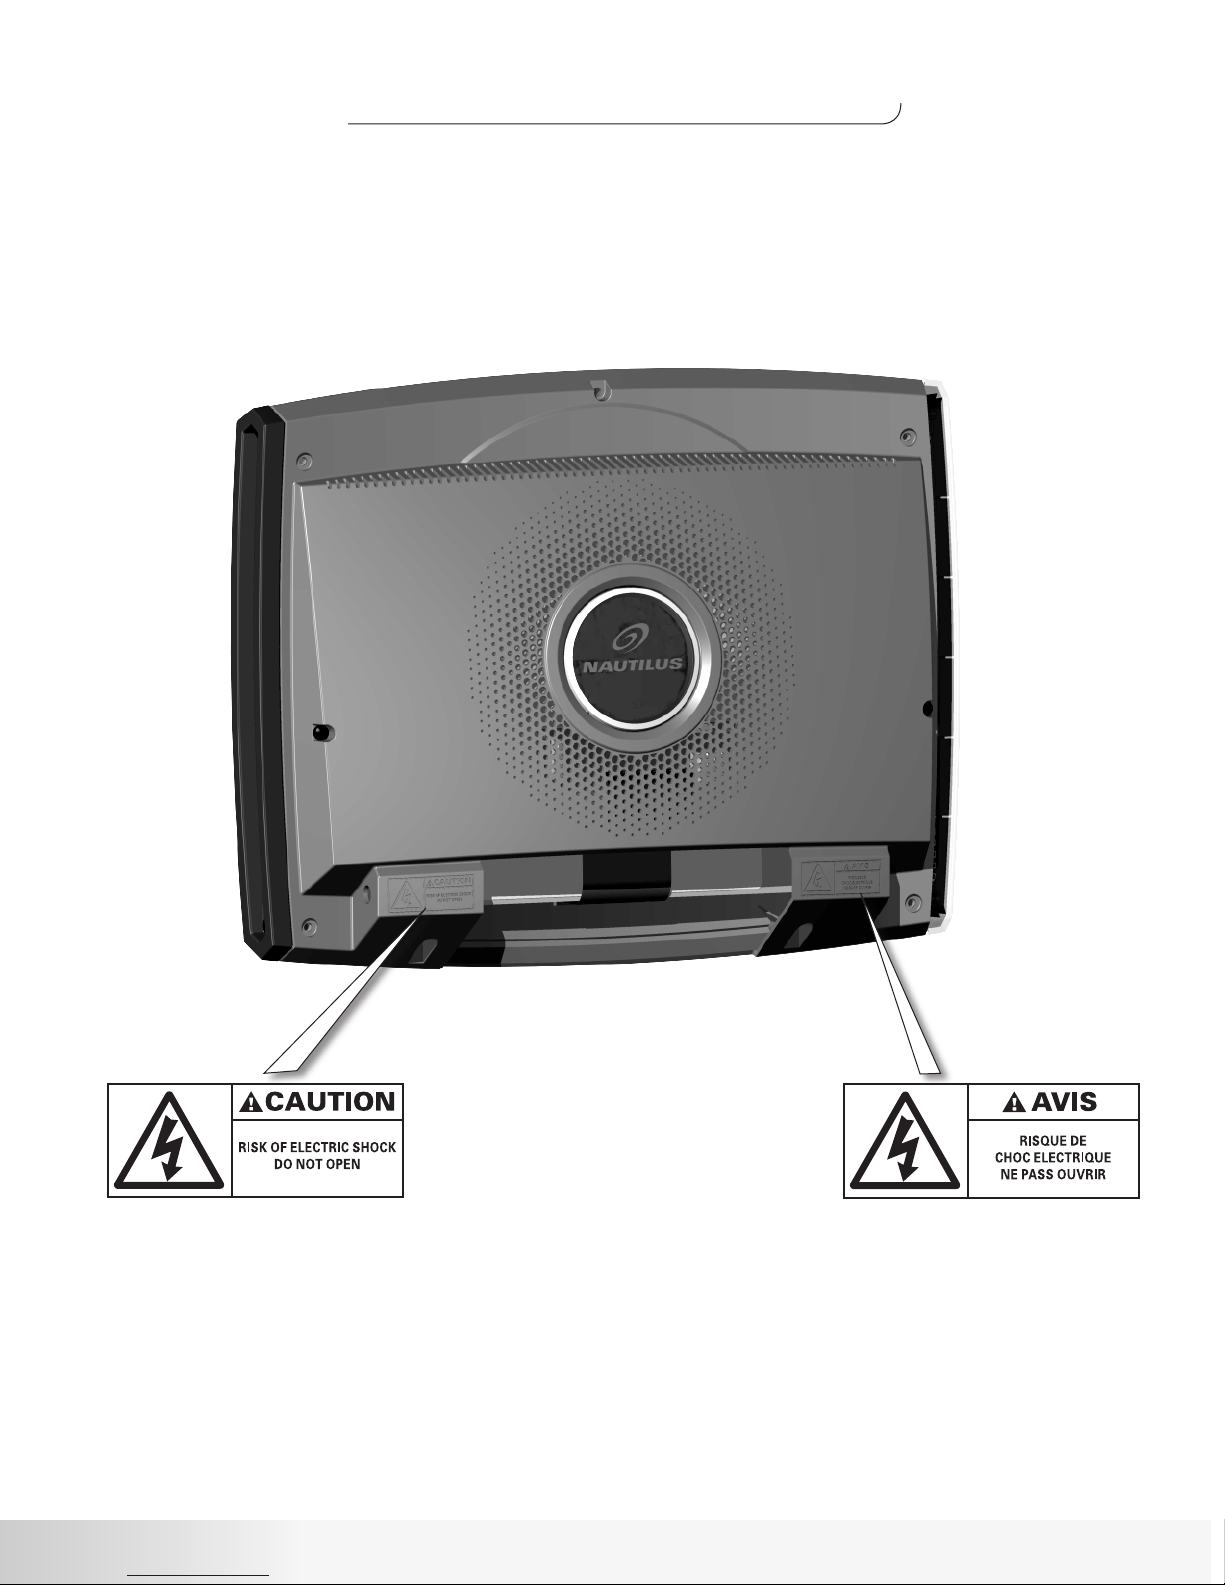
• Do not attempt to disassemble, repair or modify the LCD Monitor. If the LCD Monitor needs repair or adjustment, refer
servicing to qualified service personnel.
• When cleaning, do not directly spray with water or use flammable substances.
• Do not allow liquids to penetrate the LCD Monitor.
• When cleaning the LCD Monitor, disconnect the power and use a clean soft cloth. Never use a wet cloth.
W A R N I N G
This symbol appearing throughout this manual means:
Pay Attention! Be Alert!Your Safety Is Involved!
Save these instructions.
Read all instructions before using.

5
Nautilus®LCD Users Manual
Components
Please make sure the following items are included with your order.
If any items are missing, please contact Customer Service.
LCD Monitor/Monitors
Part # 002-3782
Power Cord
Part # 001-1922
Owners Manual CD
Part # 001-7167
Power Supply
Part # 002-3787
Remote Control with Batteries
002-3785
Hardware Kit
Part # 001-1938
(Boxed Separately)

6
NV915 Product Specifications
NV915 LCD TV Monitor
Gross Weight: 13.0 lbs/ 5.9 kg
Net Weight: 9.9 lb/ 4.5 kg
Product Dimensions: 35.6cm (L) x 3.56cm (W) x 32.3cm (H)
14.0” (L) x 1.4” (W) x 12.7” (H)
Optional Accessories
M-Series Bracket
Gross Weight: 8.0 lbs/ 3.63 kg
Net Weight: 4.75 lb/ 2.15 kg
Product Dimensions: 49cm (L) x 17cm (W) x 43cm (H)
19.3” (L) x 6.7” (W) x 16.9” (H)
T-Series Bracket
Gross Weight: 10 lbs/ 4.5 kg
Net Weight: 6.75 lb/ 3.1 kg
Product Dimensions: 49cm (L) x 17cm (W) x 43cm (H)
9.3” (L) x 6.7” (W) x 16.9” (H)
Power Requirements:
Adaptor Input:
100-240
V AC,
50-60
Hz
Adaptor Output” DC
12
V,
3.33
A
Regulatory Information:
FCC:
This device complies with Part 15 of the FCC and the Canadian ICES-003 regulations for Class A apparatus. Operations
is subject to the following two conditions:
(1).This device may not cause harmful Interferences and
(2).This device must accept any interference received, including interference
that may cause undesired operation.
The LCDTV Monitor NV915-000N Model bears the CSA Mark shown with adjacent
indicators ‘C’ and ‘US’
The LCDTV Monitor with PAL tuner bears the CE Mark and meets all safety and
EMC requirements required by the European Union and Australia / New Zealand.
For Customers in the European Union, Do not dispose of this product as refuse.
This product is to be recycled. For information on the proper method of disposal
contact a Nautilus, Inc. Customer Service Representative. Contact information is
available in the Important Contact Numbers section in this manual.
The LCDTV Monitor with PAL tuner is RoHS compliant.
35.6mm
17.5mm
200mm
368.5mm
356mm
323mm
200mm
105mm
380.6mm

7
Nautilus®LCD Users Manual
Safety Warning Labels
The following safety warnings are located on the NV915 LCD Monitor.
Please read all safety precautions and warning information prior to using your product.

8
Connections
Rear Connection Panel
1 2 3 4 5 6
7
8
9
10
Side Connection Panel
(LCD Monitor Back Cover must be removed to access Side Panel)
Front Connection Panel
11
1 2 3 4 5 6
7
8
9
10
1 2 3 4 5 6
7
8
9
10
7 Component Input (Video/Audio)
8 Audio L/R Input
9 S-Video Input
10 Video Input
1 DTV / AnalogTV Antenna Input
2 SPDIF (ATSC) Out
3 HDMI Input
4 PC Input
5 PC Audio Input / Headphone Output
6 Power Input
11 Audio (Headphone Output)

9
Nautilus®LCD Users Manual
Side Connection Panel
(LCD Monitor Back Cover must be removed to access Side Panel)
Connecting Antenna
NOTE: When using Coaxial Cable, make sure the Copper Wire is not bent.
Connecting PC
1. Connect D-Sub Cable (not included) to the D-Sub port on the LCD Monitor and PC.
2. Connect Audio Cable (not included) to Audio output of PC and the Audio Input of the
LCD Monitor.
Audio Input
D-Sub Port
Antenna Input
Coaxial Cable
Copper Wire
Output from source
Connections

10
Connecting DTV (digital), DVD (Pb Y Pr), VCR, Set Top Box or Camcorder.
Digital TV Broadcasting Receiver, Set Top
Box, DVD Player,VCR or Camcorder.
Component Cable
Audio Cable
1. Connect Component Cable (not included) to the Connection ports on the LCD
Monitor and DTV Receiver, DVD PLayer, VCR, SetTop Box or Camcorder.
2. Connect Audio Cable (not included) to Audio ports of the LCD Monitor and DTV Receiver
DVD Player, VCR, SetTop Box or Camcorder.
DTV, DVD,VCR,
Set Top Box or
Camcorder
Connections
Audio Connections
Connections
Connecting Video/S-Video Input
1. Connect Video/Audio Cable (not included) and S-Video Cable (not included) to Video port of
LCD Monitor and Camcorder, VCR, DVD Player, or SetTop Box.
NOTE: LCD Back Cover must be removed to access Side Panel. Cables must be connected to
ports of the same color.
Side Panel
Video & DVD Player
Audio Cable
S-Video
Video
NOTE: LCD Back Cover must be removed to access Side Panel. Cables must be connected to
ports of the same color.

11
Nautilus®LCD Users Manual
1. Connect HDMI cable to HDMI ports ofTV and DVD player, VCR, Set-Top box or camcorder.
2. If you would like to connect DVI of external equipment to theTV, you must use specific DVI to
HDMI cable.
NOTE: HDMI and audio cables are not included.
Connecting HDMI
HDMI Cable to SetTop Box
Connections
Connecting Headphone
Headphone Jack or External Speakers
1. Connect headphone or external speaker (not included) to the Headphone output port of theTV.
2. Please use 8ohms impedance headphone. Otherwise output volume may be too low or too
loud.
3. In case of connecting to speakers, connect speakers with amps. If connected with speakers
without amps, the output volume may be low.
Audio Cable
HDMI Cable to DVD
LCD TV BACK

12
Button Function Button Function
POWER Power On/Off MUTE Power On/Off
0 ~ 9 Numeric Buttons +100, -/-- TV: Channel input (cable) for over CH 99
DTV: Hyphen for Digital channel
VOL + - Set the volume CH Select the channel
SOURCE Select the Input Source
(TV DTV VIDEO S-VIDEO RGB HDMI COMPONENT)
SM Select Sound Mode (Standard Music Movie News User)
PM Select Picture Mode (Standard Soft Dynamic Movie1 Movie2 User)
MENU Display the Menu Screen
MTS Change MTS to match the television broadcast signal forTV/DTV
ON SCREEN Display the current channel (or input source) information on the screen
SCALE Select the screen size
////
Select a desired item on the screen
EXIT Exit Menu
SCREEN Not Available
SLEEP SleepTimer setting (Off - 180 minutes)
AUTO Auto Adjustment for PC input source only
TELETEXT Caption ON/OFF MEM Add/Remove TV Channel
PC Select PC TV Select TV/DTV
DTV (TV/RADIO) Not Available
Red Button Not Available Green Button Not Available
Blue Button Not Available Yellow Button Set the still image
DTV (MENU) Not Available DTV (EPG) DTV EPG: Not Available
PIP (CH ▲ ▼)Not Available PIP (SOURCE) Not Available
PIP (AUDIO) Not Available PIP (VIDEO) Not Available
PRE Previous Channel
1 Power On/Off
2 Sound Off
3 Channel Selection
4 TV & Input Source
5 Control Sound Mode
6 Control Picture Mode
7 Volume Control
8 Channel Control
9 Menu
10 Caption On/Off
11 TV Functions (Hot Key)
12 Still Image (Freeze)
13 Electronic Program Guide
14 Not Available
Using Remote Control
Remote Control Buttons
Remote Control Button Functions
1
3
4
5
7
9
11
13
14
2
6
8
10
12

13
Nautilus®LCD Users Manual
MENU Configuration
Most functions of theTV set can be controlled by MENU and selection buttons on the remote
control, so learning how to operate them would be convenient for you.
Main Menu Sub Menu
Using Remote Control
• Press MENU button on the remote control to display main menu.
• Press Menu control button () to move to sub menu of a selected main menu.
• Press EXIT button to turn off the menu screen.
• To move among menus, use Menu control buttons (▲/▼).
•To change a selected menu setting, use Menu control buttons (▲/▼).
Using Remote Control

14
LCD Menus
MENU Configuration
Main Menu Sub Menu Settings
Channel Search
When using the LCD Monitor after first connection, reconnection due to power
failure or other reasons, channels should be searched and registered.
• Press AUTO button on the remote control.
•To start the channel search, navigate to Start by using the VOL button.
• Press MENU button to stop the search.
• If you stop during the channel search, only the currently searched channels will be stored.

15
Nautilus®LCD Users Manual
Fine Tune
Use the FineTune function if a searched channel is unclear or has abnormal
sound.
• Press MENU button and navigate to <Ch FineTune> menu.
• Find the best reception wth the CH button.
• Press MENU button to stop the search.
LCD Menus
Add/Remove Channel
You may add or remove channels as needed.
• Use the numeric buttons (0-9) or the CH button to select a channel.
• Press the MEMORY button.
• If adding a channel by using the CH button, move to Add.
• Once the setting is complete, press the MEMORY button again.

16
Add/Remove Channel
Frequently watched channels can be swapped and stored with other channels.
• Navigate to the channel you wish to swap.
• Press the MENU button and navigate to the <CH Swap> menu.
• Set both channels that you want to swap.
• Change the default and escape the menu.
LCD Menus
Change TV Channel Mode
Choose between Air or Cable for broadcast type.
• Press MENU button and navigate to <Ch Mode> menu.
• Use the CH button to select Air or Cable mode.
• Press the MENU button to complete the selection.

17
Nautilus®LCD Users Manual
Closed Caption
Closed Caption function allows you to view conversations, narration and sound ef-
fects as subtitles on yourTV. It is available on someTV programs and on some VHS
home video tapes at the discretion of the program provider. Digital Closed Caption
service is a new caption service available only on digitalTV programs (also at the
discretion of the service provider). It is more flexible system than the original Closed
Caption system, because it allows a variety of caption sizes and font styles.
Not all programs and VHS videotapes offer closed captions. Please look for the <CC>
symbol to ensure that captions will be shown.
1. Closed Caption Setup
PressTELETEXT button on the remote control to select desired caption mode.
Select caption mode as follows;
• Analog : Off – CC1 – CC2 – CC3 – CC4 –Text1 –Text 2 –Text 3 –Text4
• Digital : Off - English - Spanish - French
2. Font Setting (Digital Closed Caption only)
This function allows you to adjust the digital closed caption screen appearance to
suit your preference.
• Press MENU button on the remote control and move to <SETUP – Caption
Mode> and execute caption.
• Press ///buttons to move to <SETUP – Font Option> and press the
button.
LCD Menus

18
• Press ///buttons to select digital closed caption screen appearance.
• Press EXIT button to return to the normal screen.
• Select different color of “Background Color” and “Foreground Color”.
Parental Control can be used to block specific channels, ratings and other viewing
sources.
The Parental Control Function (V-Chip) is used to block program viewing based on
the ratings sent by the broadcasting station.The default setting is to allow all
LCD Menus
Menu Description Item
Size Font Size Standard - Large - Small
Style Font Style Style
0
~Style
7
Background Color Font background color (White) — Black — Red — Green — Blue —Yellow
— Magenta — Cyan
Foreground Color Font color White — (Black) — Red — Green — Blue —Yellow
— Magenta — Cyan
Edge Color Edge table color White — Black — Red — Green — Blue —Yellow
— Magenta — Cyan
Background Opacity Font background opacity Solid — Flashing —Translucent
Foreground Opacity Font color opacity Solid — Flashing —Translucent —Transparent
Edge Style Edge table style Style
0
~Style
5
V-Chip Function

19
Nautilus®LCD Users Manual
programs to be viewed. Viewing can be blocked by choosing the type of the program
and the categories. It is also possible to block all programs viewing for a time period.
To use this function, the following must be done:
1. Set ratings and categories to be blocked.
2. Specify a password
3. Enable the lock
1. V-Chip rating and categories
Rating guidelines are provided by broadcasting stations. Most television programs
and television movies can be blocked byTV Rating and/or Individual Categories.
Movies that have been shown at the theaters or direct-to-video movies use the Mov-
ie Rating System (MPAA) only.
2. Ratings for Television programs including made-for-TV movies :
•TV-G (General audience) •TV-PG (Parental guidance suggested)
•TV-14 (Parents strongly cautioned) •TV-MA (Mature audience only)
•TV-Y (All children) •TV-Y7 (Children 7 years older)
3. Personal Identification Number (PIN) Setup
• Press the MENU button.
• Press the ///buttons to move to <V-Chip>.
•The message <Input PIN> will appear. Enter your 4 digit PIN number.
The <V-Chip> screen will appear.
• Press the /buttons to move to <Change PIN> and press the
button.
The Change PIN screen will appear. Choose any 4 digits for your PIN and enter
them. The default PIN number for a newTV set is <0-0-0-0>. The <Confirm
PIN> screen appears.
• Re-enter the same 4 digits. When the Confirm screen disappears, your PIN has
been memorized.
LCD Menus

20
LCD Menus
* Press the EXIT button to return to the normal screen.
4. How to Enable / Disable the V-Chip function
Press the MENU button.
Press the (///) buttons to move to <V-Chip>.
The message <Input PIN> will appear. Enter your 4 digit PIN number.
The <V-Chip> screen will appear.
To enable the V-Chip feature, press the /buttons to move to <On>.
Press the EXIT button to return to the normal screen.
5. How to Setup Restrictions
Press the MENU button.
Press the (///) buttons to move to <V-Chip>, then press the button.
The message <Input PIN> will appear. Enter your 4 digit PIN number.
The <V-Chip> screen will appear.
You can independently lock the ratings.The blocked ratings are indicated by a< >.
Press the (/) buttons and the
button to activate the appropriate restrictions for
the selected rating system.
Press the EXIT button to return to the normal screen.
Other manuals for Be Strong. NV915
2
Table of contents
Other Nautilus Monitor manuals