NEC NP-CR5450H User manual

Projector
NP-CR5450H/NP-CR5450W
User's Manual for the APPS MENU
Contents
1. What can you do with the APPS MENU? ....................................................................2
2. VIEWER ..........................................................................................................................6
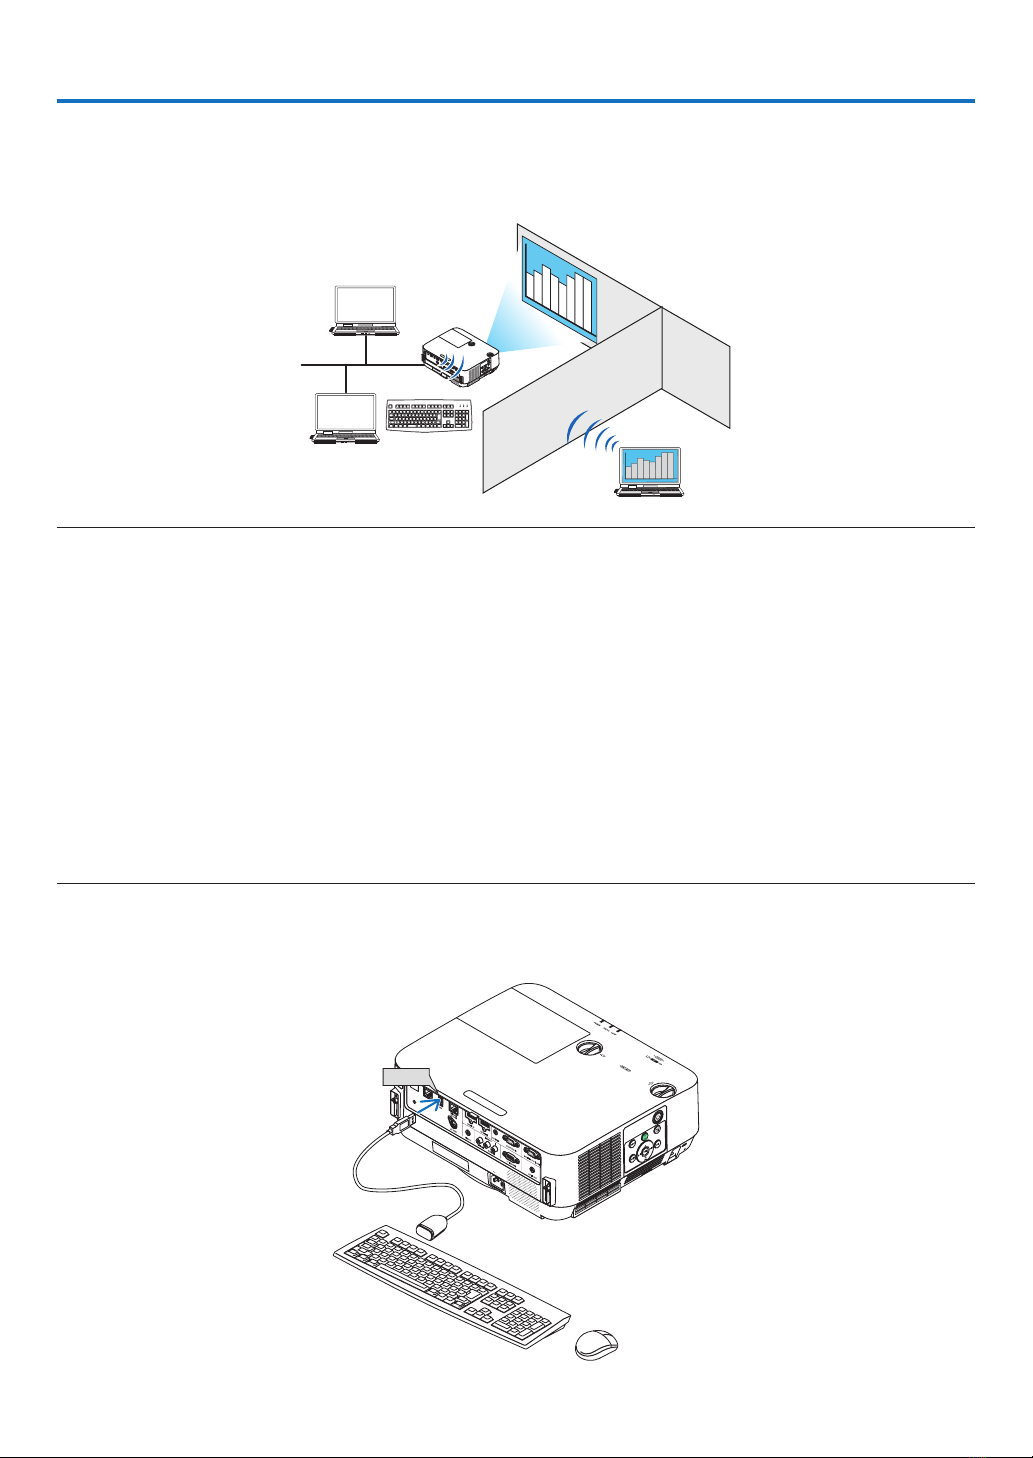
3. REMOTE DESKTOP CONNECTION...........................................................................10
4. IMAGE EXPRESS UTILITY..........................................................................................14
5. Miracast .......................................................................................................................15
6. WEB SERVER FUNCTION...........................................................................................16
6-1. WEB SHARING..................................................................................................................... 16
6-2. IMAGE EXPRESS UTILITY LITE ........................................................................................... 19
6-3. PROJECTOR CONTROL ...................................................................................................... 21
7. NETWORK SETTINGS.................................................................................................22
7-1. PROJECTOR NAME ............................................................................................................. 22
7-2. NETWORK INFORMATION................................................................................................... 22
7-3. WIRED LAN .......................................................................................................................... 22
7-4. Wireless LAN ........................................................................................................................ 22
7-5. IMAGE EXPRESS UTILITY ................................................................................................... 29
7-6. NETWORK SERVICE ............................................................................................................ 29
8. TOOLS..........................................................................................................................31
8-1. MOUSE................................................................................................................................. 31
8-2. PROGRAM TIMER................................................................................................................ 31
8-3. DATE AND TIME ................................................................................................................... 34
8-4. ADMINISTRATOR MODE...................................................................................................... 34
8-5. DEFAULT APP ...................................................................................................................... 34
Trademarks......................................................................................................................35

2
1. What can you do with the APPS MENU?
It becomes available to select the expansion functions indicated in below and various setting with the APPS MENU.
For displaying the APPS MENU, press the APPS button on the remote control or select [APPS] as the [SOURCE] on
the onscreen menu.
INFORMATION
For going back to the APPS MENU interrupting to use each application in the APPS MENU, press APPS button
on the remote control when the onscreen menu is not displayed on.
APPS MENU screen display
Current date and time
IMPORTANT:
Before utilizing the func-
tion of APPS MENU, set
day and time.
IMAGE EXPRESS UTILITY
Miracast
NETWORK INFORMATION
FOCUS
Indicating the selected
item.
Surrounded in a yellow
square.
VIEWER
REMOTE DESKTOP
CONNECTION
WIRELESS LAN PRO-
FILE SELECTION
NETWORK SETTINGS
TOOLS
WEB SHARING
SETTING/ACCESS
PASSWORD DISPLAY
NOTE:
• Whenthisprojectorisnotinanetwork,youcannotselect[REMOTEDESKTOPCONNECTION],[IMAGEEXPRESSUTILITY],
[Miracast],and[WEBSHARING].

3
1. What can you do with the APPS MENU?
VIEWER
Select the saved images/movies and project them by the projector. This function is available for explained below:
(1) Projector Memory: Images and movies temporarily saved in the projector built-in memory utilizing the WEB SHAR-
ING.
(2) USB Memory: Images and movies saved in the USB memory connected with the projector.
(3) Shared Folder: Images and movies saved in the shared folder in a network connected with the projector.
REMOTE DESKTOP CONNECTION
• Selectthecomputerconnectedinthesamenetworkwiththeprojector,andtheprojectorprojectstheimageson
the computer over the network.
A commercially available USB keyboard can be used for controlling Windows 8 and Windows 7 computers in the
network connected with the projector.
IMAGE EXPRESS UTILITY
• Ifvariousterminalunitssuchasacomputer,asmartphone,andatabletareconnectedwiththeprojectorinthe
network, it enables to transmit images saved on each terminal to the projector and to project them.
• YoucanconnectterminalunitsinmultipleOS(Windows,MacOSX,Android,andiOS)withtheprojectorsimultane-
ously.
• Theprojectorreceivesimagestransmittedfrommultipleterminalunits(Max.50units)andprojectsthemonthe
screen dividing it (Max. 4 × 4) at the same time.
BA CDE
AB
CD
Transmit Stop
Simultaneous connection
Simultaneous display
• Installtheapplicationsoftware“ImageExpressUtilityLite”,includedintheCD-ROMsuppliedwiththeprojectoron
computers.
• Forasmartphoneandatablet,downloadtheapplication“WirelessImageUtility”fromourwebsiteandinstalliton
these.
Miracast
By wirelessly connecting the terminal units supporting the Miracast such as the Android with the projector, it enables
the projector to project images transmitted from these terminals.
Before connecting these terminal units, set [Miracast] in the [NETWORK SETTINGS] on the projector.

4
1. What can you do with the APPS MENU?
WEB SERVER FUNCTION
WEB SHARING
Without using the exclusive software, it enables to share images and files among the projector and computers in the
same network by accessing the web server of the projector utilizing the web browser.
BACDE
Sharing files
IMAGE EXPRESS UTILITY LITE
It enables to control screen splitting pattern and displaying position of the images that are simultaneously transmitted
fromeachterminalutilizingtheapplicationsoftware,ImageExpressUtilityLiteorWirelessImageUtility,onthecom-
puter browser screen. Precise controls as changing number of screen portions and pages to display are available.
PROJECTOR CONTROL
It enables to control the projector on the web browser screens on the computers.
HOW TO ACCESS THE WEB SERVER
ConnecttheprojectorandcomputersinanetworkandaccesstheURLinbelowbythewebbrowserofthecomput-
ers.
URL:http://<Projector’sIPaddress>
NETWORK SETTINGS
Setupbelowforconnectingtheprojectorwithawired/wirelessLAN.
PROJECTOR NAME
Set up the projector name and host name. Serial number of the projector is set as factory default.
NETWORK INFORMATION
Indicateinformationwhentheprojectorhasconnectedinanetwork(byawired/wirelessLAN)
WIRED LAN
SetupforconnectingtheprojectorbyawiredLAN.
WIRELESS LAN
SetupforconnectingtheprojectorbyawirelessLAN.Atthesametime,setupfortheSIMPLEACCESSPOINT,
Wi-FiDirect,andMiracast.
IMAGE EXPRESS UTILITY
SetuptheMODE(FREE,MANAGED)fortheIMAGEEXPRESSUTILITY.
NETWORK SERVICE
SetupvarioussettingfortheAMX,HTTPserver,PJLink,AlertmailandCRESTRON.
TOOLS
Set up for various features as the mouse, program timer, date and time, administrator mode and default APP.

5
1. What can you do with the APPS MENU?
MOUSE
A commercially available USB mouse can be used for operating the APPS MENU. Perform the set up for using it.
PROGRAM TIMER
Oncedayandtimeissetup,changingtheprojector’sconditioninpoweringON/standby,switchinginputsignals,and
switching ECO mode can be automatically performed.
DATE AND TIME
Set up current date and time to the projector.
ADMINISTRATOR MODE
Selecting the menu mode of the projector, enable/disable to save all set up values of the projector, and set up a
password for the administrator mode.
DEFAULT APP
Whentheprojectoristurnedonundertheconditionofbeingselectedthe“APPS”terminal,thefunctionsetupasthe
default APP will be started automatically.
In case a terminal besides the APPS terminal has been selected, the function set up as the default APP will be started
automatically when the APPS terminal is selected.

6
2. VIEWER
What you can do with the viewer
Select a saved image or movie and project it from this device. The following 3 destinations can be used.
(1) Projector memory: Images and movies temporarily saved in this device's built-in memory utilizing the WEB SHAR-
ING.
(2) USB memory: Images and movies saved in the USB memory connected to this device.
(3) Shared folder: Images and movies saved in the shared folder on the network connected to this device.
Top screen of the viewer
Projector memory
USB memory
Shared folder
Settings
• Select[SETTINGS]tochangethesettingsfortheslideshow,movies,sharedfoldersandsoon.
• While"Autoplay"has beenseteitherto"Still"of"Motionimage"intheSettings,the projectorstartsperforming
"Autoplay"bytheoperationinbelow:
- When the Viewer top screen is displayed on, a USB memory is connected in the projector.
- When the Viewer screen is displayed on first time after powering ON the projector in which a USB memory has
been connected.
Forstarting"Autoplay",thesystemwillautomaticallysearchboththerootdirectoryandthefoldersinthesubsequent
level in the USB memory and then display found still images or movies in order. The images and movies will be
displayedinthe"Sorted"order.
NOTE:
• Only1USBmemorycanberecognizedbytheviewer.DonotconnecttheUSBmemorytotheUSBportofthisdeviceusedfor
connectingtoawirelessLAN.
• 1to4sharedfolderscanbeset.
• Whentheconnectiontothesharedfolderfails,anerrormessageisdisplayedandan“x”isdisplayedinthefoldericon.Carryout
thefollowingchecksinthiscase.
• IstheLANcableconnectedcorrectly?
• Isthenameofthedestinationfoldercorrect?
• Isthedestinationfoldersetforsharing?
• Haveaccessrightsbeensetinthedestinationfolder?
• Arethereanydisplayablelessavedinthedestinationfolder?
• Isdateandtimesetcorrect?

7
2. VIEWER
Displayable/playable files
Still
Supported formats
File extension Supported
*.gif Interlace, transmission, animation
*.jpg/*.jpe/*.jpeg Baseline,Progrressive,RGB,CMYK
*.png Interlace, αchannel
*.bmp
*MS-OfcelesandPDFlescannotbedisplayedintheviewer.
Supported image resolution
File extension Resolution
JPEG Upto5000x5000pixels
Gif Upto1280×1280/lesizeupto5MB
Other images (.png, .bmp) Upto4000×4000pixels
Motion image
Supported formats
File extension Video codec Audio codec
*.mpg/*.mpeg MPEG2 MPEGAudioLayer2
MPEGAudioLayer3
(MP2/MP3 in abbreviation)
*.wmv WMV9 WMA 9 Standard
(WMA9 in abbreviation)
*.mp4 H.264/AVC AAC-LC
(AAC in abbreviation)
Detailed information
Item Conditions
Resolution From320×240upto1920×1080
Video frame rate Upto30FPS
Video bit rate Upto30Mbps
Audio channel Up to 2-ch stereo
Audio sampling rate Up to 48 KHz
Audio bit rate MP2/MP3: Up to 448 kbps
WMA9: Up to 384Kbps
ACC:Upto256Kbps
Maximum file size Up to 2 gigabytes
Unsupported codec The WMV files containing sound data in the WMA Professional format can not be
played.
NOTE:
• Dependingonale,itmayoccuryoucannotplayitevenwhenitsatisesallabovementionedconditions.
• Dependingonnetworkenvironments,atypeoftheUSBmemory,andlebitrate,itmayoccuramoviecannotbeplayedprop-
erly.
• YoucannotplayDRMles(DigitalRightManagementles).
• Regardlessthesettingofleaspect,theMPEG2/WMVformattedmoviesareplayedat1:1

8
2. VIEWER
Compatible USB memory
This device cannot recognize USB memory formatted in the NTFS format. Check the format if this device cannot
recognize the connected USB memory.
FormataUSBmemoryintheFAT32formatorFAT16formatforusingitintheVIEWER,WHITEBOARD,andCOL-
LABORATION.RefertotheWindowsinstructionmanualorHelpleonhowtoformataUSBmemory.
NOTE:
• TheUSBportofthisdeviceisnotguaranteedtoworkwithallUSBmemoriessoldcommercially.
File display screen
• 12les(4lateral×3longitudinal)includingthefoldericonscanbedisplayedonasinglescreen.Usethe“PAGE
UP”or“PAGEDOWN”buttonontheleftofthescreentochangethelistoflesdisplayed.
• Thelescanbedisplayedusingeithericonsorthumbnailsintheviewer.
Icon display Thumbnail display
RETURN Go back one level higher.
PAGE UP Displayalistofthepreviousles.
PAGEDOWN Displayalistofthenextles.
SETTINGS Displaythesettingscreen.
THUMBNAILS/ICON Switch between thumbnail display and icon display.
SORT Change the order to display files by name (filename), type (file extension), date (date
ofcreation),orsize(lecapacity).Thedefaultsortingorderisby“Name”.
DELETEALL
All the files in the memory can be deleted only when a list of the files in the projector
memoryisdisplayed.Becarefulwhenexecuting“DELETEALL”asdeletedleswill
not be recoverable.
EJECT “Remove” the USB memory when a list of the les in the USB memory is dis-
played.
NOTE:
•Themaximumnumberoflescanbedisplayedinafolderincludingfoldericonsis300.
•Filenameswitha“.”atthebeginningofthelenamewillnotbedisplayed.
•Theiconofalewhosetypecannotbedeterminedisindicatedbya“?”.
•Ashortmovielemaybedisplayedwiththethumbnailinblack.

9
2. VIEWER
Slideshow display
• Focusonastillimageontheledisplayscreen(icondisplayorthumbnaildisplay)andpresstheENTERbuttonto
switch to the Slideshow display.
• Aslideshowmaybedisplayedusing“ManualPlayback”inwhichtheimagesareswitchedbyoperatingabuttonon
theremotecontrol,or“AutoPlayback”inwhichtheimagesareswitchedautomaticallyatasetinterval(playback
modeis“Auto”).
• Thedefaultfactorysettingis“ManualPlayback”.Toperform“AutoPlayback”,setthe“PlaybackMode”inthe“Set-
tings”to“Auto”.
• Theimageswillbedisplayedintheorderselectedunder“Sort”ontheledisplayscreen.
• WhenstillimagesinhighresolutionsareprojectedastheSlideshow,itmaybacktotheledisplayscreen.
Playback of a movie
• Focusonamotionimageintheledisplayscreen(icondisplayorthumbnaildisplay)andpressthe(ENTER)button
for playing back a movie.
Viewer settings
Select the icon in the file list screen or top screen of the viewer to display the configuration screen of the
viewer.
The following settings can be configured on the configuration screen.
Item 1 Item 2 Options (figures within the parenthe-
ses [ ] are default values)
Remarks
Slideshow Screen size [Best fit]/Actual size
Play Mode Automatic / [Manual]
Interval [5]-300seconds Enabledwhen“Auto”isselected
Repeat [Disable]/Enable(defaultsettingis
unchecked)
Movie settings Screen size [Best fit]/Actual size
Repeat [OFF]/One File/All Files
Auto play AutoPlay [OFF]/Still/Motion image Enabled only when a USB memory
device is connected
Shared folder Folder 1/Folder 2/
Folder 3/Folder 4
[Disable]/Enable(defaultsettingis
unchecked)
Shared folder [¥¥] Up to 41 characters
User name Up to 64 characters
Password Up to 64 characters

10
3. REMOTE DESKTOP CONNECTION
• ByselectingthePCconnectedinthesamenetworkwiththeprojector,theimageonthePCcanbeprojectedtothe
screen via network.
Then, by operating the keyboard, you can control Windows 8 or Windows 7 PC connected in the network.
• WiththeRemoteDesktopfunction,youcanremotelyoperatethePCplacedatadistancefromtheprojector.
Office
Meeting room
NOTE:
• The[REMOTEDESKTOP]functionwillworkonthefollowingWindowseditions.
Windows8Pro,Windows8Enterprise,
Windows7Professional,Windows7Ultimate,Windows7Enterprise,
• Inthisuser’smanual,thisfeatureisdescribedusingWindows7asanexample.
• AUSBkeyboardisrequiredtousetheRemoteDesktopconnection.
• TheRemoteDesktopconnectioncanbeoperatedwithakeyboard.Usingawirelessmousewithawirelesskeyboardismore
usefulforoperating.
Useacommerciallyavailablewirelesskeyboard,awirelessmouse,andaUSBwirelessreceiver.
UseacommerciallyavailableUSBkeyboardandUSBmouse.
• AUSBkeyboardwithabuilt-inUSBhubcannotbeusedwiththeprojector.
• AwirelesskeyboardormousethatsupportsBluetoothcannotbeusedwiththeprojector.
• WedonotwarrantthattheUSBportoftheprojectorwillsupportallUSBdevicesinthemarket.
• OntheloginscreenfortheREMOTEDESKTOPCONNECTION,makesuretousethestandardUSlayoutkeyboard(called101
keyboard).IfJapaneselayoutkeyboard(asJISlayoutkeyboard)isused,lettersdifferfromprintedlettersonthekeysmaybe
input.
Prepare a commercially available wireless keyboard (US layout version).
1. Connect the USB wireless receiver to the USB port (Type A) of the projector. Make all necessary settings
for your wireless keyboard and mouse.
USB

11
3. REMOTE DESKTOP CONNECTION
2. Press [APPS] on the remote to display the APPS MENU.
3. Focus on [TOOLS] and press [ENTER]
4. Focus on [MOUSE SETTING] and press [ENTER]
5. Focus on [MOUSE] and press [ENTER]
Check mark will be added.
6. Focus on [BACK] and press [ENTER]
7. Press [STANDBY] button on the remote twice.
The projector will be powered OFF.
8. Press [ON] button on the remote
The projector will be powered ON and the connected USB mouse will be available.
Setting the password to the user account of Windows 7
TIP:Ifapasswordhasbeensetforanaccount,thesteps1to8canbeskipped.
1. Click [Start] from the desktop of Windows 7.
2. Click [Control Panel].
3. Click [Add or remove user accounts] displayed under [User Accounts and Family Safety].
4. Click [Administrator].
5. Click [Create a password].
6. Input the password to the [New password] box.
7. Input the same password as that at Step 6 to the [Confirm new password] box.
8. Click [Create a password].
The Administrator is changed to [Password Protection].
Setting the Remote Access
1. Click [Start] from the desktop of Windows 7.
2. Click [Control Panel].
3. Click [System and Security].
4. Click [Allow remote access] displayed under [System].
5. When the [User Account Control] confirmation window appears, click [Continue].
The [System Properties] window appears.
6. Click [Allow connections from computers running any version of Remote Desktop (less secure)] in the
Remote Desktop box and click [OK].

12
3. REMOTE DESKTOP CONNECTION
Checking the IP address on Windows 7
1. Click [Start] from the desktop of Windows 7.
2. Click [Control Panel].
3. Click [View network status and tasks] displayed under [Network and Internet].
4. Click [View status] displayed in blue on the right of [Local Area Connection] in the window.
The [Local Area Connection Status] window appears.
5. Click [Details...].
Write down the value for “IPv4 IP Address” (xxx.xxx.xxx.xxx) displayed.
6. Click [Close].
7. Click [X] at the upper right of the window.
The system goes back to the desktop.
Starting REMOTE DESKTOP CONNECTION
1. Press the APPS button on the remote control when the projector is in the state of powered ON.
The APPS MENU screen will be displayed.

13
3. REMOTE DESKTOP CONNECTION
2. Select [REMOTE DESKTOP CONNECTION] on the APPS MENU.
The [REMOTE DESKTOP CONNECTION] window appears.
3. Operate one among the wireless keyboard, wireless mouse and the remote control to input the IP address
of Windows 7 and click [CONNECTION].
The log-on screen of Windows 7 is displayed in the screen projected by the projector.
4. Operate the wireless keyboard to input the user’s password and press “Enter”.
The REMOTE DESKTOP CONNECTION is started.
Windows 7 desktop is displayed on the screen projected by the projector.
Log out the computer.
Use the wireless keyboard connected to the projector to operate Windows 7.
NOTE:
• IfyoucannotconnectwiththeREMOTEDESKTOPCONNECTIONproperlyandblackscreenremainstodisplay,oryoucannot
performtheREMOTEDESKTOPCONNECTIONcausedonunexpectedshutdown,etc.,press(APPS)buttonontheremotecon-
trolfordisplayingtheAPPSMENU,selecttheREMOTEDESKTOPCONNECTIONthenselectDISCONNECT.Trytoreconnectthe
REMOTEDESKTOPCONNECTION.
Exiting the REMOTE DESKTOP CONNECTION
1. Operate either the wireless keyboard or wireless mouse to click [Start] from the desktop screen projected
by the projector.
2. Click [LOG OFF] on the right of the start menu.
The remote desktop connection is stopped.
3. Press the button for an input terminal other than APPS on the remote control.
TIP:
Setting[DETAILSETTINGS]inREMOTEDESKTOPCONNECTION
[DETAILSETTINGS]willallowyouto display thedesktopbackground,ortoenablethe windowanimationfunctionduringthe
RemoteDesktopoperation.
DESKTOPBACKGROUND:Clearthecheckmarktodisplaythedesktopbackgroundinasinglecolor.
THEMES: Clear the check mark not to use Themes.
MENUANDWINDOWANIMATION:Clearthecheckmarktodisablemenuandwindowanimation.
SHOWCONTENTSOFWINDOWWHILEDRAGGING:Clearthecheckmarktoshowonlythewindowpanewhile
dragging.

14
4. IMAGE EXPRESS UTILITY
• Whentheprojectorisconnectedwithvariousterminalunitsasacomputer,asmartphone,andatabletoveranet-
work, it enables to transmit and project images saved on each terminal using this Image Express Utility software
program.
• TerminalunitsinvariousOS(Windows,MacOSX,Android,andiOS)canbeconnectedtotheprojectorsimultane-
ously.
• Theprojectorenablestoreceiveimagestransmittedfrommultipleterminalunits(max.50units)atonceandproject
them splitting up its screen display into portions (max. 4 × 4).
• IMAGEEXPRESSUTILITYhastwoperformancemodes,theFREEmodeandMANAGEDmode.
EachmodecanbeselectedonthenetworksettingforIMAGEEXPRESSUTILITY(Seepage29)
- IntheFreemode,youcanfreelyconnecttotheprojectorviaImageExpressUtilityLiteinstalledonacomputer
or Wireless Image Utility installed on a smartphone, etc. The splitting pattern of the display screen is based on
the number of connected terminals. At the same time, you can select either splitting screen display or full screen
display from each terminal.
- In the Managed mode, same as in the Free mode in the state of the connection with several terminals, you can
switch the splitting/full screen display to the full/splitting screen display either by the remote or via the WEB
SERVER.
REMOTE Once pressing the ENTER button during projecting the connected terminals' screen, the menu
for selecting display splitting pattern will be displayed on.
WEB SERVER Precise setup is available as changing the screen splitting pattern and displaying position
(See page 20)
BA CDE
AB
CD
Transmit Stop
Simultaneous connection
Simultaneous display
• Installtheapplicationsoftware,“ImageExpressUtility”thatiscontainedontheCD-ROMsuppliedwiththeprojector.
Please refer to the help file about detailed software information.
• Downloadandinstalltheapplicationsoftware,“WirelessImageUtility”ontoterminalunitsasasmartphoneanda
tablet. About detailed information of this application software, please refer to the Wireless Image Utility manual that
is uploaded on our web site.
• Ourapplicationsoftware,ImageExpressUtility2.0,isalsoavailable.Downloadfromourwebsiteandinstalliton
your computer. Please be reminded the simultaneous connection and simultaneous display are not functioned by
ImageExpressUtility2.0.

15
5. Miracast
This device can be connected wirelessly to a wireless terminal such as an Android terminal etc. that supports
the Miracast standard to project mirroring images transmitted from the terminal.
Setthenetworksettingofthisdeviceto“Miracast”beforeconnectingit.(→page 24)
NOTE:
- DependingonthewirelessterminalsupportedtheMiracastinuseandtheenvironmentofradiowave,imagesandsoundmaybe
interrupted.
- TheproceduretoconnectwithMiracastisdifferedfromeachMiracastsupportedwirelessterminal.Fordetailedinformation,
pleaserefertotheuser’smanualofMiracastsupportedwirelessterminalortheHELPle.
- TheMiracastfunctionsontheprojectorarenotguaranteedforconnectingallMiracastsupportedwirelessterminalssoldcom-
mercially.

16
• Withoutusingtheexclusivesoftware,itenablestoshareimagesandlesamongtheprojectorandcomputersin
thenetworkbyaccessingtheprojector’swebserverutilizingthewebbrowser.(→this page, WEB SHARING)
• Whileimagesonvariousterminalsaretransmittedandsimultaneouslyprojectedontheprojectorbyutilizingthe
IMAGEEXPRESSUTILITY,itenablestocontrolscreensplittingpatternandchangetheordertodisplaybyutilizing
the web browser on the computer. (See page 19,IMAGEEXPRESSUTILITYLITE)
• Itisabletocontroltheprojectorbythewebbrowserscreenonthecomputer.(→page 21,PROJECTORCON-
TROL)
BACDE
Sharing files
• TheWEBServerFunctionsupportsthewebbrowsersinbelow:
For Windows Internet Explorer 11
Chrome (latest version)
ForMacOSX Safari 6 or later
For iOS Safari (latest version)
For Android Chrome (latest version)
* Compared with the computer, some functions can be restricted for utilizing the WEB SHARING on smartphones or
tablets.
* ThePCCONTROLsupportsPCversiononly.
How to access the WEB SERVER
Connect the computer and the projector (this device) in a network.
BootupthewebbrowseronthecomputerandthenaccessthefollowingURL:
URL=http://(Projector’sIPaddress)
• Theprojector’sIPaddressisindicatedattherightbottomoftheAPPSmenu.
• IftheSIMPLEACCESSPOINTmodeforthewirelessLANissetontheprojector,itenablestoaccesstheWEB
SERVERbyinputtinganycharacterstothecolumnforinputtingURL.Inthiscase,youdonotneedtoinputthe
projector’sIPaddress,however,pleaseinputtheprojector’sIPaddressifitfailstoaccesstheWEBSERVER.
6-1. WEB SHARING
Setting for the WEB SHARING
1. Connect the projector with your computer over a network.
2. Display the projector APPS MENU
6. WEB SERVER FUNCTION

17
6. WEB SERVER
3. Move the focus to the box under the WEB SHARING in the APPS MENU.
4. Press ENTER button on the remote control.
Display the WEB SHARING options setting screen.
Item Explanation Remark
WEB CAPTURE Select USE/NOT USE capture from
the WEB browser. By setting this ON,
the projector screen will be displayed
onto the browser screen every 5
seconds.
Factory default setting is NOT USE
ACCESSPASSWORD Select whether to USE/NOT USE
the password for accessing the WEB
SHARING.
Factory default setting is NOT USE
DELETESHAREDFILES Deleteallsharedles
5. After setting up options, move the focus to OK and press the ENTER button.
If USE is selected both for WEB CAPTURE and ACCESS PASSWORD, the screen in below will displayed on. The
access password will be changed every time the password is reset or the projector is powered ON and OFF.
Starting the WEB SHARING
1. Start up the web browser on the computer and access the WEB SERVER.
• Pleaserefer"HowtoaccesstheWEBSERVER"onthepreviouspage
2. Input four digits number displayed on the APPS MENU and then click LOGIN.
• IfNOTUSEisselectedfortheaccesspasswordatthestep[5],theWEBSHARINGscreenwillbedisplayed.
• TheprojectorscreenwillbeswitchedtothePROJECTORCONTROLscreenonceyouclickthePROJECTOR
CONTROL tab, same as it, the projector screen will be switched to the IMAGE EXPRESS UTILITY LITE screen
once you click the IMAGE EXPRESS UTILITY LITE tab.

18
6. WEB SERVER
Operations on the WEB SHARING screen
• ByusingthisWEBSHARING,itenablestodisplayprojectedfunctionsoftheAPPSMENUasVIEWER,REMOTE
DESKTOPCONNECTION,IMAGEEXPRESSUTILITY,etcontothewebbrowserscreenevery5secondsandyou
can save them onto your computer. (WEB capture)
* Whentheprojectorisinoneofthebelowstate,capturedscreenswouldnotbeupdatedevery5seconds:
- Played back movie screen in the Viewer.
- When the Miracast has been selected for the APPS menu.
• Whenyouwillsavetheprojectedscreen,youcanaddtextontheprojectedscreen(memo)andsavetheseupto
10pagesandsaveitonthecomputerasoneimage.
• Itenablestouploadtheimagesavedonthecomputerandshareitamongthecomputersconnectedinthenet-
work.
NOTE:
• IfSafariisused,screendisplaysmaybedistorteddependingonthetimingofreloading.Inthiscase,tryagainbyrebootingthe
Safari.
• DatastoringfunctioninHTMLformat(explainedat③intheclauseofMemocreatingscreenonthenextpage)isnotavailable
onboththeIOSandOSXdevices.Onthesedevices,youneedtosavetextaddedscreenspagebypage.
• Ifyouusethebrowser,InternetExplorer,datasavingbyrightclickmaynotbeperformedcorrectlyinperformingthewebcapture.
Recommendtotrycapturingafterstoppingtheevery5secondsdisplaybypressing④freezebuttoninthebelowpicture.
• Upto50unitscanbeconnectedsimultaneously.However,numberofunitsthatcanbeconnectedatthesametimeisvary
dependingontheperformanceoftheprojectorandthenetworkenvironment.
④
⑤
⑦
②
⑥
①
③
Number Description
①http://<Projector’sIPaddress>
②Indicate the file names saved in the projector memory. The file can be downloaded by clicking the file
name.
NOTE:Forutilizingthedownloadedlesontheterminalsastablets,itmayberequiredtouseotherapplication.
③Upload the file on the computer that will be shared. Name of the called out file is indicated as the
uploaded file.
④Stoptoupdateevery5seconds.Clickagaintoresumeupdating.
⑤DisplayprojectedfunctionsoftheAPPSMENU(VIEWER,REMOTEDESKTOP,IMAGEEXPRESS
UTILITY,etc)ontothescreenevery5seconds.
⑥Save the image indicated at ⑤onto the computer.
NOTE:ThisfunctionisnotsupportedoniOSandOSXdevices.
⑦Create text added screen (memo) utilizing the screen displayed at the center.

19
6. WEB SERVER
Memo creating screen
①③ ④ ⑤ ⑥
②
Number Explanation
①Click to input text. After inputting, click [OK] at the right side.
②Create a new page
③Save all pages in 1 file.
NOTE:ThisisnotdisplayedontheiOSandOSXdevices.
④Deleteeithertheeditingpageorallpages
⑤Back to the previous page
⑥Move to the next page
6-2. IMAGE EXPRESS UTILITY LITE
Set the MODE to MANAGED for the IMAGE EXPRESS UTILITY
1. Focus on the NETWORK SETTING on the APPS MENU and press the ENTER button.
2. Focus on the IMAGE EXPRESS UTILITY and press the ENTER button.
The IMAGE EXPRESS UTILITY setting screen will be displayed on.
3. Focus on the MODE column and select MANAGED.
4. Focus on OK and press the ENTER button.
Reference:
• If[HTTPpassword]hasbeensetup,thepasswordinputwindowisdisplayedonbeforeswitchingtotheIMAGEEXPRESSUTILITY
LITEwindowbythewebbrowser.
Display images transmitted by various terminals as computers and tablets and
simultaneously project them on the projector
• TheImageExpressUtilityLiteiscontainedontheCD-ROMsuppliedwiththeprojector.Itisalsoavailabletodown-
load from our web site.
• TheWirelessImageUtilityisavailabletodownloadfromtheAppStoreandGooglePlay.
• Fordetailedinformationaboutinstallationandoperationofeachsoftware,pleaseseetheUser’sManualofthe
projectorandtheHELPcommandforeachsoftware.

20
6. WEB SERVER
Start the IMAGE EXPRESS UTILITY LITE
1. Connect the computer and the projector in a network.
2. Start the web browser on the computer and then access to the following URL:
URL=http://(Projector’s IP address)
• Projector’sIPaddressisindicatedattherightbottomoftheAPPSmenu.
The Web Sharing screen will be displayed on.
3. If [HTTP password] has been set for the IMAGE EXPRESS UTILITY LITE in NETWORK SETTING on the APPS
menu, input the password.The IMAGE EXPRESS UTILITY LITE screen will be displayed on after confirming
the password.
Control on the IMAGE EXPRESS UTILITY LITE screen
① ②
③ ⑤
④
⑥ ⑦ ⑧ ⑨
Number Explanation
①Thumbnail Gallery
• ThumbnailsthataretransmittedtotheprojectorviatheImageExpressUtilityLiteorWirelessImage
Utility.ThumbnailswillbedisplayedinblackwhennooneusesthescreensortheIMAGEEXPRESS
UTILITYhasnotselectedonAPPSMENU.
• Enablestoswitchthethumbnaildisplayedpositionbythedraganddrop
②Focus
• Focusisdisplayedonwithalightblueframe.
③Changing screen split pattern
• Oncethe“SPLITPATTERN”buttonisclicked,itenablestochangescreensplitpattern.
Based on meeting purposes, you can select one pattern among 2×1, 2×2, 3×3, 4×4, 1×12.
④Maximize the projected image
• Focusedimagewillbemaximizebyclick.Clickitagainfordisplayingtheimageinthepreviously
projected size.
⑤Selection to Indicate or Not to indicate terminal names on the projected screen.
• Enables to switch either to indicate or not to indicate terminals’ information on the projected
screen
⑥Update the thumbnail gallery
• Oncethe“UPDATE”buttonispressed,itupdateanddisplaythelatestthumbnailgallery.
⑦ ⑧ Page change
• Changethepagetodisplaytothepreviouspagebypressingthe“PREV”buttonandtothenextpage
bypressingthe”NEXT”button.
This manual suits for next models
3
Table of contents
Other NEC Projector manuals

NEC
NEC V300X Series User manual

NEC
NEC LCDMT850 Installation and user guide

NEC
NEC VT470 User manual

NEC
NEC NP216 Series User manual

NEC
NEC PX803UL User manual

NEC
NEC NP-PX750U User manual

NEC
NEC P501X User manual

NEC
NEC LT180 - LT 180 XGA DLP Projector User manual

NEC
NEC V230X User manual

NEC
NEC NP61 Series User manual

NEC
NEC P501XG Manual

NEC
NEC HT1000 Series User manual

NEC
NEC MT1065 - MultiSync XGA LCD Projector User manual

NEC
NEC VE281 User manual

NEC
NEC DLP Cinema NP-NC1402L User manual

NEC
NEC NP-P350W User manual

NEC
NEC NP40 User manual

NEC
NEC M350XS User manual

NEC
NEC MultiSync MT1055 Installation and user guide

NEC
NEC LT260 Series Operating manual