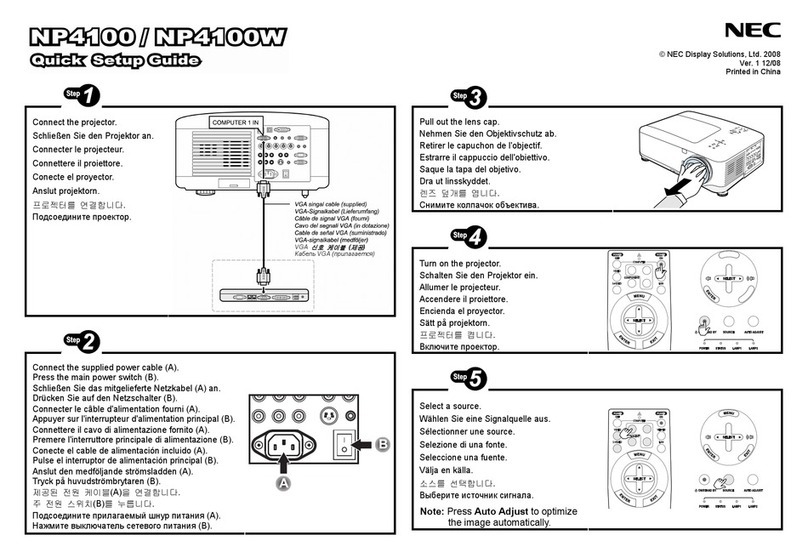
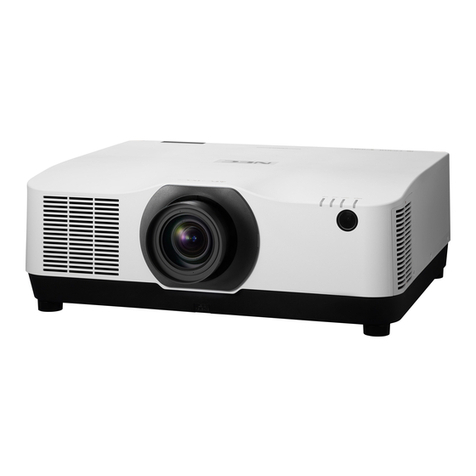
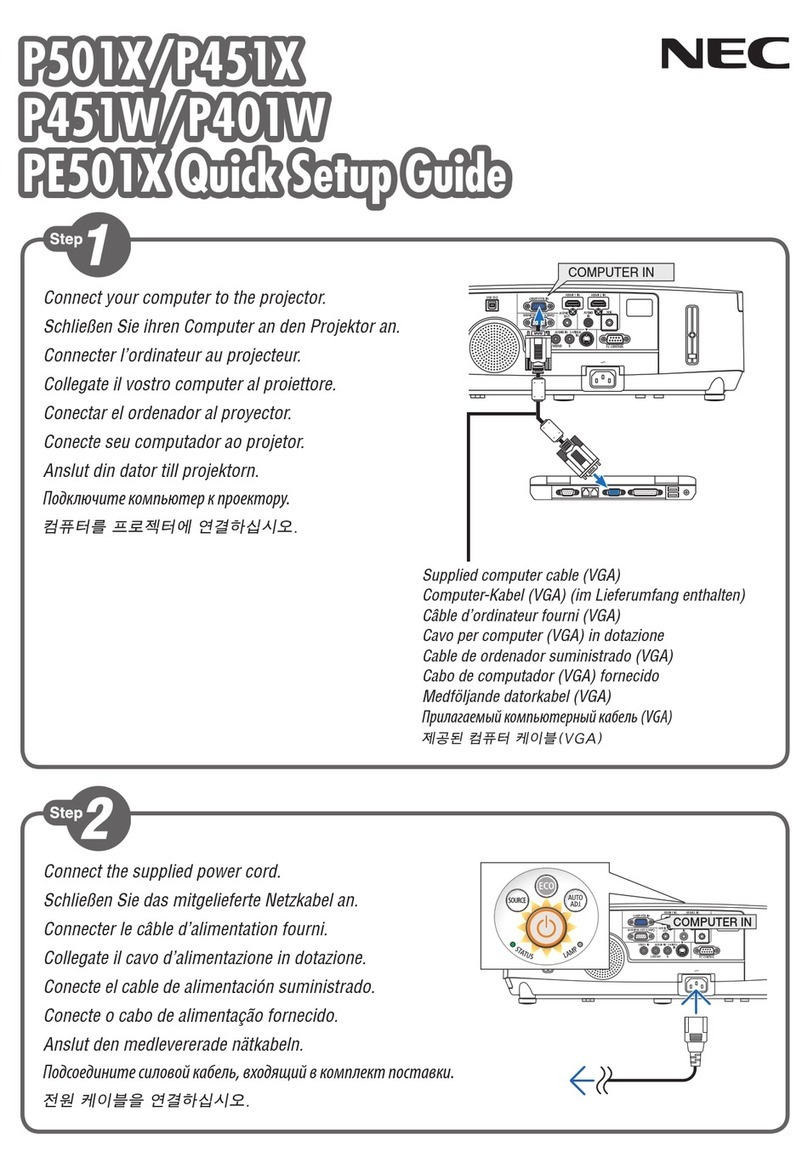
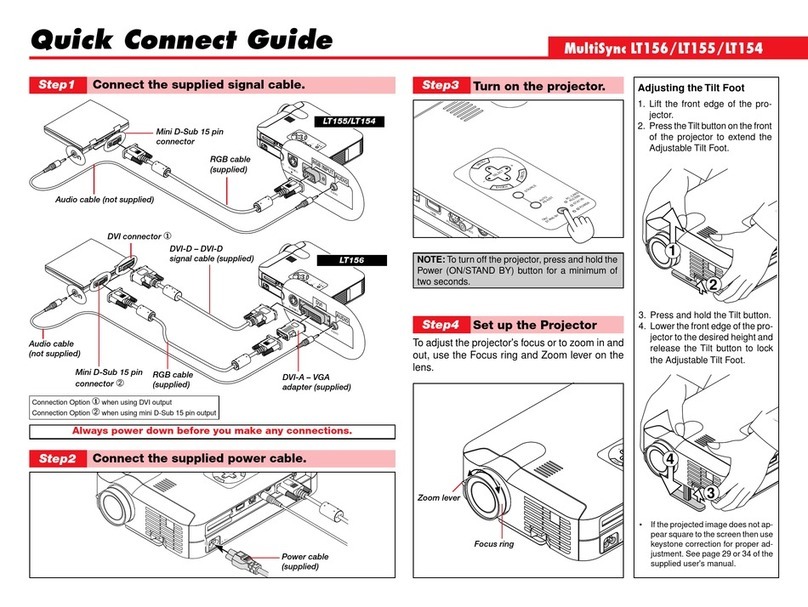
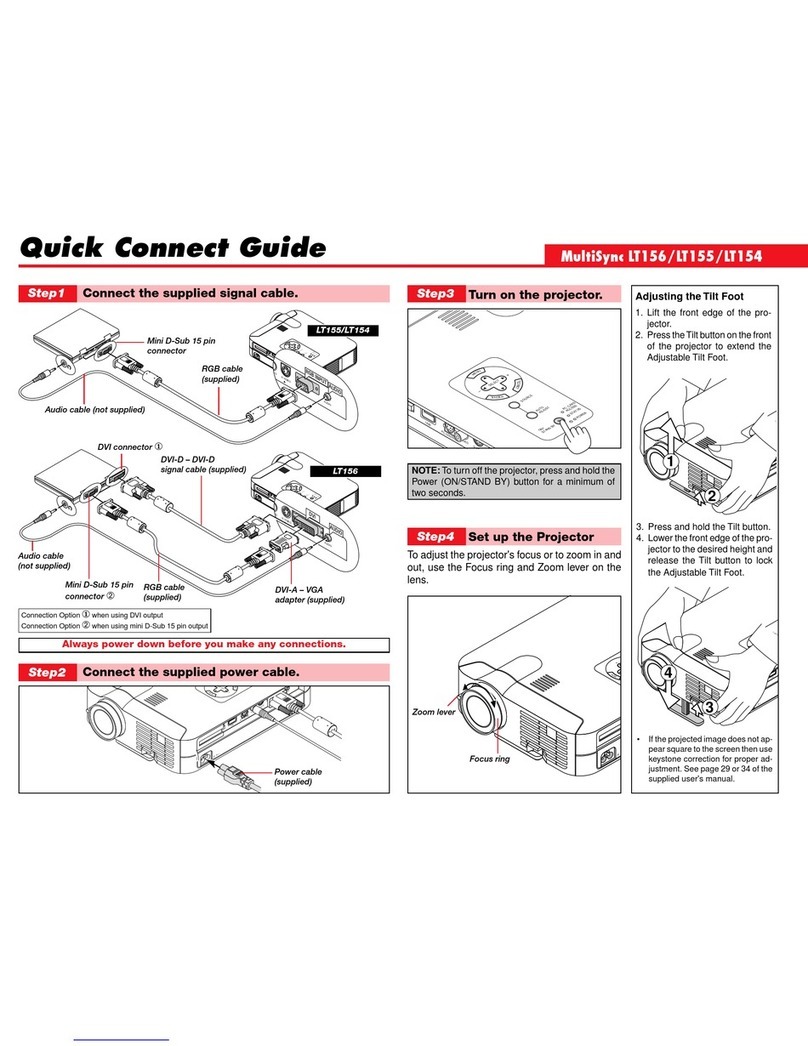
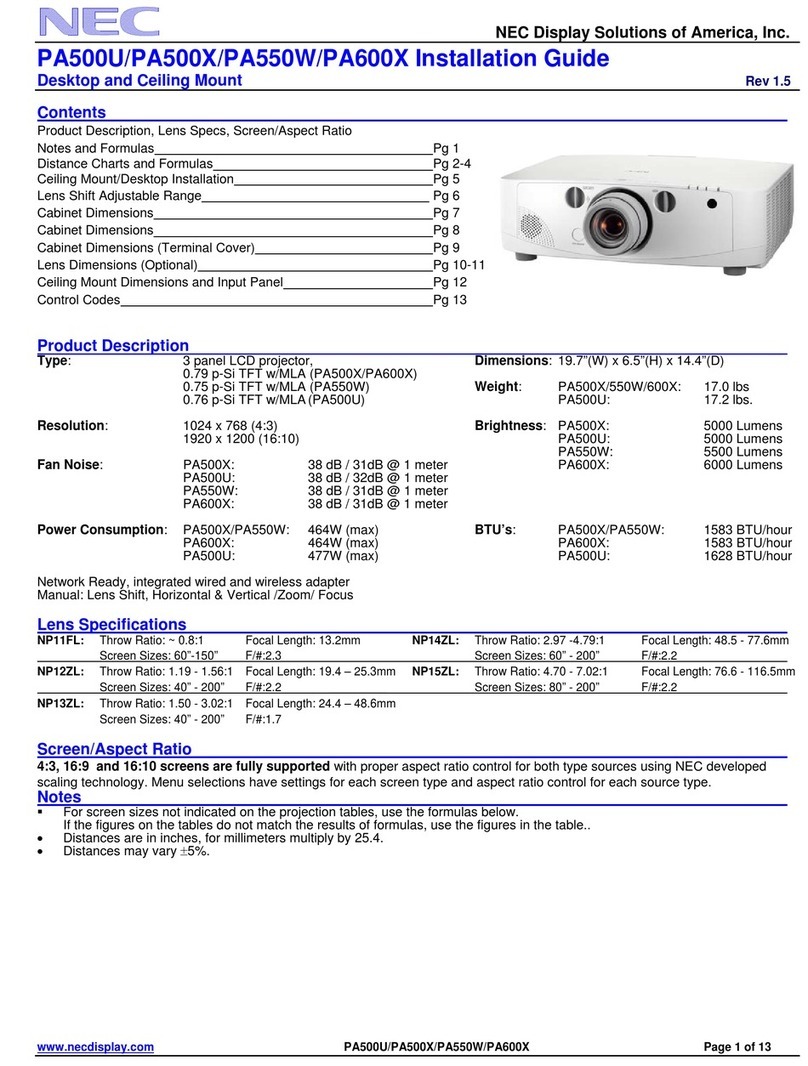
NEC PH1202HL User manual

DLP Projector
PH1202HL/PH1002HL
Installation Manual
Model No.
NP-PH1202HL, NP-PH1202HLJD, NP-PH1202HL+, NP-PH1002HL+

Introduction
DLP Projector Installation and Adjustment Manual (This document) describes the procedures to install, adjust and
maintain the projector PH1202HL/ PH1002HL. For safe and correct installation, adjustment and maintenance of the
projector, carefully read this document before considering the layout of the unit and installation. Please keep this
document under care by the company who installed or adjusted the projector. This document is intended the readers
who have basic knowledge about projector installation. Refer to the user’s manual of an applicable projector for basic
operation and remarks.
The product name used in this manual
In this manual, the device name is written as listed below. If the function has difference by devices, the product name
is written in the text.
PH1202HL/PH1002HL This product or the projector

Ver. 1 3/15
• HDMI,theHDMILogoandHigh-DenitionMultimediaInterfacearetrademarksorregisteredtrademarksofHDMI
Licensing LLC.
• DisplayPortandDisplayPortComplianceLogoaretrademarksownedbytheVideoElectronicsStandardsAssocia-
tion.
• HDBaseT™isatrademarkofHDBaseTAlliance.
• DLPisatrademarkofTexasInstruments.
• TrademarkPJLinkisatrademarkappliedfortrademarkrightsinJapan,theUnitedStatesofAmericaandother
countries and areas.
• Blu-rayisatrademarkofBlu-rayDiscAssociation
• CRESTRONandROOMVIEWareregisteredtrademarksofCrestronElectronics,Inc.intheUnitedStatesandother
countries.
• EthernetiseitheraregisteredtrademarkortrademarkofFujiXeroxCo.,Ltd.
• Otherproductnamesandcompanylogosmentionedinthisuser’smanualmaybethetrademarksorregistered
trademarks of their respective holders.
NOTES
(1) The contents of this manual may not be reprinted in part or whole without permission.
(2) The contents of this manual are subject to change without notice.
(3) Great care has been taken in the preparation of this manual; however, should you notice any questionable points,
errors or omissions, please contact us.
(4)Notwithstandingarticle(3),NECwillnotberesponsibleforanyclaimsonlossofprotorothermattersdeemed
to result from using the Projector.

i
Important Information
Safety Cautions
Precautions
PleasereadthismanualcarefullybeforeusingyourNECprojectorandkeepthemanualhandyforfuturereference.
CAUTION
To turn off main power, be sure to remove the plug from power outlet.
The power outlet socket should be installed as near to the equipment as possible, and should be easily
accessible.
CAUTION
TOPREVENTSHOCK,DONOTOPENTHECABINET.
THEREAREHIGH-VOLTAGECOMPONENTSINSIDE.
REFERSERVICINGTOQUALIFIEDSERVICEPERSONNEL.
Thissymbolwarnstheuserthatuninsulatedvoltagewithintheunitmaybesufcienttocauseelectrical
shock. Therefore, it is dangerous to make any kind of contact with any part inside of the unit.
This symbol alerts the user that important information concerning the operation and maintenance of this
unit has been provided.
The information should be read carefully to avoid problems.
WARNING:TOPREVENTFIREORSHOCK,DONOTEXPOSETHISUNITTORAINORMOISTURE.
DONOTUSETHISUNIT’SPLUGWITHANEXTENSIONCORDORINANOUTLETUNLESSALLTHEPRONGS
CANBEFULLYINSERTED.
DOC Compliance Notice (for Canada only)
ThisClassAdigitalapparatusmeetsallrequirementsoftheCanadianICES-003Standards.
Machine Noise Information Regulation - 3. GPSGV,
Thehighestsoundpressurelevelislessthan70dB(A)inaccordancewithENISO7779.
Disposing of your used product
EU-widelegislationasimplementedineachMemberStaterequiresthatusedelectricalandelectronicprod-
ucts carrying the mark (left) must be disposed of separately from normal household waste. This includes
projectorsandtheirelectricalaccessories.Whenyoudisposeofsuchproducts,pleasefollowtheguidance
of your local authority and/or ask the shop where you purchased the product.
After collecting the used products, they are reused and recycled in a proper way. This effort will help us
reduce the wastes as well as the negative impact to the human health and the environment at the minimum
level.
ThemarkontheelectricalandelectronicproductsonlyappliestothecurrentEuropeanUnionMember
States.
WARNING
This is a Class A product. In a domestic environment this product may cause radio interference in which case the
user may be required to take adequate measures.
CAUTION
• Inordertoreduceanyinterferencewithradioandtelevisionreceptionuseasignalcablewithferritecoreattached.
Useofsignalcableswithoutaferritecoreattachedmaycauseinterferencewithradioandtelevisionreception.
• ThisequipmenthasbeentestedandfoundtocomplywiththelimitsforaClassAdigitaldevice,pursuanttoPart
15 of the FCC Rules. These limits are designed to provide reasonable protection against harmful interference
when the equipment is operated in a commercial environment. This equipment generates, uses, and can radi-
ate radio frequency energy and, if not installed and used in accordance with the installation manual, may cause
harmfulinterferencetoradiocommunications.Operationofthisequipmentinaresidentialareaislikelytocause
harmful interference in which case the user will be required to correct the interference at his own expense

ii
Important Information
WARNING TO CALIFORNIA RESIDENTS:
Handlingthecablessuppliedwiththisproductwillexposeyoutolead,achemicalknowntotheStateofCalifornia
tocausebirthdefectsorotherreproductiveharm.WASHHANDSAFTERHANDLING.
ForUKonly:InUK,aBSapprovedpowercordwithmouldedplughasaBlack(15Amps)fuseinstalledforusewith
this equipment. If a power cord is not supplied with this equipment please contact your supplier.
Important Safeguards
Thesesafetyinstructionsaretoensurethelonglifeofyourprojectorandtopreventreandshock.Pleasereadthem
carefully and heed all warnings.
Installation
• Consultyourdealerforinformationabouttransportingandinstallingtheprojector.Donotattempttotransportand
installtheprojectoryourself.Theprojectormustbeinstalledbyqualiedtechniciansinordertoensureproperop-
eration and reduce the risk of bodily injury.
• Donotplacetheprojectorinthefollowingconditions:
- on an unstable cart, stand, or table.
- near water, baths, or damp rooms.
- in direct sunlight, near heaters, or heat radiating appliances.
- in a dusty, smoky or steamy environment.
- on a sheet of paper or cloth, rugs or carpets.
• Donotinstallandstoretheprojectorinthebelowcircumstances.Failuretodosomaycauseofmalfunction.
- Inpowerfulmagneticelds
- In corrosive gas environment
- Outdoors
• Ifyouwishtohavetheprojectorinstalledontheceiling:
- Do not attempt to install the projector yourself.
- Theprojectormustbeinstalledbyqualiedtechniciansinordertoensureproperoperationandreducetherisk
of bodily injury.
- In addition, the ceiling must be strong enough to support the projector and the installation must be in accordance
with any local building codes.
- Please consult your dealer for more information.

iii
Important Information
WARNING
• Donotcoverthelenswiththelenscaporequivalentwhiletheprojectorison.Doingsocanleadtomeltingof
the cap due to the heat emitted from the light output.
• Donotplaceanyobjects,whichareeasilyaffectedbyheat,infrontoftheprojectorlens.Doingsocouldlead
to the object melting from the heat that is emitted from the light output.
Do not use the projector with it leaning to the left and right. This may result in a malfunction, however, portrait instal-
lation* is possible. Please read the warnings concerning portrait orientation before setting the projector in portrait
orientation. (→page 2)
Fire and Shock Precautions
• Ensurethatthereissufcientventilationandthatventsareunobstructedtopreventthebuild-upofheatinsideyour
projector. Allow enough space between your projector and a wall. (→page 1)
• Preventforeignobjectssuchaspaperclipsandbitsofpaperfromfallingintoyourprojector.Donotattempttoretrieve
any objects that might fall into your projector. Do not insert any metal objects such as a wire or screwdriver into your
projector. If something should fall into your projector, disconnect it immediately and have the object removed by a
qualiedservicepersonnel.
• Donotplaceanyobjectsontopoftheprojector.
• Donottouchthepowerplugduringathunderstorm.Doingsocancauseelectricalshockorre.
• Theprojectorisdesignedtooperateonapowersupplyof200-240VAC50/60Hz.Ensurethatyourpowersupply
tsthisrequirementbeforeattemptingtouseyourprojector.
• Donotlookintothelenswhiletheprojectorison.Seriousdamagetoyoureyescouldresult.
• Donotlookintothelightsourceusingopticalinstruments(suchasmagnifyingglassesandmirrors).Visualimpair-
ment could result.
• Whenturningontheprojector,makesurenoonewithinprojectionrangeislookingatthelens.
• Keepanyitems(magnifyingglassetc.)outofthelightpathoftheprojector.Thelightpathbeingprojectedfromthe
lens is extensive, therefore any kind of abnormal objects that can redirect light coming out of the lens, can cause
anunpredictableoutcomesuchasareorinjurytotheeyes.

iv
Important Information
• Handlethepowercordcarefully.Adamagedorfrayedpowercordcancauseelectricshockorre.
- Do not use any power cord other than the one supplied with the projector.
- Do not bend or tug the power cord excessively.
- Do not place the power cord under the projector, or any heavy object.
- Do not cover the power cord with other soft materials such as rugs.
- Do not heat the power cord.
- Do not handle the power plug with wet hands.
• Turnofftheprojector,unplugthepowercordandhavetheprojectorservicedbyaqualiedservicepersonnelunder
thefollowingconditions:
- Whenthepowercordorplugisdamagedorfrayed.
- If liquid has been spilled into the projector, or if it has been exposed to rain or water.
- If the projector does not operate normally when you follow the instructions described in this user’s manual.
- If the projector has been dropped or the cabinet has been damaged.
- If the projector exhibits a distinct change in performance, indicating a need for service.
• Disconnectthepowercordandanyothercablesbeforecarryingtheprojector.
• Movingtheprojectorrequiresfourpeopleormore.Besuretormlygripthefrontandbackhandles,thenmovethe
projector.
• Turnofftheprojectorandunplugthepowercordbeforecleaningthecabinet.
• Turnofftheprojectorandunplugthepowercordiftheprojectorisnottobeusedforanextendedperiodoftime.
• WhenusingaLANcable:
For safety, do not connect to the terminal for peripheral device wiring that might have excessive voltage.
CAUTION
• Keephandsawayfromthelensmountingportionwhilethelensshiftisinoperation.Failuretodosocouldresult
inngersbeingpinchedbetweenthecabinetandlenscover.
• Donotusetheleveladjusterforpurposesotherthanoriginallyintended.
• Donotunplugthepowercordfromthewalloutletorprojectorwhentheprojectorispoweredon.Doingsocan
cause damage to the AC IN terminal of the projector and (or) the prong plug of the power cord.
To turn off the AC power supply when the projector is powered on, use the projector’s main power switch, a power
strip equipped with a switch, or a breaker.
Precautions when installing or replacing the lens unit sold separately (LENS
CALIBRATION)
Afterinstallingorreplacingthelensunit,presseithertheLENSCALIBRATIONbuttononthemainunitortheINFO/L-
CALIB.buttonwhilepressingtheCTLbuttonontheremotecontroltocarryout[LENSCALIBRATION].(→page 26)
By carrying out [LENS CALIBRATION], the adjustment range of the zoom and focus of the [LENS MEMORY] is
calibrated.
Contact your dealer to install and replace the lens unit.
Caution on Handling the Optional Lens
Whenshippingtheprojectorwiththelens,removethelensbeforeshippingtheprojector.Alwaysattachthedustcap
to the lens whenever it is not mounted on the projector. The lens and the lens shift mechanism may encounter damage
caused by improper handling during transportation. If you need to remove the lens unit, contact your dealer.
v
Important Information
Remote Control Precautions
• Handletheremotecontrolcarefully.
• Iftheremotecontrolgetswet,wipeitdryimmediately.
• Avoidexcessiveheatandhumidity.
• Donotshort,heat,ortakeapartbatteries.
• Donotthrowbatteriesintore.
• Ifyouwillnotbeusingtheremotecontrolforalongtime,removethebatteries.
• Ensurethatyouhavethebatteries’polarity(+/−)alignedcorrectly.
• Donotusenewandoldbatteriestogether,orusedifferenttypesofbatteriestogether.
• Disposeofusedbatteriesaccordingtoyourlocalregulations.
Light Module
1. A light module containing multiple laser diodes is equipped in the product as the light source.
2. These laser diodes are sealed in the light module. No maintenance or service is required for the performance of
the light module.
3. Enduserisnotallowedtoreplacethelightmodule.
4. Contactqualieddistributorforlightmodulereplacementandfurtherinformation.
Laser Safety Caution
• Thelasermoduleisequippedinthisproduct.
Useofcontrolsoradjustmentsofproceduresotherthanthosespeciedhereinmayresultinhazardousradiation
exposure.
• ThisproductisclassiedasClass1ofIEC60825-1Thirdedition2014.Obeythelawsandregulationsofyourcountry
in relation to the installation and management of the device.
Bluepumpinglaserdiodes:Wavelength448nm,Outputpower300W
Bluelaserdiodes:Wavelength462nm,Outputpower56W
• Donotlookintothelenswhiletheprojectorison.Seriousdamagetoyoureyescouldresult.Payenoughattention
to children.
• Thebelowdiagramisindicatedontheprojector.
• Donotlookintothelightsourceusingopticalinstruments(suchasmagnifyingglassesandmirrors).Visualimpair-
ment could result.
• Whenturningontheprojector,makesurenoonewithinprojectionrangeislookingatthelens.
DONOTSTAREINTOTHELENSWHILEINUSE.

vi
Important Information
• Thelabelisstuckonthebelowindicatedposition.
Label

vii
Important Information
Radiation range of emitted light by the projector (HD: Hazard distance)
• ThebelowtabledescribestheradiationrangeofemittedlightbytheprojectorthatisclassiedasRiskGroup3
(RG3)ofIEC62471.
• Pleasekeepwithinboundsforinstallingtheprojector.
Install a barrier for preventing human eyes from entering the RG3 area.
Forthebarrierinstallationposition,keephorizontalsafetyzoneover1.5mfromtheRG3area.
In case to install the projector over head, keep over 3m distance at least between the floor surface and the RG3
area.
Lens Zoom HD(m) H(m) V(m)
NP-9LS08ZM1 Wide 0.7 0.79 0.42
Tele 1.4 1.08 0.57
NP-9LS12ZM1 Wide 1.8 1.41 0.75
Tele 2.3 1.29 0.68
NP-9LS13ZM1 Wide 1.9 1.36 0.72
Tele 3.0 1.40 0.74
NP-9LS16ZM1 Wide 2.7 1.62 0.85
Tele 3.7 1.37 0.72
NP-9LS16Z1 Wide 2.6 1.58 0.83
Tele 3.4 1.63 0.86
NP-9LS20ZM1 Wide 3.8 1.78 0.94
Tele 3.0 0.75 0.40
NP-9LS20Z1 Wide 2.8 1.37 0.72
Tele 3.6 1.32 0.70
NP-9LS40Z
NP-9LS40ZM1
Wide 7.8 1.90 1.00
Tele 10.1 1.59 0.84
H
V
HD
[Plan view]
[Side view]
RG3 range
*Iflensshiftisutilized,pleaseconsidertheshiftofprojectedimageaccordingtothevolumeoflensshift.

viii
Important Information
Caution
Please heed all precaution for safety.
To install the projector
• Forplanningthelayoutoftheprojector,makesuretotakesafetymeasuresinstructedontheinstallationmanu-
al.
• Inordertorefusedanger,installeitherawalloutletwithineasyreachforpullingoutthepowerpluginemergency
or a device as a breaker to shut down the power supply to the projector.
• TakesafetymeasurespreventinghumaneyesfromenteringtheRG3area.
• Consideringtheinstallationplace,selectanappropriatelensandsecuresafetyzonethatisdeterminedforeach
lens. For operation on the powered projector as light adjustment, make sure appropriate safety measures have
been taken.
• Checkthevalidityoftakensecuritymeasuresifappropriatesafetyzonebasedontheinstalledlensissecured.
Periodically check the validity and keep these results.
• Educatetheadministratoroftheprojector(operators)aboutsafetybeforestartingtooperatetheprojector.
To use the projector
• Instructtheadministratoroftheprojector(operators)toperforminspectionsbeforepoweringontheprojector.
(Including the safety check against emitted light by the projector)
• Instructtheadministratoroftheprojector(operators)tobeincircumstancesabletocontroltheprojectorwhenever
the projector is powered on for an emergency.
• Instructtheadministratoroftheprojector(operators)tokeeptheinstallationmanual,user’smanualandinspec-
tion records to a place where they can take these documents out easily.
• Instructthemtoclarifyiftheprojectorisconformedtostandardsofeachcountryandregion.
About High Altitude mode
• Usingtheprojectorathighlandscanshortenthelifeofopticalcomponentssuchasthelightmodule.
About Copyright of original projected pictures:
Please note that using this projector for the purpose of commercial gain or the attraction of public attention in a venue
such as a coffee shop or hotel and employing compression or expansion of the screen image with the following func-
tions may raise concern about the infringement of copyrights which are protected by copyright law.
[ASPECTRATIO],[KEYSTONE],Magnifyingfeatureandothersimilarfeatures.
Turkish RoHS information relevant for Turkish market
EEE Yönetmeliğine Uygundur.
Thisdeviceisnotintendedforuseinthedirecteldofviewatvisualdisplayworkplaces.Toavoidincommodingreec-
tionsatvisualdisplayworkplacesthisdevicemustnotbeplacedinthedirecteldofview.

ix
Important Information
Health precautions to users viewing 3D images
Beforeviewing,besuretoreadhealthcareprecautionsthatmaybefoundintheuser’smanualincludedwithyour
3Deyeglassesoryour3DcompatiblecontentsuchasBlu-rayDiscs,videogames,computer’svideolesandthe
like.
Toavoidanyadversesymptoms,heedthefollowing:
• Donotuse3Deyeglassesforviewinganymaterialotherthan3Dimages.
• Allowadistanceof2m/7feetorgreaterbetweenthescreenandauser.Viewing3Dimagesfromtooclosea
distance can strain your eyes.
• Avoidviewing3Dimagesforaprolongedperiodoftime.Takeabreakof15minutesorlongeraftereveryhour
of viewing.
• Ifyouoranymemberofyourfamilyhasahistoryoflight-sensitiveseizures,consultadoctorbeforeviewing3D
images.
• Whileviewing3Dimages,ifyougetsicksuchasnausea,dizziness,queasiness,headache,eyestrain,blurry
vision, convulsions, and numbness, stop viewing them. If symptoms still persist, consult a doctor.
• View3Dimagesfromthefrontofthescreen.Viewingfromananglemaycausefatigueoreyestrain.
Power management function
In order to keep power consumption low, the following power management functions (1) and (2) have been set when
shipped from the factory. Please display the on-screen menu and change the settings (1) and (2) according to the
aim of using the projector.
1. STANDBY MODE (Factory preset: NORMAL)
• When[NORMAL]isselectedfor[STANDBYMODE],thefollowingterminalsandfunctionswillnotwork:
HDMIOUTterminal,Ethernet/HDBaseTPort,USBPort,LANfunctions,MailAlertfunction
(→page 39)
2. AUTO POWER OFF (Factory preset: 1 hour)
• When[1:00]isselectedfor[AUTOPOWEROFF],youcanenabletheprojectortoautomaticallyturnoffin1
hourifthereisnosignalreceivedbyanyinputorifnooperationisperformed.
(→page 51)
Clearance for Installing the Projector
Allow ample clearance between the projector and its surroundings.
The high temperature exhaust coming out of the device may be sucked into the device again.
Avoid installing the projector in a place where air movement from the HVAC is directed at the projector.
Heated air from the HVAC can be taken in by the projector's intake vent. If this happens, the temperature inside the
projector will rise too high causing the over-temperature protector to automatically turn off the projectors power.
• Beforesettingtheprojectorinportraitorientation,pleasereadpage2.

x
Table of Contents
Introduction.................................................................................................................b
The product name used in this manual.....................................................................b
Important Information............................................................................................ i
1. Before Setting Up Your Projector.............................................................1
1-1. Clearance for Installing the Projector ...........................................................................1
1-2. Installation for Tilt-free and Portrait projection..............................................................2
1-3.Selectingthelensunit ..................................................................................................5
1-4. Carrying the projector ..................................................................................................8
1-5. List of used tools ..........................................................................................................8
1-6.Mounting/Removingthelenscover............................................................................9
2. Setting Up Your Projector ...........................................................................10
2-1.SetupProcedure ........................................................................................................10
2-2. Installing the projector................................................................................................11
2-2-1. Adjustment of the projector’s settings (Level adjusters)................................11
2-2-2. Install the projector on the ceiling .................................................................12
2-2-3.Multi-ScreenProjection.................................................................................13
2-3. Connecting the Power Cord .......................................................................................17
UsingthePowerCordFixingMetal.........................................................................18
2-4.MountingtheLensUnit ..............................................................................................19
Lens unit mounting method.....................................................................................20
2-5.MountingtheOptionalBoard(soldseparately)..........................................................22
3. Projector Adjustment and Connecting................................................24
3-1. Flow of Adjustment and Connecting ..........................................................................24
3-2. Turning on the Projector .............................................................................................25
3-3.Selectingtheprojectororientation .............................................................................28
3-4.AdjustingthePictureSizeandPosition......................................................................29
3-5.ConnectingtoOtherEquipments ...............................................................................35
3-5-1. Connecting a computer.................................................................................35
3-5-2.ConnectinganExternalMonitor ...................................................................39
3-5-3.ConnectingYourBlu-rayPlayerorOtherAVEquipment...............................40
3-5-4. Connecting a document camera...................................................................43
3-5-5.ConnectingtoaWiredLAN ..........................................................................44
3-5-6.ConnectingtoaHDBaseTtransmissiondevice(soldcommercially)............45
3-6.OptimizingComputerSignalAutomatically ................................................................46

xi
Table of Contents
4. List of Menu Items ..........................................................................................47
5. Maintenance .......................................................................................................53
5-1. Cleaning the Filters ....................................................................................................53
5-2. Cleaning the Lens ......................................................................................................57
5-3. Cleaning the Cabinet..................................................................................................57
6. Appendix................................................................................................................58
6-1.CompatibleInputSignalList ......................................................................................58
6-2.Troubleshooting ..........................................................................................................61
Indicator Messages.................................................................................................61
6-3.Pinassignmentsandsignalnamesofmainterminals ...............................................63
6-4.CabinetDimensions ...................................................................................................71

1
1. Before Setting Up Your Projector
1-1. Clearance for Installing the Projector
Allow ample clearance between the projector and its surroundings as shown below.
Avoid installing the projector in a place where air movement from the HVAC is directed at the projector.
Heated air from the HVAC can be taken in by the projector’s intake vent. If this happens, the temperature inside the
projector will rise too high causing the over-temperature protector to automatically turn off the projectors power.
Installation conditions for the projector
Example 1 – If there are walls on both sides of the projector.
The drawing shows the proper clearance required for the front, back and top of the projector.
30 cm/11.8"
or greater
30 cm/11.8"
or greater
Ventilation
(inlet)
Ventilation
(inlet)
Example 2 – If there is a wall behind the projector.
The drawing shows the proper clearance required for the front, sides and top of the projector.
(1)Foroorinstallation:
70 cm/27.6"
or greater
Ventilation
(outlet)
Lens
(2)Forceilingmounting:
30 cm/11.8"
or greater
70 cm/27.6"
or greater
Lens

2
1. Before Setting Up Your Projector
1-2. Installation for Tilt-free and Portrait projection
This projector can be set to any angle within a vertical 360° range,
however, it cannot be installed with right or left slant besides the portrait
projection.
If you install the projector vertically you can project screens from your
computer and other sources in portrait orientation.
Precautions for the portrait insntallation
• Donotsimplysettheprojectorverticallyontheoororonatable.Theprojectormayfallover,resultingininjury,
damage or malfunction. Also the intake vent may become blocked causing the unit’s internal temperature to
riseresultinginmalfunctionandriskofre.
• Forportraitinstallationtheintakeventsmustbeinstalledatthetopandbottom.Toensureairowtothebottom
intake vent, a rack to support the unit is necessary. Please hire an installation service provider (for a fee) to
make a custom portrait projection stand.
• Wheninstalledinportraitorientationtheprojectorcanbetiltedforwardorbackward
withinarangeof±10°.Tiltingtheprojectorforwardorbackwardoutsideofthisrange,ortiltingittotheleftor
to the right could cause it to malfunction.
• Toensureairow,maintain30cm/11.8"ofspacebetweentheintake
vent and the installation surface.
(NOTE)Intheguretotherightthereisplentyofspacebehind,above,
and on either side of the projector unit.
Intakevent
Intakevent
30cm/11.8"orgreater

3
1. Before Setting Up Your Projector
Caution to the installation for the Tilt-free projection
• Donotinstalltheprojectorinthestateoffacingup/downorinclineddirectlyonaoorandatable.Iftheprojector
falls down, It may cause of malfunction, damage and human injury. If the intake vents are obstructed, the projector
insidetemperaturewillincreaseanditmaycauseofmalfunctionandre.
• Makesuretoproducethesupportmetalfortheprojectorastheceilingmountmetal.Pleaseasktheservice
company about the support metal production. (for a fee)
• Incaseyouneedtoinstalltheprojectorintiltedangle,pleaseinstalltheprojectorbysupportmetalsthathave
enough durability to support the projector for a long time.
Design and manufacturing conditions for a stand and a ceiling mount metal of the projector
Pleasehireaninstallationserviceprovider(forafee)todesignandmanufacturecustomizedstandandceilingmount
metal.Pleaseensurethatthedesigncomplieswiththefollowingconditions:
• Thereisoneintakeventoneithersideandoneexhaustventattherear.Theseshouldremainunobstructed.Also,
secureenoughspaceforeasyltercoverremovalforltercleaning.
• Removetheleveladjustersortheprojectorhandlesincasethesehitagainstthestand.Forremovingthelevel
adjuster, rotate the level adjuster itself, and for removing the handle, remove the handle fastening screws.
• Fixthestandontotheceilingmountscrewholes(6positions)ontheprojectorbottomface.
Dimensionsofscrewhole:forM6screwMaximumdepth10mm(Calculatetheboltlengthdependingonthestand
design)
• Horizontaladjustmentmechanism(forexample,boltsandnutsin4places)
• Makesuretodesignthestandnotfallingovereasily.
• Makesureiftheprojectorisxedonthesurfacethathasenoughdurabilitytostandthewholeprojectorweight
(theprojectorweight68kgplusthelensweight3kg,i.e.,71kgintotal)foralongtime.
Referential drawings for the portrait projection
* Figure illustrating the dimensions and conditions (not actual design blueprint).
150 150 300
140140
[Side View] [Front View]
6 - M6 bolt
(Unit: mm)
Horizontal adjuster
Exhaust vent
Intake vent
Intake vent

4
1. Before Setting Up Your Projector
CAUTION
• Whenmovingtheprojector,makesureyouhaveatleastfourpeople.Attemptingtomovetheprojectoralone
could result in back pain or other injuries.

5
1. Before Setting Up Your Projector
1-3. Selecting the lens unit
Thissectionprovidestheguidelineinformationonhowtoselectascreensize,projectormountingposition,andtype
of lens units, which is appropriate for your presentation purposes. Many types of optical lens for the projector are
available for separate sale to support various projection range.
Notethatalldescriptionsgiveninthismanualassumethattheangleofprojectioniszerodegree.Incaseofprojection
from an upper position or from the right or left, it is necessary to calculate the width for the minimum projected image
thatisalittlelargerthanthescreensize.
Minimum width
Screen
Screen
Minimum
height
Projected
image Projected
image
Throw distance and screen size
Sixseparatebayonetstylelensescanbeusedonthisprojector.Refertotheinformationonthispageandusealens
suitedfortheinstallationenvironment(screensizeandthrowdistance).Forinstallationandreplacementoflensunits
contact your dealer.
Eachnumberprovidedinthetablebelowmeansthethrowdistancebetweenthelenssurfaceandthescreen.
Lens types and throw distance
unit = m
Screensize Lens model name
NP-9LS08ZM1 NP-9LS12ZM1 NP-9LS13ZM1 NP-9LS16ZM1 NP-9LS20ZM1 NP-9LS40ZM1
60" —————5.8–9.1
70" 1.4–2.1 ————6.7–10.5
100" 2.0–3.0 2.8–4.0 3.1–4.9 3.8–6.3 5.0–9.3 9.6–15.0
120" 2.4–3.6 3.4–4.8 3.7–5.9 4.5–7.6 6.0–11.1 11.5–18.0
150" 3.0–4.5 4.2–6.0 4.7–7.4 5.7–9.5 7.5–13.9 14.3–22.5
200" 4.0–6.0 5.6–8.1 6.2–9.9 7.6–12.7 9.9–18.5 19.0–29.9
250" 5.0–7.5 7.0–10.1 7.8–12.4 9.5–15.9 12.4–23.1 23.8–37.4
300" 6.0–9.0 8.5–12.1 9.4–14.9 11.4–19.1 14.8–27.7 28.5–44.9
350" 7.0–10.6 9.9–14.2 11.0–17.4 13.3–22.3 17.3–32.3 33.3–52.3
400" 8.0–12.1 11.3–16.2 12.5–19.8 15.2–25.5 19.8–36.9 38.0–59.8
450" 9.0–13.6 12.7–18.2 14.1–22.4 17.1–28.9 22.2–41.5 42.7–67.2
500" 10.0–15.1 14.1–20.2 15.7–24.8 19.0–31.9 24.7–46.1 47.5–74.7
550" 11.1–16.6 —————
600" 12.1–18.1 —————
TIP
• Calculationofthethrowdistancefromthescreensize
NP-9LS08ZM1lensthrowdistance(m)=H×0.90toH×1.35:1.4m(min.)to18.1m(max.)
NP-9LS12ZM1lensthrowdistance(m)=H×1.28toH×1.83:2.8m(min.)to20.2m(max.)
NP-9LS13ZM1lensthrowdistance(m)=H×1.42toH×2.24:3.1m(min.)to24.8m(max.)
NP-9LS16ZM1lensthrowdistance(m)=H×1.73toH×2.88:3.8m(min.)to31.9m(max.)
NP-9LS20ZM1lensthrowdistance(m)=H×2.23toH×4.16:5.0m(min.)to46.1m(max.)
NP-9LS40ZM1lensthrowdistance(m)=H×4.34toH×6.76:5.8m(min.)to74.7m(max.)
“H”(Horizontal)referstothescreenwidth.
*Figuresdifferbyseveral%withthetableabovebecausethecalculationisapproximate.
Ex.:Throwdistancewhenprojectingona300"screenusingtheNP-9LS13ZM1lens:
Accordingtothe“Tablesofscreensizesanddimensions”(→page6),H(screenwidth)=664.1cm.
Thethrowdistanceis6.641cm×1.42to6.641cm×2.24=9.430cmto14.876cm(becauseofthezoomlens).
Projectionfromtheleft Projectionfromanupperposition

6
1. Before Setting Up Your Projector
Projection range for the different lenses
60-500"
100-500"100-500"100-500"
NP-9LS20ZM1
5.0–46.1 m
70-600"
100-500"
NP-9LS08ZM1
1.4–18.1 m
NP-9LS13ZM1
3.1–24.8 m
NP-9LS16ZM1
3.8–31.9 m
NP-9LS40ZM1
5.8–74.7 m
NP-9LS12ZM1
2.8–20.2 m
Tables of screen sizes and dimensions
Screenheight
Screenwidth
16:10screensize
(diagonal)
Size(inches) Screenwidth Screenheight
(inches) (cm) (inches) (cm)
60 52 132.8 29 74.7
70 61 155.0 34 87.2
100 87 221.4 49 124.5
150 131 332.1 74 186.8
200 174 442.8 98 249.1
250 218 553.5 123 311.3
300 261 664.1 147 373.6
350 305 774.8 172 435.8
400 349 885.5 196 498.1
450 392 996.2 221 560.4
500 436 1106.9 245 622.6
550 479 1217.6 270 684.9
600 523 1328.3 294 747.2
Other manuals for PH1202HL
2
This manual suits for next models
1
Table of contents
Other NEC Projector manuals

NEC
NEC PX750U Series User manual

NEC
NEC P501X User manual

NEC
NEC LT380 - MultiSync XGA LCD Projector User manual

NEC
NEC MultiSync MT1055 User manual

NEC
NEC NP610 Series User manual

NEC
NEC NP4100WJ User manual

NEC
NEC MultiSync MT840 Assembly instructions

NEC
NEC NP43 Series User manual

NEC
NEC GP-3000 User manual

NEC
NEC PX602UL-WH User manual
Popular Projector manuals by other brands

Toshiba
Toshiba TDP-EX20U - Short Throw DLP Projector Specifications

Califone
Califone Luminos OHP-2000 brochure

Hitachi
Hitachi CP-L300 operating guide

Sanyo
Sanyo PLV-Z4000 - 16:9 High Contrast Home Entertainment... Quick reference guide

InFocus
InFocus LP 650 brochure

Philips
Philips NeoPix Easy NPX440 user manual