NEFF B16H6A0 User manual

Instructions for use
B 16H6 . .

2
Table of contents
Important Information . . . . . . . . . . 4
Packaging and old appliances . . . . . 4
Before installation . . . . . . . . . . . . . . 5
Safety information . . . . . . . . . . . . . . 5
Reasons for damage . . . . . . . . . . . . 6
Your new cooker . . . . . . . . . . . . . . 7
The control panel . . . . . . . . . . . . . . . 7
Brief overview . . . . . . . . . . . . . . . . . 8
Shelf positions . . . . . . . . . . . . . . . . . 9
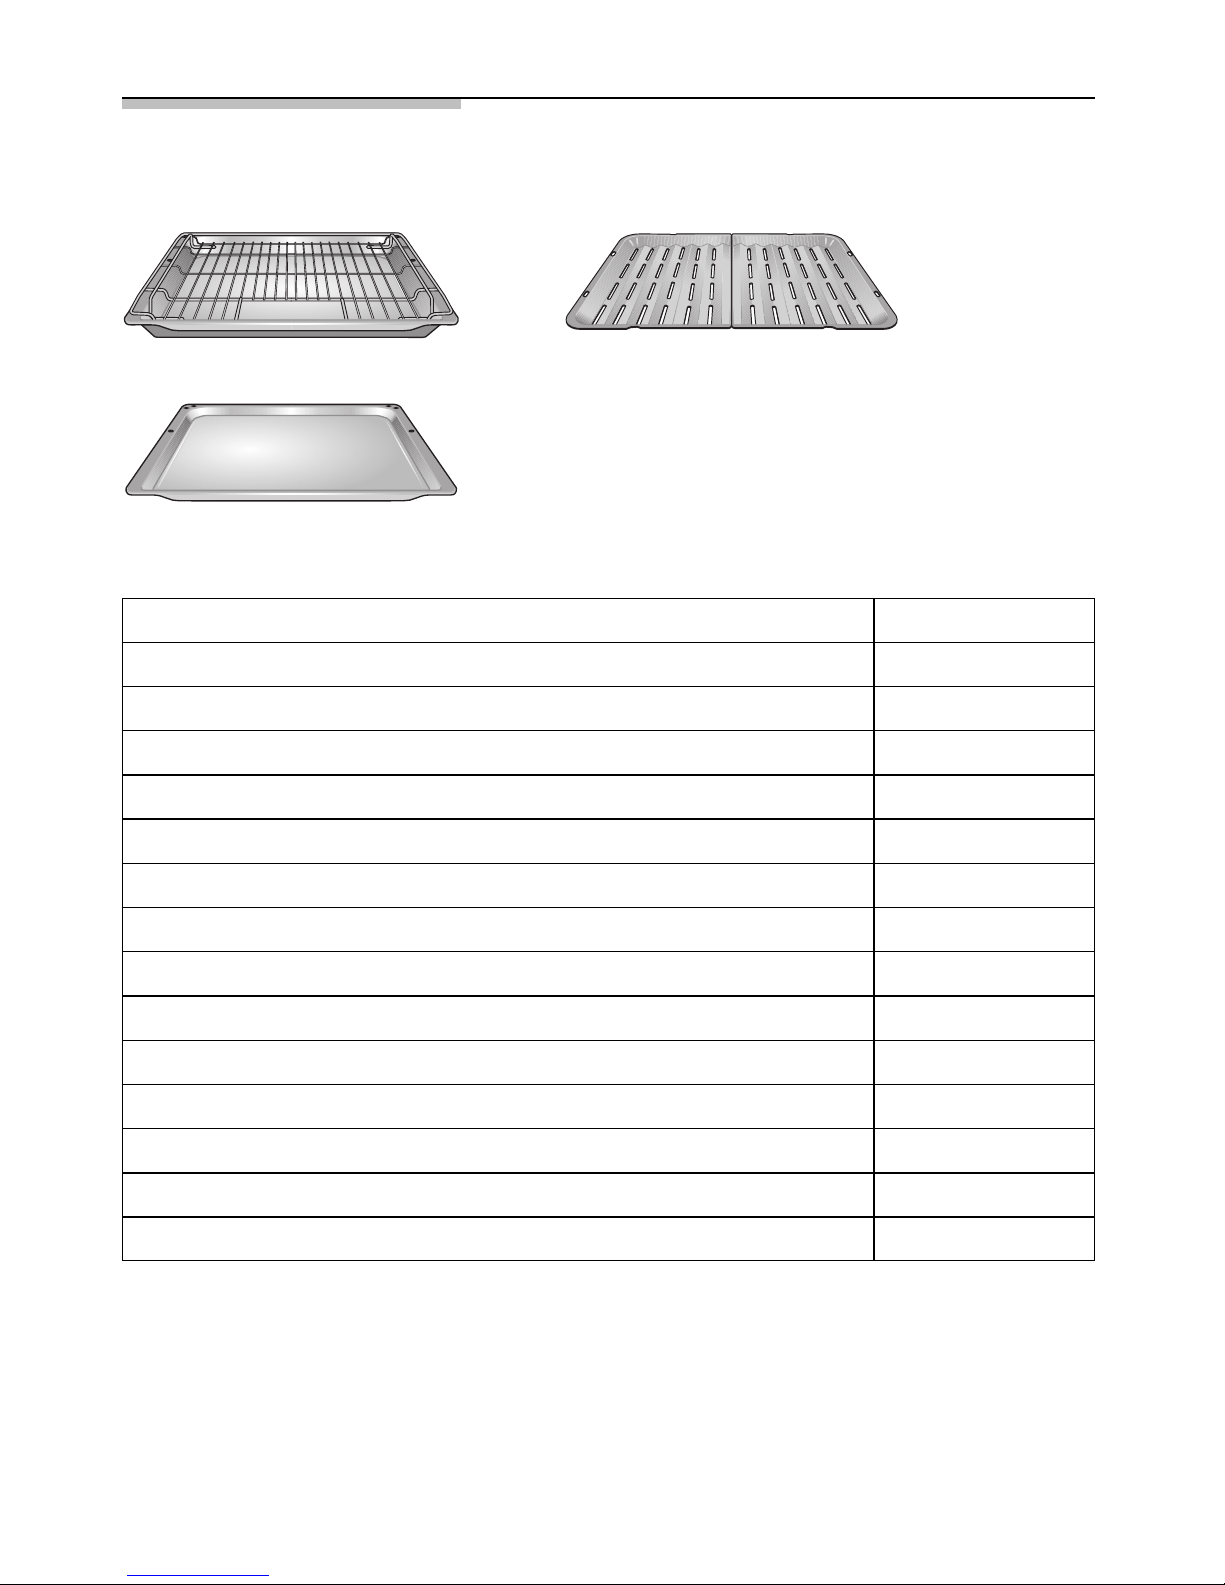
Accessories . . . . . . . . . . . . . . . . . . . 10
Before using your appliance
for the first time . . . . . . . . . . . . . . . 11
Start-up . . . . . . . . . . . . . . . . . . . . . . 11
Preliminary cleaning . . . . . . . . . . . . . 12
Initial burn-it . . . . . . . . . . . . . . . . . . . 12
Subsequent cleaning . . . . . . . . . . . . 12
Electronic clock . . . . . . . . . . . . . . . 13
The control panel . . . . . . . . . . . . . . . 13
Clock functions . . . . . . . . . . . . . . . . 13
Setting the time of day . . . . . . . . . . 14
Minute timer . . . . . . . . . . . . . . . . . . 15
Automatic timer . . . . . . . . . . . . . . . . 16
Checking, correcting and
cancelling settings . . . . . . . . . . . . . . 18
Special functions . . . . . . . . . . . . . . . 18
Oven operating modes . . . . . . . . . 19
Hot air functions . . . . . . . . . . . . . . . 19
Conventional functions . . . . . . . . . . 20
Inhaltsverzeichnis
Grill functions . . . . . . . . . . . . . . . . . . 21
Special functions . . . . . . . . . . . . . . . 22
Operating the oven . . . . . . . . . . . . 24
Switching ON and OFF . . . . . . . . . . 24
Selecting the operating mode . . . . . 24
Setting the temperature . . . . . . . . . . 26
Changing the operating mode . . . . . 26
Changing the temperature . . . . . . . . 27
Rapid heat up . . . . . . . . . . . . . . . . . 28
Checks . . . . . . . . . . . . . . . . . . . . . . 28
Safety features . . . . . . . . . . . . . . . . 30
Lock . . . . . . . . . . . . . . . . . . . . . . . . 30
Permanent lock . . . . . . . . . . . . . . . . 31
Automatic safety off function . . . . . . 31
Baking . . . . . . . . . . . . . . . . . . . . . . 32
Cooking Tips and Helpful Hints . . . . 33
Roasting . . . . . . . . . . . . . . . . . . . . . 34
Grilling . . . . . . . . . . . . . . . . . . . . . . 36
Circo-roasting . . . . . . . . . . . . . . . . . 37
Surface grilling . . . . . . . . . . . . . . . . . 37
Steam cooking . . . . . . . . . . . . . . . . 38
Dough proving . . . . . . . . . . . . . . . . . 39
Braising . . . . . . . . . . . . . . . . . . . . . . 40
Defrosting and warming . . . . . . . . 42
Defrosting with Circotherm . . . . . . . . 42
Defrost . . . . . . . . . . . . . . . . . . . . . . . 43

3
Table of contents
Plate warming . . . . . . . . . . . . . . . . . 44
Keep warm . . . . . . . . . . . . . . . . . . . 44
Sannath setting . . . . . . . . . . . . . . . . 45
Memory function . . . . . . . . . . . . . . 46
Recording a new programme . . . . . .
46
Ending programme recording . . . . . 47
Recording several programme
steps . . . . . . . . . . . . . . . . . . . . . . . . 49
Playing back programme . . . . . . . . . 51
Deleting programme . . . . . . . . . . . . 52
Cleaning and care . . . . . . . . . . . . . 53
Important cleaning basics . . . . . . . . 53
Inhaltsverzeichnis
Catalytic oven surfaces . . . . . . . . . . . 55
Keep accessories . . . . . . . . . . . . . . 55
EasyClean®-system
(oven cleaning system) . . . . . . . . . . 56
Oven door . . . . . . . . . . . . . . . . . . . . 58
Lowering the heating element . . . . . 59
Shelf supports . . . . . . . . . . . . . . . . . 59
Telescopic pull-outs . . . . . . . . . . . . . 60
Settings . . . . . . . . . . . . . . . . . . . . . 61
Service and Repair Information . . 62
Trouble-shooting guide . . . . . . . . 63

4
Important information
Before using your new appliance, please read these
Instructions for Use carefully. They contain important
information concerning your Personal safety as well
as on use and care of the appliance.
The Instructions for Use apply to several versions of
this appliance. Accordingly, you may find
descriptions of individual features that do not apply
to your specific appliance.
Please keep the operating and installation
instructions in a safe place; this important
documentation may also be of use to a possible
subsequent owner.
Packaging and Your new appliance was protected by suitable
old appliances packaging while it was on its way to you. All materials
used for this purpose are environmentally friendly and
can be recycled. Please make a contribution to
protecting the environment by disposing of the
packaging appropriately.
Old appliances are not worthless rubbish.
Environmentally-conscious recycling can reclaim
valuable raw materials.
Before disposing of your old appliance, please make
sure that it is unusable, or label it with a sticker
stating „Caution, scrap”.
This appliance is labelled in accordance with
European Directive 2002/96/EG concerning used
electrical and electronic appliances (waste electrical
and electronic equipment – WEEE). The guideline
determines the framework for the return and
recycling of used appliances as applicable
throughout the EU.
Up-to-date information on how to dispose of your
old appliance and the packaging from the new one
can be obtained from your retailer or local authority.

5
Before installation
Transport damage Check the appliance after unpacking it. Do not
connect the appliance if it has been damaged in
transport.
Electrical connection The cooker may only be connected by an approved
specialist. Losses resulting from damage caused by
incorrect connection will invalidate warranty claimes.
Safety information This appliance is intended for domestic use only.
Only use the cooker for food preparation.
Hot oven Open the oven door carefully. Hot steam may escape.
Never touch the internal surfaces of the oven or the
heating elements. There is a risk of burning.
Children must be kept at a safe distance from the
appliance.
Never store combustible items in the oven.
Risk of fire. Never place flammable objects onto the
hot plates. Fire hazard!
Never place cables of electronic devices onto the hot
plates.
Never clamp leads of electrical appliances in the hot
oven door. The insulation on the leads could melt.
There is a risk of short-circuiting.
Caution: The extension rails heat up during oven
operation. Use special care to avoid burns when
extending the rails.
Remove all packaging remnants, e.g. polystyrene
parts, from the oven.
Repairs Incorrectly done repairs are dangerous. There is a
risk of electrocution.
Repairs may only be carried out by after-sales
service technicians who have been fully trained by
BSH.
If there is a fault, switch off the oven fuse at the fuse
box.
Call the after-sales service.

6
Reasons for
damage
Baking tray, aluminium foil Do not place the baking tray on the oven floor.
or dishes on the oven floor Do not cover it with aluminium foil.
Do not place dishes on the oven floor.
This will cause heat accumulation. The baking and
roasting times will no longer be correct and the
enamel will be damaged.
Slide-in accessories To avoid damage, insert slide-in accessories
carefully.
Baking paper If using hot air functions *, do not place
greaseproof paper loosely in the oven (e.g. when
heating the oven).
The hot-air fan could draw in the paper which may
damage the heater and fan.
Water in the oven Never pour water directly into a hot oven.
This could damage the enamel.
Fruit juice When baking very moist fruit cakes, do not put too
much on the baking sheet. Fruit juice dripping from
the baking sheet leaves stains that cannot be
removed.
It is recommended that you use the deeper universal
pan.
Cooling with the oven door Only leave the oven to cool with the door closed. Do
not allow anything to become trapped in the oven
door. Even if you only leave the oven door open
slightly, the fronts of adjacent units may become
damaged over time.
Very dirty oven seal If the oven seal is very dirty, the oven door will no
longer close properly when the oven is in use.
The fronts of adjacent units could be damaged.
Keep the oven seal clean.
Using the oven door as a Do not stand or sit on the oven door.
seat
Care and cleaning Do not use high-pressure cleaners or steam jets.

7
Rapid heat up button
Temperature selector button
Clock display with clock
function symbols
Oven function buttons
Clock function button
Your new cooker
Here you will learn more about your new appliance.
The control panel, its TouchControl buttons, the roller
and displays are explained here. The oven functions,
operating modes and the accessories included with
your oven will be explained here.
The control panel
Temperature display
with indicator bars Text
display Roller Info button
Roller You can rotate and press the roller.
Rotate the roller ➝To select the functions on
the text display
➝To set the time and
temperature
Press the roller ➝To actuate the selected
settings
➝To switch the oven on and
off press and hold

8
Brief overview
Text display Text display for oven functions, operating modes,
settings and information.
Oven function buttons Tap a function button to access the required
operating modes.
Repeatedly tap a button to select the associated
operating modes.
Temperature selector button After tapping the /button, you can change the
temperature with the roller.
Temperature display with Indicates the temperature. The indicator bars
indicator bars indicate how hot the oven is.
Rapid heat up button Tap the $button to switch on rapid heat up
(for Circotherm and bread baking).
Clock function button Tap the button to be able to select clock functions
(see ”Electronic clock”).
Repeatedly tap the )button to select the clock
functions.
Clock display with clock Indicates the time. The symbols are backlit as soon
function symbols as the associated function is activated (see
”Electronic clock”).
Info button Do you want to know quickly how to do something
on your appliance? Simply tap on i. You will then
receive information e.g. on oven functions, operating
modes, clock functions, settings and much more.

9
Shelf positions Your oven features 3 shelf positions. The shelf
positionss are counted from bottom to top.
The numbers are marked in the oven.
When using hot air function *, do not use shelf
position »2«, in order not to block air circulation.
The shelf supports and telescopic rails can be
inserted at your preferred shelf position.
The simple plug-in system provides you with flexible
and quick handling when changing the shelf
supports and telescopic rails.

10
Accessories Your appliance is supplied with:
Universal pan with wire shelf
Baking tray, enamelled
Roasting tray
The following accessories can be obtained from a
specialist dealer: Order no.
Note:
The baking tray or universal pan may distort while the oven is operating. This is cau-
sed by major temperature differences on the utensil. These differences may occur if
only one part of the utensil was covered or if deep-frozen food, e.g. pizza, was placed
on the utensil.
The distortion will subside again during baking, roasting or grilling.
Universal pan, non-stick
Soufflé pan
Baking tray, aluminium
Baking tray, enamelled
Baking tray, non-stick
Wire shelf, high/low
Wire shelf, close mesh
Roasting tray
Upgrade set – Single Telescope
System steam cooker
Pizza stone
Universal pan Z 1232 X0
Z 1233 X0
Glass pan Z 1262 X0
Z 1272 X0
Z 1332 X0
Z 1342 X0
Z 1343 X0
Pizza tray Z 1352 X0
Z 1432 X0
Z 1442 X0
Z 1512 X0
Z 1784 X0
N 8642 X0
Z 1912 X0
Universal oval roaster enamelled Z 9930 X0

11
1. Rotate the roller to set the current time
(e.g. 15:00).
2. Acknowledge the settings either by pressing the
roller or the time is automatically accepted after
3 seconds.
3. When the time has been accepted, the appliance
switches off.
2. Acknowledge the setting by pressing the roller.
Setting the time Then Set time of day is indicated on the text display
with the flashing prompt: Set time.
Have you set a wrong language?
Touch the $button for at least 5 seconds.
The selectable languages are indicated on the text
display. Proceed as described above.
Have you set the wrong time?
See ”Electronic clock” chapter.
Before using your appliance
for the first time
Start-up
Selecting the language When the appliance has been connected to the
power supply, the selectable languages are indicated
on the text display.
1. Rotate the roller until the required language
appears on the red bar.

Preliminary Take the accessories out of the oven.
cleaning Remove all packaging remnants, e.g. polystyrene
parts, from the oven.
1. Clean the appliance exterior with a soft
moistened cloth.
2. Clean the oven and the accessories with a hot
detergent solution.
3. Take the shelf supports and telescopic rails out of
the oven (see ”shelf supports” and ”Telescopic
extension rails”).
Initial burn-in 1. Heat the empty oven for approx. 30 minutes.
2. Select top and bottom heat at a setting of 240° C
(see ”Oven operation” chapter”.
Subsequent cleaning Clean the oven with a hot detergent solution.
Attach the shelf supports and telescopic extension
rails (see ”shelf supports” and ” telescopic extension
rails”).
12

13
Electronic clock
The electronic clock can be operated with one hand.
After pressing the )button, select an option in the
submenu and set the time with the roller. Settings are
acknowledged by pressing the roller or are accepted
automatically after 3 seconds.
The control panel
Clock
function button
Set cooking time OFF time
Time of day
Minute timer
Clock functions
Minute timer,Counts down minutes (max. 24 h).
Set cooking time ?Switches off automatically. You set an cooking time
for the current operating mode (max. 6 h) after which
the appliance switches off automatically.
Time preselection !Switches on and off automatically. You specify when
the oven switches on automatically and after how
long it switches off again (max. 24 h).
Time of day#To change the current time of day or reset following
a power failure.
Delete times Delete time settings: Minute timer, Set cooking timer
and Timer preselection.

14
Setting the Settings are accepted either by pressing the roller or
time of day automatically after 3 seconds.
1. Tap the )button to access the clock functions
in the submenu.
3. The prompt follows: Set time.
2. Select Set time of day in the submenu either by
tapping the )button several times or by
rotating the roller until Set time of day is
highlighted in red on the text display.
Accept the setting.
4. Rotate the roller to set the current time of day
(e.g. 15:00).
5. Accept the setting.
Note Following a power failure, the display 0:00 flashes.
Set the time of day to use the appliance. In this case
press the )button and you are automatically
transferred to Point 3 Set time.
It is not possible to correct the time of day if the
automatic timer or minute timer is set.

15
3. Set the required time by rotating the roller and
accept the setting. The remaining time is
displayed.
When the time has elapsed, Time Elapsed is
indicated on the text display, a signal is emitted and
the,symbol flashes.
You can stop the signal by tapping the )button or
pressing the roller.
Example: 5 minutes
Minute timer Settings are accepted either by pressing the roller or
automatically after 3 seconds.
1. Press the )button to access the clock
functions.
2. Select Set timer and accept the selection.
The lit,signals the minute timer.

16
Automatic timer You can switch the oven on and off via the electronic
clock.
The most suitable dishes for automatic timing are
those which require little attention.
Settings are accepted either by pressing the roller or
automatically after 3 seconds.
Set time Baking or roasting starts immediately for the required
Automatic switch off time.
1. Select the operating mode and the oven
temperature.
2. Tap the )button to access the clock functions.
3. Select Set time and set the cooking time on the
roller (e.g. 1 h 30 min.).
The current time is displayed after 3 seconds.
The lit ?symbol signals automatic mode.
4. When the time has elapsed (e.g. 1 h 30 min.),
Time elapsed is indicated on the text display, a
signal is emitted, the lit !flashes and the oven
switches off automatically.
You can stop the signal by tapping the )button
or pressing the roller.
5. To end automatic mode, press the )button
again.
6. Switch the oven off.

3. Set cooking duration is indicated on the text
display.
Set the required duration with the roller
(e.g. 1 h 30 min.). Accept the setting.
4. Set end is indicated on the text display.
Set the required end time with the roller
(e.g. 12:30).
When the setting has been made, the current
time is displayed after 3 seconds.
The lit !signals automatic mode.
The oven is automatically switched on and off at
the preset times (e.g. on 11:00, duration
1 h 30 min, off 12:30).
5. When the time has elapsed, Time elapsed is
indicated on the text display, a signal is emitted,
the lit !flashes and the oven switches off
automatically.
You can stop the signal by tapping the )button
or pressing the roller.
6. To end automatic mode, press the )button
again.
7. Switch the oven off.
17
Time preselection
Automatic switch on Baking or roasting starts for the set duration at a
and switch off later time which you set.
1. Select the operating mode and the oven
temperature.
2. Tap the )button to access the clock functions
and select Time preselection.

18
Checking, correcting To check your settings, touch the )
and cancelling button and select the required function.
settings To correct your settings, tap the )button and
select the required function. You can change the
time by rotating the roller.
If you want to cancel only one of several settings,
select the function to be deleted in the clock
functions. Turn the time back to 0:00 with the
roller.
If you want to delete all the settings, select Delete
times in the clock functions.
Special functions
Dimming the display Between 22.00 and 6.00 the display is automatically
dimmed.
Radio antenna optional The electronic clock can be fitted with a radio
accessory antenna (see Accessories).
Switching off the clock See ”Settings”.
display

19
Oven operating modes
Here you will receive an overview of the four oven
functions: hot air functions, conventional functions,
grill functions and special functions. The oven
functions are divided into the following operating
modes.
Hot air
functions *The hot air functions include:
Circotherm A fan system located in the rear oven wall circulates
the circotherm in the oven, achieving an especially
effective heat transfer to the food being baked or
roasted.
Advantages:
–Simultaneous baking and roasting possible on up
to 2 levels
–low soiling of oven interior
–shorter preheating times
–low oven temperatures
–gentle defrosting
Defrost A fan in the rear wall of the oven swirls the air in the
oven around the frozen food. The fan runs without
heating.
Advantages:
–Gentle defrosting
–Deep-frozen meat, poultry, bread and cakes
defrost evenly.

20
Circotherm intensive The circotherm intensive adds the bottom heat to the
circotherm.
Advantages:
–Fresh preparation of food with met fillings or
toppings, e.g. pizza and flan.
–Especially suited for frozen products, e.g. pizzas,
chips etc.
Bread baking setting Bread baking setting with hot-air function.
Adjustable 180 – 220° C.
Conventional
functions /The conventional functions include:
Top and bottom heat The food being baked or roasted is exposed to heat
(Conventional heating system) radiation from heating elements located at the top
and bottom of the oven cavity.
Baking and roasting is possible on one shelf position
only.
Advantages:
–Baking of cake with met fillings, pizza, quiche,
e.g.
Bottom heat With this setting, only the heating element at the
bottom of the oven cavity is activated.
Advantage:
–Particularly useful with dishes and baked goods
that require a distinctive bottom crust or
browning.
Use just before the end of the baking or roasting
time.
Braising Roasting on a low heat.
Ideal for all tender meats which are to be cooked
rare or to perfection.
Advantages:
–cooking point reliably reached
–very juicy, tender and soft meat
–braised meat does not require rest times and can
easily be kept warm at a low temperature.
This manual suits for next models
2
Table of contents
Other NEFF Oven manuals

NEFF
NEFF B44M42.3GB User manual

NEFF
NEFF B1451B2GB Safety guide

NEFF
NEFF B48FT74 0B Series User manual

NEFF
NEFF B15M22.3 User manual

NEFF
NEFF E 1664 Series User manual

NEFF
NEFF B1664A0 User manual

NEFF
NEFF B17CR32.1B User manual

NEFF
NEFF B1691N2GB Reference manual

NEFF
NEFF N70 B24CR71G0B User manual

NEFF
NEFF C17MS22H0 User manual

NEFF
NEFF B57CR22G0B User manual

NEFF
NEFF C17DR02.0B User manual

NEFF
NEFF E 3544 Series User manual

NEFF
NEFF B57CS26 0B Series User manual

NEFF
NEFF B6ACH7H 0B Series User manual

NEFF
NEFF C47C42 User manual

NEFF
NEFF C17CR22G0 User manual

NEFF
NEFF B45E62N0 User manual

NEFF
NEFF B8732.0 User manual

NEFF
NEFF U15E42N0GB - annexe 2 User manual