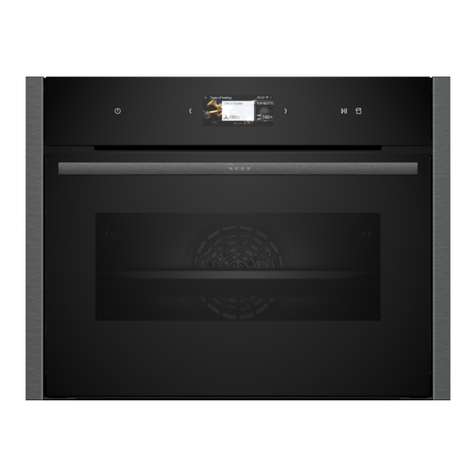
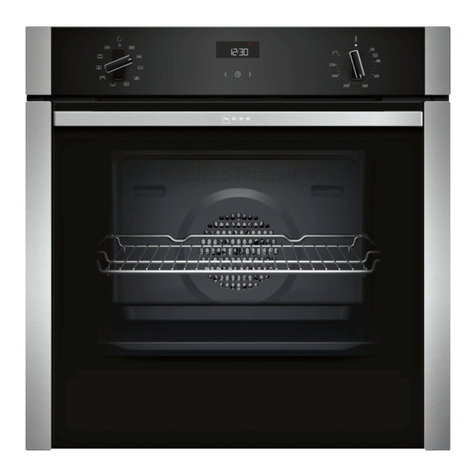
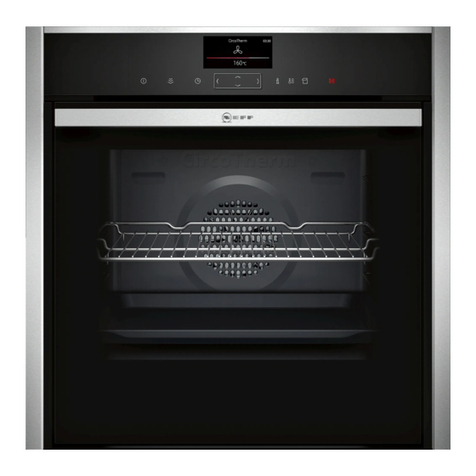
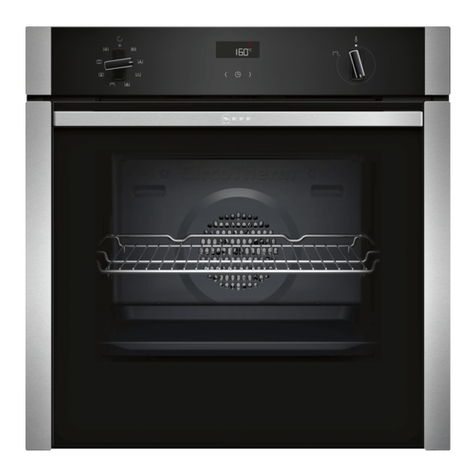
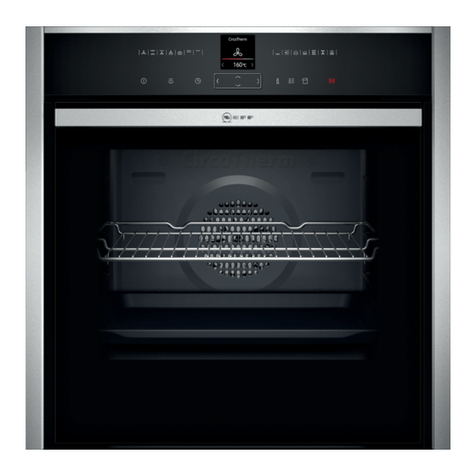
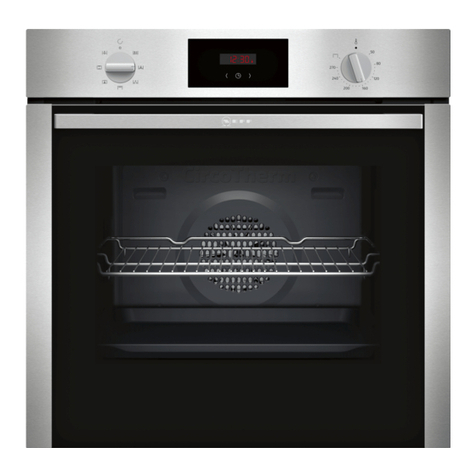
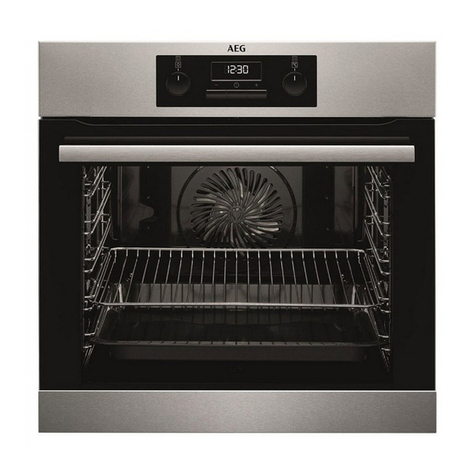
NEFF B57VR22N0B User manual

Touch button Use
en Familiarising yourself with your appliance
6
4 Familiarising yourself with your appliance
4.1 Control panel
You can use the control panel to configure all functions of your appliance and to obtain information about the operat-
ing status.
1
2 23
1
Display
2
Buttons
3
Control element
4.2 Buttons
The buttons are touch-sensitive areas. To select a function, press the corresponding button.
Symbol Name Use
On/off Switch the appliance on or off
Main menu Select operating modes and settings
Time-setting options/
childproof lock
¡Set the "timer", "cooking time" or "Ready at" time for delayed starts
¡Activate or deactivate the "childproof lock"
Information ¡View additional information
¡View the current temperature
Rapid heat-up ¡Activate or deactivate the "Rapid heat-up" function
¡Activate or deactivate the "PowerBoost" function
Start/stop Start or pause the appliance
4.3 Control element
You can configure all the functions on your appliance using the control element. You can change the setting values
that are displayed more brightly.
Press and hold a button to scroll through the setting values quickly. Release the button to stop scrolling quickly.
Button Name Use
Left Navigate to the left on the display
on/o Switch the appliance on or o.
VarioSteam assistance Switch on and o VarioSteam assistance.
en Familiarising yourself with your appliance
6
4 Familiarising yourself with your appliance
4.1 Control panel
You can use the control panel to configure all functions of your appliance and to obtain information about the operat-
ing status.
1
2 23
1
Display
2
Buttons
3
Control element
4.2 Buttons
The buttons are touch-sensitive areas. To select a function, press the corresponding button.
Symbol Name Use
On/off Switch the appliance on or off
Main menu Select operating modes and settings
Time-setting options/
childproof lock
¡Set the "timer", "cooking time" or "Ready at" time for delayed starts
¡Activate or deactivate the "childproof lock"
Information ¡View additional information
¡View the current temperature
Rapid heat-up ¡Activate or deactivate the "Rapid heat-up" function
¡Activate or deactivate the "PowerBoost" function
Start/stop Start or pause the appliance
4.3 Control element
You can configure all the functions on your appliance using the control element. You can change the setting values
that are displayed more brightly.
Press and hold a button to scroll through the setting values quickly. Release the button to stop scrolling quickly.
Button Name Use
Left Navigate to the left on the display
Main menu Select operating modes and settings.
en Familiarising yourself with your appliance
6
4 Familiarising yourself with your appliance
4.1 Control panel
You can use the control panel to configure all functions of your appliance and to obtain information about the operat-
ing status.
1
2 23
1
Display
2
Buttons
3
Control element
4.2 Buttons
The buttons are touch-sensitive areas. To select a function, press the corresponding button.
Symbol Name Use
On/off Switch the appliance on or off
Main menu Select operating modes and settings
Time-setting options/
childproof lock
¡Set the "timer", "cooking time" or "Ready at" time for delayed starts
¡Activate or deactivate the "childproof lock"
Information ¡View additional information
¡View the current temperature
Rapid heat-up ¡Activate or deactivate the "Rapid heat-up" function
¡Activate or deactivate the "PowerBoost" function
Start/stop Start or pause the appliance
4.3 Control element
You can configure all the functions on your appliance using the control element. You can change the setting values
that are displayed more brightly.
Press and hold a button to scroll through the setting values quickly. Release the button to stop scrolling quickly.
Button Name Use
Left Navigate to the left on the display
Time-setting options/
childproof lock
Set the “timer”, “cooking time” or “Ready at” time for delayed starts.
Activate or deactivate the “childproof lock”.
en Familiarising yourself with your appliance
6
4 Familiarising yourself with your appliance
4.1 Control panel
You can use the control panel to configure all functions of your appliance and to obtain information about the operat-
ing status.
1
2 23
1
Display
2
Buttons
3
Control element
4.2 Buttons
The buttons are touch-sensitive areas. To select a function, press the corresponding button.
Symbol Name Use
On/off Switch the appliance on or off
Main menu Select operating modes and settings
Time-setting options/
childproof lock
¡Set the "timer", "cooking time" or "Ready at" time for delayed starts
¡Activate or deactivate the "childproof lock"
Information ¡View additional information
¡View the current temperature
Rapid heat-up ¡Activate or deactivate the "Rapid heat-up" function
¡Activate or deactivate the "PowerBoost" function
Start/stop Start or pause the appliance
4.3 Control element
You can configure all the functions on your appliance using the control element. You can change the setting values
that are displayed more brightly.
Press and hold a button to scroll through the setting values quickly. Release the button to stop scrolling quickly.
Button Name Use
Left Navigate to the left on the display
Information View additional information such as tips or the current temperature.
en Familiarising yourself with your appliance
6
4 Familiarising yourself with your appliance
4.1 Control panel
You can use the control panel to configure all functions of your appliance and to obtain information about the operat-
ing status.
1
2 23
1
Display
2
Buttons
3
Control element
4.2 Buttons
The buttons are touch-sensitive areas. To select a function, press the corresponding button.
Symbol Name Use
On/off Switch the appliance on or off
Main menu Select operating modes and settings
Time-setting options/
childproof lock
¡Set the "timer", "cooking time" or "Ready at" time for delayed starts
¡Activate or deactivate the "childproof lock"
Information ¡View additional information
¡View the current temperature
Rapid heat-up ¡Activate or deactivate the "Rapid heat-up" function
¡Activate or deactivate the "PowerBoost" function
Start/stop Start or pause the appliance
4.3 Control element
You can configure all the functions on your appliance using the control element. You can change the setting values
that are displayed more brightly.
Press and hold a button to scroll through the setting values quickly. Release the button to stop scrolling quickly.
Button Name Use
Left Navigate to the left on the display
Rapid heat-up Activates Rapid Heat/ Power Boost to reduce preheating times on selected functions.
Open control panel Fill or empty the water tank.
en Familiarising yourself with your appliance
6
4 Familiarising yourself with your appliance
4.1 Control panel
You can use the control panel to configure all functions of your appliance and to obtain information about the operat-
ing status.
1
2 23
1
Display
2
Buttons
3
Control element
4.2 Buttons
The buttons are touch-sensitive areas. To select a function, press the corresponding button.
Symbol Name Use
On/off Switch the appliance on or off
Main menu Select operating modes and settings
Time-setting options/
childproof lock
¡Set the "timer", "cooking time" or "Ready at" time for delayed starts
¡Activate or deactivate the "childproof lock"
Information ¡View additional information
¡View the current temperature
Rapid heat-up ¡Activate or deactivate the "Rapid heat-up" function
¡Activate or deactivate the "PowerBoost" function
Start/stop Start or pause the appliance
4.3 Control element
You can configure all the functions on your appliance using the control element. You can change the setting values
that are displayed more brightly.
Press and hold a button to scroll through the setting values quickly. Release the button to stop scrolling quickly.
Button Name Use
Left Navigate to the left on the display
Start/Stop Start, pause, or stop the appliance.
en Familiarising yourself with your appliance
6
4 Familiarising yourself with your appliance
4.1 Control panel
You can use the control panel to configure all functions of your appliance and to obtain information about the operat-
ing status.
1
2 23
1
Display
2
Buttons
3
Control element
4.2 Buttons
The buttons are touch-sensitive areas. To select a function, press the corresponding button.
Symbol Name Use
On/off Switch the appliance on or off
Main menu Select operating modes and settings
Time-setting options/
childproof lock
¡Set the "timer", "cooking time" or "Ready at" time for delayed starts
¡Activate or deactivate the "childproof lock"
Information ¡View additional information
¡View the current temperature
Rapid heat-up ¡Activate or deactivate the "Rapid heat-up" function
¡Activate or deactivate the "PowerBoost" function
Start/stop Start or pause the appliance
4.3 Control element
You can configure all the functions on your appliance using the control element. You can change the setting values
that are displayed more brightly.
Press and hold a button to scroll through the setting values quickly. Release the button to stop scrolling quickly.
Button Name Use
Left Navigate to the left on the display
Shift control The shift control pad navigates and operates the display screen for settings
and functions as they appear on the display screen.
B57VR22N0B
Pyrolytic Slide&Hide®Oven
withVarioSteamUser Guide
Please refer to your user manual for more detailed information.
Familiarising yourself with your appliance en
7
4 Familiarising yourself with your appliance
4.1 Control panel
You can use the control panel to configure all functions of your appliance and to obtain information about the operat-
ing status.
1
2 23
1
Display
2
Buttons
3
Control element
4.2 Buttons
The buttons are touch-sensitive areas. To select a function, press the corresponding button.
Symbol Name Use
On/off Switch the appliance on or off
Steam assistance Switch on steam assistance
Main menu Select operating modes and settings
Time-setting options/
childproof lock
¡Set the "timer", "cooking time" or "Ready at" time for delayed starts
¡Activate or deactivate the "childproof lock"
Information ¡View additional information
¡View the current temperature
Rapid heat-up ¡Activate or deactivate the "Rapid heat-up" function
¡Activate or deactivate the "PowerBoost" function
Open control panel Fill or empty the water tank
Start/stop Start or pause the appliance
4.3 Control element
You can configure all the functions on your appliance using the control element. You can change the setting values
that are displayed more brightly.
Press and hold a button to scroll through the setting values quickly. Release the button to stop scrolling quickly.
Control Panel Buttons Explained

Step 1) Set your language, time and date
• Go to the main menu, navigate to "settings".
• Use the
en Familiarising yourself with your appliance
6
4 Familiarising yourself with your appliance
4.1 Control panel
You can use the control panel to configure all functions of your appliance and to obtain information about the operat-
ing status.
1
2 23
1
Display
2
Buttons
3
Control element
4.2 Buttons
The buttons are touch-sensitive areas. To select a function, press the corresponding button.
Symbol Name Use
On/off Switch the appliance on or off
Main menu Select operating modes and settings
Time-setting options/
childproof lock
¡Set the "timer", "cooking time" or "Ready at" time for delayed starts
¡Activate or deactivate the "childproof lock"
Information ¡View additional information
¡View the current temperature
Rapid heat-up ¡Activate or deactivate the "Rapid heat-up" function
¡Activate or deactivate the "PowerBoost" function
Start/stop Start or pause the appliance
4.3 Control element
You can configure all the functions on your appliance using the control element. You can change the setting values
that are displayed more brightly.
Press and hold a button to scroll through the setting values quickly. Release the button to stop scrolling quickly.
Button Name Use
Left Navigate to the left on the display
button to navigate to the bottom row.
• Use the
en Familiarising yourself with your appliance
6
4 Familiarising yourself with your appliance
4.1 Control panel
You can use the control panel to configure all functions of your appliance and to obtain information about the operat-
ing status.
1
2 23
1
Display
2
Buttons
3
Control element
4.2 Buttons
The buttons are touch-sensitive areas. To select a function, press the corresponding button.
Symbol Name Use
On/off Switch the appliance on or off
Main menu Select operating modes and settings
Time-setting options/
childproof lock
¡Set the "timer", "cooking time" or "Ready at" time for delayed starts
¡Activate or deactivate the "childproof lock"
Information ¡View additional information
¡View the current temperature
Rapid heat-up ¡Activate or deactivate the "Rapid heat-up" function
¡Activate or deactivate the "PowerBoost" function
Start/stop Start or pause the appliance
4.3 Control element
You can configure all the functions on your appliance using the control element. You can change the setting values
that are displayed more brightly.
Press and hold a button to scroll through the setting values quickly. Release the button to stop scrolling quickly.
Button Name Use
Left Navigate to the left on the display
or
en Familiarising yourself with your appliance
6
4 Familiarising yourself with your appliance
4.1 Control panel
You can use the control panel to configure all functions of your appliance and to obtain information about the operat-
ing status.
1
2 23
1
Display
2
Buttons
3
Control element
4.2 Buttons
The buttons are touch-sensitive areas. To select a function, press the corresponding button.
Symbol Name Use
On/off Switch the appliance on or off
Main menu Select operating modes and settings
Time-setting options/
childproof lock
¡Set the "timer", "cooking time" or "Ready at" time for delayed starts
¡Activate or deactivate the "childproof lock"
Information ¡View additional information
¡View the current temperature
Rapid heat-up ¡Activate or deactivate the "Rapid heat-up" function
¡Activate or deactivate the "PowerBoost" function
Start/stop Start or pause the appliance
4.3 Control element
You can configure all the functions on your appliance using the control element. You can change the setting values
that are displayed more brightly.
Press and hold a button to scroll through the setting values quickly. Release the button to stop scrolling quickly.
Button Name Use
Left Navigate to the left on the display
button to select the language.
• Use the
en Familiarising yourself with your appliance
6
4 Familiarising yourself with your appliance
4.1 Control panel
You can use the control panel to configure all functions of your appliance and to obtain information about the operat-
ing status.
1
2 23
1
Display
2
Buttons
3
Control element
4.2 Buttons
The buttons are touch-sensitive areas. To select a function, press the corresponding button.
Symbol Name Use
On/off Switch the appliance on or off
Main menu Select operating modes and settings
Time-setting options/
childproof lock
¡Set the "timer", "cooking time" or "Ready at" time for delayed starts
¡Activate or deactivate the "childproof lock"
Information ¡View additional information
¡View the current temperature
Rapid heat-up ¡Activate or deactivate the "Rapid heat-up" function
¡Activate or deactivate the "PowerBoost" function
Start/stop Start or pause the appliance
4.3 Control element
You can configure all the functions on your appliance using the control element. You can change the setting values
that are displayed more brightly.
Press and hold a button to scroll through the setting values quickly. Release the button to stop scrolling quickly.
Button Name Use
Left Navigate to the left on the display
button to navigate back to the top row.
• Use the
en Familiarising yourself with your appliance
6
4 Familiarising yourself with your appliance
4.1 Control panel
You can use the control panel to configure all functions of your appliance and to obtain information about the operat-
ing status.
1
2 23
1
Display
2
Buttons
3
Control element
4.2 Buttons
The buttons are touch-sensitive areas. To select a function, press the corresponding button.
Symbol Name Use
On/off Switch the appliance on or off
Main menu Select operating modes and settings
Time-setting options/
childproof lock
¡Set the "timer", "cooking time" or "Ready at" time for delayed starts
¡Activate or deactivate the "childproof lock"
Information ¡View additional information
¡View the current temperature
Rapid heat-up ¡Activate or deactivate the "Rapid heat-up" function
¡Activate or deactivate the "PowerBoost" function
Start/stop Start or pause the appliance
4.3 Control element
You can configure all the functions on your appliance using the control element. You can change the setting values
that are displayed more brightly.
Press and hold a button to scroll through the setting values quickly. Release the button to stop scrolling quickly.
Button Name Use
Left Navigate to the left on the display
button to select the next setting.
Use the same process to set the time and date on your
oven. To save the settings, press
en Familiarising yourself with your appliance
6
4 Familiarising yourself with your appliance
4.1 Control panel
You can use the control panel to configure all functions of your appliance and to obtain information about the operat-
ing status.
1
2 23
1
Display
2
Buttons
3
Control element
4.2 Buttons
The buttons are touch-sensitive areas. To select a function, press the corresponding button.
Symbol Name Use
On/off Switch the appliance on or off
Main menu Select operating modes and settings
Time-setting options/
childproof lock
¡Set the "timer", "cooking time" or "Ready at" time for delayed starts
¡Activate or deactivate the "childproof lock"
Information ¡View additional information
¡View the current temperature
Rapid heat-up ¡Activate or deactivate the "Rapid heat-up" function
¡Activate or deactivate the "PowerBoost" function
Start/stop Start or pause the appliance
4.3 Control element
You can configure all the functions on your appliance using the control element. You can change the setting values
that are displayed more brightly.
Press and hold a button to scroll through the setting values quickly. Release the button to stop scrolling quickly.
Button Name Use
Left Navigate to the left on the display
and press
en Familiarising yourself with your appliance
6
4 Familiarising yourself with your appliance
4.1 Control panel
You can use the control panel to configure all functions of your appliance and to obtain information about the operat-
ing status.
1
2 23
1
Display
2
Buttons
3
Control element
4.2 Buttons
The buttons are touch-sensitive areas. To select a function, press the corresponding button.
Symbol Name Use
On/off Switch the appliance on or off
Main menu Select operating modes and settings
Time-setting options/
childproof lock
¡Set the "timer", "cooking time" or "Ready at" time for delayed starts
¡Activate or deactivate the "childproof lock"
Information ¡View additional information
¡View the current temperature
Rapid heat-up ¡Activate or deactivate the "Rapid heat-up" function
¡Activate or deactivate the "PowerBoost" function
Start/stop Start or pause the appliance
4.3 Control element
You can configure all the functions on your appliance using the control element. You can change the setting values
that are displayed more brightly.
Press and hold a button to scroll through the setting values quickly. Release the button to stop scrolling quickly.
Button Name Use
Left Navigate to the left on the display
and Save.
Step 2) Set your water hardness
• Use the
en Familiarising yourself with your appliance
6
4 Familiarising yourself with your appliance
4.1 Control panel
You can use the control panel to configure all functions of your appliance and to obtain information about the operat-
ing status.
1
2 23
1
Display
2
Buttons
3
Control element
4.2 Buttons
The buttons are touch-sensitive areas. To select a function, press the corresponding button.
Symbol Name Use
On/off Switch the appliance on or off
Main menu Select operating modes and settings
Time-setting options/
childproof lock
¡Set the "timer", "cooking time" or "Ready at" time for delayed starts
¡Activate or deactivate the "childproof lock"
Information ¡View additional information
¡View the current temperature
Rapid heat-up ¡Activate or deactivate the "Rapid heat-up" function
¡Activate or deactivate the "PowerBoost" function
Start/stop Start or pause the appliance
4.3 Control element
You can configure all the functions on your appliance using the control element. You can change the setting values
that are displayed more brightly.
Press and hold a button to scroll through the setting values quickly. Release the button to stop scrolling quickly.
Button Name Use
Left Navigate to the left on the display
button to navigate to the bottom row.
• Use the
en Familiarising yourself with your appliance
6
4 Familiarising yourself with your appliance
4.1 Control panel
You can use the control panel to configure all functions of your appliance and to obtain information about the operat-
ing status.
1
2 23
1
Display
2
Buttons
3
Control element
4.2 Buttons
The buttons are touch-sensitive areas. To select a function, press the corresponding button.
Symbol Name Use
On/off Switch the appliance on or off
Main menu Select operating modes and settings
Time-setting options/
childproof lock
¡Set the "timer", "cooking time" or "Ready at" time for delayed starts
¡Activate or deactivate the "childproof lock"
Information ¡View additional information
¡View the current temperature
Rapid heat-up ¡Activate or deactivate the "Rapid heat-up" function
¡Activate or deactivate the "PowerBoost" function
Start/stop Start or pause the appliance
4.3 Control element
You can configure all the functions on your appliance using the control element. You can change the setting values
that are displayed more brightly.
Press and hold a button to scroll through the setting values quickly. Release the button to stop scrolling quickly.
Button Name Use
Left Navigate to the left on the display
or
en Familiarising yourself with your appliance
6
4 Familiarising yourself with your appliance
4.1 Control panel
You can use the control panel to configure all functions of your appliance and to obtain information about the operat-
ing status.
1
2 23
1
Display
2
Buttons
3
Control element
4.2 Buttons
The buttons are touch-sensitive areas. To select a function, press the corresponding button.
Symbol Name Use
On/off Switch the appliance on or off
Main menu Select operating modes and settings
Time-setting options/
childproof lock
¡Set the "timer", "cooking time" or "Ready at" time for delayed starts
¡Activate or deactivate the "childproof lock"
Information ¡View additional information
¡View the current temperature
Rapid heat-up ¡Activate or deactivate the "Rapid heat-up" function
¡Activate or deactivate the "PowerBoost" function
Start/stop Start or pause the appliance
4.3 Control element
You can configure all the functions on your appliance using the control element. You can change the setting values
that are displayed more brightly.
Press and hold a button to scroll through the setting values quickly. Release the button to stop scrolling quickly.
Button Name Use
Left Navigate to the left on the display
button to select the water hardness range.
• Use the
en Familiarising yourself with your appliance
6
4 Familiarising yourself with your appliance
4.1 Control panel
You can use the control panel to configure all functions of your appliance and to obtain information about the operat-
ing status.
1
2 23
1
Display
2
Buttons
3
Control element
4.2 Buttons
The buttons are touch-sensitive areas. To select a function, press the corresponding button.
Symbol Name Use
On/off Switch the appliance on or off
Main menu Select operating modes and settings
Time-setting options/
childproof lock
¡Set the "timer", "cooking time" or "Ready at" time for delayed starts
¡Activate or deactivate the "childproof lock"
Information ¡View additional information
¡View the current temperature
Rapid heat-up ¡Activate or deactivate the "Rapid heat-up" function
¡Activate or deactivate the "PowerBoost" function
Start/stop Start or pause the appliance
4.3 Control element
You can configure all the functions on your appliance using the control element. You can change the setting values
that are displayed more brightly.
Press and hold a button to scroll through the setting values quickly. Release the button to stop scrolling quickly.
Button Name Use
Left Navigate to the left on the display
button to navigate back to the top row.
• Use the
en Familiarising yourself with your appliance
6
4 Familiarising yourself with your appliance
4.1 Control panel
You can use the control panel to configure all functions of your appliance and to obtain information about the operat-
ing status.
1
2 23
1
Display
2
Buttons
3
Control element
4.2 Buttons
The buttons are touch-sensitive areas. To select a function, press the corresponding button.
Symbol Name Use
On/off Switch the appliance on or off
Main menu Select operating modes and settings
Time-setting options/
childproof lock
¡Set the "timer", "cooking time" or "Ready at" time for delayed starts
¡Activate or deactivate the "childproof lock"
Information ¡View additional information
¡View the current temperature
Rapid heat-up ¡Activate or deactivate the "Rapid heat-up" function
¡Activate or deactivate the "PowerBoost" function
Start/stop Start or pause the appliance
4.3 Control element
You can configure all the functions on your appliance using the control element. You can change the setting values
that are displayed more brightly.
Press and hold a button to scroll through the setting values quickly. Release the button to stop scrolling quickly.
Button Name Use
Left Navigate to the left on the display
button to save your settings.
• Open and close the appliance door once. The appliance
will perform a self-test, after which it will be ready to use.
TIP: If you are not sure of your water hardness you can
contact your local council or water supplier for water
hardness information.
Step 3) Burn o your oven
Before using the appliance to cook food for the rst time,
you must clean the cooking compartment and accessories.
Keep the kitchen ventilated while the appliance is heating.
• Remove ALL product information, accessories and any
leftover packaging (e.g. polystyrene pellets) from the
cooking compartment. Do not leave accessories in the
oven for this process.
• Wipe the smooth surfaces in the cooking compartment
with a soft, damp cloth.
• Press
en Familiarising yourself with your appliance
6
4 Familiarising yourself with your appliance
4.1 Control panel
You can use the control panel to configure all functions of your appliance and to obtain information about the operat-
ing status.
1
2 23
1
Display
2
Buttons
3
Control element
4.2 Buttons
The buttons are touch-sensitive areas. To select a function, press the corresponding button.
Symbol Name Use
On/off Switch the appliance on or off
Main menu Select operating modes and settings
Time-setting options/
childproof lock
¡Set the "timer", "cooking time" or "Ready at" time for delayed starts
¡Activate or deactivate the "childproof lock"
Information ¡View additional information
¡View the current temperature
Rapid heat-up ¡Activate or deactivate the "Rapid heat-up" function
¡Activate or deactivate the "PowerBoost" function
Start/stop Start or pause the appliance
4.3 Control element
You can configure all the functions on your appliance using the control element. You can change the setting values
that are displayed more brightly.
Press and hold a button to scroll through the setting values quickly. Release the button to stop scrolling quickly.
Button Name Use
Left Navigate to the left on the display
to switch the appliance on.
• Fill the water tank (see below).
• Use the
en Familiarising yourself with your appliance
6
4 Familiarising yourself with your appliance
4.1 Control panel
You can use the control panel to configure all functions of your appliance and to obtain information about the operat-
ing status.
1
2 23
1
Display
2
Buttons
3
Control element
4.2 Buttons
The buttons are touch-sensitive areas. To select a function, press the corresponding button.
Symbol Name Use
On/off Switch the appliance on or off
Main menu Select operating modes and settings
Time-setting options/
childproof lock
¡Set the "timer", "cooking time" or "Ready at" time for delayed starts
¡Activate or deactivate the "childproof lock"
Information ¡View additional information
¡View the current temperature
Rapid heat-up ¡Activate or deactivate the "Rapid heat-up" function
¡Activate or deactivate the "PowerBoost" function
Start/stop Start or pause the appliance
4.3 Control element
You can configure all the functions on your appliance using the control element. You can change the setting values
that are displayed more brightly.
Press and hold a button to scroll through the setting values quickly. Release the button to stop scrolling quickly.
Button Name Use
Left Navigate to the left on the display
or
en Familiarising yourself with your appliance
6
4 Familiarising yourself with your appliance
4.1 Control panel
You can use the control panel to configure all functions of your appliance and to obtain information about the operat-
ing status.
1
2 23
1
Display
2
Buttons
3
Control element
4.2 Buttons
The buttons are touch-sensitive areas. To select a function, press the corresponding button.
Symbol Name Use
On/off Switch the appliance on or off
Main menu Select operating modes and settings
Time-setting options/
childproof lock
¡Set the "timer", "cooking time" or "Ready at" time for delayed starts
¡Activate or deactivate the "childproof lock"
Information ¡View additional information
¡View the current temperature
Rapid heat-up ¡Activate or deactivate the "Rapid heat-up" function
¡Activate or deactivate the "PowerBoost" function
Start/stop Start or pause the appliance
4.3 Control element
You can configure all the functions on your appliance using the control element. You can change the setting values
that are displayed more brightly.
Press and hold a button to scroll through the setting values quickly. Release the button to stop scrolling quickly.
Button Name Use
Left Navigate to the left on the display
to select CircoTherm Hot Air.
• Use the
en Familiarising yourself with your appliance
6
4 Familiarising yourself with your appliance
4.1 Control panel
You can use the control panel to configure all functions of your appliance and to obtain information about the operat-
ing status.
1
2 23
1
Display
2
Buttons
3
Control element
4.2 Buttons
The buttons are touch-sensitive areas. To select a function, press the corresponding button.
Symbol Name Use
On/off Switch the appliance on or off
Main menu Select operating modes and settings
Time-setting options/
childproof lock
¡Set the "timer", "cooking time" or "Ready at" time for delayed starts
¡Activate or deactivate the "childproof lock"
Information ¡View additional information
¡View the current temperature
Rapid heat-up ¡Activate or deactivate the "Rapid heat-up" function
¡Activate or deactivate the "PowerBoost" function
Start/stop Start or pause the appliance
4.3 Control element
You can configure all the functions on your appliance using the control element. You can change the setting values
that are displayed more brightly.
Press and hold a button to scroll through the setting values quickly. Release the button to stop scrolling quickly.
Button Name Use
Left Navigate to the left on the display
button to navigate to the next row.
• Use the
en Familiarising yourself with your appliance
6
4 Familiarising yourself with your appliance
4.1 Control panel
You can use the control panel to configure all functions of your appliance and to obtain information about the operat-
ing status.
1
2 23
1
Display
2
Buttons
3
Control element
4.2 Buttons
The buttons are touch-sensitive areas. To select a function, press the corresponding button.
Symbol Name Use
On/off Switch the appliance on or off
Main menu Select operating modes and settings
Time-setting options/
childproof lock
¡Set the "timer", "cooking time" or "Ready at" time for delayed starts
¡Activate or deactivate the "childproof lock"
Information ¡View additional information
¡View the current temperature
Rapid heat-up ¡Activate or deactivate the "Rapid heat-up" function
¡Activate or deactivate the "PowerBoost" function
Start/stop Start or pause the appliance
4.3 Control element
You can configure all the functions on your appliance using the control element. You can change the setting values
that are displayed more brightly.
Press and hold a button to scroll through the setting values quickly. Release the button to stop scrolling quickly.
Button Name Use
Left Navigate to the left on the display
or
en Familiarising yourself with your appliance
6
4 Familiarising yourself with your appliance
4.1 Control panel
You can use the control panel to configure all functions of your appliance and to obtain information about the operat-
ing status.
1
2 23
1
Display
2
Buttons
3
Control element
4.2 Buttons
The buttons are touch-sensitive areas. To select a function, press the corresponding button.
Symbol Name Use
On/off Switch the appliance on or off
Main menu Select operating modes and settings
Time-setting options/
childproof lock
¡Set the "timer", "cooking time" or "Ready at" time for delayed starts
¡Activate or deactivate the "childproof lock"
Information ¡View additional information
¡View the current temperature
Rapid heat-up ¡Activate or deactivate the "Rapid heat-up" function
¡Activate or deactivate the "PowerBoost" function
Start/stop Start or pause the appliance
4.3 Control element
You can configure all the functions on your appliance using the control element. You can change the setting values
that are displayed more brightly.
Press and hold a button to scroll through the setting values quickly. Release the button to stop scrolling quickly.
Button Name Use
Left Navigate to the left on the display
button to select the maximum temperature.
• Use the
Familiarising yourself with your appliance en
7
4 Familiarising yourself with your appliance
4.1 Control panel
You can use the control panel to configure all functions of your appliance and to obtain information about the operat-
ing status.
1
2 23
1
Display
2
Buttons
3
Control element
4.2 Buttons
The buttons are touch-sensitive areas. To select a function, press the corresponding button.
Symbol Name Use
On/off Switch the appliance on or off
Steam assistance Switch on steam assistance
Main menu Select operating modes and settings
Time-setting options/
childproof lock
¡Set the "timer", "cooking time" or "Ready at" time for delayed starts
¡Activate or deactivate the "childproof lock"
Information ¡View additional information
¡View the current temperature
Rapid heat-up ¡Activate or deactivate the "Rapid heat-up" function
¡Activate or deactivate the "PowerBoost" function
Open control panel Fill or empty the water tank
Start/stop Start or pause the appliance
4.3 Control element
You can configure all the functions on your appliance using the control element. You can change the setting values
that are displayed more brightly.
Press and hold a button to scroll through the setting values quickly. Release the button to stop scrolling quickly.
button to switch on VarioSteam assistance.
• Use the
en Familiarising yourself with your appliance
6
4 Familiarising yourself with your appliance
4.1 Control panel
You can use the control panel to configure all functions of your appliance and to obtain information about the operat-
ing status.
1
2 23
1
Display
2
Buttons
3
Control element
4.2 Buttons
The buttons are touch-sensitive areas. To select a function, press the corresponding button.
Symbol Name Use
On/off Switch the appliance on or off
Main menu Select operating modes and settings
Time-setting options/
childproof lock
¡Set the "timer", "cooking time" or "Ready at" time for delayed starts
¡Activate or deactivate the "childproof lock"
Information ¡View additional information
¡View the current temperature
Rapid heat-up ¡Activate or deactivate the "Rapid heat-up" function
¡Activate or deactivate the "PowerBoost" function
Start/stop Start or pause the appliance
4.3 Control element
You can configure all the functions on your appliance using the control element. You can change the setting values
that are displayed more brightly.
Press and hold a button to scroll through the setting values quickly. Release the button to stop scrolling quickly.
Button Name Use
Left Navigate to the left on the display
to navigate to the row to select the level of
VarioSteam.
• Use the
en Familiarising yourself with your appliance
6
4 Familiarising yourself with your appliance
4.1 Control panel
You can use the control panel to configure all functions of your appliance and to obtain information about the operat-
ing status.
1
2 23
1
Display
2
Buttons
3
Control element
4.2 Buttons
The buttons are touch-sensitive areas. To select a function, press the corresponding button.
Symbol Name Use
On/off Switch the appliance on or off
Main menu Select operating modes and settings
Time-setting options/
childproof lock
¡Set the "timer", "cooking time" or "Ready at" time for delayed starts
¡Activate or deactivate the "childproof lock"
Information ¡View additional information
¡View the current temperature
Rapid heat-up ¡Activate or deactivate the "Rapid heat-up" function
¡Activate or deactivate the "PowerBoost" function
Start/stop Start or pause the appliance
4.3 Control element
You can configure all the functions on your appliance using the control element. You can change the setting values
that are displayed more brightly.
Press and hold a button to scroll through the setting values quickly. Release the button to stop scrolling quickly.
Button Name Use
Left Navigate to the left on the display
or
en Familiarising yourself with your appliance
6
4 Familiarising yourself with your appliance
4.1 Control panel
You can use the control panel to configure all functions of your appliance and to obtain information about the operat-
ing status.
1
2 23
1
Display
2
Buttons
3
Control element
4.2 Buttons
The buttons are touch-sensitive areas. To select a function, press the corresponding button.
Symbol Name Use
On/off Switch the appliance on or off
Main menu Select operating modes and settings
Time-setting options/
childproof lock
¡Set the "timer", "cooking time" or "Ready at" time for delayed starts
¡Activate or deactivate the "childproof lock"
Information ¡View additional information
¡View the current temperature
Rapid heat-up ¡Activate or deactivate the "Rapid heat-up" function
¡Activate or deactivate the "PowerBoost" function
Start/stop Start or pause the appliance
4.3 Control element
You can configure all the functions on your appliance using the control element. You can change the setting values
that are displayed more brightly.
Press and hold a button to scroll through the setting values quickly. Release the button to stop scrolling quickly.
Button Name Use
Left Navigate to the left on the display
to select HIGH level of VarioSteam.
• Press the
en Familiarising yourself with your appliance
6
4 Familiarising yourself with your appliance
4.1 Control panel
You can use the control panel to configure all functions of your appliance and to obtain information about the operat-
ing status.
1
2 23
1
Display
2
Buttons
3
Control element
4.2 Buttons
The buttons are touch-sensitive areas. To select a function, press the corresponding button.
Symbol Name Use
On/off Switch the appliance on or off
Main menu Select operating modes and settings
Time-setting options/
childproof lock
¡Set the "timer", "cooking time" or "Ready at" time for delayed starts
¡Activate or deactivate the "childproof lock"
Information ¡View additional information
¡View the current temperature
Rapid heat-up ¡Activate or deactivate the "Rapid heat-up" function
¡Activate or deactivate the "PowerBoost" function
Start/stop Start or pause the appliance
4.3 Control element
You can configure all the functions on your appliance using the control element. You can change the setting values
that are displayed more brightly.
Press and hold a button to scroll through the setting values quickly. Release the button to stop scrolling quickly.
Button Name Use
Left Navigate to the left on the display
.
• Use the
en Familiarising yourself with your appliance
6
4 Familiarising yourself with your appliance
4.1 Control panel
You can use the control panel to configure all functions of your appliance and to obtain information about the operat-
ing status.
1
2 23
1
Display
2
Buttons
3
Control element
4.2 Buttons
The buttons are touch-sensitive areas. To select a function, press the corresponding button.
Symbol Name Use
On/off Switch the appliance on or off
Main menu Select operating modes and settings
Time-setting options/
childproof lock
¡Set the "timer", "cooking time" or "Ready at" time for delayed starts
¡Activate or deactivate the "childproof lock"
Information ¡View additional information
¡View the current temperature
Rapid heat-up ¡Activate or deactivate the "Rapid heat-up" function
¡Activate or deactivate the "PowerBoost" function
Start/stop Start or pause the appliance
4.3 Control element
You can configure all the functions on your appliance using the control element. You can change the setting values
that are displayed more brightly.
Press and hold a button to scroll through the setting values quickly. Release the button to stop scrolling quickly.
Button Name Use
Left Navigate to the left on the display
or
en Familiarising yourself with your appliance
6
4 Familiarising yourself with your appliance
4.1 Control panel
You can use the control panel to configure all functions of your appliance and to obtain information about the operat-
ing status.
1
2 23
1
Display
2
Buttons
3
Control element
4.2 Buttons
The buttons are touch-sensitive areas. To select a function, press the corresponding button.
Symbol Name Use
On/off Switch the appliance on or off
Main menu Select operating modes and settings
Time-setting options/
childproof lock
¡Set the "timer", "cooking time" or "Ready at" time for delayed starts
¡Activate or deactivate the "childproof lock"
Information ¡View additional information
¡View the current temperature
Rapid heat-up ¡Activate or deactivate the "Rapid heat-up" function
¡Activate or deactivate the "PowerBoost" function
Start/stop Start or pause the appliance
4.3 Control element
You can configure all the functions on your appliance using the control element. You can change the setting values
that are displayed more brightly.
Press and hold a button to scroll through the setting values quickly. Release the button to stop scrolling quickly.
Button Name Use
Left Navigate to the left on the display
button to set the time to 1 hour.
• Once the cooking time has been set, press
en Familiarising yourself with your appliance
6
4 Familiarising yourself with your appliance
4.1 Control panel
You can use the control panel to configure all functions of your appliance and to obtain information about the operat-
ing status.
1
2 23
1
Display
2
Buttons
3
Control element
4.2 Buttons
The buttons are touch-sensitive areas. To select a function, press the corresponding button.
Symbol Name Use
On/off Switch the appliance on or off
Main menu Select operating modes and settings
Time-setting options/
childproof lock
¡Set the "timer", "cooking time" or "Ready at" time for delayed starts
¡Activate or deactivate the "childproof lock"
Information ¡View additional information
¡View the current temperature
Rapid heat-up ¡Activate or deactivate the "Rapid heat-up" function
¡Activate or deactivate the "PowerBoost" function
Start/stop Start or pause the appliance
4.3 Control element
You can configure all the functions on your appliance using the control element. You can change the setting values
that are displayed more brightly.
Press and hold a button to scroll through the setting values quickly. Release the button to stop scrolling quickly.
Button Name Use
Left Navigate to the left on the display
to start
(the cooking time will appear on the display and will begin
counting down. Once the cooking time has elapsed, an audible
signal will sound. Press any button to end the audible signal.).
• Allow the appliance to cool down.
• Empty the water tank and dry the cooking compartment, use
a sponge to absorb any residual water in the base of the oven.
TIP: You can use the drying function to dry the oven compartment
or dry the oven manually (see page 3 for drying function).
• Wipe clean the smooth surfaces of the oven with a damp
dish cloth and clean any accessories with warm soapy water
and a dish cloth.
You’re all set to start cooking!
When the appliance is connected to power for the rst time there are some settings you will need to congure.
Filling the Water Tank
A Quick Step By Step Guide To Get You On Your Way
Please refer to your user manual for more detailed information.
1. Touch the button. The fascia automatically
rises and is automatically pushed forwards.
2. Pull the control panel forwards with both
hands and then push it upwards until it locks
into place.
3. Lift the water container up and remove it from
the recess.
4. Fill the water container with cold water up to
the max mark.
5. Insert the lled water container. Ensure that
the water tank locks into place behind both
holders.
6. Slowly push the control panel downwards
and then towards the rear until it is closed
completely.

Time Setting Options
Option Use
Timer
Time-setting options en
11
2. Use the or button to select the required heating
function.
3. Use the button to navigate to the next row.
4. Use the or button to select the required temperat-
ure or setting.
5. Press to start.
aThe cooking time will appear on the display.
aThe heat-up indicator bar visualises the rising tem-
perature.
6. When the food is ready, press to switch the appli-
ance off.
7.5 Changing the temperature
You can also change the temperature once you have
started the appliance.
1. Use the or button to select the temperature
row.
2. Use the or button to select the required temperat-
ure.
aThe temperature will now be changed.
7.6 Changing the type of heating
If you switch to a different heating function, the appli-
ance will reset all the settings.
1. Press to pause operation.
2. Use the or button to select the required heating
function.
3. Use the button to navigate to the next row.
4. Use the or button to select the required temperat-
ure.
5. Press to start.
7.7 Pausing operation
1. Press .
2. Press again to resume operation.
7.8 Cancelling operation
Note:Some functions, e.g. cleaning functions, cannot
be cancelled.
▶▶Press and hold the button until the function that is
currently in progress is cancelled.
aOperation will stop and all the settings will be reset.
aThe cooling fan will continue to run until the cooking
compartment has cooled down.
7.9 Viewing the current temperature
You can view the current temperature while the appli-
ance is heating up.
▶▶Press .
aThe temperature will be displayed for a few
seconds.
7.10 Displaying information
Requirement:The button must be lit.
▶▶Press .
aThe information will be displayed for a few seconds.
8 Time-setting options
Your appliance has different time-setting options, with
which you can control its operation.
8.1 Overview of the time-setting options
When you are setting a time, the time values will in-
crease by greater increments as you scroll through the
higher values. The cooking time, for example, can be
set in 1-minute increments up to 1 hour, and then in 5-
minute increments thereafter.
Time-setting
option
Use
Timer When you set a time on the timer,
the timer will run independently of
the appliance and will not intervene
in its operation. The timer does not
affect the appliance.
Cooking
time
Once the cooking time has elapsed,
the appliance automatically stops
heating.
Ready at Along with the cooking time (dura-
tion), you can set the time at which
you want cooking to end. The appli-
ance will start up automatically so
that it finishes cooking at the re-
quired time.
8.2 Timer
You can set the timer regardless of whether the appli-
ance is on or off.
Setting the timer
1. Press .
2. Once the appliance is switched on, use the but-
ton to select "Timer" .
3. Use the or button to select the timer duration.
4. Press to start the timer.
a will appear on the display. The timer duration will
then count down.
aOnce the timer duration has elapsed, an audible sig-
nal will sound.
5. Press any button to end the audible signal.
Changing the timer
1. Press .
2. Use the or button to change the timer duration.
aThe setting will then be applied.
Cancelling the timer
1. Press .
2. Use the button to set a timer duration of "00:00".
aThis cancels the current timer duration.
When you set a time on the timer, the timer will run independently of
the appliance. The timer does not aect the operation of the appliance.
Cooking time*
Time-setting options en
11
2. Use the or button to select the required heating
function.
3. Use the button to navigate to the next row.
4. Use the or button to select the required temperat-
ure or setting.
5. Press to start.
aThe cooking time will appear on the display.
aThe heat-up indicator bar visualises the rising tem-
perature.
6. When the food is ready, press to switch the appli-
ance off.
7.5 Changing the temperature
You can also change the temperature once you have
started the appliance.
1. Use the or button to select the temperature
row.
2. Use the or button to select the required temperat-
ure.
aThe temperature will now be changed.
7.6 Changing the type of heating
If you switch to a different heating function, the appli-
ance will reset all the settings.
1. Press to pause operation.
2. Use the or button to select the required heating
function.
3. Use the button to navigate to the next row.
4. Use the or button to select the required temperat-
ure.
5. Press to start.
7.7 Pausing operation
1. Press .
2. Press again to resume operation.
7.8 Cancelling operation
Note:Some functions, e.g. cleaning functions, cannot
be cancelled.
▶▶Press and hold the button until the function that is
currently in progress is cancelled.
aOperation will stop and all the settings will be reset.
aThe cooling fan will continue to run until the cooking
compartment has cooled down.
7.9 Viewing the current temperature
You can view the current temperature while the appli-
ance is heating up.
▶▶Press .
aThe temperature will be displayed for a few
seconds.
7.10 Displaying information
Requirement:The button must be lit.
▶▶Press .
aThe information will be displayed for a few seconds.
8 Time-setting options
Your appliance has different time-setting options, with
which you can control its operation.
8.1 Overview of the time-setting options
When you are setting a time, the time values will in-
crease by greater increments as you scroll through the
higher values. The cooking time, for example, can be
set in 1-minute increments up to 1 hour, and then in 5-
minute increments thereafter.
Time-setting
option
Use
Timer When you set a time on the timer,
the timer will run independently of
the appliance and will not intervene
in its operation. The timer does not
affect the appliance.
Cooking
time
Once the cooking time has elapsed,
the appliance automatically stops
heating.
Ready at Along with the cooking time (dura-
tion), you can set the time at which
you want cooking to end. The appli-
ance will start up automatically so
that it finishes cooking at the re-
quired time.
8.2 Timer
You can set the timer regardless of whether the appli-
ance is on or off.
Setting the timer
1. Press .
2. Once the appliance is switched on, use the but-
ton to select "Timer" .
3. Use the or button to select the timer duration.
4. Press to start the timer.
a will appear on the display. The timer duration will
then count down.
aOnce the timer duration has elapsed, an audible sig-
nal will sound.
5. Press any button to end the audible signal.
Changing the timer
1. Press .
2. Use the or button to change the timer duration.
aThe setting will then be applied.
Cancelling the timer
1. Press .
2. Use the button to set a timer duration of "00:00".
aThis cancels the current timer duration.
Once the cooking time has elapsed, the appliance automatically stops
heating.
Ready at*
Time-setting options en
11
2. Use the or button to select the required heating
function.
3. Use the button to navigate to the next row.
4. Use the or button to select the required temperat-
ure or setting.
5. Press to start.
aThe cooking time will appear on the display.
aThe heat-up indicator bar visualises the rising tem-
perature.
6. When the food is ready, press to switch the appli-
ance off.
7.5 Changing the temperature
You can also change the temperature once you have
started the appliance.
1. Use the or button to select the temperature
row.
2. Use the or button to select the required temperat-
ure.
aThe temperature will now be changed.
7.6 Changing the type of heating
If you switch to a different heating function, the appli-
ance will reset all the settings.
1. Press to pause operation.
2. Use the or button to select the required heating
function.
3. Use the button to navigate to the next row.
4. Use the or button to select the required temperat-
ure.
5. Press to start.
7.7 Pausing operation
1. Press .
2. Press again to resume operation.
7.8 Cancelling operation
Note:Some functions, e.g. cleaning functions, cannot
be cancelled.
▶▶Press and hold the button until the function that is
currently in progress is cancelled.
aOperation will stop and all the settings will be reset.
aThe cooling fan will continue to run until the cooking
compartment has cooled down.
7.9 Viewing the current temperature
You can view the current temperature while the appli-
ance is heating up.
▶▶Press .
aThe temperature will be displayed for a few
seconds.
7.10 Displaying information
Requirement:The button must be lit.
▶▶Press .
aThe information will be displayed for a few seconds.
8 Time-setting options
Your appliance has different time-setting options, with
which you can control its operation.
8.1 Overview of the time-setting options
When you are setting a time, the time values will in-
crease by greater increments as you scroll through the
higher values. The cooking time, for example, can be
set in 1-minute increments up to 1 hour, and then in 5-
minute increments thereafter.
Time-setting
option
Use
Timer When you set a time on the timer,
the timer will run independently of
the appliance and will not intervene
in its operation. The timer does not
affect the appliance.
Cooking
time
Once the cooking time has elapsed,
the appliance automatically stops
heating.
Ready at Along with the cooking time (dura-
tion), you can set the time at which
you want cooking to end. The appli-
ance will start up automatically so
that it finishes cooking at the re-
quired time.
8.2 Timer
You can set the timer regardless of whether the appli-
ance is on or off.
Setting the timer
1. Press .
2. Once the appliance is switched on, use the but-
ton to select "Timer" .
3. Use the or button to select the timer duration.
4. Press to start the timer.
a will appear on the display. The timer duration will
then count down.
aOnce the timer duration has elapsed, an audible sig-
nal will sound.
5. Press any button to end the audible signal.
Changing the timer
1. Press .
2. Use the or button to change the timer duration.
aThe setting will then be applied.
Cancelling the timer
1. Press .
2. Use the button to set a timer duration of "00:00".
aThis cancels the current timer duration.
Along with the cooking time (duration), you can set the time at which
you want cooking to end. The appliance will start up automatically
so that it nishes cooking at the required time. No need to set
the start time.
*Press the clock symbol to return to the main menu.
*The cooking time and ready at options can only be selected once you have selected a heating function.
1. Press
en Familiarising yourself with your appliance
6
4 Familiarising yourself with your appliance
4.1 Control panel
You can use the control panel to configure all functions of your appliance and to obtain information about the operat-
ing status.
1
2 23
1
Display
2
Buttons
3
Control element
4.2 Buttons
The buttons are touch-sensitive areas. To select a function, press the corresponding button.
Symbol Name Use
On/off Switch the appliance on or off
Main menu Select operating modes and settings
Time-setting options/
childproof lock
¡Set the "timer", "cooking time" or "Ready at" time for delayed starts
¡Activate or deactivate the "childproof lock"
Information ¡View additional information
¡View the current temperature
Rapid heat-up ¡Activate or deactivate the "Rapid heat-up" function
¡Activate or deactivate the "PowerBoost" function
Start/stop Start or pause the appliance
4.3 Control element
You can configure all the functions on your appliance using the control element. You can change the setting values
that are displayed more brightly.
Press and hold a button to scroll through the setting values quickly. Release the button to stop scrolling quickly.
Button Name Use
Left Navigate to the left on the display
to switch the appliance on. The heating functions will
then be displayed.
2. Use the
en Familiarising yourself with your appliance
6
4 Familiarising yourself with your appliance
4.1 Control panel
You can use the control panel to configure all functions of your appliance and to obtain information about the operat-
ing status.
1
2 23
1
Display
2
Buttons
3
Control element
4.2 Buttons
The buttons are touch-sensitive areas. To select a function, press the corresponding button.
Symbol Name Use
On/off Switch the appliance on or off
Main menu Select operating modes and settings
Time-setting options/
childproof lock
¡Set the "timer", "cooking time" or "Ready at" time for delayed starts
¡Activate or deactivate the "childproof lock"
Information ¡View additional information
¡View the current temperature
Rapid heat-up ¡Activate or deactivate the "Rapid heat-up" function
¡Activate or deactivate the "PowerBoost" function
Start/stop Start or pause the appliance
4.3 Control element
You can configure all the functions on your appliance using the control element. You can change the setting values
that are displayed more brightly.
Press and hold a button to scroll through the setting values quickly. Release the button to stop scrolling quickly.
Button Name Use
Left Navigate to the left on the display
or
en Familiarising yourself with your appliance
6
4 Familiarising yourself with your appliance
4.1 Control panel
You can use the control panel to configure all functions of your appliance and to obtain information about the operat-
ing status.
1
2 23
1
Display
2
Buttons
3
Control element
4.2 Buttons
The buttons are touch-sensitive areas. To select a function, press the corresponding button.
Symbol Name Use
On/off Switch the appliance on or off
Main menu Select operating modes and settings
Time-setting options/
childproof lock
¡Set the "timer", "cooking time" or "Ready at" time for delayed starts
¡Activate or deactivate the "childproof lock"
Information ¡View additional information
¡View the current temperature
Rapid heat-up ¡Activate or deactivate the "Rapid heat-up" function
¡Activate or deactivate the "PowerBoost" function
Start/stop Start or pause the appliance
4.3 Control element
You can configure all the functions on your appliance using the control element. You can change the setting values
that are displayed more brightly.
Press and hold a button to scroll through the setting values quickly. Release the button to stop scrolling quickly.
Button Name Use
Left Navigate to the left on the display
button to select the required heating function.
3. Use the
en Familiarising yourself with your appliance
6
4 Familiarising yourself with your appliance
4.1 Control panel
You can use the control panel to configure all functions of your appliance and to obtain information about the operat-
ing status.
1
2 23
1
Display
2
Buttons
3
Control element
4.2 Buttons
The buttons are touch-sensitive areas. To select a function, press the corresponding button.
Symbol Name Use
On/off Switch the appliance on or off
Main menu Select operating modes and settings
Time-setting options/
childproof lock
¡Set the "timer", "cooking time" or "Ready at" time for delayed starts
¡Activate or deactivate the "childproof lock"
Information ¡View additional information
¡View the current temperature
Rapid heat-up ¡Activate or deactivate the "Rapid heat-up" function
¡Activate or deactivate the "PowerBoost" function
Start/stop Start or pause the appliance
4.3 Control element
You can configure all the functions on your appliance using the control element. You can change the setting values
that are displayed more brightly.
Press and hold a button to scroll through the setting values quickly. Release the button to stop scrolling quickly.
Button Name Use
Left Navigate to the left on the display
button to navigate to the next row.
4. Use the
en Familiarising yourself with your appliance
6
4 Familiarising yourself with your appliance
4.1 Control panel
You can use the control panel to configure all functions of your appliance and to obtain information about the operat-
ing status.
1
2 23
1
Display
2
Buttons
3
Control element
4.2 Buttons
The buttons are touch-sensitive areas. To select a function, press the corresponding button.
Symbol Name Use
On/off Switch the appliance on or off
Main menu Select operating modes and settings
Time-setting options/
childproof lock
¡Set the "timer", "cooking time" or "Ready at" time for delayed starts
¡Activate or deactivate the "childproof lock"
Information ¡View additional information
¡View the current temperature
Rapid heat-up ¡Activate or deactivate the "Rapid heat-up" function
¡Activate or deactivate the "PowerBoost" function
Start/stop Start or pause the appliance
4.3 Control element
You can configure all the functions on your appliance using the control element. You can change the setting values
that are displayed more brightly.
Press and hold a button to scroll through the setting values quickly. Release the button to stop scrolling quickly.
Button Name Use
Left Navigate to the left on the display
or
en Familiarising yourself with your appliance
6
4 Familiarising yourself with your appliance
4.1 Control panel
You can use the control panel to configure all functions of your appliance and to obtain information about the operat-
ing status.
1
2 23
1
Display
2
Buttons
3
Control element
4.2 Buttons
The buttons are touch-sensitive areas. To select a function, press the corresponding button.
Symbol Name Use
On/off Switch the appliance on or off
Main menu Select operating modes and settings
Time-setting options/
childproof lock
¡Set the "timer", "cooking time" or "Ready at" time for delayed starts
¡Activate or deactivate the "childproof lock"
Information ¡View additional information
¡View the current temperature
Rapid heat-up ¡Activate or deactivate the "Rapid heat-up" function
¡Activate or deactivate the "PowerBoost" function
Start/stop Start or pause the appliance
4.3 Control element
You can configure all the functions on your appliance using the control element. You can change the setting values
that are displayed more brightly.
Press and hold a button to scroll through the setting values quickly. Release the button to stop scrolling quickly.
Button Name Use
Left Navigate to the left on the display
button to select the required temperature
or setting.
5. Use the
Familiarising yourself with your appliance en
7
4 Familiarising yourself with your appliance
4.1 Control panel
You can use the control panel to configure all functions of your appliance and to obtain information about the operat-
ing status.
1
2 23
1
Display
2
Buttons
3
Control element
4.2 Buttons
The buttons are touch-sensitive areas. To select a function, press the corresponding button.
Symbol Name Use
On/off Switch the appliance on or off
Steam assistance Switch on steam assistance
Main menu Select operating modes and settings
Time-setting options/
childproof lock
¡Set the "timer", "cooking time" or "Ready at" time for delayed starts
¡Activate or deactivate the "childproof lock"
Information ¡View additional information
¡View the current temperature
Rapid heat-up ¡Activate or deactivate the "Rapid heat-up" function
¡Activate or deactivate the "PowerBoost" function
Open control panel Fill or empty the water tank
Start/stop Start or pause the appliance
4.3 Control element
You can configure all the functions on your appliance using the control element. You can change the setting values
that are displayed more brightly.
Press and hold a button to scroll through the setting values quickly. Release the button to stop scrolling quickly.
button to switch on VarioSteam assistance.
6. Use the
en Familiarising yourself with your appliance
6
4 Familiarising yourself with your appliance
4.1 Control panel
You can use the control panel to configure all functions of your appliance and to obtain information about the operat-
ing status.
1
2 23
1
Display
2
Buttons
3
Control element
4.2 Buttons
The buttons are touch-sensitive areas. To select a function, press the corresponding button.
Symbol Name Use
On/off Switch the appliance on or off
Main menu Select operating modes and settings
Time-setting options/
childproof lock
¡Set the "timer", "cooking time" or "Ready at" time for delayed starts
¡Activate or deactivate the "childproof lock"
Information ¡View additional information
¡View the current temperature
Rapid heat-up ¡Activate or deactivate the "Rapid heat-up" function
¡Activate or deactivate the "PowerBoost" function
Start/stop Start or pause the appliance
4.3 Control element
You can configure all the functions on your appliance using the control element. You can change the setting values
that are displayed more brightly.
Press and hold a button to scroll through the setting values quickly. Release the button to stop scrolling quickly.
Button Name Use
Left Navigate to the left on the display
to navigate to the row to select the level of
VarioSteam.
7. Use the
en Familiarising yourself with your appliance
6
4 Familiarising yourself with your appliance
4.1 Control panel
You can use the control panel to configure all functions of your appliance and to obtain information about the operat-
ing status.
1
2 23
1
Display
2
Buttons
3
Control element
4.2 Buttons
The buttons are touch-sensitive areas. To select a function, press the corresponding button.
Symbol Name Use
On/off Switch the appliance on or off
Main menu Select operating modes and settings
Time-setting options/
childproof lock
¡Set the "timer", "cooking time" or "Ready at" time for delayed starts
¡Activate or deactivate the "childproof lock"
Information ¡View additional information
¡View the current temperature
Rapid heat-up ¡Activate or deactivate the "Rapid heat-up" function
¡Activate or deactivate the "PowerBoost" function
Start/stop Start or pause the appliance
4.3 Control element
You can configure all the functions on your appliance using the control element. You can change the setting values
that are displayed more brightly.
Press and hold a button to scroll through the setting values quickly. Release the button to stop scrolling quickly.
Button Name Use
Left Navigate to the left on the display
or
en Familiarising yourself with your appliance
6
4 Familiarising yourself with your appliance
4.1 Control panel
You can use the control panel to configure all functions of your appliance and to obtain information about the operat-
ing status.
1
2 23
1
Display
2
Buttons
3
Control element
4.2 Buttons
The buttons are touch-sensitive areas. To select a function, press the corresponding button.
Symbol Name Use
On/off Switch the appliance on or off
Main menu Select operating modes and settings
Time-setting options/
childproof lock
¡Set the "timer", "cooking time" or "Ready at" time for delayed starts
¡Activate or deactivate the "childproof lock"
Information ¡View additional information
¡View the current temperature
Rapid heat-up ¡Activate or deactivate the "Rapid heat-up" function
¡Activate or deactivate the "PowerBoost" function
Start/stop Start or pause the appliance
4.3 Control element
You can configure all the functions on your appliance using the control element. You can change the setting values
that are displayed more brightly.
Press and hold a button to scroll through the setting values quickly. Release the button to stop scrolling quickly.
Button Name Use
Left Navigate to the left on the display
to select low, medium or high level of VarioSteam.
8. Press
en Familiarising yourself with your appliance
6
4 Familiarising yourself with your appliance
4.1 Control panel
You can use the control panel to configure all functions of your appliance and to obtain information about the operat-
ing status.
1
2 23
1
Display
2
Buttons
3
Control element
4.2 Buttons
The buttons are touch-sensitive areas. To select a function, press the corresponding button.
Symbol Name Use
On/off Switch the appliance on or off
Main menu Select operating modes and settings
Time-setting options/
childproof lock
¡Set the "timer", "cooking time" or "Ready at" time for delayed starts
¡Activate or deactivate the "childproof lock"
Information ¡View additional information
¡View the current temperature
Rapid heat-up ¡Activate or deactivate the "Rapid heat-up" function
¡Activate or deactivate the "PowerBoost" function
Start/stop Start or pause the appliance
4.3 Control element
You can configure all the functions on your appliance using the control element. You can change the setting values
that are displayed more brightly.
Press and hold a button to scroll through the setting values quickly. Release the button to stop scrolling quickly.
Button Name Use
Left Navigate to the left on the display
to start. The cooking time will appear on the display
and the heat-up indicator bar visualises the rising temperature.
9. When the food is ready, press
en Familiarising yourself with your appliance
6
4 Familiarising yourself with your appliance
4.1 Control panel
You can use the control panel to configure all functions of your appliance and to obtain information about the operat-
ing status.
1
2 23
1
Display
2
Buttons
3
Control element
4.2 Buttons
The buttons are touch-sensitive areas. To select a function, press the corresponding button.
Symbol Name Use
On/off Switch the appliance on or off
Main menu Select operating modes and settings
Time-setting options/
childproof lock
¡Set the "timer", "cooking time" or "Ready at" time for delayed starts
¡Activate or deactivate the "childproof lock"
Information ¡View additional information
¡View the current temperature
Rapid heat-up ¡Activate or deactivate the "Rapid heat-up" function
¡Activate or deactivate the "PowerBoost" function
Start/stop Start or pause the appliance
4.3 Control element
You can configure all the functions on your appliance using the control element. You can change the setting values
that are displayed more brightly.
Press and hold a button to scroll through the setting values quickly. Release the button to stop scrolling quickly.
Button Name Use
Left Navigate to the left on the display
to switch the appliance o.
TIPS:
• To change the temperature or VarioSteam level once you have
started the appliance use the
en Familiarising yourself with your appliance
6
4 Familiarising yourself with your appliance
4.1 Control panel
You can use the control panel to configure all functions of your appliance and to obtain information about the operat-
ing status.
1
2 23
1
Display
2
Buttons
3
Control element
4.2 Buttons
The buttons are touch-sensitive areas. To select a function, press the corresponding button.
Symbol Name Use
On/off Switch the appliance on or off
Main menu Select operating modes and settings
Time-setting options/
childproof lock
¡Set the "timer", "cooking time" or "Ready at" time for delayed starts
¡Activate or deactivate the "childproof lock"
Information ¡View additional information
¡View the current temperature
Rapid heat-up ¡Activate or deactivate the "Rapid heat-up" function
¡Activate or deactivate the "PowerBoost" function
Start/stop Start or pause the appliance
4.3 Control element
You can configure all the functions on your appliance using the control element. You can change the setting values
that are displayed more brightly.
Press and hold a button to scroll through the setting values quickly. Release the button to stop scrolling quickly.
Button Name Use
Left Navigate to the left on the display
or
en Familiarising yourself with your appliance
6
4 Familiarising yourself with your appliance
4.1 Control panel
You can use the control panel to configure all functions of your appliance and to obtain information about the operat-
ing status.
1
2 23
1
Display
2
Buttons
3
Control element
4.2 Buttons
The buttons are touch-sensitive areas. To select a function, press the corresponding button.
Symbol Name Use
On/off Switch the appliance on or off
Main menu Select operating modes and settings
Time-setting options/
childproof lock
¡Set the "timer", "cooking time" or "Ready at" time for delayed starts
¡Activate or deactivate the "childproof lock"
Information ¡View additional information
¡View the current temperature
Rapid heat-up ¡Activate or deactivate the "Rapid heat-up" function
¡Activate or deactivate the "PowerBoost" function
Start/stop Start or pause the appliance
4.3 Control element
You can configure all the functions on your appliance using the control element. You can change the setting values
that are displayed more brightly.
Press and hold a button to scroll through the setting values quickly. Release the button to stop scrolling quickly.
Button Name Use
Left Navigate to the left on the display
button to adjust.
• To turn o VarioSteam assistance press the
Familiarising yourself with your appliance en
7
4 Familiarising yourself with your appliance
4.1 Control panel
You can use the control panel to configure all functions of your appliance and to obtain information about the operat-
ing status.
1
2 23
1
Display
2
Buttons
3
Control element
4.2 Buttons
The buttons are touch-sensitive areas. To select a function, press the corresponding button.
Symbol Name Use
On/off Switch the appliance on or off
Steam assistance Switch on steam assistance
Main menu Select operating modes and settings
Time-setting options/
childproof lock
¡Set the "timer", "cooking time" or "Ready at" time for delayed starts
¡Activate or deactivate the "childproof lock"
Information ¡View additional information
¡View the current temperature
Rapid heat-up ¡Activate or deactivate the "Rapid heat-up" function
¡Activate or deactivate the "PowerBoost" function
Open control panel Fill or empty the water tank
Start/stop Start or pause the appliance
4.3 Control element
You can configure all the functions on your appliance using the control element. You can change the setting values
that are displayed more brightly.
Press and hold a button to scroll through the setting values quickly. Release the button to stop scrolling quickly.
.
Drying your Oven Cavity
You can manually dry your oven cavity or use the 'Dry Appliance'
function after adding VarioSteam to your heating function.
1. Allow the appliance to cool down. Remove any remaining food.
2. Empty the water tank and dry the cooking compartment, use
a sponge to absorb any residual water in the base of the oven.
3. Use the
en Familiarising yourself with your appliance
6
4 Familiarising yourself with your appliance
4.1 Control panel
You can use the control panel to configure all functions of your appliance and to obtain information about the operat-
ing status.
1
2 23
1
Display
2
Buttons
3
Control element
4.2 Buttons
The buttons are touch-sensitive areas. To select a function, press the corresponding button.
Symbol Name Use
On/off Switch the appliance on or off
Main menu Select operating modes and settings
Time-setting options/
childproof lock
¡Set the "timer", "cooking time" or "Ready at" time for delayed starts
¡Activate or deactivate the "childproof lock"
Information ¡View additional information
¡View the current temperature
Rapid heat-up ¡Activate or deactivate the "Rapid heat-up" function
¡Activate or deactivate the "PowerBoost" function
Start/stop Start or pause the appliance
4.3 Control element
You can configure all the functions on your appliance using the control element. You can change the setting values
that are displayed more brightly.
Press and hold a button to scroll through the setting values quickly. Release the button to stop scrolling quickly.
Button Name Use
Left Navigate to the left on the display
or
en Familiarising yourself with your appliance
6
4 Familiarising yourself with your appliance
4.1 Control panel
You can use the control panel to configure all functions of your appliance and to obtain information about the operat-
ing status.
1
2 23
1
Display
2
Buttons
3
Control element
4.2 Buttons
The buttons are touch-sensitive areas. To select a function, press the corresponding button.
Symbol Name Use
On/off Switch the appliance on or off
Main menu Select operating modes and settings
Time-setting options/
childproof lock
¡Set the "timer", "cooking time" or "Ready at" time for delayed starts
¡Activate or deactivate the "childproof lock"
Information ¡View additional information
¡View the current temperature
Rapid heat-up ¡Activate or deactivate the "Rapid heat-up" function
¡Activate or deactivate the "PowerBoost" function
Start/stop Start or pause the appliance
4.3 Control element
You can configure all the functions on your appliance using the control element. You can change the setting values
that are displayed more brightly.
Press and hold a button to scroll through the setting values quickly. Release the button to stop scrolling quickly.
Button Name Use
Left Navigate to the left on the display
button to select "Dry appliance"
The temperature and drying time will appear on the display.
These cannot be changed.
4. Press
en Familiarising yourself with your appliance
6
4 Familiarising yourself with your appliance
4.1 Control panel
You can use the control panel to configure all functions of your appliance and to obtain information about the operat-
ing status.
1
2 23
1
Display
2
Buttons
3
Control element
4.2 Buttons
The buttons are touch-sensitive areas. To select a function, press the corresponding button.
Symbol Name Use
On/off Switch the appliance on or off
Main menu Select operating modes and settings
Time-setting options/
childproof lock
¡Set the "timer", "cooking time" or "Ready at" time for delayed starts
¡Activate or deactivate the "childproof lock"
Information ¡View additional information
¡View the current temperature
Rapid heat-up ¡Activate or deactivate the "Rapid heat-up" function
¡Activate or deactivate the "PowerBoost" function
Start/stop Start or pause the appliance
4.3 Control element
You can configure all the functions on your appliance using the control element. You can change the setting values
that are displayed more brightly.
Press and hold a button to scroll through the setting values quickly. Release the button to stop scrolling quickly.
Button Name Use
Left Navigate to the left on the display
button to start drying the appliance. Once the duration
has elapsed, an audible signal will sound and the appliance will
stop heating.
Press
en Familiarising yourself with your appliance
6
4 Familiarising yourself with your appliance
4.1 Control panel
You can use the control panel to configure all functions of your appliance and to obtain information about the operat-
ing status.
1
2 23
1
Display
2
Buttons
3
Control element
4.2 Buttons
The buttons are touch-sensitive areas. To select a function, press the corresponding button.
Symbol Name Use
On/off Switch the appliance on or off
Main menu Select operating modes and settings
Time-setting options/
childproof lock
¡Set the "timer", "cooking time" or "Ready at" time for delayed starts
¡Activate or deactivate the "childproof lock"
Information ¡View additional information
¡View the current temperature
Rapid heat-up ¡Activate or deactivate the "Rapid heat-up" function
¡Activate or deactivate the "PowerBoost" function
Start/stop Start or pause the appliance
4.3 Control element
You can configure all the functions on your appliance using the control element. You can change the setting values
that are displayed more brightly.
Press and hold a button to scroll through the setting values quickly. Release the button to stop scrolling quickly.
Button Name Use
Left Navigate to the left on the display
button to switch the appliance o.
5. Leave the appliance door open for 1-2 minutes so that the
cooking compartment dries completely.
Setting Heating Type & Temperature with VarioSteam
Please refer to your user manual for more detailed information.
1. Press
en Familiarising yourself with your appliance
6
4 Familiarising yourself with your appliance
4.1 Control panel
You can use the control panel to configure all functions of your appliance and to obtain information about the operat-
ing status.
1
2 23
1
Display
2
Buttons
3
Control element
4.2 Buttons
The buttons are touch-sensitive areas. To select a function, press the corresponding button.
Symbol Name Use
On/off Switch the appliance on or off
Main menu Select operating modes and settings
Time-setting options/
childproof lock
¡Set the "timer", "cooking time" or "Ready at" time for delayed starts
¡Activate or deactivate the "childproof lock"
Information ¡View additional information
¡View the current temperature
Rapid heat-up ¡Activate or deactivate the "Rapid heat-up" function
¡Activate or deactivate the "PowerBoost" function
Start/stop Start or pause the appliance
4.3 Control element
You can configure all the functions on your appliance using the control element. You can change the setting values
that are displayed more brightly.
Press and hold a button to scroll through the setting values quickly. Release the button to stop scrolling quickly.
Button Name Use
Left Navigate to the left on the display
to switch the appliance on. The heating functions will then be displayed.
2. Use the
en Familiarising yourself with your appliance
6
4 Familiarising yourself with your appliance
4.1 Control panel
You can use the control panel to configure all functions of your appliance and to obtain information about the operat-
ing status.
1
2 23
1
Display
2
Buttons
3
Control element
4.2 Buttons
The buttons are touch-sensitive areas. To select a function, press the corresponding button.
Symbol Name Use
On/off Switch the appliance on or off
Main menu Select operating modes and settings
Time-setting options/
childproof lock
¡Set the "timer", "cooking time" or "Ready at" time for delayed starts
¡Activate or deactivate the "childproof lock"
Information ¡View additional information
¡View the current temperature
Rapid heat-up ¡Activate or deactivate the "Rapid heat-up" function
¡Activate or deactivate the "PowerBoost" function
Start/stop Start or pause the appliance
4.3 Control element
You can configure all the functions on your appliance using the control element. You can change the setting values
that are displayed more brightly.
Press and hold a button to scroll through the setting values quickly. Release the button to stop scrolling quickly.
Button Name Use
Left Navigate to the left on the display
or
en Familiarising yourself with your appliance
6
4 Familiarising yourself with your appliance
4.1 Control panel
You can use the control panel to configure all functions of your appliance and to obtain information about the operat-
ing status.
1
2 23
1
Display
2
Buttons
3
Control element
4.2 Buttons
The buttons are touch-sensitive areas. To select a function, press the corresponding button.
Symbol Name Use
On/off Switch the appliance on or off
Main menu Select operating modes and settings
Time-setting options/
childproof lock
¡Set the "timer", "cooking time" or "Ready at" time for delayed starts
¡Activate or deactivate the "childproof lock"
Information ¡View additional information
¡View the current temperature
Rapid heat-up ¡Activate or deactivate the "Rapid heat-up" function
¡Activate or deactivate the "PowerBoost" function
Start/stop Start or pause the appliance
4.3 Control element
You can configure all the functions on your appliance using the control element. You can change the setting values
that are displayed more brightly.
Press and hold a button to scroll through the setting values quickly. Release the button to stop scrolling quickly.
Button Name Use
Left Navigate to the left on the display
button to select the required heating function.
3. Use the
en Familiarising yourself with your appliance
6
4 Familiarising yourself with your appliance
4.1 Control panel
You can use the control panel to configure all functions of your appliance and to obtain information about the operat-
ing status.
1
2 23
1
Display
2
Buttons
3
Control element
4.2 Buttons
The buttons are touch-sensitive areas. To select a function, press the corresponding button.
Symbol Name Use
On/off Switch the appliance on or off
Main menu Select operating modes and settings
Time-setting options/
childproof lock
¡Set the "timer", "cooking time" or "Ready at" time for delayed starts
¡Activate or deactivate the "childproof lock"
Information ¡View additional information
¡View the current temperature
Rapid heat-up ¡Activate or deactivate the "Rapid heat-up" function
¡Activate or deactivate the "PowerBoost" function
Start/stop Start or pause the appliance
4.3 Control element
You can configure all the functions on your appliance using the control element. You can change the setting values
that are displayed more brightly.
Press and hold a button to scroll through the setting values quickly. Release the button to stop scrolling quickly.
Button Name Use
Left Navigate to the left on the display
button to navigate to the next row.
4. Use the
en Familiarising yourself with your appliance
6
4 Familiarising yourself with your appliance
4.1 Control panel
You can use the control panel to configure all functions of your appliance and to obtain information about the operat-
ing status.
1
2 23
1
Display
2
Buttons
3
Control element
4.2 Buttons
The buttons are touch-sensitive areas. To select a function, press the corresponding button.
Symbol Name Use
On/off Switch the appliance on or off
Main menu Select operating modes and settings
Time-setting options/
childproof lock
¡Set the "timer", "cooking time" or "Ready at" time for delayed starts
¡Activate or deactivate the "childproof lock"
Information ¡View additional information
¡View the current temperature
Rapid heat-up ¡Activate or deactivate the "Rapid heat-up" function
¡Activate or deactivate the "PowerBoost" function
Start/stop Start or pause the appliance
4.3 Control element
You can configure all the functions on your appliance using the control element. You can change the setting values
that are displayed more brightly.
Press and hold a button to scroll through the setting values quickly. Release the button to stop scrolling quickly.
Button Name Use
Left Navigate to the left on the display
or
en Familiarising yourself with your appliance
6
4 Familiarising yourself with your appliance
4.1 Control panel
You can use the control panel to configure all functions of your appliance and to obtain information about the operat-
ing status.
1
2 23
1
Display
2
Buttons
3
Control element
4.2 Buttons
The buttons are touch-sensitive areas. To select a function, press the corresponding button.
Symbol Name Use
On/off Switch the appliance on or off
Main menu Select operating modes and settings
Time-setting options/
childproof lock
¡Set the "timer", "cooking time" or "Ready at" time for delayed starts
¡Activate or deactivate the "childproof lock"
Information ¡View additional information
¡View the current temperature
Rapid heat-up ¡Activate or deactivate the "Rapid heat-up" function
¡Activate or deactivate the "PowerBoost" function
Start/stop Start or pause the appliance
4.3 Control element
You can configure all the functions on your appliance using the control element. You can change the setting values
that are displayed more brightly.
Press and hold a button to scroll through the setting values quickly. Release the button to stop scrolling quickly.
Button Name Use
Left Navigate to the left on the display
button to select the required temperature or setting.
5. Press
en Familiarising yourself with your appliance
6
4 Familiarising yourself with your appliance
4.1 Control panel
You can use the control panel to configure all functions of your appliance and to obtain information about the operat-
ing status.
1
2 23
1
Display
2
Buttons
3
Control element
4.2 Buttons
The buttons are touch-sensitive areas. To select a function, press the corresponding button.
Symbol Name Use
On/off Switch the appliance on or off
Main menu Select operating modes and settings
Time-setting options/
childproof lock
¡Set the "timer", "cooking time" or "Ready at" time for delayed starts
¡Activate or deactivate the "childproof lock"
Information ¡View additional information
¡View the current temperature
Rapid heat-up ¡Activate or deactivate the "Rapid heat-up" function
¡Activate or deactivate the "PowerBoost" function
Start/stop Start or pause the appliance
4.3 Control element
You can configure all the functions on your appliance using the control element. You can change the setting values
that are displayed more brightly.
Press and hold a button to scroll through the setting values quickly. Release the button to stop scrolling quickly.
Button Name Use
Left Navigate to the left on the display
to start. The cooking time will appear on the display and the heat-up
indicator bar visualises the rising temperature.
6.When the food is ready, press
en Familiarising yourself with your appliance
6
4 Familiarising yourself with your appliance
4.1 Control panel
You can use the control panel to configure all functions of your appliance and to obtain information about the operat-
ing status.
1
2 23
1
Display
2
Buttons
3
Control element
4.2 Buttons
The buttons are touch-sensitive areas. To select a function, press the corresponding button.
Symbol Name Use
On/off Switch the appliance on or off
Main menu Select operating modes and settings
Time-setting options/
childproof lock
¡Set the "timer", "cooking time" or "Ready at" time for delayed starts
¡Activate or deactivate the "childproof lock"
Information ¡View additional information
¡View the current temperature
Rapid heat-up ¡Activate or deactivate the "Rapid heat-up" function
¡Activate or deactivate the "PowerBoost" function
Start/stop Start or pause the appliance
4.3 Control element
You can configure all the functions on your appliance using the control element. You can change the setting values
that are displayed more brightly.
Press and hold a button to scroll through the setting values quickly. Release the button to stop scrolling quickly.
Button Name Use
Left Navigate to the left on the display
to switch the appliance o.
TIP:
• To change the temperature once you have started the appliance use the
en Familiarising yourself with your appliance
6
4 Familiarising yourself with your appliance
4.1 Control panel
You can use the control panel to configure all functions of your appliance and to obtain information about the operat-
ing status.
1
2 23
1
Display
2
Buttons
3
Control element
4.2 Buttons
The buttons are touch-sensitive areas. To select a function, press the corresponding button.
Symbol Name Use
On/off Switch the appliance on or off
Main menu Select operating modes and settings
Time-setting options/
childproof lock
¡Set the "timer", "cooking time" or "Ready at" time for delayed starts
¡Activate or deactivate the "childproof lock"
Information ¡View additional information
¡View the current temperature
Rapid heat-up ¡Activate or deactivate the "Rapid heat-up" function
¡Activate or deactivate the "PowerBoost" function
Start/stop Start or pause the appliance
4.3 Control element
You can configure all the functions on your appliance using the control element. You can change the setting values
that are displayed more brightly.
Press and hold a button to scroll through the setting values quickly. Release the button to stop scrolling quickly.
Button Name Use
Left Navigate to the left on the display
or
en Familiarising yourself with your appliance
6
4 Familiarising yourself with your appliance
4.1 Control panel
You can use the control panel to configure all functions of your appliance and to obtain information about the operat-
ing status.
1
2 23
1
Display
2
Buttons
3
Control element
4.2 Buttons
The buttons are touch-sensitive areas. To select a function, press the corresponding button.
Symbol Name Use
On/off Switch the appliance on or off
Main menu Select operating modes and settings
Time-setting options/
childproof lock
¡Set the "timer", "cooking time" or "Ready at" time for delayed starts
¡Activate or deactivate the "childproof lock"
Information ¡View additional information
¡View the current temperature
Rapid heat-up ¡Activate or deactivate the "Rapid heat-up" function
¡Activate or deactivate the "PowerBoost" function
Start/stop Start or pause the appliance
4.3 Control element
You can configure all the functions on your appliance using the control element. You can change the setting values
that are displayed more brightly.
Press and hold a button to scroll through the setting values quickly. Release the button to stop scrolling quickly.
Button Name Use
Left Navigate to the left on the display
button to select the required temperature.
Setting Heating Type & Temperature
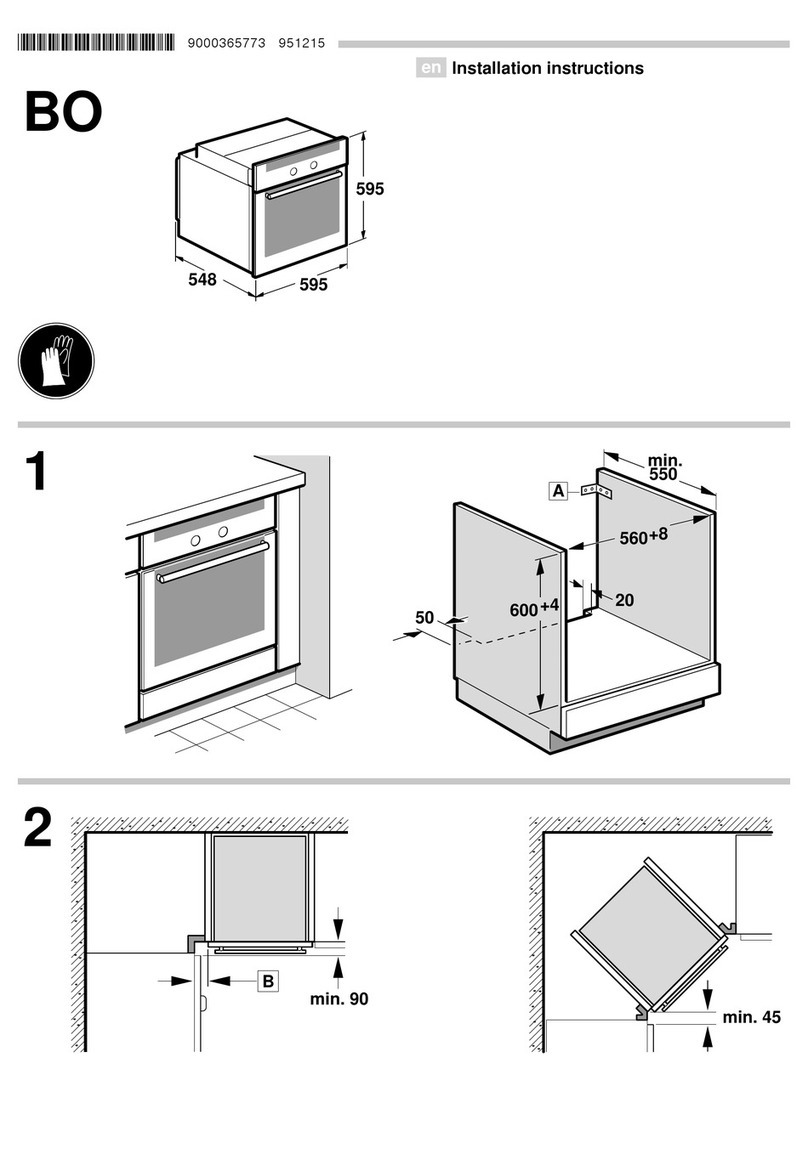
Please refer to your user manual for more detailed information.
• Ensure oven has cooled down. Remove ALL accessories
including side rails, cookware and coarse residue or food.
The cooking compartment must be empty.
Easy Clean
1. Mix 400mls water with a drop of dishwashing liquid and pour
into the centre of the cooking compartment oor.
2. Press
en Familiarising yourself with your appliance
6
4 Familiarising yourself with your appliance
4.1 Control panel
You can use the control panel to configure all functions of your appliance and to obtain information about the operat-
ing status.
1
2 23
1
Display
2
Buttons
3
Control element
4.2 Buttons
The buttons are touch-sensitive areas. To select a function, press the corresponding button.
Symbol Name Use
On/off Switch the appliance on or off
Main menu Select operating modes and settings
Time-setting options/
childproof lock
¡Set the "timer", "cooking time" or "Ready at" time for delayed starts
¡Activate or deactivate the "childproof lock"
Information ¡View additional information
¡View the current temperature
Rapid heat-up ¡Activate or deactivate the "Rapid heat-up" function
¡Activate or deactivate the "PowerBoost" function
Start/stop Start or pause the appliance
4.3 Control element
You can configure all the functions on your appliance using the control element. You can change the setting values
that are displayed more brightly.
Press and hold a button to scroll through the setting values quickly. Release the button to stop scrolling quickly.
Button Name Use
Left Navigate to the left on the display
to switch the appliance on.
The heating functions will then be displayed.
3. Press
en Familiarising yourself with your appliance
6
4 Familiarising yourself with your appliance
4.1 Control panel
You can use the control panel to configure all functions of your appliance and to obtain information about the operat-
ing status.
1
2 23
1
Display
2
Buttons
3
Control element
4.2 Buttons
The buttons are touch-sensitive areas. To select a function, press the corresponding button.
Symbol Name Use
On/off Switch the appliance on or off
Main menu Select operating modes and settings
Time-setting options/
childproof lock
¡Set the "timer", "cooking time" or "Ready at" time for delayed starts
¡Activate or deactivate the "childproof lock"
Information ¡View additional information
¡View the current temperature
Rapid heat-up ¡Activate or deactivate the "Rapid heat-up" function
¡Activate or deactivate the "PowerBoost" function
Start/stop Start or pause the appliance
4.3 Control element
You can configure all the functions on your appliance using the control element. You can change the setting values
that are displayed more brightly.
Press and hold a button to scroll through the setting values quickly. Release the button to stop scrolling quickly.
Button Name Use
Left Navigate to the left on the display
4. Use the
en Familiarising yourself with your appliance
6
4 Familiarising yourself with your appliance
4.1 Control panel
You can use the control panel to configure all functions of your appliance and to obtain information about the operat-
ing status.
1
2 23
1
Display
2
Buttons
3
Control element
4.2 Buttons
The buttons are touch-sensitive areas. To select a function, press the corresponding button.
Symbol Name Use
On/off Switch the appliance on or off
Main menu Select operating modes and settings
Time-setting options/
childproof lock
¡Set the "timer", "cooking time" or "Ready at" time for delayed starts
¡Activate or deactivate the "childproof lock"
Information ¡View additional information
¡View the current temperature
Rapid heat-up ¡Activate or deactivate the "Rapid heat-up" function
¡Activate or deactivate the "PowerBoost" function
Start/stop Start or pause the appliance
4.3 Control element
You can configure all the functions on your appliance using the control element. You can change the setting values
that are displayed more brightly.
Press and hold a button to scroll through the setting values quickly. Release the button to stop scrolling quickly.
Button Name Use
Left Navigate to the left on the display
or
en Familiarising yourself with your appliance
6
4 Familiarising yourself with your appliance
4.1 Control panel
You can use the control panel to configure all functions of your appliance and to obtain information about the operat-
ing status.
1
2 23
1
Display
2
Buttons
3
Control element
4.2 Buttons
The buttons are touch-sensitive areas. To select a function, press the corresponding button.
Symbol Name Use
On/off Switch the appliance on or off
Main menu Select operating modes and settings
Time-setting options/
childproof lock
¡Set the "timer", "cooking time" or "Ready at" time for delayed starts
¡Activate or deactivate the "childproof lock"
Information ¡View additional information
¡View the current temperature
Rapid heat-up ¡Activate or deactivate the "Rapid heat-up" function
¡Activate or deactivate the "PowerBoost" function
Start/stop Start or pause the appliance
4.3 Control element
You can configure all the functions on your appliance using the control element. You can change the setting values
that are displayed more brightly.
Press and hold a button to scroll through the setting values quickly. Release the button to stop scrolling quickly.
Button Name Use
Left Navigate to the left on the display
button to select “EasyClean“ .
5. Use the
en Familiarising yourself with your appliance
6
4 Familiarising yourself with your appliance
4.1 Control panel
You can use the control panel to configure all functions of your appliance and to obtain information about the operat-
ing status.
1
2 23
1
Display
2
Buttons
3
Control element
4.2 Buttons
The buttons are touch-sensitive areas. To select a function, press the corresponding button.
Symbol Name Use
On/off Switch the appliance on or off
Main menu Select operating modes and settings
Time-setting options/
childproof lock
¡Set the "timer", "cooking time" or "Ready at" time for delayed starts
¡Activate or deactivate the "childproof lock"
Information ¡View additional information
¡View the current temperature
Rapid heat-up ¡Activate or deactivate the "Rapid heat-up" function
¡Activate or deactivate the "PowerBoost" function
Start/stop Start or pause the appliance
4.3 Control element
You can configure all the functions on your appliance using the control element. You can change the setting values
that are displayed more brightly.
Press and hold a button to scroll through the setting values quickly. Release the button to stop scrolling quickly.
Button Name Use
Left Navigate to the left on the display
button to navigate to the next row.
6. Press
en Familiarising yourself with your appliance
6
4 Familiarising yourself with your appliance
4.1 Control panel
You can use the control panel to configure all functions of your appliance and to obtain information about the operat-
ing status.
1
2 23
1
Display
2
Buttons
3
Control element
4.2 Buttons
The buttons are touch-sensitive areas. To select a function, press the corresponding button.
Symbol Name Use
On/off Switch the appliance on or off
Main menu Select operating modes and settings
Time-setting options/
childproof lock
¡Set the "timer", "cooking time" or "Ready at" time for delayed starts
¡Activate or deactivate the "childproof lock"
Information ¡View additional information
¡View the current temperature
Rapid heat-up ¡Activate or deactivate the "Rapid heat-up" function
¡Activate or deactivate the "PowerBoost" function
Start/stop Start or pause the appliance
4.3 Control element
You can configure all the functions on your appliance using the control element. You can change the setting values
that are displayed more brightly.
Press and hold a button to scroll through the setting values quickly. Release the button to stop scrolling quickly.
Button Name Use
Left Navigate to the left on the display
to start the cleaning aid. The cleaning aid will start.
The duration will count down on the display. Once the cleaning
aid has run through to the end, an audible signal will sound.
7. Press any button to end the audible signal.
8. After using the cleaning aid, allow oven to cool down. Remove
the remaining water with an absorbent sponge cloth, wipe
the cooking compartment clean and allow it to dry fully with
appliance door open.
NOTES
Do not open the appliance door while the appliance is in operation,
as this will abort the cleaning aid.
To remove particularly stubborn dirt, leave the soapy water to work
for a while before starting the cleaning aid.
• Clean the smooth surfaces in the cooking compartment
with a dish cloth or a soft brush.
Descaling
Your oven will occasionally require descaling, please view the
manual for full instructions and visit https://www.ne.com.au/
service/accessories#tab-navigation for NEFF descaling accessories
• Ensure oven has cooled down. Remove ALL accessories including side rails, cookware, water tank and coarse residue or food.
The cooking compartment must be empty.
• Use warm soapy water and a soft cloth to clean the surfaces at the edges of the cooking compartment around the door seal.
Do not remove or scrub the door seal. Use oven cleaner to remove stubborn dirt from the inner door pane.
Pyrolytic Self-Cleaning
Cleaning
setting Cleaning level Duration in hours
1Low Approx. 1:15
2 Medium Approx. 1:30
3 High Approx. 2:00
1. Press
en Familiarising yourself with your appliance
6
4 Familiarising yourself with your appliance
4.1 Control panel
You can use the control panel to configure all functions of your appliance and to obtain information about the operat-
ing status.
1
2 23
1
Display
2
Buttons
3
Control element
4.2 Buttons
The buttons are touch-sensitive areas. To select a function, press the corresponding button.
Symbol Name Use
On/off Switch the appliance on or off
Main menu Select operating modes and settings
Time-setting options/
childproof lock
¡Set the "timer", "cooking time" or "Ready at" time for delayed starts
¡Activate or deactivate the "childproof lock"
Information ¡View additional information
¡View the current temperature
Rapid heat-up ¡Activate or deactivate the "Rapid heat-up" function
¡Activate or deactivate the "PowerBoost" function
Start/stop Start or pause the appliance
4.3 Control element
You can configure all the functions on your appliance using the control element. You can change the setting values
that are displayed more brightly.
Press and hold a button to scroll through the setting values quickly. Release the button to stop scrolling quickly.
Button Name Use
Left Navigate to the left on the display
to switch the appliance on.
2. Press
en Familiarising yourself with your appliance
6
4 Familiarising yourself with your appliance
4.1 Control panel
You can use the control panel to configure all functions of your appliance and to obtain information about the operat-
ing status.
1
2 23
1
Display
2
Buttons
3
Control element
4.2 Buttons
The buttons are touch-sensitive areas. To select a function, press the corresponding button.
Symbol Name Use
On/off Switch the appliance on or off
Main menu Select operating modes and settings
Time-setting options/
childproof lock
¡Set the "timer", "cooking time" or "Ready at" time for delayed starts
¡Activate or deactivate the "childproof lock"
Information ¡View additional information
¡View the current temperature
Rapid heat-up ¡Activate or deactivate the "Rapid heat-up" function
¡Activate or deactivate the "PowerBoost" function
Start/stop Start or pause the appliance
4.3 Control element
You can configure all the functions on your appliance using the control element. You can change the setting values
that are displayed more brightly.
Press and hold a button to scroll through the setting values quickly. Release the button to stop scrolling quickly.
Button Name Use
Left Navigate to the left on the display
.
3. Use the
en Familiarising yourself with your appliance
6
4 Familiarising yourself with your appliance
4.1 Control panel
You can use the control panel to configure all functions of your appliance and to obtain information about the operat-
ing status.
1
2 23
1
Display
2
Buttons
3
Control element
4.2 Buttons
The buttons are touch-sensitive areas. To select a function, press the corresponding button.
Symbol Name Use
On/off Switch the appliance on or off
Main menu Select operating modes and settings
Time-setting options/
childproof lock
¡Set the "timer", "cooking time" or "Ready at" time for delayed starts
¡Activate or deactivate the "childproof lock"
Information ¡View additional information
¡View the current temperature
Rapid heat-up ¡Activate or deactivate the "Rapid heat-up" function
¡Activate or deactivate the "PowerBoost" function
Start/stop Start or pause the appliance
4.3 Control element
You can configure all the functions on your appliance using the control element. You can change the setting values
that are displayed more brightly.
Press and hold a button to scroll through the setting values quickly. Release the button to stop scrolling quickly.
Button Name Use
Left Navigate to the left on the display
or
en Familiarising yourself with your appliance
6
4 Familiarising yourself with your appliance
4.1 Control panel
You can use the control panel to configure all functions of your appliance and to obtain information about the operat-
ing status.
1
2 23
1
Display
2
Buttons
3
Control element
4.2 Buttons
The buttons are touch-sensitive areas. To select a function, press the corresponding button.
Symbol Name Use
On/off Switch the appliance on or off
Main menu Select operating modes and settings
Time-setting options/
childproof lock
¡Set the "timer", "cooking time" or "Ready at" time for delayed starts
¡Activate or deactivate the "childproof lock"
Information ¡View additional information
¡View the current temperature
Rapid heat-up ¡Activate or deactivate the "Rapid heat-up" function
¡Activate or deactivate the "PowerBoost" function
Start/stop Start or pause the appliance
4.3 Control element
You can configure all the functions on your appliance using the control element. You can change the setting values
that are displayed more brightly.
Press and hold a button to scroll through the setting values quickly. Release the button to stop scrolling quickly.
Button Name Use
Left Navigate to the left on the display
button to set “Self-cleaning“ .
4. Use the
en Familiarising yourself with your appliance
6
4 Familiarising yourself with your appliance
4.1 Control panel
You can use the control panel to configure all functions of your appliance and to obtain information about the operat-
ing status.
1
2 23
1
Display
2
Buttons
3
Control element
4.2 Buttons
The buttons are touch-sensitive areas. To select a function, press the corresponding button.
Symbol Name Use
On/off Switch the appliance on or off
Main menu Select operating modes and settings
Time-setting options/
childproof lock
¡Set the "timer", "cooking time" or "Ready at" time for delayed starts
¡Activate or deactivate the "childproof lock"
Information ¡View additional information
¡View the current temperature
Rapid heat-up ¡Activate or deactivate the "Rapid heat-up" function
¡Activate or deactivate the "PowerBoost" function
Start/stop Start or pause the appliance
4.3 Control element
You can configure all the functions on your appliance using the control element. You can change the setting values
that are displayed more brightly.
Press and hold a button to scroll through the setting values quickly. Release the button to stop scrolling quickly.
Button Name Use
Left Navigate to the left on the display
button to navigate to the next row.
5. Use the
en Familiarising yourself with your appliance
6
4 Familiarising yourself with your appliance
4.1 Control panel
You can use the control panel to configure all functions of your appliance and to obtain information about the operat-
ing status.
1
2 23
1
Display
2
Buttons
3
Control element
4.2 Buttons
The buttons are touch-sensitive areas. To select a function, press the corresponding button.
Symbol Name Use
On/off Switch the appliance on or off
Main menu Select operating modes and settings
Time-setting options/
childproof lock
¡Set the "timer", "cooking time" or "Ready at" time for delayed starts
¡Activate or deactivate the "childproof lock"
Information ¡View additional information
¡View the current temperature
Rapid heat-up ¡Activate or deactivate the "Rapid heat-up" function
¡Activate or deactivate the "PowerBoost" function
Start/stop Start or pause the appliance
4.3 Control element
You can configure all the functions on your appliance using the control element. You can change the setting values
that are displayed more brightly.
Press and hold a button to scroll through the setting values quickly. Release the button to stop scrolling quickly.
Button Name Use
Left Navigate to the left on the display
or
en Familiarising yourself with your appliance
6
4 Familiarising yourself with your appliance
4.1 Control panel
You can use the control panel to configure all functions of your appliance and to obtain information about the operat-
ing status.
1
2 23
1
Display
2
Buttons
3
Control element
4.2 Buttons
The buttons are touch-sensitive areas. To select a function, press the corresponding button.
Symbol Name Use
On/off Switch the appliance on or off
Main menu Select operating modes and settings
Time-setting options/
childproof lock
¡Set the "timer", "cooking time" or "Ready at" time for delayed starts
¡Activate or deactivate the "childproof lock"
Information ¡View additional information
¡View the current temperature
Rapid heat-up ¡Activate or deactivate the "Rapid heat-up" function
¡Activate or deactivate the "PowerBoost" function
Start/stop Start or pause the appliance
4.3 Control element
You can configure all the functions on your appliance using the control element. You can change the setting values
that are displayed more brightly.
Press and hold a button to scroll through the setting values quickly. Release the button to stop scrolling quickly.
Button Name Use
Left Navigate to the left on the display
button to select the cleaning setting.
Cleaning functions en
17
14 Cleaning functions
You can use the cleaning functions to clean the appli-
ance.
14.1 Self-cleaning function
The "Self-cleaning" function cleans the cooking com-
partment virtually automatically.
Use this cleaning function to clean the cooking com-
partment every 2 to 3 months. You can use the clean-
ing function more often, if required. The cleaning func-
tion requires approx. 2.5 - 4.7 kilowatt hours.
Preparing the appliance for the cleaning
function
To achieve a good cleaning result and prevent dam-
age, prepare the appliance carefully.
WARNING‒Risk of fire!
Combustible objects that are left in the cooking com-
partment may catch fire.
▶▶Never store combustible objects in the cooking
compartment.
▶▶If smoke is emitted, the appliance must be switched
off or the plug must be pulled out and the door
must be held closed in order to stifle any flames.
Loose food remnants, fat and meat juices may catch
fire when the cleaning function is in progress.
▶▶Before starting the cleaning function, always remove
the worst of the food residues and remnants from
the cooking compartment and accessories.
The outside of the appliance gets very hot when the
cleaning function is in progress.
▶▶Never hang combustible objects, e.g. tea towels, on
the door handle.
▶▶Leave the front of the appliance clear.
▶▶Keep children at a safe distance.
If the door seal is damaged, a large amount of heat is
generated around the door.
▶▶Do not scrub or remove the seal.
▶▶Never operate the appliance if the seal is damaged
or missing.
1. Remove accessories and cookware from the cook-
ing compartment.
2. Detach the shelf supports and remove them from
the cooking compartment.
→"Rails", Page19
3. Remove coarse dirt from the cooking compartment.
4. Use a detergent solution and a soft cloth to clean
the surfaces at the edges of the cooking compart-
ment around the door seal.
Do not remove or scrub the door seal.
Use oven cleaner to remove stubborn dirt from the
inner door pane.
5. Remove any objects from the cooking compartment.
The cooking compartment must be empty.
Using accessory supports
With the accessory supports, you can clean an access-
ory at the same time when cleaning using the cleaning
function.
1. Attach the accessory supports in the same way as
the rails.
→"Rails", Page19
Note:
The vertical bar must be to the front of the ac-
cessory supports.
2. Remove coarse dirt from the accessory.
3. Place the accessory on the accessory supports.
Note:Only clean accessories that were included
with the appliance and that are enamelled, e.g. the
universal pan or the baking tray. Wire racks are not
suitable for the cleaning function and will become
discoloured.
Configuring the Self-cleaning function
WARNING‒Risk of harm to health!
The cleaning function heats up the cooking compart-
ment to a very high temperature so that food left over
from roasting, grilling and baking will burn off. This pro-
cess releases vapours, which can irritate mucous mem-
branes.
▶▶Keep the kitchen well ventilated while the cleaning
function is running.
▶▶Do not remain in the room for long periods.
▶▶Keep children and pets away.
WARNING‒Risk of burns!
The cooking compartment gets very hot when the
cleaning function is in progress.
▶▶Never open the appliance door.
▶▶Allow the appliance to cool down.
▶▶Keep children at a safe distance.
The outside of the appliance gets very hot when the
cleaning function is in progress.
▶▶Never touch the appliance door.
▶▶Allow the appliance to cool down.
▶▶Keep children at a safe distance.
Note:The oven light will not be lit while the cleaning
function is running.
Requirement:→"Preparing the appliance for the
cleaning function", Page17.
1. Press to switch the appliance on.
2. Press .
3. Use the or button to set "Self-cleaning" .
4. Use the button to navigate to the next row.
5. Use the or button to select the cleaning setting.
Accessory supports
NOTES
You can clean your NEFF supplied enamel trays with the pyro
function by using the accessory supports shown in the image.
Please see manual for more details.
• Keep the kitchen ventilated
while the cleaning function
is running.
• For your safety, the
appliance door locks the
cooking compartment and
will remain locked until the
appliance has cooled down
sufciently.
IMPORTANT: For full instructions
and more detailed information please refer to manual
6. Press
en Familiarising yourself with your appliance
6
4 Familiarising yourself with your appliance
4.1 Control panel
You can use the control panel to configure all functions of your appliance and to obtain information about the operat-
ing status.
1
2 23
1
Display
2
Buttons
3
Control element
4.2 Buttons
The buttons are touch-sensitive areas. To select a function, press the corresponding button.
Symbol Name Use
On/off Switch the appliance on or off
Main menu Select operating modes and settings
Time-setting options/
childproof lock
¡Set the "timer", "cooking time" or "Ready at" time for delayed starts
¡Activate or deactivate the "childproof lock"
Information ¡View additional information
¡View the current temperature
Rapid heat-up ¡Activate or deactivate the "Rapid heat-up" function
¡Activate or deactivate the "PowerBoost" function
Start/stop Start or pause the appliance
4.3 Control element
You can configure all the functions on your appliance using the control element. You can change the setting values
that are displayed more brightly.
Press and hold a button to scroll through the setting values quickly. Release the button to stop scrolling quickly.
Button Name Use
Left Navigate to the left on the display
to start the cleaning function. Once the cleaning
function has completed, an audible signal will sound.
7. Allow the appliance to cool down.
8. Wipe o any ash that has been left behind in the cooking
compartment and around the appliance door with a damp cloth
Your oven has two cleaning functions:
• Pyrolytic Self-Cleaning
For automatic self cleaning of your oven cavity. Recommended
every 2-3 months depending on how dirty your oven is
(you can do this more often if required).
• EasyClean
Using water and detergent EasyClean will soften baked on
residue in the oven cavity so you can wipe it down. Perfect
for intermittent cleaning.
Cleaning Your Oven

Heating Functions Explained
Type of heating Temperature Use Possible to add
VarioSteam*
#05.31_ P
AD D FAVO URITE
DRINK
#01.45_P
CIRCOTHERM
ECO
#01.03_P
PIZZA SETTING
#01.04_P
BREAD BAKING
# 01 .16 _ P
DEFROST
SETTING
#01.02_P
TOP-/ BOTTOM
HEAT
#01.05_P
BOTTOM HEAT
#01.07_ P G
FULL S URFACE
GRILL
#01.08_P
CENTRE-AREA
GRILL
#01.0 6_P
CIRCO-
ROASTING
#00.22_P
DECALCIFY
# 01 .11_ P
DOUGH
PROVING
# 01 .17_ P
SPEISEN
WARMING 3
#01.09_P
GENTLE
COOKING
#01.01_ P
CIRCOTHERM
#01.31_P
OVEN
CLEANING ??
#01.28_P
PR E HE ATING
DISHES
#01.29_P
PYROLYTIC
SELFCLEAN
#01.27_P
REH E AT
# 01 .10 _ P
STEAM COOKING
#01.32_P
EASYCLEAN
#01.3 0_P
ECOLYSIS
#01.76 _P
BOTTOM-
CLEAN
#01.13_P
STEAM ASSIST
VARIO STEAM
# 01 .10 _ P
STEAM COOKING
FULL STEAM
#01.73_P
BA K E A S SISTANT
#01.75_P
CORE
TEMPERATURE
MEAT PROBE
# 01 .18 _ P
SYSTEM STEAM
COOKING
#01.12_P
RAPID
HEAT UP
# 01 .14 _ P
TOP-/ BOTTOM
HEAT EC O
#01.08_P
CENTRE-AREA
GRILL
#01.07_ P G
FULL S URFACE
GRILL
#01.33_P
SABBATH
CIRCO THERM®* 40°–200°CFor baking and cooking on one or more levels. The fan distributes the heat from
the ring heating element in the back panel evenly around the cooking compartment. Yes
#05.31_ P
AD D FAVO URITE
DRINK
#01.45_P
CIRCOTHERM
ECO
#01.03_P
PIZZA SETTING
#01.04_P
BREAD BAKING
# 01 .16 _ P
DEFROST
SETTING
#01.02_P
TOP-/ BOTTOM
HEAT
#01.05_P
BOTTOM HEAT
#01.07_ P G
FULL S URFACE
GRILL
#01.08_P
CENTRE-AREA
GRILL
#01.0 6_P
CIRCO-
ROASTING
#00.22_P
DECALCIFY
# 01 .11_ P
DOUGH
PROVING
# 01 .17_ P
SPEISEN
WARMING 3
#01.09_P
GENTLE
COOKING
#01.01_ P
CIRCOTHERM
#01.31_P
OVEN
CLEANING ??
#01.28_P
PR E HE ATING
DISHES
#01.29_P
PYROLYTIC
SELFCLEAN
#01.27_P
REH E AT
# 01 .10 _ P
STEAM COOKING
#01.32_P
EASYCLEAN
#01.3 0_P
ECOLYSIS
#01.76 _P
BOTTOM-
CLEAN
#01.13_P
STEAM ASSIST
VARIO STEAM
# 01 .10 _ P
STEAM COOKING
FULL STEAM
#01.73_P
BA K E A S SISTANT
#01.75_P
CORE
TEMPERATURE
MEAT PROBE
# 01 .18 _ P
SYSTEM STEAM
COOKING
#01.12_P
RAPID
HEAT UP
# 01 .14 _ P
TOP-/ BOTTOM
HEAT EC O
#01.08_P
CENTRE-AREA
GRILL
#01.07_ P G
FULL S URFACE
GRILL
#01.33_P
SABBATH
CIRCO THERM®
ECO 40°–200°CFor gentle cooking of selected dishes on one level without preheating. The fan
distributes the heat from the ring heating element in the back panel around the
cooking compartment.
#05.31_ P
AD D FAVO URITE
DRINK
#01.45_P
CIRCOTHERM
ECO
#01.03_P
PIZZA SETTING
#01.04_P
BREAD BAKING
# 01 .16 _ P
DEFROST
SETTING
#01.02_P
TOP-/ BOTTOM
HEAT
#01.05_P
BOTTOM HEAT
#01.07_ P G
FULL S URFACE
GRILL
#01.08_P
CENTRE-AREA
GRILL
#01.0 6_P
CIRCO-
ROASTING
#00.22_P
DECALCIFY
# 01 .11_ P
DOUGH
PROVING
# 01 .17_ P
SPEISEN
WARMING 3
#01.09_P
GENTLE
COOKING
#01.01_ P
CIRCOTHERM
#01.31_P
OVEN
CLEANING ??
#01.28_P
PR E HE ATING
DISHES
#01.29_P
PYROLYTIC
SELFCLEAN
#01.27_P
REH E AT
# 01 .10 _ P
STEAM COOKING
#01.32_P
EASYCLEAN
#01.3 0_P
ECOLYSIS
#01.76 _P
BOTTOM-
CLEAN
#01.13_P
STEAM ASSIST
VARIO STEAM
# 01 .10 _ P
STEAM COOKING
FULL STEAM
#01.73_P
BA K E A S SISTANT
#01.75_P
CORE
TEMPERATURE
MEAT PROBE
# 01 .18 _ P
SYSTEM STEAM
COOKING
#01.12_P
RAPID
HEAT UP
# 01 .14 _ P
TOP-/ BOTTOM
HEAT EC O
#01.08_P
CENTRE-AREA
GRILL
#01.07_ P G
FULL S URFACE
GRILL
#01.33_P
SABBATH
TOP/BOTTOM
HEAT* 50°–275 °CFor traditional baking and roasting on one level. Especially suitable for cakes with
moist toppings. Heat is emitted evenly from the top and bottom. Yes
#05.31_ P
AD D FAVO URITE
DRINK
#01.45_P
CIRCOTHERM
ECO
#01.03_P
PIZZA SETTING
#01.04_P
BREAD BAKING
# 01 .16 _ P
DEFROST
SETTING
#01.02_P
TOP-/ BOTTOM
HEAT
#01.05_P
BOTTOM HEAT
#01.07_ P G
FULL S URFACE
GRILL
#01.08_P
CENTRE-AREA
GRILL
#01.0 6_P
CIRCO-
ROASTING
#00.22_P
DECALCIFY
# 01 .11_ P
DOUGH
PROVING
# 01 .17_ P
SPEISEN
WARMING 3
#01.09_P
GENTLE
COOKING
#01.01_ P
CIRCOTHERM
#01.31_P
OVEN
CLEANING ??
#01.28_P
PR E HE ATING
DISHES
#01.29_P
PYROLYTIC
SELFCLEAN
#01.27_P
REH E AT
# 01 .10 _ P
STEAM COOKING
#01.32_P
EASYCLEAN
#01.3 0_P
ECOLYSIS
#01.76 _P
BOTTOM-
CLEAN
#01.13_P
STEAM ASSIST
VARIO STEAM
# 01 .10 _ P
STEAM COOKING
FULL STEAM
#01.73_P
BA K E A S SISTANT
#01.75_P
CORE
TEMPERATURE
MEAT PROBE
# 01 .18 _ P
SYSTEM STEAM
COOKING
#01.12_P
RAPID
HEAT UP
# 01 .14 _ P
TOP-/ BOTTOM
HEAT EC O
#01.08_P
CENTRE-AREA
GRILL
#01.07_ P G
FULL S URFACE
GRILL
#01.33_P
SABBATH
TOP/BOTTOM
HEAT ECO 50°–275 °CFor gentle cooking of selected dishes. The heat is emitted from above and below.
#05.31_ P
AD D FAVO URITE
DRINK
#01.45_P
CIRCOTHERM
ECO
#01.03_P
PIZZA SETTING
#01.04_P
BREAD BAKING
# 01 .16 _ P
DEFROST
SETTING
#01.02_P
TOP-/ BOTTOM
HEAT
#01.05_P
BOTTOM HEAT
#01.07_ P G
FULL S URFACE
GRILL
#01.08_P
CENTRE-AREA
GRILL
#01.0 6_P
CIRCO-
ROASTING
#00.22_P
DECALCIFY
# 01 .11_ P
DOUGH
PROVING
# 01 .17_ P
SPEISEN
WARMING 3
#01.09_P
GENTLE
COOKING
#01.01_ P
CIRCOTHERM
#01.31_P
OVEN
CLEANING ??
#01.28_P
PR E HE ATING
DISHES
#01.29_P
PYROLYTIC
SELFCLEAN
#01.27_P
REH E AT
# 01 .10 _ P
STEAM COOKING
#01.32_P
EASYCLEAN
#01.3 0_P
ECOLYSIS
#01.76 _P
BOTTOM-
CLEAN
#01.13_P
STEAM ASSIST
VARIO STEAM
# 01 .10 _ P
STEAM COOKING
FULL STEAM
#01.73_P
BA K E A S SISTANT
#01.75_P
CORE
TEMPERATURE
MEAT PROBE
# 01 .18 _ P
SYSTEM STEAM
COOKING
#01.12_P
RAPID
HEAT UP
# 01 .14 _ P
TOP-/ BOTTOM
HEAT EC O
#01.08_P
CENTRE-AREA
GRILL
#01.07_ P G
FULL S URFACE
GRILL
#01.33_P
SABBATH
CIRCO ROASTING* 50°–250°CFor roasting poultry, whole sh or larger pieces of meat. The grill element and the
fan switch on and o alternately. The fan circulates the hot air around the food. Yes
#05.31_ P
AD D FAVO URITE
DRINK
#01.45_P
CIRCOTHERM
ECO
#01.03_P
PIZZA SETTING
#01.04_P
BREAD BAKING
# 01 .16 _ P
DEFROST
SETTING
#01.02_P
TOP-/ BOTTOM
HEAT
#01.05_P
BOTTOM HEAT
#01.07_ P G
FULL S URFACE
GRILL
#01.08_P
CENTRE-AREA
GRILL
#01.0 6_P
CIRCO-
ROASTING
#00.22_P
DECALCIFY
# 01 .11_ P
DOUGH
PROVING
# 01 .17_ P
SPEISEN
WARMING 3
#01.09_P
GENTLE
COOKING
#01.01_ P
CIRCOTHERM
#01.31_P
OVEN
CLEANING ??
#01.28_P
PR E HE ATING
DISHES
#01.29_P
PYROLYTIC
SELFCLEAN
#01.27_P
REH E AT
# 01 .10 _ P
STEAM COOKING
#01.32_P
EASYCLEAN
#01.3 0_P
ECOLYSIS
#01.76 _P
BOTTOM-
CLEAN
#01.13_P
STEAM ASSIST
VARIO STEAM
# 01 .10 _ P
STEAM COOKING
FULL STEAM
#01.73_P
BA K E A S SISTANT
#01.75_P
CORE
TEMPERATURE
MEAT PROBE
# 01 .18 _ P
SYSTEM STEAM
COOKING
#01.12_P
RAPID
HEAT UP
# 01 .14 _ P
TOP-/ BOTTOM
HEAT EC O
#01.08_P
CENTRE-AREA
GRILL
#01.07_ P G
FULL S URFACE
GRILL
#01.33_P
SABBATH
CIRCO THERM®
INTENSIVE /
PIZZA SETTING
50°–275°CFor preparing pizza and dishes which require a lot of heat from underneath. The
bottom heating element and the ring heating element in the back panel heat up.
#05.31_ P
AD D FAVO URITE
DRINK
#01.45_P
CIRCOTHERM
ECO
#01.03_P
PIZZA SETTING
#01.04_P
BREAD BAKING
# 01 .16 _ P
DEFROST
SETTING
#01.02_P
TOP-/ BOTTOM
HEAT
#01.05_P
BOTTOM HEAT
#01.07_ P G
FULL S URFACE
GRILL
#01.08_P
CENTRE-AREA
GRILL
#01.0 6_P
CIRCO-
ROASTING
#00.22_P
DECALCIFY
# 01 .11_ P
DOUGH
PROVING
# 01 .17_ P
SPEISEN
WARMING 3
#01.09_P
GENTLE
COOKING
#01.01_ P
CIRCOTHERM
#01.31_P
OVEN
CLEANING ??
#01.28_P
PR E HE ATING
DISHES
#01.29_P
PYROLYTIC
SELFCLEAN
#01.27_P
REH E AT
# 01 .10 _ P
STEAM COOKING
#01.32_P
EASYCLEAN
#01.3 0_P
ECOLYSIS
#01.76 _P
BOTTOM-
CLEAN
#01.13_P
STEAM ASSIST
VARIO STEAM
# 01 .10 _ P
STEAM COOKING
FULL STEAM
#01.73_P
BA K E A S SISTANT
#01.75_P
CORE
TEMPERATURE
MEAT PROBE
# 01 .18 _ P
SYSTEM STEAM
COOKING
#01.12_P
RAPID
HEAT UP
# 01 .14 _ P
TOP-/ BOTTOM
HEAT EC O
#01.08_P
CENTRE-AREA
GRILL
#01.07_ P G
FULL S URFACE
GRILL
#01.33_P
SABBATH
GRILL, LARGE AREA 50°–290°CFor grilling at items, such as steaks or sausages, for making toast, and for au gratin
dishes. The whole area below the grill element becomes hot.
#05.31_ P
AD D FAVO URITE
DRINK
#01.45_P
CIRCOTHERM
ECO
#01.03_P
PIZZA SETTING
#01.04_P
BREAD BAKING
# 01 .16 _ P
DEFROST
SETTING
#01.02_P
TOP-/ BOTTOM
HEAT
#01.05_P
BOTTOM HEAT
#01.07_ P G
FULL S URFACE
GRILL
#01.08_P
CENTRE-AREA
GRILL
#01.0 6_P
CIRCO-
ROASTING
#00.22_P
DECALCIFY
# 01 .11_ P
DOUGH
PROVING
# 01 .17_ P
SPEISEN
WARMING 3
#01.09_P
GENTLE
COOKING
#01.01_ P
CIRCOTHERM
#01.31_P
OVEN
CLEANING ??
#01.28_P
PR E HE ATING
DISHES
#01.29_P
PYROLYTIC
SELFCLEAN
#01.27_P
REH E AT
# 01 .10 _ P
STEAM COOKING
#01.32_P
EASYCLEAN
#01.3 0_P
ECOLYSIS
#01.76 _P
BOTTOM-
CLEAN
#01.13_P
STEAM ASSIST
VARIO STEAM
# 01 .10 _ P
STEAM COOKING
FULL STEAM
#01.73_P
BA K E A S SISTANT
#01.75_P
CORE
TEMPERATURE
MEAT PROBE
# 01 .18 _ P
SYSTEM STEAM
COOKING
#01.12_P
RAPID
HEAT UP
# 01 .14 _ P
TOP-/ BOTTOM
HEAT EC O
#01.08_P
CENTRE-AREA
GRILL
#01.07_ P G
FULL S URFACE
GRILL
#01.33_P
SABBATH
GRILL, SMALL AREA 50°–290°CFor grilling small amounts of steaks or sausages, for making toast, and for au gratin
dishes. The centre area under the grill heating element becomes hot.
#05.31_P
AD D FAVOURITE
DRINK
#01.45 _ P
CIRCOTHERM
ECO
#01.03_P
PIZZA SETTING
#01.04_P
BREAD BAKING
# 01 .16 _ P
DEFROST
SETTING
#01.02_P
TOP-/ BOTTOM
HEAT
#01.0 5 _ P
BOTTOM HEAT
#01.07_ P G
FULL SU RFACE
GRILL
#01.0 8 _ P
CENTRE-AREA
GRILL
#01.0 6 _ P
CIRCO-
ROASTING
#00.22_P
DECALCIFY
# 01 .11_ P
DOUGH
PROVING
# 01 .17_ P
SPEISEN
WARMING 3
#01.0 9_ P
GENTLE
COOKING
#01.01_ P
CIRCOTHERM
#01.31_ P
OVEN
CLEANING ??
#01.28 _ P
PR EH EATING
DISHES
#01.29_P
PYROLYTIC
SELFCLEAN
#01. 27_ P
REHEAT
# 01 .10 _ P
STEAM COOKING
#01.32_P
EASYCLEAN
#01.30 _ P
ECOLYSIS
#01.76 _P
BOTTOM-
CLEAN
#01.13_P
STEAM ASSIST
VARIO STEAM
# 01 .10 _ P
STEAM COOKING
FULL STEAM
#01.73_P
BAKE ASSISTANT
#01.75 _ P
CORE
TEMPERATURE
MEAT PROBE
# 01 .18 _ P
SYSTEM STEAM
COOKING
#01.12_ P
RAPID
HEAT UP
# 01 .14 _ P
TOP-/ BOTTOM
HEAT ECO
#01.0 8 _ P
CENTRE-AREA
GRILL
#01.07_ P G
FULL SU RFACE
GRILL
#01.33_P
SABBATH
BOTTOM HEAT 50°–250°CFor cooking in a bain marie and for the nal baking stage. The heat is emitted from
below.
#05.31_ P
AD D FAVO URITE
DRINK
#01.45_P
CIRCOTHERM
ECO
#01.03_P
PIZZA SETTING
#01.04_P
BREAD BAKING
# 01 .16 _ P
DEFROST
SETTING
#01.02_P
TOP-/ BOTTOM
HEAT
#01.05_P
BOTTOM HEAT
#01.07_ P G
FULL S URFACE
GRILL
#01.08_P
CENTRE-AREA
GRILL
#01.0 6_P
CIRCO-
ROASTING
#00.22_P
DECALCIFY
# 01 .11_ P
DOUGH
PROVING
# 01 .17_ P
SPEISEN
WARMING 3
#01.09_P
GENTLE
COOKING
#01.01_ P
CIRCOTHERM
#01.31_P
OVEN
CLEANING ??
#01.28_P
PR E HE ATING
DISHES
#01.29_P
PYROLYTIC
SELFCLEAN
#01.27_P
REH E AT
# 01 .10 _ P
STEAM COOKING
#01.32_P
EASYCLEAN
#01.3 0_P
ECOLYSIS
#01.76 _P
BOTTOM-
CLEAN
#01.13_P
STEAM ASSIST
VARIO STEAM
# 01 .10 _ P
STEAM COOKING
FULL STEAM
#01.73_P
BA K E A S SISTANT
#01.75_P
CORE
TEMPERATURE
MEAT PROBE
# 01 .18 _ P
SYSTEM STEAM
COOKING
#01.12_P
RAPID
HEAT UP
# 01 .14 _ P
TOP-/ BOTTOM
HEAT EC O
#01.08_P
CENTRE-AREA
GRILL
#01.07_ P G
FULL S URFACE
GRILL
#01.33_P
SABBATH
SLOW COOK 70°–12 0 °CFor gentle and slow cooking of seared, tender pieces of meat in ovenware without a
lid.
The heat is emitted evenly from the top and bottom at low temperatures.
#05.31_ P
AD D FAVO URITE
DRINK
#01.45_P
CIRCOTHERM
ECO
#01.03_P
PIZZA SETTING
#01.04_P
BREAD BAKING
# 01 .16 _ P
DEFROST
SETTING
#01.02_P
TOP-/ BOTTOM
HEAT
#01.05_P
BOTTOM HEAT
#01.07_ P G
FULL S URFACE
GRILL
#01.08_P
CENTRE-AREA
GRILL
#01.0 6_P
CIRCO-
ROASTING
#00.22_P
DECALCIFY
# 01 .11_ P
DOUGH
PROVING
# 01 .17_ P
SPEISEN
WARMING 3
#01.09_P
GENTLE
COOKING
#01.01_ P
CIRCOTHERM
#01.31_P
OVEN
CLEANING ??
#01.28_P
PR E HE ATING
DISHES
#01.29_P
PYROLYTIC
SELFCLEAN
#01.27_P
REH E AT
# 01 .10 _ P
STEAM COOKING
#01.32_P
EASYCLEAN
#01.3 0_P
ECOLYSIS
#01.76 _P
BOTTOM-
CLEAN
#01.13_P
STEAM ASSIST
VARIO STEAM
# 01 .10 _ P
STEAM COOKING
FULL STEAM
#01.73_P
BA K E A S SISTANT
#01.75_P
CORE
TEMPERATURE
MEAT PROBE
# 01 .18 _ P
SYSTEM STEAM
COOKING
#01.12_P
RAPID
HEAT UP
# 01 .14 _ P
TOP-/ BOTTOM
HEAT EC O
#01.08_P
CENTRE-AREA
GRILL
#01.07_ P G
FULL S URFACE
GRILL
#01.33_P
SABBATH
BREAD BAKING* 180°–240°CFor baking bread, bread rolls and baked items that require high temperatures. Yes
#05.31_ P
AD D FAVO URITE
DRINK
#01.45_P
CIRCOTHERM
ECO
#01.03_P
PIZZA SETTING
#01.04_P
BREAD BAKING
# 01 .16 _ P
DEFROST
SETTING
#01.02_P
TOP-/ BOTTOM
HEAT
#01.05_P
BOTTOM HEAT
#01.07_ P G
FULL S URFACE
GRILL
#01.08_P
CENTRE-AREA
GRILL
#01.0 6_P
CIRCO-
ROASTING
#00.22_P
DECALCIFY
# 01 .11_ P
DOUGH
PROVING
# 01 .17_ P
SPEISEN
WARMING 3
#01.09_P
GENTLE
COOKING
#01.01_ P
CIRCOTHERM
#01.31_P
OVEN
CLEANING ??
#01.28_P
PR E HE ATING
DISHES
#01.29_P
PYROLYTIC
SELFCLEAN
#01.27_P
REH E AT
# 01 .10 _ P
STEAM COOKING
#01.32_P
EASYCLEAN
#01.3 0_P
ECOLYSIS
#01.76 _P
BOTTOM-
CLEAN
#01.13_P
STEAM ASSIST
VARIO STEAM
# 01 .10 _ P
STEAM COOKING
FULL STEAM
#01.73_P
BA K E A S SISTANT
#01.75_P
CORE
TEMPERATURE
MEAT PROBE
# 01 .18 _ P
SYSTEM STEAM
COOKING
#01.12_P
RAPID
HEAT UP
# 01 .14 _ P
TOP-/ BOTTOM
HEAT EC O
#01.08_P
CENTRE-AREA
GRILL
#01.07_ P G
FULL S URFACE
GRILL
#01.33_P
SABBATH
KEEP WARM* 60°–10 0 °CFor keeping cooked food warm. Yes
#05.31_ P
AD D FAVO URITE
DRINK
#01.45_P
CIRCOTHERM
ECO
#01.03_P
PIZZA SETTING
#01.04_P
BREAD BAKING
# 01 .16 _ P
DEFROST
SETTING
#01.02_P
TOP-/ BOTTOM
HEAT
#01.05_P
BOTTOM HEAT
#01.07_ P G
FULL S URFACE
GRILL
#01.08_P
CENTRE-AREA
GRILL
#01.0 6_P
CIRCO-
ROASTING
#00.22_P
DECALCIFY
# 01 .11_ P
DOUGH
PROVING
# 01 .17_ P
SPEISEN
WARMING 3
#01.09_P
GENTLE
COOKING
#01.01_ P
CIRCOTHERM
#01.31_P
OVEN
CLEANING ??
#01.28_P
PR E HE ATING
DISHES
#01.29_P
PYROLYTIC
SELFCLEAN
#01.27_P
REH E AT
# 01 .10 _ P
STEAM COOKING
#01.32_P
EASYCLEAN
#01.3 0_P
ECOLYSIS
#01.76 _P
BOTTOM-
CLEAN
#01.13_P
STEAM ASSIST
VARIO STEAM
# 01 .10 _ P
STEAM COOKING
FULL STEAM
#01.73_P
BA K E A S SISTANT
#01.75_P
CORE
TEMPERATURE
MEAT PROBE
# 01 .18 _ P
SYSTEM STEAM
COOKING
#01.12_P
RAPID
HEAT UP
# 01 .14 _ P
TOP-/ BOTTOM
HEAT EC O
#01.08_P
CENTRE-AREA
GRILL
#01.07_ P G
FULL S URFACE
GRILL
#01.33_P
SABBATH
REHEAT** 80°–180°C For gently reheating food or for crisping up pastries.
#05.31_ P
AD D FAVO URITE
DRINK
#01.45_P
CIRCOTHERM
ECO
#01.03_P
PIZZA SETTING
#01.04_P
BREAD BAKING
# 01 .16 _ P
DEFROST
SETTING
#01.02_P
TOP-/ BOTTOM
HEAT
#01.05_P
BOTTOM HEAT
#01.07_ P G
FULL S URFACE
GRILL
#01.08_P
CENTRE-AREA
GRILL
#01.0 6_P
CIRCO-
ROASTING
#00.22_P
DECALCIFY
# 01 .11_ P
DOUGH
PROVING
# 01 .17_ P
SPEISEN
WARMING 3
#01.09_P
GENTLE
COOKING
#01.01_ P
CIRCOTHERM
#01.31_P
OVEN
CLEANING ??
#01.28_P
PR E HE ATING
DISHES
#01.29_P
PYROLYTIC
SELFCLEAN
#01.27_P
REH E AT
# 01 .10 _ P
STEAM COOKING
#01.32_P
EASYCLEAN
#01.3 0_P
ECOLYSIS
#01.76 _P
BOTTOM-
CLEAN
#01.13_P
STEAM ASSIST
VARIO STEAM
# 01 .10 _ P
STEAM COOKING
FULL STEAM
#01.73_P
BA K E A S SISTANT
#01.75_P
CORE
TEMPERATURE
MEAT PROBE
# 01 .18 _ P
SYSTEM STEAM
COOKING
#01.12_P
RAPID
HEAT UP
# 01 .14 _ P
TOP-/ BOTTOM
HEAT EC O
#01.08_P
CENTRE-AREA
GRILL
#01.07_ P G
FULL S URFACE
GRILL
#01.33_P
SABBATH
DOUGH PROVING** 2 Settings For proving dough and culturing yoghurt. Dough will prove more quickly than at room
temperature. The surface of the dough will not dry out.
Common Dishes & Recommended Settings For Your Oven
Dish Recommended settings Alternative settings
ROAST MEAT & VEGETABLES (MULTIPLE TRAYS)
e.g. 1 tray meat/poultry and 1 tray vegetables CircoTherm® 180°–200°C
Low – Med VarioSteam
CircoTherm® 180°–200°C
ROAST MEAT & VEGETABLES (SINGLE TRAY)
e.g. 1 tray meat/poultry and vegetables CircoRoasting 180°–200°C
Low – Med VarioSteam
CircoRoasting 180°–200°C
ROAST VEGETABLES CircoTherm® 185°C
Low – Med VarioSteam
CircoTherm® 185°C
LAMB SHANKS Top/Bottom heat Eco 140°C CircoTherm® Eco 140°C
LASAGNE Top/Bottom heat 160°–180°C
High VarioSteam
Top/Bottom heat 160°–180°C
or CircoTherm® 160°–180°C
QUICHE CircoTherm® Intensive /
Pizza Setting 180°–190°C
(no blind baking required)
CircoTherm® 160°–180°C
(blind baking required)
SAUSAGE ROLLS CircoTherm® 190°–200°C
Low – Med VarioSteam
CircoTherm® 190°–200°C
BREAD Bread Baking 190°C
High VarioSteam
Bread Baking 190°C
SPONGE CAKE CircoTherm® 160°–170°C Top/Bottom heat 180°–190°C
MUD CAKE Top/Bottom heat 140°–160°C
Low VarioSteam
Top/Bottom heat 140°–160°C
FRUIT CAKE CircoTherm® 140°–150°C
Low – Med VarioSteam
Top/Bottom heat 140°–150°C
COOKIES CircoTherm® 160°–170°C
CUPCAKES CircoTherm® 160°–180°C
Low – Med VarioSteam
Top/Bottom heat 180°C
LEMON TART CircoTherm® Intensive /
Pizza Setting 160°C
(no blind baking required)
CircoTherm® Intensive /
Pizza Setting 160°C
(blind baking required)
CircoTherm® 130°C (lling)
**VarioSteam heating function where VarioSteam is automatically added on selected models.

Visit theneffkitchen.com.au
For NEFF recipes & product how-to videos
Table of contents
Other NEFF Oven manuals

NEFF
NEFF U1744 User manual

NEFF
NEFF B8732.0 User manual

NEFF
NEFF C17MR02N0B Operating and maintenance instructions

NEFF
NEFF B45C52.3GB User manual

NEFF
NEFF B56CT64.0 User manual

NEFF
NEFF B1432 User manual

NEFF
NEFF B47FS26G0 User manual

NEFF
NEFF U1GCC0A.0B User manual

NEFF
NEFF B1GCD4J 0 Series User manual

NEFF
NEFF U1863N2GB Safety guide

NEFF
NEFF B48FT78.0B User manual

NEFF
NEFF B59FS3A 0 Series User manual

NEFF
NEFF B2ACH7H.0B User manual

NEFF
NEFF U15E52.3GB User manual

NEFF
NEFF B47VR32.0B User manual

NEFF
NEFF C28CT26 0B Series User manual

NEFF
NEFF B1ACC2A 0 Series User manual

NEFF
NEFF B64CS71 0B Series Specification sheet

NEFF
NEFF B46W74N0GB User manual

NEFF
NEFF B1432A2GB Safety guide