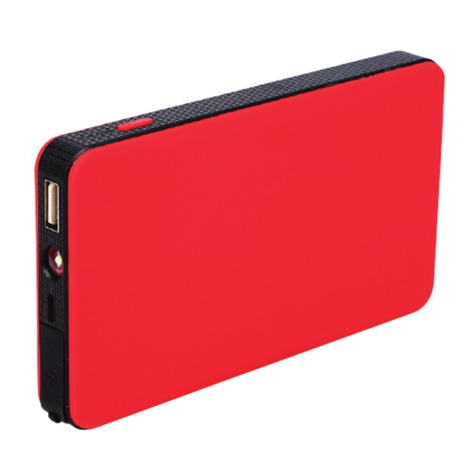
Neilsen CT4840 User manual

Failure to follow instructions may
cause damage or explosion,
always shield eyes. Read entire
instruction manual before use.
WARNING
WARNING: This product can expose you to chemicals
including Vinyl-Chloride, Styrene and Acrylonitrile,
which may cause cancer and birth defects or
other reproductive harm. Wash hands after handling.
To reduce risk of fire or burns, do not disassemble,
crush, puncture, short external contacts, or dispose
of in fire or water.
Multi-function Jump Starter & Work Light
CT4840
ORIGINAL INSTRUCTIONS
Cannon Tools Limited
Address: 20 Station Road, Rowley Regis, West Midlands, B65 0JU.U.K.

EC DECLARATION OF CONFORMITY
We CANNON TOOLS LTD
20 Station road, Rowley Regis, West Midlands,B65 0JU.U.K.
Declare that the following machine complies with the appropriate
basic safety and health requirements of the EC Directive based
on its design and type, as brought into circulation by us.
In case of alteration of the machine, not agreed upon by us,
this declaration will lose its validity.
Product description:
Model:
Applicable EC Directives:
EC-EMC Directive 2014/30/EU
Harmonized standards
EN 55032 EN 61000-3-2 EN 61000-3-3 EN55024:2010+A1
20 Station Road, Rowley Regis, West Midlands, B65 0JU.U.K.
Mr. Gurcharan Tony Singh Sanghera
Managing Director
CANNON TOOLS LTD
Multi-function Jump Starter & Working Light
CT4840
2018-04-17
1

2
This unit has a sealed lithium-based battery that should be kept at full charge.
Recharge when first received, immediately after each use, and every three months
if not used. Failure to perform maintenance charges may cause the battery life to be
reduced.
WARNING
Read these instructions completely before using the POWERLIGHT RESCUE and save them
for future reference. Before using the POWERLIGHT RESCUE to jump start a car, truck, boat
or to power any equipment, read these instructions and the instruction manual/safety
information provided by the car, truck, boat or equipment manufacturer. Following all
manufacturers’ instructions and safety procedures will reduce the risk of accident.
Working around lead-acid batteries may be dangerous. Vehicle lead-acid batteries release
explosive gases during normal operation, charging and jump starting. Carefully read and
follow these instructions for safe use. Always follow the specic instructions in this manual
and on the POWERLIGHT RESCUE each time you jump start using the POWERLIGHT
RESCUE. All lead-acid batteries (car, truck and boat) produce hydrogen gas which may
violently explode in the presence of re or sparks. Do not smoke, use matches or a
cigarette lighter while near batteries. Do not handle the battery while wearing vinyl clothing
because static electricity sparks are generated when vinyl clothing is rubbed. Review all
cautionary material on the POWERLIGHT RESCUE and in the engine compartment.
Always wear eye protection, appropriate protective clothing and other safety equipment when
working near lead-acid batteries. Do not touch eyes while working on or around lead-acid
batteries.
When not using the unit to jump start, remove and properly store output cables. Leaving
clamps connected and improperly storing the unit may cause the clamps to come into
contact with each other or a common conductor, causing the battery to short and generating
high enough heat to ignite most materials.
Use extreme care while working within the engine compartment, because moving parts may
cause severe injury. Read and follow all safety instructions published in the vehicle's Owner's
Manual.
While the battery in the POWERLIGHT RESCUE is a sealed unit with no free liquid acid,
batteries being jump started with the POWERLIGHT RESCUE unit likely contain liquid acids
which are hazardous if spilled.
Failure to follow instructions may
cause damage or explosion,
always shield eyes. Read entire
instruction manual before use.
WARNING
WARNING: The POWERLIGHT RESCUE should only be used as a
jump starter with the supplied Safety Cable. NEVER use an alternate
cable when jump starting with the POWERLIGHT RESCUE.
!

3
SAFETY SUMMARY
LITHIUM BATTERY HAZARDS
Lithium batteries are very energy dense and provide a high level of power to their
respective applications. Care must be taken to properly manage all lithium batteries
in their use, charging and storage to ensure safety for the operator and equipment
serviced.
All rechargeable lithium batteries are potentially hazardous and can present a serious
FIRE HAZARD if damaged or improperly used. A fire is most likely to occur during the
charging process under the following circumstances:
a. THE BATTERY HAS BEEN FULLY DISCHARGED AND IS NOT
RECHARGED SHORTLY AFTERWARD. Lithium batteries should be recharged
within 24 hours of use, particularly if fully or near fully discharged.
b. CHARGING IS ATTEMPTED AT TEMPERATURES BELOW 40°F (4°C).
Charging below 40°F (4°C), causes a chemical reaction in the battery cells that
can cause permanent damage and the possibility of fire or explosion during
charging.
c. THE BATTERY HAS BEEN EXPOSED TO LIQUIDS, ESPECIALLY
SALTWATER. Exposure to liquids can cause internal corrosion or damage
to the cells or to the internal Battery Management System (BMS). The BMS
protects the battery from overcharging, high self-discharge or imbalanced
charging of the cells, any of which can present the possibility of fire during
recharging.
d. OPERATING OR CHARGING A BATTERY THAT HAS BEEN DAMAGED
FROM DROPPING OR FROM SHIPPING DAMAGE. If your unit has a crack
on the outer case, it should not be charged, as it may may contain a damaged
battery.
e. USING A CHARGER OTHER THAN SPECIFICALLY DESIGNATED FOR THE
PARTICULAR BATTERY. Each battery wall charger provides charging voltage,
current and charge control parameters specific to that particular wall charger.
The specific parameters of the wall charger provided with your unit exactly meet
the charging requirements of its internal battery. These could be very different
from other lithium battery wall chargers and are certainly different than chargers
for use with SLA, NiCd, NiMH, or other rechargeable batteries. Never use a
charger other than the one provided with your unit – this could present a serious
fire risk.

4
PERSONAL PRECAUTIONS
Someone should always be within range of your voice or close enough to come to your
aid when you work near a lead-acid battery.
Have plenty of fresh water and soap nearby in case battery acid contacts skin, clothing
or eyes. Protective eyewear should always be worn when working near
lead-acid batteries.
If battery acid contacts skin or clothing, wash immediately with soap and water. If acid
enters eye, immediately flood eye with running cold water for at least 10 minutes and
get medical attention immediately.
Be extra cautious to reduce risk of dropping a metal tool onto a battery. It might spark
or short circuit the battery or another electrical part that may cause explosion.
Remove personal metal items such as rings, bracelets, necklaces and watches when
working with a lead-acid battery. A lead-acid battery can produce a short-circuit current
high enough to weld a ring or the like to metal, causing a severe burn.
Use the POWERLIGHT RESCUE for jump starting lead-acid batteries only. Do not use
for charging dry-cell batteries that are commonly used with home appliances. These
batteries may burst and cause injury to persons and damage to property.
NEVER charge or jump start a frozen battery.
To prevent arcing, NEVER allow clamps to touch together or to contact the same piece
of metal.
IMPORTANT SAFETY INSTRUCTIONS
Use of an attachment not recommended or sold by the manufacturer may result in a
risk of damage to the unit or injury to personnel.
When using the wall charger or power extension cord, pull on the plug and never on
the wire when disconnecting.
Do not recharge the POWERLIGHT RESCUE with a damaged wall charger or power
extension cord. Replace them immediately.
The POWERLIGHT RESCUE may be used under any weather condition – rain, snow,
hot or cold temperatures. Do not charge the POWERLIGHT RESCUE in temperatures
below 40˚F (4˚C).
Do not submerge in water.
Do not operate with flammables such as gasoline, etc.
If the POWERLIGHT RESCUE receives a sharp blow or is otherwise damaged in any
way, have it checked by a qualified service person. If the POWERLIGHT RESCUE is
leaking battery acid, do not ship it. Take it to the closest battery recycler in your area.
Do not disassemble the POWERLIGHT RESCUE. Have it checked by a qualified
service person.
The POWERLIGHT RESCUE should never be left in a completely discharged state for
any period of time. Damage to the battery could be permanent, with poor performance
as a result. When not in use, recharge every three (3) months.

5
OPERATION AND MAINTENANCE
POWERLIGHT RESCUE Operating and Safety Features
The POWERLIGHT RESCUE is an ideal power supply for powering and/or recharging
small electronics connected through its USB power ports. With 12000 mAh of power, it
can recharge multiple devices on a single charge.
The POWERLIGHT RESCUE can serve as a vehicle jump starter when the included
output cables and clamps are connected through the 12V cable port. It is designed to
jump start vehicles of all shapes and sizes up to a V8 gasoline engine.
The POWERLIGHT RESCUE features a variety of safety features, including reverse
polarity protection, backfeed protection, short circuit protection, over voltage protection
and under voltage protection to make jump starting safe and hassle free.
The POWERLIGHT RESCUE also features multifunctional work light capabilities. It can
be deployed as a 480 lumen work light, a 3W focus beam light, a 3W SOS emergency
light, a red warning light or a red blinking warning light.
CHARGE STATUS AND RECHARGING PROCEDURES
Note: Upon initial purchase, your POWERLIGHT RESCUE should be charged for a
minimum of 6 hours.
Charge Status Indication
Press the Power Button on the front of the unit one time to see the unit’s state of
charge. The unit’s state of charge status is indicated by four LED indicators below the
Power Button, as follows:
One Blue Status LED = Recharge Immediately
Two Blue Status LEDs = 25-50% Charge – Charge soon
Three Blue Status LEDs = 50-75% Charge – Charge if using as a jump starter
Four Blue Status LEDs = At or near full charge
It is recommended that the unit be at or near 100% state of charge when using as a
jump starter. This will greatly improve your odds of success.

6
Recharging Your POWERLIGHT RESCUE
Charging via the included AC adapter.
Never use any other charger than the one provide with the unit. Use of another
charger can damage the internal Lithium battery, which could result in fire.
1. Connect the pin jack at the end of the AC adapter cord to the POWERLIGHT
RESCUE through the input port marked “AC IN.”
2.
Connect the male end of the AC adapter to the AC outlet.
3. Using this method, the unit will be brought to full charge automatically without
overcharging. It can remain connected to AC power without adverse effect.
Note: The blue status LEDs will turn on successively to indicate charging progress.
When all blue LEDs are lit solid, the unit has reached full charge.
OPERATING INSTRUCTIONS
Used as a 12 Volt Jump Starter
WARNING: The POWERLIGHT RESCUE should only be used as a jump
starter with the supplied Safety Cable. NEVER use an alternate cable when
jump starting with the POWERLIGHT RESCUE.
Note: For optimal performance, do not store your POWERLIGHT RESCUE below 50°F
when using as a jump starter. Never charge or jump start a frozen battery.
Note: When using as a jump starter, make sure that the unit is charged such that the
unit’s Status Display shows 4 blue LEDs when the Power Button is depressed.
1. Use in a well ventilated area.
2. Shield eyes. Always wear protective eyewear when working near batteries.
3. Review this instruction manual and the instruction/safety manual provided by the
manufacturer of the vehicle being jump started.
4. Connect the smart cable/clamp set to the POWERLIGHT RESCUE through the
covered port on the side of the unit. Be sure that the cable connection is fully
engaged and secure. Upon connection, the smart cable will beep and flash all
LEDs as it does its safety check. It will then light a flashing blue LED, indicating
the unit is in standby mode.
5. Turn ignition off before making vehicle connections.
6. Clamp the positive (red +) clamp to the positive terminal on the vehicle battery (for
negative ground system), or an alternate vehicle starting point as recommended
by vehicle manufacturer.
!

7
7. Clamp the negative (black –) clamp to the vehicle frame (ground).
Note: Make sure the cables are not in the path of moving engine parts (belts,
fans, etc.).
8. Once connected, the smart cable/clamp will provide an assessment of the
connection.
8a. If the smart cable/clamp lights solid green, the battery to be jumped in the
normal range. You have 30 seconds in which to start the vehicle or the unit will
return to standby mode.
8b. If the smart cable/clamp lights red and a warning buzzer sounds, this indicates
a reverse connection. Disconnect from vehicle immediately and properly
connect to vehicle. This condition cannot be overridden.
8c. If proper connection has been made, but the vehicle battery is below 10VDC,
the red LED will beep. If you check that all connections are correct, you can
circumvent this protection by depressing the Override Button for 4 seconds
on the side of the smart cable clamp box. The Green Status LED should now
light. You have 30 seconds in which to start the vehicle or the unit will return to
standby mode.
9. Stay clear of batteries while jump starting.
10. Start the vehicle (turn on the vehicle ignition).
Note: If the vehicle doesn’t start within 6 seconds, let the POWERLIGHT
RESCUE cool for 3 minutes before attempting to start the vehicle again or you
may damage the POWERLIGHT RESCUE.
Note: During very cold conditions, the unit may not start on the first attempt. We
suggest attempting to start a second or third time, as the starting attempt will
warm the internal battery and improve your starting chances. Do not attempt to
jump start after four attempts – either the unit does not have sufficient power
to start the vehicle or there is a more extensive problem with the vehicle than
simply a depleted battery.
11. When the vehicle is started, the smart cable/clamp will show a solid blue LED
and the warning buzzer will beep for a short period.
12. Disconnect the negative (–) battery clamp from the vehicle frame.
13. Disconnect the positive (+) clamp.
14. Disconnect smart cables/clamps from the PowerLight RESCUE and properly
store them for the next use.

8
Used as a USB Power Supply
Your POWERLIGHT RESCUE can be used to power or recharge a wide variety of small
electronic devices.
1. Connect your device’s charging cable to the device.
2.
Connect the USB end of the charging cable into a POWERLIGHT RESCUE USB
port.
3. Press the Power Button to activate USB charging.
Used as a WorkLight
The POWERLIGHT RESCUE features several different work light modes. The
sequence below explains how the unit cycles through each of these modes:
1. First Power Button press turns the unit ON, activating the USB ports and battery
status panel.
2. Second press turns ON the primary work light.
3. Third press turns ON solid red warning light.
4. Fourth press turns ON flashing red warning light.
5. Fifth press turns ON focus beam light.
6. Sixth press turns ON focus beam light SOS signal.
7. Seventh press turns entire unit OFF.
Note: While in any of the above work light modes, you can turn the unit OFF by
pressing and holding the Power Button for four seconds. You will see the battery status
panel turn OFF at that time.

9
TROUBLESHOOTING
Problem: I charged the unit when the LED indicated it was low, but after several
hours, there is no change in status.
Answer: Suspect a faulty charger.
Problem: While charging, the four blue status LEDs light to indicate full charge
has been reached. But, when the unit is removed from the charger and
Power Button pressed, the status LEDs indicate a low or completely dead
battery.
Answer: Suspect a battery problem.
QUESTIONS & ANSWERS
Question: How many jump starts can a fully charged POWERLIGHT RESCUE
provide before needing to be recharged?
Answer: 1 to 8. Factors impacting this are temperature, general condition of the
vehicle being jump started, engine type and size.
Question: Can the battery in the POWERLIGHT RESCUE be replaced?
Answer: No, the battery connections inside the POWERLIGHT RESCUE make it
impossible to replace the battery.
Question: What is the ideal in-use temperature for the POWERLIGHT RESCUE?
Answer: Room temperature. The POWERLIGHT RESCUE will also operate at
low and high temperatures, however its capacity will be reduced. For
instance, high heat will increase self-discharge of the POWERLIGHT
RESCUE battery.
Question: I have a regular 10 amp battery charger, can I use it to recharge the
POWERLIGHT RESCUE?
Answer: No, only the supplied AC adapter should be used.
Question: Is the POWERLIGHT RESCUE goof proof?
Answer: No, jump starting instructions must be followed. Read and understand
all safety and operating instructions in this manual and those found in
the owner’s manual of any vehicle being jump started before using your
POWERLIGHT RESCUE.
Question: How long should I charge the POWERLIGHT RESCUE?
Answer: It should be charged for a minimum of 6 hours when new. When
recharging, the POWERLIGHT RESCUE should be charged until full
charge is indicated.
Question: How often should I charge the POWERLIGHT RESCUE?
Answer: It should be charged whenever the status LED indicates the unit is low
and after every use. Otherwise, it should be charged every 90 days.

10
DISPOSAL INSTRUCTIONS
Contains Lithium-based battery.
Must be recycled/disposed of properly.
The battery inside your POWERLIGHT RESCUE is a lithium-based battery and should
be recycled or disposed of properly, as you would any electronic device containing
an advanced technology battery. It is your responsibility to recycle or dispose of your
POWERLIGHT RESCUE in accordance with your specific local, regional and national
requirements.
WARRANTY
This warranty extends to each person who acquires lawful ownership within one year
of the original retail purchase, but is void if the product has been abused, altered,
misused or improperly packaged and damaged when returned for repair.
This warranty applies to the product only and does not apply to any accessory items
included with the product which are subject to wear from usage; the replacement or
repair of these items shall be at the expense of the owner.
This product is warranted to be free from defects in material or workmanship for
a period of one year from the date of original end user purchase.
Cannon Tools Limited
Address: 20 Station Road, Rowley Regis, West Midlands, B65 0JU.U.K.
Made in China
Table of contents
Popular Remote Starter manuals by other brands

Best Power
Best Power TOPDON VOLCANO 2000 quick start guide

Chicago Electric
Chicago Electric 8884 Set up and operating instructions

Subaru
Subaru H001SSG400 installation instructions

Osram
Osram BATTERYstart 700 PRO instructions

Mazda
Mazda Remote Start System MPV owner's manual

ADS
ADS OL-RS-HA6 install guide

Black Widow Security
Black Widow Security BW 752 installation manual

Schumacher Electric
Schumacher Electric BE01255 owner's manual

Audiovox
Audiovox AS-9055 installation instructions

Hamron
Hamron 002-832 operating instructions

Voxx
Voxx PRO9056TWE Pursuit Series owner's manual

Fortin
Fortin FSA-206 user guide