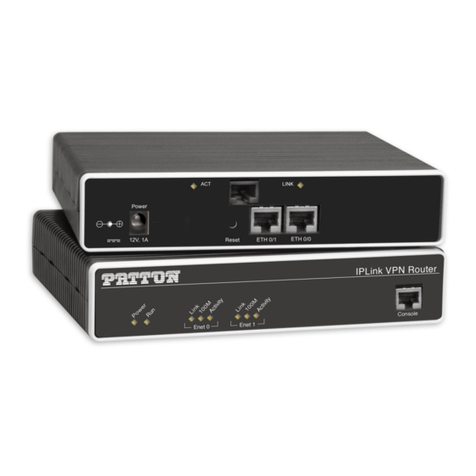
NetSwitch MASTER User manual

NetSwitch Master
User’s Manual
Version 2.0

- i -
Table of Contents
Chapter 1: Introducing NetSwitch Master .............................................................. 1
1.1 Contents of Your NetSwitch Master Package .............................................................. 1
1.2 NetSwitch Master Features ......................................................................................... 2
Chapter 2: Hardware Setup ..................................................................................... 3
2.1 Basic Connection ........................................................................................................ 3
2.2 Hardware Installation Procedure ................................................................................. 3
2.3 Daisy Chain Setup Procedure ..................................................................................... 4
Chapter 3: Setup Netility .......................................................................................... 6
3.1 Installing Netility .......................................................................................................... 6
3.2 Using Netility for IP Configurations .............................................................................. 6
3.2.1Configure ............................................................................................................... 7
Chapter 4: NetSwitch Master Web Management ................................................. 10
4.1 Introduction ............................................................................................................... 10
4.2 Control Management ................................................................................................. 10
4.2.1 Information .......................................................................................................... 11
4.2.2 Configuration ....................................................................................................... 13
4.2.3 Log Information ................................................................................................ 29
4.2.4 Help ................................................................................................................. 30
Chapter 5: Connected Device ............................................................................... 32
5.1 Environment Monitor, ENV ........................................................................................ 32
Chapter 6: Remote Monitoring Using Telnet ........................................................ 34
6.1 Accessing NetSwitch Master using Telnet.................................................................. 34
6.2 Control and Setup NETSWITCH MASTER using Telnet ............................................ 34
Chapter 7: The Outlook of NetSwitch Master Panels .......................................... 36
7.1 NetSwitch Master Front and Back Panels ................................................................. 36
7.2 NetSwitch Master LED Table ..................................................................................... 36
7.3 SNMP LED Table ...................................................................................................... 37
Chapter 8: Accessing NetSwitch Master using a Telephone .............................. 38
Appendix A: Frequently Asked Questions ........................................................... 40

- 1 -
Chapter 1: Introducing NetSwitch Master
The Netswitch Master is an Internet ready device designed to allow administrators to
remotely and individually control the AC power for up to eight connected devices,
such as: servers, routers, modems and telephone networks. Moreover, user is able
to pre-configure to turn on/off specific outlet when a UPS or NetFeeler II event
occurs or resolved. With the expandable function of allowing daisy chaining
(cascading) of up to 16 client units, administrators can control a total of 128 devices.
NetSwitch Master offers easy set up and user-friendly communication and control
methods. Most common connection of all is via the LAN using normal Ethernet
connection. Once connected and properly set up, the administrator will be notified of
a web IP address and the administrator can manage the power of the devices from
anywhere in the world via the web browser.
The superiority of the NetSwitch Master over other power management products is
NetSwitch Master gives you control through a telephone (tone signals) with no need
of a modem connection. So even if networks lock up or Internet crashes, there is
always a back up telephone control option for administrators to control devices. With
such powerful features, administrators can be sure that they will always gain access
to their devices no matter where they are in the world.
1.1 Contents of Your NetSwitch Master Package
The standard NetSwitch Master package contains the following with supporting
hardware and software. The components of your package are:
1. NetSwitch Master Unit
2. Rack mount Brackets
3. 1 piece of AC Power Cord.
4. 8 pieces of RJ-11 to RS232 NT Server Cables: For PC communication.
(Optional)
5. 1 piece RJ-11 Cascade Cable: For NetSwitch Master daisy chain.
6. CD-ROM
a. Netility for Windows: Configure SNMP card’s IP address and
upgrade firmware.
b. SNMP MIB: Management Information Base for Network.
c. User Manual: NetSwitch Master User’s Manual Rev.2.0

- 2 -
1.2 NetSwitch Master Features
Turn On/Off/Reset any or all NetSwitch outlets via network GUI, phone or
manually on site..
Equipped with master switch and protected by circuit breaker.
Daisy- chain 16 units to control a total of 128 outlets.
Set sequential or scheduled power on/off/reset to each outlet.
Connect to compatible UPS for real-time remote monitoring, management &
control and to perform UPS self-tests
Add on NetFeeler II to monitor temperature, humidity, water presence, smoke,
PIR, security and other RF sensors.
Turn on/off outlet when a UPS or NetFeeler II event occurs or resolved.
Perform safe shutdown to allow software time to save & exit and safe reboot to
avoid overloading mains.
Event notification ia e-mail, SMS or trap.
Support multi-user management, event logs and data log downloads.
Support USB WiFi 802.11b/g and USB flash disk, GPRS modem
Centralized authentication by Radius.
Support advance encryption: Https, SSL, SSH, SNMPv3
Perform multiple PC shutdown using ClientMate when AC fails or battery low.
Available in 115VAC and 230VAC

- 3 -
Chapter 2: Hardware Setup
This section will guide you through the quick installation of the NetSwitch Master
2.1 Basic Connection
2.2 Hardware Installation Procedure
1. Install mounting brackets.
2. The NetSwitch Master comes with brackets for mounting in a standard 19-inch
rack. To mount the NetSwitch Master into a rack perform the following procedure:
3. Attach the mounting brackets to the unit as shown, using the four retaining
screws provided for each of the brackets.
4. Choose a location for the brackets. A notched hole on the vertical rail denotes
the middle of a U slot.
5. Align the mounting holes of brackets with the notched hole on the vertical rail and
attach with the retaining screws.
6. If installing more than one NetSwitch Master, repeat process 3 -5.
7. Connect all input and output connectors. (Refer to section 5.0 for daisy chain
configuration)
8. Connect Ethernet cable to NetSwitch Master.
9. Program the IP address using Netility. (Refer to section 6.0 for IP configuration).
10. Set NetSwitch Master’s front control buttons for Internet/remote on manually
control. (Please check LED Table for the operation)
11. Use browser to monitor and control.
NOTE: NetSwitch Master is only to work with the UPS that supports Megatec Protocol. It connects via
standard USB/USB cable ( UPS with Megatec IC embedded); Or, via Megatec DB9/USB M2905 (pin
2,3,5) or M2902 (pin 6,7,9) cable

- 4 -
2.3 Daisy Chain Setup Procedure
The NetSwitch Master can be Daisy Chained up to a maximum of sixteen units.
Each NetSwitch in the Daisy Chain must have its own unique identification number.
The default ID# is “0 “. The first NetSwitch Master must have the Internet Power
Management Card install and must be configured before you can begin Daisy
Chaining any additional NetSwitch. Only the first NetSwitch Master requires the
Internet Power Management Card. All of the other NetSwitch in the Daisy Chain do
not require that the Internet Power Management Card be installed. Follow the
procedure below to Daisy Chain the NetSwitch
Figure 1 - First NetSwitch Master
1. Make sure that the Terminator is plugged into the first NetSwitch Master Port
(See Figure 1)
2. Plug the first NetSwitch Master
3. Turn the master power switch on.
4. Setup the NetSwitch Master (see Setup Procedure page 9).
5. Configure the first NetSwitch Master’s ID number (each NetSwitch Master must
have it's own unique ID#, the default ID# is "0").
Figure 2 - First and second NetSwitch Master /NetSwitch
6. Make sure that the second NetSwitch has the Terminator plugged into the iLink
port (see Figure 2).
7. Connect the first and second NetSwitch together with the iLink cable.
8. Plug the second NetSwitch power cord into utility power.
9. Turn the master power switch on.
10. Configure the second NetSwitch ID number (each NETSWITCH MASTER must
have it's own unique ID#, the default ID# is "0").
11. If there are only two NetSwitch required for this application, then this completes
the Daisy Chaining procedure and the NetSwitch are ready to use.
12. If your application requires additional NetSwitch then continue on with the Daisy
Chaining procedure.

- 5 -
Figure 3 - First, second and third NetSwitch Master/ NetSwitch
13. Make sure that the third NetSwitch has the Terminator plugged into the iLink port
(see Figure 3).
14. Remove the Terminator from the second NetSwitch
15. Connect the second and third NetSwitch together with the iLink cable.
16. Plug the third NetSwitch power cord into utility power.
17. Turn the master power switch on.
18. Configure the third NetSwitch ID number (each NetSwitch must have it's own
unique ID#, the default ID# is "0").
19. If there are only three NetSwitch required for this application, then this
completes the Daisy Chaining procedure and the NetSwitch are ready for use
20. If your application requires additional NetSwitch (maximum of sixteen), then
repeat steps 13-19 of the Daisy Chaining procedure.

- 6 -
Chapter 3: Setup Netility
3.1 Installing Netility
1. Insert the Utility CD into the CD-ROM driver and execute Netility.exe
2. After installation is completed, ‘Netility’ group will appear in Windows ’Start’
‘Program Group’.
Netility Group
3. Click “Netility” to start the program.
3.2 Using Netility for IP Configurations
The Netility main menu is shown below. The selection menu is located on the left.
The device, hardware, firmware and IP addresses of all NetSwitch Master connected
to the LAN are displayed on the right.
Netility Main Menu
Once Netility starts-up, it will automatically search for the computer’s Network card

- 7 -
3.2.1Configure
Launch Device
Click Launch Device or double click the NetSwitch Master listed in the table to
launch it.
Enter the Account (Login Name) and Password (Login Password) set earlier to
login. If you did not configure one, then just click Apply to login.
Network Settings
Choose the NetSwitch Master from the right of the screen, then click “Configure”,
would shows the following setting page
IP Address:Set IP address for NetSwitch Master
When use at the first time, please set IP address; subnet mask; and gateway. After
setting, enter IP address from Telnet or Browser to connect to NetSwitch Master’s
webpage
Netility Network Configure
When using DHCP or BOOTTP to set up IP address, IP address, Subnet Mask and
Gateway would receive directly by the system.
Advanced:Advanced NetSwitch Master Setting
In order to ensure the secure management, Netility provides two protecting function:
Management Protocol
NetSwitch Master provides HTTP/HTTPS(WEB) and Telnet to reference any related
parameter setting for the manager. Concerning with security, the manager could
build use openly or any advance port setting methods. Followings are the description:
1. At advanced setting, two functions were set as activated by using port number 80
and 23 for Http and Telnet. As for Https and SSH are 443 and 22.
2. Untick means not using the function.

- 8 -
3. When set to the other port value, full IP Address must be entered in order to login
to the website or Telnet.
For example,
Set 81 as HTTP port number, then http://192.168.0.177:81 must be typed
at the web address to proceed to NetSwitch Master’s webpage.
Set 23 as Telnet port number, then "192.168.0.177:24" must be typed at
Telnet to proceed to the Telnet screen of NetSwitch Master
Netility Advanced
Netility Password
After password setting here, there is no way to give any command to NetSwitch
Master by Netility software without user’s password.
Netility Password

- 9 -
Firmware Upgrade
NetSwitch Master offer convenient firmware upgrade function. When you are going
to upgrade firmware, click Download Firmware from NetSwitch Master Setup menu,
click “Browser” select new firmware file (*.bin) and press “Start”. Thus, NetSwitch
Master Red LED and Yellow LED flashing alternative means the firmware is
upgrading. After upgrade completed, NetSwitch Master will auto reboot. To upgrade
multi NetSwitch Master with same firmware, hold on “shift” or Ctrl” and choose the
NetSwitch Master device from Netility list,
Note:NetSwitch Master provided well-considerable protection function. If uploading was
interrupted and raised data in incomplete, Netswitch Master will keep its default to avoid
of complete data loss. In the case, just repeat “firmware upload” as well.
Netility Firmware Download
About - Netility version examined
Netility About
Refresh List – Search all NetSwitch Master within netowrk
Netility would search all the available NetSwitch Master from Lan automatically, or
the user could search manually by click on “Search NetSwitch”

- 10 -
Chapter 4: NetSwitch Master Web Management
4.1 Introduction
After finishing NetSwitch Master installation, including hardware installation and IP
setting, you are now able to login to NetSwitch Master’s web site to monitor and
control outlets by inputting NetSwitch Master’s IP address in Browser.
Starting the Web Brower
Enter the NetSwitch Master’s IP Address (Which set on Netility, e.g.
192.168.0.194).
Fig.13 Input NetSwitch Master IP address
On the first screen, enter the current password. If no password has been set, just
press [ENTER].
Fig.14 NetSwitch Master Login dialog
4.2 Control Management
The NetSwitch Master’s webpage main menu is divided into four sections. The
selections menu on the left and display menu on the right. Enter the main function
item, the sub-menu items will be shown on the left side of the page. When using this
NetSwitch Master for the first time, please enter the Configuration menu item to set
all the configuration items. Then the NetSwitch Master status could be correctly
revealed by other pages. The selection menu consists of the following options:
Information
Configuration
Log Information
Help

- 11 -
4.2.1 Information
This tab displays the System Information and NetSwitch Master Status. The
information and values are either provided by NetSwitch Master or values set by the
users in the “Configuration” section.
Information
Sub Menu
4.2.1.1 System Status
4.2.1.2.NetSwitch Status
4.2.1.3 UPS Status
4.2.1.4 Remote Control
4.2.1.1 System Status
This section shows you the System Information and Network Status such as the
Firmware Version, the system name, uptime, IP Address, Gateway, PPP Server,
Login IP and the like. These values are either provided by NetSwitch Master (i.e.
MAC address) or set by user.
NetSwitch Master System Status Menu
4.2.1.2 NetSwitch Status
This section gives you remote control over the NetSwitch Master unit and its
individual devices. Click on the individual power input icon to either switch on /
off the device.

- 12 -
NetSwitch Master Status Menu
4.2.1.3 UPS Status
This section shows the basic information of UPS and the current status of UPS data
and connection mode. Users can choose an interval from the drop-down box to
refresh the status readings
NetSwitch Master UPS Status Menu
4.2.1.4 Remote Control
This page is to provide the UPS remote test functions. Choose the test item, then
click on 'Apply' to execute it. (Please refer to the UPS manual for individual UPS Test
functions.)

- 13 -
NetSwitch Master Remote Control Menu
4.2.2 Configuration
Please ensure that each of the following option is set correctly. Otherwise,
NetSwitch Master may not work properly.
Configuration
Sub Menu
4.2.2.1 NetSwitch Settings
4.2.2.2 NetSwitch Action
4.2.2.3 Network
4.2.2.4 SNMP
4.2.2.5 Email
4.2.2.6 SMS
4.2.2.7 Web/Telnet
4.2.2.8 System Time
4.2.2.9 UPS Configuration
4.2.2.10 UPS On/Off Schedule
4.2.2.11 SMS Modem
4.2.2.12 Language
4.2.2.1 NetSwitch Settings
This section determines the setting to the individual device connected to
NetSwitch Master
Select NetSwitch
Master
:
Select the NetSwitch Master that is currently
connected and switched on
Address Change :
Use this to assign a new number or change the
currently assigned number for the NetSwitch
Master unit. You have a choice of 00 to 16.
Note: You cannot choose a number that is already
assigned to another NetSwitch Master
Identification :
To give a unique name for the NetSwitch Master.
Outlet :
Indicate outlets A-H
Name :
To set a unique name for the Outlets
Phone Controllable :
Option of “Yes” or ”No”
Control Type :
Select a control type for the outlet. Option of;
1. Safe shutdown
2. Safe reboot, and
3. Instant shutdown
(refer to Control Type Table for examples)
Power off Delay
:
Sets the power off delay time in seconds (value
from 0 to 9999)

- 14 -
Power Resume
Delay
:
Sets
the power resume/on delay time in seconds
(value from 0 to 9999)
NetSwitch Master Settings Menu
Table of Control Type and Resulting NetSwitch Master Action:
Power Mode
Control Type
Power Off
Delay
(sec)
Power
Resume
Delay (sec)
Action By
NETSWITCH MASTER
ON-OFF Safe Shutdown 0 0 Instant Shutdown
ON-OFF Safe Shutdown 10 0 Shutdown in 10 sec.
ON-OFF Safe Shutdown 0 10 Instant Shutdown
ON-OFF Safe Shutdown 10 10 Shutdown in 10 sec.
OFF-ON Safe Shutdown 0 0 Instant ON
OFF-ON Safe Shutdown 0 10 On within 10 sec.
OFF-ON Safe Shutdown 10 0 Instant ON
OFF-ON Safe Shutdown 10 10 On within 10 sec.
ON-OFF Safe Reboot 0 0 Inst S/D, reboot in 10
ON-OFF Safe Reboot 10 0 S/D in 10, reboot in 10
ON-OFF Safe Reboot 0 10 Inst S/D, reboot in 20
ON-OFF Safe Reboot 10 10 S/D in 10, reboot in 20
Note: If the Control Type were changed from Instant or Safe Shutdown to Safe Reboot
and for the first time only, the following will occur;
Power Mode
Control Type
Po
wer Off
Delay
(sec)
Power
Resume
Delay (sec)
Action By
NETSWITCH MASTER
OFF-ON Safe Reboot 0 10 Starts in 20 sec.
OFF-ON Safe Reboot 10 0 Starts in 10 sec.
4.2.2.2 NetSwitch Actions
Use this section to manage your NetSwitch Master schedules or to turn on/off the
outlet when UPS or NetFeeler II event occurs or resolved. You can choose to
add a new event, schedule or to delete the existing event/schedule.

- 15 -
NetSwitch Master Action Menu
4.2.2.3 Network
This option determines the NetSwitch Master’s Network settings. Once changed
the IP Address, you will have to redirect your browser to the new IP address
manually. In addition, changing the option between “manually” and “using DHCP”
to “Obtain an IP Address” will cause the SNMP card to reset once you click the
<Apply> button.
Ethernet: Connection Type
This item sets the communication speed between SNMP card and the Network.
If change the Connection Type settings, SNMP card will reboot.
NetSwitch Master Network Menu
4.2.2.4 SNMP
This page is to configure the SNMP settings so that the NetSwitch Master can be
used by a NMS (Network Management System). (Eg: HP OpenView, SUN
SunNet Manager, IBM Trivoli, etc…)

- 16 -
NetSwitch Master MIB Menu
General
System Name :
Give a name to the SNMP.
System Contact :
Name the administrator.
System Location :
Name SNMP location.
NetSwitch SNMP
Port
:
Set the SNMP UDP port
Trap Receive Port :
Set the port to receive trap notification
NetSwitch Master Access Control Menu
Access Control
Manager IP Address :
This section is to fix the IP address from which the
administrator can access the Environment Control
Management webpage. You can set up to 8 IP
addresses.
To access this webpage from any IP address leave
this space as *.*.*.* (default)

- 17 -
Version
This is to choose the SNMP version.
SNMPv1/v2c/v3
Community :
This section is to set a Community name for NMS.
Note: The community name has to be the same as
the setting in NMS.
Permission
:
This section is to set the authorities of accessing
administrator. There is an option of Read,
Read/Write, and No Access (for banning /
restricting access from certain IP Address).
Username/Password
When selec
t SNMPv3, username/password must
be entered. Password must be at least 8
characters. Sender and Recipient’s password must
match to communication
Authentication
Privacy
Description
:
This is to select
between
MD5 and SHA. Length
must be at least 8 characters.
This is to select DES and AES. Length must be at
least 8 characters
This section is for an administrator to make notes.
NetSwitch Master Trap Notification Menu
Trap Notification
Destination IP :
This section is to set receivers IP address for
receiving traps sent by NetSwitch Master. It is valid
for up to 8 IP Addresses.
Community :
This section is to set a Community name for NMS.
The community name has to be as the same as
the setting in NMS.

- 18 -
Severity :
This section is to set Trap receiver levels. There
are three levels of Trap receiver:
1. Information: To receive all traps.
2. Warning: To receive “warning” and “severe”
traps.
3. Severe: To receive only “severe” traps. (Please
refer to NMS manual for Trap levels).
Accept :
Determines if the IP will receive a trap or not.
Description :
This section is for an administrator to make notes.
Event :
This section is to select events for NetSwitch
Master to send traps. Clicking on Select will open
a “Select Events List”. Event Traps may be
selected from this list.
4.2.2.5 E-mail
This option sets the following Email details for NetSwitch Master
NetSwitch Master Email Menu
E-mail Settings
E
-
mail Server
:
This is to set the email server
Email Port
Enter the email port to send the mail
Sender’s Email
Address
:
This item determines NETSWITCH MASTER
Email address
Email Server
Requires
Authentication
:
If set to “YES”, the user will have to provide the
account name and password in order to access
the Email server. Otherwise, enter “NO”.
Account Name :
Enter the account (login) name for the email
server.
Table of contents
