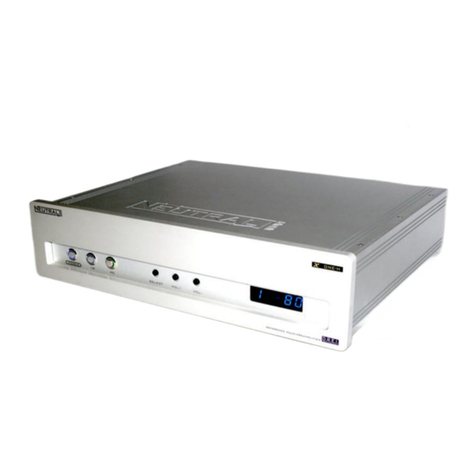
Neutral DREi Micro User manual

V2

DREi Micro

DREi Micro
1
NEUTRAL AUDIO wants to thank you for the trust
you have placed in us by purchasing this product
and we hope it will fill you with satisfaction
for a very long time.
You should know that we have made every effort to
be an exclusive and unique audio industry leader,
with our advanced analog technology.
Signed. J. M. Jimenez

DREi Micro
2
Important Security Information
oPlease read all the instructions.
oDon‟t use this equipment in humid environments.
oDo not use cleaning fluids. Use a dry or slightly damp cloth.
oDo not install near any heat sources or equipment that generates a lot of heat.
oThere are no components inside that need any adjustment. Do not open the unit, and refer to qualified
service personnel in case of failure to prevent electrical accidents or shocks.
oPlace the equipment on a flat surface with enough space for ventilation
oDo not cover rear ventilation vents.
oBefore connecting the mains power, be sure that you have the proper voltage and the earth is good
quality.
oContact NEUTRAL AUDIO with any questions that may not be contained in this guide.
oAlways disconnect the amplifier before handling connecting cables.
This product has been assembled by hand in Spain, member of the European Community. NEUTRAL AUDIO and
D.R.E.I. Technology are trademarks and may not be used without permission from the owner. The system
D.R.E.I. technology is patented and cannot be used without having been licensed by the owner.
This NEUTRAL AUDIO electric device has been
Certified for use with the integrate D.R.E.I. system

DREi Micro
3
INDEX
A brief description, 4
Alternative connection, 10
Conexión recomendada, 8
Connecting the DREi Micro, 6
DEMO Mode, 15
Designed by D.R.E.I. technology, 5
Everything is analog, 6
Front pannel, 11
Guarantee conditions, 17
IR self learning function, 16
Line inputs, 8
Multi-buffers, 6
Output to amplifier, 9
STANDBY Function, 12
SYNERGY CONTROL, 13
Technical features, 18
Turning on the system, 12

DREi Micro
4
A brief description
In the first place we are proud that NEUTRAL AUDIO has formed a part of your highly valued musical system.
With this DREi DeIntermodulator, Stereo and Analogue, we have taken a important step forward in the audio
industry. D.R.E.i. stands for Dynamic Reduction of Electronic Interactions and is the essence of this device.
This new and essential product is designed to increase the listening quality of your system audio to levels
well beyond currently normal. Our sound will give you many more hours of warm, friendly enjoyment. If the rest of
your audio system is at an appropriate level, we are convinced that it will sound more neutral, transparent,
detailed, warm and musical than you could ever have imagined.
A preamplifier is the element in the music reproduction system that lets you select the source you want to hear, to
change its output level or volume and connect to the associated amplification. NEUTRAL AUDIO is aware that this
is the step where the musical signal deteriorates mostly due to the extremely low levels with which they work and
the electrical problems inherent in this and therefore should be chosen with great care as overall outcome of the
entire system depends on it. For this reason we developed the Multi Pre amplification technology, which with
several preamps modules in parallel per channel commanded by the DREi module the problems we have talked
about are greatly reduced obtaining a pure sound you will never have heard before. There are several NEUTRAL
AUDIO Multi-preamp models with DREi tech. and they are undoubtedly the best choice if you want to have the
best sound possible, as they have been designed from scratch to eliminate any electronic interaction in the sound
signal.
The DREi Micro is not a preamp. It is designed for those cases in which there may not be a need or desire to
replace the existing preamplifier but where there is a desire to include the DREi technology in the final sound. To
do this it is necessary to insert this external module before the amplifier.
Internally it uses a simplified Multi-preamp technology , using 6 high-precision buffers operating in parallel with no
gain or volume control and controlled by the incorporated module chip "DREi All Inside" with the objective to
neutralize intermodulation, correcting errors in the electronics and increasing the overall performance of the
amplification, filters and speakers. An external SYNERGY control over these buffers provides a new
experience to system optimization in a way that has not heard before.

DREi Micro
5
PRO AUDIO, in this sector this device has an important use at indoor and outdoor concerts and nightclubs with
the extraordinary control it exercises over power and amplification allowing higher sound levels without saturating
rooms, producing fewer problems of sound transmission to adjacent rooms and floors and increases the
intelligibility of the music. Less power is needed to achieve the required sound level, therefore facilitating
compliance with acoustic regulations, increasing acoustic efficiency and extending the life of the power equipment
and speakers thus increasing their profitability. In Recording studios, part of the properties our technology confers
to is reflected in the sound quality of the Master.
The audio tone is not modified, it keeps the characteristic "sound" of your equipment but at a much higher level.
The main function is as described but has other interesting features:
You can select from 5 different SYNERGY positions using the central button or any brand of
remote control (RC5), thanks to its code learning function (including power on / off)
Push button Standby/Bypass. In standby, or if disconnected from the mains, it will redirect the input
to the output, unchanged.
It remembers the last Synergy position used.
"DEMO" mode changes between the different Synergy positions starting with bypass.
Voltage change on the base of the chassis (115VAC/230VAC)
LED lights indicate the DREI is on and the selected Synergy.
The RCA/XLR version is also an active adapter between the RCA input and the Balanced output.
Designed by D.R.E.I. technology
The incorporation of D.R.E.i. technology in all NEUTRAL AUDIO analogue products makes them exceptional
pioneers.
For more information please visit our website. http://www.neutralaudio.com/drei.htm

DREi Micro
6
Multi-buffers
Similar to a prism that separates white light in to different colours, D.R.E.i. technology separates various blocks of
the musical signal and redirects them into 6 high precision buffers working in parallel. Each of these buffers is
directed by the “D.R.E.i. ALL Inside" chip
Everything is analogue
One of the fundamental aspects of these systems is that they don‟t use any digital device with the audio signal.
Everything is done using analogue technology, there is no digitization of audio in any part of the process which
respects the full musical content.
The audio signal does not run through any internal cables and takes a greatly shortened route across a single
high quality, gold plated circuit board.
Connecting the DREi Micro
CAUTION. Before connecting, turn off the associated amplification and disconnect the plug from the outlet.
Make sure the voltage of the device matches that of your power supply. For safety, the earth of your electrical
system must work properly, otherwise unwanted noise and interference may invade the audio system.

DREi Micro
7
You can select the correct voltage for your installation(depending model) with the switch that can be found on the
bottom of the DREI Micro. DO NOT CONNECT TO THE MAINS until you have verified this setting. Standard
delivery is set to 230VAC. To switch it to 115VAC you only have to slide the red lever in the center until you see
the 115VAC mark. Use the supplied cable and a good quality plug which must be earthed.
Please note that when the unit is off it creates a "bypass" of the input signal which will be available at the
output "as is", connecting RCA in RCA and XLR in XLR (not in the RCA/XLR model).
When connecting the unit the led STB (Standby) light will flash until all the internal modules are
operational (Approx. 2 sec.) after which the LED "DREi" will turn on and the system will start to work.
We strongly recommend you to use good quality, clean, dry, rust free interconnecting cables. Periodically
check the status of these connections. Our "CABLE DREi" are highly suitable to connect to the rest
of the audio system, as the DREi process is cumulative.
Our connections are of very high quality and gold plated. We recommend periodic application of a specific
product, (ask the dealer), to the connectors to prevent rust and loss of contact.
Balanced connections of input and output XLR connectors are the standard in:
The pin 1 = Ground The pin 2 = Hot The pin 3 = Cold

DREi Micro
8
Line inputs
Depending on the version, the unit might have RCA (not balanced) inputs and outputs or XLR (balanced)
connectors or the RCA/XLR version which can be used as an active adaptor with RCA inputs and XLR outputs.
We recommend connecting the left channel to the "LEFT" (white) input and the right channel to the "RIGHT" (red)
input, but this is not obligatory.
It is normal for the balanced input signal (XLR) to have more volume than the RCA and this doesn‟t imply a
malfunction of the unit. In the same way the XLR output also has a higher volume level (+6 db.) than the RCA.
Recommended connection
The recommended and usual way to connect the DREi Micro in your current stereo system is as shown in the
illustration above.
The DREi Micro is inserted between the preamplifier and amplifier. In this mode with a single appliance, the DREi
Micro serves all the sources used.

DREi Micro
9
At the input you can connect any preamp of any brand, transistor or valve, or any source (CD player, DAC, etc.)
but it is very important that it has VOLUME CONTROL.
Remember that this device does not have any gain or volume control, so the volume level of the output is the
same as the input. If you connect a source directly, the sound is very loud and could damage your speakers.
Output to amplifier
You must connect the output marked "OUT" directly to the associated amplifier. If you have active speakers
connect the DREi Micro directly to the internal amplifier input.
XLR Model

DREi Micro
10
Alternative connection
There is another way to connect the DREi
Micro into your current stereo system,
indicated in the illustration (right), although it
is generally less efficient than the previous
way. It inserts the DREi Micro between a
source and preamp. It is not necessary that
the source has a volume control.
You may wish to connect it this way for various reasons, including:
Do not want any of your sources to be directed to the DREI (although you can always turn it off thanks
to its internal bypass).
You want to set a different Synergy in each source.
To enhance the sound with several DREi, both on the inputs and the outputs.
At the input you can connect any source whether transistor or valve from any manufacturer.
Remember that this device does not have any gain or volume control, so the volume level of the output is the
same as the input.
Do not connect in this way, unless the connected source has a volume control or the sound will be very loud and
could damage your speakers.

DREi Micro
11
Finally there is another possible connection mode, the Loop
Tape. If your preamp has an input / output recording tape,
you can connect the X-DREI here as indicated in the
instruction manual of your preamp, as if it were a recording
system, processor or equalizer.
Front pannel
As you can see the design of the DREi Micro is extremely simple, as
befits a device of its range where ease of use and high sound quality
should dominate.
While "off" the bypass redirects each input to its output (RCA-RCA and Balanced-Balanced). There is no change
in the connected equipment's impedance values when in bypass.
Turning on the system
If you've already got to here, you must have the equipment fully installed, tested and connected.

DREi Micro
12
It is common sense to avoid damage to your speakers by turning the amplifier stage on last, and also switching
them off first!
When you press the power button located on the rear panel, the LED STB light will flash for a few seconds and,
when all the interior modules are stabilized, the led "DREi" light will light up, indicating that everything is fully
operational.
This device memorizes the mode it was on when it was disconnected from the mains. If you disconnected it while
in standby it will remain on standby or if it was operating normally, it will turn back on with the same Synergy
setting it had when it was turned off.
STANDBY Function
STANDBY FUNCTION, pressing the central switch of the
device will turn it on or off. The LED STB light will be lit dimly
and the device will enter a low power mode. To switch it on
again you simply press the switch or turn it in any direction.
We recommend you disconnect the device using the back power switch, located next to the power input
cable, if it is not going to be used for a long period. Unlike standby, turning the device off doesn‟t
consume any electricity at all.
SYNERGY CONTROL
The D.R.E.i. technology process is always running at 100% and its process is independent
of this setting.

DREi Micro
13
SYNERGY CONTROL: One of the advantages of the technology developed by NEUTRAL AUDIO is that it allows
you to vary the impulse response of each of the several buffers which compose each channel. With this new
technique you can adapt the resulting Synergy to your requirements turning the central button.
What led NEUTRAL AUDIO to design this feature is very important. Bear in mind that the room/hall where music
is played always alters the overall sound. Depending on the physical characteristics and elements of the room/hall
and the type of speakers you have in your installation, the resulting sound can be far from ideal. It would be
endless to explain all the possible situations and that is not the goal of this manual but generalizing, all equipment
+ room/hall may deliver a less crisp and more confused sound with severely uncontrolled bass areas with little
detail, in addition to lack of amplitude and focus on the stage, including lack of "life" and realism. All this can be
improved by using this DREi Micro.
To achieve maximum synergy between the room/hall and your High End equipment (especially the speakers), try
using the different positions (5) by turning the switch to the one that best suits your preferences. There is no need
to turn off the appliance.
The different positions are indicated by LED "SYNERGY" lights. Note that
each time you modify this setting or turn on the device these LEDs will light
for 10 seconds and then they will turn off, but the Synergy position is running.
Our recommendation is not to make any radical changes in the beginning.
For example start at Blue (A) and eventually turn the switch until you reach
your optimal position. You might be interested in other positions when using
different sources.

DREi Micro
14
A very obvious improvement with extreme optimization of the system, is the opening and three-dimensionality of
the “SYNERGY” settings. This image will help you select the position you like best. The following explanations
should not be taken too literally as they are only intended to explain as simply and graphically as possible what to
expect from this technology and its results will depend on the quality of the associated elements and the listening
room/hall.
As you can see in our example, the C (green) position gives you a close sound, with great bass detail and only
the first wave reflections the middles and trebles will be clean and straightforward, widely spaced and with plenty
of air between the instruments as might be perceived by an orchestra director. Everything seems to become
otherworldly and listening becomes pleasanter and less tiring.
On A (blue) you will seem to move back a few rows into the audience, the bass will become more present and
more instruments are fused together. The soundstage becomes a bit narrower.
In FULL (red) the feeling of the room/hall becomes more present. The reverberations seem to increase, the bass
becomes more powerful and confused and some details are lost. The middles and trebles attenuate because of

DREi Micro
15
the effect of the stored energy, in general the room/hall and the speakers are more easily saturated and the sound
pressure level can‟t be so high and produces more listening fatigue.
FULL SYNERGY (= OFF) produces no change and is less perceptible to be more balanced in the operation
of the buffers. The D.R.E.i. process is always running at 100% and its process is independent of this setting.
DEMO function
To help with SYNERGY control setting, we have provided the DREi Micro with a demo mode. To operate it, hold
the center button for 3 to 8 seconds. When you release the button the 3 LED lights from the SCENE panel will
illuminate in a rapid sequence and the LED DREi light will flash every second indicating that it has begun this
mode. To exit the demo mode you just have to press or rotate the button again.
The device starts a sequence that begins with the DREi Micro in Standby
making an internal audio signal bypass, so you will be hearing your system
directly as if there was nothing connected. After 10 seconds it will automatically
turn on so you can hear the DREi Micro with the SYNERGY "FULL" (only the
DREi process). After another 10 seconds it will automatically switch to the
SYNERGY "NORMAL", and so on with the other scenes. After the "C" it will go
back to Standby and restart the cycle.
Activate this mode and relax in the comfort of your own home until you decide
which Synergy is your favorite depending the best performance of your sound
system.

DREi Micro
16
IR self learning function
Another interesting feature that has been added to the DREI Micro is the one that will allow you to use any
infrared remote control for this device. We have equipped it with an infrared receiver capable of memorizing.
As we have seen, it only needs 3 keys," Function" (by pressing the center button), "Left" and "Right". Look for any
remote control you have for one that has 3 buttons that you don‟t use.
Press the center button for over 8 seconds and then release it. The SYNERGY LEDs will all flash
together, indicating that the learning mode has been enabled.
Now the LED DREi light starts flashing quickly and the 1 LED light.
Point the remote towards the device and press the button which you have selected to be „‟Function‟‟.
Don‟t keep it pressed, press just once.
If the device accepts the button the LED light will flash quickly again and the 2 LED light will light.
Press the button you have chosen to be LEFT.
If accepted it will flash rapidly and the 3 LED will light.
Press the button you have chosen to be RIGHT.
If accepted it will flash quickly and the device will return to its normal functioning.
If you need to leave this mode you simply have to press the center button on the device.
Now you can use the remote control to work the DREi Micro. You can repeat this programming as many times as
you need to, but only one remote will be memorized. Disconnecting the device doesn‟t erase this setting.
Some controls are not compatible with the codes that can be stored, so it might not work. Note that we use the
RC5 protocol to 36kHz. It could happen that with some controls only some of the keys operate.

DREi Micro
17
Guarantee conditions
NEUTRAL AUDIO guarantees this product for a period of 1 year, or the time legally established in
the country where it is purchased, as long as it is purchased from an authorized dealer.
This guarantee covers any manufacturing defects.
To qualify for this guarantee, you must go to a service centre authorized by NEUTRALAUDIO or
the store where you purchased it, presenting your purchase invoice.
The Guarantee DOES NOT COVER:
oDamage caused by accident, misuse or abuse.
oDamage caused by external factors or natural tragedies.
oTheft or robbery.
oDamage caused by handling by persons not authorized by NEUTRAL AUDIO.
oDamage caused by other non-product components.
oProducts purchased from unauthorized distributors.
oThe shipment rates for the repair and return of the device is to be carried by the customer.
oAny costs arising from installation or dis-installation of the product is to be carried by the customer.
Any manipulation of the product by any person not authorized by NEUTRAL AUDIO automatically makes this
guarantee null and void.
Consult your distributor as to your nearest technical assistance provider and how to contact them.

DREi Micro
18
Technical features
All technical specifications contained in this manual are correct at the time of printing. However NEUTRAL AUDIO
may have made modifications to them without notice.
Line input RCA unbalanced or XLR balanced depending of model
Line outputs RCA unbalanced or XLR balanced depending of model
Frequency response 0-200.000 Hz (extended up to 500,000 Hz)
Total Distortion 0.04%
Recommended maximum input voltage 3.2Vpp RCA / 9Vpp XLR
Maximum output voltage Vpp 3.2Vpp RCA / 9Vpp XLR
Input impedance 20 Kohms RCA / 50 kohms balanced
Output impedance 600 ohms RCA / 300 Ohm balanced
Signal to noise ratio better than 110 dB
Channel separation better than 100 dB
IEC socket for power supply
Maximum Consumption less than 3 W
Supply voltage 230VAC 50/60Hz. (or 115VAC) (using an external switch).
Dimensions Width: 185 mm, Depth: 130 mm, Height: 55 mm
Approximate Net Weight 3 kg
For more information contact your local NEUTRAL AUDIO dealer.
Note for technical experts::
This unit challenges the traditional method of the electronic measurement of sound. If you want to correctly
interpret these values, consider talking to NEUTRAL AUDIO regarding them.
Table of contents
Other Neutral Amplifier manuals
