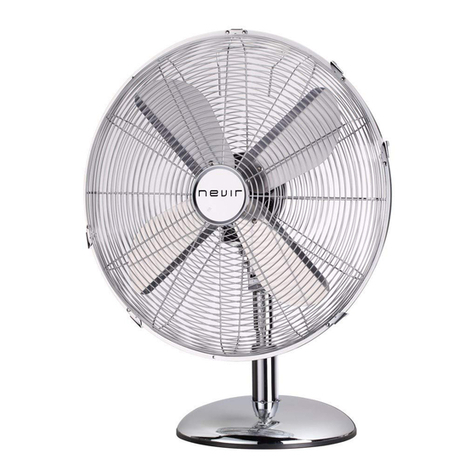
Nevir NVR-VPM40-C User manual

1
VENTILADOR DE PIE METALICO
NVR-VPM40-C/A/R/AZ 40 CM
220-240V-50Hz
ES

2
MANUAL DE INSTRUCCIONES
Lea las instrucciones antes del uso y guardar para posteriores consultas
Gracias por elegir este producto.
Este manual de instrucciones le proporcionará toda la información necesaria
en relación con la instalación, uso y mantenimiento del aparato. Para un
funcionamiento adecuado y seguro, por favor lea este manual
cuidadosamente y siga todas las indicaciones.
Ventilador de alta velocidad elegante y moderno que proporciona un flujo de
aire más potente que los ventiladores de plástico ordinarios. Proyecta el aire
sobre el suelo, el cual circula por toda la estancia, manteniéndola fresca y
ventilada. Poniéndolo junto a las ventanas ayudara a extraer el aire caliente y
viciado del interior renovándolo por aire fresco del exterior.
Motor de alta velocidad para una circulación máxima del aire y de
ahorro energético.
Ajuste de inclinación para un uso flexible.
Selector de tres velocidades.
Aspas de precisión silenciosas y de potente resultado.
Soporte de cromo. Sólida construcción con protección térmica para
evitar el sobrecalentamiento del motor.
INSTRUCCIONES PARA INSTALACION
ATENCION: SI EL CABLE DE ALIMENTACION SUMINISTRADO ESTA DAÑADO, DEBE
SER REEMPLAZADO POR EL FABRICANTE O POR SU SERVICIO TECNICO O AGENTE
AUTORIZADO, PARA EVITAR DAÑÓS.
ASEGURESE DE APAGAR EL SUMINISTRO ELECTRICO EN EL INTERRUPTOR
PRINCIPAL O EL DISYUNTOR ANTES DE LA INSTALACION.
LAS SALVAGUARDIAS IMPORTANTES E INSTRUCCIONES QUE APARECEN EN ESTE
MANUAL NO INTENTAN CUBRIR TODAS LAS CONDICIONES Y SITUACIONES
POSIBLES QUE PUEDAN OCURRIR. DEBE SER ENTENDIDO QUE EL SENTIDO
COMUN, LA PRECAUCION Y CUIDADO SON FACTORES QUE NO PUEDEN SER
CONSTRUIDOS EN CUALQUIER PRODUCTO. ESOS FACTORES DEBEN SER
OFRECIDOS POR LA PERSONA (S) QUE OPERAN Y CUIDAN DE LAS OPERACIONES
DE LA UNIDAD.
NO SE ACEPTARA RESPONSABILIDAD ALGUNA POR CUALQUIER DAÑO QUE
PUEDA OCURRIR DURANTE EL TRANSPORTE O POR INAPROPIADA INSTALACION
O FLUCTUACION DE VOLTAJE O SI UNA PARTE DEL PRODUCTO HA SIDO
ALTERADO O MODIFICADO.

3
INSTRUCCIONES DE SEGURIDAD
1. Este aparato puede ser usado por niños a partir de ocho años y
personas con capacidad física, sensorial o mental reducida o falta de
experiencia y conocimiento si han recibido supervisión o instrucción
concerniente al uso de la aplicación y de los peligros derivados.
2. El mantenimiento y limpieza no debe ser realizado por niños sin
supervisión. 2.
3. Los niños deben ser supervisados para asegurar que no juegan con el
aparato.
4. Si el cable de alimentación está dañado, este debe ser reemplazado
por el fabricante o por su servicio técnico o agente autorizado, para evitar
daños.
5. Una instalación inadecuada puede dar como resultado riesgo de
incendio, un cortocircuito o herir a las personas.
6. Para prevenir riesgo de incendio o cortocircuitos, no use esta unidad
cerca de las ventanas.
7. El ventilador debe colocarse y usarse en superficies planas y estables
cuando está en funcionamiento para evitar el vuelco de la unidad.
8. El ventilador no debe ser usado en un lugar húmedo o donde la
humedad es alta (tal como en un baño).
9. Asegúrese de que el ventilador se desconecta de la red de suministro antes
de retirar la rejilla protectora.
PARTES DEL VENTILADOR
1. Rejilla protectora frontal
2. Tuerca de las Aspas
3. Aspas
4. Tuerca Rejilla trasera
5. Rejilla protectora trasera
6. Unidad Motor
7. Interruptor de Oscilación
8. Cable de Alimentación
9. Interruptor Control Velocidades
10. Tornillo de fijación
11. Tubo interno
12. Ajuste de altura
13. Tubo exterior
14. Base del aparato
15. Contrapeso de la unidad
16. Placa de bloqueo
17. Llave de bloqueo.

4
ENSAMBLAJE
1. Instalar el tubo interior (11) y el tubo exterior (13) a la base (14), junto al
contrapeso (15) ajustando todo junto con la placa de bloqueo (16) y la llave
de bloqueo (17).
2. Presente la unidad motor (6), en el tubo interior (11,) apretando el tornillo de
fijación (10).
3. Instale la rejilla de protección trasera (5), bloquéela con su tuerca (4), en
sentido de las agujas del reloj.
4. Inserte las aspas (3) en el eje de motor, ajústelas con la tuerca de las aspas
(2).
5. Juntar la rejilla protectora delantera (1) a la rejilla protectora trasera (5)
fijándolas con las tuercas y tornillos de seguridad proporcionados.
Operaciones de puesta en marcha:
a) Asegúrese de que el voltaje usado es el voltaje indicado.
b) Gire el control de velocidad en el mando para seleccionar la velocidad: 0
Apagado; - 1-2-3. Despacio, Medio, Rápido.
c) Ajuste la inclinación del ángulo del ventilador pulsando o elevando la
palanca de oscilación.
d) Nunca toque las aspas con las manos o con ningún objeto!!!
e) No tire demasiado fuerte del cable. Si está dañado después de un uso
prolongado, su reparación puede ser realizada por cualquier electricista.
f) Limpieza: Desconecte el aparato de la red. Retire las rejillas delantera y
trasera con cuidado. No deje caer las aspas. Use primero un paño suave con
jabón para limpiar las manchas de aceite. Entonces limpie y pula con un paño
seco. No usar líquidos corrosivos que puedan dañar la pintura, el metal o el
plástico! Ponga de nuevo las aspas, cierre con seguridad las rejillas antes de
usar!
Ningún cambio será admisible si las instrucciones anteriores no se siguen.
Verifique siempre el producto antes de su compra.

5
Proceso correcto de desecho de este producto
Según la directiva de Residuos de Aparatos Eléctricos y Electrónicos (RAEE), los
residuos AEE han de recogerse y tratarse por separado. Si en un futuro necesita
desprenderse de este producto NO lo ponga en los residuos domésticos, envíelo a los
puntos de recogidas de residuos existentes en su área. De igual manera, debe extraer
los residuos de pilas y/o acumuladores antes de la entrega del RAEE a través de los canales de
recogida separada habilitados al efecto (distribuidores y/o instalaciones de las Entidades
Locales).

6
ANTIQUE STYLE STAND FAN
NVR-VPM40-C/A/R/AZ 40 CM
230V-50Hz
EN

7
REMARKS: ELECTRICAL CONNECTIONS SHALL BE IN ACCORDANCE WITH NATIONAL OR
LOCAL CODES.
READ AND SAVE THIS INSTRUCTION MANUAL
Sleek & modern high-velocity fan provides more powerful wind than ordinary plastic fans.
Draws air off the floor and circulate through the entire room keeping room cool and breezy.
Put near the windows and it helps exhaust hot indoor stuffy air and pulls in fresh outdoor air.
● Energy-saving, high velocity motor for maximum air circulation
● Tilt-adjustment for flexible use
● Triple speed selection
● Precision fan blades for powerful wind but low-noise
● Chrome-stand, solid construction with thermal-protection to prevent motor overheat.
INSTRUCTION FOR INSTALLING
WARNING: IF THE SUPPLY CORD IS DAMAGED, MUST BE REPLACED BY THE MANUFACTURER OR ITS
SERVICE AGENT OR SIMILAR QUALIFIED PERSON IN ORDER TO AVOID THE HAZARD.
BE SURE TO SHUT OFF ELECTRIC SUPPLY AT MAIN SWITCH OR CIRCUIT BREAKER BEFORE
INSTALLATION.
THE IMPORTANT SAFEGUARDS AND INSTRUCTION APPEARING IN THIS MANUAL ARE NOT MEANT
TO COVER ALL POSSIBLE CONDITIONS AND SITUATION THAT MAY OCCUR.IT MUST BE UNDERSTOOD
THAT COMMON SENSE, CAUTION AND CARE ARE FACTORS WHICH CANNOT BE BUILT INTO ANY
PROCDUCT.THESE FACTORS MUST BE SUPPLIED BY THE PERSON(S) CARING FOR AND OPERATING
THE UNIT.
NO RESPONSIBILITY WILL BE ACCEPTED FOR ANY DAMAGE WHICH MAY OCCUR DURING
TRANSPORT OR BY IMPROPER INSTALLATION OR VOLTAGE FLUCTUATION OR IF ANY PORTION OF
THE PRODCT HAS BEEN ALTERED OR MODIFIED.
Safety Instructions:
1. This appliance can be used by children aged from 8 years and above and persons
with reduced physical, sensory or mental capabilities or lack of experience and
knowledge if they have been given supervision or instruction concerning use of
the appliance in a safe way and understand the hazards involved.
2. Cleaning and user maintenance shall not be made by children without
supervision.
3. Children should be supervised to ensure that they do not play with the appliance.
4. If the supply cord is damaged, it must be replaced by the manufacturer, its
service agent or similarly qualified persons in order to avoid a hazard.
5. Improper installation may result in the risk of fire, electric shock, or injury to
persons.
6. To present risk of fire and electric shock, do not use the unit near windows.
7. The fan should be placed on a flat and stable surface when operating to avoid
overturning.
8. The fan should not be placed in a damp place or where humidity is high (such as
in a bathroom).
9. Ensure that the fan is switched off from the supply mains before removing the
guard.

8
ASSEMBLY
1. Install both the interior pipe (11) and Exterior Pipe (13) with the base (14), the weight unit (15), lock
them by tightening the locking plate(16) and locking screw (17) together.
2. Put the motor unit (6) onto the interior pipe (11), tightening the fixing screw (10).
3. Install the rear guard, then lock it by turning the rear guard Nut (4) clockwisely.
4. Insert the blade(3) into the motor shaft, fix it by blade nut (2)
5. Put the front guard (1) and rear guard(5) together, fix them with fixing buckles and safety screw sets
provided.
Explode view
1. Front Guard
2. Blade Nut
3. Fan Blade
4. Rear Guard Nut
5. Rear Guard
6. Motor Unit
7. Oscillation Switch
8. Power Cord
9. Speed Control
10. Fixing Screw
11. Interior Pipe
12. Height Adjustment
13. Exterior Pipe
14. Base
15. Weight Unit
16. Locking Plate
17. Locking Screw
Operating Instructions:
a) Ensure voltage used corresponds with the voltage indicated.
b) Turn the speed control to selected speeds: 0(off) and speeds1, 2, 3 is Slow, Middle, Fast.
c) Tilting angles-By pushing the tilt-guard, you can adjust the fan to any elevation preferred.
d) Never touch the blades with hand or any object!
e) Do not pull the cord too hard. If damaged after pro-long use, get it repaired by any electrical repairman.
f) To clean: Disconnect the power cord from the mains. Remove the guard and the blades carefully. Do not
drop the blades! First use soft cloth with light soap to clean off oil stains. Then wipe and polish with dry
cloth. Never use polish or any corrosive liquid that will damage the paint, metal or plastic! Put back the
blades and lock the guard securely before use.
NO exchange will be entertained if the above instructions are not followed. Always Test the product first
before purchase.

9
Correct Disposal of this product
The European Directive 2002/96 /EC on Waste Electrical and Electronic Equipment (WEEE)
required that old household electrical appliances must not be disposed of in the normal unsorted
municipal waste stream. Old appliances must be collected separately in order to optimize the
recovery and recycling of the material they contain, and reduce the impact on human health and
the environment. The crossed out “wheeled bin” symbol on the product remind you of your
obligations that when you dispose of the appliance, it must be separately collected.
Besides that, waste batteries and/or accumulator must be removed prior to delivery of WEEE, thought the
separated collection channels provided for this purpose (distributors and/or facilities from Local Authorities).

10
DECLARACIÓN DE CONFORMIDAD
NEVIR, S.A. Declara bajo su responsabilidad que el aparato indicado cumple los
requisitos de las siguientes directivas:
DIRECTIVA EMC
LOW VOLTAGE DIRECTIVA EEC
EN 55014-1:2006+A1:2009+A2:2011
EN 61000-3-2:2006+A1:2009+A2:2009
EN 61000-3-3:2013
EN 55014-2:1997+A1:2001+A2:2008
EMC Directive 2004/108/EC
EN 60335-1:2012+A11:2014
EN 60335-2-80:2003+A1:2004+A2:2009
EN 62233:2008
Low Voltage Directive 2006/95/EC
Descripciones del aparato: VENTILADOR DE PIE METALICO
Modelo(s) NEVIR: NVR-VPM40-A/C/R/AZ
Importador: NEVIR, S.A.
Dirección del importador: NEVIR, S.A.
C/ Canteros, 14
Parque Empresarial Puerta de Madrid
28830 San Fernando de Henares, Madrid
This manual suits for next models
3
Table of contents
Languages:
Other Nevir Fan manuals
Popular Fan manuals by other brands

LUCCI Air
LUCCI Air AIRFUSION BREEZE TRIPOD FAN installation instructions

Goldair
Goldair GCDF145 operating instructions

EAS Electric
EAS Electric Gama CND instruction manual

Alf
Alf ISIV-01 user manual

Qazqa
Qazqa 102468 instruction manual

Monte Carlo Fan Company
Monte Carlo Fan Company 3MAVR60 D Series Owner's guide and installation manual