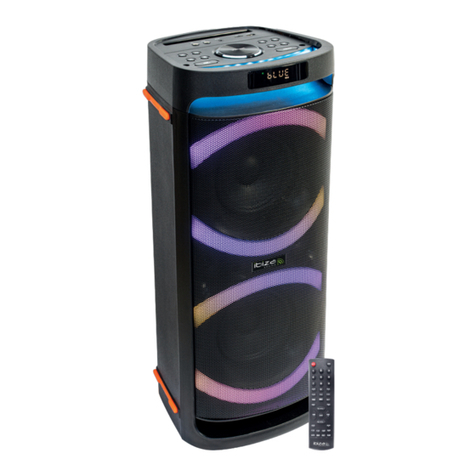
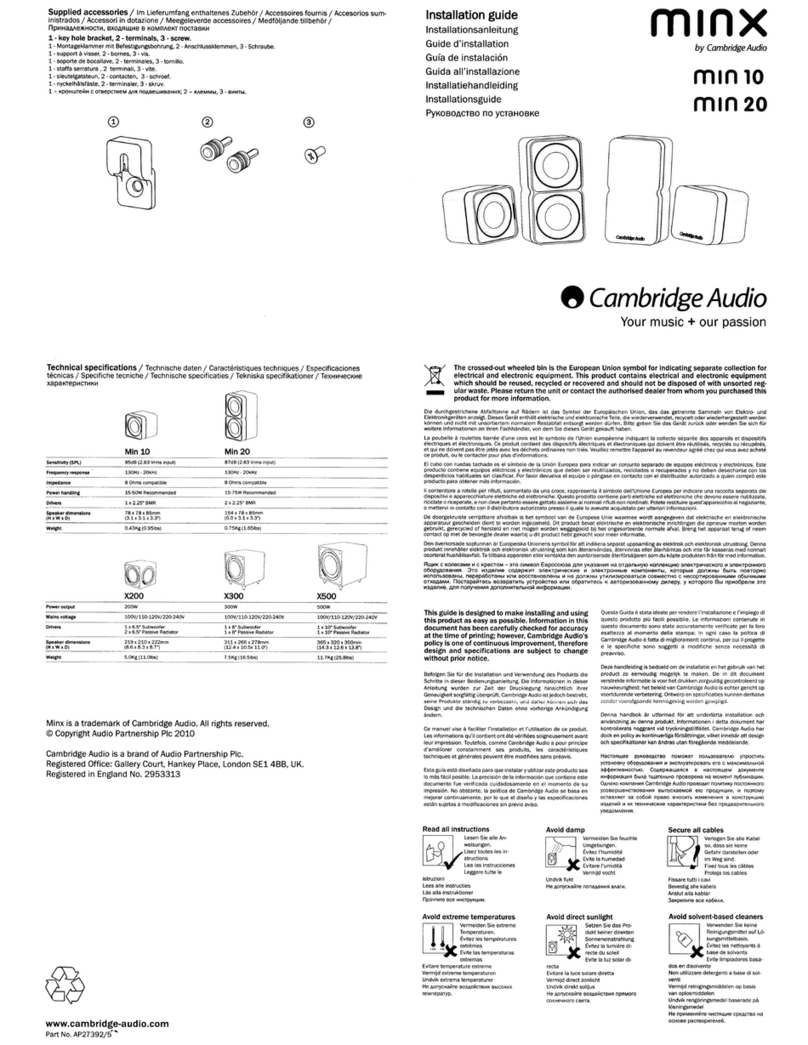
New Dawn Innovation HD Radio Retro Min User manual

GUIDE DE DÉMARRAGE RAPIDE
GUIA DE INÍCIO RÁPIDO
KURZANLEITUNG
BEKNOPTE HANDLEIDING
GUÍA DE INICIO RÁPIDO
HURTIGVEILEDNING
QUICK START GUIDE

MODE
USB Charging
Headphones
Aux-in Power

These are the basic features for
your Retro Mini - explore the
it can do for you. If you need a
can be downloaded from:
www.MyVQ.com
Or contact our
Support Team:
0333 1234 601
básicas do seu Retro Mini -
explore o produto e descubra
que mais ele pode fazer por si.
Se necessitar de mais ajuda,
pode descarregar o manual
completo em:
www.MyVQ.com
a nossa Equipa de Apoio:
0044 (0)333 1234 601
Retro Mini - leer het product
te ontdekken. Als je wat meer
hulp nodig hebt, kun je de
volledige handleiding downloa-
den op:
www.MyVQ.com
Of neem contact op met ons
Support Team:
0044 (0)333 1234 601
Beschreibung der wesentlichen
– lernen Sie das Produkt kennen
und entdecken Sie, welche Vor-
teile es Ihnen noch bietet. Falls
-
nen Sie das vollständige Hand-
buch herunterladen:
www.MyVQ.com
Oder wenden Sie sich an
unser Support-Team:
0044 (0)333 1234 601
Her er de grunnleggende
hva mer det har å by på. Hvis du
trenger mer hjelp, kan du laste
ned hele bruksanvisningen fra:
www.MyVQ.com
0044 (0)333 1234 601
de votre Retro Mini - explorez
votre produit pour découvrir ses
autres avantages. Si vous avez
besoin d‘aide, vous pouvez télé-
charger le manuel complet ici :
www.MyVQ.com
Ou contacter l‘équipe
du support client:
0044 (0)333 1234 601
Ficar a conhecer o seu Retro Mini | Je Retro Mini leren kennen | Bli kjent med din Retro Mini
principales de su Retro Mini.
Explore el producto para averi-
guar qué más puede hacer por
usted. Si necesita ayuda adicio-
nal, puede descargar el manual
completo en:
www.MyVQ.com
O contactar con nuestro
Equipo de Asistencia:
0044 (0)333 1234 601

1 |
Re
t
r
o Mini uses either
sec
t
eur ou des piles
Das Re
t
ro Mini
k
ann mit Ne
t
zs
t
rom
R
e
t
r
o Mini puede funcionar a t
ra
v
és
de la
t
oma de
corrien
t
e o con pilas
O
Re
t
ro Mini usa
t
a
nt
o alimen
t
aç
ão
el
é
tri
c
a, qua
n
t
o a pilhas
De R
e
t
r
o Mini
w
er
k
t op
4x AA
Connect
t
o p
o
w
er port,
t
o use mains p
o
w
er
Le
c
onnec
t
er à une prise pour
Schließen Sie das
K
abel an
den N
e
t
z
anschluss an, um das
Ge
r
ä
t mit Ne
t
zs
t
rom z
u b
e
t
reiben
Conec
t
e a la en
t
rada de alimen
t
ación
Ligue a uma
t
omada de alime
n
t
a
ç
ã
o
,
para usar a alime
n
t
aç
ão el
étrica
om n
e
t
s
t
r
oom
t
e
g
ebrui
k
en
3 |
Sinon, insé
r
er 4 x piles AA
Insi
r
a 4 pilhas A
A
, para usar a
alime
n
t
a
ç
ão a pilhas
Marche/Arrêt Retro Mini | Ein/Aus Retro Mini | Encendido/Apagado de Retro Mini

4 |
Appu
y
er sur le bou
t
on
V
Q
Drüc
k
en Sie die
V
Q-
T
a
T
T
s
t
e, um
das Ge
r
ä
t ein
z
uschal
t
en
P
r
esione el bo
t
ón
V
Q pa
r
a encender
Prima o bo
t
ão
V
Q pa
r
a li
g
ar
Druk op de
V
Q-knop om in
t
e scha
k
elen
T
r
ykk på
V
Q-knappen
f
or å slå på
5 |
Appu
y
er
e
t mai
n
t
enir e
n
f
oncé le
bou
t
on
V
Q pour
é
t
eind
r
e l
’
appa
r
eil
Drüc
k
en und hal
t
en Sie die
V
Q-
T
a
T
T
s
t
e,
um das Ge
r
ä
t au
s
z
uschal
t
en
P
r
esione y ma
n
t
en
g
a pulsado
el bo
t
ón
V
Q pa
r
a apa
g
ar
Prima e ma
nt
enha p
r
emido o
bo
t
ão
V
Q pa
r
a desli
g
ar
Houd de
V
Q-knop in
g
edru
k
t
om uit
t
e scha
k
elen
T
r
ykk og hold inne
V
Q-knappen
f
or å slå
a
v
Ligar/desligar a alimentação ao Retro Mini | Retro Mini in- en uitschakelen | Slå på/av Retro Mini

1 |
D
AB s
c
an should occur
Lo
r
s de la p
r
emiè
r
e mise en
r
ou
t
e, un
Beim e
r
s
t
en Einschal
t
en soll
t
e ein
v
oll
s
t
ändi
g
er
D
AB-Suchlauf
aus
g
e
führt
w
e
r
den
Al encende
r
se por prime
r
a
ve
z, debería
p
r
oduci
r
se una búsqueda
c
ompl
e
t
a
(Full S
c
an) de emiso
r
as
D
AB
Ao li
g
ar pela primei
r
a
ve
z, d
e
v
e o
c
or
r
er
Bij de ee
r
s
t
e
k
eer inscha
k
elen
w
o
r
dt er
een
v
olledi
g
e
D
AB-s
c
an uit
g
e
v
oe
r
d
F
ø
r
s
t
e
g
ang du slår på enh
e
t
en, s
k
al
Tuning into DAB
Capter DAB | DAB-Sender einstellen | Sintonizar en DAB
2 |
If this does not occu
r
,
r
p
r
ess MENU
Si cela n
’
e
s
t pas le
c
as,
appu
y
er sur MENU
Soll
t
e dies nic
h
t der
F
all sein,
drüc
k
en Sie die MENU-
T
a
T
T
s
t
e
Si e
s
t
o no ocur
r
e, p
r
esione MENU
Se
t
al não a
c
o
n
t
ece
r
, prima MENU
r
Als dit ni
e
t
g
e
v
al is, druk dan op MENU
t
r
yk
k
er du på MENU
Use & ar
t
r
ou
v
er ‘Full S
c
an’
mithil
f
e der &
P
f
eil
t
a
s
t
en aus
bus
c
ar ‘Full S
c
an’
Use as s
e
t
as & pa
r
a p
r
ocu
r
ar
Gebruik de & pijlen om naar
‘Full S
c
an’
t
e
g
aan
‘Full S
c
a
n
‘ (full
s
t
endig søk)

Tuning into DAB
Sintonização DAB | Afstemmen op DAB | Bruke DAB
S
t
art Full S
c
an
b
y
Lancer un s
c
an
c
ompl
e
t en
appu
y
a
n
t sur le bou
t
on
V
Q
Drüc
k
en Sie die
V
Q-
T
a
T
T
s
t
e, um den
v
oll
s
t
ändi
g
en Suchlauf
z
u
s
t
ar
t
en
Comience la búsqueda
c
ompl
e
t
a (Full
S
c
an) p
r
esionando el bo
t
ón
V
Q
p
r
emindo o bo
t
ão
V
Q
S
t
art de Full S
c
an door op de
V
Q-knop
t
e druk
k
en
S
t
art full
st
endig søk
v
ed
å t
r
yk
k
e på
V
Q-knappen
5 |
R
e
t
r
o Mini will s
c
an
f
or
R
e
t
r
o Mini
v
a
r
eche
r
cher
t
ou
t
es
Das
R
e
t
r
o Mini suc
h
t j
e
tzt
nach allen
v
erfügba
r
en Sendern
R
e
t
r
o Mini bus
c
a
r
á
t
odas
las emiso
r
as disponibles
t
odas as e
s
t
a
ç
ões disponí
v
eis
R
e
t
r
o Mini
z
oe
k
t alle

n
o
t
u
o
b
e
l
é
c
n
o
f
n
e
r
i
n
e
t
n
i
a
m
&
r
e
y
u
p
p
A
Hal
t
en Sie die
T
a
T
T
s
t
e
g
edrüc
k
t,
sobald ein Sender
g
e
funden wu
r
de
P
r
esione y ma
n
t
en
g
a pulsado el bo
t
ón
mie
n
t
r
as e
s
t
á si
n
t
oni
z
ada una emiso
r
a
Prima e ma
nt
enha p
r
emido o bo
t
ão
Houd de knop in
g
edru
k
t
w
anneer
T
r
ykk og hold inne knappen når
Use & ar
o
w
s
t
o
pick an
a
v
ailable p
r
es
e
t
Nut
z
en Sie die &
P
f
eil
t
a
s
t
en,
um einen
v
o
r
ein
g
e
s
t
ell
t
en
Sender au
s
z
u
w
ählen
seleccionar una p
r
esi
nt
onía disponible
Use as s
e
t
as & pa
r
a es
c
olher
Gebruik de & pijlen om een
beschikba
r
e p
r
es
e
t
t
e ki
e
z
en
Bruk pilene &
f
or å
v
el
g
e en
Appu
y
e
z sur le bou
t
on
V
Q pour
Drüc
k
en Sie die
V
Q-
T
a
T
T
s
t
e, um die
V
o
r
ein
st
ellung
z
u speichern
P
r
esione el bo
t
ón
V
Q pa
r
a
Druk op de
V
Q-knop om de p
r
es
e
t
t
e

T
o
T
T
r
es
e
t, p
r
ess
appu
y
er sur le bou
t
on (sans le
mai
n
t
enir e
n
f
oncé)
Um einen
v
o
r
ein
g
e
s
t
ell
t
en Sender
au
f
z
uru
f
en, drüc
k
en (nic
h
t hal
t
en) Sie
die
T
a
T
T
s
t
e
P
a
r
a si
n
t
oni
z
ar la p
r
esi
nt
onía p
r
esione
(sin ma
n
t
enerlo pulsado) el bo
t
ón
P
a
r
a
r
ep
r
oduzir uma e
s
t
a
ç
ão
ma
n
t
er p
r
emido)
Om de p
r
es
e
t op
t
e
r
oepen, druk je
(
k
ort) op de knop
T
r
ykk på knappen (ik
k
e
hold den inne)
f
or å åpne en
Use & ar
o
w
s
t
o
W
ählen Sie den
v
o
r
ein
g
e
s
t
ell
t
en
Sender mit den &
P
f
eil
t
a
s
t
en aus
seleccionar la emiso
r
a p
r
esi
nt
oni
z
ada
Use as s
e
t
as & pa
r
a selecionar
Gebruik de & pijlen om h
e
t
Bruk pilene &
f
or å
v
el
g
e en
li
st
en
t
o p
r
es
e
t
Appu
y
er sur le bou
t
on
V
Q
Drüc
k
en Sie die
V
Q-
T
a
T
T
s
t
e,
um den Sender
z
u hö
r
en
P
r
esione el bo
t
ón
V
Q pa
r
a
escuchar la p
r
esi
nt
onía
Prima o bo
t
ão
V
Q pa
r
a ouvir
Druk op de
V
Q-knop om
de p
r
es
e
t
t
e belui
st
e
r
en

Se connecter par Bluetooth | Verbindung über Bluetooth | Conectar a través de Bluetooth
1 |
‘Blu
e
t
ooth Mode’
Appu
y
er sur le bou
t
on MODE pour
‘Blu
e
t
ooth Mode’
Drüc
k
en Sie die MOD
E
-
T
a
T
T
s
t
e, um
‘Blu
e
t
ooth Mode’
an
z
u
z
ei
g
en
P
r
esione el bo
t
ón MODE ha
s
t
a
visuali
z
ar
‘Blu
e
t
ooth Mode’
Prima o bo
t
ão MODE pa
r
a
ap
r
ese
n
t
ar o
‘Blu
e
t
ooth Mode’
Druk op de MOD
E
-knop om de
‘Blu
e
t
ooth Mode’
w
eer
t
e
g
e
v
en
T
r
ykk på MOD
E
-knappen
f
or å vise
‘Blu
e
t
ooth Mode’
(Blu
e
t
ooth-modus)
2 |
R
e
t
r
o Mini will then displ
a
y
‘B
L
UE
T
O
O
TH
P
AIRING’
P
P
‘B
L
UE
T
O
O
TH
P
AIRING’
P
P
‘B
L
UE
T
O
O
TH
P
AIRING’
P
P
an
mo
s
t
r
a
r
á
‘B
L
UE
T
O
O
TH
P
AIRING‘
P
P
O
R
e
t
r
o Mini ap
r
ese
n
t
a
r
á e
n
t
ão
’B
L
UE
T
O
O
TH
P
AIRING’
P
P
R
e
t
r
o Mini
t
oo
n
t
v
e
r
v
ol
g
ens
‘B
L
UE
T
O
O
TH
P
AIRING’
P
P
‘B
L
UE
T
O
O
TH
P
AIRING‘
P
P
3 |
an
f
or Blu
e
t
ooth d
e
vices
on
y
our smart d
e
vice
S
c
anner les appa
r
eils Blu
e
t
ooth
sur
v
ot
r
e appa
r
eil i
n
t
elli
g
e
n
t
Suchen Sie auf Ih
r
em Smartphone
nach Blu
e
t
ooth-Ge
r
ä
t
en
Z
oek naar Blu
e
t
ooth appa
r
a
t
en
smar
t
enh
e
t
en din

4 |
Connect
t
o ‘
R
e
t
r
o Min
i
’
on
y
our smart d
e
vice
Connec
t
er ‘
R
e
t
r
o Mini‘ à
v
ot
r
e appa
r
eil i
n
t
elli
g
e
n
t
V
erbinden Sie das ‘
R
e
t
r
o Min
i
’
mit Ih
r
em Smartphone
Conéc
t
ese a ‘
R
e
t
r
o Min
i
’ desde
E
s
t
abele
ç
a a li
g
a
ç
ão e
n
t
r
e o ‘
R
e
t
r
o
Maak
v
erbinding m
e
t ‘
R
e
t
r
o Min
i
’
5 |
If succes
s
ful, displ
a
y will sh
o
w
‘B
L
UE
T
O
O
TH
C
ONN
E
C
TE
D
’
‘B
L
UE
T
O
O
TH
C
ONN
E
C
TE
D
’
appa
r
aît à
v
ot
r
e éc
r
an
Sobald die
V
erbindung he
r
g
e
s
t
ellt
wu
r
de,
z
ei
g
t das Ge
r
ä
t
‘B
L
UE
T
O
O
TH
C
ONN
E
C
TE
D
’
an
Si se
e
f
ectúa la
c
on
e
xión, la pa
n
t
alla
mo
s
t
r
a
r
á
‘B
L
UE
T
O
O
TH
C
ONN
E
C
TE
D
’
Se
f
or bem sucedid
o
, o ec
r
ã mo
s
t
r
a
r
á
‘B
L
UE
T
O
O
TH
C
ONN
E
C
TE
D
’
Als dit lu
k
t,
t
oo
n
t h
e
t displ
a
y
‘B
L
UE
T
O
O
TH
C
ONN
E
C
TE
D
’
’B
L
UE
T
O
O
TH
C
ONN
E
C
TE
D
’

Using MyEQ To Personalise Sound
1 |
Appu
y
er sur le bou
t
on MENU
Drüc
k
en Sie die MENU-
T
a
T
T
s
t
e
P
r
esione el bo
t
ón MENU
Prima o bo
t
ão MENU
Druk op de MENU-knop
T
r
ykk på MENU-knappen
Use & ar
r
o
w
s
pour t
r
ou
v
er ‘
E
Q S
e
tup’
mithil
f
e der &
P
f
eil
t
a
s
t
en aus
Use as s
e
t
as & pa
r
a p
r
ocu
r
ar
Gebruik de & pijlen om
naar ‘
E
Q S
e
tup’
t
e
g
aan
Appu
y
er sur le bou
t
on
V
Q
Drüc
k
en Sie die
V
Q-
T
a
T
T
s
t
e
P
r
esione el bo
t
ón
V
Q
Prima o bo
t
ão
V
Q
Druk op de
V
Q-knop
T
r
ykk på
V
Q-knappen

Using MyEQ To Personalise Sound
Use & ar
r
o
w
s
pour choisir un pa
r
am
è
t
r
e
W
ählen Sie eine Ein
s
t
ellung mithil
f
e
der &
P
f
eil
t
a
s
t
en aus
Use as s
e
t
as & pa
r
a
Gebruik de & pijlen
om een in
st
elling
t
e ki
e
z
en
Bruk pilene &
f
or
Appu
y
er sur le bou
t
on
V
Q
Drüc
k
en Sie die
V
Q-
T
a
T
T
s
t
e,
P
r
esione el bo
t
ón
V
Q
Prima o bo
t
ão
V
Q
Druk op de
V
Q-knop om
T
r
ykk på
V
Q-knappen

Setup Clock & Alarms
x2
f
or Alarm 2)
Appu
y
er sur le bou
t
on (x1 pour
l
’
alarme 1, x2 pour l
’
alarme 2)
Drüc
k
en Sie die
T
a
T
T
s
t
e (x1 für
Alarm 1, x2 für Alarm 2)
P
r
esione el bo
t
ón (x1 pa
r
a
Alarma 1, x2 pa
r
a Alarma 2)
Prima o bo
t
ão (1x pa
r
a Alarme 1,
2x pa
r
a Alarme 2)
Druk op de knop (1x
v
oor
Alarm 1, 2x
v
oor Alarm 2)
T
r
ykk på knappen (x1
f
or
alarm 1, x2
f
or alarm 2)
Use & ar
r
o
w
s
t
o
Nut
z
en Sie die &
P
f
eil
t
a
s
t
en,
au
s
z
uschal
t
en
c
onec
t
ar/des
c
onec
t
ar la alarma
Use as s
e
t
as & pa
r
a li
g
ar
e desli
g
ar o alarme
Gebruik de & pijlen
om alarm in of uit
t
e scha
k
elen
Bruk pilene &
f
or å slå
på
/
a
v alarmen
t
o p
r
og
r
ess
Appu
y
er sur le bou
t
on
Drüc
k
en Sie die
V
Q-
T
a
T
T
s
t
e,
um
f
ort
z
u
f
ah
r
en
P
r
esione el bo
t
ón
V
Q
Prima o bo
t
ão
V
Q
pa
r
a p
r
osseguir
Druk op de
V
Q-knop
om
v
e
r
der
t
e
g
aan
T
r
ykk på
V
Q-knappen
f
or å
g
å vide
r
e

Setup Clock & Alarms
Use & ar
r
o
w
s
t
o
s
e
t hour of alarm
r
égler l’heu
r
e de l
’
alarme
Nut
z
en Sie die &
P
f
eil
t
a
s
t
en, um die
W
eck
z
eit
(Stunden) ein
z
u
st
ellen
aju
s
t
ar la ho
r
a de la alarma
Use as s
e
t
as & pa
r
a
Gebruik de & pijlen om h
e
t
uur
v
oor h
e
t alarm in
t
e
s
t
ellen
Bruk pilene &
f
or å
Appu
y
er sur le bou
t
on
mit der
V
Q-
T
a
T
T
s
t
e
Use & ar
t
o s
e
t minu
t
e of alarm
pour
r
égler les minu
t
es de l
’
alarme
Nut
z
en Sie die &
P
f
eil
t
a
s
t
en, um die
W
eck
z
eit
(Minu
t
en) ein
z
u
st
ellen
aju
s
t
ar el minu
t
o de la alarma
Use as s
e
t
as & pa
r
a
Gebruik de & pijlen om de
minu
t
en
v
oor h
e
t alarm in
t
e
s
t
ellen
Bruk pilene &
f
or å

Appu
y
er sur le bou
t
on
mit der
V
Q-
T
a
T
T
s
t
e
Use & ar
o
w
s
t
o
choose type of alarm
pour choisir le type d
’
alarme
Nut
z
en Sie die &
P
f
eil
t
a
s
t
en,
um den
W
eckmodus au
s
z
u
w
ählen
Use as s
e
t
as & pa
r
a
Gebruik de & pijlen om
h
e
t type alarm in
t
e
s
t
ellen
Bruk pilene &
f
or
å
v
el
g
e alar
m
type
Appu
y
er sur le bou
t
on
mit der
V
Q-
T
a
T
T
s
t
e
Setup Clock & Alarms

Use & ar
r
o
w
s
t
o s
e
t alarm
v
olume
r
égler le
v
olume de l
’
alarme
Nut
z
en Sie die &
P
f
eil
t
a
s
t
en,
um die
W
ecklaut
s
t
är
k
e ein
z
u
st
ellen
aju
s
t
ar el
v
olumen de la alarma
v
olume do alarme
Gebruik de & pijlen om
h
e
t alar
m
v
olume in
t
e
s
t
ellen
Bruk pilene &
f
or
å angi alar
m
v
olum
Appu
y
er sur le bou
t
on
mit der
V
Q-
T
a
T
T
s
t
e
Setup Clock & Alarms


FCC Caution.
This device complies with part 15 of the FCC Rules. Operation is subject to the following two
conditions:
(1) This device may not cause harmful interference, and
(2) this device must accept any interference received, including interference that may cause
undesired operation.
Any Changes or modifications not expressly approved by the party responsible for compliance
could void the user's authority to operate the equipment.
Note: This equipment has been tested and found to comply with the limits for a Class B digital
device, pursuant to part 15 of the FCC Rules. These limits are designed to provide reasonable
protection against harmful interference in a residential installation. This equipment generates
uses and can radiate radio frequency energy and, if not installed and used in accordance with the
instructions, may cause harmful interference to radio communications. However, there is no
guarantee that interference will not occur in a particular installation. If this equipment does
cause harmful interference to radio or television reception, which can be determined by turning
the equipment off and on, the user is encouraged to try to correct the interference by one or
more of the following measures:
-Reorient or relocate the receiving antenna.
-Increase the separation between the equipment and receiver.
-Connect the equipment into an outlet on a circuit different from that to which the receiver is
connected.
-Consult the dealer or an experienced radio/TV technician for help.
The device has been evaluated to meet general RF exposure requirement. The device can be used
in portable exposure condition without restriction.
IC Warning
This device complies with Industry Canada licence-exempt RSS standard(s). Operation is subject
to the following two conditions:
(1) This device may not cause interference, and
(2) This device must accept any interference, including interference that may cause undesired
operation of the device.
Le présent appareil est conforme aux CNR d'Industrie Canada applicables aux appareils radio
exempts de licence. L'exploitation est autorisée aux deux conditions suivantes: (1) l'appareil ne
doit pas produire de brouillage, et (2) l'utilisateur de l'appareil doit accepter tout brouillage
radioélectrique subi, même si le brouillage est susceptible d'en compromettre le fonctionnement
The device has been evaluated to meet general RF exposure requirement. The device can be used
in portable exposure condition without restriction.
L'appareil a été évalué pour répondre aux exigences générales d'exposition aux radiofréquences
L'appareil peut être utilisé dans des conditions d'exposition portable sans restriction.
