NewTek NDI-PTZ1 User manual
Page | i
t

Revised –September 21, 2018
Trademarks: NewTek, NewTek VMC1, NewTek VMC1 IN, NewTek VMC1 OUT, NewTek NC1, NewTek NC1 IN, NewTek NC1 I/O, TriCaster,
TriCaster TC1, TriCaster Advanced Edition, TriCaster XD, TriCaster 8000, TriCaster TCXD8000, TCXD8000, TriCaster 860, TriCaster
TCXD860, TCXD860, TriCaster 460, TriCaster TCXD460, TCXD460, TriCaster 410, TriCaster TCXD410, TCXD410, TriCaster Mini SDI,
TriCaster Mini, TriCaster 40, TriCaster TCXD40, TCXD40, TriCaster 855, TriCaster TCXD855, TCXD855, TriCaster 455, TriCaster TCXD455,
TCXD455, TriCaster EXTREME, TriCaster 850 EXTREME, TriCaster TCXD850 EXTREME, TCXD850 EXTREME, TriCaster 450 EXTREME,
TriCaster TCXD450 EXTREME, TCXD450 EXTREME, TriCaster 850, TriCaster TCXD850, TCXD850, TriCaster 450, TriCaster TCXD450,
TCXD450, TriCaster 300, TriCaster TCXD300, TCXD300, TriCaster PRO, TriCaster STUDIO, TriCaster BROADCAST, TriCaster DUO,
MediaDS, MDS1, 3PLAY, 3Play, 3Play 3P1, 3Play 4800, 3PXD4800, 3Play 440, 3PXD440, 3Play Mini, 3Play 820, 3PXD820, 3Play 425,
3PXD425 3Play 330, 3PXD330, TalkShow, TalkShow VS 4000, TalkShow VS100, Network Device Interface, NDI, NewTek Connect, NewTek
Connect Spark, NewTek IsoCorder, ProTek, ProTek Care, ProTek Elite, iVGA, SpeedEDIT, IsoCorder, LiveText, LiveGraphics Creator,
LiveGraphics, DataLink, LiveSet, LiveGraphics, TriCaster Virtual Set Editor, Virtual Set Editor Advanced Edition, TriCaster VSE, TriCaster VSE
Advanced Edition, LiveMatte, TimeWarp, VT, VT[3], VT[4], V[T5], Video Toaster, Toaster, Inspire 3D, 3D Arsenal, Aura, LightWave, LightWave
3D and LightWave CORE are trademarks, service marks, and registered trademarks of NewTek. All other brand names, product names, or
trademarks belong to their respective holders.

Page | 3
Table of Contents
SECTION 1 INTRODUCTION AND SETUP ..................................................................................................... 1
1.1 Overview................................................................................................................................................................................1
1.2 Getting Ready ........................................................................................................................................................................1
1.3 Making Connections ..............................................................................................................................................................2
1.4 Web Configuration.................................................................................................................................................................2
1.4.1 Studio Monitor ...............................................................................................................................................................3
1.4.2 Logging In .......................................................................................................................................................................5
1.1 Video Source..........................................................................................................................................................................6
1.1.1 Video Bandwidth ............................................................................................................................................................6
1.1.2 Pan, Tilt and Zoom..........................................................................................................................................................7
1.2 Audio Video Settings..............................................................................................................................................................7
1.3 Administration .......................................................................................................................................................................8
1.3.1 Multicast.........................................................................................................................................................................9
1.3.2 Network Settings ..........................................................................................................................................................10
1.4 Tally......................................................................................................................................................................................10
SECTION 2 REMOTE CONTROL & OSD ...................................................................................................... 11
2.1 Remote Control....................................................................................................................................................................11
2.2 OSD Menu............................................................................................................................................................................12
SECTION 3 MOUNTING NDI-PTZ1™ .......................................................................................................... 19
3.1 Preparation ..........................................................................................................................................................................19
3.1.1 Other Precautions ........................................................................................................................................................19
3.2 Ceiling Mounting..................................................................................................................................................................21
3.3 Removal ...............................................................................................................................................................................22
SECTION 4 ABOUT NDI®............................................................................................................................. 23
4.1 A ‘Video Internet’.................................................................................................................................................................23
4.2 NDI Benefits .........................................................................................................................................................................24

Page | 4
4.3 NDI Virtual Input..................................................................................................................................................................24
SECTION 5 END USER LICENSE AGREEMENT ............................................................................................ 27
CREDITS..................................................................................................................................................... 37
Page | 1
Section 1 INTRODUCTION AND SETUP
This section explains how to connect and configure your NewTek NDI-PTZ1™camera. It
also explains how to update the device, and where you can find additional NDI®software to
extend your workflow. After completing this short section, you’ll be all set to begin using
your new camera.
1.1 OVERVIEW
Thank you for purchasing this NewTek™ product. NewTek is
proud of its record of innovation and commitment to excellence
in design, manufacture, and superb product support.
NewTek provides some of the most advanced live production
tools available, and we are confident you will find them
exceptionally powerful and versatile.
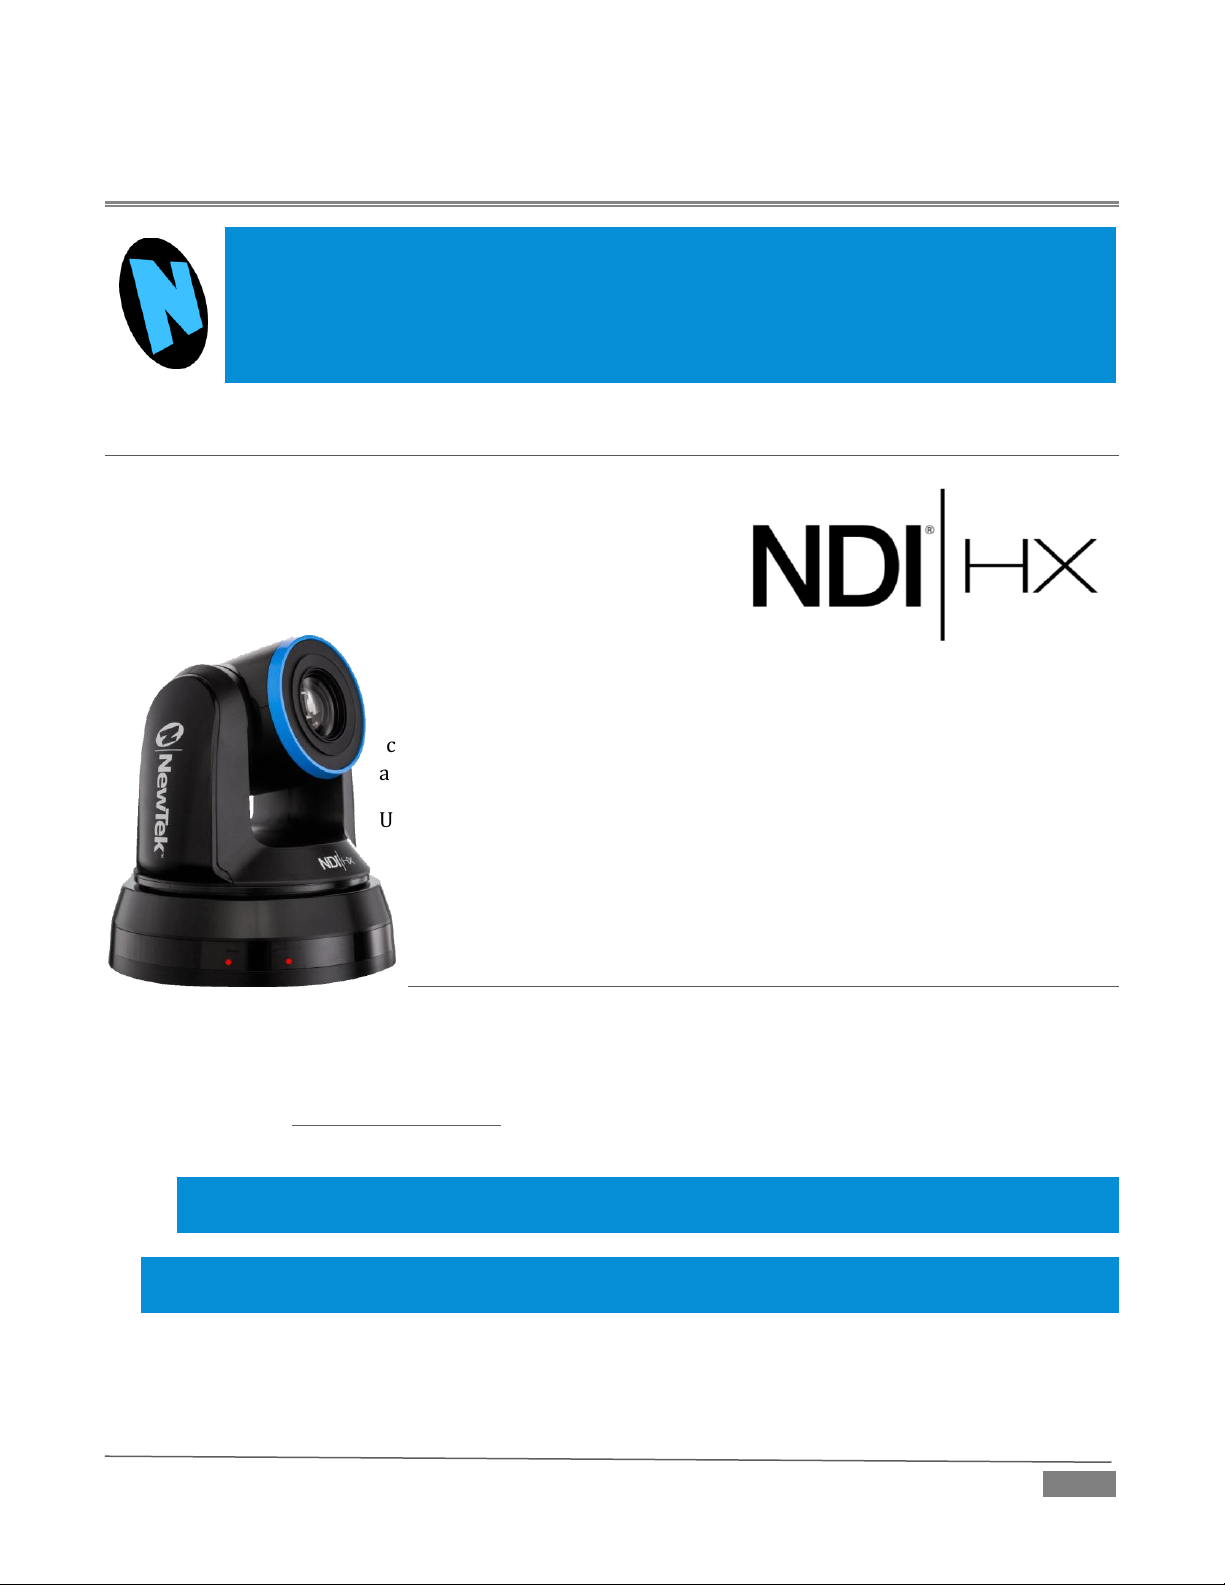
Your NewTek NDI-PTZ1™camera delivers amazing functionality in a compact
package. Prosumers and video professionals alike will appreciate the
convenience and flexibility it provides in connection with video production
and capture.
Unlike typical cameras, PTZ1 leverages the ground-breaking benefits of the
NDI-based IP workflow supported by leading video software and hardware
developers around the globe. This manual will assist you to install and
configure your new product.
1.2 GETTING READY
Your NewTek NDI-PTZ1 device uses the NDI|HX™ protocol for audio/video transmission, and more.
Your first step will be to install NDI|HX drivers as appropriate for your computer platform or device:
1. Navigate to http://new.tk/PTZ1Info in your web browser, and follow the relevant directions to
download and install NDI|HX drivers for your computer platform.
NOTE: The NDI|HX driver also installs NewTek’s NDI Studio Monitor application, which will not only display
the output of your camera, but provide easy access to its settings. It even includes built-in PTZ controls.
NOTE: The End User License Agreement under which you use the NDI|HX driver specifies that “you may use up
to five (5), and no more than five, copies on separate machines at one time.”

Page | 2
2. Optional –for Microsoft Windows®users, downloading and installing the NewTek NDI Tools pack,
available at no cost from https://www.newtek.com/ndi, will provide a very useful array of practical
NDI learning tools and utilities.
1.3 MAKING CONNECTIONS
FIGURE 1-1
1. Connect the power supply line cord to an A/C power outlet, and insert the round power plug into the
DC IN 12V socket located at left on the a/v connection panel (Figure 1-1). Push the power plug into
the socket until it is firmly seated.
Hint: Your NDI-PTZ1 supports the Power over Ethernet standard (IEEE802.3at). This allows you to skip the
step above if your network supplies DC power by this means.
2. Connect one end of a network cable to NDI-PTZ1’s RJ-45 Ethernet port, marked NDI|HX. Connect the
other end of the cable to your network switch or router, or a computer's Ethernet port.
At this point, two lights on the front of PTZ1’s base illuminate as the camera performs a self-test. If this does
not happen, check your connections and retry. After a few moments, the standby light will go out, leaving
only the power light on.
Hint: These front panel lights do dual duty, serving as Tally lights as discussed later.
Your NewTek NDI-PTZ1 is already sending NDI audio and video to your local network. We’ll talk about how
to access it soon, but first let’s discuss how to manage configuration settings and options.
1.4 WEB CONFIGURATION
NewTek NDI-PTZ1 is very easy to configure. In many installations, all you need to do is supply power,
connect a video source and your network, and you‘re ready to go.
Sometimes, though, you will want to access its settings, perhaps to configure login credentials, adjust color
balance, and so on.
Note: As web browsers vary widely, you may occasionally find it necessary to delete cached files (sometimes
referred to as the browser’s “history”) before the display refreshes to properly show some recent change. This can
happen, for example, after a firmware update.

Page | 3
These settings are made available by means of a configuration webpage, which you can access from any
suitable device (i.e., one with a web browser) on the same network.
KEEP READING TO LEARN HOW TO ACCESS YOUR CAMERA’S WEBPAGE.
Some devices provide direct, easy access to PTZ1’s
configuration webpage.
For example, when you select its NDI output as the
source for a NewTek TriCaster®input, a convenient
“Configure” button is shown. Simply click it to open
PTZ1’s web control page.
1.4.1 STUDIO MONITOR
For other platforms, you can use the Studio Monitor
application you installed along with the NDI|HX driver
back in Section 1.2.
Windows platform users can launch Studio
Monitor from the Start menu or App list (Figure
1-2), where it will appear in the NewTek NDIHX
Driver folder.
OS X users will also find a new Studio Monitor
application available to them after installing the NDI|HX driver for their platform.
FIGURE 1-3
FIGURE 1-2

Page | 4
Among its capabilities, Studio Monitor (see Figure 1-3, which shows the Windows version of the application)
detect and display any NDI or NDI|HX sources available on your network.
LOCATING YOUR CAMERA ON THE NETWORK –WINDOWS™
1. Having launched Studio Monitor, click the small menu gadget (‘hamburger’) at upper left to open the
application menu. Among other things, this menu displays all NDI sources detected on your network.
2. Shortly, you should see a new main entry named NDI-PTZ1 listed in the menu. Rolling the mouse
pointer over this label shows the individual names for the NDI output channels of any NDI-PTZ1
cameras detected on the network.
Hint: Detection of newly-connected NDI sources can take a few moments; in network settings with a great
number of NDI sources available, a complete refresh of the source list can take a minute or even more.
When the sub-menu lists multiple NDI channels with the same name, the device IP address is shown to
further identify them. (NDI users seldom need to bother with mundane matters such as IP addresses.
)
Select the newly listed channel for the camera you wish to configure. In a few moments, its NDI video
output will appear in the Studio Monitor window.
FIGURE 1-4
3. For NDI sources (like PTZ1) that supply a configuration web page, Studio Monitor displays a small
configuration (gear) icon at lower right when you roll the mouse pointer over it window –Figure 1-5.
FIGURE 1-5

Page | 5
4. Click the gear to open PTZ1’s web page, popping up a request for you to enter login credentials.
Note: The Microsoft Edge™ web browser is not fully supported at this time. On Windows platforms, please
another modern web browser or Internet Explorer™.
LOCATING YOUR CAMERA ON THE NETWORK –OS X™
The process is very similar for OS X users.
1. Having launched the Studio Monitor application, use the File menu to locate a new main entry named
NDI-PTZ1. Rolling the mouse pointer over this label shows the individual names for the NDI output
channels of any PTZ1 cameras detected on the network.
Hint: Detection of newly-connected NDI sources can take a few moments; in network settings with a great
number of NDI sources available, a complete refresh of the source list can take a minute or even more.
When the sub-menu lists multiple NDI channels with the same name, the device IP addresses are shown to
further identify them. (NDI users seldom need to bother with mundane matters such as IP addresses.
)
Select the newly listed channel for the camera you wish to configure. In a few moments, its video
output will appear in the Studio Monitor window.
2. The Studio Monitor application’s Settings menu shows an option near the bottom that lets you open
the Device Webpage in your system web browser. Select this item, and continue as follows.
1.4.2 LOGGING IN
Note: If you were unable to detect your camera using the methods described above, refer to the sub-heading
Network Settings in Section 1.3.2 for details of an alternative way to locate it on the network.
1. Enter the User Name “admin” and the default Password - also “admin”.
FIGURE 1-6
Page | 6
1.1 VIDEO SOURCE
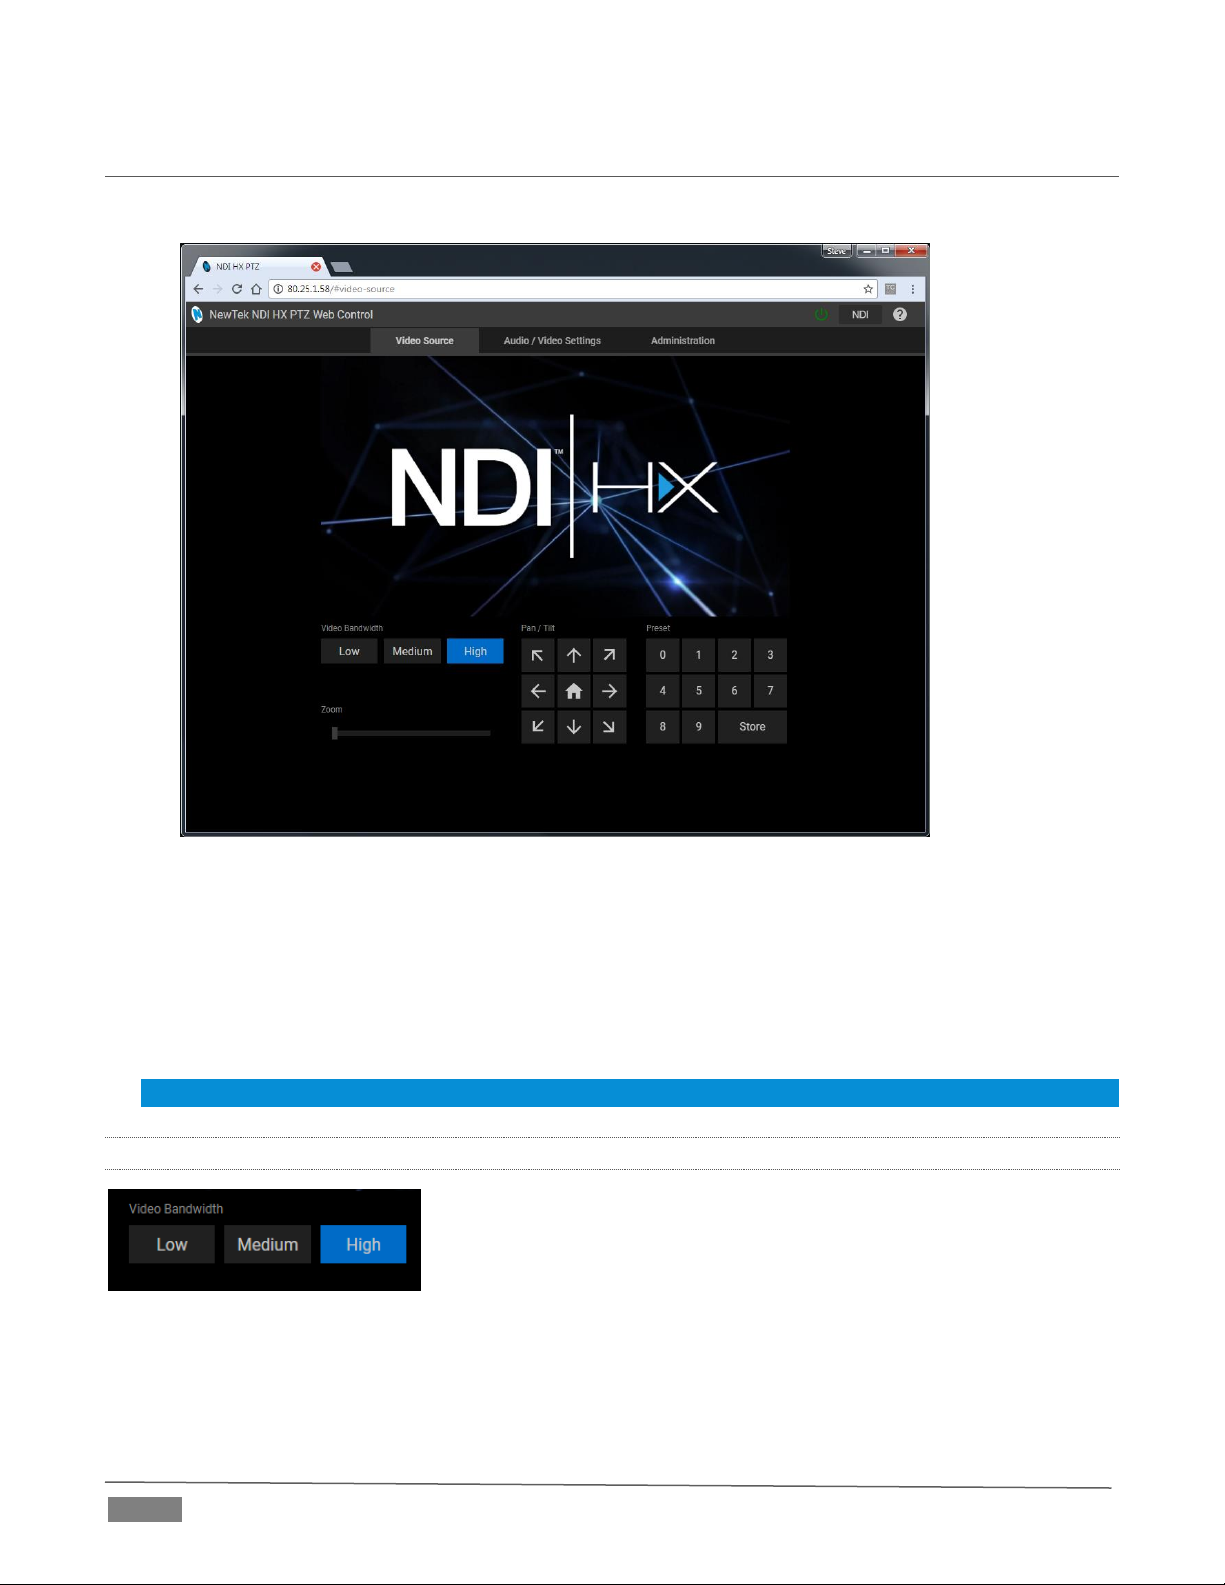
After logging in, your camera’s options and controls are shown in your web browser (Figure 1-7).
FIGURE 1-7
The first tab shown on this web page is labeled Video Source. At the time of writing, a placeholder image
substitutes for the ‘monitor’ on the web page. Below this, you will see:
Video Bandwidth buttons
Live Pan, Tilt, and Zoom controls
Preset buttons
Hint: Studio Monitor provides an excellent alternative to almost all of the settings on this first tab.
1.1.1 VIDEO BANDWIDTH
FIGURE 1-8
Video Bandwidth controls (Figure 1-8) allow you to select between the default High bandwidth output, or
Medium and Low reduced bandwidth options which, dependent on your network throughput capabilities
and other traffic, or size of the image required to display on the receiver, may work better for you.
Page | 7
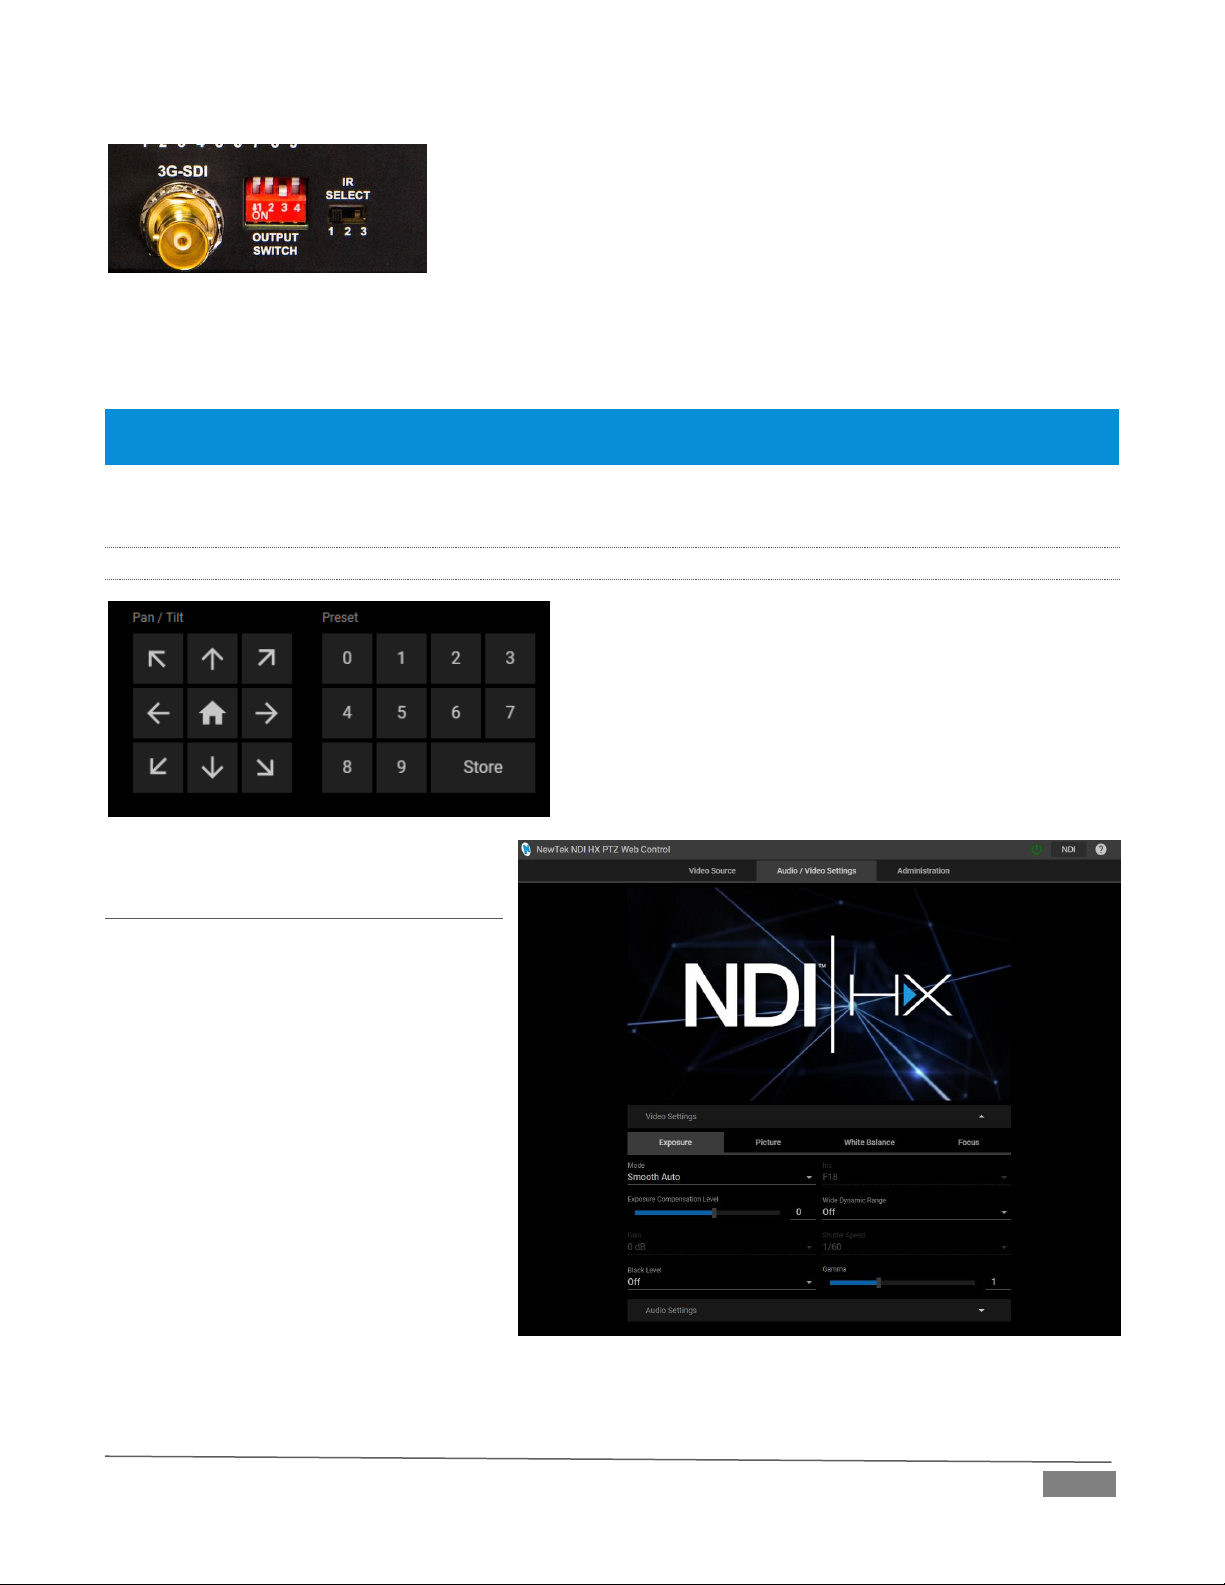
FIGURE 1-9
The highest Video Bandwidth setting outputs the same video format as you have selected using the Output
DIP switches, located near the 3G-SDI connector on the camera’s connector panel.
NOTE: The various DIP switch configurations for different output formats are depicted on a sticker on the underside
of PTZ1’s pedestal base. Typically, you might choose something like 1080p/59.94, or 1080p/50.
From left to right, the other Bandwidth options correspond to SD and 720P output formats.
1.1.2 PAN, TILT AND ZOOM
The Pan, Tilt controls and Zoom slider work much as you
would expect.
Likewise the neighboring preset buttons are easy to use.
Simply click Store followed by a numbered Preset button to
store the current PTZ1 position; click the numbered Preset
button along to send the camera to the stored position.
1.2 AUDIO VIDEO SETTINGS
Click the second web page tab to reveal
more advanced Audio/Video Settings
(Figure 1-11).
Expanding the Video Settings control
group shows additional nested tabs with
various Exposure, Picture, White Balance,
and Focus options.
A little lower on the page, you can expand
the Audio Settings control group (Figure
1-12).
FIGURE 1-10
FIGURE 1-11

Page | 8
FIGURE 1-12
This group includes Audio Input level buttons labeled Line and Mic, along with the Volume slider. The switch
at left allows you to completely disable audio output.
1.3 ADMINISTRATION
FIGURE 1-13
The third tab on the configuration web page is labeled Administration. Here you will find information and
settings related to your camera, and its network connection.
FIGURE 1-14
The uppermost section of this tab displays the Device Name and NDI Channel Name fields, which determine
how your camera is identified on your NDI network. These names are editable, allowing you a convenient
way to make identify the output of specific cameras to other NDI-enabled devices and systems connected
downstream.

Page | 9
You will also see the Hardware and Firmware versions for your camera displayed in this area, along with its
unique serial number. Buttons just below allow you to update the installed firmware, modify the default
network password, or to power the device down (‘sleep’).
1.3.1 MULTICAST
FIGURE 15
Click Multicast to transmit video using multicast, rather than the default unicast method. A suitable Multicast
address is generated, but you can edit the result manually if you need to. To update the address to another
random value, click Generate Address. Please take time to consider the following information before enabling
this feature.
MULTICAST OR UNICAST?
Multicast can seem like a bandwidth-saving miracle. Unlike
NDI’s default mode (unicast), multicast does not require a
unique stream from the source to each receiver. When using
unicast, each connection to the sender reduces the
bandwidth available by a similar amount.
By contrast, multicast connections do not add significantly
to the bandwidth required as connections multiply. You
could be forgiven for wondering why anyone would ever
turn this option off - yet, it is off by default. Why?
This is because multicast requires more careful network
configuration. While you might not notice any issues in a
simple network setting; a poorly configured environment
can have serious impact on more complex networks.
Specifically, it is essential that IGMP snooping be
enabled for each switch on the network. This lets the
device listen to traffic between other hosts, switches
and routers, and identify receiving ports using
various IP multicast streams.
In addition, we strongly recommend that all
network switches be of the ‘managed’ type (see the
sidebar “Managed vs. Un-managed”).
Managed vs. Unmanaged
An un-managed (a.k.a., ‘dumb’) network
switch will cause a multicast stream to
revert to unicast. This can have serious
ramifications.
For example, even though a device
broadcasts a multicast stream, the un-
managed switch will pass unicast
packets to downstream switches and
clients. This can flood parts of the
network with unnecessary traffic. It can
even slow down the rest of the network,
as upstream devices are forced to wait
for responses from the over-saturated
devices.
The net result of such a poor setup can
be likened to a self-inflicted denial of
service attack.
Page | 10
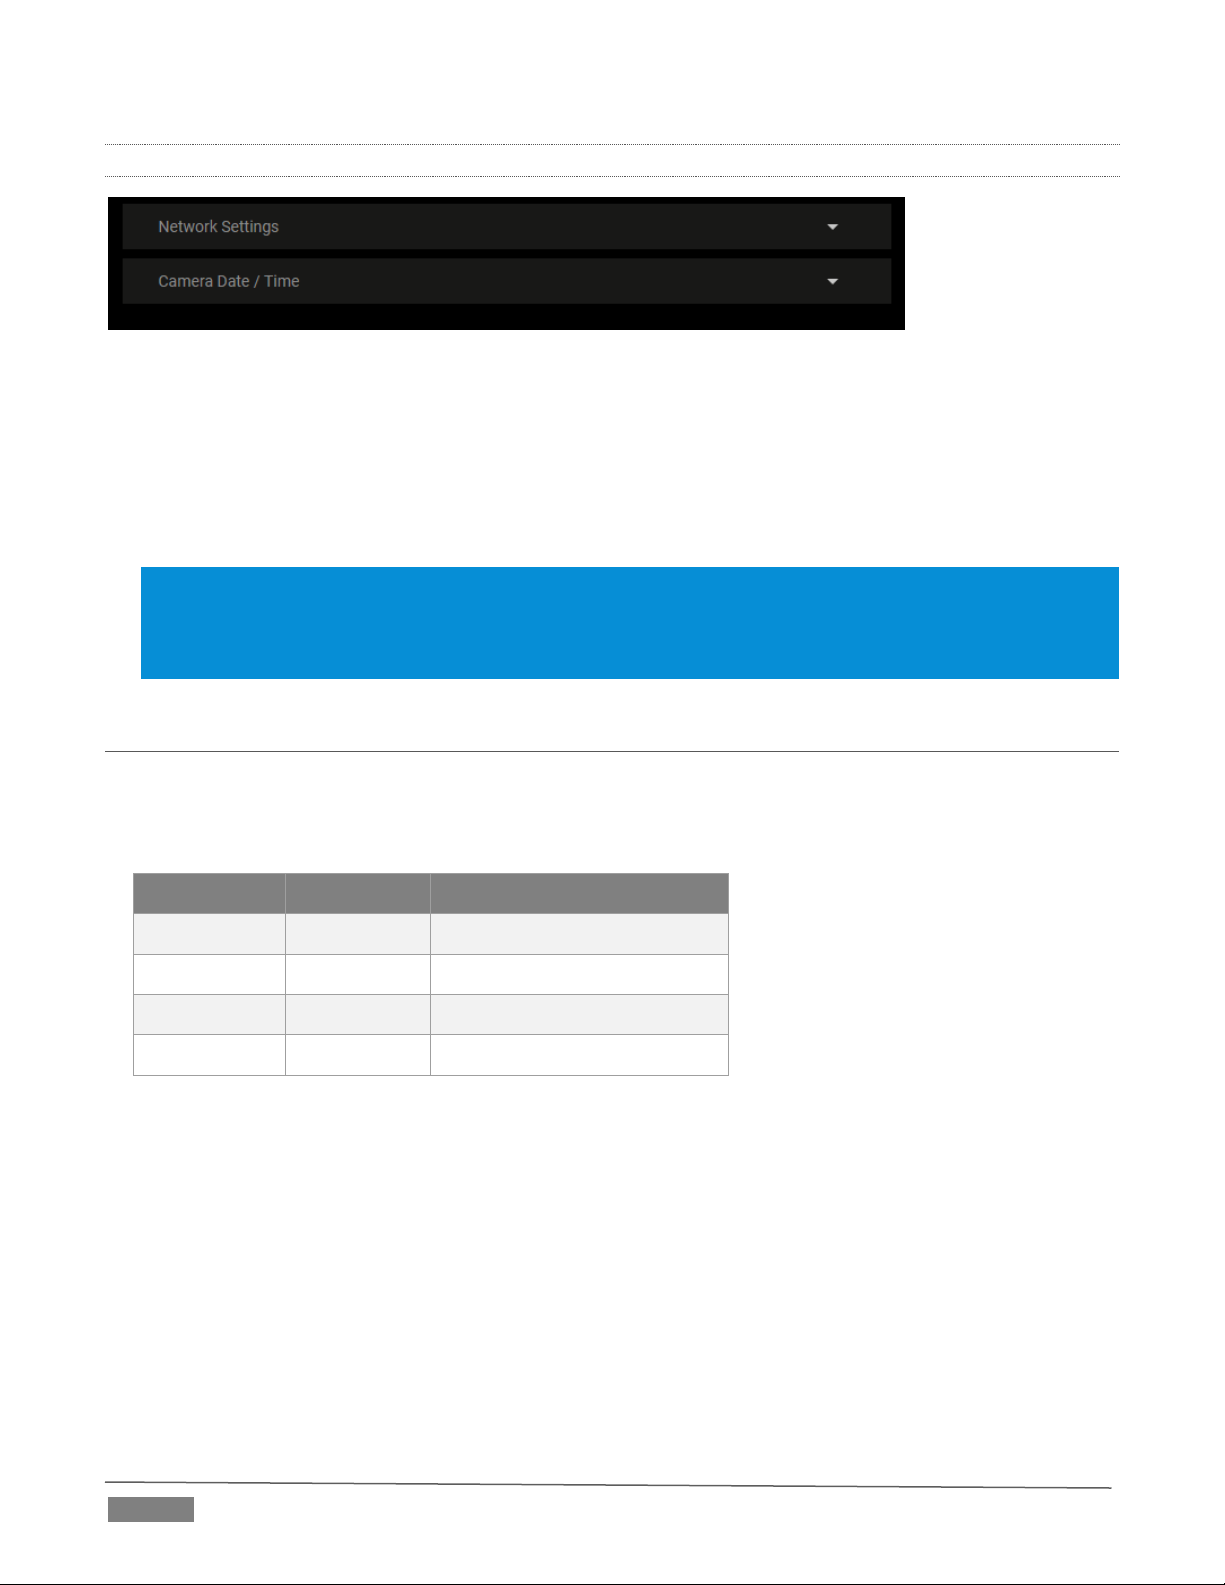
1.3.2 NETWORK SETTINGS
FIGURE 1-16
Controls in the Network Settings section will be familiar to anyone who has connected a computer or mobile
device to a network, and thus require little explanation.
Typically, your network will be configured to automatically supply IP addresses to devices you connect to it
by means of a DHCP server. Your camera’s IP Address resolution method is set to Dynamic by default, to take
advantage of this scheme. To assign a static IP address to your PTZ1, change the IP Address setting to Manual.
NOTE: Should the default IP Address mode (Dynamic) fail to provide a usable IP address within a minute or
two of powering up –as when an active DHCP server is not found on the network –PTZ1 will automatically
switch to Manual mode and attempt to connect using a static IP address. The default IP address is
192.168.100.168.
1.4 TALLY
Your camera unit provides ‘tally’ notification from NDI devices supporting it. Specifically, the Power and
Standby lights and located on the front of the pedestal base light up in red or green to tell you when video
output from the device is visible on the Program output or Preview, as listed in the following table.
POWER
STANDBY
Indicates (tally state)
Green
Off
On preview
Red
Red
On program
Green
Red
On program and preview
Off
Off
Not on output
Page | 11
Section 2 REMOTE CONTROL & OSD
Some of the more exotic settings and options available on your NDI-PTZ1™ are supported by
means of the onscreen display, and accessed via the included remote control. This section
first describes the features of the latter, then provides a full list of options and settings in the
‘OSD’.
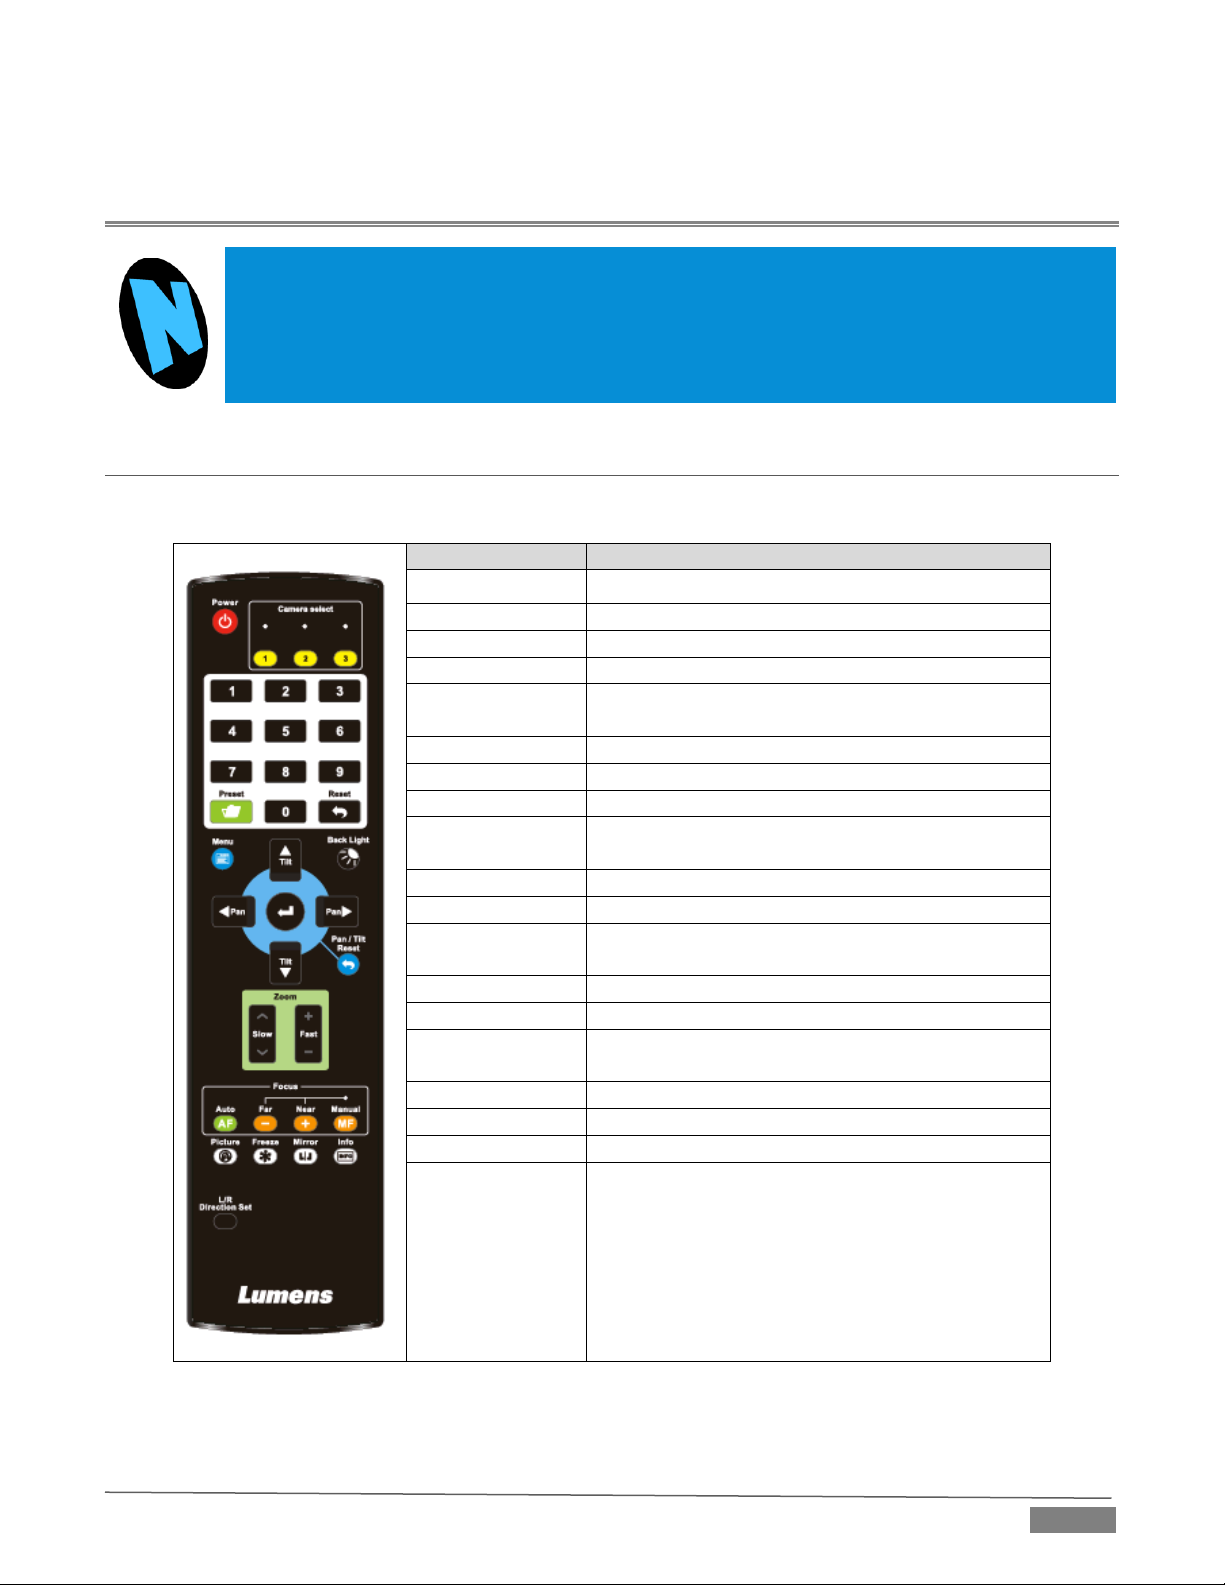
2.1 REMOTE CONTROL
The following table identifies the various controls and buttons on your NDI-PTZ1™ remote control.
Item
Description
,,,
Pan or tilt the camera
Back Light
Enable/Disable backlight compensation
Camera select
Control 1 ~ 3 of VC-A50P
Auto
Auto focus
Focus: Manual,
Far, Near
Turn on manual focus to adjust the focal length
using the Far and Near buttons
Freeze
Freeze the screen
Home-Enter
Go back to the main page / Execute
Info
Status information
L/R
Direction Set
L/R Direction / Normal
Menu
Display OSD menu
Mirror
Rotate the image (OFF / Mirror / Flip / Rotate)
Pan/Tilt
Reset
Clear the Pan / Tilt setting
Picture
Image effect: OFF / NEG / Black & White
Power
Power Switch
Preset
Select a Preset (0 ~ 9) to store the current
position data
Reset
Select a Preset (0 ~ 9) to clear
Zoom-Fast
Adjust image size
Zoom-Slow
Fine-tune image size

Page | 12
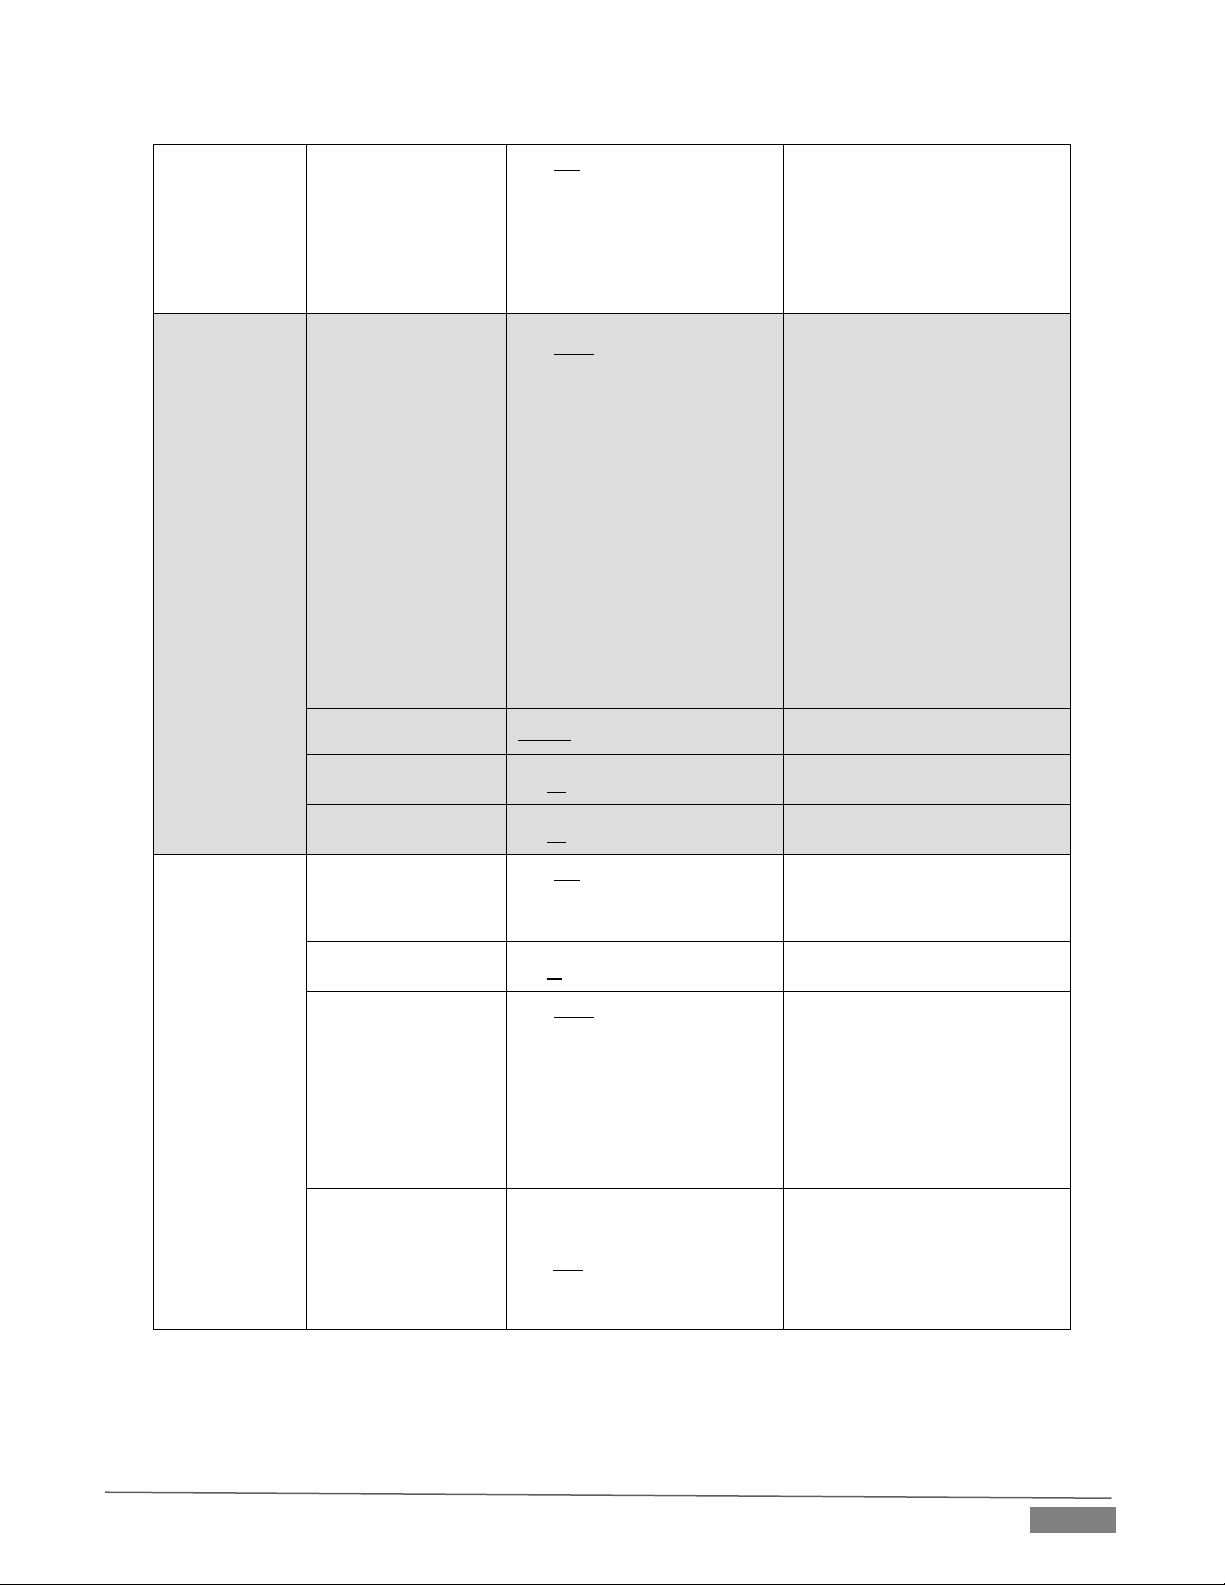
2.2 OSD MENU
Press the Menu button on the remote control to display the OSD (On Screen Display) and settings menu over
your live video on PTZ1’s hardware video output (SDI or HDMI).
Hint: The bold underlined values in the following table are the defaults.
The following tables detail the options available to you in the OSD settings menu.
Level 1
Level 2
Level 3
Description
Exposure
Mode
1. Full Auto
2. Shutter Pri
3. Iris Pri
4. Manual
5. White Board
6. Smooth Auto
Exposure mode
Exposure Comp.
On / Off
AE Level
Exposure Comp.
Level
-6 ~ 0 ~ 5
Available when Exposure Comp.
is enabled.
Shutter Pri
60/30 mode
50/25 mode
1/10000
1/10000
1/5000
1/5000
1/3000
1/3000
1/2500
1/2500
1/2000
1/1750
1/1500
1/1250
1/1000
1/1000
1/725
1/600
1/500
1/425
1/350
1/300
1/250
1/215
1/180
1/150
1/120
1/120
1/100
1/100
1/90
1/75
1/60
1/50
1/30
1/25
1/15
1/12
1/8
1/6
1/4
1/3
1/2
1/2
1/1
1/1

Page | 13
Iris Pri
1. F1.6
2. F2
3. F2.2
4. F2.7
5. F3.2
6. F3.8
7. F4.5
8. F5.4
9. F6.3
10. F7.8
11. F9
12. F11
13. F13
14. F16
15. F18
Iris setting
Manual Gain
1. 0dB
2. 2 dB
3. 4 dB
4. 6 dB
5. 8 dB
6. 10 dB
7. 12 dB
8. 14 dB
9. 16 dB
10. 18 dB
11. 20 dB
12. 22dB
13. 24dB
14. 26 dB
15. 28 dB
16. 30 dB
Manually set the gain
Manual Speed
60/30 mode
50/25 mode
Manually set the shutter
1/10000
1/10000
1/5000
1/5000
1/3000
1/3000
1/2500
1/2500
1/2000
1/1750
1/1500
1/1250
1/1000
1/1000
1/725
1/600
1/500
1/425
1/350
1/300
1/250
1/215
1/180
1/150

Page | 14
1/120
1/120
1/100
1/100
1/90
1/75
1/60
1/50
1/30
1/25
1/15
1/12
1/8
1/6
1/4
1/3
1/2
1/2
1/1
1/1
Manual Iris
1. F1.6
2. F2
3. F2.2
4. F2.7
5. F3.2
6. F3.8
7. F4.5
8. F5.4
9. F6.3
10. F7.8
11. F9
12. F11
13. F13
14. F16
15. F18
Manually set the iris
Gain Limit
1. 8 dB
2. 10 dB
3. 12 dB
4. 14 dB
5. 16 dB
6. 18 dB
7. 20 dB
Maximum limit of electronic gain
Iris Limit
1. F1.6
2. F2.2
3. F3.2
4. F4.5
5. F6.3
6. F9
7. F13
8. F18
Maximum limit value of iris
Page | 15
WDR
1. Off
2. 1
3. 2
4. 3
5. 4
6. 5
WDR settings
White Balance
Mode
1. Auto
2. Indoor
3. Outdoor
4. One Push WB
5. ATW
6. Manual
7. Sodium Lamp
8. 3000K
9. 4300K
10. 5000K
11. 6500K
12. 8000K
13. WideAuto
Select color temperature mode
1. 4000k ~ 7000k
2. 3200k
3. 5800k
4. 1700k ~ 10000k
5. 1700k ~ 10000k
6. Custom
7. 2800k
8. 3000K
9. 4300K
10. 5000K
11. 6500K
12. 8000K
13. 3000k ~ 7000k
One Push Trigger
ENTER
One push trigger
Manual Red
0 ~ C ~ 128
Adjustable when the white
balance mode is set to Manual
Manual Blue
0 ~ C ~ 128
Adjustable when the white
balance mode is set to Manual
Picture
Picture effect
1. Off
2. Neg
3. B & W
Set the picture effect
Sharpness
0 ~ C ~ 15
Adjust the sharpness of the
image
2D NR
1. Auto
2. Off
3. 1
4. 2
5. 3
6. 4
7. 5
2D noise reduction settings
3D NR
1. Off
2. Low
3. Typ
4. Max
5. Auto
3D dynamic noise reduction
settings

Page | 16
Image Mode
1. Mode 1
2. Mode 2
3. Mode 3
4. Mode 4
5. Mode 5
6. Mode 6
7. Custom
Customize desired image modes
Image Mode Load
1. Mode 1
2. Mode 2
3. Mode 3
4. Mode 4
5. Mode 5
6. Mode 6
Adjustable when the image
mode is set to Custom. After
selection, the image mode
parameters are read and applied
to Custom
Brightness
0 ~ C ~25
Adjustable when the image
mode is set to Custom
Contrast
0 ~ C ~ 25
Contrast adjustment; Adjustable
when the image mode is set to
Custom
Saturation
0 ~ C ~ 25
Adjustable in the Custom Mode
Black Level
1. Off
2. Type 1
3. Type 2
4. Type 3
5. Type 4
6. Type 5
Adjustable in the Custom Mode
Gamma
0 ~ C ~ 3
Adjustable in the Custom Mode
Skin Tone
0 ~ C ~ 5
Skin tone setting, adjustable in
the Custom Mode
Pan Tilt Zoom
Pan/Tilt Limit
ON/Off
Turn on/off the angle limit
setting
Pan Right Limit
0 ~ 170
Limit the right angle
Pan Left Limit
-170 ~ 0
Limit the left angle
Tilt UP Limit
0 ~ 90
Limit the upward angle
Tilt Down Limit
-30 ~ 0
Limit the downward angle
Pan Flip
On/Off
Activate the reverse Pan
command
Tilt Flip
On/Off
Activate the reverse Tilt
command
Preset Speed
1. 5 per second
2. 25 per second
3. 50 per second
4. 120 per second
Set the rotation speed of the
cradle head when Preset is
executed
PTZ Speed Comp
On/Off
PTZ Speed Compensation
This manual suits for next models
1
Table of contents
Other NewTek IP Camera manuals

Popular IP Camera manuals by other brands


SCW
SCW PRO SERIES user manual

Digital Watchdog
Digital Watchdog Star-Light Plus DWC-VA553WTIR user manual

Shenzhen
Shenzhen ip607 user manual

OpenEye
OpenEye OE-C6412-R user manual

Moxa Technologies
Moxa Technologies Vport P16-1MP-M12-IR Series Quick installation guide

Nearus
Nearus NU-100-USB2PT-B user manual