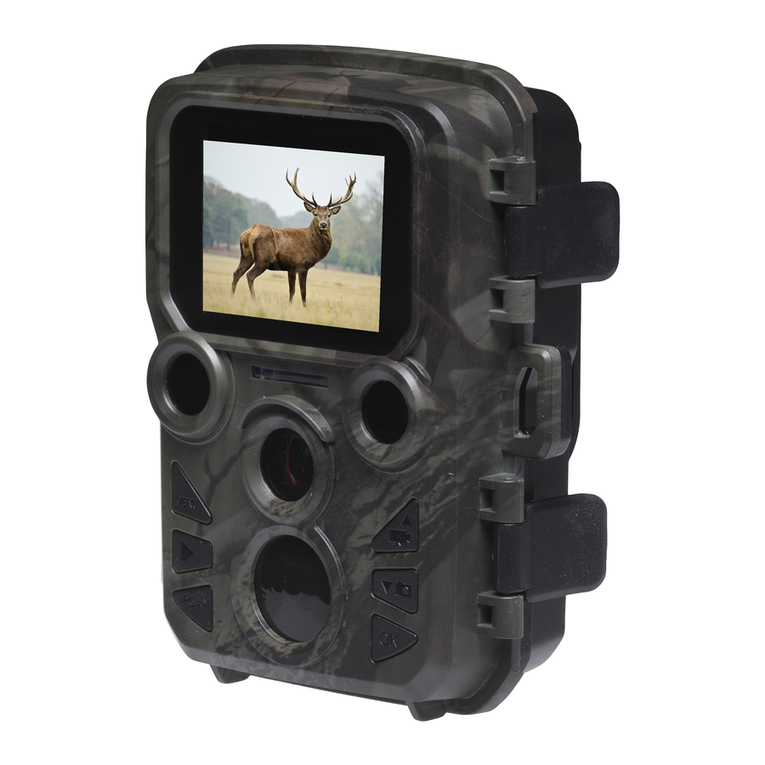
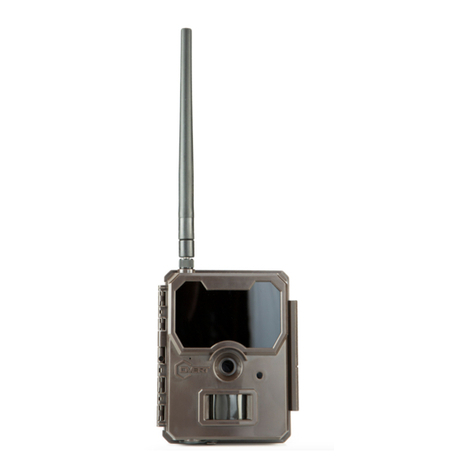
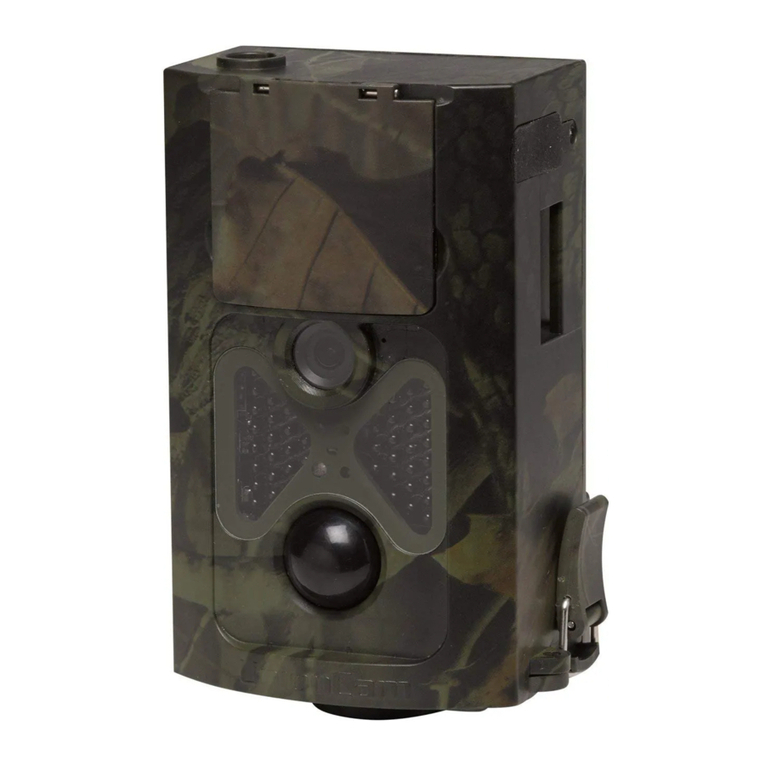
Nex-tech QC8061 User manual

Instruction Manual
QC8061
Outdoor Wildlife
Trail Camera

Please study all notices carefully and diligently.
Please study this information in detail observing,
in particular, the safety instructions.
Note:
•
Remove the protective foil from the camera lens by pulling the protruding tab.
•
Caution! Keep plastic foil and bags away from babies and small children, as otherwise danger
of suocation.
1

9. SYSTEM INFORMATION, MAINTENANCE AND DISPOSAL23
9.1. Care 23
9.2. Storage 23
9.3. Disposal 23
1. FAQ 3
2. HAZARD, SAFETY AND WARNING NOTICES 4
3. INTRODUCTION6
4. YOUR CAMERA 7
4.1. Front view 7
4.2. Inside views 8
5. PREPARING THE CAMERA 10
5.1. Opening and closing the camera 10
5.2. Inserting the batteries 10
5.3. Inserting the memory card 11
5.4. External power supply 12
5.5. Assembly with strap 12
6. USING THE CAMERA 13
6.1. Mode switch 13
6.2. Operating buttons 13
6.3. Settings 15
6.4. Night recording 19
6.5. Setting up the Live mode 19
6.6. Aligning the camera 19
6.7. File format 20
7. CONNECTING TO COMPUTER 21
8. TECHNICAL SPECIFICATION22
Contents
2

3
1. FAQ:
Problem: The camera only record video at daylight, it doesn't work at night?
Solution: 1. Please check whether your battery is dry and full of energy. If not, please use some new
batteries for your camera.
2. Please check whether you have set the timer. For example, if you set the timer from 6:00
to 18:00, then it only works at daylight and doesn't record videos at night. So you should
set the timer for 24 hours.
3. If the problem still can't be resolved, please format the camera to default setting and
format your SD card ,then all the problems will be resolved.
Problem: The sensor doesn't work or it's not sensitive?
Solution: 1. Please check whether you attached your camera to a good location. If you want to record
some little animals, please measure whether the height is reasonable.
2. Please check the time interval. For example ,if you set it to 60 seconds, then the camera will
take pictures for each 60 seconds, if you want to get more pictures ,please set it to 1 seconds.
Problem: The camera doesn't work or can't switch on?
Solution: 1. Please check whether your battery is AA battery and full of energy and dry.
Problem: The camera doesn't take pictures or videos?
Solution: 1. Please check whether your battery runs out.
2. Please check whether you attched it to a good location.
3. Please check whether there is some animals in the sensor range.
4. Please attach it to a good location.

2. Hazard, safety and warning notices
Incorrect use of the camera and accessories can be dangerous for you and others and can damage or
destroy the camera.We therefore ask you to read and strictly observe the following Hazard, safety and
warning notices.
Intended use
This camera is intended for taking digital photos and video clips. It has been designed for private
use and is not suitable for commercial purposes.
Hazards for children and persons with limited ability to operate
electronic equipment
The camera, accessory and packaging are not toys for children. These should therefore always
be kept away from children. Danger of electrocution, poisoning and suocation.
The camera and accessory may not be used by children and persons with limited abilities. The
camera may only be operated by persons physically and mentally able to operate it safely.
Electrical hazard
Damage from heat-re hazard
Switch o the camera and remove the batteries if a foreign body or liquid has entered the
camera. Let all parts dry thoroughly. Otherwise danger of re or electrocution
Switch o the camera and remove the batteries if the camera hasbeen dropped or the housing is
damaged. Otherwise danger of re and electrocution.
The camera may not be dismantled, modied or repaired. Danger of re and electrocution.
Only use a power adaptor (not supplied) with the mains voltage specied on the rating plate (6V).
Otherwise danger of re or electrocution. Disconnect the power by pulling the power adaptor out of
the socket.
A plugged in power adaptor (not supplied) can continue to use power and therefore represents a
hazard source.
The power supply may not be used during thunderstorms. Otherwise danger of electrocution.
Do notleave the camera in places that are susceptible to considerableincreases in temperature
(e.g. a vehicle). The housing and internal parts may be damaged, which in turn could cause a re.
4

Ensure adequate ventilation and do not cover the mains adaptor (not supplied) to avoid overheating.
Do not place any open ignition sources, such as lit candles onto or close to the device.
Do not subject the LCD monitor to impact or pressure.This could damage the glass of the monitor or
the liquid could leak from the inside. In case of contact with eyes or skin, rinse immediately with clear
water. In case of contact with eyes contact a doctor immediately.
Damage to the electronics, the monitor or the lens caused by external inuences such as impacts,
falls or other are not covered by the warranty and must be paid for.
Do not drop or bump the camera and always handle it carefully. Otherwise the camera can be
damaged.
Do not wrap up camera or place on textiles. This could produce a build up of heat in the camera
that can cause deformation of the housing and may represent a re hazard.
Injuries and material damage
Only place the camera on sturdy surfaces. The camera could otherwise fall or topple over, causing
damage or injury.
Do not operate the camera whilst running or driving. You could fall or cause a trac accident.
Only use a mains adaptor (not supplied) for the camera, having the input voltage specied on
the rating plate (6V). We do not accept any liability for damage caused by the use of an incorrect
mains adaptor.
The 230V socket used for the mains adaptor (not supplied) must not be covered and accessible at all
times so that the mains adaptor can be quickly disconnected from the mains, when required.
5

3.
Introduction
The Wildlife Camera is a wildlife and surveillance camera with a PIR sensor. The sensor can detect sudden
changes to the ambient temperature within an evaluation area. The signals of the highly sensitive infrared
sensor (PIR, passive infrared sensor) switch on the camera, activating picture or video mode.
Features of Wildlife Camera:
• 1/4" CMOS sensor.
• During day, sharp and clear colour images and during night time clear black and white images.
• Extremely low power consumption in standby operation providing extremely long operating
times (in standby mode up to 3 months with 8 AA batteries).
• The unique sensor design oers a wider angle of detection and improves the response time of the
camera.
• Possible use under extreme temperatures of between -20° C to 60° C.
• Compact size (approx. 13.5 x 9.7 x 6.7cm). Ideally suited for covered use.
• Impressively quick shutter release time (0.5 seconds).
• Spray water protected according to standard IP66.
• The easy to operate securing strap allows quick assembly and alignment of camera.
• Using the serial number function, locations can be encoded on photos.Where several cameras are
used, this function allows easier identication of locations when viewing photos.
• Date, time, temperature and moon phase can be displayed on the images.
• Lockable and password protection.
• Alarm in case of low battery level.
Areas of application
• Camera trap for hunting.
• Animal or incident observation.
• Motion triggered security camera for domestic, oce or public use.
• Any internal and external surveillance, where evidence of an infringement has to be provided.
6

4. Your camera
4.1. Front view
7
LED infrared
light
Motion indicator,
red LED
PIR sensor
Lens
Microphone
Locking hole
for lock
Locking bracket
Locking bracket
Light sensor

4.2. Inside views
The monitor is only switched on in theTest mode for changing menu settings or viewing existing
photos and videos.
Using the operating buttons, menu settings can be changed in the test mode or existing photos and
videos can be played back.
An SD or SDHC memory card must have been inserted into the memory card slot in order to save
photos and videos.
Using the mini USB connection (USB 2.0), the camera can be connected to a computer, in order
to download photos and videos.
Using the mode switch the three operating modes OFF, TEST and ON can be selected.
Monitor
Operating
buttons
Speaker
Locking hole
for lock
Memory card
compartment Mini USB connection
Mode switch (OFF/
TEST/ON)
8

Battery compartment : Insert 8 type LR6 (AA) batteries as shown.
An external power supply can be provided via the DC connection (input 6 V, at least 1.5 A. Mains
adaptor is not included.)
Locking hole
for lock
Locking bracket
Tripod thread
Battery compartment
6V DC connection
Locking bracket
9

5. Preparing the camera
5.1. Opening and closing the camera
Operating buttons, connections and batteries are located inside theWildlife Camera.
To open the camera undo the two lateral locking brackets as shown in Fig. 1.
To lock the camera again, engage metal hoops of locking brackets into mount and press down plastic
tab of bracket (Fig. 2).
A xing for a padlock is provideed between the two locking brackets, allowing the camera to be securely
locked.
5.2. Inserting the batteries
Open the camera as described in section 6.1 to insert the
batteries.The battery compartment is housed in the right,
rear part of the camera. Now open the protective cover of the
battery compartment by pulling the clamping closure at the
top slightly inwards before lifting o the cover.
First remove any existing batteries from the battery compartment. Insert 4 or 8 fully charge batteries as
shown in the below gure. When inserting batteries ensure correct position as marked for each battery
in the battery compartment.
Fig. 1. Fig. 2.
10

5.3.
Inserting the memory card
A memory card must have been inserted in order to save photos and videos. Insert a SD/SDHC memory
card in the memory card compartment before switching on the camera.
Note:
• Instead of
type LR6 (AA) batteries, rechargeable batteries with the same specication (with
2000 mAh or higher) may be used.We recommend NiMh batteries with low self discharge
(not supplied).
•
An alarm is sounded if battery charge is too low.
Switch o the camera and open as described in section 6.1.
11
Prior to inserting the memory card ensure that
the lateral write protection on the memory
card has not beet activated (see gure).
If the camera displays "Card protected", remove
the memory card and change the position of
the memory protection.
Insert the memory card as shown in the
adjacent illustration. Push the memory card
into compartment until it clicks into place.
To remove the memory card push card in again
until it is partly ejected.
Note:
•
SD/SDHC memory cards up to a capacity of 32 GB are supported.
Write Protection WriteProtection
lockedunlocked

5.4. External power supply
The camera can be operated using power from an
external power supply. A 6V power supply with at
least 1.5 A is required containing a connector with
a 3.5 mm external and 1.35 mm internal diameter
(internal plus pole, external minus pole).
Rechargeable batteries cannot be recharged in the
camera using an external power supply.
12
5.5.
Assembly with strap
Use the securing strap supplied to attach the Wildlife Camera to a tree or another object. The illustrations
below demonstrate how to fasten the securing strap.
Position the Wildlife Camera as desired and pull the loose end of the securing strap tight until the camera is
rmly secured.
To release the securing strap again, pull at the tab of the securing strap.

13
6. Using the camera
Prior to setting up the camera for surveillance, it must be set up for the respective purpose. For this
purpose, there is a test mode available. In addition to changing settings, photos and videos can be taken
and existing photos can be viewed in this mode.
6.1.
Mode switch
Open the camera as described in section 6.1. The Mode switch is located at the bottom edge on the left
inside. 3 operating modes can be selected:
OFF: The camera is completely switched o in the OFF mode.
TEST: Select TEST mode to adjust settings and make or
playback photos and videos.
ON: The camera is activated to take photos automatically
(Live mode).
6.2.
Operating buttons
Set the mode switch to TEST and the camera and monitor are switched on.
Using the operating buttons dierent functions can now be activated and settings can be changed. For
this purpose, the following operating buttons are provided on the display panel:

14
Functions of operating buttons in replay mode
Below, the operating buttons are described in the replay mode with non activated menu.
MENU: Select the Replay menu using the MENU button.
REPLAY : Press the button to return to recording mode.
: View existing pictures backwards.
: View existing pictures forwards.
: Enlarge photos in increments (up to 16 times).
: Decrease enlarged photos in increments
OK, : Start and end replay of videos.
SHOT
Functions of operating buttons in menu
Below, the operating buttons are described in the replay mode with activated menu. (Recording and
Replay mode).
MENU: Close the Main menu or any sub menu by pressing the MENU button.
: Move up one menu point or increment value by 1.
Functions of operating buttons in recording mode
Below, the operating buttons are described in the recording mode with non activated menu.
MENU: Open the Settings menu using the MENU button.
REPLAY: Press this button to start the replay mode.
: Change to the manual recording mode for video recordings.
: Change to the manual recording mode for taking photos.
SHOT : Manually take a video or photo depending on the set recording mode.Video recordings are
also ended by pressing the SHOT button.
OK , , : No function (in recording mode).

•
Video size: 1080P (1920 x1080, 30fps), 720P (1080 x 720, 30 fps),WVGA (848 x 480, 30 fps),
VGA (640 x 480, 30 fps)
Select the required video resolution.
A higher resolution produces higher quality videos but results in larger les requiring more space on
the memory card. Videos are recorded in AVI format which can be played back on most video equipment.
6.3.
Settings
Prior to using the Wildlife Camera, change the settings as required.
Slide the mode switch of the Wildlife Camera to the TEST
position to start
the test mode. In the Photo orVideo
mode press the MENU button to call up the menu.
All menu options of the Wildlife Camera and possible
setting values for the recording mode are listed below.
The standard setting is always highlighted in
bold.
•
Mode: Camera, Video, Camera + Video
Select whether photos or videos should be taken when motion is detected.When in the "Camera +
Video" mode, the camera rst takes a set number of photos prior to recording a video.
•
Photo size: 16M, 12M, 8M,
5M
, 3M,1M
Select the desired resolution for photos.
A higher resolution produces a somewhat better photo quality but results in larger les requiring more
space on the memory card.
OK : Open selected options or accept selected settings.
SHOT, REPLAY: No function (in replay mode).
Conrm each change to a setting by pressing
OK
. If the change is not conrmed by pressing the OK
button, the new settings are lost when leaving the menu.
: Move down one menu point or decrease value by 1.
: Enlarge displayed photos in increments (up to 16x).
: Decrease enlarged photos in increments.
15

• Picture No.: 1 photo, 2 photo, 3 photo
Select the number of photos to be taken in succession when the camera is triggered in the Photo
mode. Please also observe the parameter Interval!
16
• Video length: 10 sec(onds), optional 1 - 60 seconds and 3, 5 and 10 minutes
Specify the duration of a video recording when the camera is triggered automatically. The recording
period for videos is not limited in theTest mode.
• Interval: 30 sec(onds), optional from 5 seconds to 60 minutes
Select the shortest period for the camera to wait before it reacts to the successive triggering of the
main sensor after an animal has rst been detected.The camera does not record any images or videos
during the selected interval. This prevents the memory card from being lled with unnecessary shots.
• Time stamp: On/O (only available for photos, not for videos)
Select "ON" to print the date, time, temperature and moon phase on each photo. Otherwise select
"O".
• Time switch: O/On
Set timer to "On" if camera should only be active within a certain time. Once "On" has been conrmed
with the OK button, the start and end time can be set.
If the start time is, for instance set to 18:35 hrs and the end time to 8:25 hrs, the camera will be
operational from 6:35 pm of the current day until 8:25 am of the following day. The camera will not be
triggered and will not take any photos or videos outside of this period.
• Password Set: O/On
After selecting "On" enter a four digit password to protect your camera against unauthorised access.
This password must be entered each time the camera is switched on in the Test mode before the
camera can be used.
Note:
• 1M, 3M, 5M can choose 1 photo, 2 photos, 3 photos;
8M can choose 1photo, 2 photos, but 3 photos not available;
12M, 16M can choose 1photo, but 2 photos, 3 photos not available.

17
•
Serial no. Set:O/On (can only be used for photos not for videos)
Select "On" to assign a serial number to the camera. As soon as "On" has been conrmed by pressing
the OK button, the individual serial number can be inserted.
You can use a combination of 4 digits and letters to document the location on the photos (e.g. YSP1
for Yellow Stone Park). When using several cameras this makes it easier to identify the location when
viewing photos.
•
Time lapse: O/On
When "On" has been selected, the camera automatically takes photos or videos in the selected time
interval, irrespective of whether or not the PIR sensor has detected a motion or not.This is useful for
observing cold blooded animals e.g. snakes or plants opening up, etc.
As soon as the "On" setting has been conrmed by pressing the OK button, you can enter the interval
time after which photos and videos are to be taken.
•
Language: Select the desired menu language
The following languages are available: English, German, Danish, French, Italian, Dutch, Spanish,
Hungarian, Portuguese, Chinese.
•
Format: No/Yes
All les are deleted by formatting the memory card. Press OK button and conrm formatting by
selecting "Yes".
We recommend formatting the memory card if it has already been used in other devices or if it is a
new card.
Caution: Ensure that les still required have been backed up prior to formatting!
•
Set clock: Set date and time
Press OK button to set date and time. Using the and buttons to skip between values and
change selected values by pressing the and buttons. Conrm your setting by pressing the OK
button.
Note:
•
If you forgot your password, please unlock the camera with password “OPEN”.

18
• Default set: No/Yes
Press “Yes” to reset the camera settings to the default values and conrm the selection by pressing the
OK button.
• Auto power o: 3min/5min/10min/o
With this function you can determine whether the camera should be automatically switched
o when not used for some time in the Test mode. Set the time after which the camera should be
switched o in the Test mode or deactivate automatic switch o by selecting “ OFF”.
The camera can be switched on again by pressing any operating button.
• Volume Rec: O/On
• Beep Sound: O/On
• Volume play: Low/Normal/High
Select with which volume audio recordings are to be played back.
• System:There are two available options:
FW Update: If the memory card contains new rmware this can be installed by conrming the option
by pressing the OK button.
During the update the respective status is shown on the display.
FW Version: Shows the rmware version installed on the camera.
In replay mode the option Delete is available in the menu.
• Delete: Select the "Delete" option to remove individual or all photos from the memory
card thus making storage room for new photos.
Single: Using this option you can delete individual photos. After selection the option by
pressing the OK button, the photo to be deleted is shown.You can toggle between photos
using the buttons and . As soon as the deletion of a photo has been conrmed by
pressing "Yes", the photo is deleted and the next photo is displayed.To end the deletion
process, select "No" and conrm by pressing OK.
All: Select option "All" to delete all photos on your memory card. To conrm deletion of all
your photos, select "Yes" and press the OK button. Select "No" to interrupt the deletion
operation.

19
6.6. Aligning the camera
TheTest mode is advantageous for determining the best possible detection angle and range of the
movement sensor. For this purpose attach the camera at approx. 1-2 m height to a tree and align the
camera with a desired direction.
Move slowly from one side of the observed area to the other. Move parallel to the camera.Try out dierent
angles and distances.
• The red LED on the front of the camera indicates that you were detected by the sensor zone.
6.4. Night recording
During night recording the infrared LEDs
(IR LEDs) at the front of theWildlife Camera
provide the light required for taking photos.
Wildlife Camera uses IR LEDs with a
long wavelength, to keep red light to a
minimum. The provided number of IR
LEDs generates a high deection angle
thus allowing night recording at a distance of 3 m to 20 m, without overexposing the object. Reecting
objects can, however, also cause overexposure within this range (e.g. road signs).
Please note that night recording using IR LEDs produces black and white images.
6.5. Setting up the Live mode
The standard application of the Wildlife Camera is the Live mode. When in this mode, photos are either
triggered by movement sensors or at intervals according to the respective setting.
To set up the Live mode, switch mode switch to ON position.
The red status LED ashes for approx. 5 seconds after which the
camera operates automatically and enters the Standby mode.
As soon as wild animals or other objects directly enter the detection
area of the sensor zone, the camera starts to record photos and
videos.
Other manuals for QC8061
1
Table of contents
