NEXDIAG NexPTG Standard User manual

NexPTG
1
NexPTG –lacquer coating thickness gauge
Device designed and manufactured in POLAND
User manual
NexPTG Standard, NexPTG Advanced,
NexPTG Professional
NexPTG Standard
NexPTG Advanced
NexPTG Professional
Supported systems: Android, iOS
Version 1.1 Issue date: February 2018

NexPTG
2
SPIS TREŚCI
1. SAFETY OF WORK AND MEASUREMENTS.......................................................................................................... 3
2. GENERAL INFORMATION .................................................................................................................................. 4
2.1 EQUIPMENT SET ........................................................................................................................................ 4
2.2 WORKING CHARACTERISTICS .................................................................................................................... 4
2.3 TECHNICAL SPECIFICATIONS...................................................................................................................... 4
2.4 CONSTRUCTION OF THE DEVICE................................................................................................................ 9
3. OPERATION OF THE NexPTG GAUGE................................................................................................................. 9
3.1 FIRST START-UP ......................................................................................................................................... 9
3.2 CALIBRATION OF THE GAUGE.................................................................................................................. 10
3.3 PERFORMING MEASUREMENTS .............................................................................................................. 10
3.4 OPERATION OF THE NexPTG APPLICATION............................................................................................. 12
4. MAINTENANCE ................................................................................................................................................ 12
4.1 BATTERY REPLACEMENT.......................................................................................................................... 12
5. SERVICE............................................................................................................................................................ 13
6. WARRANTY ...................................................................................................................................................... 13
7. ENVIRONMENTAL PROTECTION ...................................................................................................................... 13
7.1 DISPOSAL OF THE DEVICE AND BATTERIES.............................................................................................. 14
CAREFULLY READ THE INSTRUCTION MANUAL BEFORE YOU BEGIN WORKING WITH THE DEVICE!
Failure to follow the instructions contained in this manual may result in a risk to the user's health and
damage/destruction of the device.

NexPTG
3
1. SAFETY OF WORK AND MEASUREMENTS
WARNING!
The product is not a toy and should be kept out of the reach of children.
Any other use of the device contrary to its intended use will lead to product
damage. The information in the operating instructions and safety rules must be
strictly observed. The manufacturer is not responsible for use of the gauge
inconsistent with the above instructions and for damage resulting from this. It is
prohibited to interfere with the NexPTG gauge, making modifications or
alterations to the device or its components.
The device should not be shaken during measurements.
DANGER
Do not expose the device to high humidity or water condensation, this may
cause operation that does not comply with the specification or damage the
device.
The device is not waterproof.
Do not expose the device to caustic substances (acids, esters, alkalis).
It is prohibited to run the instrument on hot surfaces (<80 ºC).
It is prohibited to open and take apart the device for other purposes except for
replacing the battery (photo of the cover).
Do not leave the device near hot objects (<70 ºC), this may result in damage to
the housing.
Do not use the gauge if it is damaged, the housing is removed or internal
components are removed .
Do not leave the device unattended - keep away from children.
Battery
replacement
Service
Do not expose to
low temperatures
Refer to the
instructions
Do not expose
to rain
Do not expose to
high
temperatures
Calibration
Do not expose
to snow
Warning
Information
Keep away from
children
Disposal/
Environmental
Protection

NexPTG
4
2. GENERAL INFORMATION
2.1 EQUIPMENT SET
NexPTG device
Instruction manual/declaration of conformity
Alkaline batteries LR6 (AA) –2 pcs (installed in the device)
Calibration set –two plates:
steel 1 pc (blue) - 90μm
aluminum 1 pc (white) - 90μm
2.2 WORKING CHARACTERISTICS
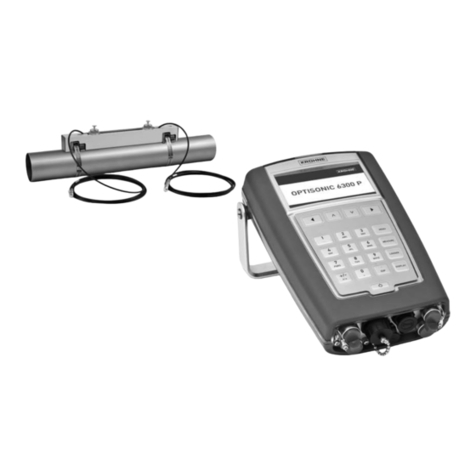
The NexPTG device has been specially designed for measuring the thickness of lacquer coat layers
on car bodywork. It is intended for testing steel, galvanized steel and aluminum surfaces. It has the function of
automatic identification of the tested substrate. The device performs a lacquer coating analysis and transmits
data wirelessly to a dedicated mobile application (installed on an external device), where it is interpreted.
Allows examination and comparison of individual car bodywork for the thickness of the lacquer coat.
Detects possible interference with the coating in the wider automotive industry (auto detailing / sheet
metal works / lacquering / mechanical).
Dedicated to appraisers / claims adjusters / employees of the insurance industry for private use
2.3 TECHNICAL SPECIFICATIONS
General characteristics of the device NexPTG
Power consumption
Standby mode: ~ 0.45µA Operating mode: 31mA
Power supply
2x1.5 V LR6 (AA)
Battery life
Operating mode: to 100 h
Wireless communication
Bluetooth 4.0 LE
Battery consumption indicator
Displayed in %age in the lower left corner of the main application
menu
Working temperature
From -20°C to +40°C
Storage temperature
From -20°C to +40°C
Temperature of the test surface
<50°C
Automatic device shutdown
After 5 min (in the absence of a wireless connection)
Dimensions of the device
108x50x28mm –Standard and Advanced model
112x50x28mm –Professional model
Weight of the device
57 grams (without battery) –Standard and Advanced model
58 grams (without battery) –Professional model
Size of the report
From 80B to 60kB –text (single measurement)
From 400kB to 800kB –graphics and text
Multilingual menu
PL, EN, DE, FR, IT, ES, RU, FA

NexPTG
5
Electrical / measurement specification of the device NexPTG
Measurement method
Magnetic induction / eddy current method
(steel, galvanized steel / aluminum)
Thickness scale
μm / mils
Sampling
10 / s
Range of measurement
0 - 1000 μm (0 –39.37 mils) Standard model
0 - 2200 μm (0 –86.61 mils) Advanced model
0 - 2500 μm (0 –98.43 mils) Professional model
Accuracy of measurement
2% - device accuracy
5% - accuracy of the calibration set
Measurement resolution
10 μm (0.4 mils) Standard model
1 μm (0.04 mils) Advanced and Professional model
Minimum diameter of measurement area
20mm
Minimum system and hardware requirements for the NexPTG mobile application
Android: telephone, tablet
Android 4.3 or higher,
Bluetooth with Bluetooth Low Energy support
iOS: telephone, tablet
System iOS 8 or higher, iPhone 5s or higher
Android Wear: Smartwatch
Any smartwatch with this system

NexPTG
6
NexPTG Standard
* after 300 measurements, the next ones will be saved in the place of the oldest saved results
** recognition of galvanized steel - beta version, recognition in the range of 0-600 μm
Range of measurement
0 - 1000 μm (0 – 39.37 mils)
Measurement resolution
10 μm (0.4 mils)
Sampling
10/s
Type of probe / Probe ending
Traditional/ Flat
Probe housing
Flat
Curve measurement
No
Measurement memory
Up to 300*
Time of continuous work on alkaline batteries
Up to 100 h
Ambient temperature of the meter's work
From -20 to + 40 °C
Unit of measurement
μm or mils
Recognition of the substrate
Steel, galvanized steel **, aluminum
Testing of the substrate
Steel, galvanized steel **, aluminum
Communication with the application
Bluetooth 4.0 LE
Application update
Free
Message indication
Text, graphics, audio
Housing color
Grey
Weight without batteries
57 grams
Size/Dimensions
108x50x28mm
Availability on systems
Android, iOS
Supported batteries
2xAA
Measurement modes
Continuous, single
Test relative to the reference point
Yes
Automatic shutdown of device during period of
inactivity
Yes
Measurement statistics
Yes
Lacquer coatings Analysis System
Basic
Multilingual menu
Yes (PL, EN, DE, FR, IT, ES, RU, FA)
Enrichment with new features
No
Suggested measurement points
No
Buyer's guide
No
Export of measurement history
No
Creation of reports
No

NexPTG
7
NexPTG Advanced
Range of measurement
0 - 2200 μm (0 – 86.61 mils)
Measurement resolution
1 μm (0.04 mils)
Sampling
10/s
Type of probe / Probe ending
Traditional/ Flat
Probe housing
Flat
Curve measurement
No
Measurement memory
Up to 2000*
Time of continuous work on alkaline batteries
Up to 100 h
Ambient temperature of the meter's work
From -20 to + 40 °C
Unit of measurement
μm lub mils
Recognition of the substrate
Steel, galvanized steel **, aluminum
Testing of the substrate
Steel, galvanized steel **, aluminum
Communication with the application
Bluetooth 4.0 LE
Application update
Free
Message indication
Text, graphics, audio
Housing color
Black
Weight without batteries
57 grams
Size/Dimensions
108x50x28mm
Availability on systems
Android, iOS
Supported batteries
2xAA
Measurement modes
Continuous, single
Test relative to the reference point
Yes
Automatic shutdown of device during period of
inactivity
Yes
Measurement statistics
Yes
Lacquer coatings Analysis System
Expanded
Multilingual menu
Yes (PL, EN, DE, FR, IT, ES, RU, FA)
Enrichment with new features
Yes
Suggested measurement points
Yes
Buyer's guide
Yes
Export of measurement history
Yes
Creation of reports
Yes
* after 2000 measurements, the next ones will be saved in the place of the oldest saved results
** recognition of galvanized steel - beta version, recognition in the range of 0-600 μm

NexPTG
8
NexPTG Professional
Range of measurement
0 - 2500 μm (0 – 98.43 mils)
Measurement resolution
1 μm (0.04 mils)
Sampling
10/s
Type of probe / Probe ending
Movable / Spherical
Probe housing
Profiled
Curve measurement
Yes
Measurement memory
Up to 4000*
Time of continuous work on alkaline batteries
Up to 100 h
Ambient temperature of the meter's work
From -20 to + 40 °C
Unit of measurement
μm lub mils
Recognition of the substrate
Steel, galvanized steel **, aluminum
Testing of the substrate
Steel, galvanized steel **, aluminum
Communication with the application
Bluetooth 4.0 LE
Application update
Free
Message indication
Text, graphics, audio
Housing color
Blue
Weight without batteries
58 grams
Size/Dimensions
112x50x28mm
Availability on systems
Android, iOS
Supported batteries
2xAA
Measurement modes
Continuous, single
Test relative to the reference point
Yes
Automatic shutdown of device during period of
inactivity
Yes
Measurement statistics
Yes
Lacquer coatings Analysis System
Expanded
Multilingual menu
Yes (PL, EN, DE, FR, IT, ES, RU, FA)
Enrichment with new features
Yes
Suggested measurement points
Yes
Buyer's guide
Yes
Export of measurement history
Yes
Creation of reports
Yes
* after 4000 measurements, the next ones will be saved in the place of the oldest saved results
** recognition of galvanized steel - beta version, recognition in the range of 0-800 μm

NexPTG
9
2.4 CONSTRUCTION OF THE DEVICE
The gauge consists of two panels: the front panel (with diodes indicating power supply and connection, and a
multifunction key –switch on, switch off, save measurement) and the rear panel with the battery cover. The
electronics assembly is terminated with a probe with a measuring sensor.
3. OPERATION OF THE NexPTG GAUGE
Turn the device on or off by pressing the button and holding it down for 3 seconds, until the red diode on
the front panel lights up. Pressing this button once briefly saves the measurement in the application.
The NexPTG application can be downloaded from: Google Play and App Store.
3.1 FIRST START-UP
In order to start the NexPTG gauge the button 3 should be
held down for three seconds until the power diode lights up on
the panel 2 Next, start the NexPTG application on the mobile
device (external). Correct communication will be signaled by the
lighting up of the blue diode 1 .
WARNING: The first start of the gauge requires access to the
Internet.
If there is no communication, the device (telephone, tablet,
smartphone) should be restarted and the NexPTG mobile
application should be restarted.

NexPTG
10
3.2 CALIBRATION OF THE GAUGE
The gauge is calibrated at the factory. Calibration is performed after prolonged non-use of the gauge. Both
devices should communicate with each other via a wireless connection. Correct communication is signaled by
switching on the blue diode. We carry out calibration after starting the NexPTG gauge and application. The red
diode indicates that that the device is properly turned on.
Spread the calibration plates from the kit on a hard, stable and flat surface with color upwards (steel - blue and
aluminum - white, each 90μm). When calibrating the gauge, the plates should lie on a non-metallic surface, so
as not to disturb the calibration process and should be clean. Do not hold the plates in your hands during
calibration. The gauge should be pressed against the plates so that the probe adheres firmly with its entire
surface. The device must not stand on them loosely.
In the main menu of the NexPTG application, find the calibration icon and clicking on it follow the
messages that appear. The calibration process consists of two steps:
1. To calibrate, apply the gauge to the supplied steel plate, colored blue.
NOTE: the gauge should be placed in the center of the calibration plate
2. Next, apply the gauge to the supplied aluminum plate, colored white.
NOTE: the gauge should be placed in the center of the calibration plate.
Its correct implementation should end with a text message with the text "Calibration completed successfully". A
correctly calibrated gauge should indicate 90 μm plates (accuracy according to the table).
If this is not the case, start the device and application again or contact the distributor.
3.3 PERFORMING MEASUREMENTS
FOR NEXPTG STANDARD AND NEXPTG ADVANCED METERS
Before starting measurement, make sure that:
all radios are switched off (radio, CB radio). If there is a CB antenna on the vehicle –remove it from the
car for the duration of the measurement;
there are no devices nearby that generate strong electromagnetic radiation and there is no close
presence of static electric charges, as they may cause erroneous measurements;
no measurement is made in conditions such as: significant presence of dust, sediments, air bubbles,
high moisture, high humidity, rain, snow;
the tested surface is clean.
The device is designed to test magnetic metal (steel, galvanized steel) and non-magnetic (aluminum) surfaces of
car bodywork. The types of surface tested are detected automatically. Attention should be paid to the correct
use of the device so that the probe does not slip or move from the test surface. It should be applied so that it
adheres firmly to the bodywork of the tested vehicle with all its diameter (20 mm) (see below).

NexPTG
11
Then wait for the measured value to appear on the screen of the external device.
FOR NEXPTG PROFESSIONAL METER
Before starting measurement, make sure that:
all radios are switched off (radio, CB radio). If there is a CB antenna on the vehicle –remove it from the
car for the duration of the measurement;
there are no devices nearby that generate strong electromagnetic radiation and there is no close
presence of static electric charges, as they may cause erroneous measurements;
no measurement is made in conditions such as: presence of dust, sediments, air bubbles, high moisture,
high humidity, rain, snow;
the tested surface is not dirty.
The device is designed to test magnetic metal (steel, galvanized steel) and non-magnetic (aluminum) surfaces
of car bodywork. The types of surface tested are detected automatically. Attention should be paid to the
correct use of the device (see below).
Then wait for the measured value to appear on the screen of the external device.

NexPTG
12
3.4 OPERATION OF THE NexPTG APPLICATION
The application has been designed and written specifically for the NexPTG gauge and is an inseparable part of it
that allows the proper functioning of the device. The measurements are displayed in the main application view
and the MEASUREMENT tab.
SETTINGS measurement mode unit of measure other functions
The full NexPTG application manual is available on the manufacturer's website at www.nexdiag.com and in the
main application menu in the HELP tab. All copyrights and licenses relating to the NexPTG application are the
property of the manufacturer. It is prohibited to use the application in any other way than the author has
assumed.
4. MAINTENANCE
It is recommended to periodically clean the device with a cloth. Remember to keep the probe clean.
Its soiling can cause differences in measurements.
4.1 BATTERY REPLACEMENT
To replace the battery, unscrew the screw that secures the battery cover to the housing,
raise it as shown in the picture below. Then replace the batteries with new ones and screw
on the cover.
The gauge is powered with 1.5 V LR6 (AA) alkaline batteries –2 pcs. The low battery indicator displayed on the
screen of the mobile device (external) indicates the need to replace the batteries with new ones. Their
discharge status is displayed as a percentage in the lower left corner of the main menu of the NexPTG
application.
IMPORTANT!
Pay attention to the polarity of the battery.
Incorrect operation of the gauge may be caused by battery depletion.
Alkaline batteries should be used.

NexPTG
13
5. SERVICE
Repairs to the device are carried out only by qualified personnel at the
manufacturer's premises.
Contact details:
Nexdiag Ltd., 1 Przy Torze St., 35-205 Rzeszow, NIP PL 5170378987
The manufacturer is obliged to repair a faulty device under warranty or replace it
with one free from defects within 14 days. The gauge may not be qualified for the
service procedure. The manufacturer may refrain from replacing or repairing a
damaged device if the conditions contained in the above instructions in sections 1,
2 and 6 are broken.
NOTE! Use according to the purpose! The manufacturer is not responsible for situations arising from the use of
the gauge inconsistent
6. WARRANTY
The manufacturer provides a 24-month warranty for the device. The warranty ensures that the product remains
free from material defects and manufacturing defects for a period of 24 months from the date of purchase,
subject to the following conditions:
1. The warranty does not cover mechanical damage resulting from operations or events beyond the
normal use of the NexPTG gauge. (see point 2)
2. Any attempt by the User to repair the device releases the Manufacturer from the warranty.
3. All mechanical damage (spills, moisture, cracks, breakage, scratches, etc.) may also constitute grounds
for release of the Manufacturer from the warranty.
4. Other external interference in the device releases the Manufacturer from the warranty.
5. The warranty period is extended by the time from the date of acceptance of the gauge to the service
until the date of its release to the User.
6. Time to repair –14 days.
NOTE! After the warranty period for the NexPTG device has elapsed, it is possible to take advantage
of the post-warranty service provided by the manufacturer.
7. ENVIRONMENTAL PROTECTION
The sign on the product or in the texts referring to it indicates that the product should not be disposed of with
other household waste at the end of its useful life. To avoid harmful effects on the
environment and human health due to uncontrolled waste disposal, please separate the
product from other types of waste and responsibly recycle to promote the re-use of
material resources as a permanent practice.
For information on the place and method of environmentally safe recycling of this
product, domestic users should contact the retail outlet where they purchased it or their
local authority. Business users should contact their supplier and check the terms of the purchase contract. The
product should not be disposed of with other commercial wastes.

NexPTG
14
7.1 DISPOSAL OF THE DEVICE AND BATTERIES
NOTE: do not throw used batteries into unsorted municipal waste! The batteries should be
separated from the device. After the end of the useful life of the batteries with which the
gauge was equipped they cannot be disposed of together with other household waste. If the
batteries are not properly disposed of, hazardous substances may cause a danger to human
health and the environment. To protect natural resources and to promote the re-use of
materials, separate the batteries from other types of waste and dispose of them through a
local, free battery return system. The batteries should be disposed of in accordance with the
rules for the disposal of hazardous electronic waste.
All rights to reprint or copy are reserved. Allowed –only with the consent of the manufacturer.
Nexdiag Ltd. reserves the right to make changes to the information provided. The information provided was up-
to-date at the time of going to press. In connection with the motto of Nexdiag Ltd. concerning continuous
improvement of products, the information may be subject to change without prior notice.

NexPTG
15
NEXDIAG Ltd.
1 Przy Torze St.
35-205 Rzeszow
NIP PL 5170378987
www.nexdiag.com
tel. +48 570 069 014

NexPTG
16
This manual suits for next models
2
Table of contents
