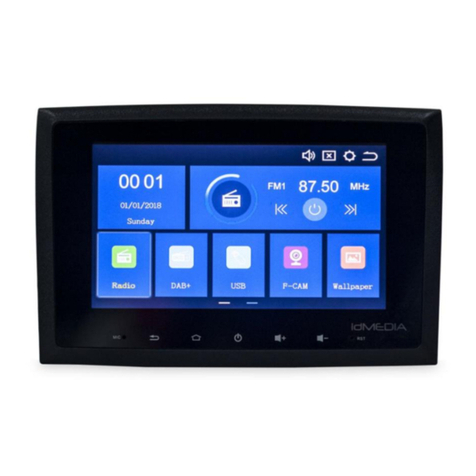
Next Technology idMEDIA 8 User manual

www.next-technology-ltd.com
Android Car Radio User Manual
Model:

www.next-technology-ltd.com

Content
1. BASIC COMMON SENSE OF CAR RADIO...............................................................................................................................1
1.1 Power on and off ......................................................................................................................................................1
1.2 Screen function key...................................................................................................................................................1
1.3 Home and Application interface................................................................................................................................1
1.4 Drop-down menu and status bar...............................................................................................................................1
2. MAIN FUNCTIONS OF YOUR CAR RADIO DEVICE .................................................................................................................2
2.1 Navigation function...................................................................................................................................................2
2.1.1 Use of maps ...................................................................................................................................................2
2.2 Radio function ..........................................................................................................................................................2
2.2.1 Radio interface...............................................................................................................................................2
2.2.2 RDS ................................................................................................................................................................2
2.3 Bluetooth function....................................................................................................................................................3
2.3.1 Pairing equipment..........................................................................................................................................3
2.3.2 Bluetooth music.............................................................................................................................................3
2.3.3 BT Contact......................................................................................................................................................3
2.3.4 Dial and Call ...................................................................................................................................................4
2.3.4.1 Dialing function ...................................................................................................................................4
2.3.4.2 Call record ...........................................................................................................................................5
2.4 Music Player .............................................................................................................................................................5
2.5 Video Player..............................................................................................................................................................5
2.6 EQ.............................................................................................................................................................................6
2.6.1 Interface.........................................................................................................................................................6
2.6.2 Equalizer setting interface ..............................................................................................................................6
2.7 AUX IN ......................................................................................................................................................................6
2.8 DAB+ ........................................................................................................................................................................7
2.9 Zlink..........................................................................................................................................................................7
2.9.1 Connection.....................................................................................................................................................7
2.9.1.1 Andriod Auto connection.....................................................................................................................8
2.9.1.2 Carplay connection ..............................................................................................................................8
2.9.2 Zlink interface and functions ..........................................................................................................................8
2.9.2.1 Android Auto .......................................................................................................................................8
2.9.2.2 Car play .............................................................................................................................................10
2.9.3 Cautions.......................................................................................................................................................11
3. SET UP COMMON SENSE ..................................................................................................................................................12
3.1 WiFi Setting ............................................................................................................................................................12
3.2 Sound Setting .........................................................................................................................................................12
3.2.1 Reverse mute ...............................................................................................................................................12
3.2.2 Navi volume .................................................................................................................................................12
3.2.3 Device ringtone............................................................................................................................................12
3.3 Setting Date & time.................................................................................................................................................13
3.4 Switching input method..........................................................................................................................................13

1
1. BASIC COMMON SENSE OF CAR RADIO
Warning: Before using this device, please make sure you read this manual.
1.1 Power on and off
Power on: When you plug in the car keys, the car’s ACC power is switched on. The device will automatically power on, displaying
the boot animation LOGO idMEDIA.
Power off: When you take off the key, the car’s ACC power is switched off. The device will automatically shut down.
1.2 Screen function key
Power
When the car radio is on, long
press to switch off and short
press for mute.
Homepage
Click to return to homepage
Back
Click to return to previous page
Volume +
Click to turn up the volume
Volume -
Click to turn down the volume
Remark:
“long press” means pressing for at least 3 seconds. Button and socket will vary according to car types. Please take actual type
as standard.
1.3 Home and Application interface
The touch screen allows you to use the various functions of the device.
The device has a multi page screen. Slide to the left or right to toggle.
On any page, click the HOME key on the screen to enter the main interface
In the main interface, click the relevant application icon to enter the application of your choice.
1.4 Drop-down menu and status bar
Drop-down menu and status bar icon functions:

2
Note: The device software is under upgrading, the status indicator may be different in your device; please refer to the actual
device software.
2. MAIN FUNCTIONS OF YOUR CAR RADIO DEVICE
2.1 Navigation function
2.1.1 Use of maps
Click on the Navigation icon in the main interface or in the application interface to enter the map interface.
2.2 Radio function
2.2.1 Radio interface
In the main interface or in the application interface, click the Radio icon to enter the audio interface. The functions of icons in
the radio interface are described below:
2.2.2 RDS
Here are the functions for the RDS interface:

3
2.3 Bluetooth function
The Bluetooth interface can be entered by the main interface or the application interface by clicking on the Bluetooth icon.
2.3.1 Pairing equipment
1) When the machine has not yet paired the equipment, it can only enter the setting and search interface, and the other
interface cannot be entered.
2) Search interface: click the search key to find nearby Bluetooth device. When selecting Bluetooth that needs pairing, the
phone will pop up into the PIN code box and input can be paired successfully.
3) After the pairing is successful, the Bluetooth icon will be displayed behind the device
2.3.2 Bluetooth music
In the Bluetooth interface, the click icon can enter the Bluetooth music playback interface and tracks can be played /
paused / moved to previous / moved to next after connecting with the Bluetooth mobile phone.
Note: With some types of mobile phones, you need to start playing the music player first to be able to use the Bluetooth music
function.
2.3.3 BT Contact
Access to the phone interface: in the Bluetooth interface, click on the icons of the address book to enter the address book
interface.
Download the phone book:
Click on the download key in the phone book or SIM card interface

4
Find contacts: in the mobile address book interface, click the phone book icon or in the SIM card address book interface,
click the SIM card phone book icon . The contact interface will pop up the search box. Enter the name and phone to find
the contact.
2.3.4 Dial and Call
In the Bluetooth interface, click dialing icon to enter into the Bluetooth Dial interface.
1) Click numbers on the interface. If the input is wrong, click to delete entered phone number.
2) Enter phone number. Click to initiate the call. Click to end up the call.
If you already are on a call, press the icon to switch to the incoming phone call.
2.3.4.1 Dialing function
1) When a mobile phone or SIM card phone book has not been downloaded, the phone number in the cell phone or SIM
card phone can only show the phone number. If the phone book is downloaded, the name of the contact displays.
2) When a non-standard number is called, only the phone number displays.

5
Note: when you click on the icon, the call is answered. When you click on the icon, the call ends. When the call
ends, the small window will disappear automatically.
2.3.4.2 Call record
1) In the Bluetooth interface, click to enter into Bluetooth call history interface. The history records incoming / dialed
and missed calls.
2) In the call record interface, the contacts in the list can also be dialed.
2.4 Music Player
Click on the music icon in the main interface or in the application interface to enter the music playback interface. The audio
player supports the following formats:MP3/MP2/WMA/APE/FLAC/AAC/WAV/OGG.
2.5 Video Player
The video play interface can be entered by clicking on the video icon in the main interface or application interface. The format
of the video player is as follows: MP4/AVI/WMV//MOV/MKV/MPEG/RMVB.

6
2.6 EQ
2.6.1 Interface
There are two ways to enter the EQ interface:
1) In the main interface or application interface, click on the equalizer application function to enter the equalizer settings
interface
2) Or click EQ in some of the functions, such as audio and music, to enter the equalizer settings interface
2.6.2 Equalizer setting interface
Equalizer and sound field setting
1) The equalizer settings interface provides 8 kinds of audio playback modes that you can choose. In a field setting interface
the user can freely adjust the bass and loudness of the contrast.
2) The user can also adjust the fader on the front left, front right, left, right after the four angularly audio settings, as shown
below:
Note: in the custom mode, the user can customize the effect mode by the effect regulator and reset the bass. It is effective only
when the external 4.1 amplifier is connected.
2.7 AUX IN
Click on the AUX function in the main interface or application interface to enter the AUX IN interface:
1) When the video input signal is not yet received, the AUX IN interface displays: No Video Signal.
2) When the signal is connected, the AUX interface displays the video screen. Click to return to the upper interface.
Click to return to the main interface.

7
2.8 DAB+
Click the DAB+ icon to enter into the following page:
1. Slideshow
2. Channel list
3. Channel LOG
6. Frequency tracking: if you click , the icon turns yellow. The Frequency tracking is activated. If you click the icon again,
it turns white and this function is off.
7. Favorite radio : There is one heart shaped icon in every Channel Log. Click it.
When it turns red, you can find this channel in the list of favorite radios. If you click the icon again, it turns white and the channel
will not be in the list of favorite radios.
Click this heart shaped icon to find your favorite channel: . Click this heart shaped icon to add the channel to your
list of favorite channels.
2.9 Zlink
2.9.1 Connection
Upon connection, mobile phone is automatically recognized as android or Apple, as shown in the following picture:

8
2.9.1.1 Andriod Auto connection
1) The Android auto app should be downloaded and installed in the mobile phone. You need to open it as shown below:
2) Click in the car radio to open it and then connect the mobile phone by USB cable. Note: please only use the
original USB cable for your phone.
2.9.1.2 Carplay connection
Click in the car radio to open it and then connect the iphone by USB cable. Note: please only use the original USB cable
for your iphone.
2.9.2 Zlink interface and functions
2.9.2.1 Android Auto
1) Homepage
In the homepage, click to return to the first page.
At the top of the page, a status bar shows the wifi connection status, the time and the battery level, etc of the mobile phone.
Click to enter into navigation interface
Click to enter into phonebook interface
Click to return to homepage
Click to enter into Music page
Click to return to car radio system
Voice input, android voice operation

9
2) Navigation
Click to enter the navigation interface
3) Dial and Call
Click to enter into Dial and Call interface
4) Music
Click to enter into music interface
Click to enter into music display page:
Click to search
Settings, set mute/road condition/road image
etc
Click to return to current location
Zoom in the map
Zoom out the map
Slide up
Slide down
Dial pad
Menu where you can choose to see the call
record, missed calls etc.
Contacts
Slide up
Slide down
Play the music
Menu where you can choose the
music/list/type
Return to music page
PREV song
Play/Stop
Next song
More

10
Return to car radio page
Click to return to the car radio system page.
Once you are back to the car radio page, android auto is running in the background, so you don’t need to connect it again if
the mobile phone is still connected to the car radio.
2.9.2.2 Car play
You can choose to display the interface menu on the left or on the right. If you choose right, the interface menu will display on
the right. If you choose left, it will display on the left.
Music
Click to enter Music page
PREV song
Play/Stop
Next song
Random play
Default is list loop, click to change to single
cycle
Music page
Navigation page
Dial and Call
Short press to return to homepage, long press to enter voice recognition

11
Navigation
Click to enter the map. Search the location you need in the top left corner.
Dial and call
Click to enter into dial and call
Siri
Long press to enter into Siri page (voice recognition page), so the carplay can be operated by voice commands.
2.9.3 Cautions
Checking the activated Zlink mode and version.
Click zlink to open it and then click About, you can see the activated Zlink mode and version as shown:
Move up/down/left/right
Voice input
Settings
Current location

12
3. SET UP COMMON SENSE
3.1 WiFi Setting
There are two ways to open and close WiFi:
1) The drop-down interface has a WLAN function. Click it to set it.
2) Settings →WLAN or Wi-Fi. Click to set.
3.2 Sound Setting
Voice settings includes four common functions: Reverse mute, Navi audio channel, Navi volume, and Device ringtone:
3.2.1 Reverse mute
By default, radio sound is on when in reverse mode. When you remove the tick, it will be mute.
3.2.2 Navi volume
1) Navigation: the volume of the navigation can be adjusted with the slider. The new setting is effective only when
the navigation is set.
2) Background music: when sliding progress bar, you can adjust the volume of the current source, reduce the
number of current sources, and reduce the current source voice when navigating.
3.2.3 Device ringtone

13
Device ringtone is the sound of the phone when call is received through the idMAEDIA device. After setting, the sound
of the ring sounds when you receive a call.
3.3 Setting Date & time
The device automatically calibrates the current time function, but requires your GPS to be activated. You can also
manually set the date, time, time zone, and format.
Settings →Date & time. Note: you can set the time zone and time format according to your needs.
3.4 Switching input method
1) Settings →Language & input →Check the input required by the user
2) After selecting the input method, it can be selected in the default.

14
iGO NAVIGATION
INSTALLATIONSVERFAHREN iGONAVIGATION aufRadio
idMEDIA
oSchalten SieIhrRadio ein
oKlickenSieim MenüAllgemein aufEinstellungen
oWählen SieAbout Tablet
oWählen SieIMEI
oMachen SieeinBild desBildschirms mitderIMEI-Nummer
oSenden SiedasFoto an die folgende E-Mail-Adresse
olicense-igo@next-technology-ltd.com
oIm Gegenzug erhalten Sieeine Datei per E-Mail.
oSteckenSiedeniGONavigation USB-Stick in denUSB-Anschluss Ihres PCs
oWählen SiedenInhaltdesSchlüssels
oÖffnen SiedeniGO-Ordner
oÖffnen SiedenLizenzordner
oKopieren SiedieempfangeneDatei (xxxxx.lyc) in denLizenzordner
oVerbinden SiedeniGONavigation USB-Stick mitdemUSB-Kabel Ihres Radios
oKlickenSieim MenüAllgemein aufEinstellungen
oWählen SieExplorer-Datei
oWählen SieExterner Speicher
oWählen SiedeniGO-Ordner
oKlickenSieaufiGOAPK,um dieSoftware zu installieren
Wenn dieInstallation abgeschlossen ist
oIm MenüAllgemein
oKlickenSieaufEinstellungen
oWählen SieAutoeinstellungen
oWählen SieNavigationssoftware
oWählen SieiGONavigation
oKehren SiezumHauptmenüzurück
INSTALLATIONPROCEDURE iGONAVIGATION on Radio
idMEDIA
oTurn on your radio
oIn theGeneral menu Click Settings
oSelect About Tablet
oSelect IMEI
oTake apicture of thescreen with theIMEI number
oSend thephoto to the following emailaddress
olicense-igo@next-technology-ltd.com
oIn return youwill receive a file by email.
oPuttheiGONavigation USBstick in theUSBport of your PC
oSelect thecontents of thekey
oOpen theiGO folder
oOpen theLicense folder
oCopy thereceived file (xxxxx.lyc) into theLicense folder
oConnect theiGONavigation USBstick to theUSB cable of your radio
oIn theGeneral menu Click Settings
oSelect Explorer File
oSelect External Storage
oSelect iGOFolder
oClick on iGOAPK to install thesoftware
When theinstallationis complete
oIn theGeneral menu
oClick Settings
oSelect CarSettings
oSelect Navigation Software
oSelect iGONavigation
oReturn to theMain Menu
PROCEDURE INSTALLATIONiGONAVIGATION surRadio
idMEDIA
oAllumezvotre radio
oDans le menu Général Cliquez surParamètres
oSélectionnez A proposde Tablette
oSélectionnez IMEI
oPrenez une photo de l’écran avec le n°IMEI
oEnvoyez la photo àl’adresse emailsuivante
olicense-igo@next-technology-ltd.com
oEn retour vous allez recevoir un fichier paremail.
oMettez la cléUSBiGONavigation dans le port USBde votre PC
oSélectionnez le contenude la clé
oOuvrez le dossier iGO
oOuvrez le dossier License
oCopiez le fichier reçu(xxxxx.lyc)dans le dossier License
oBranchez la cléUSBiGONavigation au cable USBde votre radio
oDans le menu Général Cliquez surParamètres
oSélectionnez Explorer File
oSelectionnez Stockage Externe
oSélectionnez DossieriGO
oCliquez suriGOAPK pour installerle logiciel
Une fois l’installationterminée
oDans le menu Général
oCliquez surParamètres
oSélectionnez Paramètres voiture
oSélectionnez Logiciel de Navigation
oSélectionnez iGONavigation
oRetournez au Menu principal

15
This manual suits for next models
1
Table of contents
Other Next Technology Car Receiver manuals
