Nexto Di NVS2501 User manual

Version 03/11
User Guide
www.nextodi.com
NextoDI Co., Ltd.
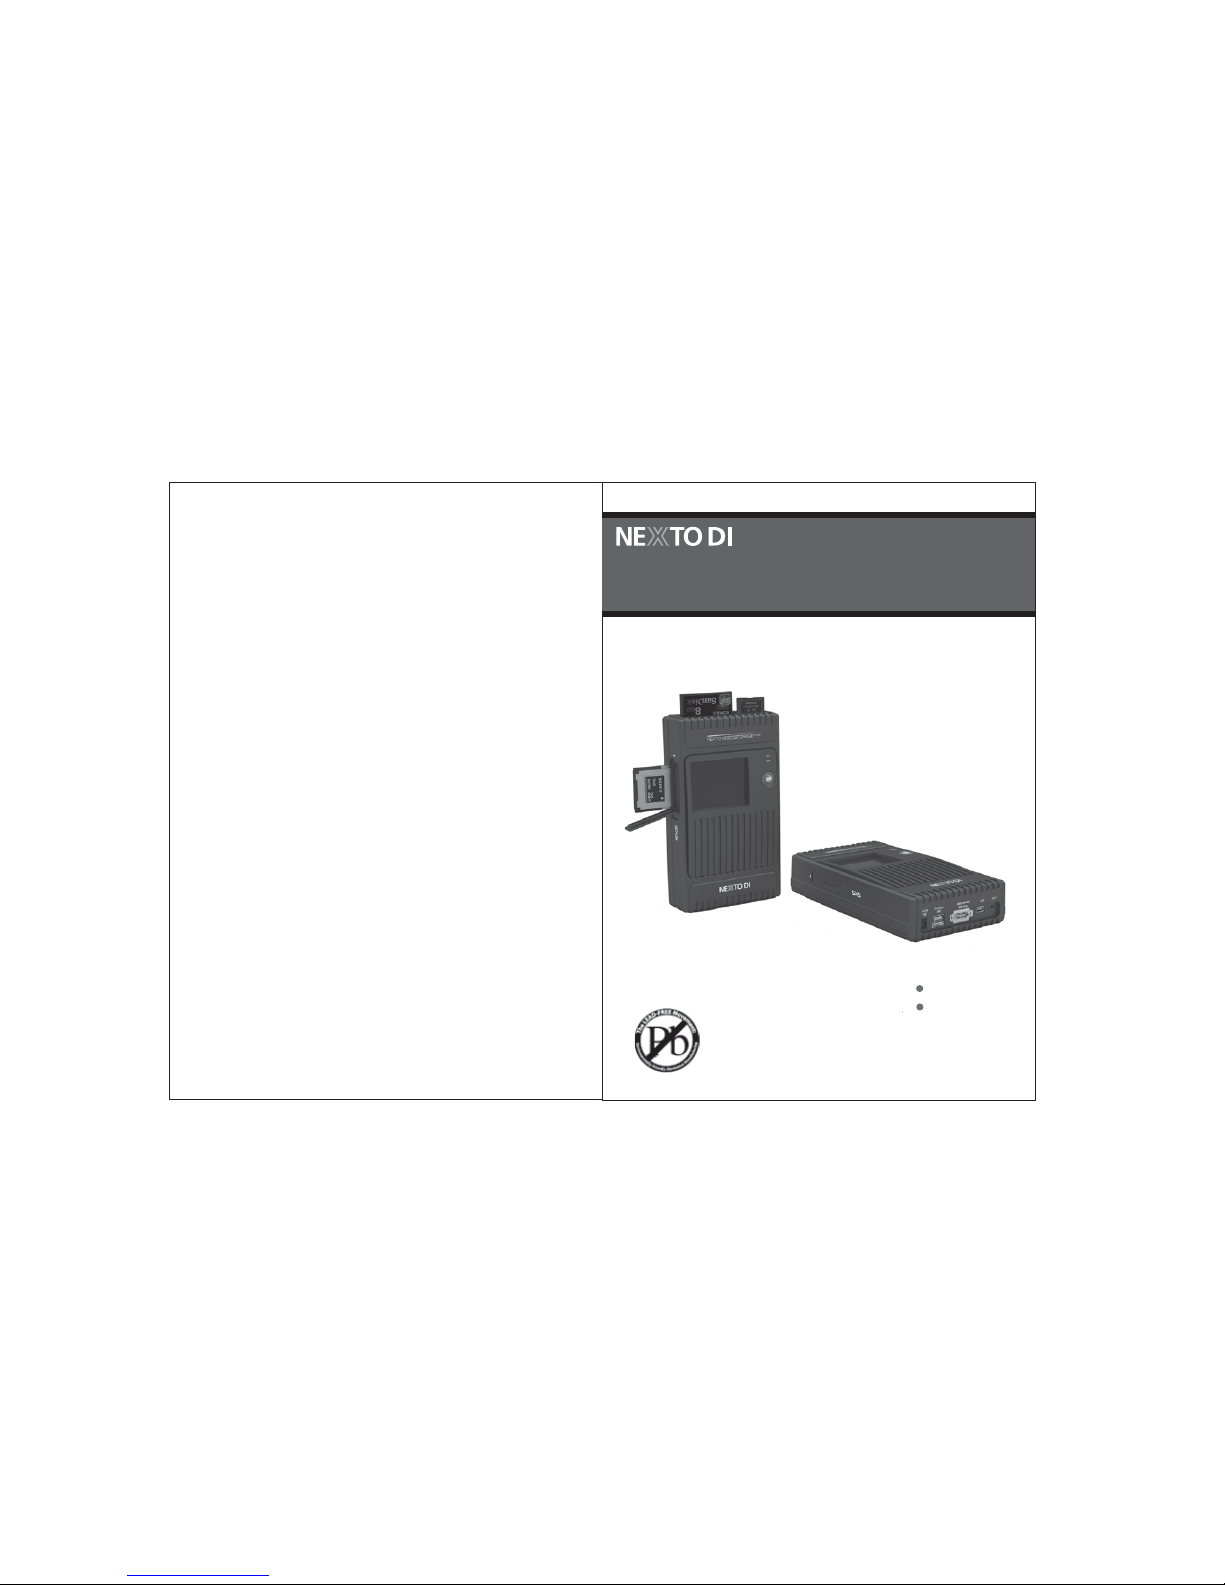
Portable Storage for Professional
Video Cameras
VIDEO STORAGE pro

Thank you for purchasing this NEXTO VIDEO STORAGE pro (NVS2501) product.
NVS2501 product allows videographers to save footages from camcorders to a hard
drive, without using a computer. The camcorder can then be used to record new
data. NextoDI has optimized performance so that data transfers from memory card
to NVS2501 more quickly than to other storage devices. Data stored on NVS2501
can later be copied to a computer.
NVS2501 supports professional video cameras from various manufacturers,
and memory formats such as SxS, CardBus Memory Card (including P2/P2E),
Compact Flash (CF), Microdrive (MD), SDHC, SDXC and Memory Stick(MS) Card.
Please read this manual before using the product. Follow operating instructions
carefully to avoid any damage to the product, or any personal injury. This guide
assumes that your NVS2501 unit contains a properly formatted hard disk and a
charged battery. If this is not the case, refer to the User Manual for instructions
on formatting a hard disk and charging the battery.
"NextoDI", "NEXTO VIDEO STORAGE pro", "NVS2501" and "X-Copy" are registered
trademark or trademarks of NextoDI Co., Ltd.
"Sony" and "SxS" are registered trademark or trademarks of Sony Corporation.
"Panasonic" and "P2" are registered trademark or trademarks of Panasonic
Corporation.
"Windows" is a trademark or registered trademarks of U.S. Microsoft Corporation
in the USA and other countries.
"Mac OS" is a trademark of Apple Inc. in the USA and other countries.
All other trademarks are the property of their respective owners.
All company names and product designations contained herein are trademarks of
the respective owners. All rights are reserved.
Important safety notice
● Do not drop, jar, bump, shock, or expose NVS2501 to severe vibration
during video preview or while data is being transferred.
● Do not use near open flames (candles, stoves, grills, fires,) or sparks
(fireworks, welding torches.).
● Backup your data. Under no conditions is NextoDI Co.,, Ltd. liable for loss
of or damage to a computer; or loss of, or damage to, a program, records,
or data; or any consequential or incidental damages.
For more inquiries, contact or consult our technical advisory service:
http://www.nextodi.com/support/en_qna.php
* NextoDI Co., Ltd. reserves the right to make improvements and/or changes
to the product and programs described in this User's Guide at any time
without notice.

16. BAD SECTOR RECOVREY
..............................................................
17. ADVANCED FUNCTIONS
................................................................
CAPACITY CHECK
............................................................................
SELF TEST
......................................................................................
BUZZER
..........................................................................................
FIRMWARE UPDATE
.....................................................................
DELETE TMP FOLDER
..................................................................
LANGUAGE SETTING
...................................................................
18. BURNING A BLU-RAY DISC
............................................................
19. EXAMPLES OF BASIC FUNCTIONS
...............................................
20. AUTO-GENERATION OF INDEX FILE
............................................
21. TROUBLESHOOTING TIPS
............................................................
22. BATTERY DISPOSAL
........................................................................
36
38
39
40
44
44
46
47
48
52
55
57
60
1. PRODUCT DESCRIPTION
...................................................................
2. CONTENTS OF THE NEXTO VIDEO STORAGE PRO
......................
3. SYMBOLS USED IN THIS DOCUMENT
.............................................
4. SAFETY INSTRUCTIONS
....................................................................
5. DEVICE DIAGRAM
..............................................................................
6. ABOUT THE RECHARGEABLE BATTERY
........................................
7. CHARGING THE RECHARGEABLE BATTERY
.................................
8. NVS2501 INTERFACE
.....................................................................
9. FORMATTING THE HARD DRIVE
...................................................
10. USING THE NVS2501 AS A HARD DRIVE
...................................
11. DATA BACKUP(COPY) AND VERIFY
..............................................
12. VIDEO/PHOTO PREVIEW
.............................................................
13. USING AN EXTERNAL HARD DRIVE
............................................
14. MAKING TWO COPIES IN A SINGLE BACKUP(MULTI-COPY)
..
15. MAKING A SECONDARY COPY(SYNC)
.................................
Table of Contents
1
4
5
5
7
8
9
10
13
15
19
22
30
32
34

1. Product Description
01
PRODUCT DESCRIPTION PRODUCT DESCRIPTION
02
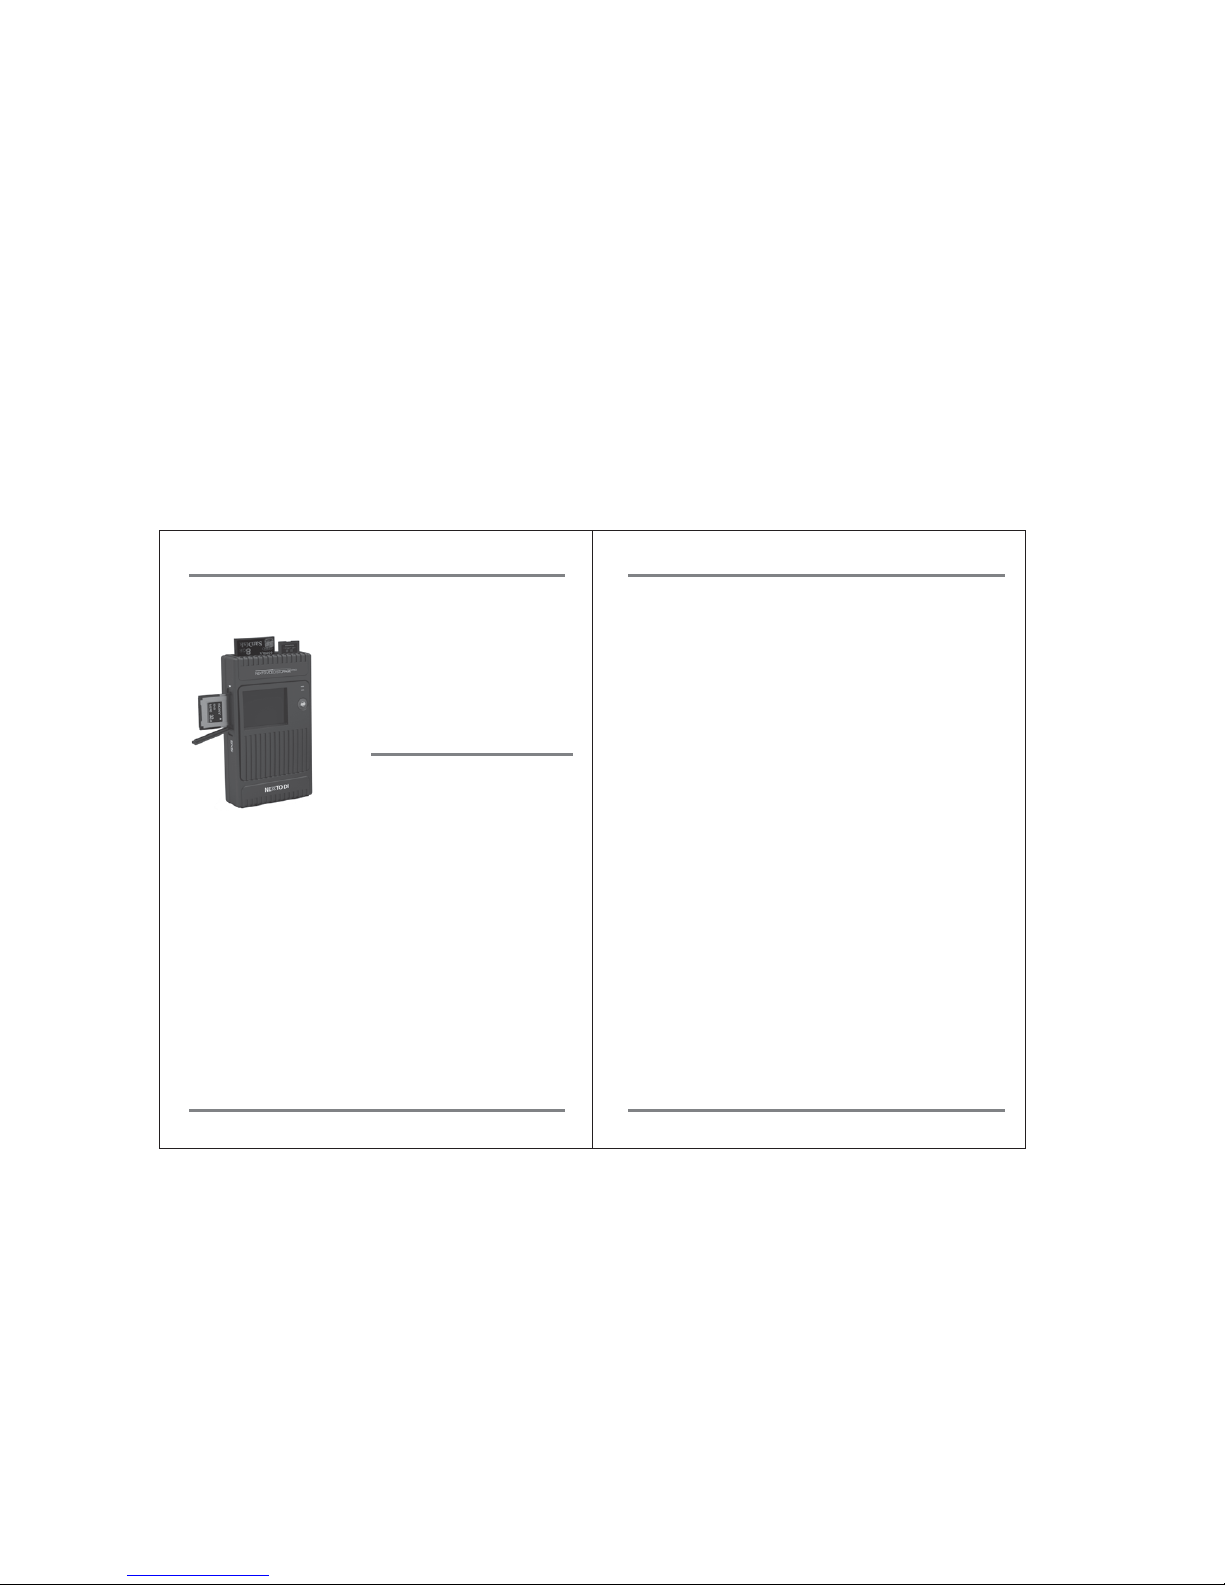
The NEXTO VIDEO STORAGE pro (hereinafter NVS2501) includes a 2.5”Serial ATA
(SATA) hard drive and a Li-Poly battery. The NVS2501 provides the following
functions:
1. Memory card backup
The NVS2501 contains a 2.5”SATA hard drive and a Li-Poly rechargeable battery.
The NVS2501 can copy the contents of a memory card to the internal hard drive
without a PC--even in the field where no electric power source is available.
You can copy SxS cards and Cardbus memory cards (including P2/P2E)
(using a CardBus Memory card adapter) through the ExpressCard slot
on the left side of the device. You can copy through the Cardbus slot on the top
of the device.
For IKEGAMI GFPAK, you can copy through the eSATA_host/USB_host combo port
on the bottom of the NVS2501.
For complete backup information, refer to Chapter 11 of this manual.
2. Video/Photo Preview
The NVS2501 can display video footage taken with professional video cameras,
such as the XDCAM or P2CAM, on a color TFT LCD. The NVS2501 provides a
“best effort” preview of the video clip--that is, the resolution and speed may be
lower than on a regular device. For details on Video Preview, see chapter 12.
3. Multi-Copy
NVS2501 can copy the contents of a memory card to the internal hard drive and
an USB external hard drive at the same time, allowing you to make two copies
in a single operation using this function.
For details of the Multi-Copy feature, see chapter 14.
4. Sync
The NVS2501 can synchronize the contents of a folder with the folder on an
USB external hard drive. This allows you to make a secondary copy of
the backup folder to an USB external hard drive without using a computer.
For details of the Sync function, see chapter 15.
5. Computer connection
The NVS2501 can be connected via USB2.0, eSATA, FireWire 800 (IEEE 1394b) to
a corresponding port on a computer, in order to copy data.
For details of Computer Connections, see chapter 10.
6. Button operation
All of the functions of the NVS2501 are controlled by two buttons, one for power
(On/Off) and the other for function control (control key). The power button can
also be used as a function key in some instances.
For details on Power (On/Off) and control key operation, see chapter 8.
7. Bad Sector Recovery
When a video file stored in the NVS2501 cannot be copied or edited on
a computer, the problem may be a bad sector on the hard drive. The NVS2501
has a sector recovery function which may recover the video file.
For details on Sector recovery, see chapter 16.
8. Internal/External rechargeable battery
The NVS2501 contains an internal Li-Poly battery that enables the NVS2501 to
be used without the power adapter. The power adapter is used to charge
the internal battery, supplying power to the main unit. The external battery
can be used to charge the internal battery.
For details on Charging the Internal Battery, see chapter 7.
9. Internal hard drive
The NVS2501 offers these functions for the internal hard drive:
[Hard drive format]
[Hard drive capacity check]
[Hard drive self test]
For details see chapter 9 and chapter 17.
10. Firmware upgrade
When NextoDI develops new functionality—or offers support for new video
formats--firmware is provided to users through the website’s download page.
You can download the new firmware to a memory card or the internal hard
drive of the NVS2501. You can then upgrade your NVS2501 using the firmware
update function of the NVS2501. For details, see chapter 17.

03
PRODUCT DESCRIPTION CONTENTS OF THE NEXTO VIDEO STORAGE PRO
04
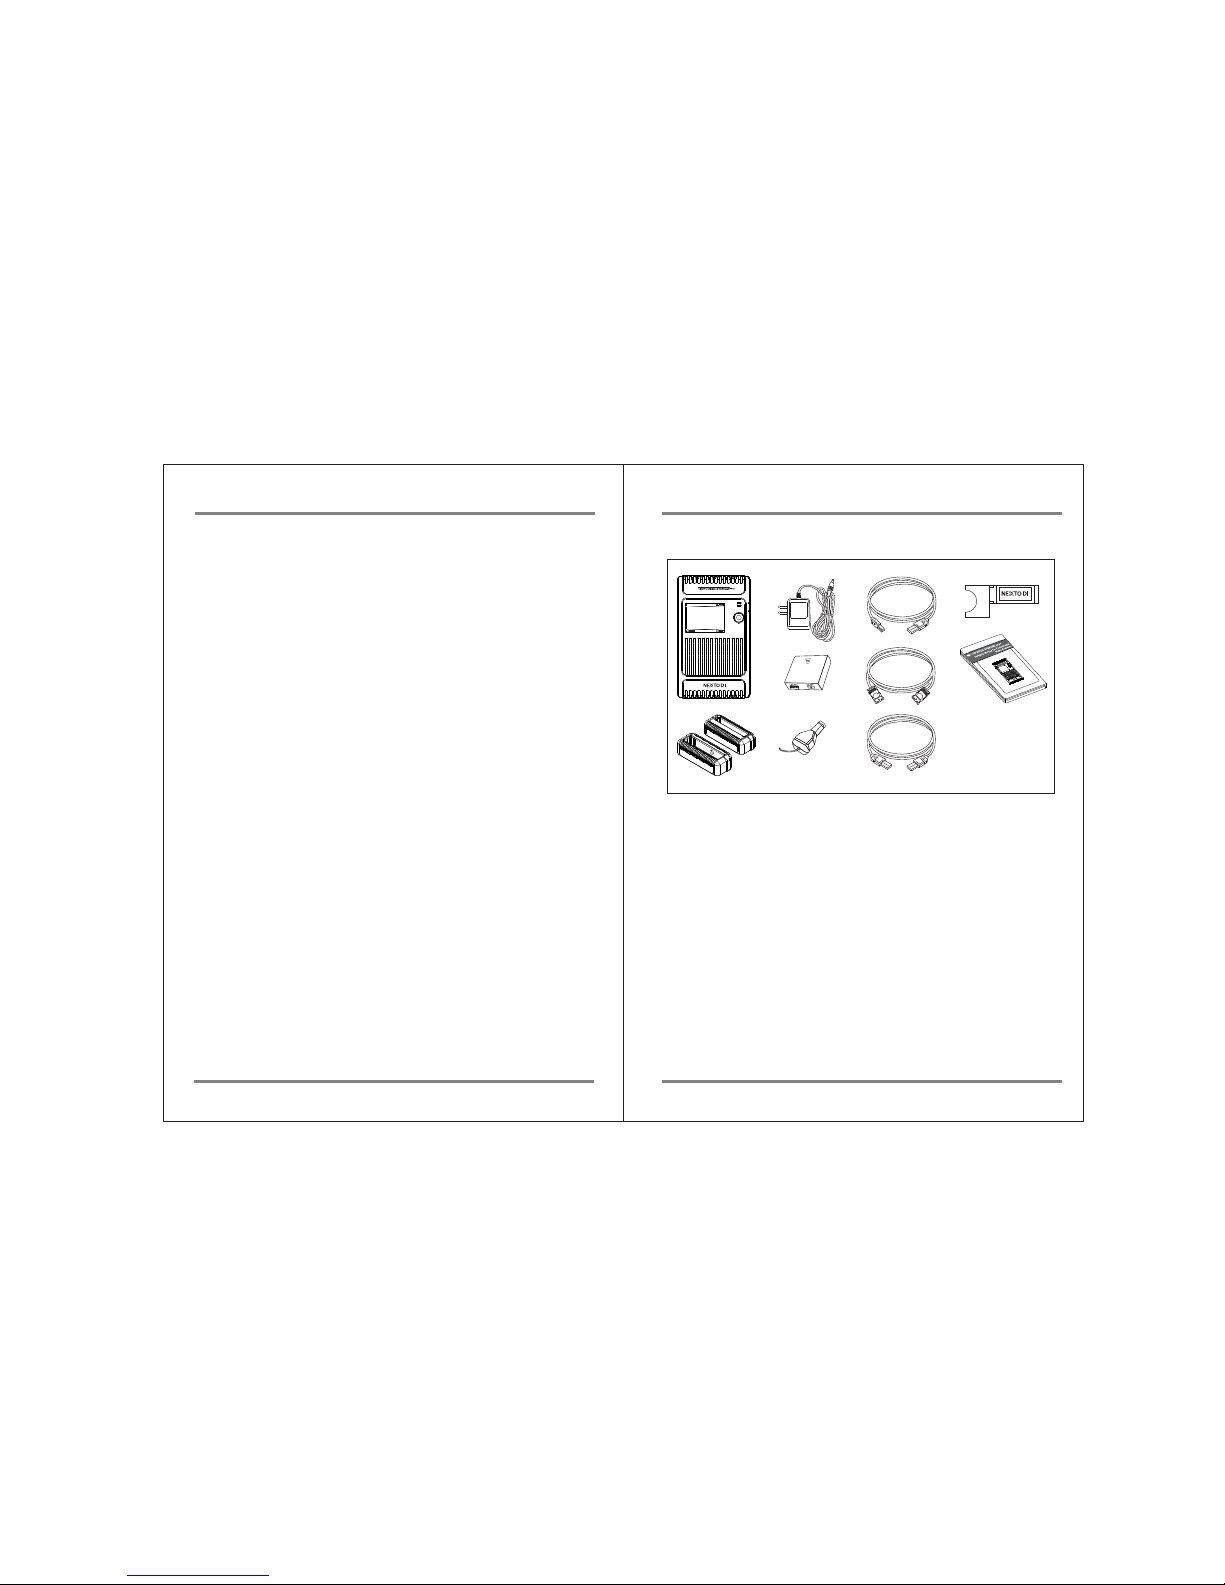
2. Contents of the NEXTO VIDEO STORAGE pro
①Main storage unit
②Shock protective rubber jacket
③AC power adapter (wall plug; 12V)
④AA battery holder for recharging internal Li-Poly battery
⑤Car Charger Cable for recharging internal battery
⑥USB cable for computer connection or connecting external USB hard drive
and GFPAK
⑦eSATA cable for computer connection
⑧FireWire 800 (IEEE 1394b) cable for computer connection
⑨CardBus memory card adapter for CardBus memory card (including P2/P2E)
backup. (Not for computer use. Use with NVS2501 only)
⑩User’s Guide
1. Main Package
11. Language selection
The NVS2501 supports various languages. You can select a language from the menu
of the NVS2501. For details, see chapter 17.
12. Buzzer on/off
The NVS2501 uses a buzzer to note the results of various operations. A user can
turn the buzzer on or off via the menu. For details, see chapter 17.
13. Auto-generation of Index File
After a memory card has been copied, the NVS2501 generates HTML files
containing metadata and thumbnails of the video footage. For details,
see chapter 20.
14. Burning Blu-ray Disc
Users can copy video files that are stored in the NVS2501 to a Blu-ray disc using
a USB Blu-ray driver. After copying the footage, the NVS2501 will support video
preview from the Blu-ray Disc. For details, see chapter 18.
①
②
③
④
⑤
⑥
⑦
⑧
⑨
⑩
145.0 GB
XCopy Ready
Menu Off

05
SYMBOLS USED IN THIS DOCUMENT SYMBOLS USED IN THIS DOCUMENT
06
3. Symbols Used in This Document
Warning
Caution
Reference
The flash icon in a triangle is used to alert you to
personal injury hazards such as electric shock
An exclamation mark in a triangle indicates important
instructions in this operating manual which must be
observed.
The "hand" icon gives you special tips and notes on
the operation.
4. Safety Instructions
Caution
In case of any damage due to failure to observe these operating
instructions, the warranty is voided. NextoDI does not assume liability
for consequential damages. Nor do we assume liability for damage
to property or personal injury caused by improper use or failure to
observe the safety instructions. The warranty is void in any such case.
The following safety instructions and warnings are not only to protect
you, but also to protect the device. Please read the following
warnings:
Warning
● Unauthorized conversion and/or modification of the product is
forbidden for safety reasons.
● Never open the product. This device is not user serviceable.
● Damaging the Li-Poly rechargeable may result in explosion or fire!
● Maintenance, or repairs may only be carried out by authorized
repair center.
● The AC power adapter unit is intended for use in dry conditions to
avoid electric shock!
Warning
● The case of the hard disk must not get damp or wet.
Protect the device from humidity and water, from sun, excessive
heat (>113°F) or cold (<32ºF), dust and dirt.
● When the product is brought from a cold place into a warm room,
condensation may form. This could damage the product. Always let
the product get to room temperature before use or before
connecting the AC power adapter unit. This can take several hours.
● Do not use in tropical climate conditions
● The AC power adapter unit complies with safety class II. As a voltage
source only a proper power socket of the public power supply system
may be used. Note the input voltage/frequency imprinted on the AC
Adapter. It must correspond to the voltage/frequency of the power
outlet. The AC power adapter is equipped with an input voltage
range of 100 ~ 240V, 50/60Hz. Adapters may be necessary for use in
countries other than the US.
● The product is not a toy and should be kept out of reach of children!
● Do not place liquid near the product. Liquid could get inside
the housing and cause a fire or electric shock. In case of fire
damage or short circuit, de-energize the respective socket
(e.g. turn off circuit breaker) and only then pull the AC power
adapter unit from the socket. Do not attempt to use the product!
Take it to your dealer for repair immediately.
● Never touch the AC power adapter unit when your hands are damp
or wet.
● In industrial facilities, safety regulations for electrical equipment
and facilities must be observed. If the product is used at schools,
training facilities, or do-it-yourself/hobby shops, it should not be
handled unless supervised by trained, responsible personnel.
● Do not drop NVS2501 device.
Caution
The product must not get damp or wet. This product is not a toy.
It contains fragile and swallowable glass parts, small parts,
and a rechargeable battery. Any use other than that described above
may damage the product. Read these operating instructions
thoroughly and carefully. The instructions contain important
information for installation, operation, and handling. Take note of
all safety instructions.

07
DEVICE DIAGRAM ABOUT THE RECHARGEABLE BATTERY
08
5. Device Diagram
①DC IN" slot for AC power adapter unit (wall plug; 5~25V).
②Connector " Firewire 800 (IEEE 1394b)" to connect to the computer with max
800Mbps speed.
③Combo slot for “eSATA” and “USB_Host”
● "eSATA" slot to connect to a computer. "eSATA" cable does not provide power,
so use the AC power adapter or connect USB/Firewire cable to PC when using eSATA.
● USB Host slot to connect USB external hard drive or IKEGAMI GFPAK or USB Blu-ray driver.
④"USB” slot for USB2.0 device connection to a computer
⑤Recessed Reset key, to be pressed with a tooth pick or similar tool;
switches off NVS2501 in the event of a hardware or software malfunction.
⑥ExpressCard slot for SxS card and CardBus memory card (including P2/P2E)
connection. CardBus memory card (including P2/P2E) needs CardBus memory
card adapter which is included in the NVS2501 box.
⑦LCD Display
⑧Control key. Controls up/down/left/right/select of cursor when power is on.
⑨Power key. Controls power on/off and selecting command when power is on.
⑩Compact Flash slot
⑪3-in-1 connector for SDHC/SDXC/MS
①
②
③
④
⑤
⑥
⑦
⑧
⑨
⑩
⑪
6. About the Rechargeable Battery
A "Li-Poly" (lithium-polymer) rechargeable battery is integrated into the NVS2501.
This rechargeable battery does not have the so-called "memory effect"--
the rechargeable battery can be charged whenever you want. Furthermore,
it has a higher energy content than conventional NiCd and NiMH rechargeable
batteries. Note these important instructions when handling the Li-Poly
rechargeable battery.
The rechargeable battery can be recharged 400 times.
If the battery operation time gets shorter, it may be time to replace the battery.
Consult your authorized NEXTODI dealer to replace the internal battery.
Caution
● Never damage the rechargeable battery--do not remove it from
the NVS2501. Consult the chapter on "Battery Disposal". Damaging
the wrapping of the rechargeable battery might cause an explosion
or fire.
● Never short circuit the contacts of the rechargeable battery. Never
touch the connections or electrical components inside the NVS2501
with metal objects.
● Charge the rechargeable battery regularly, even if you do not use
the product. The NVS2501 needs some "current" (a small quantity)
at all times. Due to the Li-Poly rechargeable battery technology,
it is not necessary to discharge the battery before recharging.
Recharge the battery completely, about once a month. The device
will be ready for use at any time.

09
CHARGING THE RECHARGEABLE BATTERY NVS2501 INTERFACE
10
7. Charging the Rechargeable Battery
1. Internal battery
The battery can be charged using the AC power adapter unit delivered with this
product.
①Turn off NVS2501.
②Connect the charger’s wall plug to the NVS’s "DC IN" slot.
③Plug the AC power adapter unit into a wall socket.
④The LED above the Control key shows red during the charging.
⑤When the battery is charged, the red LED turns off.
⑥If there is an error when charging, the LED blinks. If this happens,
unplug the AC adapter unit and plug it in again.
Users can charge the NVS2501 via the USB/FireWire 800 (IEEE 1394b) cable,
or the AA battery holder.
With a completely empty rechargeable battery, the charging procedure lasts
approximately 4 hours using the AC power adapter, or the FireWire 800 (IEEE
1394b) cable. With the USB cable, charging takes about 7 hours.
With the AA battery holder, charging takes about 10 hours. An AA battery pack
charges about 40% of the internal battery capacity.
Reference
● You must turn off the NVS2501 in order to charge the unit.
● The NVS2501 can be charged via USB without using the AC power adapter
included in the box. A high powered USB connection is needed, i.e. a USB
connection with its own power supply, such as the USB port of a computer or
a USB hub with a power unit.
● If the NVS2501 is operated with a notebook, you must always use the AC
power adapter unit to charge the NVS2501. Notebooks may not deliver the
necessary amount of current via USB
● The NVS2501 will operate for about two hours with a fully charged internal
battery.
● When connected to a computer using FireWire 800 (IEEE 1394b) or USB,
the NVS2501 draws power from the computer, not the internal battery.
● If the NVS2501’s battery is completely discharged, the performance of
the battery may be degraded. It is recommended that the NVS2501’s battery
be recharged before the battery gauge reaches the empty level.
● See Chapter 8 for more information on the battery gauge.
Caution
● Car charger cable should be used only for charging the internal
(or external) battery.
1. Turning NVS2501 on/off
8. NVS2501 Interface
Reference
● The NVS2501 can be reset via the recessed RESET key (see chapter 5 and
chapter 22). This will also turn the power off.
145.0 GB
XCopy Ready
Menu Off
102.3 GB
Power Off
NEXTO VIDEO STORAGE pro+
Ver 1.0
Press the power key on the right side of device
for more than 2sec in order to switch NVS2501
on. The power up logo and firmware version is
shown on the LCD.
When you see the logo on the LCD screen,
release the button. Otherwise, the NVS2501
will automatically power down.
After checking the system, the NVS2501 goes
into [XCopy ready] mode.
You can copy a memory card in this mode.
The NVS2501 turns off automatically after
about 50 seconds if you do not use it.
When the (L) Off control option appears on
the LCD, the NVS2501 can be powered off by
pressing down on the control key or power key
for more than 2 seconds.

11
NVS2501 INTERFACE NVS2501 INTERFACE
12
2. Key operation
The NVS2501 is operated by a single control key which can be used in five
different ways. The display shows you the “S” (Short) or “L” (Long) symbol as
a means to invoke the desired function.
Symbols Operation
S
L
Press once and release immediately.
Press and hold the key for more than two seconds.
Push the key in the appropriate direction.
Up/down/left/right movements are supported.
Pushing and Holding the key in the up or down
direction, results in repeated executions of
the operation.
▲▼◀▶
3. The LED indicator
Control
Button
Off
①
②
LCD
If the control key is not working: If the control key is malfunctioning,
the menu sub-functions cannot be used. However, functions such as copy and
verify can be controlled through the power key. The user could thus rely on the
power key—instead of the control key—to select the desired function from
the menu.
①Red indicates battery is being charged.
Green indicates “power on”.
②Blinking red indicates that a data transfer is
occurring.
4. The LCD Display
①Remaining capacity of the internal hard disk.
If the capacity of the internal hard disk is uncertain, the display will be
grayed out. A capacity check will be performed automatically during power
on or power off. The capacity check can also be activated from the menu.
If an external hard drive is connected to the NVS2501, the capacity of
external hard drive will be displayed next to the capacity of the internal
hard drive.
②Remaining capacity of the rechargeable battery
The battery capacity is displayed in four ways: (3→2→1→empty) by the battery
gauge.
① ②
③
④
145.0 GB
XCopy Ready
Menu Off
③Current status of the device.
④Available functions for the current screen. The display varies depending on
the function in use.
(Full): 80% ~ 100%
(2nd Gauge): 30% ~ 80%
(1st Gauge): 5% ~ 30%
(Empty): Under 5%
● Once the capacity counter has
decreased, it will not increase until fully
charged
Reference

13
FORMATTING THE HARD DRIVE FORMATTING THE HARD DRIVE
14
9. Formatting the Hard Drive
The hard disk in the NVS2501 should already be formatted with the "FAT32" or
"exFAT" file system. Only one (or the first) partition can be used.
Do not attempt to format the NVS2501 disk with a computer. Use only the format
function on the NVS2501. This will allow the hard disk to be read by either
the Windows or Mac operating systems.
Caution
The NVS2501 can work only with one partition in the file format
"FAT32" or "exFAT". Therefore, NVS2501 offers users the function for
formatting the hard disk in the "FAT32 file system" or "exFAT file
system". If you using SDXC card then NVS2501 should be formatted
with the "exFAT" file system.
149.0 GB
Preview
Select Back
HDD Management
Buzzer On
SectprRecpvery
Sync
Language
Firmware Update
Index AutoGen. On
To Format a New Hard Disk
The NVS2501 must not be connected with a computer via USB or eSATA or
FireWire 800 (IEEE 1394b). Remove any memory card or USB device.
To re-partition/format the hard disk, press
the control key once at the [XCopy Ready]
mode to get to the menu ("S-Menu"). Move
the highlighted cursor to the [HDD
Management] menu by pushing the control
key downward. Press the control key once
to select [HDD Management].
Move the highlighted cursor to the [Format]
menu option with the control key.
Press the control key once to select
[Format]. Select [FAT32] or [exFAT] and
briefly press the control key [S] to move to
the next step.
149.0 GB
HDD Management
Select Back
Format
HDD Info
Self Test
TMP Folders
Recovery
FAT32
exFAT
149.0 GB
Back
HDD Format
All data in HDD
will be deleted
Format HDD ?
Ok
149.0 GB
HDD Format
Completed
149.0 GB
HDD Format
Formatting
149.0 GB
Back
HDD Format
All data in HDD
will be deleted
Format HDD ?
Ok
Confirm the selection by pushing the
control key upward.
You can cancel the operation by pressing
and holding the control key or power key.
Note: With Windows XP, hard disks and
partitions are formatted (with a size of
more than 32GB) only with the file system
"NTFS"; the "FAT32" option is no longer
available. For MAC OS, hard drives are
formatted with the file system HFS+
(MAC OS Extended). These formats are
incompatible with the NVS2501.
Then you can repartition and reformat
the hard disk; to confirm,
push the control key downward.
All data on the hard disk will be lost!
You can cancel the operation by pressing
and holding the control key or power key.
The NVS2501 indicates the progress of
the formatting operation.
When the formatting is completed you are
ready to copy data to the hard disk.

15
USING THE NVS2501 AS A HARD DRIVE USING THE NVS2501 AS A HARD DRIVE
16
10. Using the NVS2501 as a Hard Drive
The NVS2501 can be connected to your computer for use as an external hard
disk. Three connection methods are supported.
1. Connect to the computer’s USB2.0 slot via the NVS2501 "USB" slot and
the USB cable.
2. Connect to the computer’s eSATA slot via the NVS2501 "eSATA/USB-Host combo"
slot and the eSATA cable.
3. Connect to the computer’s Firewire 800 (IEEE 1394b) slot via the NVS2501
"Firewire 800 (IEEE 1394b)" slot and the Firewire 800 (IEEE 1394b) cable.
Device drivers for the NVS2501 are included in the Microsoft Windows 7, Vista,
ME, XP and 2000 operating systems. Drivers for Windows 98 systems can be
downloaded from the NextoDI website. To download drivers, go to
http://www.nextodi.com/support
http://www.nextodiusa.com/support.htm
When you have successfully connected the NVS2501 to your computer,
the contents of the NVS2501 hard disk will appear in Windows File Explorer.
1. Connect via USB
①Turn your computer on. Wait until the operating system is completely booted.
②Turn your NVS2501 on.
③Connect the NVS2501 "USB" slot via the USB cable with a free USB2.0 port
on your computer. A USB1.1 port can also be used.
④Check the "PC Connection" on the NVS2501’s LCD display.
⑤If your computer detects the NVS2501 correctly,
a new drive named [NEXTODI] will appear in
the “My Computer” display.
Off
USB Cable
USB(mini-B)
USB(Standard-A)
PC Connection
Off
Connection Power
PC CONNECTION
The eSATA cable does not provide power.
Use the AC power adapter unit or USB/
Firewire 800 (IEEE 1394b) cable to provide
power. If no power is provided, the NVS2501
shows the “Connect power” message and
waits for external power to be applied.
Caution
● DO NOT connect the eSATA cable during Firewire/USB connection
to the computer. You may lose your data.
2. Connect via eSATA
① Switch your computer on and wait until the operating system is completely
booted.
② Switch the NVS2501 on.
③ Connect the NVS2501 "eSATA" slot via the eSATA cable with a free eSATA port
of your computer. The eSATA cable does not provide power.
Use the AC power adapter unit or USB/Firewire cable to provide power.
If no power is provided, NVS2501 shows “Connect power” message and waits
for external power applied.
④ Check the NVS2501 LCD display. If the connection has been made, you will
see "PC connection”.
⑤ If the computer detects NVS2501 correctly, a new drive named [NEXTODI]
appears in the 'My Computer' display
eSATA eS ATA
PC CONNECTION
Off
eSATA Cable
12V Adapter

File Edit View Favorites Tools Help
My Computer
내 컴퓨터
Search Folders
Local Disk (C:)
My Computer
NEXTODI (G:)
Address Go
Back
17
USING THE NVS2501 AS A HARD DRIVE USING THE NVS2501 AS A HARD DRIVE
18
3. Connect via Firewire 800 (IEEE 1394b)
①Turn your computer on. Wait until the operating system is completely booted.
②Turn your NVS2501 on.
③Connect the NVS2501 "Firewire 800 (IEEE 1394b)" slot via the Firewire 800
(IEEE 1394b) cable with a free Firewire 800 (IEEE 1394b) port on your computer.
④Check the "PC Connection" on the NVS2501’s LCD display.
⑤If your computer detects the NVS2501 correctly, a new drive named
[NEXTODI] will appear in the “My Computer” display.
Off
Connect Power
PC Connection
The 4pin-9pin Firewire 800 (IEEE 1394b)
cable does not provide power.
Use the AC power adapter unit or USB
cable to provide power. If no power is
provided, the NVS2501 shows the
“Connect power” message and waits for
external power to be applied.
4. Browsing the contents of your hard drive
If your computer detects the NVS2501 correctly, a new drive named [NEXTODI]
will appear on 'My Computer'.
5. Disconnecting the NVS2501 from Your Computer
For Windows
Right click the Storage device icon in the System Tray (lower right corner of
your screen) and select “Safely Remove Hardware” or “Unplug” or “Eject
Hardware”. Then disconnect the cable from your NVS2501 and your computer.
For MAC
Drag and drop the NEXTODI icon to the trash. Then disconnect the cable from
your NVS2501 and your computer.
FireWire 800 (IEEE 1394b)
FireWire 800
(IEEE 1394b)
FireWire 800 (IEEE 1394b) Cable
Off
PC Connection
File Edit View Favorit
G:\
back
Address
Control Panel
My Document
My Computer
Local Disk (C:)
Local Disk (D:)
DVD-RAM Drive (E:)
Skylark (F:)
NEXTODI (G:)
NVSPRO
20090601.000
CLPR
-01_002_01
-01_003_01
TMP.000
TMP.001
Search
G:\
Back up data is stored in the "NVSPRO" folder. This
folder is created automatically. The NVS2501
generates a new folder for each memory card copy.
The name of the folder is determined by the shooting
date.
For example, 20081112.000 means the last footage
recorded on November 12, 2008. (If you copy
multiple items on a single day, the last three digits
will be changed to indicate the download sequence –
“000, 001,002, 003, etc.) The date code comes from
the video cameras. If the date setting on the video
camera is incorrect, the folder name of NVS2501 will
also be incorrect.
If a copying failure occurs, the copy is stored on your
computer as a TMP folder. The TMP folder contains
the same file names, but the data may be abnormal.
You may delete the TMP folder.

19
DATA BACKUP(COPY) AND VERIFY DATA BACKUP(COPY) AND VERIFY
20
11. Data Backup(Copy) and Verify
This chapter represents the ‘Copy’ and ‘Verify’ functions.
Insert a memory card into the corresponding memory slot.
The slot for CF/MD/SDHC/SDXC/MS is located on the top side of the NVS2501.
The slot for the SxS card is located on the left side of NVS2501.
The Cardbus memory card (including P2/P2E cards) must be used with a CardBus
memory card adapter which is included in the NVS2501 box.
The Ikegami GFPAK flash memory device can be connected via the “eSATA/
USB-Host” combo slot using the USB cable.
When copying from a memory card, the NVS2501 must not be connected to
a computer. The NVS2501 can copy a memory card onto the internal hard disk via
the built-in memory slot or via the "eSATA/USB-Host" combo slot connector
with a USB cable. After the backup, the copy procedure can be verified. The data
on the memory card and the data on the hard disk are compared with one another.
This ensures that the data has been copied properly (“Verify”). You can choose
the “New Copy” or the “Verify” function according to whether the contents of
the memory card have been copied before.
● Do not connect more than one memory card or USB external HDD to
the NVS2501. Only the first one connected will be detected.
● Insert the memory card carefully. The pin may get bent if you insert
incorrectly.
102.3 GB
Cancel
SxS Detected
Checking...
1. Parsing the memory
2. Copy
(1) If the memory card contains new data.
The NVS2501 will make a new folder on the hard
disk and copy all the files and folders in the
memory card onto the internal hard disk. The
contents of the memory card will not be deleted.
: To Copy, press the control key briefly.
: To Cancel the copy, press the control key
for more than 2 seconds.
3.6 GB
16 Files
Copy SxS?
Fast Copy
Copy & Verify
Safe Copy
105.9 GB
Cancel
Select
SxS
3.6 GB
16 Files
Same Copy is in
20090618.000
Verify SxS?
102.3 GB
Cancel
Select
Verify DeleteCopy
SxS 3.6 GB
16 Files
102.3 GB
Copy Delete
Verify
Same Copy is in
20090618.000
New Copy SxS?
Cancel
Select
SxS
102.3 GB
DeleteVerify Copy
Cancel
Select
3.6 GB
16 Files
Same Copy is in
20090618.000
Delete SxS?
SxS
3. Verify
3.6 GB
16 Files
Same Copy is in
20090618.000
Verify SxS?
102.3 GB
Cancel
Select
Sample Full
SxS
When you choose the verify function, the NVS2501
compares the data stored on the hard drive to that
on the memory card. The verification logic entails
a full bit-by-bit verification, and detects any
differences.
: For verification, press the control key briefly
: Another option: press the control key for more
than 2 seconds. Select to make one more copy
of this memory card.
Two options are available for verification using left/right key selection.
Sample verify
Full verify
Compare first 1MByte of each file.
All the data is compared
Compare data stored in the hard drive to the data stored in the memory
card.
Verify
Copy again. Make a new folder and copy all of the data in the memory
card to the hard drive.
Copy
Delete the data on the memory card so that it can be reused.Delete
The data on the memory card is compared with
the data stored on the NVS2501 hard disk to
determine whether it is new data or if the data or
a portion of the data has already been stored on
the NVS2501. According to the comparison result,
the NVS2501 operates as follows:
Make new folder and copy all the memory card data into the folder.
Before copying data, the NVS2501 verifies that its hard drive area is
safe. If a bad sector is detected, a new, safe area is found –
then copying [Fast Copy] will begin.
Fast Copy
Verify&Copy
Same as [Fast Copy] but after copying, the data on the memory card
is compared with the copied data in the NVS2501 hard drive. Each
bit is verified.
Safe Copy
(2) Memory card with copied data
If the memory card was copied before and not modified since, then you can
choose to [Verify] or [Copy] or [Delete].
Three options are available for copy using up/down key selection.

VIDEO/PHOTO PREVIEW
22
21
DATA BACKUP(COPY) AND VERIFY
4. Status
Current operation status is shown
on the LCD display.
(1) Total number of files in the memory
card versus the number of copied files.
(2) Amount of data copied.
(3) Elapsed time
5. Indication of Results
If the operation completes successfully,
the user is notified with a beep sound
and the lapsed time is displayed.
(1) Total number of files in the memory
card versus the number of copied files.
(2) Amount of data copied.
(3) Copy speed in (MB/s)
Reference
● Remove the memory card to return to the initial display.
● If you don't remove the memory card, the NVS2501 will automatically turn off
within 50 seconds to preserve battery life.
Copying
4/16 20.1 GB
102.3 GB
Cancel
0m30s
SxS
Copy Done
Remove SxS
16/16 3.6 GB
98.7 GB
Off
10.7 MB/s
Copy Success
12
3
12
3
102.3 GB
Device Read Error
ErrorNo: 0x33006000
SxS
Error
91.4 Gb
Previous
Copy Failed
20090618.003
16 Files
3.6 GB
Ok
6. Error Display
The NVS2501 displays the previous operational status at the next power up. The
user will then know whether the last backup was successful.
12. Video/Photo Preview
The NVS2501 shows stored video or photo files after backup depending on the file
format. A preview of both the internal and external device (SxS/P2/CF/SDHC/
SDXC/MS/USB) is supported. Users can also choose to delete the backup folders.
1. Preview from the internal hard drive
149.0 GB
Preview
Select Back
HDD Management
Sector Recovery
Buzzer Off
Sync
Language
Firmware Update
Index AutoGen. Off
Preview
Select a Source
Internal HDD
External Device
149.0 GB
Select Back
2/3
20090701.000
20090630.000
20090601.000
Select Back
Press the control key once at the “XCopy Ready”
mode to activate the menu.
Press the control key and select “Preview”.
Select “INTERNAL HDD” to preview the video file
stored in the internal hard drive.
The NVS2501 will display the contents of the
backup folder
in date order. The most recent folder is shown
first. After you select a folder, the NVS2501
will display a brief list of the contents as shown
in the figure below.

23
VIDEO/PHOTO PREVIEW VIDEO/PHOTO PREVIEW
24
20090601.000
Select Back
55 Files/ 528 MB
Delete This Backup
Show Video ... 4
Copy to External Device
Show Image ... 0
1/1
720p_123.mxf
Select Back
Pause Back
1x 00:00:05
Reference
● See http://www.nextodi.com/manual for supporting preview format.
● The preview of the NVS2501 is a “best effort” preview. The preview speed
differs depending on the video format.
3
12
4
5
2. Image Preview
Select [Show Image] at the preview menu.
The number on the right is the number of
image files.
The NVS2501 shows a list of image files
contained in that folder as thumbnails--
just like [Show Video].
If you select an image, the NVS2501 shows
the larger one. A user can control the “left/
right” button to preview the next image or
can short press the key([S]) to preview in
slide show mode.
(1) File extension
(2) Size of Images
(3) Preview Images
(4) Selectable command
1/1
pic_001.jpg
Select Back
Auto View Back
JPG 3872x2592
1 2
4
3
20090601.000
Select Back
55 Files / 528 MB
Show Video ... 0
Show Image ... 3
Delete This Backup
Copy to External Device
Reference
● See http://www.nextodi.com/manual for supporting preview format.
The user can select [Show Video] for video
preview, [Show Image] for photo preview,
[Delete] for deleting this backup, or [Copy] for
copying to an external hard drive.
If “SHOW VIDEO” is selected, the NVS2501 will
display the video files contained in that folder
as thumbnails.
Unsupported video files are shown with an
[X] mark. Video clips are selected for preview
by using an up/down/left/right push of the
control key. Press the control key briefly to
select a clip.
The NVS2501 will show a preview of the video
file at reduced resolution. The user can select
play/pause by pressing the control key. The user
can also adjust the preview speed by pushing
the control key to the left/right.
(1) Preview speed
(2) Elapsed time
(3) Progress of preview in %
(4) Preview video
(5) Selectable command

VIDEO/PHOTO PREVIEW
26
25
VIDEO/PHOTO PREVIEW
3. Delete the backup data
20090629.000
Select Back
55 Files
1.4 GB
4 Video Files
Delete?
20090629.000
Select Back
55 Files
1.4 GB
4 Video Files
Are You Sure?
Select “Delete This Backup” from the Preview
menu.
The NVS2501 will ask you twice to confirm the
delete operation. (If you do not want to
delete, press the button for more than 2
seconds to go back to the main menu.) Push
the control key up and down to confirm the
deletion.
The specific folder is deleted.
Return to the main menu by pressing the
control key once.
The specific folder is deleted.
Return to the main menu by pressing the
control key once.
20090601.000
Select Back
55 Files / 1.4 GB
Show Video ... 4
Show Image ... 0
Delete This Backup
Copy to External Device
20090629.000
Ok
Deleted
102.3 Gb
Copy to CF?
CF
Select Cancel
4. Copy to External Device
Select a backup folder in the preview menu.
Choose “Copy to External Device” to copy that
backup folder to an external memory card.
Connect the memory card (CF/SDHC/SDXC/MS)
to the 3-in-1 connector or CompactFlash slot.
The copying of internal data to an SxS or P2 card
is not supported.
The NVS2501 checks for the memory card.
148.0 Gb
Cancel
Copy
External Device
Insert a
(CF/SDHC/SDXC/MS)
102.3 Gb
Cancel
CF Detected
Checking...
4.1. If the memory card is empty
Copying all of the files inside the selected
folder onto a memory card.
: To Copy, press the control key briefly
: To cancel the Copy, press the control key
for more than 2 seconds.
A user can upload the backup folder inside the NVS2501 to a memory card using
the “Copy to external device” function provided by the NVS2501.
20090601.000
Select Back
16 Files / 20.1 GB
Show Video ... 4
Show Image ... 3
Delete This Backup
Copy to External Device

VIDEO/PHOTO PREVIEW
28
27
VIDEO/PHOTO PREVIEW
Current operation status is shown on
the LCD display.
(1) Total number of files in the memory
card versus the number of copied files.
(2) Size of files to be copied
(3) Elapsed time
If the operation completes successfully,
the NVS2501 will make a beeping sound and
the display will show:
(1) Total number of files in the memory
card versus the number of copied files.
(2) Size of copied files
(3) Copy speed in (MB/s)
Copying
4/16 3.6 Gb
102.3 Gb
Cancel
0m30s
CF
12
3
Copy Done
Remove CF
16/16 20.1 Gb
102.3 Gb
Off
50.7Mb/s
CF
12
3
4.2. If the memory card is NOT empty
20090629.000
OK Back
16 Files
20.1 Gb
4 Video Files
Delete ?
102.3 Gb
CF is NOT Empty
All data in CF
will be Deleted
CF
OK Cancel
The NVS2501 will ask you twice to confirm
the memory card deletion operation.
If you do not wish to proceed with deleting the
data from the memory card, press the control
key for more than 2 seconds to go back to the
main menu.
Use the Control key (up or down motion)
to confirm that you wish to delete the contents of
the memory card.
The contents of the memory card have been
deleted.
The copy operation is initiated automatically.
Current operation status is shown on
the LCD display.
(1) Total number of files in the memory card
versus the number of copied files.
(2) Size of files to be copied
(3) Elapsed time
IIf the operation completes successfully,
the NVS2501 will make a beeping sound and the
display will show:
(1) Total number of files in the memory card
versus the number of copied files.
(2) Size of the copied files
(3) Copy speed (in MB/s)
20090629.000
OK Back
16 Files
20.1 Gb
4 Video Files
Are You Sure ?
20090629.000
OK
16 Files
20.1 Gb
4 Video Files
Deleted
Copying
4/16 3.6 Gb
102.3 Gb
Cancel
0m30s
CF
12
3
Copy Done
Remove CF
16/16 20.1 Gb
102.3 Gb
Off
50.7Mb/s
CF
12
3
4.3. If the capacity of the memory card is smaller than the backup
folder 102.3 Gb
NOT enough space
in CF
Remove CF
CF
Off
The NVS2501 does not support “Copy to
External Device” if the capacity of an
inserted memory card is less than
the size of a selected backup folder.

USING AN EXTERNAL HARD DRIVE
30
29
VIDEO/PHOTO PREVIEW
5. Preview from an external device
Select a Source
Internal HDD
External Device
149.0 GB
Select Back
Preview
148.0 GB
Cancel
External Device
(SxS/P2/CF/SDHC/SDXC/USB)
Insert an
Preview
Select Back
2 Files / 257.2 MB
Show Video... 1
Show Image... 0
102.3 GB
Off
Remove USB
Preview
20090421.000
1/2
Select Back
20090417.002
The NVS2501 supports the preview of video files
stored on an USB external hard drive—as well as
video files stored on memory cards such as: SxS,
CardBus memory card(including P2/P2E), SDHC,
SDXC, MS, MD and CF.
Select “External device” from the preview menu.
Then connect the external device to the NVS2501.
(1) If an SxS or CardBus memory card (including
P2/P2E) contains video or image files—and is
inserted into the NVS2501--information about the
video or image files will be displayed.
(2) If an USB hard drive is connected, the
NVS2501 will detect and analyze the backup
folders. The NVS2501 will then display the backup
folders as in the figure. The rest of operations are
the same as previewing from the internal hard
drive
If you select “Back” by pressing and holding the
control key, then a “remove (device type)”
message will appear on the LCD display. Once the
cable or memory card has been removed, you will
automatically be returned to the main menu.
13. Using An External Hard Drive
1. Connecting an external USB hard drive
Connect an external USB hard drive using the supplied USB mini-B cable during
“XCopy ready” mode. Connect the larger plug to the eSATA\USB HOST combo port
of the NVS2501. The NVS2501 will detect the device and check the external hard
drive.
102.3 GB
Cacel
USB Detected
Checking...
USB Cable
USB(mini-B)
USB(Standard-A)
Adapter
Adapter
The NVS2501 allows a user to copy a memory card to both the NVS2501 hard drive
and to an USB external hard drive at the same time, making two copies of data
in a single operation. The NVS2501 provides “Multi-copy” and “Sync” functions
to make backup more reliable. Users can also choose to copy from an external USB
device (USB HDD / USB Card Reader) to the NVS2501 internal hard drive.

31
USING AN EXTERNAL HARD DRIVE
MAKING TWO COPIES IN SINGLE BACKUP(MULTI-COPY)
32
Copying a memory card to both the internal hard drive and an external USB hard
drive at the same time makes two copies of data in a single operation.
The “Multi-copy” function of the NVS2501 makes backup more reliable.
14. Making Two Copies In A Single Backup(Multi-Copy)
If the proper external hard drive is connected,
the NVS2501 shows information about the drive.
Quickly [S] press the key or wait 10 seconds--
the NVS2501 will automatically go into the
“Multi-Copy” mode. (If the external USB hard
drive connects before the power is on,
the NVS2501 will go directly into “Multi-Copy”
mode)
The remaining operation is the same as the
“XCopy ready” mode. This mode can be exited
by holding and pressing the key or by removing
the USB cable from the NVS2501.
Insert the memory card when you are in the
“MCopy ready” mode. The NVS2501 detects/
parses the contents of the memory card and
asks you to confirm the mode of copy. Three
options are available as in the normal XCopy
mode. For details, see chapter 11.
: Copy: briefly press the key.
: Cancel the copy: press and hold the key
for more than 2 seconds.
98.7 GB
MCopy Ready
Off
Menu
231.0 GB
USB HDD Info
Total: 149.0Gb
149.0 GB
Select
Used: 37.9 Mb
MCopy Sync
Cancel
3.6 GB
16 Files
SxS를
동시 복사 하겠습니까?
98.7 GB
Cancel
Select
Multi Copy
Fast Copy
Copy & Verify
Safe Copy
231.0 GB
Reference
● The “MCopy/SYNC” is possible only when the capacity of the USB external
hard drive is more than 128GB.
● The wall power adapter should be connected to both the NVS2501 and the
USB external hard drive. The USB power supplied by the NVS2501 may not be
enough to run an external USB hard drive.
2. When the USB drive capacity is less than 128GB
If the drive capacity is less than 128GB,
this capacity will be detected and only the
Copy menu option will be displayed.
The NVS2501 can copy data from an external
USB hard drive or from a USB card reader to
the internal hard drive.
For details, see chapter 11.
3. When the USB drive capacity is more than 128GB
If the drive capacity is more than 128GB,
a user can choose between “Copy from USB
device” or “Multi-copy/SYNC” to a USB device.
For details on copy, see chapter 11.
For details on “MCopy/SYNC”, see
chapters 14 and 15.
3.6 GB
16 Files
105.9 GB
Cancel
Select
Copy USB?
Fast Copy
Copy & Verify
Safe Copy
105.9 GB
Cancel
Select
Select Mode
Copy from USB
MCopy / Sync
231.0 GB

33
MAKING TWO COPIES IN SINGLE BACKUP(MULTI-COPY)
MAKING A SECONDARY COPY(SYNC)
34
When Multi-Copy is in progress,
do not remove the memory card or disconnect
the USB external hard drive.
Multi-Copy completed.
Remove the memory card to return to the
initial display. If you do not remove the
memory card within 50 seconds, the NVS2501
will automatically turn off in order to preserve
battery life. See chapter 10 for the location
and name of the backup folders.
The NVS2501 displays the previous backup
status during the next power on.
Multi Copying
14/16 964.3 MB
98.7 GB
Cancel
1m47s
SxS
Copy Done
Remove SxS
16/16 3.6 GB
95.0 GB
Off80.7 MB/s
Copy Success
91.4 GB
Preview
Previous
MCopy Success
20090618.003
16 Files
3.6 GB
Ok
(1) Selecting “SYNC” from the menu
USB HDD Info
Total: 149.0Gb
149.0 GB
Select
Used: 37.9 Mb
SyncMCopy
Cancel
(2) Connecting the USB hard drive during “XCopy ready” mode
If a proper external hard drive is
connected, the NVS2501 will display the
status of that drive. Press the control key
button to the left to highlight “Sync” and
briefly press the key to select “Sync”.
149.0 GB
Preview
Select Back
HDD Management
Sector Recovery
Buzzer Off
Sync
Language
Firmware Update
Index AutoGen. Off
148.0 GB
Cancel
External Device
Insert an
Sync
15. Making A Secondary Copy (Sync)
Move to “SYNC” on the main menu and
select it.
Connect the USB external hard drive to the
[eSATA/USB-Host] combo port of the
NVS2501 as shown in chapter 13.
The “Sync” function synchronizes data between the [NVSPRO] folder of the
NVS2501 and the [NEXTO] folder of an external USB hard drive connected on the
“eSATA/USB Host” connector via USB cable. This function compares the folders
stored in the [NVSPRO] folder of the NVS2501 and the [NEXTO] folder of an
external hard drive. A new folder will be copied to the external hard drive only
if a folder is in the [NVSPRO] folder of the NVS2501—but not in [NEXTO] folder of
an external hard drive.
Table of contents
Other Nexto Di Camera Accessories manuals