NEXTTEQ NXS Series User manual

Nextteq Portable
NXS Series
INSTRUCTION
MANUAL
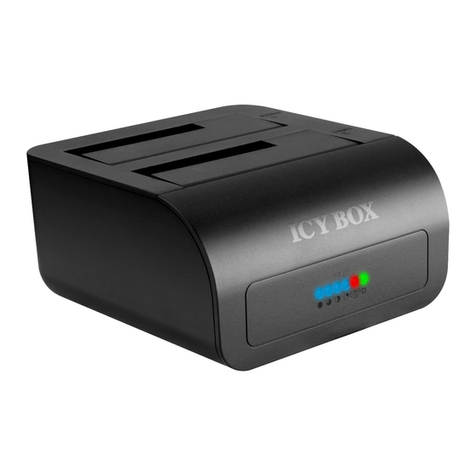
Docking Station

2Designed, built and supported by industry professionals for industry professionals
Table of Contents
Warning ………………………………………………………………………………………… 3
1. Overview ……………………………………………………………………………………… 4
1.1 Description ………………………………………………………………………… 4
1.2 Instructions and Parts …………………………………………………………… 4
1.3 Key Features ……………………………………………………………………… 5
1.4 Specifications ……………………………………………………………………… 5
2. Set Up and Operation ………………………………………………………………………… 6
2.1 Power Turn On/Off ………………………………………………………………… 6
2.2 Bay LEDs and Meanings …………………………………………………………… 6
2.3 Charging Batteries ………………………………………………………………… 6
2.4 Exhaust Port & Fresh Air Inlet …………………………………………………… 6
2.5 Installation of Gas Cylinder………………………………………………………… 7
3. Testing ………………………………………………………………………………………… 7
3.1 Calibration ………………………………………………………………………… 7
3.2 Bump Test ………………………………………………………………………… 8
4. Troubleshooting ……………………………………………………………………………… 8
5. Docking Station Manager Software …………………………………………………………… 9
5.1 Software Installation ……………………………………………………………… 9
6. Connecting to the NXS Docking Station ……………………………………………………… 11
6.1 Connecting with Nextteq IR Link…………………………………………………… 12
6.2 Connecting with USB ……………………………………………………………… 12
7. Using Software ……………………………………………………………………………… 13
7.1 Overview of Software ……………………………………………………………… 13
7.1.1 Docking Station Tab ……………………………………………………… 14
7.1.2 NXS Tab ………………………………………………………………… 15
7.1.3 Logs Tab ………………………………………………………………… 16
8. Limited Warranty ……………………………………………………………………………… 17
8.1 Limited Warranty ………………………………………………………………… 17
8.2 Warranty Disclaimer ……………………………………………………………… 18

3
Tel: 813-249-5888 Toll free: 877-312-2333 Fax: 813-249-0188 Toll free: 877-312-2444 www.nextteq.com [email protected]
WARNING
Any unauthorized attempt to repair or modify the product, or any other cause of damage beyond the
range of the intended use including damage by fire, lightning, or other hazard, voids liability of the
manufacturer.
Do not use the device if it appears to be damaged.
Use the device in a clean environment, with no hazardous gases present.
Do not use expired gas cylinders.
Only use certified gas cylinders.
Ensure that the gas types and the concentrations match with the manual instructions and devices.
Severe vibration or shock to the device may cause a sudden reading change and cause the device
to malfunction.
Do not leave or use the device in a location where it will be exposed to moisture.
Do not use a gas detector which has failed or cannot pass a bump or calibration test.
Read the Operation Manual Before Use
Before operation, read the manual carefully and follow all the instructions.
IR link communication works only when it is placed in Bay 1 on the docking station device.
The device only operates when the power LED is lit green.
Before upgrading firmware, connect the plug to avoid any data loss or malfunction by unexpected
power failure. The firmware file names are listed below:
- Docking Station F/W File Name : DK_FW.bin
- NXS F/W Names : NXS_H2S_L5_H10_C25_V127.bin
NXS_O2_L195_H235_C180_V127_DD.bin
NXS_CO_L35_H200_C100_V127.bin

4Designed, built and supported by industry professionals for industry professionals
1. Overview
1.1 Description
A bump test and the calibration test are the key features to ensure the gas detectors are working properly
and the end users are safe. The NXS docking station provides bump testing, event management and
calibration from a simple-to-use multi-unit station and gives fleet or safety managers the ability to update
configurations on large fleets.
It also maintains all the important event logs that demonstrate users are working within company
requirements.
1.2 Instructions and Parts
aBay LED
bBay 1
cHandle
dThumbscrews
ePower LED
fBump Test button
gCalibration button
hBay 2, 3, 4
iPressure gauge
jCylinder 58L/116L
kCylinder Straps
lGas regulator
mCylinder compartment
nExhaust port
oFresh air Inlet
pLAN port
qCharging port
rUSB port
b
h
a
d
c
efg
i
j
k
l
r
m
p
on
q

5
Tel: 813-249-5888 Toll free: 877-312-2333 Fax: 813-249-0188 Toll free: 877-312-2444 www.nextteq.com [email protected]
1.3 Key Features
Zero and Span Calibration, Bump Test Function.
Rechargeable internal battery lasts up to 1000 bump tests on a single charge.
Indicate the current status of operation by the Power LED and Unit LED color.
Configure settings and automatic update firmware of up to four NXS devices.
Gas Ventilation system to purge any remaining gas.
Computer not required for normal operation.
Saves the log events after calibration and bump tests.
Enable users to adjust the setting points of docking station and NXS via IR Link or USB.
1.4 Specifications
Model NXS Series Dock
Size 52.5 x 43.7 x 21.3cm (20.66” x 17.20” x 8.40”)
Weight (Without gas cylinder) 11.0kg
Operating Temperature 41 to + 104˚F ( 5 to + 40˚C)
Warranty Full 2 years
Battery Type Rechargeable Lithium lon
Battery Life Up to 1000 Bump Tests
LEDs 6 Blue LEDs for each bay, 3 color LEDs for power,
Switch Back Light LED (Orange, Green)
Memory USB 8GB Standard
Log Capacity Approximately Up to 5 million tests
(8GB, removable USB memory)
Tests Performed Bump Test and Calibration
Information Stored Bump/Cal Logs, Individual Monitor Event Logs, Firmware
and Unit Configurations
Gases Available O2, CO, H2S
Unit Compatibility Works with NXS Series (O2, CO, H2S)
Calibration Gas Compatible with 58L & 116L cylinders with C10 fitting
Interface Ethernet RJ-45(TCP/IP), 10Mb/s
Charging Adapter DC12.0V, 3A/h

6Designed, built and supported by industry professionals for industry professionals
2. Set up and Operation
2.1 Power turn on/off
The NXS Docking Station operates using only 2 (two) buttons for calibration and Bump Test.
To turn on the power:
Press and hold either Calibration or Bump Test button for 2 seconds.
The Power LED turns on to orange and blinks during warm up and after a while will turn green
when it is ready for use. When the unit has a low battery, the LED will turn red.
To turn off the power:
Press and hold both Calibration and Bump Test buttons simultaneously for 2 seconds.
NOTE: If unit is inactive for 300 seconds, it will automatically turn off (Power Saver mode).
The unit only works when the power LED turns green.
2.2 Bay LEDs and meanings
Each Bay has six blue LEDs (see Figure 2) which indicates the process status. Each of them will turn on by
order from left to right while testing. After testing is finished, make sure all six blue LEDs are turned on. If
the test failed, the 3rd blue LED will be the only LED lit.
2.3 Charging battery
The unit`s Power LED turns to red when the battery is very low as shown above. However, it comes with
a DC adapter with 5 plugs which can be used to charge the unit using a 110V power supply. A full charge
will take approximately 3 hours and will last for approximately 1000 bump tests.
NOTE: Refer to Figure 1 for charging location.
Bump Test
Calibration
Power On & Off
Test Results
Insert the monitor(s) into the bay(s) facing down.
Press the Bump Test button for 2 seconds to initiate bump test.
Can perform up to 1,000 bump tests on a single charge.
Insert the monitor(s) into the bay(s) facing down.
Press the Calibration button for 2 seconds to initiate calibration
test.
All (six) blue Bay LEDs illumination indicates if the NXS has
passed the test.
If only the third blue Bay LED is illuminated, then the NXS has
failed the test.
Be sure the Docking Station is charged or plugged in before use.
(Note: A red power LED light indicates a low battery. To fully
charge the Docking Station, it should be plugged in for 3 hours.)
To turn on, press and hold the Calibration or Bump Test button
for 2 seconds.
The automatic power saver mode will turn off the unit after 5
minutes of inactivity.
To turn off, press and hold the Calibration and Bump Test button
for 2 seconds.
Docking Station for Nextteq Portable
NXS Series Single Gas Detectors
Calibration
button
Bump Test
button Power
button
Bay & Power LED
Troubleshooting
Bay Light does not turn on/test not performed
- Clean Monitor IR window
- IR interference (bright lights/sunlight)
- Monitor in gas alarm state
All tests fail
- Gas cylinder empty
- Gas Expired
- Wrong gas concentration(s)
Test results are not stored
- USB not attached or USB is full
If you’re unable to resolve technical issues, please contact the
product’s authorized reseller or the Nextteq service center.
Important Notes
USB drive must be installed to store the test results.
Be sure the latest NXS Firmware is installed in the Nextteq Docking Manager
Software. The NXS portable monitor firmware will then be updated during the
next calibration or bump test.
For bump testing, ensure the cylinder gas concentration is above the
“Low Alarm” setting of the NXS Single Gas Detector.
For calibration, ensure the NXS “Cal Concentration” setting is the same as
the cylinder gas concentration.
Any monitor that fails the bump test or calibration must be re-calibrated or
bump tested again. If the attempts fail continuously, please do not use the
detector and contact your authorized Nextteq International Distributor or
Nextteq International.
When changing NXS settings using the USB from the Docking Station or
when using IR Link in the Docking Station, remember to click the “write”
button to save customized settings.
Set up Calibration Gas Cylinder
Gas bottle
USB
Gas bottle
USB
Gas bottle
USB
Remove thumbscrews and lift the handle.
Install the cylinder onto the gas regulator.
Fasten the cylinder straps and close the cylinder compartment.
Check the pressure gauge on the front panel.
Re-install thumbscrews.
LED’s
Stand by
Injecting fresh air
Test
Purging remaining gas
Save a log data
Test passed
Test failed
Bay LED
Power LED
Green: Power on
Red: Low Battery
Orange: USB not attached or full storage
Quick Start Guide
For more information or to purchase
calibration gas mixtures call
Nextteq International:
Tel: 813-249-5888
Toll free: 877-312-2333
www.nextteq.com
Full range of calibration
gas mixtures available. NX90211

7
Tel: 813-249-5888 Toll free: 877-312-2333 Fax: 813-249-0188 Toll free: 877-312-2444 www.nextteq.com [email protected]
2.4 Exhaust Port & Fresh Air Inlet
There are two small ports on the left side of the charging port (see Figure 1). The Fresh air inlet port will
draw clean air in during an active test. The incoming air automatically counts as fresh air (O2, 20.9%vol).
The Exhaust port is the inverse of the Fresh air inlet port. During an active test, the used test gas will exit
the unit through the exhaust port. Optionally, tubing can be attached to the exhaust port using the included
twist connector to direct the used test gas to a suitable location.
2.5 Installation of Gas Cylinder
A gas cylinder which fits into the Docking Station must have the C10 fitting on it. Both 58L and
116L cylinders are suitable. Before installing the cylinder for testing the NXS, ensure that Calibration
concentration of gases are suitable for the NXS being tested.
To install a cylinder:
Remove thumbscrews and lift the handle up.
Install the cylinder to the gas regulator.
Fasten the cylinder straps and close the cylinder compartment.
Check the pressure gauge on the front panel.
After installing a gas cylinder, ensure USB is attached.
Re-install thumbscrews.
3. Testing
A Bump Test and a Calibration Test are the key features to ensure gas detectors are working properly
and the end users are safe. The NXS Docking Station provides bump testing, event management and
calibration from a simple to use multi unit station.
3.1 Calibration
Calibration is the comparison of measurement values delivered by a device under test with a calibration
standard of known concentration. It is very important to calibrate a device periodically for better
performance of the device and to assure sensor accuracy.
To perform a calibration:
Insert the monitor(s) into the bay facing down.
Slightly press down on the monitor until it locks into place.
Press the calibration button for 2 seconds to execute the Calibration test.
During the 90 second test period, bay LEDs begin to light as the test progresses.
When the test is finished, all (six) blue LEDs illuminate indicating the NXS has passed
the test (see Figure 3).
If only the third blue LED illuminates, the NXS has failed the test (see Figure 3).
Bump Test
Calibration
Power On & Off
Test Results
Insert the monitor(s) into the bay(s) facing down.
Press the Bump Test button for 2 seconds to initiate bump test.
Can perform up to 1,000 bump tests on a single charge.
Insert the monitor(s) into the bay(s) facing down.
Press the Calibration button for 2 seconds to initiate calibration
test.
All (six) blue Bay LEDs illumination indicates if the NXS has
passed the test.
If only the third blue Bay LED is illuminated, then the NXS has
failed the test.
Be sure the Docking Station is charged or plugged in before use.
(Note: A red power LED light indicates a low battery. To fully
charge the Docking Station, it should be plugged in for 3 hours.)
To turn on, press and hold the Calibration or Bump Test button
for 2 seconds.
The automatic power saver mode will turn off the unit after 5
minutes of inactivity.
To turn off, press and hold the Calibration and Bump Test button
for 2 seconds.
Docking Station for Nextteq Portable
NXS Series Single Gas Detectors
Calibration
button
Bump Test
button Power
button
Bay & Power LED
Troubleshooting
Bay Light does not turn on/test not performed
- Clean Monitor IR window
- IR interference (bright lights/sunlight)
- Monitor in gas alarm state
All tests fail
- Gas cylinder empty
- Gas Expired
- Wrong gas concentration(s)
Test results are not stored
- USB not attached or USB is full
If you’re unable to resolve technical issues, please contact the
product’s authorized reseller or the Nextteq service center.
Important Notes
USB drive must be installed to store the test results.
Be sure the latest NXS Firmware is installed in the Nextteq Docking Manager
Software. The NXS portable monitor firmware will then be updated during the
next calibration or bump test.
For bump testing, ensure the cylinder gas concentration is above the
“Low Alarm” setting of the NXS Single Gas Detector.
For calibration, ensure the NXS “Cal Concentration” setting is the same as
the cylinder gas concentration.
Any monitor that fails the bump test or calibration must be re-calibrated or
bump tested again. If the attempts fail continuously, please do not use the
detector and contact your authorized Nextteq International Distributor or
Nextteq International.
When changing NXS settings using the USB from the Docking Station or
when using IR Link in the Docking Station, remember to click the “write”
button to save customized settings.
Set up Calibration Gas Cylinder
Gas bottle
USB
Gas bottle
USB
Gas bottle
USB
Remove thumbscrews and lift the handle.
Install the cylinder onto the gas regulator.
Fasten the cylinder straps and close the cylinder compartment.
Check the pressure gauge on the front panel.
Re-install thumbscrews.
LED’s
Stand by
Injecting fresh air
Test
Purging remaining gas
Save a log data
Test passed
Test failed
Bay LED
Power LED
Green: Power on
Red: Low Battery
Orange: USB not attached or full storage
Quick Start Guide
For more information or to purchase
calibration gas mixtures call
Nextteq International:
Tel: 813-249-5888
Toll free: 877-312-2333
www.nextteq.com
Full range of calibration
gas mixtures available. NX90211

8Designed, built and supported by industry professionals for industry professionals
Figure 3
Note: Do not use the monitors that failed the calibration test.
3.2 Bump Test
Bump test is the process which checks and verifies the performance of the monitors and
ensures that sensors are correctly responding to the target gas.
To perform a Bump Test:
Insert the monitor(s) into the bay facing down.
Slightly press down on the monitor until it locks into place.
Press the Bump Test button for 2 seconds to execute the Bump test.
During the 20-30 second test period, bay LEDs begin to light as the test progress.
When test is finished, all (six) blue LEDs illuminate indicating the NXS has passed
the test (see Figure 3).
If only the third blue LED illuminates, the NXS has failed the test (see Figure 3).
4. Trouble Shooting
4.1 Bay Light does not turn on /test not performed
Clean Monitor IR window.
IR interference (bright lights/sunlight).
Monitor in gas alarm state.
4.2 All tests fail
Gas cylinder empty - check pressure gauge to be sure it indicates at least 100psi/10bar.
Gas Expired - check gas expiration date located on the cylinder.
Wrong gas concentration(s) - gas cylinder and NXS concentrations not same.
Wrong gas type - check the gas type.
NXS has passed the
test (six LEDs visible)
NXS has failed the test
(only 3rd LED visible)

9
Tel: 813-249-5888 Toll free: 877-312-2333 Fax: 813-249-0188 Toll free: 877-312-2444 www.nextteq.com [email protected]
4.3 Test results are not stored
USB not attached or storage is full.
4.4 Uploaded Settings are not saved
“Write” button has not clicked.
Connection was lost.
5. NXS Docking Station Manager Software
The purpose of NXS Docking Station Manager Software is to customize and configure the Station`s
settings and NXS devices` internal configurations. The software can adjust and make changes to the
Docking Station and the NXS units using Nextteq IR Link or the USB Disk.
5.1 Software Installation
After downloading the file, navigate to the saved file.
Double click the installation software to initiate the installation.
Click “Read More” or “Run Away” if you receive a warning message.
Click “Next” to install in default folder when the “Select Installation Folder” window appears.
To install to a different folder, click “Browse” or enter the link.

10 Designed, built and supported by industry professionals for industry professionals
Click “Install”.

11
Tel: 813-249-5888 Toll free: 877-312-2333 Fax: 813-249-0188 Toll free: 877-312-2444 www.nextteq.com [email protected]
Click “Yes” if you get the warning message below.
The Docking Station Setup Wizard is complete.
Click the “Finish” button to exit the Setup Wizard.
6. Connecting to the NXS Docking Station
When the Docking Manager software opens, the fields are grayed out. Before it can be
used, the IR Link must be connected to the Docking Station.
Note: The IR Link connection works only when it is placed into Bay 1.
USB drive must be installed to store the test results
Do not open the software if IR Link is not plugged to PC.

12 Designed, built and supported by industry professionals for industry professionals
6.1 Connecting with Nextteq IR Link
The Nextteq IR Link is a device which conveniently configures and communicates with NXS Docking
Station using the IR communication in Bay 1.
To connect the IR Link, follow the steps below:
Plug the IR link into a USB port on PC.
Power on (green LED) the Docking Station.
Place the IR Link facing up into the Bay 1(see Figure 4).
Double click and open the installed software.
Click “OPEN” button at the top right corner of the software interface.
The IR Link starts to flash rapidly.
After a few seconds, the “Read complete” message will be displayed, and the current settings of the
Docking Station will be show on the interface.
Note: If “Send timeOut ” message displays, the IR Link has failed to
communicate with the Docking Station. In this case, make sure IR Link screen
is aimed at the IR screen of Bay 1 and check to be sure the Power is on.
Figure 4
6.2 Connecting with USB
To connect the USB, follow the steps below:
Open the Cylinder compartment.
Find the USB port (see Figure 1) and remove the USB Disk.
Plug the USB into a PC.
Double click and open the installed software.
Select the “USB Disk” in the upper middle left corner.
Select the location of USB Disk and click “OK” button.

13
Tel: 813-249-5888 Toll free: 877-312-2333 Fax: 813-249-0188 Toll free: 877-312-2444 www.nextteq.com [email protected]
7. Using Software
7.1 Overview of Software
Figure 5
Figure 6
When IR Link is connected to the Docking Station, the window shown in Figure 5 will be displayed.
If it is connected using the USB Disk, the “Logs” tab will not be shown.
Serial Number
Detector User ID
Calibration Interval:
0-365 days
Bump Interval:
0-365 days
Self Test Interval:
0-20 hours
Low/High
Alarm Setting
Display Mode:
- Remain Life
- Measuring Mode
To connect to IR-Link To connect with USB
Location
Cylinder No.
Firmware Version
Save power Mode
(1~3600 sec)
Gas Expiration
date on cylinder
Reading or Writing
configuration on
Docking Station
Docking Station
firmware upgrade
Max Bump Time
(20-120 sec)
Enable/Disable
Cal./Bump Test
Bump result decision:
- Beep
- Concentration
- Beep + Concentration
Cal. Gas
Concentration
Firmware Upgrade
Reading or Writing
configuration on
Docking Station

14 Designed, built and supported by industry professionals for industry professionals
7.1.1 Docking Station Tab
Serial Number — Serial number of Docking Station (cannot be changed).
Version — The current firmware version.
Auto Power Off — The time when unit automatically goes to Save Power Mode. Min/max time can be
set 1 ~ 3,600 seconds.
Maximum Bump Time — The maximum and minimum time spent for Bump Test process. If unit
cannot respond correctly before time expires, the process will stop and result will be failure. Can be
adjusted to a min/max of 20 ~ 120 seconds.
Location — The location where test was done. It is beneficial when downloading the data logs. Can
add 12 alphanumeric characters.
Gas Expiration Date — Shows the date of expiration of gas in installed cylinder. Must be updated
after installing a new one.
Gas Bottle Lot # — Displays lot number of installed cylinder. Must be updated after installing a new
cylinder.
Info Read/Write — By pressing the “Read” it displays current setting of the Docking Station and will
discard any unsaved changes in the Tab.
Calibrate — If this box is not selected, calibration process will not proceed by pressing the Calibration
button. However, it will still update firmware and the configuration of NXS.
Bump Test — If this box is not selected, Bump test process will not proceed by pressing the Bump
Test button. However, it will still update firmware and configuration of NXS.
Bump Result Decision — The drop-down list can be selected for “Beep”, “Concentration”, or
“Beep + Concentration”. The “Beep” option will run the bump test until the alarm condition is met
and the audible alarm is detected. The “Concentration” option will run the bump test until the test gas
concentration is verified. If the units are in Stealth Mode, the Concentration option will be required
for a successful bump test. The “Beep + Concentration” option will run the bump test until the audible
alarm is detected and the test gas concentration is verified.
Browse & Write — To upgrade the latest firmware of Docking Station, click “Browse”, navigate to the
firmware location and click “Open”. Click “Write” to begin upgrading process.
Note: Without clicking the “Write” button, configured and customized
settings will not be saved.

15
Tel: 813-249-5888 Toll free: 877-312-2333 Fax: 813-249-0188 Toll free: 877-312-2444 www.nextteq.com [email protected]
7.1.2 NXS Tab
User ID — The User ID can be used to add a message.
Calibration Interval (Days) — The calibration reminder shows the calibration interval
(can adjust from 0 (n/a) ~ 365).
Bump Interval (Days) — The Bump test reminder shows the bump test interval
(can adjust from 0 (n/a) ~ 365).
Self Test Interval (Days) — The Self Test reminder shows the self-test interval
(can adjust from 0 (n/a) ~ 365).
Low Alarm & High Alarm — The 1st and 2nd alarm set points for each gas.
Display mode — Displays remaining lifetime of unit or gas concentration .
Gas Concentration — This allows a user to enter/amend correct concentration of the installed gas
cylinder on Docking Station.
NXS Option Info Read/Write — Pressing the “Read” button will display current setting of the NXS
and will discard any unsaved changes. By clicking the “Write” button, all configured and customized
settings will be saved on NXS monitor.
Browse & Write — To upgrade the latest firmware of NXS, click “Browse”, navigate to the firmware
location and click “Open”. Click “Write” button to begin upgrading process.

16 Designed, built and supported by industry professionals for industry professionals
7.1.3 Logs Tab
All logs will be stored on the USB Disk (logs are not available if USB is not plugged in) and can be
downloaded via Nextteq-IR-Link using the Docking Manager software. The log files will be created for each
device by their Serial numbers and will be in “.csv” format.
Note: the USB drive must be installed to store the test results (logs). By connecting directly to the USB
Disk, the “Logs” Tab is not available on the software interface. But logs are still available to download
from the “Events” file in the USB Disk. Click “Refresh” button to view and download the latest logs. After
clicking the “Refresh” button, all logs will be available to view (see Figure 7).
Figure 7
To download the logs:
Plug the IR Link into a USB port on PC and place into Bay 1.
Double click and open the installed software.
Click the “OPEN” button at the top right corner of the software interface.
Click the “Logs” Tab and Click the “Refresh” button.
Select needed log by indicating NXS`s serial number.
Click the “Local Save” button and a Browse window will open.
Select a location to save the file.
Click the “OK” button to begin the downloading process.
When downloading is finished, “Log data save success” message will come up.

17
Tel: 813-249-5888 Toll free: 877-312-2333 Fax: 813-249-0188 Toll free: 877-312-2444 www.nextteq.com [email protected]
8 Warranty
8.1. Limited Warranty
Nextteq warrants this product to be free from defects in material and workmanship under normal use and
service for a period of two years from the manufacturing date for this NXS product. This warranty is valid
only if the personal monitor is activated by the ‘activate by’ date on the external packaging. This warranty
extends only to the sale of new and unused products to the original buyer.
Warranty Procedure
To facilitate efficient processing of any claim, contact your local Nextteq agent/distributor, a Nextteq
regional office or our global customer support team (English speaking) at 813-249-5888 or
traceability purposes.
Be sure to include:
• Your company name, contact name, phone number and email address.
• Description and quantity of goods being returned, including any accessories.
• Instrument serial number(s).
• Reason for return.
Products will not be accepted for warranty without a Nextteq RMA #. It is essential that the address label
is securely attached to the outer packaging of the returned goods. The guarantee will be rendered invalid if
the instrument is found to have been altered, incorrectly stored, modified, dismantled, tampered with, has
not used Nextteq spares for replacement parts (including sensors) or has been serviced or repaired by any
party not authorized and certified by Nextteq to do so. The warranty does not cover misuse or abuse of the
unit including use outside of specified limits.

18 Designed, built and supported by industry professionals for industry professionals
8.2. Warranty Disclaimer
Nextteq accepts no liability for consequential or indirect loss or damage howsoever arising (including
any loss or damage arising out of the use of the instrument) and all liability in respect of any third
party is expressly excluded. This warranty does not cover the accuracy of the calibration of the unit or
the cosmetic finish of the product. The unit must be maintained in accordance with the instructions in
this manual. The warranty on replacement consumable items supplied under warranty to replace faulty
items will be limited to the unexpired warranty of the original supplied item. Nextteq reserves the right
to determine a reduced warranty period, or decline a warranty period for any sensor supplied for use
in an environment or for an application known to carry risk of degradation or damage to the sensor.
Our liability in respect of defective equipment shall be limited to the obligations set out in the guarantee
and any extended warranty, condition or statement, express or implied, statutory or otherwise as to the
merchantable quality of our equipment or its fitness for any particular purpose is excluded except as
prohibited by statute. This guarantee shall not affect a customer’s statutory rights.
Nextteq reserves the right to apply a handling and carriage charge whereby units returned as faulty are
found to require only normal calibration or servicing, which the customer then declines to proceed with.
For warranty and technical support inquiries please contact:
Nextteq International Customer Support
Tel: 813-249-5888
Toll Free: 877-312-2333
Fax: 813-249-0188
Toll Free: 877-312-2444
Email: [email protected]

19
Tel: 813-249-5888 Toll free: 877-312-2333 Fax: 813-249-0188 Toll free: 877-312-2444 www.nextteq.com [email protected]

©2020 Nextteq International LLC
All rights reserved.
This book is fully protected by copyright and no part of it may be
reproduced in any form, by photocopy, microfilm, or any other
means, without prior written permission of Nextteq International LLC.
P/N NX90228
Nextteq is a registered trademark of Nextteq International LLC. All
other brand names and trademarks mentioned in this document are
the properties of their respective holders.
Nextteq International LLC
Website http://www.nextteq.com
8406 Benjamin Rd., Suite J, Tampa, FL 33634
Tel: 813-249-5888
Toll Free: 877-312-2333
Fax: 813-249-0188
Toll Free Fax: 877-312-2444
Email: [email protected]
Printed in the United States of America
Table of contents
