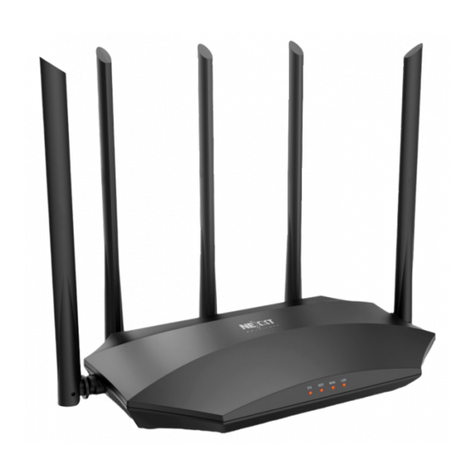
Nexxt Solutions Bolt AX1800 User manual

Bolt AX1800
True Mesh Router Technology

Table of content
Introduction
I. Product description
• Front view
• Back view
• Bottom view
II. How to install the Nexxt Home app
III. Router installation
IV. How to add the Bolt AX1800 to your Nexxt Home account
V. How to manage the application
1. Status
2. Devices
3. Settings
A. Wi-Fi setting
B. Guest Wi-Fi
C. Parental control
D. Wi-Fi Mesh
E. LED indicator
F. Maintenance schedule
G. Firmware upgrade
H. WPS
G. QoS
I. Fast roaming
J. Port forwarding
K. UPnP
L. DHCP
M. DNS
O. Message notications
VI. How to add an additional node
VII. How to manage your node through a desktop internet site
VIII. Troubleshooting
Introduction
Hello! Congratulations on your purchase of the Nexxt Home Bolt
AX1800. To ensure optimal operation of this unit, carefully read the
manual in your hands. And if you have questions about its
installation and operation, do not hesitate to contact us. A technical
support agent will help you with whatever you need. In the following
link you will nd several ways to communicate with us:
https://www.nexxtsolutions.com/connectivity/support/contact-us/
I. Product description
• Front view
The LED indicator on the front of the Bolt AX1800 gives you
real-time information about its activity and status. Here's how to
read its prompts:
English
LED indicator Status
Solid
O
Blinking
Solid
Blue
Red
The system is working correctly.
There is no power to the router or the unit
is unplugged.
The device is in pairing mode with a Wi-Fi
internet signal.
Node disconnected. Check the connection.
If the node is part of a mesh, do a manual reboot,
disconnecting it and connecting it again to
reestablish the mesh.
Description

• Back view
The rear panel allows physical connection to power and client
network devices. Below, we describe each of the ports:
1. WAN Port: This RJ45 port is for connecting the cable
modem or Ethernet line belonging to your internet service provider.
2 / 3. LAN ports: Connect your computer to either of these two
RJ45 ethernet ports.
4. Power Input: Connect the power adapter included with
this product here.
• Bottom view
In addition to the technical information of the product, the lower side
has the reset button. With the node powered on, press
this button for 8 to 10 seconds to return the router to its factory
settings. Use the small key included in the packaging to press
this button.
English
1
1
2 3 4

English
II. Installing the Nexxt Home app
Download the Nexxt Home app from Google Play or the Apple
App Store.
60 %
9:41 AM
Nexxt Home
Nexxt Solutions Home App
Cancel
GET
Accvent LLC
Login with existing account
Create New Account
SOLUTIONS
Iniciarsesión con cuenta existente
Crear Cuenta Nueva
SOLUTIONS
60 %
9:41 AM
Nexxt Home
Nexxt Solutions Home App
Cancel
INSTALL
Accvent LLC
Step 1
Register by email. Fill in the required elds.
60 %
9:41 AM
Register by email
United States of America
Get authentication code

Step 2
Enter the verication code you received.
60 %
9:41 AM
Enter verication code
Verication code has been sent to your
Step 3
Create a password and press Completed.
60 %
9:41 AM
Set Password
Completed
6-20 characters, including letters and numbers

Step 4
Your account in the Nexxt Home app has been created
successfully.
60 %
9:41 AM
60 %
Signal
9:41 AM
III. Router installation
Follow the steps below to install the device:
1. Dene where you are going to place the device.
Remember that you should place it no more than
5 feet from the modem.
2. Connect the modem to the WAN port of the Bolt AX1800
using the Ethernet cable contained in the packaging.
3. Insert one end of the cable/power adapter into the
corresponding port on the back panel. Next, plug the
other end into a wall outlet.
4. Wait about a minute for the connection LED to ash blue.
Note: If your connection is wired, connect the router to
your computer with an Ethernet cable.

Step 1
In the Nexxt Home app, click the + sign, then "Add Device" and select
the Router icon from the list of devices.
IV. Adding the Bolt AX1800 to
your Nexxt Home account
Step 1
First, with the indicator ashing blue, locate the Bolt AX1800's default
password and Wi-Fi name, inscribed on the label located at the
bottom of the node. With this information, go to Wi-Fi Settings on
your phone and the following will appear in the list of available
networks: AX1800_xxxx and AX1800_xxxx_5G. You can choose any of
the two. Then enter the password. Once connected, go to the Nexxt
Home app.
60 %
9:41 AM
60 %
9:41 AM
60 %
9:41 AM

Step 3
The application will ask you to confirm the network you are
connected to, in this case it should be "AX-1800_XXXX". To do this,
press the "Go to Wi-Fi Settings" button and search for the Wi-Fi
network “AX1800_XXXX”. Once the connection is made, return to the
application and press the Confirm button
Step 2
Immediately, the application will recognize the node. Click Next in
screens 1 and 2, as shown above. In step 3, tap “Conrm the indicator
is ashing”and then tap Next.
Note: If the light is not blinking, press the button located at the
bottom of the node for 8-10 seconds to reset it.
60 %
9:41 AM
60 %
9:41 AM
60 %
9:41 AM
60 %
9:41 AM
60 %
9:41 AM
60 %
9:41 AM

V. Managing the app
Step 4
In the “Start Connection”window, the “DHCP” option will appear
selected. Click on the Start connection button. Then, wait a few
seconds until a screen appears with the message“A device was added
successfully.” Click on Done.
If the device was not added successfully, make sure your mobile
device is connected to the correct Bolt AX1800 Wi-Fi network,
"AX1800_XXXX".
60 %
9:41 AM
60 %
9:41 AM
60 %
9:41 AM
1. Status
The Bolt AX1800 interface has a menu with three options: Status, Device
and Settings. Whenever you open the node app, by default you will see the
“Status” option.
This option shows you the signal status in the blue circle in the center. The
blue color means there is an internet connection. Red indicates signal
problems or interference.
Also, within the blue circle you will see the number of devices connected
to your network.

You can access this option by clicking inside the blue circle or by
choosing the second option from the menu at the bottom.
Devices will show you a list of all the devices connected to the
network and technical details such as the device's IP information,
which node it is connected to, the MAC address, among others.
This section will give you access to the following options:
2. Devices 3. Settings

60 %
9:41 AM
60 %
9:41 AM
60 %
9:41 AM
60 %
9:41 AM
60 %
9:41 AM
60 %
9:41 AM
A. Wi-Fi Settings: Enter here to change the name and password of
the 2.4 or 5G networks.
B. Guest Network: Set up and use the 2.4 GHz guest network to allow
guest access using a password that you can share with others in
various ways.
To enable the guest network, open the Nexxt Home app and click
Settings. Then select Guest Wi-Fi and click Save.
C. Parental Control: Allows you to create a group for your children.
You can specify the hours your children can connect to the internet.

How to use Parental Control:
- Open the Nexxt Home app and tap Settings. Then, select Parental Control,
which allows you to dene when a device can connect to the internet.
-Press the Add group option and give it a name. For example, “Kids”. Press
Next. Now choose which devices/users you want to integrate into the
“Kids” group. For example, “Laptop”.
- Click on the circle in front of “Laptop”and you will see a check mark
appear in blue. Press Finished.
-When you nish selecting the devices, press Conrm. Then tap Kids again
to set restrictions for this network.
- First, enable the Web Page Filter option to add the restricted websites.
Note: Sites must be entered including the“www.”.
- Then click Conrm and nally Save.
-To set the time that restrictions will be in eect, tap Limit Period.
Then, in Start Time, enter the time you want the schedule to activate.
Under End Time, choose the time you want the schedule to turn o.
The seven circles at the bottom allow you to choose the days you
want the schedule to run. Click on Save.
Note: You can return to the programmed time later if you would like
to change any of its parameters.
60 %
9:41 AM

D. Wi-Fi Mesh: This function is used to add up to a maximum of three
additional nodes to the Wi-Fi network.
E. LED Indicator: Enter here to turn o the front LED of all nodes on
the network.
F. Maintenance Schedule: Enter here to perform network updates. It
is recommended to schedule these updates during the early morning
hours so as not to aect the connection during peak trac hours.
G. Firmware upgrade: This option detects or registers the latest
rmware versions.
H. WPS: Enter here to enable or disable the WPS connection.
I. QoS: This option allows you to prioritize devices to navigate the
Internet smoothly. These devices will always get the best access when
connected.
J. Fast roaming: Enter here to enable or disable fast roaming.
K. Port forwarding: Enter here to access LAN resources over the
Internet.
L. UPnP: Also called Universal Auto Detection, this option
automatically enables ports for UPnP-compatible programs.
M. DHCP: This option congures the IP addresses assigned to
network devices.
N. DNS: This option congures the DNS addresses assigned to
network devices.
O. Notications: Enable the option that allows the app to notify you
when a device connects to your network.
This device allows you to connect up to three more nodes to create a
stronger and more stable signal with a greater coverage. To do so,
follow these steps:
1. To connect a second node, plug its respective cable into power.
Make sure to place it no further than 32 feet from the main node.
2. After placing the node at the proper location and connecting it to
an AC outlet, wait for one minute until the red LED indicator starts
blinking blue. Then press the button for 2 seconds to put it in pairing
mode.
3. In the application go to settings, select Wi-Fi Mesh, and click Add
node.
4. Once the pairing process between nodes is complete, both LED
indicators will turn solid blue. With this the nodes are now linked.
VI. Adding an extra node

5. Click the Finish button in the application. Then, you will be able to
see the linked nodes in the interface. The primary node will appear as
Main and the secondary node will appear as Node 1.
Note: To link an additional node, simply repeat the process described
above.
60 %
9:41 AM
60 %
9:41 AM
60 %
9:41 AM
Although this device can be managed through the Nexxt Home
application, it is also possible to do so on a computer on a web page
(web UI), which oers additional and advanced settings.
Note: These options may be technically complex. It is recommended
to use specialized assistance to avoid problems in the operation of
your device.
Steps to open the Web UI:
1. Open an internet browser and in the URL bar, enter the router's
default IP address: 192.168.0.1. Then press the Enter key on the
keyboard. A page will open that says Set up internet Access mode.
The default options will appear (Mode: Router; Internet access:
DHCP). Click Next step.
The home screen will ask you for a password to log in. The
pre-assigned password is “12345678”. Click Apply or press the return
key to continue.
Note: The conguration assistant will ask you to do the initial
conguration, even if you have already done it on your mobile,
through the application. Just make sure you put the same selected
access parameters in the app.
VII. Managing the node on a web
browser using the computer

2. When you see the message “Welcome to my router”, enter the
administrator password (12345678) and then click Login to enter the
main page.
3. The main page will give you a menu of options with information
about the node and your internet signal, network status, as well as
document upload and download speed, available networks,
connected devices, among other options.
Pasospara abrir la Web UI:
1.Abre un navegador de internet y en la barra del URL, ingresa la
dirección IP predeterminadadel router: 192.168.0.1. Luego presiona
la tecla de Retorno en el teclado.Se abrirá una página que dice Set up
internet Accessmode. Aparecerán las opciones predeterminadas
(Mode: Router; Internet access: DHCP). Haz clic en Next step.

5. The Network page shows information about the device regarding
mode, IP version, internet access, among other options.
6. The Wi-Fi page contains technical information about the two
signals of the device: 2.4G and 5G networks.

7. Finally, the Management page gives you a detailed list of all the
devices connected to your wireless network.
This page is also available in Spanish. Click the button in the upper
right corner to choose your preferred language.

Error Description Solution
Red LED on main
node
This failure can be caused by external factors such
as: Loss of electrical uid, or loss of internet signal
from the internet service provider.
1. Verify that the Ethernet cable is connected to the WAN port of the main
node to the modem
Red LED on
secondary node
This failure can be caused by external factors such
as: Loss of electrical uid, or loss of internet signal
from the internet service provider.
Manually restart the internet connection on the main node by
disconnecting and reconnecting the power cable to restart the device.
Note: It is recommended to disconnect the power cord for ten seconds.
Oine router In the application the device is registered as oine. Restart device connection via web management. Enter 192.168.0.1, option
“More,”“Administration,” and click Reboot. Wait one to two minutes for the
system to reset and the router to appear online again in the app.
Restore factory
settings
Return nodes to their original factory conguration. If the previous solutions do not correct the problem, it is suggested to do a
general reset of the nodes to bring the devices to the default values, and
congure the network again. Use the included tool to press the reset
button located on the bottom of the node for about ten seconds until the
front LED turns o and on again.
2. Manually restart the internet connection on the main node by
disconnecting and reconnecting the power cable to restart the device.
Note: It is recommended to disconnect the power cord for ten seconds.
3. Check connection problems from the main modem source of the internet
service provider.
VIII: Troubleshooting

Tabla de contenido
Introducción
I. Descripción del producto
• Vista frontal
• Vista posterior
• Vista inferior
II. Cómo instalar la aplicación Nexxt Home
III. Instalación del router
IV. Cómo agregar el Bolt AX1800 a tu cuenta de Nexxt Home
V. Cómo administrar la aplicación
1. Estado
2. Dispositivos
3. Conguración
A. Conguración Wi-Fi
B. Wi-Fi para invitados
C. Control parental
D. Mesh Wi-Fi
E. Indicador LED
F. Horario de mantenimiento
G. Actualización del rmware
H. WPS
G. QoS
I. Itinerancia rápida
J. Renvío de puertos
K. UPnP
L. DHCP
M. DNS
O. Noticación de mensajes
VI. Cómo agregar un nodo adicional
VII. Cómo administrar el nodo en internet mediante una computadora
VIII. Resolución de problemas
Introducción
¡Hola! Felicidades por la compra del Bolt AX1800 de Nexxt Home.
Para asegurar el funcionamiento óptimo de esta unidad, lee
atentamente el manual que tienes en tus manos. Y si tienes dudas
sobre su instalación y funcionamiento, no dudes en contactarnos.
Un agente de asistencia técnica te ayudará con lo que necesites.
En el siguiente enlace encontrarás varias formas de comunicarte
con nosotros:
www.nexxtsolutions.com/es/conectividad/soporte/contactanos/
I. Descripción del producto
• Vista frontal
El indicador LED en el frente del Bolt AX1800 te da información en
tiempo real sobre su actividad y su estatus. Aquí te mostramos cómo leer
sus indicaciones:
Español
Indicador LED Estado
Fijo
Apagado
Parpadeante
Fijo
Azul
Rojo
El sistema está funcionando correctamente.
No llega corriente al router o la unidad está
desconectada.
El dispositivo está en modo de emparejamiento
con una señal Wi-Fi de internet.
Nodo desconectado. Verica la conexión.
Si el nodo es parte de una malla, haz un reboot
manual, desconectándolo y conectándolo de
nuevo para reestablecer la malla.
Descripción

• Vista posterior
El panel posterior permite la conexión física a la corriente y los
dispositivos de red clientes. A continuación, te describimos cada
uno de los puertos:
1. Puerto WAN: Este puerto RJ45 es para la conexión del
módem de cable o línea de ethernet perteneciente a tu
proveedor de servicio de internet.
2 y 3. Puertos LAN: Conecta tu computadora a cualquiera de
estos dos puertos ethernet RJ45.
4. Entrada de corriente: Conecta aquí el adaptador de corriente
incluido con este producto.
• Vista inferior
Además de la información técnica del producto, el lado inferior tiene el
botón de reset, reinicio o reposición. Con el nodo encendido, oprime
este botón por 8 a 10 segundos para llevar el router a su conguración
original. Utiliza la pequeña llave incluida en el empaque para presionar
este botón.
1
1
2 3 4
Español
Table of contents
Languages:
Other Nexxt Solutions Network Router manuals
Popular Network Router manuals by other brands
Cabletron Systems
Cabletron Systems SSR 2000 quick start guide
IntesisHome
IntesisHome IS-IR-WIFI-1 Quick install guide

Moxa Technologies
Moxa Technologies OnCell 5004 Series Quick installation guide
Dynex
Dynex DX-E401 - EN Broadband Router installation guide

KYLAND Technology
KYLAND Technology KIEN3016M user manual
Digisol
Digisol DG-FS4552 user manual
