6
5. Getting started
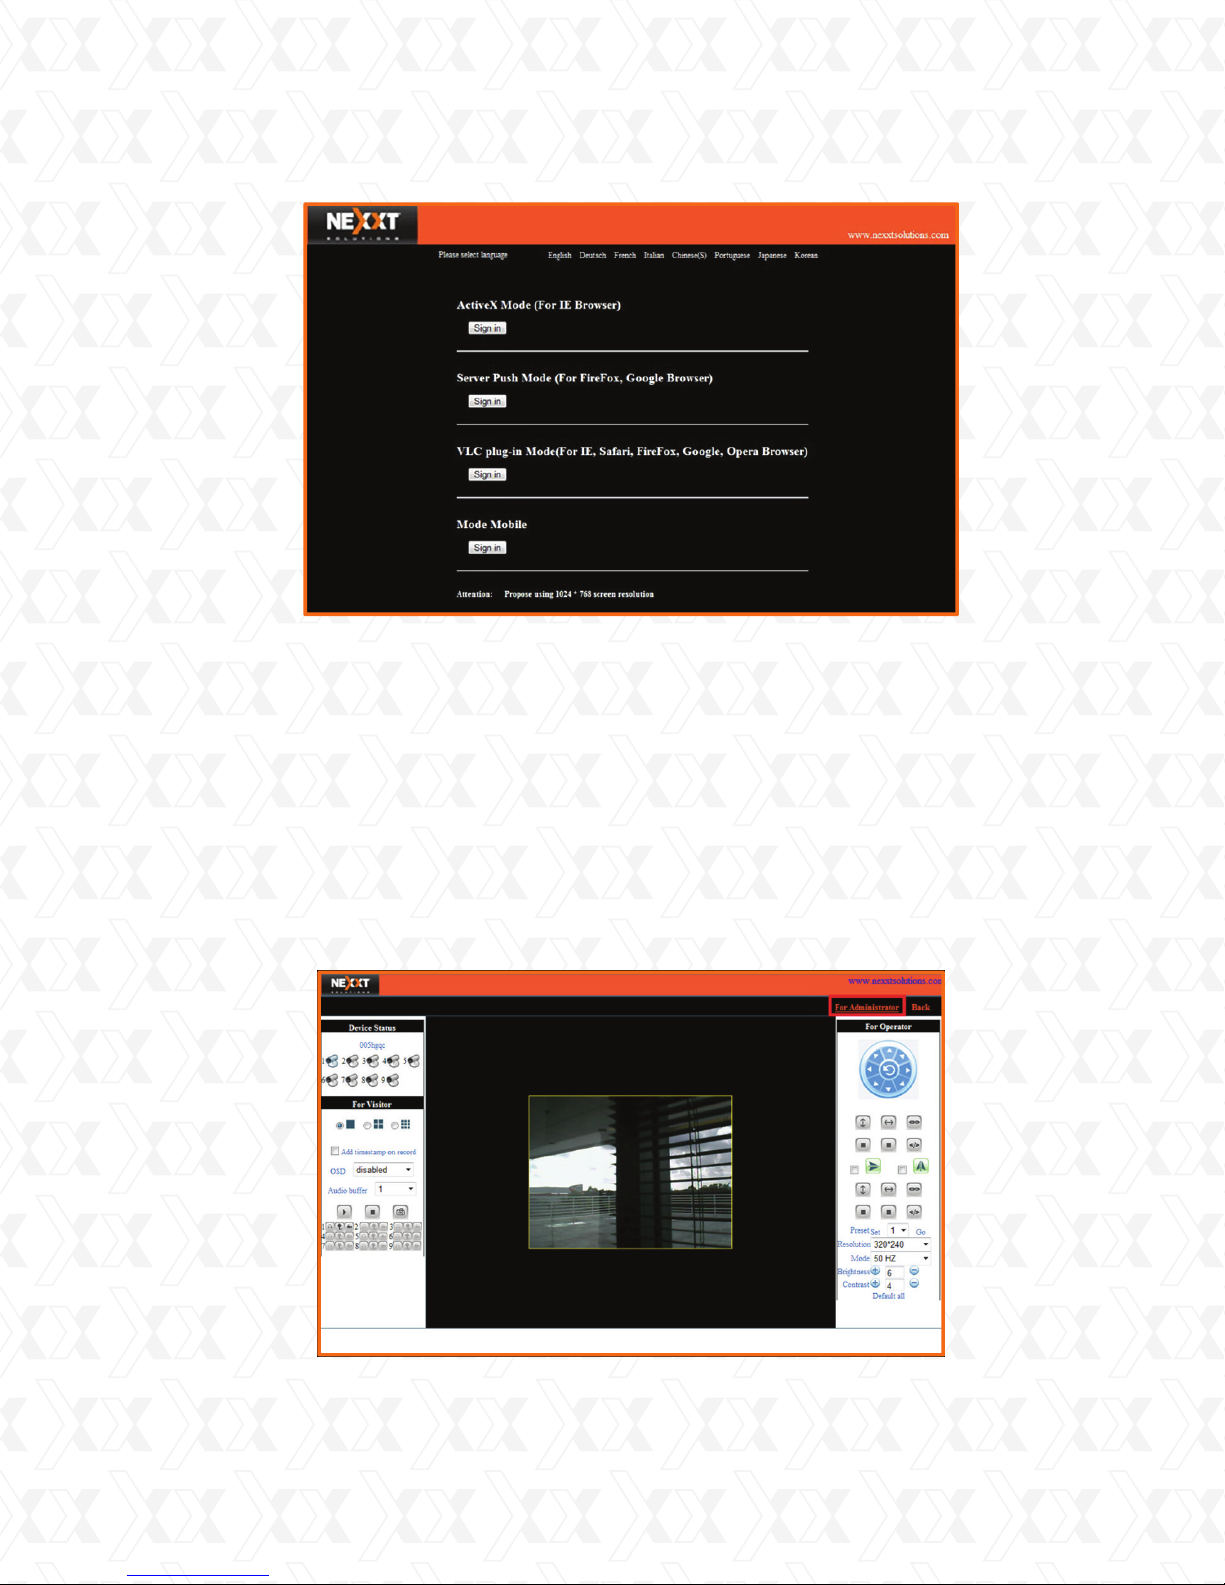
System login
A. Installation in a network with the same address range (plug and play mode)
B.Installation in a network with a different address range (manual setup)
In order to be able to see the camera and congure it, you must rst ensure that the IP
camera is within your network address range.
Note: Nexxt Solutions routers are configured within such parameters.
This means that if your internal network is congured with an IP address using
192.168.0.XXX with subnet mask 255.255.255.0, you will be able to access the camera
directly by entering the default IP address into your web browser (Internet Explorer is the
recommended browser).
Access the camera using the web interface by typing the device IP address:
192.168.0.239, and then hit enter.
If your internal network is congured based on a different IP address range, you must
change the IP address of the camera to match your network range. In that case, use the
BSearch_en.exe tool located on the supplied CD or on our Nexxt Solutions website.
Next, open BSearch_en.exe tool and click on the Search option located near the lower-left
corner of the screen, or simply press F3 on your keyboard.
Under Local PC information, you will nd your PC’s network parameters.
Under Device information, you will nd the default values of the IP camera.
Under Device list, you will nd all the IP cameras detected on your network.
In the example below, you will notice a PC connected to an internal network which is using
an IP address of 192.168.1.14, a Subnet mask of 255.255.255.0, plus a Gateway and
a DNS1 of 192.168.1.1.
When done, skip to Step 13 to continue.
1.
2.
3.
1.
2.
3.
4.
5.
6.
4.
Nexxt Solutions - IP Cameras XPY 500-510-520 Series