NexxTech 8015483A User manual
8015483A
Compact Alarm Clock Radio – Instruction Manual

2
Table of Contents
Important Safety Instructions .............................................................3
Specications...........................................................................6
Features ...............................................................................6
Power Source ..........................................................................7
Batter Backup ..........................................................................7
OPERATING INSTRUCTIONS ...........................................................8
Setting the clock ......................................................8
Radio operation.......................................................8
Preset tuning .........................................................8
Setting the alarm......................................................9
Using the snooze alarm................................................9
Setting the sleep timer.................................................9
The FCC Wants You to Know ............................................................10
Warranty ...............................................................................11

3
TO PREVENT FIRE OR SHOCK HAZARD, DO NOT USE THIS PLUG WITH AN EXTENSION CORD, RECEPTACLE OR OTHER
OUTLET UNLESS THE BLADE SCAN IS FULLY INSERTED TO PREVENT BLADE EXPOSURE. TO PREVENT FIRE OR
SHOCK HAZARD, DO NOT EXPOSE THIS APPLIANCE TO RAIN OR MOISTURE.
WARNING: TO REDUCE THE RISK OF ELECTRIC
SHOCK DO NOT REMOVE COVER (OR BACK),
NO USER SERVICEABLE PARTS INSIDE REFER
SERVICING TO QUALIFIED SERVICE PERSONNEL.
Important Safety Instructions
TO PREVENT FIRE OR SHOCK HAZARD, DO NOT EXPOSE THIS APPLIANCE TO RAIN OR MOISTURE.
CAUTION!
HAZARDOUS LASER RADIATION WHEN
OPEN AND INTERLOCK FAILED OR
DEFEATED. AVOID EXPOSURE TO BEAM
CLASS 1 LASER PRODUCT

4
IMPORTANT SAFETY INSTRUCTIONS
1) Read these instructions – All the safety and operating instructions should be read before this product
is operated.
2) Keep these instructions – The safety and operating instructions should be retained for future reference.
3) Heed all warnings – All warnings on the appliance and in the operating instructions should be adhered to.
4) Follow all instructions – All operating and use instructions should be followed.
5) Do not use this apparatus near water – The appliance should not be used near water or moisture – for
example, in a wet basement or near a swimming pool, and the like.
6) Clean only with dry cloth.
7) Do not block any ventilation openings. Install in accordance with the manufacture’s instructions.
8) Do not install near any heat sources such as radiators, heat registers, stoves, or other apparatus (including
ampliers) that produce heat.
9) Do not defeat the safety purpose of the polarized or grounding plug. A polarized plug has two blades with
one wider than the other. A grounding plug has two blades and a third grounding prong. The wide blade or
the third prong is provided for your safety. If the provided plug does not t into your outlet, consult an
electrician for replacement of the obsolete outlet.
10) Protect the power cord from being walked on or pinched particularly at the plugs, convenience receptacles,
and at the point where they exit from the apparatus.
11) Only use attachments/accessories specied by the manufacturer.
12) Use only with the cart, stand, tripod, bracket, or table specied by the manufacturer, or sold
with the apparatus. When a cart or rack is used, use caution when moving the cart/apparatus
combination to avoid injury from tip-over.
13) Unplug the apparatus during lightning storms or when unused for long periods of time.
14) Refer all servicing to qualied personnel. Servicing is required when the apparatus has been damaged in
any way, such as power supply cord or plug is damaged, liquid has been spilled or objects have fallen into

5
the apparatus, has been exposed to rain or moisture, does not operate normally, or has been dropped.
15) Please keep the unit in a well-ventilated environment.
16) WARNING: To reduce the risk of re or electric shock, do not expose this apparatus to rain or moisture. The
apparatus shall not be exposed to dripping or splashing and that objects lled with liquids, such as vases,
shall not be placed on apparatus.
17) WARNING: The wall socket plug is used as disconnect device, the disconnect device shall remain readily
operable.
18) WARNING: The batteries shall not be exposed to excessive heat such as sunshine, re or any other source
of heat.
19) This lightning ash with arrowhead symbol within an equilateral triangle is intended to alert the
user to the presence of non-insulated “dangerous voltage” within the product’s enclosure that
may be of sufcient magnitude to constitute a risk of electric shock.
- Warning: To reduce the risk of electric shock, do not remove cover (or back) as there are no user-
serviceable parts inside. Refer servicing to qualied personnel.
- The exclamation point within an equilateral triangle is intended to alert the user to the presence of important
operating and maintenance instructions in the literature accompanying the appliance.
20) The apparatus should be connected to an electrical wall outlet with a protective grounding connection.

6
8
SPECIFICATIONS
Power Supply: 120V, 60Hz
Backup battery: 2 × AA size batteries (not included)
Frequency Range: AM: 530-1710 KHz
FM: 87.5-107.9 MHz
Idle power consumption: 2W
Power consumption: 3W
Speaker Output Power (RMS): 1×0.4W
Unit dimension(L×D×H): 134mm×118mm×47mm
Standard Accessories: Operation Instruction Booklet
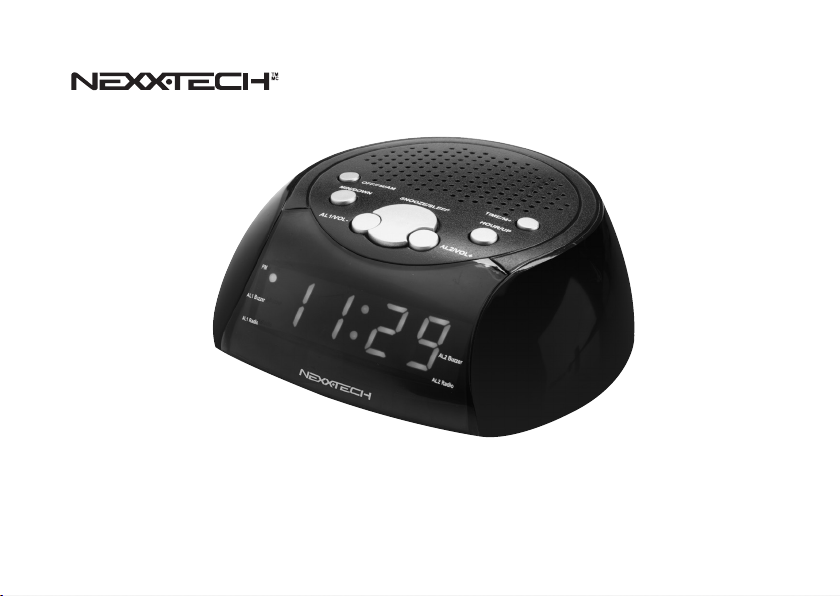
FEATURES
1. AL1/VOL- BUTTON
2. MIN/DOWN BUTTON
3. OFF/FM/AM SELECTOR SWITCH
4. SNOOZE/SLEEP BUTTON
5. AL2/VOL+ BUTTON
6. HOUR/UP BUTTON
7. TIME/M+ BUTTON
8. FM ANTENNA
1567
4
2
3

7
POWER SOURCE
Place the unit on a at stable surface and connect the unit’s power cord to any convenient
AC 120V - 60 Hz household outlet.
BATTERY BACKUP
The clock and alarm settings can be protected against power failure with batteries for a short
period of time. If no backup batteries are installed or the power failure is prolonged, you will need
to set the clock and alarm settings again.
1. Open the battery cover.
2. Insert 2 “AA” batteries (not included) into the battery compartment, making sure that the
proper polarities (“+”and“-”) are maintained.
To prevent possible damage to this unit:
• Load new batteries with their polarities (“+” and“-”) aligned correctly.
• Do not apply heat to batteries, or internal short circuit may occur.
• If this unit is not to be used for a long period of time, remove all batteries and store them in a
cool and dry place.
• Remove used batteries immediately and dispose of them.
• Do not use old and new batteries together. Also never use different types of batteries.
• Never try to take batteries appart, put batteries under the direct sunlight, or throw them into re
or place them on a heater. Results could cause harm.

8
OPERATING INSTRUCTIONS
Setting the clock
1. Press and hold the OFF/FM/AM button to switch to OFF mode, which is the clock mode.
2. Press and hold “TIME/M+”button to switch to time mode, and the time will ash on the display.
3. Press the “HOUR/UP” button to adjust the hour, press the “MIN/DOWN” button to adjust the minute.
Radio Operation
1. Press the OFF/FM/AM button to switch to AM mode.
2. Press the OFF/FM/AM button to switch to FM mode.
3. Press the AL1/VOL- and AL2/VOL+ to adjust to your desired volume level.
4. Press the HOUR/UP and MIN/DOWN to adjust the AM/FM station.
5. Press and hold the HOUR/UP button and MIN/DOWN button to search AM/FM stations
automatically.
6. To turn off the radio, press and hold the OFF/FM/AM button to switch to OFF mode.
Preset Tuning
Up to 10 FM and 10 AM radio stations can be preset.
1. Follow steps in “Radio Operation” and tune into the station that you wish to preset.
2. Press and hold TIME/M+ button, “P_ _” (“_ _” indicates the memory slot) will be shown on the
display. Repeatedly press TIME/M+ button to select the desired memory slot. Press the
TIME/M+ button again to store the station. Repeat the above steps to store additional stations.
3. Press and hold the OFF/FM/AM button to turn off preset mode. To playback the preset station,
press the TIME/M+ button.

9
Setting the alarm
1. Press and hold the OFF/FM/AM button to switch to OFF mode, which is the clock mode, the
display will show the time.
2. Repeatedly press AL1/VOL- or AL2/VOL+ button to select the desired alarm mode. There are
two alarm modes: Buzzer or radio. When the alarm is activated, the corresponding alarm
indicator light will turn on. Press and hold the AL1/VOL- button to enter into the AL1 mode.
Press the “HOUR/UP” button to adjust to your desired hour, press the “MIN/DOWN” button to
adjust to your desired minute.
3. Press and hold the AL2/VOL+ button to enter into the AL2 mode, the operation is same as the AL1.
Note: When the alarm is set to radio mode, the last used volume level and station will be used.
Using the snooze alarm
1. When the alarm (buzzer or radio) turns on, press the Snooze button. The alarm turns off for
about nine minutes.
2. To cancel the snooze feature, press and hold the OFF/FM/AM button to switch to OFF mode,
which is the clock mode.
Setting the sleep timer
The Sleep function is designed to automatically turn off the radio.
1. Press the SNOOZE/SLEEP button, the display will show 90 minutes. The radio will be turned
off after the set sleep time has elapsed.
2. To select the desired sleep time from 90, 80, 70, 60, 50, 40, 30, 20 or 10 minutes, press the
SNOOZE/SLEEP button until the desired number of minutes appears.
3. To turn off the sleep timer before the set time occurs, press the SNOOZE/SLEEP button once.

10
The FCC Wants You to Know
This equipment has been tested and found to comply with the limits for a Class B digital device, pursuant
to Part 15 of the FCC Rules. These limits are designed to provide reasonable protection against harmful
interference in a residential installation.
This equipment generates, uses and can radiate radio frequency energy and, if not installed and used
in accordance with the instructions, may cause harmful interference to radio communications. However,
there is no guarantee that interference will not occur in a particular installation.
If this equipment does cause harmful interference to radio or television reception, which can be deter-
mined by turning the equipment off and on, the user is encouraged to try to correct the interference by
one or more of the following measures:
• Reorient or relocate the receiving antenna.
• Increase the separation between the equipment and receiver.
• Connect the equipment into an outlet on a circuit different from that to which the receiver is connected.
• Consult the dealer or an experienced radio/TV technician for additional suggestions.
Any changes or modications not expressly approved by the party responsible for compliance could void
the user’s authority to operate the equipment. Where shielded interface cables have been provided with
the product or specied additional components or accessories elsewhere dened to be used with the
installation of the product, they must be used in order to ensure compliance with FCC regulation.

11
The Source warrants that this product will be free from defects in materials and workmanship for a period of
(1) year from the date of purchase. Within this period, simply take the product and your proof of purchase to
any The Source store or participating dealer and the product will be replaced (where available) without charge.
Any product which has been subject to misuse or accidental damage is excluded from this warranty.
This warranty is only applicable to a product purchased through The Source company-owned stores or
participating dealers in Canada where the warranty is included with the product. While this warranty does not
confer any legal rights other than those set out above, you may have additional statutory rights which will vary
under the laws of the various countries, states, provinces and other governmental entities in which The Source
operates. This warranty is subject to all statutory rights you may have in Canada.
THE SOURCE – WARRANTY
© 2015 The Source
All rights reserved.
Imported by:
The Source,
Barrie, Ontario, Canada, L4M 4W5
Manufactured in China
For product support please visit
www.thesource.ca
Please Recycle
Table of contents
Other NexxTech Clock Radio manuals


