NHT PD1106D User manual
USER GUIDE
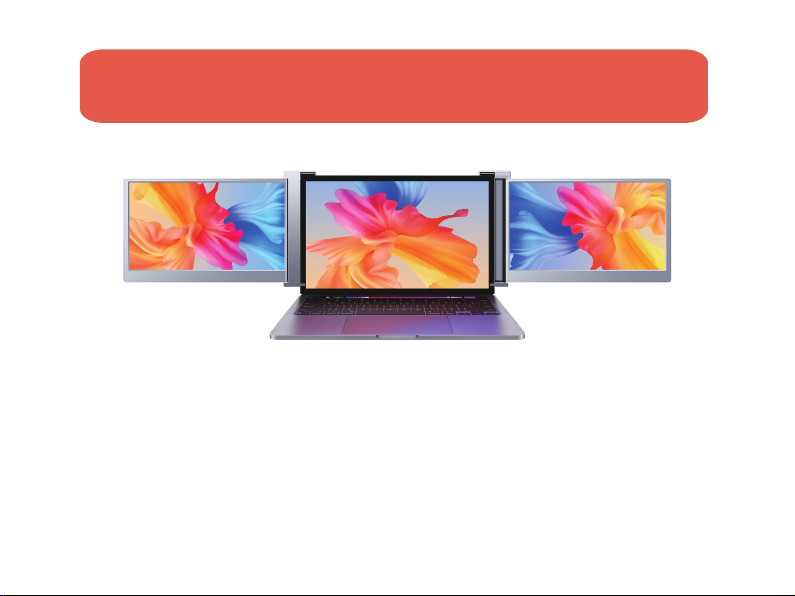
Portable Tri-Screen for Laptop
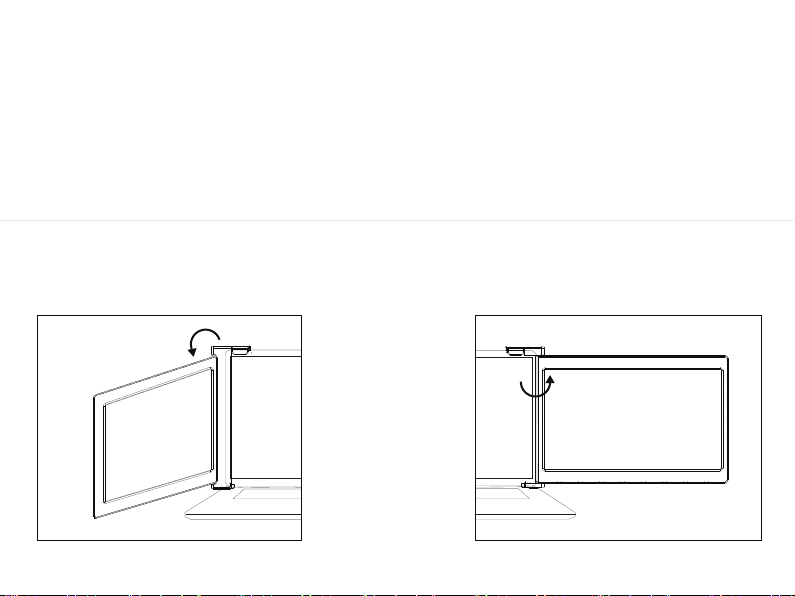
请在允许旋转的角度内旋转屏幕,不可过度旋转,否则会造成机器损坏
(14 inch)
*Adaptive for 15-17 inch mainstream laptops
WARN IN G
Right screen(0° - 180°)Left screen(0° - 235°)
Please handle the tri-screen with care and do not press the
screens to avoid damage. Do not exceed its maximum turning
angle showing as below:
Turning angle of screens

Contents
1|Parts Overview
2
|Inputs and Buttons
3
|Choose your cables
4
|Set It Up
5-8
|Connection Methods
9-10
|Laptop Display Configuration
12-14 OSD Setting
11
|
|
15 Tech Specs
|
OSD Function Introduction

Parts Overview
Tri-Screen
2*USB-C to USB-C
(90 degree) cables
2*MINI HDMI to
HDMI cables
Velcro Cable Tie
(Magic Tape)
Travel case
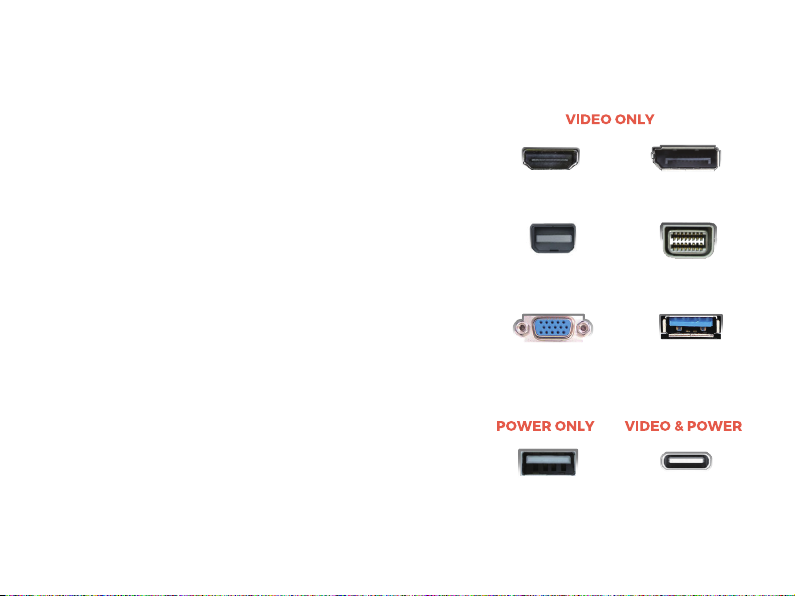
VIDEO & POWER
VIDEO ONLY
2*USB-C to USB-A
cables
POWER ONLY
1

Inputs and
Buttons
2
USB Full Functioned Port: Power Supply, Video
Signal Transmission
USB Full Functioned Port: Power Supply, Video
Signal Transmission
Mini HDMI Port (No Power Supply): Video Signal
Transmission
Decrease the brightness; Return to the previous page;
Decrease the value
Increase the brightness; Enter the Menu, and press it to turn to
the next selection; Increase the value
Press the Menu to enter the OSD (On-Screen Display) menu.
* It only displays the interfaces and buttons function. Please check the actual machine for the specific position of interfaces and buttons.
HDMI
3
To determine which cables you will use, first identify
your laptop’s ports using the pictures to the right or
reference your laptop’s user manual.
If your laptop has two Thunderbolt3/4 / USB-C with DP
ports, the simplest way to use the tri-screen is with the
two USB-C to USB-C cables provided.
If your laptop does not have any Thunderbolt3/4 / USB-C
with DP ports, you will need to use one USB-A to USB-C
cable and one HDMI to Mini-HDMI cable for each screen.
If your laptop does not have an HDMI port, then you can
use any other video out ports shown to the right along
with a simple HDMI adapter.
HDMI Displayport
Mini-Displayport Mini-DVI
VGA
USB-A Thunderbolt 3/4 /
USB-C with DP*
USB 3.0 (with
HDMI adapter)
*Some laptops have USB-C ports that do not support DisplayPort over USB-C.
Please reference your laptop’s user manual.
Choose your
cables
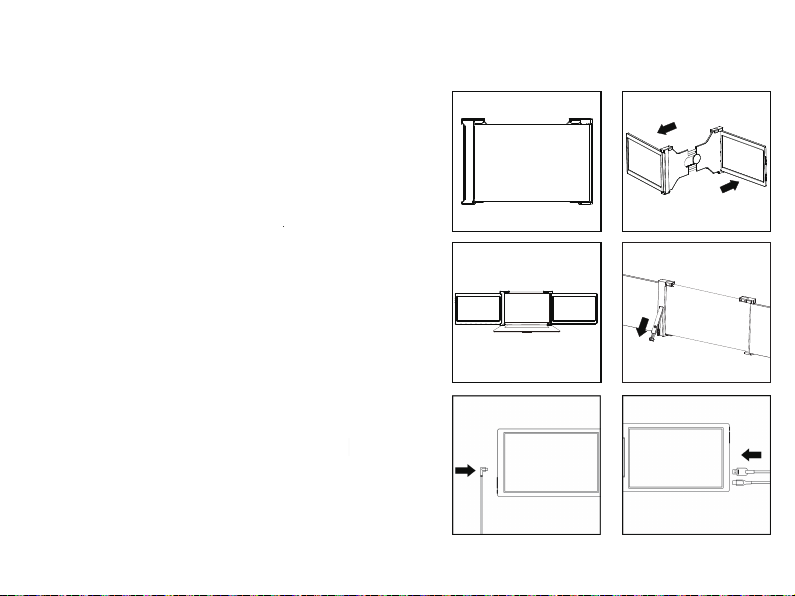
Set It Up
4
12
3
56
4
1. Unpack the triple monitor.
2. Open two screens in the directions as shown in Fig. 2.
3. Place the bracket at the back of the laptop screen
and install it well with the bracket clamping the
screen.
4. Lift up the stand and stretch to its end. Press and hold
the button to retract the stand.
(The stand is embedded at the back of the triple
monitor, which can offer extra support to the triple
monitor. )
5. Using the necessary cables, plug one end of the cable
into the triple monitor and the other into your laptop.
(See “Inputs and Buttons” on page 2 for the input
diagram.)
5
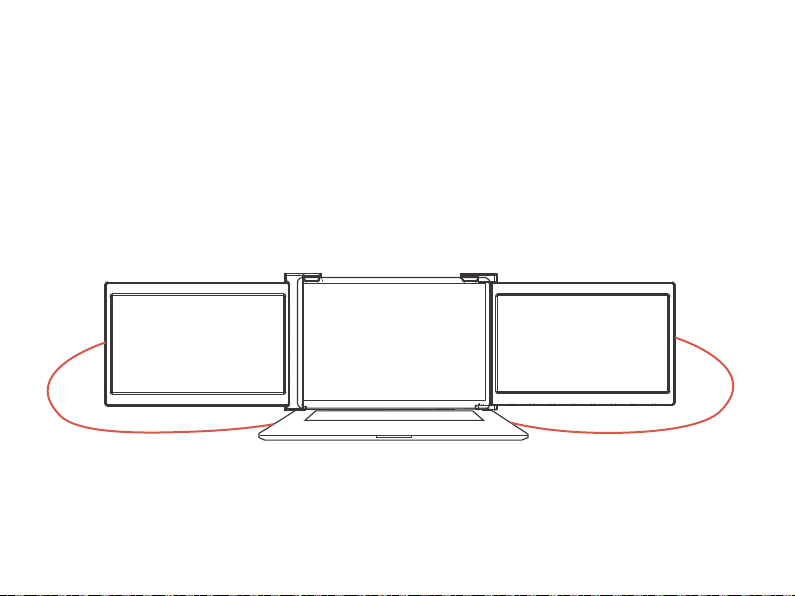
Connection Methods
1. Two USB-C or Thunderbolt 3/4 Ports
Notes:
USB-C USB-C
Two Full Functioned Type-C/Thunderbolt-3/4 Ports Connection
If there are 2 full-functioned Type-C or 2 Thunderbolt 3/4 ports on the laptop, use two included Type-C
cables to connect the laptop to the triple monitors.
Make sure that the laptop Type-C ports support power & data tranmission, and has enough power
supply above 5V/2A.

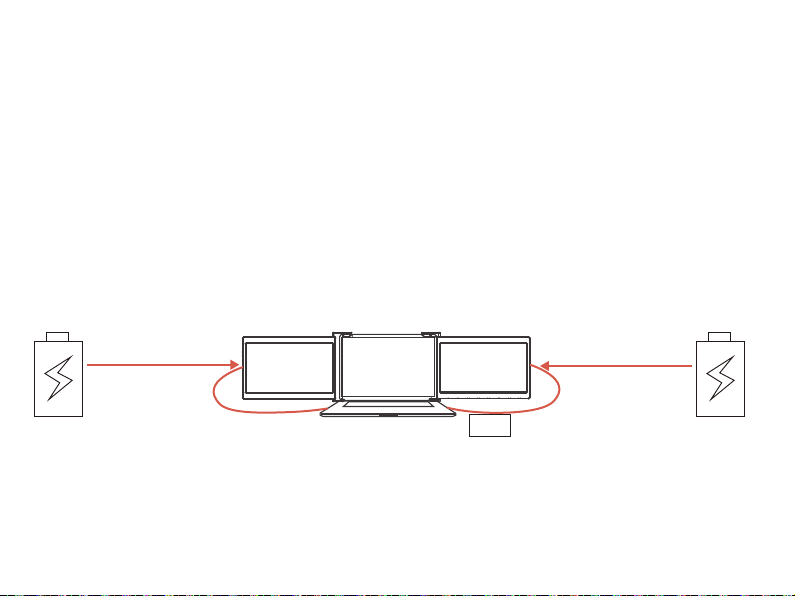
6
Connection Methods
①Make sure the USB-C of your laptop is a Full-functioned USB-C port(support both video & data
transmission).
②Make sure 5V/2A or above power can be supported through USB-C port. An external power supply
of 5V/2A or above is needed for normal use (adjust brightness above 50).
Some USB-C ports may not be able to transmit currents above 5V/2A, please connect an external
power supply to better use the monitor.
Notes:
USB-C USB-C
USB-C to USB-A

7
2. One Full Functioned Type-C and HDMI Port Connection
Connection Methods
USB-C HDMI
USB-C to USB-A
If there's one full functioned Type-C port and one HDMI port on the laptop:
1) Use the included full functioned Type-C cable to connect one side of the monitor and the laptop.
2) Meanwhile, use the HDMI cable and an extra power supply (USB-C to USB-A cord) to connect the
other side of the monitor and the laptop.
The HDMI port does not provide power, so the monitor must be plugged into the power supply
(5V/2A or Above).
Notes:
8
Connection Methods
HDMI HDMI
HUB
USB-C to USB-AUSB-C to USB-A
The HDMI port does not provide power, so the monitor must be plugged into the power supply
(5V/2A or Above).
Notes:
3. Other Connection Type (Extra Adapter Needed)
If you lack enough HDMI port for connection
(1) Find a suitable HDMI hub for your laptop.
(2) You need to use 4 cables with an extra hub for connection:
First, connect one side of your monitor to laptop with a HDMI and a USB-C to USB-A cord.
Second, connect the HDMI hub to your laptop.
Finally, connect the other side of your monitor with another HDMI and USB-C to USB-A cord

Laptop Display
Configuration
PC / WINDOWS
1. Go to your Display Settings (Start Settings
System Display)
2. Click and drag screens to configuration shown
3. If you need to set different display modes for multiple
screens, please click 1/2/3 (click the "Identify" button
down the screen to find the corresponding screen) and
select the one, then enter into the "Multiple displays"
menu to set
4. If any of the screens are upside down, click on the
screen in the display menu. Then click on the
“Orientation” dropdown menu and select “Landscape
(flipped)”
5. To increase the zoom, click the “Change the size of
text, apps, and other items ” dropdown and select
“150%”
9
* Keeping three displays sync can be configured in setting of graphic card.
If there is any issue please consult local distributor.
>
>
>

10
1. Open “System Preferences”
2. Select “Displays” from the menu
3. Click “Display Settings” from display menu(Fig. 1)
4. Click monitor name to set Mirror or Extended display(Fig. 2)
5. Click any display screen in the interface shown in Fig. 3
to adjust the screen position
6. To increase the zoom, click the “Scaled” radio button.
Laptop Display
Configuration
MAC
Fig. 1
Fig. 2
Fig. 3
S19(1)
S19(2)
S19(2)
S19

11
OSD Function
Introduction
1. Short press the ” “ Menu button to activate
the OSD menu
2. Long press ” “ to return to previous page
3. Short press “+”/“-” button to choose your
settings
4. Short press “ ” Menu button to confirm
5. Press “+”/“-” button directly to enter brightness menu
BRIGHTNESS
BRIGHTNESS
CONTRAST
SHARPNESS
ECO
DCR
STANDARD
OFF

OSD Setting
Brightness
Brightness:
The adjusting range is from 0 to 100.
Contrast:
The adjusting range is from 0 to 100.
ECO: Preset display settings for various modes
(Standard/ Game/ Movie/ Text/ FPS/ RTS /
ECM Modes)
DCR: Select ON or OFF to enable or
disable dynamic contrast ratio function
Sharpness:
The adjusting range is from 0 to 100.
Image
Aspect: Adjusts the aspect ratio to 4:3/ WIDE
IMAGE
ASPECT WIDE
12
BRIGHTNESS
BRIGHTNESS
CONTRAST
SHARPNESS
ECO
DCR
STANDARD
OFF

13
Color Temp
OSD Setting
Color Temp: Enables the adjustment of each
individual User, Standard, Warm or Cool
preset level
Red: The adjusting range is from 0 to 100
Green: The adjusting range is from 0 to 100
Blue: The adjusting range is from 0 to 100
Language: Select OSD language. The
selections are: English, French, German,
Simplified Chinese, Italian, Spanish, Portuguese,
Turkish, Polish, Nederlands, Japanese, Korean
Transparency:
Sets transparency of monitor settings menus
OSD Timer:
Sets time-out for monitor settings menu
(10-60 seconds)
OSD Setting
COLOR TEMP
COLOR TEMP COOL
RED
GREEN
BLUE
38
43
45
OSD SETTING
LANGUAGE
OSD TIMER 20
TRANSPARENCY 16
OSD H.POS. 50
OSD V.POS. 50

14
OSD Setting
Reset
Reset:
Selects RESET to revert all settings to the
factory default mode
HDR MODE:
Enables HDR (High Dynamic Range) if connected
to a compatible device
Contains three modes (off/ auto/ 2084)
MISC.
Signal Source:
Contains two signal sources Type C and HDMI
Low Blue Light:
Decreases blue light content in display
MISC.
SIGNAL SOURCE TYPE - C1
LOW BLUE LIGHT
1920 X 1080 60HZ
RESET
RESET
HDR MODE OFF

15
Tech Specs
DISPLAY
Two 14 inch (diagonal) 1920*1080, Full
HD LCD IPS Panels
16:9 aspect ratio
Adjustable brightness
Power consumption: 5V 2A (Per screen)
INPUTS AND CONNECTIVITY
(PER SCREEN)
Thunderbolt 3/4 / USB-C 3.1 input
Video and Power
Thunderbolt 3/4 / USB-C 3.1 input
Video and Power
Mini-HDMI input
Video Only
SIZE AND WEIGHT
Weight: 3 pounds/ 1.36 kg
Depth: 1 inch/ 2.53 cm
Height: 9.1 inch/ 23.1 cm
Width: 14.6 inch/ 37.1 cm
Adaptive laptop dimensions
Length(left to right)
305-425 mm (12 -16.7 inch)
Breadth(top to bottom) > 230mm (9.1 inch)
Thickness (display panel) < 8 mm (0.31 inch)
Table of contents


