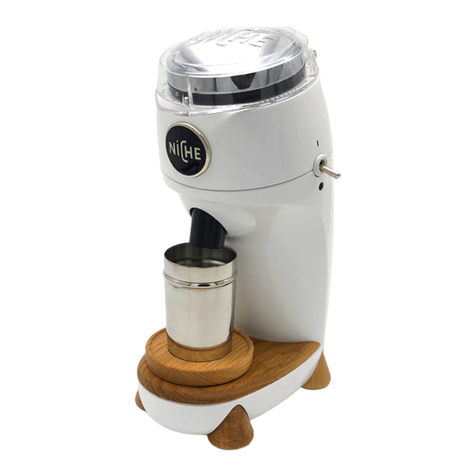
Niche Duo User manual

Niche™Duo
83F Coffee Grinder
User Manual
Scan to get started with your Niche Duo

2

3
Introduction 4-5
Important Safeguards 6-8
Electrical Safety 9
First Use of the Grinder 10
Using the Grinder 11-12
Changing the Burrs 13-15
Care and Cleaning 16-17
Zeroing the Niche Duo 18-23
Troubleshooting 24
Additional Information 25
Guarantee 26
Warranty 27
Contents

4
Introduction
Thank you for purchasing the Niche Duo. The Niche Duo is a domestic
coffee grinder, intended for use with two specialised sets of 83mm at
burrs - one set engineered for exceptional espresso and the other set
for awless lter brewing.
Please take a moment to familiarise yourself with the diagrams on
these pages - the terminology is used later in these instructions.
Espresso Burr Set
(Black)
Filter Burr Set
(Blue)
Upper
burr carrier
Lower
burr carrier
IMPORTANT: YOUR NICHE DUO HAS BEEN ZEROED DURING
MANUFACTURE AND IS READY TO USE IMMEDIATELY. ‘ZEROING’
DESCRIBES THE PROCESS OF ALIGNING THE BURRS SO THE ‘0’
MARK ON THE GRIND DIAL REFERS TO THE POSITION WHERE
THE BURRS JUST BEGIN TO TOUCH. ZEROING YOUR
NICHE DUO IS NOT NECESSARY, EVEN WHEN CHANGING
BETWEEN THE BURR SETS OR CLEANING. PLEASE SEE THE
‘ZEROING THE NICHE DUO’ SECTION FOR MORE INFORMATION.

5
Power switch
Bezel ring indicator
Power light
Grind chute Grinder body
Grind cup
Power cord
(plug not shown)
Grind tray
Base cover
83mm at burr set
Grind dial
Bezel ring
Interlock pin
Bean hopper
(60 - 70g)
Clear lid
Magnetic latch
Introduction

6
Important Safeguards
When using electrical appliances, basic safety precautions should
always be followed, including the following. READ ALL INSTRUCTIONS
BEFORE USING THE NICHE DUO 83MM FLAT BURR COFFEE GRINDER,
HEREINAFTER REFERRED TO AS THE ‘NICHE DUO’ OR ‘GRINDER’.
WARNING: MISUSE OF
THIS APPLIANCE MAY
CAUSE INJURY.
1. Before using the Niche Duo for
the rst time, please ensure
that your electricity supply
is the same as shown on the
rating label on the underside
of the grinder. If you have any
concerns, please contact your
local electricity company.
2. If the power cord or plug
is damaged, the appliance
malfunctions, or it has been
damaged in any manner; it
must be replaced or repaired
by the manufacturer, its
service agent or a similarly
qualied person(s) in order to
avoid a hazard.
3. Any plug cut from the power
cord should be disposed
of immediately. Inserting a
cut-off plug into an electrical
socket is dangerous.
4. The Niche Duo features an
overheat cut-out that cuts
the power if it overheats.
If this occurs, unplug the
grinder. The safety cut-out
will automatically reset itself
after 1 hour and power will be
restored when the grinder is
plugged in again.
5. Do not place the Niche Duo
on or near a gas or electric
burner, or where it could
touch a heated surface.
6. Any signicant spillage onto
the surface under, around,
or onto the Niche Duo itself,
should be cleaned and dried
before using the grinder.

7
Important Safeguards
7. To protect against electric
shock and damage, do not
immerse any part of the
Niche Duo in water or allow
moisture to come in contact
with the internal components.
Do not operate the grinder on
a sink draining board.
8. The burrs are extremely sharp;
take extra care when handling,
especially when removing from
the body. Avoid touching the
sharp edges and wear cotton
gloves when handling the burrs.
9. To avoid suffocation and
choking hazards for young
children, remove and safely
dispose of the protective cover
tted on the power plug pins
and any plastic bags.
10. Avoid contact with moving
parts. Do not attempt to
defeat any safety interlock
mechanisms.
11. Always make sure the
Niche Duo is properly
assembled before use.
The grinder will not operate
unless properly assembled
and the lid is closed.
12. The Niche Duo is not
intended for use by persons
(including children) with
reduced physical, sensory or
mental capabilities, or lack of
experience and knowledge,
unless they are closely
supervised and instructed
concerning use of the grinder
by a person responsible for
their safety. Close supervision
is necessary when any
appliance is used by or near
children. Children should
be supervised to ensure
that they do not play with
the appliance.
13. Before assembly, disassembly
or cleaning, turn the
Niche Duo OFF and unplug
from the outlet. To unplug,
grasp the plug and pull from
the outlet. Once installed,
ensure the grinder is OFF
when not in use.
14. Do not attempt to operate
the Niche Duo by any method
other than for which it is
intended and described in
this booklet.

8
Important Safeguards
15. The Niche Duo is not intended
to be operated by an external
timer or separate remote
control system.
16. The use of attachments not
recommended or sold by
Niche Coffee may cause re,
electric shock or injury.
17. Check the bean hopper for
the presence of foreign
objects before using.
18. The Niche Duo is for household
use only. Do not use the
grinder for anything other
than its intended use. Misuse
may cause injury. If the grinder
is used improperly or not used
in accordance with these
instructions, the guarantee
will become invalid and Niche
Coffee refuses to accept any
liability for damage caused.
19. Do not place the Niche Duo
near a surface edge. Ensure
the surface is level, clean and
dry. Do not let the power
cord hang over the surface
edge, touch hot surfaces, or
become knotted.
20. The Niche Duo is only
designed to grind whole
roasted coffee beans. Do not
attempt to grind any other
foodstuffs; including herbs,
spices and pre-ground coffee.
21. Always disconnect the
Niche Duo from a power
supply if it is left unattended
and before assembly,
disassembly or cleaning. To
unplug it, hold the plug and
pull it out of the socket. Never
pull it out by the power cord.
22. Do not put the Niche Duo,
or any of its parts in
a dishwasher.
23. Keep the Niche Duo clean.
Refer to the ‘Care and
Cleaning’ section.
24. Do not use the Niche Duo
outdoors.
25. Never tamper with the safety
mechanisms. They are included
for your personal safety.

9
Electrical Safety
Input rating: 220-240V~ 50Hz 130W
Note
The Niche Duo has a grounded/earthed
plug. To reduce the risk of electrical shock,
this plug will only t in an outlet one way. If
the plug does not t in the outlet, contact
a qualied electrician. Do not modify the
plug in any way. A power cord storage
area is provided inside the grinder to help
prevent cord tangling and to limit the risk
of the cord becoming a trip hazard.
Disposal
The symbol shown to the right indicates that this
appliance should not be disposed of in normal
household waste. It should be taken to a local authority
waste collection centre designated for this purpose. For
more information, please contact your local authority.
SAVE THESE INSTRUCTIONS.
FOR HOUSEHOLD USE ONLY
Electrical Shock Hazard
Plug into a grounded outlet.
Do not remove ground prong.
Do not use an adapter.
Failure to follow these
instructions can result in
death, re or electrical shock.
WARNING

10
First Use of the Grinder
WARNING: DO NOT USE
THE GRINDER SET AT ‘0’
FOR SUSTAINED PERIODS
AS THIS MAY DAMAGE
THE BURRS.
1. Before use remove all
packaging.
2. There may be coffee residue in
your Niche Duo - this is from
testing to make sure your
grinder performs optimally.
3. Your Niche Duo has been
zeroed during manufacture
and is ready to use
immediately. ‘Zeroing’
describes the process of
aligning the burrs so the ‘0’
mark on the grind dial refers
to the position where the
burrs just begin to touch.
Zeroing your Niche Duo is
not necessary, even when
changing between the burr
sets or cleaning. Please see
the ‘Zeroing the Niche Duo’
section for more information.
4. Plug the Niche Duo into a
power outlet. The power light
will glow red to show power
is present.
5. Your grinder comes with
the black espresso burr set
installed and has been adjusted
to setting 10. Please see the
‘Changing the Burrs’ section for
advice on changing the burr set.
6. If you require an extra coarse
setting, you are able to
continue rotating the bean
hopper anticlockwise until you
reach your desired setting. The
grind dial markings are only
a guide. We recommend you
nd the settings that work
best for you.
7. Grind quality is good
immediately, but see the
‘Additional Information’ section
for more information about
seasoning of the burrs.
8. You’re now ready to begin
using your Niche Duo. Please
follow the instructions in the
‘Using the Grinder’ section.

11
Using the Grinder
1. Open the Niche Duo lid and
check that the bean hopper is
empty. Turn the entire bean
hopper to adjust grind
consistency, matching the bezel
ring indicator to your desired
setting on the grind dial. Turn
clockwise for ner grinds and
anticlockwise for coarser grinds.
Ensure you do this with no
beans in the bean hopper.
When adjusting for ner
grinds, run the grinder for 1
second every time the bean
hopper is rotated 10 marks on
the grind dial. This ensures any
trapped coffee between the
burrs does not strain the
mechanism and also makes
adjusting easier.
2. Pour your beans into the
supplied grind cup and weigh
to check you have the correct
amount. Ensure no foreign
objects are present as these
could damage the burrs. This
is also a good time to remove
any defective beans such as
quakers (unusually light beans)
and blacks (very dark beans).
3. Open the lid and pour your
beans into the bean hopper.

12
Using the Grinder
4. Replace the grind cup on
the grind tray underneath.
5. Close the lid (the Niche Duo will
not operate if the lid is open)
and ick the power switch up,
to turn on.
6. You will hear a change in motor
noise when the Niche Duo
has nished grinding. Leave
the grinder running for 5 - 10
seconds, to make sure all the
beans have been ground, before
turning off.
7. For espresso, t your 58mm
portalter over the grind cup.
8. Invert the grind cup and
portalter together, shake
and tap the grind cup, and
then remove the grind cup.
9. For other brewing methods,
pour the ground coffee directly
from the grind cup into your
chosen brewing equipment.

13
Changing the Burrs
WARNING: ALWAYS MAKE SURE THE GRINDER IS TURNED OFF
AND UNPLUGGED WHEN NOT IN USE, BEFORE ASSEMBLING
OR DISASSEMBLING PARTS AND BEFORE CLEANING. DO NOT
TOUCH THE EXPOSED PART OF THE BURR ON EITHER CARRIER.
The Niche Duo has been designed for use with two specialist 83mm
at burr sets - a set dedicated to making exceptional espresso and
another set optimised for making awless lter coffee. Follow these
instructions to switch between these two at burr sets. Please do not
touch the exposed burrs. We recommend wearing cotton gloves when
handling the burrs.
Please note that the lter burr set has been specically designed for
lter coffee and cannot grind ne enough for espresso.
1. Rotate the bean hopper
anticlockwise to unscrew. Place
the bean hopper to one side.
2. Remove the upper burr carrier
from the grind chamber and
place to one side.

14
Changing the Burrs
3. Unscrew and remove the centre
screw using the hex driver.
Place the screw to one side.
4. Remove the lower burr carrier
from the grind chamber and
place to one side.
5. Place the grind cup under
the grind chute and clean
the grind chamber.
6. Fit the lower burr carrier from
the other set and rotate until it
drops to the chamber base.

15
7. Reseat the centre screw and
tighten the screw using the
hex driver.
8. Align the three prongs on the
other upper burr carrier to the
holes inside the chamber.
9. Reseat the bean hopper
and screw clockwise until
lightly hand tight.
10.Turn the bean hopper to your
desired grind setting. Your
Niche Duo is now ready to use.
Changing the Burrs

16
Care and Cleaning
1. Specialist cleaning products:
We do not recommend that
rice or any other specialist
cleaning products are run
through the Niche Duo, as
this may damage the burrs.
The grinder is not designed
to be cleaned this way. Do
not use abrasive cleaners or
scouring pads.
2. Cleaning the grinder body,
bean hopper and wood:
Do not immerse any part of
the Niche Duo in water.
Wipe
the grinder body, power cord
and lid with a clean damp
cloth and dry immediately
with a soft microbre cloth.
3. Cleaning the grind chute
and grind cup:
Use the brush provided to clean
the grind chute. This can be
done by pushing the brush up
the chute and twisting. The
grind cup can be cleaned in hot
soapy water. Do not place your
grind cup in a dishwasher.
4. Cleaning the grind chamber:
Unscrew and remove the bean
hopper. Remove the upper burr
carrier. Remove the 3 springs
if vacuuming. Use the brush to
sweep any residual grind into
the grind chute and collect in
the grind cup. Reassemble the
Niche Duo when nished.
WARNING: ALWAYS MAKE SURE THE GRINDER IS TURNED
OFF AND UNPLUGGED WHEN CLEANING. DO NOT TOUCH THE
EXPOSED PART OF THE BURR ON EITHER CARRIER.

17
5. Cleaning the burrs:
If the Niche Duo is used
frequently, the burrs need to
be cleaned regularly. Foreign
objects sometimes nd their
way into whole bean coffee.
These objects may cause the
grinder to jam. Ensure the burrs
are cleaned if this is the case.
Unscrew and remove the
bean hopper followed by the
burr carriers as detailed in the
‘Changing the Burrs’ section.
Please do not touch the
exposed burrs. We recommend
wearing cotton gloves when
handling the burrs. Remove the
3 springs below the upper burr
carrier if vacuuming.
Clean both burr carriers with the
brush supplied and then return
the burr carriers to the grinder
or the plastic case provided.
6. Deep cleaning:
We advise that you deep clean
the Niche Duo every 3-6 months
(depending on use).
Unscrew and remove the bean
hopper followed by the burr
carriers. Please do not touch the
exposed burrs. We recommend
wearing cotton gloves when
handling the burrs.
Use a soft toothbrush to clean
the burr grinding surfaces. A
vacuum is optional but can help
remove coffee you can’t see.
Remove the 3 springs below the
upper burr carrier if vacuuming.
Use a soft damp cloth to clean
the chamber. Clean the internal
threads with a dry toothbrush
and very lightly lubricate with
food safe grease. Ensure the
chamber is completely dry
before reseating the burrs.
Use a soft microbre cloth
around a nger to clean the
grind chute as high as possible.
Reassemble the Niche Duo and
run 18g of
coffee beans through
the grinder and discard.
Care and Cleaning

18
Zeroing the Niche Duo
1. Rotate the bean hopper
anticlockwise and unscrew
it from the body casting.
Once removed, turn the bean
hopper upside down.
2. Loosen the thumb screw
located on the inside of the
bean hopper. This releases the
bezel ring lock, allowing you to
adjust the bezel ring.
WARNING: ALWAYS MAKE SURE THE GRINDER IS TURNED OFF
AND UNPLUGGED WHEN REMOVING THE BEAN HOPPER. DO
NOT TOUCH THE EXPOSED PART OF THE BURR ON EITHER
CARRIER. ONCE ZEROED DO NOT USE THE GRINDER SET AT ‘0’
FOR SUSTAINED PERIODS AS THIS MAY DAMAGE THE BURRS.
‘Zeroing’ describes the process of aligning the burrs so the ‘0’ mark on the
grind dial refers to the position where the burrs just begin to touch. YOUR
NICHE DUO HAS BEEN ZEROED DURING MANUFACTURE AND IS READY
TO USE IMMEDIATELY. ZEROING YOUR NICHE DUO IS NOT NECESSARY,
EVEN WHEN CHANGING BETWEEN THE BURR SETS OR CLEANING.
These instructions explain how to zero your Niche Duo if you wish to do so.
ONLY PERFORM ZEROING WITH THE ESPRESSO BURR SET INSTALLED.

19
Zeroing the Niche Duo
3. Remove the upper burr carrier
and ensure that the burrs, upper
burr carrier and lower burr
carrier are completely clean.
4. Only perform zeroing with the
espresso burr set installed.
5. Reseat the bean hopper and
screw clockwise until lightly
hand tight.
6. Rotate the bezel ring (black
ring only) until the bezel ring
indicator is aligned to ‘0’.

20
Zeroing the Niche Duo
7. Rotate the bean hopper
anticlockwise until the bezel
ring indicator is aligned to ‘20’.
8. Turn on the grinder to hear what
the grinder sounds like when
the burrs are not touching.
9. Rotate the bean hopper
clockwise so the bezel ring
indicator moves by 2 marks.
10. Close the lid and turn on the
grinder for a few seconds.
If the burrs sound like they
are touching you are close to
zeroing the burrs.
11. If there is no discernible change
in noise please repeat steps 9
and 10 until you denitely hear
the burrs touching.
12. Once the burrs are denitely
touching, rotate the bezel ring
(black ring only) until the bezel
ring indicator is aligned to ‘0’.
You should hear a clicking noise
when turning the bezel ring.
13. For optimum performance
it is important to ensure the
accuracy of the zero position.
This manual suits for next models
1
Table of contents
Other Niche Coffee Grinder manuals
