Nikkei NH2414 User manual
24" HD LED TV
User manual
MODEL: NH2414

EN-01
IMPORTANT WARNINGS AND
SAFETY ADVICE
We encourage you to read this user guide carefully and
completely before installing and using your device.
It is important that this user guide is kept with the device for any new
consultation. If this unit is to betransferred to another person, make
sure that the user guide follows the unit so that the new user can be
informed of the operation of the unit.In this user guide, the following
symbols are used:
Important information about your personal safety and how to
avoid damage to the device
General information and advice
Environmental information
Fire hazard
Risk of electric shock
EN-02
Important safety instructions – please read carefully and keep
for future reference
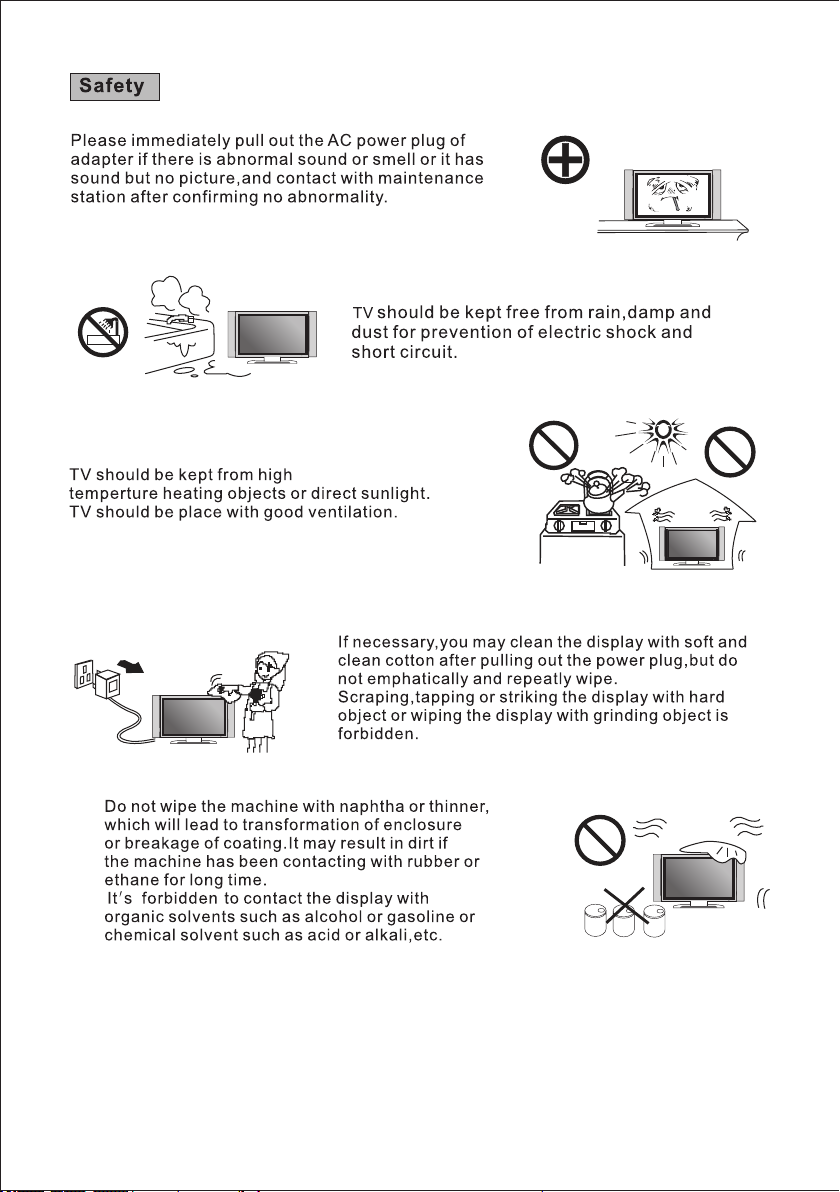
To reduce the risk of fire or electric shock, do
not expose this product to water, rain or
moisture. To prevent the risk of electric shock,
do not remove the cover or back of this product.
In case of product failure, only qualified
personnel can repair. There are no user-
serviceable parts inside.
CAUTION !
Dangerous tension inside the product ! Do not open. Risk of
electric shock ! No parts can be repaired by the end-user.
Only qualified personnel can repair and maintain this product.
If the electric cord is damaged, it must be replaced by the
manufacturer or qualified after-sales personnel in order to avoid
any danger.

EN-03
The product must be installed in accordance with local laws.
Damaged batteries must be properly disposed. In order to protect
the environment, please dispose the batteries properly, in
accordance with local laws (information is available at your
reseller).
Remote control batteries (not included) shall not be exposed to
excessive heat (e.g. from sun or fire).
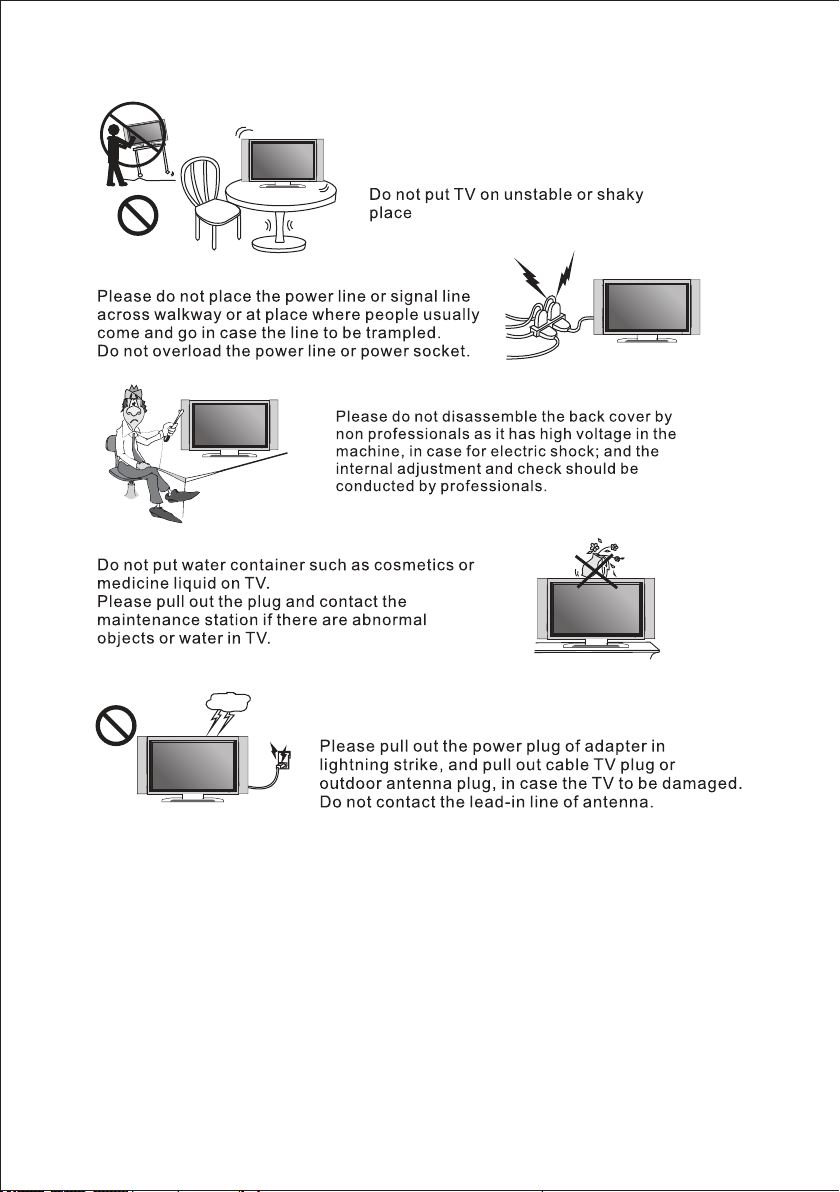
Where to install the product
- Place the product on a straight, rigid and stable place. Do not
place the product on a carpet.
- Do not place the product on top of another that may cause
overheating (for example, a receiver or amplifier).
- Do not place anything underneath the product (for example, Cds
or magazines).
Proper ventilation
- Place the product in a sufficiently–aerated place to avoid
overheating. Allow at least 10cm spacing at the back and top of
the product, and 5cm spacing on both sides to prevent
overheating.
- Do not place items such as newspapers,tablecloth, curtains, in
front of the ventilating openings.
Do not expose the product to high temperatures, moisture,
water and dust.
- The apparatus shall not be exposed to dripping or splashing. No
object filled with liquids, such as vases, shall be placed on the
apparatus.
- Do not place other items close to this product that may damage it
(for example, objects containing water or lightened candles).
- No naked flame sources, such as lighted candles, should be
placed on the apparatus.
Electric supply
- Please unplug the product in case of prolonged non-use.

EN-04
- If the supply cable is damaged, it must be replaced by the
manufacturer or qualified after-sales personnel to avoid any
danger.
- This product must be connected to an electrical supply 100-240V
~ 50/60Hz.
- The mains plug is used as the disconnect device, so the
disconnect device shall remain readily operable
WARNING
Never place a television set in an unstable location. A television set
may fall, causing serious personal injury or death. Many injuries,
particularly to children, can be
avoided by taking simple precautions such as:
- Using cabinets or stands recommended by the manufacturer of
the television set.
- Only using furniture that can safely support the television set.
- Ensuring the television set is not overhanging the edge of the
supporting furniture.
- Not placing the television set on tall furniture (for example,
cupboards or bookcases) without anchoring both the furniture and
the television set to a suitable support.
- Not placing the television set on cloth or other materials that may
be located between the television set and supportingfurniture.
- Educating children about the dangers of climbing on furniture to
reach the television set or its controls.
- In case this television set is to be relocated to a different location,
please keep in mind and apply the above safety instructions.
Information about the meaning of the conformity marking
The CE marking indicates that the product meets the main
requirements of the European Directives 2014/35/EU (Low
Voltage), 2014/30/EU (Electromagnetic Compatibility), 2011/65/EU
(Restriction of the use of certain hazardous substances in electronic
equipment), 2014/53/EU (Radio equipment).

EN-05
Technical Specification:
Name: Television Product
Net Weight: 2.4Kg
Operation Temperature: 0℃~40℃
TV Reception System: DVB-T2/C,DVB-S2
Auto Standby
In order to save energy, the electricity consumption of this product
has been reduced in both operation mode and standby mode.
Furthermore, if no operation is carried out for four consecutive
hours, the unit will automatically enter standby mode. Simply press
the Standby button on the remote control to switch the unit back to
operation mode.
Product Introduction
Congratulations! You have chosen the latest generation high
definition television. Endowed with high display quality and light
weight, it is power-saving and radiationless with high sensitivity
television reception. The new generation television will bring you
safe & comfortable brand new visual experience. Thank you for
purchasing and using our products!
Accessories
User manual x1
Remote control x1
EN-06
EN-07

EN-08
Table Of Contents
This user guide is available in the following languages:
NL (translated from the original)
FR (version originale)
EN (translated from the original)
Any other translation would be a translation of the original version.
This user guide, its possible modifications or any new version,
is available on our website.
Congratulations! Your have chosen the latest generation high
definition television. Endowed with high display quality and light
weight, it is power-saving and radiationless with high sensitivity
television reception. The new generation television will bring you
safe & comfortable brand new visual experience.
Thank you for purchasing and using our products!
Important warnings and safety advice
I - Control Panel
II - Base Installation Guide
III - Wall Mounting instructions
IV - Connecting Cables
V - Remote Control
VI - Antenna Connections
VII - Watching Television Programs
VIII - First Time Installation
A - Channel
B - Picture
C - Sound
D - TIME
E - Setup
F - LOCK
IX - Important Notice
X -Troubleshooting
01
09
10
11
12
13
16
17
18
22
24
25
26
27
29
30
31

EN-09
I - Control Panel
The command buttons are at the back of the TV.
Introduction for Each Key
Turn the TV on or enter into standby mode.
Enter/exit the main menu.
Signal source selection button.
Channel upwards short cut key; skip to next channel no.
and select the next option in the menu
Channel downwards short cut key; skip to previous
channel no. and select the previous option in the menu.
Volume increasing short cut key; enter into the next menu
and adjust OSD options (increasing).
Volume decreasing short cut key; enter into the next menu
and adjust OSD options (decreasing).
INPUT
STANDBY
SOURCE MENU CH- CH+ VOL- VOL+

1. Please put the base on the desk as shown figure 1.
(the stand approximately 180 degrees from horizontal).
2. Put the hole of the base upright into shaft of unit(as shown figure 2).
3. Fix the stand and the screen with 4 screws (figure 3)
4. The rendering after installed (as shown figure 4).
II - Base Installation Guide
The Way Of Installing Base:
The Way Of Unloading Base:
1. Please remove the screw between the base and shaft (as shown figure 1).
2. Left hand hold the cabinet of the unit,right hand hold the base then remove
the stand. (as shown figure 2)
EN-10

● Use standard M4x8mm screws (4 pieces, not included) to mount
this TV. Using different screws as specified will damage the wall
mounting support and will be outside the scope of product
guarantee.
● Contact a professional technician for assistance when wall
mounting your TV.
● Do not wall mount the TV while TV is turned on.
● Refer to the instruction of your wall mounting bracket.
III - Wall Mounting instructions
Back of your TV
EN-11

IV - Connecting Cables
This TV has digital multimedia
performance and can be connected
to multiple external devices.The
following diagram presents the
connections to other video and audio
1. AC
AC 100-240V~ 50/60Hz
2. EARPHONE OUTPUT
3. SCART
4. PC AUDIO
PC audio input.
5. VGA
Connect with the D-sub 15 pin signal cable to your computer.
6. HDMI
High-definition multimedia interface (Note: compatible video
signal 480P/576P/720P/1080i/1080P)
7. COAXIAL
Digital TV sound output.
8. RF T2
DVB-T/C.
9. USB
Access multi-media files stored in the USB device.
(Note: compatible format includes: *.dat, *.vob, *.ts, *.mpg , *.avi , *.mkv,
and *.mp4 for video, *.jpg and *.bmp for photo, *.mp3 for music. )
10. MiniYPbPr IN
Component input terminal.
11. CI SLOT
Insert a CI (common interface) card.
12. MiniAV IN
Connect to the left/right RCAvideo out connection of any vide resource.
13. RF S2
DVB-S.
EN-12
PC VGA
5
PC AUDIO
3
RF S2 RF T2 HDMICOAX Mini AV In Mini AYPbPr InEARPHONE
2 910
6
13 8 7

FAV+
FAV-
V - Remote Control
1 Power
Press this button to switch on the TV. Press again
to enter the mode
2MUTE
Press this button to cancel the output sound.
Press again to set the normal audio level.
3 0-9
Figures 0-9 are used for directly the number
of the input channel.
4 TV/RADIO
Switch between DVB-T and RADIO. (Digital radio
is not available in countries such as France)
5
Press this button to switch to the current
program to the previous one.
6 SLEEP
Press this button to set the Delia LCD Television
automatic switch-off function.
7 NICAM/A2
To choose STEREO, MONO, DUAL in the case
of two languages.
8 S.MODE
Press repeatedly to scroll through the available
audio modes
9 P.MODE
Press repeatedly to scroll through the available
picture modes
10 SOURCE
Displays the list of signal sources in
11 CH+/-
Press the keys to scroll through the TV channels.
12 VOL+/-
Press the button to increase / decrease the audio
level directly.
13 INFO
View the system status information set by the
active user.
14 ASPECT
Select the aspect ratio
15 FAV
To preview the favorite channel list.
16 FAV+/FAV-
Press the keys to scroll through the favorite
channels.
EN-13

FAV+
FAV-
17 OK
Select the option previous/next
Increase / decrease option value.
Select the option previous/next.
18MENU
Select a menu.
19 EXIT
Return to TV viewing from any menu.
20 REVEAL
Display the characters hidden.
Fast Forward.
21 SIZE
Change the size of current page.
Fast Rewind
22 SUBPAGE
Display the current sub-page.
Go to the next track or chapter
23 TEXT
Display the teletext on screen.
Go to the next track or chapter
24 INDEX
Ask for the list of main Tv letter broadcast page
number,
Start/Pause
25 HOLD
Hold the current page and prevent again.
Stop playback
26 SUBTITLE
Recalls you preferred subtitile in digital mode.
27 CANCEL
Delete TXT on screen
28 MEDIA
Enter into the media mode(USB)directly.
29 A-B
Reproduction of fragments.
30 REPEAT
Repeated playback(per file in USB).
31 AUTO
Automatically adjust the PC/VGA screen.
32 RED/GREEN/YELLOW/BLUE
Available in the following ways:televideo,
DVB-T e TV.
EN-14
V - Remote Control
17
18 19
20
21
26
27
28
29
23
22
24
25
30
31
32

Install the batteries as shown in the following figures. Make sure the + and - terminals are
positioned as indicated in the battery compartment (Fig. 1)-
USEFUL DURATION OF BATTERIES
- Normally the batteries last for a year, even if the consumption of the batteries depends on
the effective use of the remote control.
- If the remote control does not work when it is used near the appliance, replace the
batteries.
- Use two dry type 2xAAA batteries (batteries not included ).
NOTE:
• Do not drop, step on or otherwise hit the remote control. This could damage the
components or cause a malfunction.
• If the remote control is not used for a long time, remove the batteries.
OPERATION OF THE
TV REMOTE
Point the remote control at a distance of
no more than 6 m from the remote sensor
and within an angle of 60 ° in front of the
appliance (Fig. 2).
NOTE:
- The operating distance may vary
depending on the brightness of the
environment.
- Do not aim light sources at the remote
sensor.
- Do not place any object between the
remote control and the remote control
sensor..
- Do not use this remote control when
using the remote control of another device
at the same time.
Push
Open
Press
Remote
sensor
EN-15
BATTERY INSTALLATION
FAV+
FAV-

VI - Antenna Connections
EN-16
We recommend you use a 75Ω antenna cable so as to eliminate the disturbance
caused by impedance mismatching. The antenna cable shall not be bundled
together with the power cord.
Directly insert the 75Ω antenna cable plug into the antenna socket when applying
cable television.
Note: The antenna should be checked periodically.If clear image is not available,
shut down the power and then carefully check the antenna.
Power-on/Power-off
1.Make sure all cables are disconnected from the main unit before connecting to the AC
power source.
2.Read the instructions carefully before connecting other devices.
Press the standby button again on the remote control for the television the indicating
lamp becomes green, and then television image is available.
Press the standby button onthe remote controller or the television to enter into
standby state.
Power-saving & protection mode
1.In video or PC state, the television will enter into lower power sleep state (standby state)
to conduct power saving and protection after several minutes with no signal inputs.

EN-17
VII - Watching Television Programs
MAKE SURE ALLTHE EQUIPMENTS AND POWER CORD ARE CONNECTED PROPERLYAND THE
UNIT IS SET IN CORRECT MODE BEFORE KINDS OF OPERATIONS.
BASIC OPERATIONS
- Press POWER button on the unit or remote control to power ON the unit (indicator will glow green);
press it again to power OFF (standby mode) the unit (indicator will glow red).
- Press SOURCE button on the unit or remote control to switch the unit to DTV or ATV mode.
SELECT DESIRED PROGRAM
1. Press CH+ button to play next channel.
2. Press CH- button to play previous channel.
3. Press number buttons on remote control directly to select desired program.
NOTE: Press -/-- button repeatedly to switch the digit.
VOLUME CONTROL
- Press VOL+ or VOL- to adjust the level of current volume.
Available range: 0-100.
MUTE CONTROL
- Press MUTE button to mute the sound, press it again to turn on the sound.
SOURCE SETTING
- Press SOURCE button on the unit or remote control to display the input source list.
- Press UP or DOWN navigation button to select desired input source, then press OK button to
confirm selection.
Available options: DTV, ATV, YPbPr, SCART, AV, HDMI , USB, VGA.
MULTIAUDIO SATLLITE
- Press AUDIO button on remote control and use navigation buttons to select desired audio
language.
NOTE: To enable this function, make sure that the channel you are viewing supports multi-audio
languages.
INFORMATION DISPLAY
- Press DISPLAY button on remote control to display information of current program.

EN-18
VIII - First Time Installation
● The unit contains different setting menus. Once the initial programming is entered, it will
be remained in the memory until change, and the unit can always be operated under the
same conditions.
● The settings will be remained in the memory until the settings are changed, even after
setting the player to standby mode.
Common procedure for initial settings
- Press MENU button on the unit or remote control to display the main menu.
- Press UP/DOWN/LEFT/RIGHT navigation buttons to move the cursor.
- Press OK or RIGHT navigation button to enter submenu.
- Press MENU button to save current setting and return to previous menu page.
- Press EXIT button to exit menu page.
First Time Installation
- Connect to power source and turn on this TV, then below setup page will display on the
screen.
- Press UP/DOWN navigation button to move the cursor.
- Press LEFT/RIGHT navigation button to select an option.
Step 1
OSD Language: select the on-screen menu language.
Country: select your country.
Energy Model: select Home or Store mode.
Step 2
- When Step 1 finished, press OK to enter next page.
- Use UP/DOWN navigation button to highlight an option and press OK to enter subpage.
- Select Tune Type and Digital Type using navigation buttons and press OK to start auto
tuning.
NOTE: Items following Digital Type are adjustable only when Digital Type is DVB-T / C / S
and these items vary for different digital type.
- Select an available input source.
NOTE: To play an external device, connect it to related terminal on TV back first.

EN-19
QUICK SELECT
When viewing an available channel, press CH.LIST button
on remote control to enter Channel List menu page.
- Press UP or DOWN navigation button to select
preferred channel.
- Press LEFT/RIGHT navigation button to select a
channel group.
- Press OK button to confirm selection.
TELETEXT
- Press TEXT button on remote control to display the
available teletext information and press it repeatedly
to stop playing the teletext.
TV/RADIO (FOR DTV MODE ONLY)
- Press TV/RADIO button on remote control to switch the unit between TV and radio
mode.
SUBTITLE
- Press SUBTITLE button on remote control repeatedly to select desired subtitle.
NOTE: To enable this function, make sure that the channel you are viewing supports multi-
subtitle.
Table of contents
Other Nikkei LED TV manuals

Nikkei
Nikkei NLD24MSMART User manual

Nikkei
Nikkei NF4014 User manual

Nikkei
Nikkei NU5518S User manual

Nikkei
Nikkei NU5018S User manual

Nikkei
Nikkei NH2424SMART User manual

Nikkei
Nikkei NH2424 User manual

Nikkei
Nikkei NH3218S User manual

Nikkei
Nikkei NH3214 User manual

Nikkei
Nikkei NF4321SMART User manual

Nikkei
Nikkei NH3225ANDROID User manual


