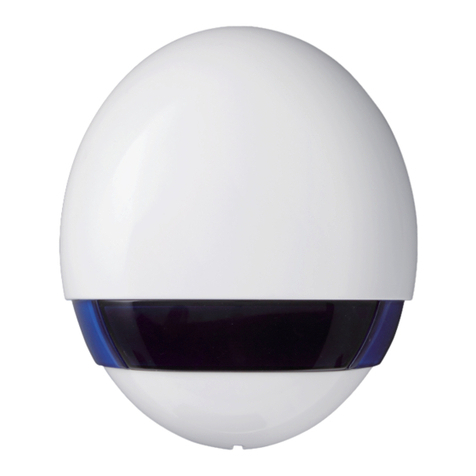
Ningbo JB-P03 User manual

IMPORTANT: PLEASE READ THIS MANUAL CAREFULLY AND KEEP IT IN A SAFE PLACE
SWIMMING POOL ALARM is designed and made by ISO 9001 certified
manufacturer. Our mission is to provide the highest combination of quality, service
and price to support our distributors and customers.
1
SWIMMING POOL
ALARM JB-P03
MANUAL

1. GENERAL
POOL ALARM is the result of intellectualized and quality design and high
manufacturing techniques, it is an electronics monitoring system that automatically
sounds an alarm when children or pets fall into your unsupervised pool. POOL
ALARM is a portable, self-contained, light weight unit that is safe and simple to
operate. Entry into the pool will be detected by the unit’s electronics sensor, triggering
a loud pulsating alarm to give people alert in shortest time.
2. PRODUCT & SPARE PARTS
Such device is packaged in a shipping carton that minimizes the chance of damage
due to handling. Check for damage and confirm that the contents of the carton
included the following items (see Fig.1).
1-Main unit
2-Stainless steel screw ( 2pcs )
3-Plastic swell screw ( 2pcs )
4-Small tube (3cm 3pcs, 2.4cm 1pc, 3.9cm 1pc)
5-Manual
If any above item is missing, contact either the place of purchase or our distributor for
replacement.
3. GENERAL FIGURE
2
6-Dry Battery Tray (6pcs x LR20 1.5V size D)
(Batteries not inlcuded)

4. BATTERY INSTALLATION / REPLACEMENT
4.1
The Main unit
is powered by 6pcs alkaline batteries LR20 1.5V, install and replace
battery as followings:
Remove the screws in rear battery-case (see Fig. 3-1/2/3/4).
4.2 With low battery warning function, if main unit beep every 20 seconds, that
indicates you to replace the battery with new ones.
Keep in mind: It is important that do not let the rubber washer come off.
5. OPERATION & CONTROL
3

5.1 Your pool alarm integrates intelligent system which analyzes the surface of the pool
and can automatically reset. It is easy to operate, and involve many different functions,
which are achieved through operation of Control Buttons.
Attention:
1. To move control button, you have to press it down at first, this is designed to
avoid false operation by children.
2. Status indication
A. Surveillance status Green light flash at intervals of 10s
B. Sleep/Swimming status Yellow light flash at intervals of 10s
C. System-Off status Red light flash at intervals of 10s
D Alarming sound locking. Red light and yellow light keep
flashing of 30s
5.2 System Start
4
Fig 4
Fig 5
5.3 System Turnoff
Warning: Please turn off the system only when out for holiday or pool not in use
for long time;
Move control button to "OFF", system turns off ,red light will start to flash every 30s
(see Fig. 5).
Move control button to "SURVEIL", green light will flash every 30s, it indicates the
system into surveillance status (see Fig. 4).

5.4 Return to surveillance status
5
If system sounds alarm,it will last alarming for 4 minutes, if you want to stop it,just
move button to any position, then system will re-enter into surveillance status(see Fig.
6-1/2)
5.5 Swim status
Fig 6-1
Fig 7
Fig 6-2
WO WO
Attention:
2. When pool water calms down, system will activate automatically in 100
seconds and enter into Surveillance status.
3. If you want to stop the Swimming status immediately, just cintrol move button
to"SURVEIL",meanwhile you can hear “WO WO” twice and green light start to flash,
it indicates the system is re-started.
Move control button to "SWIM", you will hear “WO WO” and a yellow light will
flash every 10s, it indicates the system into Swim status (see Fig. 7).
1. Swimming status is available only when system is not alarming, if alarming,
please reset the system (refer to 5.4).

6
Fig 8
5.6 Mute function for main unit
Move control button to "MUTE", the system enter into MUTE status,the main unit only
send signal to receiver without giving out alarm sound(see Fig. 8).
5.7 Transmitter function description
5.7.1 Power-on
Connect the DC plug with the receiver and power on the receiver,then set the red switch
key to ON, the LED3 of the receiver will flashes every 10 seconds to indicate the
receiver is in working status. Please read this manual carefully before use and learn the
function and intelligence of the receiver .

WO~WO~……
7
5.7.2 Alarm Function
5.7.2.1 Normal Alarm
When children or pets fall into pool, ponds, the receiver will alarm with LEDS flashing
and give out sounds at the same time(see Fig 10).
5.7.2.2 Temporarily sound mute function
5.7.2.3 Alarm sound locking function
When the receiver alarm, you can press the function button for 3 seconds till alarm
stop, then the receiver won’t receive the transmitter’s signal within 5 minutes. Press the
red button again, the receiver can alarm again(see Fig 12).
LED3LED1 LED2 LED4 LED5 LED3LED1 LED2 LED4 LED5
3 seconds
Fig 10
Fig 11 Fig 12
short press
When the receiver receive the alarm signal from the transmitter and alarm, you can
temporarily stop the alarm sound by short pressing the function button(see Fig 11).
LED3LED1 LED2 LED4 LED5

8
5.7.3 MUTE function
When the receiver enter into MUTE status, it means the receiver will give out visual
LED flashing without sound.
5.7.3.1 Normal status to MUTE status
5.7.3.2 MUTE status to normal status
When the receiver is MUTE status, press receiver function button 1 time, LED4 will flash 1
time along with 1 beep, it enters into normal status(see Fig 14),then the LED3 of the
receiver flashes every 10 seconds to indicate the receiver is in working status (see Fig
9-4).
5.7.4 Low battery alarm
DI
LED2
short press
DI
LED4
short press
LED2 LED3 LED4
LED3LED1 LED2 LED4 LED5LED3LED1 LED2 LED4 LED5 LED3LED1 LED2 LED4 LED5
Fig15-2 Fig 15-3
Fig 13-1 Fig 13-2 Fig 14
Fig15-1
Short press function button 1 time, LED2 will flash 1 time along with 1 beep, it
enters into Mute status, then LED2, LED3, LED4 will flash every 10 seconds to
indicate the receiver is now MUTE status(see Fig 13-1/2).
When the transmitter battery is lower than 7V, it will send out signal to the receiver
every 30 seconds, when the receiver receive the transmitter low battery signal, the
receiver will turn on all the 5 LEDS at the same time, and then turn out from left to
right one by one to indicate that the transmittet buttery is low (see Fig15-1/2/3).

9
5.7.5 Battery recharge function
5.7.6 Switch ON-OFF function
6. POSITION FOR INSTALLATION
Fig 16-1
Fig 16-3 Fig 16-4
Fig 16-2
Below Figs indicate the proper place for main unit installation, if you have pool bigger
than 16x32sq feet, or pool with two return lines, or pool with irregular shapes, please
contact our distributor to clarify the numbers of alarm needed and proper location for
installation (see Fig. 16-1/2/3/4);IfIf
If you put a rechargeable 9V battery in the receiver. When the adaptor is plugged in, the
battery will be recharged automatically.The battery can be recharged approximately
1,200 times, and will last about 6~7 hours once fully charged. The normal charging
time is about 10 hours.When the mains is disconnected or you want to use outside,the
fully charged battery can last about 6~7 hours.
To switch off the receiver after use, set the red switch to OFF. Don’t forget to set the
red switch ON again when you use the receiver again.

7. INSTALLATION & REMOVAL OF MAIN UNIT
7.1 Our alarm can be adjusted to apply different water levels with submersible sensor
tube, we suggest the gap 1-2cm between tube and pool wall (see Fig. 17-1/2).
7.2 Tools needed: percussive drill, dia.8mm; cross screwdriver, dia.6mm.
7.3 Procedures:
A. set the system in Off status at first;
B. choose the proper place to install, mark the position for hole drilling, and drill
two hole 3-4cm deep; (see Fig. 18-1/2 )
7.4 Installation for kinds of pool base(see Fig. 19-1/2/3/4).
10
Fig 17-1 Fig 17-2
Fig 18-1 Fig 18-2

7.5 If to remove the main unit, use screwdriver to take off screws.
8. ADJUSTMENT OF SUBMERSIBLE SENSOR TUBE
8.1. It is suggested that the sensor tube should submerge into water 10cm(3.9") deep (see
Fig. 20);
8.2. Turn the nut loose counterclockwise, move the extension tube up and down to
make it proper, then turn the nut tight clockwise (see Fig. 21-1/2/3/4).
11
Fig 19-1
Fig 19-3 Fig 19-4
Fig 19-2
Fig 20

9. TEST
9.1 To make sure the device work effectively, we suggest to test alarm each time
before use:
Set the alarm system in surveillance status at first, drop child simulator (e.g. four
1.5L bottles full of water, not less than 6kgs) into pool at the farthest point from main
unit, the alarm system will sound alarm in seconds when water waves get contact with
sensor (see Fig. 22-1/2/3).
Wait till the water calm down, then repeat the test in other places to make sure the
alarm system work well.
9.2 The options of pool test place (see Fig.22-3) .
Attention: make sure the submersible sensor tube 10cm deep in water, otherwise, the
system may not achieve the best performance.
10. REMOTE RECEIVER
10.2. W/ power indicator.
21
Fig 21-1 Fig 21-2 Fig 21-3 Fig 21-4
Fig 22-2
Fig 22-1
Fig 22-3
10.1. Place remote receiver within 300 feet from main unit.

10.3. In case of power failure, you can have back-up battery inside, battery
installation or removal, see Fig. 23.
10.4. W/ reset button, you can reset remote receiver when alarming.
Attention: do remember to install the back-up battery before use.
11. TO SWIM IN THE POOL
31
Fig 23
10.5. Remote receiver sounds alarm together with red light flashing, both to attract
attention and help alert those who may be hard of hearing.
.10.6. DO Not put it in the basements or close to metal walls. Be sure that the red light
on the
remote is on, remember, only when the main unit alarms, the remote receiver will
sound.
10.7. When use the remote receiver for the first time, remote receiver need seconds to
match with main unit.
10.8. If your remote receiver is not getting a clear signal or no signal from the main unit,
try the following, before plugging adapter in the power supply, be sure to stretch out the
cord; do not leave it tied in a bow as packaged. When the main unit alarms, the remote
receiver not alarms, move the remote receiver to different locations and stand back for a
few seconds for the remote receiver to pick up the signal. You may only have to move
your remote receiver a little to the left or right to bring in the signal. In some cases you
might have to move the remote receiver to a different location or another room. If you
still cannot get a signal on your remote receiver, please ask to change.
Take off the adapter and test remote receiver as the above mentioned steps to see the
working condition without electricity power. If it can still receive the signal, now you
can use the remote receiver safely.
11.1. Move control botton to “SWIM”, system will beep several times and yellow light
will flash, it indicates the system into Sleep/Swimming status.
11.2. After set system into Sleep/Swimming status, you will have 100 seconds to start
your swimming, if no swimming, alarm system will activate automatically.

It will not sound alarm when you are swimming.
Attention: make sure the system is activated before leaving the pool.
12ˊSWIMMING POOL SAFETY TIPS
-Supervise children at all times.
-Never permit swimming alone. Never leave a child alone, even to answer the
telephone.
-Always remove the entire solar cover from a pool before swimming.
-Remember that alcohol and pool water do not mix.
-Have your pool area fenced and the gate locked to prevent unauthorized entry to the
pool, and install a gate alarm.
-Lock and secure all doors in the house which permit easy access to the pool, and
install a door alarm.
-Have a responsible adult teach swimming and water safety to your children.
-Maintain clean, clear water in the pool.
-Do not swim during storms.
-Do not permit bottles, glass, or sharp objects to be used around the pool.
-Ask your pool dealer how you can improve your pool safety-they will be glad to
assist you.
-Above all: remember that common sense, awareness, and caution will allow you to
enjoy your pool.
13. WARRANTY AND REPAIRS
POOL ALARM is sold with two year limited warranty to cover defects in parts and
workmanship for two year from date of purchase (retain proof of purchase).
If our alarm exhibits a defect, please contact our distributor. Unauthorized returns will
not be accepted, proper repair is only ensured when the unit is returned to the
manufacturer.
All pool alarms will false alarm on occasion for different reasons. False alarms can be
minimized; however, it is important to remember that a false alarm is better than no
alarm at all. WEATHER & WIND-Our Unit set stationary on the deck of the pool so the
wind will not effect the alarm unit itself. Wind may trigger a false alarm if it is strong
enough or steady enough. That causes the water in the pool to rock or bounce up and
down the pool wall. When the water in the pool moves up and down the alarm sensing
throat, it may finally cause the alarm to sound. On extremely windy days when the pool
water is rocking it is advised to set the alarm in Sleep/Swimming status.
Light wind or rain will not effect the alarm.
41
11.3. After your swimming, wait till the water calm down, move Control Button to left
side to activate alarm system, or wait a few seconds for the system to activate
automatically.

14. ATTENTION
POOL ALARM has been designed to aid in the detection of unwanted intrusions into
unsupervised pools. POOL ALARM IS A SAFETY ALARM SYSTEM AND NOT A
LIFE SAVING DEVICE. “This device is not intended to replace any other safety
consideration -e.g. adult supervision, lifeguards, fences, gates, pool covers, locks, etc.,
and some devices may not detect gradual entry.”
POOL ALARM is made of sturdy Plastic+UV. Because the alarm is electronic and
mechanical, great care should be taken not to drop the unit, it may break, sun and rain
will not hurt the alarm.
15ˊKEEP IN MIND
-DO read the manual carefully;
-DO install the alarm properly;
-DO test the alarm properly;
-Do adjust submersible tube properly to meet the water level;
-Do not leave until the unit is activated after swimming;
-Do replace the battery when in low voltage;
-Do supervise the pool, when the alarm in the Sleep/Swimming status;
-DON’T start your alarm immediately after swimming.
-If your pool has a tilted soft slope less than 30% and without discontinuity, this
pool alarm is not enough to supervise, you need to use another alarm system to
complete.
-Turn off the system only when pool is not to be used for long time or family is out
for holiday, and do remember to start the alarm system before using the pool or
back from holiday.
16. TROUBLESHOOTING
Q: alarm system does not work in test?
A: check if the battery is installed correctly and control botton in right side.
Q: can not move the button?
A: be sure to press down it before move
Q: false alarm by strong wind?
A: move control botton to right to be into Sleep/Swimming status.
Q: keep alarming after swimming when activate the system?
A: water is not calm down, be sure to activate system after the water calm down.
Q: my pool is bigger than 16x32 square feet, if extra alarm system needed?
A: you’d better install more
Q: no alarm when drop object in pool?
A: check the submersible sensor tube into water lever 10cm deep, or weight of the object
Q: I do not want to drill hole on my pool, how to do?
A: place alarm edge of the pool side.

Q: if it is ok to drop alarm into water for long time?
A: do not
Q: Unconscious of alarm dropping into water for long time, what to do?
A: turn off the system and let it dry at first, and test it before start to use.
Q: if it is available to use in lake, spa, fish pond, …?
A: Yes. If use in fish pond, another accessory is needed, please contact our local
distributor for details.
Q: one remote receiver works with more main units, or one main unit works with more
receivers, if it is ok?
A: Yes.
Q: my remote receiver can not get the signal, what to do?
A: check if install remote receiver on metal objects, or something weaken the signal.
17. WARNING
This device complies with part 15 of the FCC Rules. Operation is subject to the condition that
this device does not cause harmful interference (1) this device may not cause harmful
interference, and (2) this device must accept any interference received, including interference
that may cause undesired operation.
Any changes or modifications not expressly approved by the party responsible for compliance
could void the user's authority to operate the equipment.
NOTE: This equipment has been tested and found to comply with the limits for a Class B
digital device, pursuant to Part 15 of the FCC Rules. These limits are designed to provide
reasonable protection against harmful interference in a residential installation. This equipment
generates, uses and can radiate radio frequency energy and, if not installed and used in
accordance with the instructions, may cause harmful interference to radio communications.
However, there is no guarantee that interference will not occur in a particular installation.
If this equipment does cause harmful interference to radio or television reception,
which can be determined by turning the equipment off and on, the user is encouraged to try to
correct the interference by one or more of the following measures:
-- Reorient or relocate the receiving antenna.
-- Increase the separation between the equipment and receiver.
-- Connect the equipment into an outlet on a circuit different from that to which the receiver is
connected.
-- Consult the dealer or an experienced radio/TV technician for help.
To maintain compliance with FCC’s RF Exposure guidelines, This equipment should be
installed and operated with minimum distance between 20cm the radiator your body: Use only
the supplied antenna.
Table of contents
Other Ningbo Security System manuals
Popular Security System manuals by other brands
BeaconMedaes
BeaconMedaes MedPlus TotalAlert Operation and maintenance
NookBox
NookBox E6309666 installation guide
HomeMatic
HomeMatic 4047976424085 Installation and operating manual
SMC Networks
SMC Networks RB5701-Z Specifications

Python
Python Responder LE 524 owner's guide
CHALET
CHALET 300 Series Basic operation guide

