Nisis M8PLUS User manual

NISIS M8Plus PS/2-USB Optical 5 Button Mouse Installation Guide Rev 1.5
NISIS M8Plus Mouse
Installation Guide
Revision 1.5
Product Code 10008
Copyright Statement
No part of this publication may be reproduced, stored in a retrieval system, or transmitted in any form or by any means, whether
electronic, mechanical, photocopying, recording or otherwise, without the prior agreement in writing fromNetway Components
Ltd.
Windows98, Windows 98SE, WindowsME, Windows 2000 and Windows XP are trademarks of Microsoft Corporation.
All copyright is reserved.

NISIS M8Plus PS/2-USB Optical 5 Button Mouse Installation Guide Rev 1.5
Setting up your NISIS M8Plus PS/2-USB Optical 5 Button Mouse
Welcome
Thank you and congratulations on your purchase of the NISIS M8Plus PS/2-USB Optical 5 Button Mouse.
Introduction
The NISIS M8Plus PS/2-USB Optical 5 Button Mouse uses Optical Technology to eliminate one of the most frustrating traits of
a conventional mechanical ball mouse; sticking or sliding. This is when you move your mouse but the cursor on the screen does
not move.
Mechanical mice balls pick up dust and dirt,which builds up onthe internal rollers. The only practical method of curing this
problem is to dismantle the mouse so you can get at and clean the internal rollers.
The NISIS Optical Mice have no moving parts to collect dust and dirt. They use optical technology to provide an accurate,
reliable and quick cursor response that does not suffer from sticking or sliding.
The M8Plus Mouse has a USB interface, with a PS/2 converter giving you the choice of a PS/2 or USB interface*
Package Contents
Please check that your NISIS M8PlusPS/2-USB Optical 5 Button Mouse package contains the following items. If you find any
parts missing, please contact your supplier immediately.
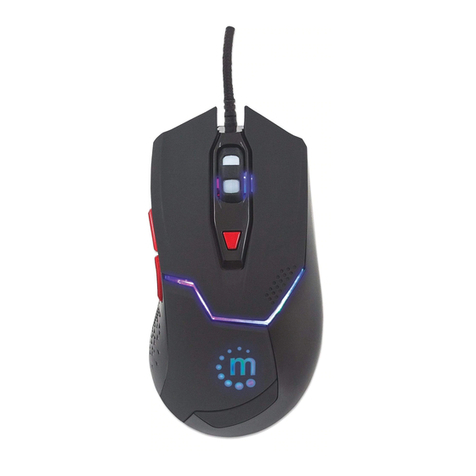
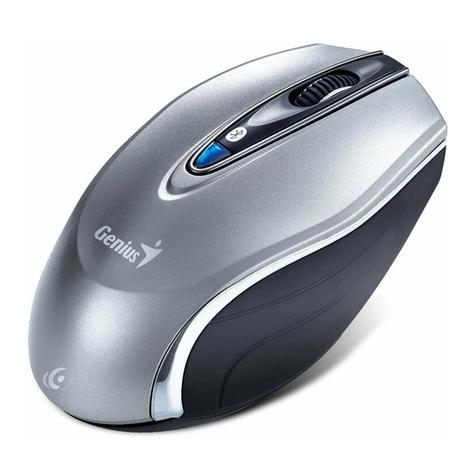
1. NISIS M8Plus PS/2-USB Optical 5 Button Mouse
2. USB to PS/2 adaptor (connected to USB Mouse Plug)
3. Installation diskette or CD
4. Installation Guide (this document)
Minimum System Requirements
IBM compatible PC with PS/2 Mouse port or installed USB port*
Windows 98, 98SE, ME, 2000 or XP operating system*
3½” Floppy disk Drive
CD ROM Drive
If you intend to use the USB interface, it is recommended that you check to ensure that your USB ports have been installed,
before you commence the installation by following these instructions :-
1. Select Start>Settings>Control Panel>System>Device Manager if you have Windows 98 or ME, or
Start>Settings>Control Panel>System>Hardware>Device Manager if you have Windows 2000.
2. In the list of Devices shown in the Device Manager, there should be a line that reads Universal Serial Bus
controllers.
3. Double click on this line. At least two devices should be listed.
4. One line should end with “………….PCI to USB Universal Host Controller” and the other line should read “USB
RootHub”
5. If either or both of these two lines have a yellow explanation mark “!” or a red cross next to them, this indicates
your USB controller has a problem. You MUST correct these problems before you attempt to install the NISIS
M8Plus PS/2-USB Optical 5 Button Mouse on a USB port, otherwise the installation will fail.
Checking for the latest Manuals and Software Drivers
NISIS continuously strives to improve its products and services, so manuals and software drivers are updated frequently. Before
you start the installation of this product, we strongly recommend you visit the NISIS web site athttp://www.nisis.com to see
whether there is a later manual and later drivers for this product.
You will find the latest drivers and manuals under the Drivers & Manuals section on the web site. All new manuals have a
Revision No. so you can compare the Rev. No. of your manual with the latest Revision on the web site.
Similarly, Drivers have Version Numbers so you can check to see whether you already have the latest Drivers Version.
Installation Instructions
IMPORTANT NOTES:
•Please check that your PC meets the minimum system requirements before attempting to install your NISIS Product.
•Please take the time to follow these instructions very carefully. An extra few minutes that it takes to ensure you
follow these instructions precisely and completely, will help ensure the installation of your NISIS product is
successful. If you miss or ignore any of these instructions you may end up with a partial or failed installation, and it
can be very difficult to correct a partial or failed installation.

NISIS M8Plus PS/2-USB Optical 5 Button Mouse Installation Guide Rev 1.5
PortSelection
If your PC has both a PS/2 Mouse socket AND a USB port, it is recommended that you use the PS/2 Mouse port.
Switch off your PC.
Disconnect from your PC any previous mouse.
If you wish to use your PS/2 Mouse port, (recommended), then plug your NISISM8PlusPS/2-USB Optical 5 Button Mouse into
your PS/2 Mouse port.
If you wish to use a USB port, then plug your NISIS M8Plus PS/2-USB Optical 5 Button Mouse into a USB port.
Switch your PC on.
Installing the your NISIS M8Plus PS/2-USB Optical 5 Button Mouse Drivers
If you are running Windows 98, 98SE or 2000, please skip to the section headed Background Tasks
For Windows ME and Windows XP users
Windows ME and Windows XP both have a facility called System Restore, which enables you to go back to a previous state, if
problems occur with your computer. This feature can be very useful, if you experience a problem during the installation of a new
application program or a new hardware device.
Although it very unlikely that you will encounter a problem when installing new devices, it is sensible to make use of this
System Restore facility if you are running Windows ME or Windows XP. You can think of it as you think of car seat belts. You
don’t expect to be involved in a car accident, but just in case, most of us feel more comfortable wearing a seat belt.
It is suggested that before you start the installation of your new NISIS product, you create a System Restore point, which you can
go back to in the unlikely event that you experience a problem during the installation.
To create a System Restore point click on Start>Programs>Accessories>System Tools>System Restore. Select the option
“Create a restore point”, then click “Next”. In the Name box where you can name the particular Restore point, type something
that is meaningful, such as “Before installation of NISIS Mouse”, then click the “Next” button if you have Windows ME, or the
“Create” button if you have Windows XP. At the next screen, click “OK” and you will have created your Restore point.
Now continue with the installation, ensuring you are using the latest Manuals and Device Drivers. If you experience a problem
during the installation, go to the end of this manual and read the section headed “Restoring System Status for Windows ME and
XP users”.
BackgroundTasks
Before installing any Programs or Drivers, you should ensure that all other programs and background tasks are closed. This
applies to whatever Programs or Drivers you are installing and is not specific to NISIS products. To check what background
tasks are running, hold the “Ctrl” and “Alt” keys down on your keyboard while you press the “Delete” key once only.
Windows 98 or ME
If you are running Windows 98, or ME, you should see a list of programs that are running in the background.
Windows 2000 or XP
If you are running Windows 2000 or XP, you should see a Windows Security window. Click on the Task Manager button to see
a list of programs that are running in the background.
Some of these programs or background tasks are necessary for Windows to function correctly, but most others are background
tasks such as mouse drivers, virus checkers and other communication programs, should be shut down, temporarily, while you
install new application programs, drivers or hardware.
If you see "Explorer" listed, leave it displayed. If you see "Systray" listed, leave it displayed. All other tasks can be ended.
You close down a Task by highlighting it, then clicking on the "End Task" button. Some tasks will end immediately, while
others may take some time before you see the screen confirming the task has ended.
Once all the tasks that you have chosen to close down, have ended, you can start the installation of your NISIS product drivers.
When you restart your PC, all tasks that you ended, will start again as usual.
Insert the Installation diskette into your Floppy disk drive. Clicking on the Windows “Start” button, select the “Run…” option,
click on the “Browse…” button, and locate your Floppy disk drive (usually drive “A:”), and select the “Setup.exe” program,
click on the “Open” button, and finally click on the “OK” button.

NISIS M8Plus PS/2-USB Optical 5 Button Mouse Installation Guide Rev 1.5
If Windows shows a Digital Signature Not Found window, then select Yes and continue with the installation. If you see a
message saying “The software you are installing has not passed Windows Logo testing to verify its compatibility with Windows
XP”then select “Continue Anyway” and continue with the installation.
Follow the instructions on the screen.
You have now completed the installation of the NISIS M8Plus PS/2-USB Optical 5 Button Mouse.
Customising your NISIS M8Plus-USB Optical 5 Button Mouse
Open Control Panel by selecting Start>Settings>Control Panel, then double click on the Mouse icon in Control Panel. Then
select the "Programmable Button" tab. The window next to the line that reads "Please assign the desired function to the" should
show "Wheel Button". If you click on the small down arrow next to "Wheel Button", the window should show two further
options :-Side Button 1, and Side Button 2. Select the button you wish to programme. Then select the function you wish for that
particular button. Click on the "Apply" button, followed by the "OK" button. Repeat for the other side button.
Registering you NISIS M8Plus PS/2-USB Optical 5 Button Mouse
Please register your NISIS M8Plus PS/2-USB Optical 5 Button Mouse on-line by visiting the NISIS web site at
http://www.nisis.com. You will be issued with a NISIS Registration Number which you will need to quote to receive free
technical support.
Please visitthe NISIS web site and read the Frequently Asked Questions section covering your NISIS product. There you will
find useful Hints and Tips on how to get the very best out of your new device.
If you have problems with the installation of your NISIS M8Plus PS/2-USB Optical 5 Button Mouse
If you have problems during the installation, please first of all, visit the Support pages on the NISIS web site at
http://www.nisis.com. Please check the Frequently Asked Questions (FAQs) which contain Hints and Tips on how to overcome
some of the more usual problems you may encounter during installation and operation of the product.
If you are still unable to find a solution, then please complete and submit the NISIS Technical Support Questionnaire on the
NISIS web site. You will then be issued a case number automatically. We shall then contact you with our suggestions, as soon as
possible.
IMPORTANT NOTE: We will need you to complete and submit the NISIS Technical Support Questionnaire on the NISIS web
site, to supply our technical staff with enough information about your system set up, to determine the best remedy.
Restoring System Status for Windows ME and XP users
If you are running Windows ME or Windows XP and you experience a problem during the installation, please follow the
suggestions above, first. If you have read the FAQs section, checked that you are using the latest installation guide, and the latest
Device Drivers, checked your computer meets the minimum system requirements and you still have a problem, then you can
restore your computer to the Restore point you created before you started the installation.
To restore your computer to the Restore point you created earlier, click on Start>Programs>Accessories>System Tools>System
Restore. Select the option “Restore my computer to an earlier time” and click “Next”. Select the day that you created your
Restore point and then select the specific restore point that you named earlier, and click “Next”. Follow the instructions on the
screen to complete restoring your computer to the status it was in before you started to install your NISIS product.
Now you will be ready to reinstall the NISIS product ensuring that your follow the instructions in the latest installation guide,
precisely.
Contact details
Web site: http://www.nisis.com
Telephone: 0845 458 8750 at local rates from within the UK or
+44 845 458 8750 from outside the UK
* Please complete and submit the NISIS Technical Support Questionnaire, before calling the NISIS
Technical support department.
Email: [email protected]
Post: NISIS Technology
P.O.Box 155
Tonbridge
Kent
TN9 1WG
UnitedKingdom
For more products and full information visit our web site at:-
www.nisis.com
Table of contents
