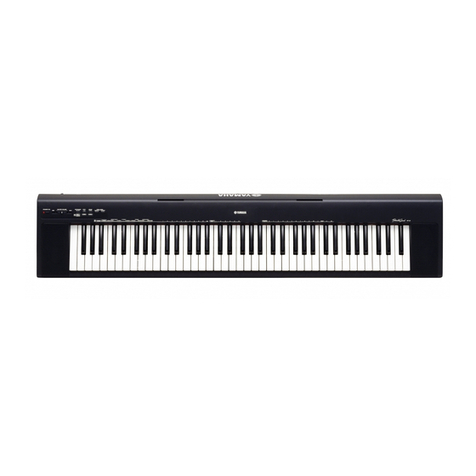
NJS NJS800 User manual

Page 1
NJS800
Electronic Keyboard Kit

Page 2
IMPORTANT
Installer and Users please note:
These instructions should be read carefully and left with the user of the product
for future reference.
PAT TESTING
When used in an office or studio environment, or at any public performance, this
product must be safety-tested yearly by a qualified electrician (PAT Tested) in
order to comply with the Electricity at Work Regulations.
We recommend that it is PAT tested regularly when used in a domestic
environment.
GENERAL SAFETY REQUIREMENTS
Domestic wiring must be tested periodically by a qualified electrician at least
once every 10 years or at every change of occupancy.
For office and retail premises, and buildings such as village halls, the wiring must
be inspected at least once every 5 years.
It is recommended that all building be fitted with smoke alarms (it is mandatory
for new buildings).
PRODUCT SAFETY
This appliance can be used by children aged from 8 years and above
and persons with reduced physical, sensory or mental capabilities or lack of
experience and knowledge if they have been given supervision or instruction
concerning use of the appliance in a safe way and understand the hazards
involved.
Children shall not play with the appliance.
Cleaning and user maintenance shall not be made by children without
supervision.
Do not place the mains lead beneath a carpet or rug.
Do not use the appliance in locations where paint, petrol or other flammable
liquids are used or stored.
Do not use this appliance in the immediate surroundings of a bath, a shower
or a swimming pool.

Page 3
ASSEMBLY
Assemble the keyboard stand as shown below.

Page 4
SETTING UP
Using AC/DC Power Supply Adaptor
Plug the adaptor provided to the mains supply. Plug the output lead from the
adaptor into the socket on the front panel labelled “DC 12V”.
If the adaptor is lost or needs to be replaced for any other reason, use an adaptor
rated at 12 V DC at 350 mA or greater, fitted with a 2.1 mm power plug, with the
centre pole positive, such as P003L.
Installation of Batteries (not included)
Remove the cover of the battery compartment on the underside of the keyboard
and install six D-size batteries, making sure that the correct polarity is observed.
When the batteries are exhausted, the sound may become distorted and the
display unclear. Do not mix new and old batteries, this may cause batteries to
leak.
Connection of an external Amplifier
The keyboard has a built-in loudspeaker system and can also be connected to an
external amplifier. First turn off the keyboard, then connect to the amplifier.
Connect to the sockets labelled “R OUT L” on the back of the keyboard: right
channel to the “R” socket, and left channel to the “L” socket.
If the amplifier is fitted with RCA Phono sockets, use two mono 3.5 mm jack to
Phono plug leads, such as A118.
If the amplifier is fitted with 6.3 mm jacks, then use two mono 3.5 mm jack to
6.3 mm jack leads, such as G035AU.
Headphones (included) and Microphone (not included)
(1) When you are practising or performing, stereo headphones can be used to
monitor the performance. Use 32Ω headphones, fitted with a stereo 3.5 mm jack,
and connect to the socket on the rear panel labelled “HEADPHONES”
(2) A microphone can be connected to the 3.5 mm jack on the rear panel, so that
the built in speaker system can be used to amplifiy the vocals.

Page 5
Identifying the controls.
1. Speaker
2. Power Switch
3. Master Volume
4. Accom Volume
5. Tempo
6. Transpose
7. Sustain
8. Vibrato
9. Record
10. Playback
11. Program
12. Null Play
13. LED Display
14. Keyboard
15. Demo One
16. Demo All
17. One Key
18. Guide
19. Numbers
20. Rhythm
21. Timbre
22. Metronome
23. Chord Off
24. Manual Bass
25. Fingered
26. Single
27. Panel
Percussion
28. Intro/Ending
29. Fill in
30. Sync
31. Start/Stop
32. Auto-chord
Basic Method of Performance
Press the [POWER] button and the digital display shows ”120”, and the system is
in the standby state. To switch it off, press the POWER button again.
Selection of Timbre
The keyboard has 100 built-in sounds (timbres), called "t00" to "t99".
When first turned on, the preset timbre is “t00”,which stands for piano sound.
If the buttons have been used for rhythm control, press the [Timbre] button first.
The desired timbre can be selected by pressing the number buttons. For
example, if the desired timbre is the “32”, press the number “3”first, then the
number”2”,the screen display “t32’, and the timbre is selected.

Page 6
This can also be done by pressing the [+] and [-] buttons repeatedly until the
desired timbre is reached.
Master Volume Adjustment
There are 16 levels of master volume from “00” to “15” and the preset volume is
“10” when first switched on. Press [MASTER VOL +/-] button to increase or
decrease the master volume. If the both two are applied at the same time, the
master volume will turn back to stage "10". The master volume button also
controls the volume of accompaniment.
Demonstration Songs
There are 12 demonstration songs built into the instrument.,
When a demo song starts, its code is shown on the LED display.
(1) To play all the demonstration songs sucessively, press the [Demo All] button;
press the [Demo one] button, playing the present song repeatedly.
(2)When playing demonstration songs, in order to change to another song, press
[Demo All] or [Demo One] button first to make the system stop, then press the
button again, to select the next song.
Percussions
There are 8 types of panel percussion and 61 types of keyboard percussions.
Press panel percussions and the related percussion can be reached. The
performance effect can be enriched if a certain piece of percussion is inserted.
Press [Keyboard Percussion] button, the screen shows [PEr], the keyboard
becomes the percussion keyboard transitorily, and a keystroke corresponds to a
type of percussion; press the button once more, the keyboard percussion is off,
and the keyboard turns normal.
Auto-Rhythm
Rhythm Selection
The system provides 100 kinds of rhythms, from “r00” to “r99”. Before selecting,
press the [RHYTHM] button first, its indicator illuminates, and the scheduled
rhythm “r00”, appears on the screen; then use the button [+] / [-] or the number
buttons on the digital panel to select the desired rhythm. (The selection method is
the same as the timbre selection.)
Rhythm Control
(1) Start Rhythm
There are 3 ways to start the rhythm.
Press [Start/Stop] button to start the rhythm immediately.
Press [SYNC] button, then press any note of the 19 keys on the left part of the
keyboard. The accompaniment rhythm begins when the keys are played.

Page 7
Press [Intro/Ending] button to start the accompaniment immediately from the intro
part. The system first plays a prelude, and then enter auto accompaniment.
(2) Fill in
During the accompaniment, press [Fill in] button, the instrument plays a short
piece of intermezzo automatically and then continues the original
accompaniment
(3) To Stop the Accompaniment
Press [Start/Stop] button to stop the accompaniment.
Press [Intro/Ending] button, then the ending beings. When the ending is finished,
the accompaniment ends simultaneously.
Auto-Metronome
There are 8 types of metronome built into the instrument, from 1/8 beat, 2/8 beat
to 7/8 beat and 8/8 beat. In the normal state, press the [Metronome] button for
the first time, the keyboard plays rhythm at 1/8beat; press the button once to
select 1/8 beat, press again to stop; press a third time to select 2/8 beat, and
again to stop. Repeat the process to select any beat up to 8/8 beat
Tempo Control
The preset tempo is 120 beats/min. but the adjustment range of tempo is from 60
beats/min to 240 beats/min,46 stages in all. The temp can be speeded up or
slowed down using the [Tempo+ ] /[Tempo-] buttons.
Press both buttons together to return the tempo to 120 beats/min.
Accompaniment Volume Setting
The accompaniment volume is preset a t”A13”.There are 16 levels, from ”A00” to
”A15”. Press the [Accom VOL +/-] to increase or decrease the accompaniment
volume. The accompaniment volume is also controlled by the master volume.
Auto-Bass Chord
The instrument has several different chord performances ”single finger Auto Bass
Chord” ,”Fingered Bass Chord” and “Manual Bass”
Single-finger Chord
Press [Single] button with [C-1] appearing on the screen, which means that the
single-finger auto-bass chord is on and 19 note keys on the left part of keyboard
change into chord keys.
Play on the chord keyboard with the Single-finger scales, the single finger chord
can be performed. Press the [CHORD OFF] button to stop the single-finger chord
function.+

Page 8
Single-finger Auto-bass Chord Method
To select Major chords: press the basic voice key.
To select Minor chords: press the basic key and any black key on its left side
synchronously.
To select Major Seventh chords: press the basic key and any white key on its left
side synchronously.
To select Minor seventh chords: press the basic key and one white key, and one
black key on its left side synchronously.
Fingered Chord
Press [FINGER] button with [C-2] appearing on the screen, which means that the
fingered auto-bass chord is on and 19 note keys on the left part of keyboard
change into chord keys. Play on the chord keyboard with fingered chord scales,
the fingered chord can be performed. Press [CHORD OFF] button again to
cancel the function.
The following table is the key of ”C”, in other keys it operates the same way.

Page 9
Manual Bass
Press [Manual Bass] button, the manual bass function is on, the 19 keys on the
left part of the keyboard change into bass keys but still keep the original timbre.
However, the timbre of the other keys can be changed.
Press [Chord Off] button to cancel this function.
EFFECT CONTROL
Transpose
Press “Transpose”[+] / [-] button to process transposing on the keyboard, and the
current data is displayed on LED window. The range of the transposition may be
adjusted from “-12” to “12” semitones.
Press [+] and [-] button at the same time, the keyboard turns normal with the
preset stage “00”.
Sustain Function
Press [Sustain] button with "S-1" appearing on the LED screen, the sustain
function is on, and the sounds of note keys take on a sustain effect. Press the
button again to turn the function off, the screen displays “S-0”.
Vibrato Function
Press the [Vibrato] button with screen displays “ON”, the vibrato function is on,
and the sounds of note keys take on a vibrato effect. Press the button again to
turn the function off , the screen displays “OFF”,
Record
Press [REC] button with the screen display “rEC”, In this state, all the notes that
are played can be recorded. Press [REC] button again to turn off the record
function. Up to 63 notes can be recorded. Press [Playback] button, the screen
displays “PLY“, the instrument plays the melody which was just recorded.
Program
The system in the instrument can be used to make up a piece of percussion
which is able to be an accompaniment to the performance.
Programming
Press [Prog] button, the screen shows “Prg”, any type of panel or keyboard
percussion can be selected to edit a piece of rhythm. Press the button again to
stop recording. Up to 32 selections can be programmed.

Page 10
Null Play
Press [Null Play] button with the screen showing “Ply, the edited rhythm can be
played. Repeatedly. Press the button again or the [Start/Stop] to stop playing.
INTELLIGENT TEACHING FUNCTION
One-key Function
Press [One Key] button, the screen displays the code number of the current,
Demo songs. By pressing any key on the keyboard, the main melody of the song
can be started. After selecting the target demo song by pressing [DEMO] button,
press the button [One Key] to select the relative demo song.
Teaching Function
Press [GUIDE] button, then press any note key, the melody starts. If the keys are
played, the melody will be muted but the accompaniment will continue. If no
notes are played for 5 seconds, the melody will resume.
TECHNICAL SPECIFICATION
Dimensions: 910×325×120 mm
Weight: 5.3 kg
Power supply: 12V DC 350 mA
via adaptor (supplied)
Keys: 61
Built-in sounds: 100
Built-in rhythms: 100
Audio output: 2 × 3.5 mm mono jacks
Headphone output: 3.5 mm stereo jack
Suitable headphones: 32 Ω
Microphone: 3.5 mm mono jack

Page 11
GUARANTEE
New Jersey Sound products are distributed by Electrovision Ltd.,
Electrovision guarantees the product free from defects in materials and
workmanship for a period of twelve months.
Should this appliance be operated under conditions other than those
recommended, at voltages other than the voltage indicated on the
appliance,or any attempts made to service or modify the appliance, then the
warranty will be rendered void.
The product you buy may sometimes differ slightly from illustrations. This
warranty is in addition to, and does not affect, your statutory rights.
Our guarantee is administered by our retailers.
If your product arrives damaged, you must contact the retailer from whom
you bought it. The retailer's contact details will be on the invoice that arrived
with the product, or on the e-mail you received when you placed the order.
Do not contact Electrovision, only your retailer can arrange a replacement.
If your product fails within the guarantee period or If the product needs to be
repaired or replaced, you must contact the retailer from whom you bought it.
The retailer's contact details will be on the invoice that arrived with the
product, or on the e-mail you received when you placed the order.
If you have just received your product and require techical help in using it,
please call our Help Desk on (0845) 459 4816
If you have any other technical queires about the product, please call our
Help Desk on (0845) 459 4816.
Electrovision Ltd,
Lancots Lane,
Sutton,
St. Helens,
Merseyside.
WA9 3EX
Telephone: 01744 745000
Fax: 01744 745001
e-mail: sales@electrovision.co.uk
Web-site: www.electrovision.co.uk

Page 12
IMPORTANT
Installateurs et Utilisateurs, veuillez noter:
Vous devez lire cette notice attentivement et la conserver précieusement pour
une éventuelle future consultation.
AVANT UTILISATION
Vous devez contrôler l'appareil y compris le câble et la prise. Si le produit est
endommagé, NE l'utilisez PAS et contactez immédiatement votre revendeur.
TEST DE CONFORMITE
Si vous utilisez cet appareil sur un lieu de travail, il doit être contrôlé tous les ans
par un électricien qualifié qui vérifiera la conformité aux normes électriques en
vigueur.
Nous vous conseillons de le faire contrôler régulièrement quand vous l'utilisez à
la maison.
EXIGENCES GENERALES DE SECURITE
Le câblage électrique domestique doit être vérifié régulièrement par un
électricien qualifié, au minimum tous les 10 ans ou à chaque changement
d'occupant.
Pour les bureaux, commerces et bâtiments comme la maison du village ou salle
des fêtes, le câblage doit être contrôlé tous les 5 ans.
Il est conseillé d'équiper les bâtiments de détecteurs de fumée (ceci est
obligatoire pour les nouveaux bâtiments).
CONSIGNES DE SECURITE
Cet appareil peut être utilisé par des enfants âgés de 8 ans et plus et par des
personnes dont les capacités physiques, sensorielles ou mentales sont
diminuées ou manquant d'expérience ou de connaissances uniquement sous la
surveillance d'un adulte qui leur aura appris à utiliser l'appareil et leur aura
expliqué les risques encourus.
Les enfants ne doivent pas jouer avec l'appareil.
Ne pas utiliser dans alentours immédiats d'une salle de bains, d'une cabine de
douche ou d'une piscine.
Ne placez pas le cordon d'alimentation sous un tapis ou une carpette.
N'utilisez pas cet appareil dans des endroits où sont stockés ou utilisés de la
peinture, de l'essence ou d'autres liquides inflammables.

Page 13
COMMENT ASSEMBLER LE SUPPORT
1. Trouvez les pièces (C) & (F).
Alignez les trous situés sur la base
(C) avec les trous sur (F). Utilisez les
écrous et boulons (J) pour raccorder les 2
sections. Utilisez les outils adéquats
pour assurer une fixation solide.
Répétez ces actions pour les sections (D) &
(G).
2. Fixez la section (E) avec (C) et (D) en
utilisant les vis appropriées (K). Cela devrait
compléter la « partie basse » du
support.
3. Fixez la section (H) à la section (A) & (B)
en utilisant les quatre (L) vis pour créer la
« partie haute ». La face plate de (H) doit
être tournée vers le haut.
4. Glissez la partie haute dans la
partir & ajustez la hauteur à votre guise,
vérifiez que les ressorts sont bien
enclenchés.
5. Fixez le clavier sur le support en
utilisant les vis (M). La face plate de la
section (E) doit faire face à l’utilisateur.
Les ressorts se verrouillent quand la
hauteur désirée est sélectionnée.

Page 14
PANNEAU DE COMMANDE :
1- Haut-parleur
2- Interrupteur
3- Contrôle du volume
principal
4- Volume de
l’accompagnement
5- Tempo
6- Transposition
7- Soutien
8- Vibrato
9- Enregistrement
10- Lecture
11- Programmation
12- Lecture nulle
13- Affichage à DEL
14- Percussions clavier
15- Démo 1
16- Toutes les démos
17- Monotouche
18- Guide
19- Touches numériques
20- Rythme
21- Timbre
22- Métronome
23- Accords désactivés
24- Basse manuelle
25- Plusieurs doigts
26- Un doigt
27- Percussions panneau
28- Intro/Final
29- Transition
30- Synchronisation
31- Marche/Arrêt
32- Clavier à accords
automatiques
PRÉPARATION AVANT L’UTILISATION
Utilisation de l’adaptateur de courant CA/CC
Si vous utilisez un adaptateur de courant CA/CC, l’appareil doit être raccordé à
un adaptateur spécifique fourni par le fabricant ou à une source d’alimentation de
tension constante (avec une tension de sortie de 12 V et une intensité de sortie
de 350 mA au minimum). Assurez-vous que la borne centrale de la fiche

Page 15
d’alimentation est le pôle positif. Raccordez un côté de l’adaptateur à la prise
d’alimentation de l’appareil et l’autre à la prise du réseau électrique. (Notez que
la tension d’entrée de l’adaptateur doit correspondre à celle fournie par le
secteur.)
Installation des piles (non fournies)
Retirez le couvercle du compartiment à piles situé sur le dessous du synthétiseur
et placez-y, 6 piles 1,5 V (de type R20, D, SUM-1, ou équivalent) en vous
assurant de respecter la polarité, comme indiqué sur le schéma.
REMARQUES : lorsque la tension fournie tombe en dessous d’un certain niveau
parce que les piles sont usées, l’instrument ne peut plus fonctionner
correctement et présente des dysfonctionnements telles qu’un son déformé et un
affichage flou. Veillez à remplacer les piles en temps opportun. Ne mélangez pas
des piles neuves et usagées, ou des piles de types différents. Si vous n’allez pas
utiliser l’instrument pendant une période prolongée, retirez les piles pour éviter
toute fuite d’électrolyte qui risquerait d’endommager l’instrument.
Raccordement d’amplificateurs ou d’équipements acoustiques
L’instrument est équipé d’un système de haut-parleurs intégrés et peut
également être raccordé à d’autres amplificateurs ou à des mégaphones.
Éteignez d’abord l’instrument et l’équipement externe, puis branchez une
extrémité du câble audio stéréo à la prise d’entrée (LINE IN ou AUX IN) des
équipements externes, et l’autre extrémité à la prise SORTIE (OUT L/R) située
sur la face avant de l’instrument.
Casque (fourni) / microphone (non fournis)
(1) Lorsque vous répétez ou lorsque vous jouez de la musique, vous pouvez
brancher le casque stéréo à la prise CASQUE située sur la face avant de
l’instrument afin de ne pas gêner les personnes qui vous entourent. Le haut-
parleur intégré sera alors coupé automatiquement.
(2) Branchez la fiche du microphone dans la prise MICRO du clavier pour pouvoir
chanter tout en jouant.
MÉTHODE D’UTILISATION DE BASE
Appuyez sur l’interrupteur (POWER) : l’affichage numérique indique « 120 » et le
système est en veille. Si vous appuyez de nouveau sur l’interrupteur, le bouton
remonte et l’instrument s’éteint.
Alimentation (POWER)
Marche (ON)
Arrêt (OFF)

Page 16
Sélection des timbres
Vous pouvez choisir librement l’un des 100 types de timbre réservés que
comprend l’appareil, numérotés de « t00 » à « t99 ».
(1) Lorsque vous allumez l’appareil, le timbre prédéfini est « t00 » et correspond
au son du piano. Vous pouvez sélectionner le timbre de votre choix à l’aide des
touches numériques. Par exemple, si vous souhaitez le timbre « 32 », appuyez
d’abord sur le numéro « 3 », puis sur le numéro « 2 », l’écran affiche « t32 » et le
choix est effectué.
(2) Le timbre souhaité peut également être sélectionné en appuyant sur les
touches [+] et [–], lorsque les touches numériques sont activées pour le contrôle
du rythme. Pour cela, appuyez sur la touche [TIMBRE] : toutes les touches
numériques et les touches [+] et [–] permettent alors de sélectionner le timbre.
TIMBRE
RYTHME (RHYTHM)
Réglage du volume principal
Il existe 16 niveaux de volume, numérotés de « 00 » à « 15 » ; le volume
prédéfini est « 10 ». Appuyez sur la touche [VOLUME PRINCIPAL +] (MASTER
VOL +) pour augmenter le volume et sur la touche [VOLUME PRINCIPAL –]
(MASTER VOL –) pour le diminuer. Si vous appuyez simultanément sur les deux
touches, le volume revient au niveau « 10 ». La touche de contrôle du volume
principal règle également le volume de l’accompagnement.
VOLUME PRINCIPAL (MASTER VOL)
VOLUME ACCOMPAGNEMENT (ACCOM VOL)
TEMPO
TRANSPOSITION (TRANSPOSE)
Mélodies de démonstration
L’instrument contient 12 morceaux de démonstration préenregistrés. Lorsqu’une
des mélodies de démonstration commence, l’affichage à DEL indique le code
correspondant.
(1) Appuyez sur la touche [TOUTES LES DÉMOS] (DEMO ALL) pour que le
système joue toutes les mélodies de démonstration successivement, et sur la
touche [DÉMO 1] (DEMO ONE) pour qu’il joue en boucle la mélodie en cours de
lecture.
(2) Pour changer de mélodie en mode [TOUTES LES DÉMOS] (DEMO ALL) ou
[DÉMO 1] (DEMO ONE), appuyez d’abord sur l’une de ces deux touches pour
arrêter le système, puis appuyez une nouvelle fois sur la touche pour que
l’instrument passe à la mélodie suivante.
DÉMO 1 (DEMO ONE)

Page 17
TOUTES LES DÉMOS (DEMO ALL)
MONOTOUCHE (ONE KEY)
GUIDE
12 morceaux de démonstration :
01 Grassland paean
02 Courser gallop defend the frontiers
03 Opéra de Pékin
04 Embroider gold plaque
05 Noisy New Year
06 Marche turque (Turkish march)
07 Enfance (Childhood)
08 Joyeux Noël (Merry Christmas)
09 Vive le vent (Jingle bells)
10 Lettre à Elise (For Elise)
11 Tape dans tes mains (Clap Your Hands)
12 Boîte à musique (Music Box dancer)
Percussions
8 types de percussions peuvent être sélectionnés par le panneau de commande,
et 61 types de percussions par le clavier.
Appuyez sur les touches percussions du panneau de commande pour
sélectionner la percussion associée. L’effet de l’interprétation peut être enrichi
par l’insertion d’un air de percussions.
Lorsque vous appuyez sur la touche [PERCUSSIONS CLAVIER] (KEYBOARD
PERCUSSION), l’écran affiche « PEr » : le clavier devient transitoirement un
clavier de percussions et chaque frappe correspond à un type de percussion ;
appuyez de nouveau sur la touche, le mode percussions clavier est désactivé et
le clavier revient à son mode normal.
SOUTIEN (SUSTAIN)
VIBRATO
ENREGISTREMENT (REC)
LECTURE (PLAY)
PROGRAMMATION (PROG)
LECTURE NULLE (NULL-PLAY)
UN DOIGT (SINGLE)
PLUSIEURS DOIGTS (FINGERED)
BASSE MANUELLE (MANUAL BASS)
ACCORDS DÉSACTIVÉS (CHORD OFF)

Page 18
MÉTRONOME (METRONOME)
PERCUSSIONS CLAVIER (KEYBOARD PERCUSSION)
RYTHME AUTOMATIQUE
Sélection du rythme
Le système propose 100 types de rythme différents, de « r00 » à « r99 ». Pour
en sélectionner un, appuyez sur la touche [RYTHME] (RHYTHM) : le voyant de la
touche s’allume et le rythme programmé « r00 » apparaît à l’écran. Utilisez
ensuite les touches [+] / [–] ou les touches du pavé numérique pour sélectionner
le rythme souhaité. (Le mode de sélection est le même que pour les timbres.)
Contrôle du rythme
(1) Démarrer le rythme
Il existe trois manières de démarrer le rythme.
Appuyez sur la touche [MARCHE/ARRÊT] (START/STOP) pour démarrer
immédiatement le rythme.
Appuyez sur la touche [SYNCHRONISATION] (SYNC), puis sur l’une des
19 touches de la partie gauche du clavier. Le rythme d’accompagnement
commence lorsque vous appuyez sur les touches.
Appuyez sur la touche [INTRO/FINAL] (INTRO/ENDING) pour démarrer
immédiatement l’accompagnement à partir de l’introduction. Le système joue
d’abord un prélude, puis démarre l’accompagnement automatique.
MARCHE/ARRÊT (START/STOP)
SYNCHRONISATION (SYNC)
TRANSITION (FILL IN)
INTRO/FINAL (INTRO/ENDING)
(2) Transition
Pendant l’accompagnement, appuyez sur la touche [TRANSITION] (FILL IN),
l’instrument joue automatiquement un court morceau d’intermezzo, puis reprend
l’accompagnement d’origine.
(3) Arrêt de l’accompagnement
Appuyez sur la touche [MARCHE/ARRÊT] (START/STOP) pour arrêter
l’accompagnement.
Appuyez sur la touche [INTRO/FINAL] (INTRO/ENDING) pour amorcer le final.
Lorsque le final s’achève, l’accompagnement s’arrête en même temps.

Page 19
Métronome automatique
Ce système offre 8 types de métronome, avec une battue à 1/8, 2/8… 7/8, 8/8.
En mode normal, appuyez sur la touche [MÉTRONOME] (METRONOME) une
première fois, le synthétiseur bat la mesure à 1/8. Appuyez sur la touche une
deuxième fois, il s’arrête. Appuyez sur la touche une troisième fois, le
synthétiseur bat la mesure à 2/8. Appuyez sur la touche une quatrième fois, il
s’arrête. En poursuivant ainsi, il est également possible d’obtenir une battue à
3/8, 4/8… 7/8 et 8/8.
SOUTIEN (SUSTAIN)
VIBRATO
ENREGISTREMENT (REC)
LECTURE (PLAY)
PROGRAMMATION (PROG)
LECTURE NULLE (NULL-PLAY)
UN DOIGT (SINGLE)
PLUSIEURS DOIGTS (FINGERED)
BASSE MANUELLE (MANUAL BASS)
ACCORDS DÉSACTIVÉS (CHORD OFF)
MÉTRONOME (METRONOME)
PERCUSSIONS CLAVIER (KEYBOARD PERCUSSION)
Contrôle du tempo
Le tempo prédéfini est de 120 battements/min mais il est possible de le faire
varier de 60 battements/min à 240 battements/min, avec 46 niveaux de réglage
au total. Appuyez sur les touches [TEMPO +] / [TEMPO –] pour accélérer ou
ralentir le tempo du rythme. Appuyez simultanément sur les deux touches, le
tempo revient à 120 battements/min.
VOLUME PRINCIPAL (MASTER VOL)
VOLUME ACCOMPAGNEMENT (ACCOM VOL)
TEMPO
TRANSPOSITION (TRANSPOSE)
Réglage du volume de l’accompagnement
Le volume de l’accompagnement est prédéfini sur « A13 ». 16 niveaux de
réglage sont disponibles, de « A00 » à « A15 ». Appuyez sur la touche [VOLUME
ACCOMPAGNEMENT +] (ACCOM VOL +) pour augmenter le volume de
l’accompagnement et sur la touche [VOLUME ACCOMPAGNEMENT –] (ACCOM
VOL –) pour le diminuer. Le volume de l’accompagnement est également modifié
par le réglage du volume principal.

Page 20
VOLUME PRINCIPAL (MASTER VOL)
VOLUME ACCOMPAGNEMENT (ACCOM VOL)
TEMPO
TRANSPOSITION (TRANSPOSE)
ACCORD DE BASSE AUTOMATIQUE
L’instrument offre plusieurs types d’accords différents : « accords de basse
automatiques à un doigt », « accords de basse à plusieurs doigts », « basse
manuelle ».
Accords à un doigt
Appuyez sur la touche [UN DOIGT] (SINGLE), « C-1 » apparaît alors à l’écran, ce
qui signifie que le mode accords de basse automatiques à un doigt est activé et
que les 19 touches de la partie gauche du clavier sont devenues des touches
d’accords. Jouez sur ce clavier d’accords selon la gamme d’accords indiquée
pour obtenir l’accord à un doigt correspondant. Appuyez sur la touche
[ACCORDS DÉSACTIVÉS] (CHORD OFF), « OFF » s’affiche alors à l’écran et le
mode accords à un doigt s’arrête.
SOUTIEN (SUSTAIN)
VIBRATO
ENREGISTREMENT (REC)
LECTURE (PLAY)
PROGRAMMATION (PROG)
LECTURE NULLE (NULL-PLAY)
UN DOIGT (SINGLE)
PLUSIEURS DOIGTS (FINGERED)
BASSE MANUELLE (MANUAL BASS)
ACCORDS DÉSACTIVÉS (CHORD OFF)
MÉTRONOME (METRONOME)
PERCUSSIONS CLAVIER (KEYBOARD PERCUSSION)
Méthode d’accords de basse automatiques à un doigt :
1- Majeur : appuyez sur la touche de la note de base.
2- Mineur : appuyez simultanément sur la note de base et sur une touche noire
située à sa gauche.
3- Septième : appuyez simultanément sur la note de base et sur une touche
blanche située à sa gauche.
4- Septième mineure : appuyez simultanément sur la note de base et sur une
touche blanche et une touche noire situées à sa gauche.
Table of contents
Languages:
