no!no! 8800 User manual

User Manual Model 8800
English • Español • Francais
LIT-00083 / Rev. A02 / Aug. 2012

Contents
Safety Instructions . . . . . . . . . . . . . . . . . . . . . . . . . . . . . . . . . . . . . . . . . . . . . 3
Meet no!no! . . . . . . . . . . . . . . . . . . . . . . . . . . . . . . . . . . . . . . . . . . . . . . . . . 4
Before you no!no! . . . . . . . . . . . . . . . . . . . . . . . . . . . . . . . . . . . . . . . . . . . . . . 5
Before You Start. . . . . . . . . . . . . . . . . . . . . . . . . . . . . . . . . . . . . . . . . . . . . . . 6
Treatment Summary . . . . . . . . . . . . . . . . . . . . . . . . . . . . . . . . . . . . . . . . . . . . 9
Thermicon™ Tips . . . . . . . . . . . . . . . . . . . . . . . . . . . . . . . . . . . . . . . . . . . . . .10
Treating Facial Hair . . . . . . . . . . . . . . . . . . . . . . . . . . . . . . . . . . . . . . . . . . . . .11
Maintenance. . . . . . . . . . . . . . . . . . . . . . . . . . . . . . . . . . . . . . . . . . . . . . . . .12
Troubleshooting . . . . . . . . . . . . . . . . . . . . . . . . . . . . . . . . . . . . . . . . . . . . . . .12
Technical Specifications . . . . . . . . . . . . . . . . . . . . . . . . . . . . . . . . . . . . . . . . . .13

3
Safety Instructions
WARNINGS – to reduce the risk of burns or
injury
• Do not use this device on the genitals or nipples.
• Do not use this device on the sensitive skin around the
eyes, especially the area under the eyes.
• Do not use this device on sunburned skin, open cuts,
bruises, blisters, moles or on raised areas such as scars.
• If you have any skin condition other than those listed above,
like cold sores, please consult your physician before using
this device.
• Keep out of reach of children.
• Do not use deodorants, lubricants, liquids, creams, gels,
water, and etc. before use.
• Do not allow the thermodynamic wire inside the
Thermicon™ Tip to touch your skin
• Only use this device for its intended purpose as described in
this manual.
CAUTIONS - to reduce the risk of fire, electric
shock, etc.
• Do not reach for a device that has fallen into water while it
is plugged in.
• Unplug the power supply before removing it from the water.
Make sure the device is completely dry before turning it on.
• Do not place or store device near a sink or bathtub.
• This device should never be left unattended when plugged
in.
• Do not use the Thermicon™ Tip if the wire is bent or
damaged in any way.
• Turn off the device while changing the Thermicon™ Tip.
• Do not use the power supply if the cord or plug is damaged
in any way.
• Do not use this device near or rest it on flammable objects
such as paper, cloth, etc.
• Always unplug the power cord from the electrical outlet
after charging before use, cleaning or maintenance.
• Do not place this device near water or other liquids.
• This device should only be used with the supplied power
supply.
• Always turn off the device when you have finished working
with it.
• Do not open the outer casing of the unit. This might harm
the unit and it will void any warranty.

4
Meet no!no! Hair (Model 8800)
Congratulations, you are about to enter the world of painless, professional hair removal. As you do, it’s important to remember that
no!no! is an ongoing hair removal treatment for professional salon-like results at home. This is science, not magic. Results take
time, patience and a strong commitment to the treatment’s unique procedures. And since every body is unique, results will vary. The
average user should notice results in 4-6 weeks, for others it might take a bit longer.
Treatment Level Button
Status Screen
On/Off Button
Power Supply
Connection
Thermicon™ Tip Socket
Blue Guide Light Posts
Roller
Cover
Buffer
no! no! Cleaning Brush
Power Supply
User Manual on CD
Quick Guide
Thermicon™ Tips
Thermodynamic Wire

5
Before you no!no!
Get the best results and performance by learning as much as you can before you no!no!. Below is a brief description about
what to expect, what to look out for and how each of the parts work.
• Track your progress! Before you use no!no! the first time,
study the area you want to treat. You might even want to
take pictures or choose a small area and count the hairs.
Then, once every 2 weeks, check your progress. After 4-6
weeks, you should be able to see initial results.
• Aroma therapy – no!no! burns hair and burnt hair smells.
But that’s how you know its working. Try aromatic candles
or other air fresheners. An after treatment cream or
moisturizer like no!no! Smooth will help mask the smell
even further.
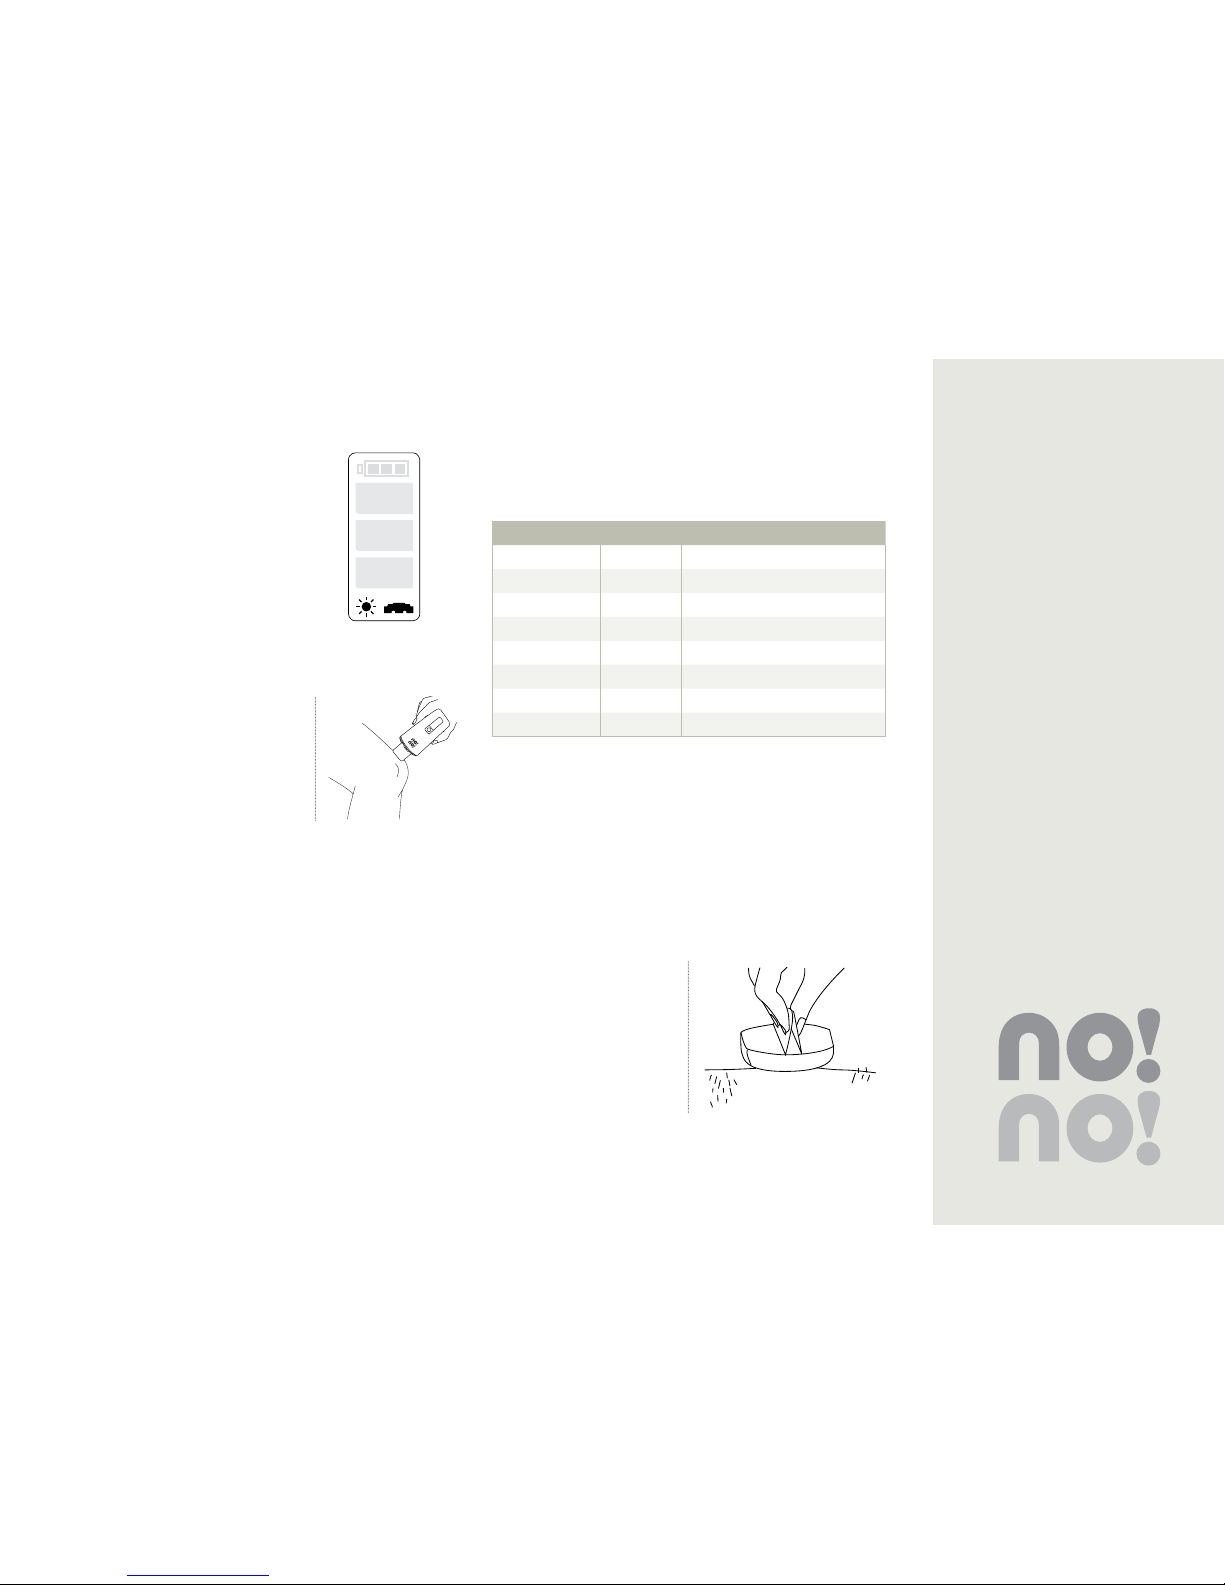
• Test Run – Before you use no!no! the first time, and before
treating new areas, always test no!no! on a small section at
the lowest treatment level.
• That feels weird –Some people experience a mild tingling
sensation when they first use no!no!, especially around
sensitive areas. This sensation will fade away completely
after a few treatments.
• For the sensitive type – If your skin feels uncomfortable
during treatment, reduce the treatment level and/or take
short breaks after repeatedly gliding on any one area.
• Keep it Smooth – When you finish your treatment, apply
a non-alcoholic lotion or cream like no!no! Smooth to
keep your skin moisturized.
• Patience is a virtue – Initial results take 4-6 weeks to
appear.
• The first 4-6 weeks – For best results, use no!no! at
least 2 -3 times a week for the first 4-6 weeks. You don’t
have to wait for a lot of hair to grow back. Just 1mm
of stubble is enough to get the smooth results you are
looking for.
• After the first 4-6 weeks – As you continue to use
no!no!, you may have noticed that your hair isn’t growing
in as fast or as thick. You can reduce the treatments to
once or twice a week or use as need to maintain your
results.
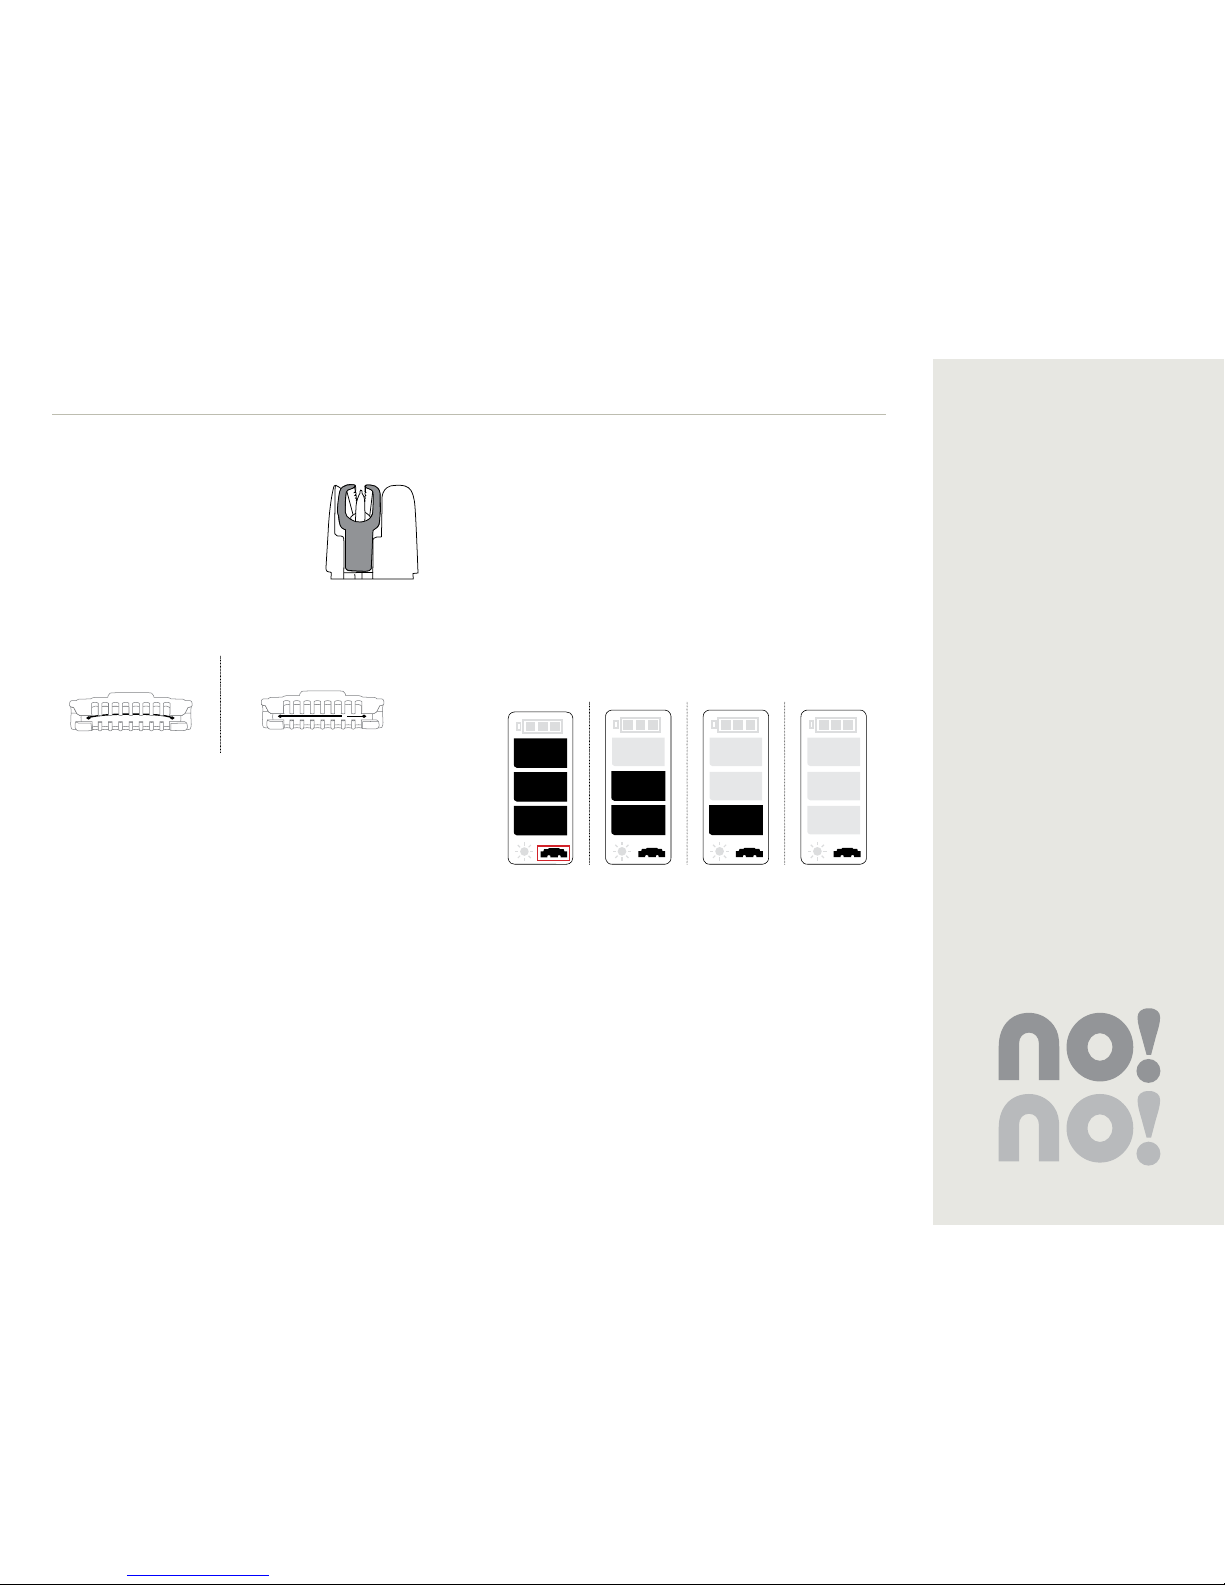
• Check the Thermicon™ Tips – Always make sure the
thermodynamic wire is completely intact before use. If it
is bent or torn, replace it before your next treatment.
• Clean the Thermicon™ Tips – Clean the tips frequently
during treatment with the enclosed cleaning brush,
especially when working on long hair. This will help
prolong the life of your Thermicon™ Tips.
• Stay Safe! Do not use no!no! on sunburned skin, open
cuts, bruises, blisters, large moles or on raised areas
such as scars.
• Stay Smart! Do not use no!no! on the genitals, around
the eye or on and around the nipple area.
• Stay protected! Your no!no! warranty lasts for one year
on parts and service. Keep your receipt.

6
Before You Start
Charging no!no!
Before using it for the first time, charge no!no! at least 5 hours.
• When charging is complete, the full battery icon on the
status screen will flicker until no!no! is removed from
the power supply.
• When recharging is necessary, the empty battery icon
will flicker.
• During charging, the bars will alternately light up, one
after the other.
Battery Status
Full Charge
Partial Charge
Low Charge
Charge Immediately
Table 1: Battery Status
Skin Preparation
Thoroughly clean and dry your skin. Do not use no!no! on
any area where there might be residual gels, oils, lotions,
deodorant, etc.
Assembly
1. Make sure that no!no! is
charged and the power supply
disconnected.
2. Remove the cover before use.
3. Install the Thermicon™ Tip for
your current use.
• Select the right tip.
Wide Tip Narrow Tip
Use the wide tip for
large areas like the
arms, legs and back.
Use the narrow tip for
small, sensitive areas like
the face, nape of the neck,
underarms and bikini line.
• Hold no!no! in one hand and the tip of your choice in the
other. Make sure the no!no! logos are facing the same
direction. Then line up the posts in the socket with the
holes in the Thermicon™ Tip and gently push into place
• Check the Thermicon™ Tip to make sure it is inserted
correctly.
• Make sure the Thermicon™ Tip is pushed all the way into
the socket.
improperly placed properly placed
When treating facial hair, please refer to the section
"Treating Facial Hair".
To remove the Thermicon™ Tip
• Grasp it by both ends.
• Gently pull out.
Posts
Holes

7
4. Turn it On
• Hold the on/off button down for a few seconds until the
status screen appears.
Status Screen
5. Adjust the Treatment Level
• For your comfort, there are 3 different treatment levels.
Treatment Level
Low Medium High
Treatment
Level Icon
• Select the level by pressing
the button under the Status
Screen until the desired
heat level appears. Press
once for Medium, twice
for High, and once more to
return to Low
Treatment
Level Button
• When first using no!no! or when starting to treat a new
area, test no!no! on a small section of skin using the
lowest treatment level.
• If you can, raise the level and work at the highest level
possible while still maintaining comfort for optimal
results.
• If your skin feels hot or uncomfortable at anytime, stop
immediately. Lower the treatment level and try again.
• The default treatment level is low. When you turn it on
again, it will display the last used treatment level. .
Master the Slow Glide
Crucial to the treatment is the Slow Glide. To master this
technique:
1. Hold no!no! at a
90º angle with
the rollers flat
against the skin.
2. Gently glide no!no! over each section
against the grain of hair growth, with
the no!no! logo in the front.
3. Always glide in a slow, steady, smooth, even motion in one
direction. Do not stop in one place.
4. Keep the blue light steady. If it flickers, you may be going
too slow, adjust your speed accordingly
5. Do not press down too hard with the device
6. If you are treating facial hair, please refer to the section
"Treating Facial Hair".
On/Off button
90º

8
Important Note:
Do not be alarmed when the number
of bars changes on the Status Screen.
When you first start to glide, the Status
Screen will automatically switch from
the Treatment Level display (q)to the
Thermicon™Tip display (w)
Check the icon to determine what
information is being displayed
q
w
Rounded areas
To work on more difficult areas, go
slowly and allow no!no! to follow
the natural curve of the body. We
recommend mastering the glide on
arms and legs before moving on to the
knees, elbows, face and bikini line.
NOTE: The bikini line may be extra-sensitive to temperature. If
it becomes uncomfortably warm during treatment, lower the
treatment level or work on a different site for a while.
Do not proceed to the genital area.
Watch the Light
The Blue Guide Light by the Thermicon™ Tip will guide you
throughout your no!no! hair removal experience. It lets you
know when you are working at the right speed and warns
you if the Thermicon™ Tip is torn, damaged or no longer
working. The Blue Guide Light is only visible while you are
gliding the no!no!.
When working at the right speed, the light will remain
steady. If the light flickers, adjust your speed accordingly.
If the light turns red - turn the unit off and then back on.
Now, begin treatment again, making sure you glide in one
smooth, non-stop motion.
Blue Red What it means?
On and steady Off Correct gliding speed
Off On No Thermicon™ Tip in socket
Off On Depleted Thermicon™ Tip
Off On Damaged Thermicon™ Tip
Off On Incorrect Gliding technique
Flickering Off Incorrect gliding speed
Off Off No movement
Flickering Charge no!no!
Table 2: Signal Light
Master the Buffer
You have tried everything but your skin still doesn’t feel
smooth? Did you remember to buff? Without buffing,
crystallized hair remains in place, giving your skin a prickly
feel. These treated hairs will eventually fall out – but why wait?
Buffing exfoliates your skin, removes crystallized hair and
leaves your skin feeling silky smooth.
To Buff:
1. Hold the Buffer by the
flaps.
2. Firmly rub the buffer in
either a circular or back
and forth motion over
the treated area.

9
Treatment Summary
1. Unplug no!no! from the power supply.
2. Remove the cover.
3. Insert the proper size Thermicon™ Tip for the area you are treating.
4. Push the power button on the top of the unit.
5. Set the treatment level.
6. Glide no!no! over your skin at a 90º angle, against the grain of the hair.
7. Buff after completing each section.
8. Apply a moisturizer like no!no! Smooth after treatment cream.

10
Thermicon™ Tips
• To avoid possible malfunction or
harm, make sure to gently push the
Thermicon™ Tip all the way into the
socket.
• WARNING! Always check the wire in the Thermicon™ Tip
before. Never use a Thermicon™ Tip if the wire is bent
,
torn
or damaged in any way.
Bent thermodynamic wire Torn thermodynamic wire
Replace the Thermicon™ Tip:
The Thermicon™ Tip indicator appears as you no!no! and lets
you know the present condition of your Thermicon™ Tip.
Replace the tip…
• When the Thermicon™ Tip icon flickers
• If you notice that it is no longer working efficiently
if the wire
is damaged in any way
Thermicon™ Tip Status
New Slightly Used Used Depleted

11
Treating Facial Hair
Your face is very sensitive. Take a few minutes and read these
important tips for the safest, most effective treatment.
To view videos of facial hair treatments in action, go to
www.howtonono.com.
Always use the narrow tip and start with the lowest treatment
level.
And remember, if there is any discomfort, anywhere – STOP.
Get Comfortable - Practice using the no!no! on your arms or
legs before moving to your face.
TEST
Before you begin, use the instructions below and treat a small,
discreet section of your face to see how your skin reacts to a
no!no! facial hair treatment.
If there is any discomfort – STOP.
Upper Lip and Mustache Area
When treating the mustache area – start under the nose and
work your way outwards – be careful not to touch your lips or
let your skin bunch up into the tip – hold the skin tight and/or
purse your lips inward to create a straight, smooth surface.
DO NOT allow your lips to come in contact with the
Thermicon™ wire.
DO NOT go over one place excessively.
If there is any discomfort – STOP.
Chin & Jaw Line
Working from just below the jaw or chin line, glide your no!no!
up and around the curve.
If you need to, pull skin straight and/or purse your lips inward
to give your chin and jaw a straighter, smoother line.
If there is any discomfort – STOP.
Sideburns
Start at the base of the chin and glide upwards following
the curve of your face. If you need to, pull your skin tight and
straight for a flat, smooth working surface.
If there is any discomfort – STOP.
IMPORTANTNOTE: The area just below the eye and around the eyelid is especially sensitive. DO NOT treat this area.

12
Maintenance
Do not use any liquids of any kind to clean the Thermicon™ Tip
or rollers.
Thermicon™ Tips
It is important to keep the Thermicon™ Tip free of hair debris.
Allowing hair to build up may cause it to burn out prematurely
or malfunction. Check and clean the tip periodically during
each treatment session.
To clean the Thermicon™ Tip:
1. Turn off your no!no!
2. Remove the Thermicon™ Tip.
3. Gently brush clean.
Rollers
Although not necessary to the performance of no!no!, keeping
the rollers clean is all part of proper maintenance and will
help the tips last longer. Use the cleaning brush to remove
excess hair and debris from the rollers.
Brush debris out and away from the socket in order to prevent
any particles from falling into the socket.
If any hair or debris fall into the
socket, this may cause no!no! to not
function properly. Gently blow any
particles out of the socket before
beginning the next treatment
Troubleshooting
If no!no! does not start when you glide it on the skin:
• Press and hold the On/Off button down for a few seconds
again until the Status Screen appears.
• If it’s not turning on make sure the unit is charged.
• Check the Status Screen while gliding. If no bars appear,
replace the Thermicon™ Tip.
• Make sure the Thermicon™ Tip is not bent or torn. Replace it
if necessary.
• If the signal light turns red while you glide no!no! on your skin:
• Check if you are gliding properly.
• Simply restart your no!no!
• Check if you need to replace the Thermicon™ Tip.
If the device is not working properly, contact your point of
purchase for examination or repair. The no!no! warranty is
only valid if no!no! has been used according to the instructions
in this guide. Retain all receipts and original packaging.

13
Technical Specications
Technical Specifications:
• Weight: 104gr
• Physical Dimensions: 120 X 40 X 15mm (4.7 X 1.6 X 0.6 in)
• Mode of Operation: Continuous
Operating Conditions:
• Temperature: 5° C-30° C
• Humidity: 30%-80% RH
• Power Supply/Battery Charger Rating:
Input 100-240VAC/50-60Hz. 0.2AOutput 8.4VDC 0.5A
Transport and Storage
• Temperature: -20° C to 80° C
• Humidity: 05-95% RH
• Atmospheric pressure: 0.1-1.5 atm.
Electrical Safety:
• Power Supply: Class II equipment – double insulation
• This appliance is not suitable for use in the presence of
flammable anesthetic mixture with air or with oxygen or
nitrous oxide.
• The Quality Management System of Radiancy Ltd. complies
with the Quality Management Standard ISO 13485.
• no!no! complies with IEC 60335 and with Low Voltage
Directive (Electric Safety) LVD: 2006/95/EC
• Design and technical specifications are subject to change
without notice.
Manufacturer:
Radiancy Israel Ltd.
5 Hanagar Street
45240 Hod Hasharon
Israel
Israel EC Representative:
Obelis S.A Av.de Tervuren 34 Bte. 44
B-1040 Brussels, BELGIUM
Tel: 32 (0) 2 732 59 54
Fax: 32 (0) 2 732 60 03
GSM: 07545 46 60
Email: [email protected]

Contenido
Instrucciones de Seguridad . . . . . . . . . . . . . . . . . . . . . . . . . . . . . . . . . . . . . . . .15
Conoce tu no!no! . . . . . . . . . . . . . . . . . . . . . . . . . . . . . . . . . . . . . . . . . . . . . .16
Antes de que haces no!no! . . . . . . . . . . . . . . . . . . . . . . . . . . . . . . . . . . . . . . . . .17
Antes de que Empiezas . . . . . . . . . . . . . . . . . . . . . . . . . . . . . . . . . . . . . . . . . . .18
Resumen del Tratamiento . . . . . . . . . . . . . . . . . . . . . . . . . . . . . . . . . . . . . . . . .21
Puntas del ThermiconTM . . . . . . . . . . . . . . . . . . . . . . . . . . . . . . . . . . . . . . . . . 22
Tratar el Vello Facial . . . . . . . . . . . . . . . . . . . . . . . . . . . . . . . . . . . . . . . . . . . 23
Mantenimiento . . . . . . . . . . . . . . . . . . . . . . . . . . . . . . . . . . . . . . . . . . . . . . .24
Localización y Solución de Problemas. . . . . . . . . . . . . . . . . . . . . . . . . . . . . . . . . . .24
Especificaciones Técnicas . . . . . . . . . . . . . . . . . . . . . . . . . . . . . . . . . . . . . . . . .25

15
Instrucciones de Seguridad
ADVERTENCIAS – para reducir el riesgo de
quemaduras o heridas
• No uses este aparato en órganos genitales o pezones.
• No uses este aparato en la piel sensible alrededor de los
ojos, especialmente en el área debajo de los ojos.
• No uses este aparato en piel quemada por el sol, en
heridas abiertos, en moretones, ampollas, lunares o en
áreas elevadas como cicatrices.
• Si tú tienes cualquier condición de piel distinta de las
anteriormente enlistadas, como herpes de la boca, por
favor consulta con tu médico antes de usar este dispositivo.
• Mantenlo lejos del alcance de niños.
• No uses desodorantes, lubricantes, líquidos, cremas, geles,
agua, etc., antes del uso.
• No permitas que el alambre termodinámico que está
dentro de la Punta del ThermiconTM toque tu piel.
• Use este dispositivo solamente para su propósito
intencionado como está descrito en este manual.
PRECAUCIONES – para reducir el riesgo de
fuego, choque eléctrico, etc.
• No trates de agarrar un aparato que cayó al agua
mientras éste está enchufado.
• Desenchufe el cargador antes de sacarlo del agua.
asegurate de que el aparato está completamente seco
antes de encenderlo.
• No coloques o guardes el aparato cerca de un lavabo o
una bañadera.
• Este aparato no debe quedar nunca sin atención cuando
está enchufado.
• No uses la Punta ThermiconTM si el alambre está doblado
o dañado en cualquier forma.
• Apague el aparato cuando cambies la Punta
ThermiconTM.
• No uses el cargador si el cable o el enchufe están
dañados en cualquier forma.
• No uses este aparato cerca de, o no lo dejes sobre
objetos inflamables como papel o tela, etc.
• Siempre desenchufa el cable de alimentación del
enchufe eléctrico inmediatamente después de cargar o
de usar y antes de la limpieza o del mantenimiento.
• No coloques este aparato cerca de agua o de otros
líquidos.
• Este aparato debe ser usado solamente con el cargador
suministrado.
• Siempre apague el aparato cuando has terminado de
trabajar con él.
• No abras la caja exterior del aparato. Esto podría dañar
al aparato y va a anular la garantía.

16
Conoce tu no!no! de Vello (Modelo 8800)
Enhorabuena, estás a punto de entrar en el mundo de la depilación indolora, profesional. Cuando lo haces, es importante recordar
que no! no! es un tratamiento de eliminación de cabello continuo para resultados profesionales como de salón, en casa. Esto es
ciencia, no magia. Los resultados toman tiempo, paciencia y un fuerte compromiso con los procedimientos únicos del tratamiento.
Y ya que cada cuerpo es único, los resultados pueden variar. El usuario promedio deberá notar resultados en 4 - 6 semanas, para
otros, podría tardar un poco más.
Pulidor
Cepillo de Limpieza del no!no!
Cargador
Manual del Usuario en CD
Guía Rápida
Puntas del Thermicon
TM
Alambre Termodinámico
Botón de Nivel de Tratamiento
Pantalla de Estatus
Botón ON/OFF
Conexión al
Cargador
Enchufe de Punta del
Thermicon
TM
Luz de Señal Postes
Rodillo
Cubierta

17
Antes de que uses no!no!
Obtén los mejores resultados y el mejor rendimiento aprendiendo lo más que puedas antes de que empieces a hacer no!no! abajo en
esta figura esta una breve descripción respecto a qué esperar, a qué prestar atención, y cómo funciona cada una de las partes.
• Mantén un registro de tu progreso! Andes de que uses
el no!no! Por primera vez, estudia el área que quieres
tratar. Si tu deseas tomar algunas fotografías o elige un
área pequeña y cuenta los vellos. Entonces, una vez cada 2
semanas, examina tu progreso. Después de 4 - 6 semanas,
tú ya serás capaz de ver los primeros resultados.
• Aroma terapia - no!no! quema el vello, y vello quemado
huele. Pero tú ya sabes que es así como esto funciona.
Prueba velas aromáticas u otros refrescantes de aire. Una
crema para después del tratamiento o un humidificador
como no!no! Smooth ayudará aún más a disimular el olor.
• Prueba - Antes que uses el no!no! por primera vez, y antes
de tratar áreas nuevas, siempre prueba el no!no! en una
pequeña sección al más bajo nivel de tratamiento.
• Eso se siente raro - Algunas personas experimentan una
suave sensación de hormigueo cuando usan el no!no! por
primera vez, especialmente alrededor de áreas sensibles.
Esta sensación se desvanecerá por completo después de
unos pocos tratamientos.
• Para el tipo sensible - Si tu piel se siente incómoda
durante el tratamiento, disminuye el nivel del tratamiento
y / o tómate breves descansos después de deslizar
repetidamente en un área determinada.
• Mantenla suave - Cuando terminas tu tratamiento, aplica
una loción no alcohólica o una crema como no!no! Smooth
para mantener tu piel humedecida.
• Paciencia es una Virtud - Los resultados iniciales demoran
de 4 - 6 semanas hasta que aparecen.
• Las Primeras 4 - 6 semanas - Para los mejores
resultados, usa no!no! por lo menos 2 - 3 veces por semana
durante las primeras 4 - 6 semanas. No tienes que esperar
que mucho vello vuelva a crecer. Con sólo 1 mm de rastrojo
es suficiente para obtener los lisos y suaves resultados que
tú estás buscando.
• Después de las primeras 4 - 6 semanas – mientras que
tú continúas a utilizando el no! no!, tú puedes haber notado
que el cabello no está creciendo tan rápido o tan grueso.
Puedes reducir los tratamientos para una o dos veces a
la semana o usarlos como necesario para mantener los
resultados.
• Inspecciona las Puntas del ThermiconTM - Asegúrate
siempre que el alambre termodinámico este
completamente intacto antes del uso. Si está doblado o
roto, reemplázalo antes de tu próximo tratamiento.
• Limpia las Puntas del ThermiconTM - Limpia las puntas
frecuentemente durante el tratamiento con el cepillo de
limpieza adjunto, especialmente cuando estás trabajando
en vello largo. Esto ayudará a prolongar la vida de tus
Puntas de ThermiconTM.
• Mantente segura! - No uses este aparato en piel tostada
por el sol, en heridas abiertos, en contusiones, ampollas,
lunares o en áreas elevadas como cicatrices.
• Mantente astuta! - No uses el no!no! en los órganos
genitales, alrededor del ojo, o sobre o alrededor del área de
los pezones.
• Mantente protegida! - La garantía de tu no!no! dura un año
para partes y servicios. Guarda tu recibo.

18
Antes de que Empieces
Cargar el no! no!
Antes de usarlo por primera vez, carga tu no!no! por lo
menos durante 5 horas.
• Cuando la carga esté completa, el ícono de batería cargada
parpadeará hasta que se quite el dispositivo del cargador.
• Cuando sea necesario recargarlo, el ícono de batería
descargada parpadeará.
• Durante la carga, las barras se encenderán
alternativamente, una después de la otra.
Estatus de la Batería
Carga Total
Carga Parcial
Carga Baja
Cargar Inmediatamente
Tabla 1 – Estatus de la Batería
Preparación de la Piel
Limpia meticulosamente y seca tu piel. No uses el no!no! en
ningún área donde puedan haber residuos de geles, aceites,
lociones, desodorante, etc
Ensamblaje
1. Asegúrate de que el no!no!
esté cargado y el cargador esté
desconectado.
2. Quita la cubierta.
3. Instala la Punta de TermiconTM
para tu uso actual.
• Selecciona la Punta adecuada
Punta Ancha Punta Angosta
Usa la punta ancha
para áreas grandes
como los hombros, las
piernas, y la espalda.
Usa la punta angosta para
áreas pequeñas y sensibles
como la cara, la nuca, las
axilas y la línea del bikini.
• Ten el no!no! en una mano y la punta que elegiste en
la otra mano. Asegúrate que los logotipos no!no! estén
ambos encarados en la misma dirección. Entonces alinee
los postes en el enchufe con los orificios en la Punta del
ThermiconTM y suavemente empuja uno contra el otro hasta
que lleguen a su lugar
• Comprueba para asegurarte de que la punta esté
apropiadamente ubicada en su lugar.
Mal ubicada Bien ubicada
Al tratar vello facial, por favor ve la Sección de Consejos
Prácticos para Vello Facial
Para quitar la punta del ThermiconTM
• Agárrala por ambos extremos
• Suavemente tira hacia afuera
Postes
Orificios

19
4. Enciéndelo
• Mantén el botón ON /OFF hacia abajo durante algunos
segundos hasta que aparezca la Pantalla de Estatus.
Pantalla del estatus
5. Ajusta el Nivel del Tratamiento
• Para tu comodidad y bienestar, hay tres niveles diferentes
de tratamiento.
Nivel de Tratamiento
Bajo Mediano Alto
Ícono del Nivel de
Tratamiento
• Selecciona el nivel al
presionar el botón debajo
de la Pantalla de Estatus
hasta que aparece el nivel
de calor deseado. Aprieta
una vez para Mediano, dos
veces para Alto, y una vez
más para volver a Bajo.
Botón del Nivel
de Tratamiento
• Al usar el no!no! por primera vez o al empezar a tratar
un área nueva, prueba el no!no! en una pequeña sección
de piel usando el más bajo nivel de tratamiento.
• Si puedes, eleva el nivel y trabaja al nivel más alto
posible mientras que mantienes siempre la comodidad
para obtener óptimos resultados.
• Si tu piel siente calor o molestia en cualquier momento,
interrumpe inmediatamente. Disminuye el nivel de
tratamiento y vuelve a probar.
• El nivel de tratamiento predefinido es el Bajo. Cuando
tú lo enciendes de nuevo, presentará el último nivel de
tratamiento usado.
Domina el Deslizamiento Lento
El deslizamiento lento es crucial para un buen tratamiento.
Para dominar esta técnica:
1. Ten el no!no! a
un ángulo de 90
grados con los
rodillos parejo
contra la piel.
2. Suavemente desliza el no!no! sobre
cada sección a contrapelo del
crecimiento del vello, con el logotipo
del no!no! hacia el frente.
3. Siempre desliza en movimiento lento, continuo, suave, y
parejo en una dirección. No pares en un lugar.
4. Mantén la luz azul estable. Si está parpadeando, es
posible que tú estés avanzando demasiado lentamente,
ajusta tu velocidad como corresponda.
5. No hagas demasiada presión hacia abajo con el aparato.
6. Si estás tratando el vello facial, ve por favor la sección de
consejos prácticos faciales.
Botón ON / OFF
90º

20
Nota Importante:
No te alarmes cuando el número de
barras cambia en la Pantalla de Estatus.
Cuando tú empiezas a deslizar, la Pantalla
de Estatus cambiará automáticamente de
Pantalla de Nivel de Tratamiento (q) a la
Pantalla de Punta del Thermicon
TM
(w).
Consulta el ícono para determinar qué
información te está siendo presentada.
q
w
Áreas Redondeadas
Para trabajar en áreas más
dificultosas, vé lentamente y permite
al no!no! seguir la curva natural del
cuerpo. Recomendamos dominar el
deslizamiento en brazos y piernas
antes de progresar hacia las rodillas,
los codos, la cara y la línea del bikini.
NOTA: La línea del bikini puede ser extremadamente sensible
a la temperatura. Si se vuelve molestamente caliente durante
el tratamiento, baja el nivel del tratamiento o trabaja por un
rato en otra parte. No pases la línea del bikini.
Fíjate en la Luz
La señal de luz en la Punta del Thermicon
TM
te guiará a lo
largo de la experiencia de la depilación del vello. Te permite
saber cuando estás trabajando a la velocidad apropiada y te
advierte si la Punta del Thermicon
TM
está rota, dañada, o ya
no funciona más. La Señal de Luz es visible sólo cuando tú
deslizas el no!no!
Al trabajar a la correcta velocidad, la luz permanecerá
estable. Si la luz parpadea, ajusta tu velocidad como
corresponda. Si la luz se pone roja – apaga la unidad y
luego enciéndela de nuevo. Ahora, empieza nuevamente el
tratamiento, asegurándote que deslizas en un movimiento
suave, sin parar.
Azul Roja Significado
Encendida y
estable Apagada Correcta velocidad de
deslizamiento
Apagada Encendida No hay Punta de ThermiconTM
en el enchufe
Apagada Encendida Punta de ThermiconTM gastada
Apagada Encendida Punta de ThermiconTM dañada
Apagada Encendida Incorrecta técnica de
deslizamiento
Parpadeando Apagada Incorrecta velocidad de
deslizamiento
Apagada Apagada No hay movimiento
Parpadeando Carga el no!no!
Tabla 2: Señal de Luz
Dominar el Pulidor
¿Ya has tratado todo, pero aún no sientes tu piel suave? ¿Te
has acordado de pulir? Sin el pulido, el vello cristalizado
permanece en su lugar, dando a tu piel una sensación erizada.
Esos vellos tratados se caerán al fin y al cabo, pero ¿porqué
esperar? El pulido exfolia tu piel, quita el vello cristalizado y
deja tu piel con una sensación suave como la seda.
Para pulir:
1. Sostén el pulidor por sus
solapas.
2. Frota firmemente
el pulidor ya sea en
movimiento circular o
de adelante hacia atrás
sobre el área tratada.
Other manuals for 8800
1
Table of contents
Languages:
Other no!no! Hair Removal System manuals