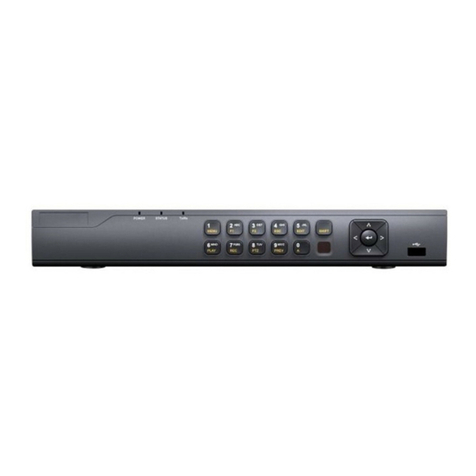
Norden EYENOR User manual

Please read the manual carefully before install and use the camera
Network
Video Recorder
User Manual
www.nordencommunication.com/eyenor
A BRAND

Purpose
This document describes the features, hardware installation, network access, network configuration, routine maintenance,
fault analysis, and troubleshooting of the Network Video Recorder(NVR).
Symbol Conventions
* The symbols that may be found in this document are defined as follows.
DANGER
Important Statement
Users are required to enable and maintain the lawful interception (LI) interfaces of video surveillance products in
strict compliance with relevant laws and regulations. Installation of surveillance devices in an office area by an enterprise or
individual to monitor employee behavior and working efficiency outside the permitted scope of the local law and use of video
surveillance devices for eavesdropping of illegal purposes constitute behaviors of unlawful interception.
Alerts you to a high risk hazard that could, if not avoided, result in
serious injury or death.
Alerts you to a medium or low risk hazard that could, if not avoided,
result in moderate or minor injury.
Alerts you to a potentially hazardous situation that could, if not avoided,
result in equipment damage, data loss, performance deterioration, or
unanticipated results.
NOTE
TIP
Provides additional information to emphasize or supplement important
points in the main text.
Provides a tip that may help you solve a problem or save time.
Network Video Recorder User Manual

Network Video Recorder User Manual
Local Operations.....................................................................................................................................1
1. Before You Begin.................................................................................................................................1
Login................................................................................................................................................1
Local Operations................................................................................................................................1
2. Initial Configuration.............................................................................................................................5
Preparation.......................................................................................................................................5
Wizard..............................................................................................................................................5
3. Live View............................................................................................................................................7
Live View Status ...............................................................................................................................7
Window Toolbar ................................................................................................................................8
Screen Toolbar...................................................................................................................................9
Shortcut Menu ................................................................................................................................10
Sequence Operation.........................................................................................................................11
Zoom..............................................................................................................................................12
Image Configuration........................................................................................................................12
Preview Configuration......................................................................................................................13
4. Channel Configuration ......................................................................................................................14
Channel Management .....................................................................................................................14
OSD Configuration ..........................................................................................................................17
Image Configuration .......................................................................................................................17
Privacy Mask Configuration ..............................................................................................................20
5. PTZ Control ......................................................................................................................................21
PTZ Control Window and PTZ Management Window...........................................................................21
Setting and Calling a Preset .............................................................................................................22
Setting a Preset Patrol .....................................................................................................................23
Setting a Recorded Patrol.................................................................................................................24
6. Recording and Snapshot ...................................................................................................................25
Encoding Settings ...........................................................................................................................25
Scheduled Recording and Snapshot...................................................................................................27
Motion Detection Recording and Snapshot ........................................................................................27
Alarm Triggered Recording and Snapshot .........................................................................................29
Manual Recording and Snapshot ......................................................................................................30
Holiday Recording and Snapshot ......................................................................................................30
Other Recording and Snapshot Types ...............................................................................................31
Disk Management ...........................................................................................................................31
Disk Group .....................................................................................................................................32
Space Allocation .............................................................................................................................32
Advanced Configuration ..................................................................................................................33
7. Playback ...........................................................................................................................................33
Instant Playback..............................................................................................................................33
Preface...................................................................................................................................................1
Playback Toolbar..............................................................................................................................34
Index

Network Video Recorder User Manual
Playback by Camera and Date ..........................................................................................................35
Playback in Corridor Mode ...............................................................................................................35
Playback by Tag ..............................................................................................................................35
Playback by Event ...........................................................................................................................36
Playback by Smart Search ...............................................................................................................36
Playback by External File .................................................................................................................36
Playback by Image ..........................................................................................................................36
File Management ............................................................................................................................37
8. Backup ............................................................................................................................................37
Recording Backup ...........................................................................................................................37
Image Backup ................................................................................................................................38
Alarm Input and Output ..................................................................................................................38
Motion Detection ............................................................................................................................40
Tampering Detection .......................................................................................................................40
Video Loss ......................................................................................................................................41
VCA ...............................................................................................................................................41
9. Alarm ..............................................................................................................................................38
Alert ..............................................................................................................................................44
Buzzer.............................................................................................................................................45
Alarm-Triggered Actions ...................................................................................................................45
Manual Alarm .................................................................................................................................46
Behavior Search ..............................................................................................................................46
Face Search ...................................................................................................................................47
People Counting .............................................................................................................................47
10. VCA Search .....................................................................................................................................46
Basic Configuration..........................................................................................................................48
PPPoE.............................................................................................................................................49
Eyenor Cloud...................................................................................................................................49
DDNS ............................................................................................................................................50
3G/4G ............................................................................................................................................50
11. Network Configuration......................................................................................................................48
Port ...............................................................................................................................................50
Port Mapping ..................................................................................................................................51
Email .............................................................................................................................................52
FTP ................................................................................................................................................53
Creating an Array ...........................................................................................................................54
Rebuilding an Array ........................................................................................................................54
Deleting an Array ...........................................................................................................................54
12. Array Configuration .........................................................................................................................54
Basic Configuration .........................................................................................................................55
Time Configuration .........................................................................................................................55
13. System Configuration.......................................................................................................................55
Index

Serial Port Configuration ..................................................................................................................56
User Configuration .........................................................................................................................56
Security Configuration .....................................................................................................................57
Hot Spare Configuration ..................................................................................................................58
System Information ........................................................................................................................ 59
Network Information .......................................................................................................................60
Log Query ......................................................................................................................................61
Import/Export..................................................................................................................................62
System Restoration .........................................................................................................................62
Automatic Maintenance ...................................................................................................................62
Hard Disk Detection ........................................................................................................................63
Part II Web-Based Operations ...............................................................................................................65
1 Before You Begin ...............................................................................................................................65
2 Login ................................................................................................................................................65
System Upgrade .............................................................................................................................63
3 Live View ..........................................................................................................................................66
4 Playback ...........................................................................................................................................67
5 Configuration ....................................................................................................................................68
Typical Application 2 .......................................................................................................................69
Typical Application 3 .......................................................................................................................69
Appendix A Typical Applications .............................................................................................................68
14. System Maintenance .......................................................................................................................59
15. Shutdown........................................................................................................................................65
Typical Application 1 .......................................................................................................................68
Network Video Recorder User Manual
Index

Preface
This manual describes how to use your NVR locally or on the Web interface.
In this manual, the terms IP camera and IPC refer to the same thing: network camera, which requires a connection to the
network. And the IP device mentioned in this manual refers to an IP camera (also known as network camera) or a Digital Video
Server (DVS).
Network Video Recorder User Manual
www.nordencommunication.com/eyenor 1
Local Operations
An NVR supports two types of operations: local operations and web-based remote operations. With local operations
you connect a monitor and a mouse to the NVR and use the mouse to operate. If your NVR has buttons on the front panel or is
delivered with a remote control, you may also control your NVR by pressing the front panel buttons or using the remote control.
The NVR has an embedded web server and allows web-based operations. To do this, you need a PC that has a network
connection to the NVR and is installed with a web browser. You just need to navigate to the NVR's IP address and log in to the Web
interface like you log in to the system locally.
This section describes local operations.
Before You Begin
Please be aware that the parameters that are grayed out on the system user interface (UI) cannot be modified. The
parameters and values displayed may vary with device model, and the figures in this manual are for illustration purpose only.
Login
Use the default username admin and password admin for your first login.
The default password is intended only for the first login and should be changed to a strong one containing at least eight characters
including uppercase and lowercase letters, digits and symbols after your first login to ensure security.
1. Right-click anywhere in the window and then choose . The login dialog box is displayed. Menu
2. Select the username from the drop-down list, enter your password, and then click Login.
Local Operations
You can refer to Initial Configuration and complete a quick configuration.
Unless otherwise specified, all operations described in this manual are performed with a mouse by the right hand.
See Mouse Operations for details.

Network Video Recorder User Manual
2www.nordencommunication.com/eyenor
Mouse Operations
Table 1-1 Mouse Operations
Name Action
Left button
Click
Double-click
Description
lSelect or confirm an item.
Select to edit digits, symbols,l
upper-case or lower-case letters
in a field.
Enter or exit full screen mode in live view.
Drag Draw or move a rectangle on the screen,
for example, a motion detection area.
Right button Click lShow the shortcut menu.
Exit zoom.l
Exit the current window whenl
Cancel or Exit is displayed.
Wheel Scroll up or down Scroll up or down a list or a window; or
zoom in or out on a playback progress bar.
Front Panel Buttons
The front panel buttons may vary with NVR model.
Table 1-2 Front Panel Buttons 1
Button
Description
Display the main menu.
Switch to the next tab on the screen or switch the input method.
Auxiliary function button.
Exit the current window.
l , , , : Switch windows or menu items; or control
rotation directions of a PTZ camera when the PTZ toolbar
is closed. PTZ stands for pan, tilt, and zoom.
, : Rewind or forward 30 seconds in full screen.l
, : Variable-speed forward or rewind in full screen. l
Confirm an operation, or start/pause the playback.
Press this button to start up or shut down the NVR.
To shut down, press this button and hold for at least 3
seconds till a message appears on your monitor. Click Yes.
Note:
This shutdown operation can be performed only when you
have logged in to the system.

Network Video Recorder User Manual
www.nordencommunication.com/eyenor 3
Table 1-3 Front Panel Buttons 2
Button
Description
Enter 1; or display the main menu.
Enter 2, A, B, or C; or start instant playback.
Enter 3, D, E, or F; or start manual recording.
Enter 6, M, N, or O; or enable or disable arming.
Press this button to start up or shut down the NVR.
To shut down, press this button and hold for at least 3 seconds
till a message appears on your monitor. Click Yes.
Note:
This shutdown operation can be performed only when you
have logged in to the system.
Enter 4, G, H, or I; or enter the PTZ control interface.
Enter 5, J, K, or L; or switch the screen layout in live view
or playback mode.
Enter 7, P, Q, R, or S; or take a snapshot.
Enter 8, T, U, or V.
Enter 9, W, X, Y, or Z.
Enter 0 or a space.
Delete
Switch the input method.
Auxiliary function button.
Exit the current window.
Switch to the next tab.

Network Video Recorder User Manual
4www.nordencommunication.com/eyenor
Button Description
l , , , : Switch windows or menu items; or control
rotation directions of a PTZ camera when the PTZ toolbar
is closed
, : Rewind or forward 30 seconds in full screen.l
, : Variable-speed forward or rewind in full screen.l
: Confirm an operation; or start or pause playback. l
Front Panel Buttons
Table 1-4 Functions of the Buttons on the Remote Control
Button Function
Power
Press this button to start up or shut down the NVR.
To shut down, press this button and hold for at least 3 seconds
till a message appears on your monitor. Click Yes.
Note:
This shutdown operation can be performed only when you
have logged in to the system.
DEV This button is for reserved functions.
lIn live view mode, press this button to show the toolbar for the
currently selected window.
lIn playback mode, press this button to display windows
according to the configured screen layout.
Toolbar
Menu Press this button to display the main menu.
Iris+/Iris-
Focus+/Focus- Adjust the iris, focus and zoom of the PTZ camera in
PTZ control mode.
Zoom+/Zoom-
UP, DOWN, LEFT, RIGHT,
ENTER
lPress UP, DOWN, LEFT and RIGHT to navigate between menu
items or shift focus.
lIn PTZ control mode, press UP, DOWN, LEFT, and RIGHT
buttons to select the corresponding buttons on the screen, and
then press ENTER to activate the selection.
lIn live view mode, press UP to start sequence in full screen.
Pressing UP again starts sequence with three windows on the
screen. Press DOWN to open the playback window.
lPress ENTER to confirm an operation or to display a selected
drop-down list. In playback mode, press ENTER to play or
pause in full screen mode.
lUP and DOWN: Variable speed forward or rewind in full screen.
lLEFT and RIGHT: Rewind or forward 30 seconds in full screen.

Network Video Recorder User Manual
www.nordencommunication.com/eyenor 5
Button Function
Fn
Esc Exit.
lSwitch to the corresponding channel in live view mode.
lInput numbers and characters in edit mode.
Press to navigate to the next window when multiple windows
are displayed.
Alphanumeric buttons
Shift Switch menu items.
Del Remove characters or spaces on the left of the cursor.
2. Initial Configuration
Preparation
lMake sure that at least one monitor is correctly connected to the VGA or HDMI interface on the rear panel of the NVR.
lVerify that the hard disk(s) are correctly installed. For detailed steps to install a hard disk, please refer to the quick guide
shipped with your NVR.
Wizard
The wizard can guide you to complete the most basic setup. The wizard may vary with device model and other factors. The
following shows an example
1. Enable or disable the wizard as needed and then click Next.
lYou may change the setting under System > Basic.
lIf a QR code is displayed, you may scan the code to download an app and use the app to control your NVR.
2. Enter the default admin password and then click admin Next.
The default password is intended only for the first login and should be changed to a strong one containing at least eight characters
including uppercase and lowercase letters, digits and symbols after your first login for account security.

Network Video Recorder User Manual
6www.nordencommunication.com/eyenor
For RAID models, a window appears following this step for RAID configuration.
3 . Complete time information and then click Next.
4. Set the IP address, subnet mask, and default gateway. Use the default settings for other parameters unless
modification is necessary. Review the settings and then click Next.
lIf your NVR has more than one Network Interface Card (NIC), you may configure the NICs and choose one for
default route.
lAn internal IPv4 address can be configured if your NVR has PoE ports or switching ports.

Network Video Recorder User Manual
www.nordencommunication.com/eyenor 7
5. Click . The detected IP devices are listed. Select the device(s) to and then click Add. Click toSearch add OK
complete the setup.
You may also edit wizard settings by clicking Wizard under System > Basic.
3. Live View
Live View Status
The following icons are used to indicate alarms, recording status, and audio status in a live view window.
Icon
Description
Tampering alarm
Motion detection alarm
Recording
Two-way audio
Turn on audio
Normally, live video is displayed, but other situations are also possible.

Network Video Recorder User Manual
8www.nordencommunication.com/eyenor
No. Description
1. The IP device is online, and live video is displayed.
2. The IP device is online, but the NVR has insufficient capacity to decode streams from
the IP device.
3. No permission to view live video from the IP device.
4. The IP device is offline.
5. No IP device is linked to the window.
Window Toolbar
Icon
Description
Available for PTZ cameras only. Click to display the PTZ
control window.
Record live video in the window to the hard disk. Clicking stops recording.
Click to play video recorded during the past 5 minutes and 30 seconds.
Zoom in on an area of interest
Click to edit image settings.
Click to take a snapshot. You may view and back up snapshots under
Backup > Image.

Network Video Recorder User Manual
www.nordencommunication.com/eyenor 9
Icon
Description
Rest your mouse pointer on the icon to view live video information. Or click
it to view the channel number, camera name, IP address, connection status
and recording status.
Two-way audio with the front-end device. Clicking stops two-way audio.
The sound volume is adjustable.
Click to turn on audio. Clicking turns off audio. The sound volume is adjustable.
Click to link the window to another IP device.
Exit
Note: When you turn on audio in the current window, audio of the previous
window is turned off.
Screen Toolbar
Icon
Description
Click to access the main menu.
, , , Select the screen layout.
,
, Start or stop sequence.
Playback.
Previous or next screen.
Rest the mouse pointer on this icon to view encoding
information including frame rate, bit rate, and resolution;
or click to view camera status.
Click to view device alarm status and camera status.
Rest the mouse pointer on it to view NIC card information.
Or click this icon to edit basic network settings.
Rest the mouse pointer on it to view the date. Or click this
icon to edit time settings.
Available only for some models.
Click to display the cloud service window. You may scan the
QR code and download an app to manage your NVR.
Click to automatically hide the toolbar, or click to lock.

Network Video Recorder User Manual
10 www.nordencommunication.com/eyenor
Shortcut Menu
A shortcut menu as shown below appears when you right-click in a window. Some menu items are described in
Shortcut Menu Description.
Table 3-2 Shortcut Menu
Table 3-2 Shortcut Menu
Menu Description
Menu
Access the main menu.
Most of operations described in this manual are performed start
from the main menu; for example, click Camera > Camera
(with Menu > omitted).
Corridor
Choose a corridor mode. Corridor mode can also be set in the Default
Layout drop-down list under System > Preview.
To display images in corridor mode, the camera must be installed correctly
(rotated 90° clockwise or counterclockwise), and then use the Image Rotation
parameter under Camera > Image to rotate images accordingly.
Main/Aux
Monitor Switch live video from different video output.
PTZ Control Display the PTZ control window for the first PTZ camera in live view.
Playback Play the current day's recording for the camera linked to the current window.
Output Mode Choose a video output mode, including standard, soft, bright, and vivid.

Network Video Recorder User Manual
www.nordencommunication.com/eyenor 11
Sequence Operation
The sequence operation requires you to configure the screen layout, windows, linked cameras, and the sequence
interval.
This example describes how to configure sequence for five cameras based on a 4-window screen layout.
1 . Click on the screen toolbar.4 Windows
The number of windows that can be displayed may vary with NVR model.
2. Click on the screen toolbar. Sequence starts by displaying four windows on the first screen andStart Sequence
then the fifth on the second screen at the set interval.
The default sequence interval is eight seconds and can be set under System > Preview.

Network Video Recorder User Manual
12 www.nordencommunication.com/eyenor
Zoom
Zoom in on an area of images in a window for details.
1 . Click the window and then click on the window toolbar.
2. In the small window in the lower right corner, click and drag your mouse to specify the area to zoom in on. The
image in the main window zooms in. The following shows an example.
The system adjusts the area automatically according to the window size and its aspect ratio. Also, the system has
specified a minimum size to ensure zoom effects.
Image Configuration
Adjust image settings to get optimal images from a camera.
1 . Click the window and then click on the window toolbar.
2. Select a mode from the drop-down list according to the surveillance scenario, and then adjust contrast, hue,
saturation and brightness as needed. The settings available may vary with device model.
3. Click OK to save the settings and exit.

Network Video Recorder User Manual
www.nordencommunication.com/eyenor 13
Preview Configuration
Normally, live view (video) is available after you complete the basic setup by following the wizard. You can click System >
Preview and edit preview setting as needed, including video output, image resolution, default layout, and sequence
interval. The video output and the number of windows supported may vary with NVR model.
Preview Configuration
Each preview window (window for short) links to a camera. By default, window 1 links to camera D1, window 2 links to
camera D2, and so on. You may want to change the link to display live video from a camera in another specified window.
The following example describes how to link window 1 to camera D2 and link window 2 to camera D1.
Step 1: Click window 1 on the right, and then click under on the left. Now appears in window 1, and D2 Camera D2 None
appears in window 2. Meanwhile, is cleared for camera D1, meaning D1 is not linked to any window.
Step 2: Click window 2 on the right, and then click under on the left. Now appears in window 2. Click D1 Camera D1 Apply
to save the settings.

Network Video Recorder User Manual
14 www.nordencommunication.com/eyenor
Advanced Configuration
Click the Advanced tab and then select Sub Stream First so the NVR uses the sub stream to establish live video from
multiple cameras simultaneously. This function is disabled by default.
4. Channel Configuration
Channel Management
This chapter describes how to add and manage IP devices in your NVR. The IP devices mentioned in this manual mainly
refer to IP camera (or network camera); sometimes they can also be Digital Video Server (DVS). Before you start, make
sure the IP devices are connected to your NVR via network.
An IP device should be connected to one NVR only. An IP device managed by multiple NVRs may cause unwanted issues.
Adding an IP Device
This section provides multiple options to add an IP device. Some options are only applicable to certain NVR models.
Choose one as appropriate.
Option 1
1 . Click The system automatically searches for IP devices and lists the discovered.Camera > Camera > Camera.

Network Video Recorder User Manual
www.nordencommunication.com/eyenor 15
l under Status means an IP device is added successfully, and you may click to view live video from the IP
device. means the IP device is offline, and you may view the cause by resting the mouse pointer on the .
lThe idle bandwidth is displayed to indicate current bandwidth available for receiving streams. For more details,
see Network Statistics.
2. (Optional) To search a specified network segment, click and then set the address range. Search
3. Click for the IP device to add. Or, you may also
lClick to add all the discovered IP devices allowed (depending on channels supported byOne-click Add
the NVR).
lClick click to select an IP device from the list, modify settings including IP address, port,Custom Add,
username and password if necessary, and then click Add.
For a Digital Video Server (DVS), a window appears when you click Add, and you need to select channels to
add the connected cameras.
Option 2
This option is not applicable to NVRs with PoE ports or switching ports.
1 . Click in a window.
2. Select the desired IP device and then click Add.
Option 3
This option is only applicable to NVRs with PoE ports or switching ports. Connect an IP camera to a PoE port or a
switching port with a network cable. The connected camera will be added to the NVR automatically. Check status
under . means live video from the camera is available. Click to view live video.Camera > Camera > Camera
If the camera is connected via a network switch, click under . In the window displayed, set toEdit Add Mode
and then complete the settings correctly. Manual
appears under Status if the power output from a PoE port is below or above the rated power of the
connected camera.
Table of contents
Popular Network Hardware manuals by other brands
GeoVision
GeoVision GV-Compact DVR V2 user manual

PairGain
PairGain PG-Flex FRC-754 L4 manual

Iron Bow
Iron Bow CLINiC 12 Series user guide
Mobatime
Mobatime NTS IT Quick installation guide
ADTRAN
ADTRAN TOTAL ACCESS 1200 quick start guide

Iomega
Iomega Ix2-200 - StorCenter Network Storage NAS... Release notes
