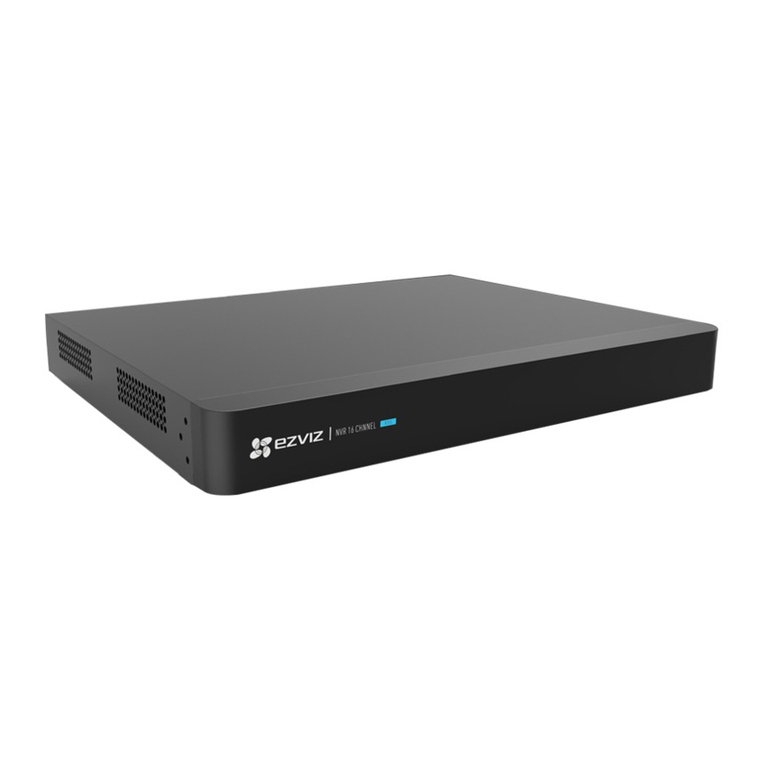
Ezviz X5S-16L2 User manual


COPYRIGHT © Hangzhou EZVIZ Software Co., Ltd.. ALL RIGHTS RESERVED.
Any and all information, including, among others, wordings, pictures, graphs are the properties of Hangzhou EZVIZ Software Co.,
Ltd. (hereinafter referred to as “EZVIZ”). This user manual (hereinafter referred to as “the Manual”) cannot be reproduced, changed,
translated, or distributed, partially or wholly, by any means, without the prior written permission of EZVIZ. Unless otherwise stipulated,
EZVIZ does not make any warranties, guarantees or representations, express or implied, regarding to the Manual.
About this Manual
The Manual includes instructions for using and managing the product. Pictures, charts, images and all other information hereinafter
are for description and explanation only. The information contained in the Manual is subject to change, without notice, due to firmware
updates or other reasons. Please find the latest version in the ™ website (http://www.ezvizlife.com).
Revision Record
New release – January, 2019
Trademarks Acknowledgement
™, ™, and other EZVIZ’s trademarks and logos are the properties of EZVIZ in various jurisdictions. Other trademarks
and logos mentioned below are the properties of their respective owners.
Legal Disclaimer
TO THE MAXIMUM EXTENT PERMITTED BY APPLICABLE LAW, THE PRODUCT DESCRIBED, WITH ITS HARDWARE, SOFTWARE AND
FIRMWARE, IS PROVIDED “AS IS”, WITH ALL FAULTS AND ERRORS, AND EZVIZ MAKES NO WARRANTIES, EXPRESS OR IMPLIED, INCLUDING
WITHOUT LIMITATION, MERCHANTABILITY, SATISFACTORY QUALITY, FITNESS FOR A PARTICULAR PURPOSE, AND NON-INFRINGEMENT
OF THIRD PARTY. IN NO EVENT WILL EZVIZ, ITS DIRECTORS, OFFICERS, EMPLOYEES, OR AGENTS BE LIABLE TO YOU FOR ANY SPECIAL,
CONSEQUENTIAL, INCIDENTAL, OR INDIRECT DAMAGES, INCLUDING, AMONG OTHERS, DAMAGES FOR LOSS OF BUSINESS PROFITS,
BUSINESS INTERRUPTION, OR LOSS OF DATA OR DOCUMENTATION, IN CONNECTION WITH THE USE OF THIS PRODUCT, EVEN IF EZVIZ HAS
BEEN ADVISED OF THE POSSIBILITY OF SUCH DAMAGES.
TO THE MAXIMUM EXTENT PERMITTED BY APPLICABLE LAW, IN NO EVENT SHALL EZVIZ’S TOTAL LIABILITY FOR ALL DAMAGES EXCEED THE
ORIGINAL PURCHASE PRICE OF THE PRODUCT.
EZVIZ DOES NOT UNDERTAKE ANY LIABILITY FOR PERSONAL INJURY OR PROPERTY DAMAGE AS THE RESULT OF PRODUCT INTERRUPTION
OR SERVICE TERMINATION CAUSED BY: A) IMPROPER INSTALLATION OR USAGE OTHER THAN AS REQUESTED; B) THE PROTECTION OF
NATIONAL OR PUBLIC INTERESTS; C) FORCE MAJEURE; D) YOURSELF OR THE THIRD PARTY, INCLUDING WITHOUT LIMITATION, USING ANY
THIRD PARTY’S PRODUCTS, SOFTWARE, APPLICATIONS, AND AMONG OTHERS.
REGARDING TO THE PRODUCT WITH INTERNET ACCESS, THE USE OF PRODUCT SHALL BE WHOLLY AT YOUR OWN RISKS. EZVIZ SHALL
NOT TAKE ANY RESPONSIBILITES FOR ABNORMAL OPERATION, PRIVACY LEAKAGE OR OTHER DAMAGES RESULTING FROM CYBER ATTACK,
HACKER ATTACK, VIRUS INSPECTION, OR OTHER INTERNET SECURITY RISKS; HOWEVER, EZVIZ WILL PROVIDE TIMELY TECHNICAL
SUPPORT IF REQUIRED.
SURVEILLANCE LAWS AND DATA PROTECTION LAWS VARY BY JURISDICTION. PLEASE CHECK ALL RELEVANT LAWS IN YOUR JURISDICTION
BEFORE USING THIS PRODUCT IN ORDER TO ENSURE THAT YOUR USE CONFORMS TO THE APPLICABLE LAW. EZVIZ SHALL NOT BE LIABLE
IN THE EVENT THAT THIS PRODUCT IS USED WITH ILLEGITIMATE PURPOSES.
IN THE EVENT OF ANY CONFLICTS BETWEEN THE ABOVE AND THE APPLICABLE LAW, THE LATTER PREVAILS.
Regulatory Information
FCC Information
This device complies with Part 15 of the FCC Rules. Operation is subject to the following two conditions:
(1) This device may not cause harmful interference, and
(2) This device must accept any interference received, including interference that may cause undesired operation.
Note: This product has been tested and found to comply with the limits for a Class B digital device, pursuant to Part 15 of the FCC
Rules. These limits are designed to provide reasonable protection against harmful interference in a residential installation. This
product generates, uses, and can radiate radio frequency energy and, if not installed and used in accordance with the instructions, may
cause harmful interference to radio communications. However, there is no guarantee that interference will not occur in a particular
installation. If this product does cause harmful interference to radio or television reception, which can be determined by turning the
equipment off and on, the user is encouraged to try to correct the interference by one or more of the following measures:

SAVE THIS MANUAL FOR FUTURE REFERENCE
—Reorient or relocate the receiving antenna.
—Increase the separation between the equipment and receiver.
—Connect the equipment into an outlet on a circuit different from that to which the receiver is connected.
—Consult the dealer or an experienced radio/TV technician for help.
Please take attention that changes or modification not expressly approved by the party responsible for compliance could void the user’s
authority to operate the equipment.
This equipment should be installed and operated with a minimum distance 20cm between the radiator and your body.
This device complies with Industry Canada licence-exempt RSS standard(s). Operation is subject to the following two conditions:
(1) this device may not cause interference, and
(2) this device must accept any interference, including interference that may cause undesired operation of the device.
Under Industry Canada regulations, this radio transmitter may only operate using an antenna of a type and maximum (or lesser)
gain approved for the transmitter by Industry Canada. To reduce potential radio interference to other users, the antenna type and its
gain should be so chosen that the equivalent isotropically radiated power (e.i.r.p.) is not more than that necessary for successful
communication.
EU Conformity Statement
This product and - if applicable - the supplied accessories too are marked with "CE" and comply therefore with the
applicable harmonized European standards listed under the Radio Equipment Directive 2014/53/EU, the EMC Directive
2014/30/EU, the RoHS Directive 2011/65/EU.
2012/19/EU (WEEE directive): Products marked with this symbol cannot be disposed of as unsorted municipal waste
in the European Union. For proper recycling, return this product to your local supplier upon the purchase of equivalent
new equipment, or dispose of it at designated collection points. For more information see: www.recyclethis.info.
2006/66/EC and its amendment 2013/56/EU (battery directive): This product contains a battery that cannot be
disposed of as unsorted municipal waste in the European Union. See the product documentation for specific battery
information. The battery is marked with this symbol, which may include lettering to indicate cadmium (Cd), lead (Pb),
or mercury (Hg). For proper recycling, return the battery to your supplier or to a designated collection point. For more
information see: www.recyclethis.info.
EC DECLARATION OF CONFORMITY
Hereby, Hangzhou EZVIZ Software Co.,Ltd. declares that the radio equipment type [CS-X5S-16L2] is in compliance with Directive
2014/53/EU.
The full text of the EC DECLARATION OF CONFORMITY is available at the following web link:
http://www.ezvizlife.com/declaration-of-conformity.
Safety Instruction
Due to the product shape and dimension, the name and address of the importer/manufacturer are printed on the
package.
Customer Service
For more information, please visit www.ezvizlife.com.
Need help? Please visit “www.ezvizlife.com/inter/page/contact-us” for our local contact details.

1
Basic Information
Box Contents
Device (x1) Power Adapter (x1)
Screw Kit (x1) Mouse (x1) Quick Start Guide (x1)
For models equipped with HDD (Hard Disk Drive), the screw kit is not included.
Product View
Rear Panel Overview
OF F
RESET Hole
VGA Interface
For Monitor
USB Interface
For mouse
Power Input (12 V)
Audio Output
For Louderspeaker (e.g.)
HDMI Interface
For Monitor
Audio Input
For Pickup
Power Button
UPLINK Interface
For Router
Insert and hold a pin for 7s until the
LED indicator flashes in red.
The cables with dotted lines above are not included.

2
Wiring
If you want to install HDD by yourself, refer to Appendix.
1. Connect the uplink interface of device to that of router using network cable.
2. Connect the mouse to the USB interface of device.
For LAN For UPLINK
OFF
3. Connect the device to the Monitor using VGA or HDMI cable.
VGA Cable (Purchase Seperately)
Monitor
OFF
Monitor
HDMI Cable (Purchase Seperately)
OFF
Choose the corresponding signal source of the Monitor according to different connections.

3
Setup
Power on
1. Connect the device with power outlet and turn on the power button.
Power Adaptor
Power Outlet
OFF
Use stable power supply to avoid device exception or even damage.
2. Wait until the Wizard interface appears on the Monitor and set the password (For the first time access).
It is recommended to set new password for better security.
3. Log in the device.
•Admin password is the verification code on the lable of the device.
•If the wizard does not appear, please check the steps above.
(Optional) Shutdown
1. In the operation interface of device (Monitor), go to Shutdown by Menu Shutdown and click it.
2. Click Yes.
3. Turn off the power button to disconnect the power supply.
For device protection, do not turn off or disconnect the power supply while the device is working.

4
Linkage
Link through Monitor
•Make sure that the camera and device are using the same network.
•Power on all devices before you start.
1. Go to Camera Management by Menu Camera.
2. Click Search.
3. Click "+" to add the camera.
The camera will automatically connect to the device.
LED Indicator Status
LED Indicator
LED Indicator Status
Steady Green Working Properly
Steady Red Device Exceptions or Alarm
Flashing Red Restore Factory Defaults

5
Link to EZVIZ APP
You can add your devcie to EZVIZ app for more functions.
1. Download the App in your Phone (Optional).
- Search for "EZVIZ" in the App Store/Google Play™ to download and install the app.
- Launch the App.
- Register an EZVIZ user account.
2. Add the Device.
- Log into the EZVIZ App.
- Click “+” on the upper-right corner to go to QR code scanning interface.
- Scan the QR Code at the bottom to add the device.

6
Appendix
HDD Installation
1. Loosen ten screws No.1 to 10 on the back and both sides of the device to take apart the cover.
OFF
2. Connect the data cable and power cable of device with HDD respectively.
3. Use screws to fixate the HDD.
4. Re-assemble the device with screws (No.1 to No. 10).
4
OFF

7
기본 정보
박스 내용물
장비 (x1) 전원 어댑터 (x1)
나사 세트 (x1) 마우스 (x1) 빠른 시작 가이드 (x1)
HDD(하드 디스크 드라이브)가장착된 모델에는 나사 세트가 포함되어 있지 않습니다.
제품 보기
뒷면 개요
OF F
초기화 구멍
VGA 인터페이스
모니터용
USB 인터페이스
마우스용
전원 입력 (12 V)
오디오 출력
스피커용 (예)
HDMI 인터페이스
모니터용
오디오 입력
픽업용
전원 버튼
업링크
인터페이스
라우터용
핀을 삽입한 후표시등이
빨간색으로 깜빡일 때까지 7
초동안 길게 누릅니다.
위의 점선에 해당하는 케이블은 포함되지 않습니다.

8
배선
HDD를직접 설치하고 싶으시면 부록을참조하십시오.
1. 네트워크 케이블을 사용하여 장비의 업링크 인터페이스를 라우터의
업링크 인터페이스에 연결하십시오.
2. 마우스를 장비의 USB 인터페이스에 연결하십시오.
LAN용 업링크용
OFF
3. VGA 또는 HDMI 케이블을 사용하여 장치를 모니터에 연결하십시오.
VGA 케이블 (별도 판매)
모니터
OFF
모니터
HDMI 케이블 (별도 판매)
OFF
모니터에서 연결 케이블에 해당하는 신호 소스를 선택하십시오.

9
설정
전원 켜기
1. 전원 콘센트에 장치를 연결하고 전원 버튼을 켜십시오.
전원 어댑터
전원 콘센트
OFF
장치가 비정상적으로 되거나 장치에 심한 손상이 가는 것을 방지하려면 안정적인
전원 장치를 사용하십시오.
2. 마법사 인터페이스가 모니터에 나타날 때까지 기다리고 비밀번호(최초
접속용)를설정하십시오.
더나은 보안을 위해 새로운 비밀번호를 설정하길 권장합니다.
3. 장비에 로그인하십시오.
•관리자 비밀번호는 장비의 라벨에 있는 인증 코드입니다.
•마법사가 나타나지 않으면 위의 단계를 확인해 주십시오.
(선택사항) 종료
1. 장비(모니터)의조작 인터페이스에서 Menu (메뉴)Shutdown(종료)의
Shutdown(종료)으로 가서 클릭하십시오.
2. Yes (예)를클릭하십시오 .
3. 전원 버튼을 꺼서 전원 공급 장치의 연결을 해제하십시오.
장비를 보호하기 위해 장비가 작동하는 동안에는 전원을 끄거나 전원 공급 장치의
연결을 해제하지 마십시오.

10
연결
모니터를 통한 연결
•카메라와 장비가 동일한 네트워크를 사용하고 있는지 확인하십시오.
•시작하기 전에 모든 기기의 전원을 켭니다.
1. Menu (메뉴) Camera(카메라)를거쳐Camera Management(카메라 관리)로
이동합니다.
2. Search (검색)을클릭하십시오 .
3. "+"를클릭하여 카메라를 추가하십시오.
카메라는 장비에 자동으로 연결됩니다.
LED 표시기 상태
LED 표시등
LED 표시등 상태
녹색 상시 점등 정상 작동 중
빨간색 점등 장비 비정상 또는 알람
빨간색 깜빡임 공장 기본값으로 복원

11
EZVIZ 앱에 연결하기
더많은 기능을 사용하기 위해 장비를 EZVIZ 앱에 추가할 수있습니다.
1. 스마트폰에서 앱을 다운로드하십시오(선택사항).
- 앱을 다운로드하고 설치하려면 앱스토어/구글 플레이 TM에서 “EZVIZ”를
검색하십시오.
- 앱을 실행합니다.
- EZVIZ 사용자 계정을 등록하십시오.
2. 장비를 추가하십시오.
- EZVIZ 앱에 로그인합니다.
- 오른쪽 상단 구석의 “+”를 클릭하여 QR 코드를 스캔하는 인터페이스로
가십시오.
- 장비를 추가하려면 바닥에 있는 QR 코드를 스캔하십시오.
이기기는 가정용으로 전자파적합등록을 한기기로서 주거지역은 물론
모든 지역에서 사용할 수있습니다. 위와 같은 무선설비는 전파혼선의
가능성이 있으므로 인명안전과 관련된 서비스는 할수없습니다.

12
부록
HDD 설치
1. 장비의 뒷면과 양쪽 옆면에서 1번부터 10번까지 10개의 나사를 풀어 커버를
분리하십시오.
OFF
2. 장비의 데이터 케이블과 전원 케이블을 HDD에각각 연결하십시오.
3. 나사를 사용하여 HDD를고정하십시오.
4. 나사(1번~10번)로장비를 다시 조립하십시오.
4
OFF

13
Thông n cơ bản
Linh kiện trong hộp đựng
Thiết bị (x1) Bộ chuyển đổi điện (x1)
Bộ vít nở (x1) Chuột (x1) Hướng dẫn sử dụng nhanh (x1)
Đối với các mẫu máy được trang bị HDD (Ổ Đĩa Cứng), sẽ không bán kèm bộ vít nở này.
Xem Sản phẩm
Khái quát bảng điều khiển phía sau
OF F
Lỗ RESET (ĐẶT LẠI)
Cổng VGA
Cho Màn hình
Cổng USB
Cho chuột
Nguồn vào (12V)
Đầu ra âm thanh
Cho Loa (ví dụ)
Cổng HDMI
Cho Màn
hình
Đầu vào âm thanh
Cho Bộ thu chuyển
Nút Nguồn
Giao diện
UPLINK
Cho Bộ định
tuyến
Chèn và giữ ghim khoảng
7 giây cho đến khi chỉ báo
LED nháy đỏ.
Các dây cáp được minh họa bằng đường vạch đứt trong hình trên sẽ không được cấp kèm.

14
Đi dây
Nếu bạn muốn tự cài đặt HDD, hãy tham khảo Phụ lục.
1. Kết nối giao diện uplink của thiết bị với bộ định tuyến của thiết bị bằng cáp
mạng.
2. Kết nối chuột với giao diện USB của thiết bị.
Cho LAN Cho UPLINK
OFF
3. Kết nối thiết bị với Màn hình bằng cáp VGA hoặc cáp HDMI.
Cáp VGA (Mua riêng)
Màn hình
OFF
Màn hình
Cáp HDMI (Mua riêng)
OFF
Chọn nguồn n hiệu tương ứng của Màn hình theo các kết nối khác nhau.

15
Đặt
Bật nguồn
1. Kết nối thiết bị với ổ cắm nguồn và bật nút nguồn.
Bộ chuyển
đổi điện
Ổ cắm điện
OFF
Sử dụng nguồn điện ổn định để tránh thiết bị ngoại lệ hoặc thậm chí hỏng hóc.
2. Đợi cho đến khi giao diện Trình hướng dẫn xuất hiện trên Màn hình và đặt
mật khẩu (Dành cho lần truy cập đầu ên).
Khuyến nghị đặt mật khẩu mới nhằm tăng cường bảo mật tốt hơn.
3. Đăng nhập vào thiết bị.
•Mật khẩu quản trị viên là mã xác thực trên nhãn của thiết bị.
•Nếu Trình hướng dẫn cài đặt không xuất hiện, hãy kiểm tra các bước trên.
Tắt (tùy chọn)
1. Trong giao diện vận hành của thiết bị (Màn hình), truy cập vào mục
Shutdown(Tắt) bằng Menu Shutdown (Tắt) và nhấp vào đó.
2. Nhấp vào Yes (Có).
3. Tắt nút nguồn để ngắt kết nối nguồn điện.
Để bảo vệ thiết bị, không tắt hoặc ngắt kết nối nguồn điện khi thiết bị đang hoạt
động.

16
Kết nối
Kết nối qua Màn hình
• Hãy chắc chắn rằng camera và thiết bị đang dùng chung một mạng.
• Bật tất cả các thiết bị trước khi bắt đầu.
1. Truy cập phần Camera Management (Quản lý Camera) trong Menu
Camera.
2. Nhấp nút Search (Tìm kiếm).
3. Nhấp "+" để thêm camera.
Camera sẽ tự động kết nối với thiết bị.
Trạng thái Đèn báo LED
Đèn LED
Đèn LED Trạng thái
Xanh lá ổn định Hoạt động bình thường
Màu đỏ ổn định Thiết bị ngoại lệ hoặc Báo động
Nháy đỏ Khôi phục các giá trị mặc định tại nhà máy
Other manuals for X5S-16L2
1
Table of contents
Other Ezviz Network Hardware manuals
Popular Network Hardware manuals by other brands

Patton electronics
Patton electronics SmartNode 4400 Getting started guide

Quantum
Quantum LightSpeed Appliance QLS250 owner's manual

Motorola
Motorola DSR-4410MD Operator's guide

LTS
LTS VSN8208-P8 quick guide

Clearfield
Clearfield CraftSmart FiberFirst instruction manual

Rosenberg
Rosenberg Taurus B2 installation guide

Siemens
Siemens WTT662 Series Operating and installation instructions

Digiever
Digiever DS-16300-RM Pro+ Series Quick installation guide

AMX
AMX Mio Modero DMS quick start guide

Oracle
Oracle Oracle Video Server Getting started guide

Evolveo
Evolveo PCIe Gigabit Ethernet Card 10/100/1000 Mbps manual

Cisco
Cisco SCE8000 GBE quick start guide