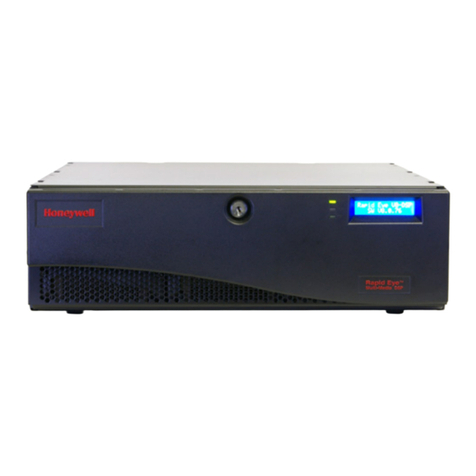
Nortek Control LINEAR LNVR1-08P User manual

Quick Installation Guide
LNVR1-08P / LNVR1-16P
SATA2
SATA1
J3
SATA Data x2
SATA Power x1
SATA power SATA data
4
3
Warning Before Installation Avertissement avant installation Advertencia antes de la instalación
Power off the Network Video Recorder if you detect
abnormal smell or smoke coming from it.
Éteignez rapidement le magnétoscope de réseau s’il
dégage de la fumée ou une odeur inhabituelle.
Apague el Grabador de Vídeo de Red si aparece
humo o algún olor no habitual.
Keep the Network Video Recorder away from water. If
the Video Recorder is wet, power off immediately.
Tenez le magnétoscope de réseau éloigné de l’eau. Si
le magnétoscope de réseau est mouillé, éteignez le
immédiatement.
Mantenga el Grabador de Vídeo de Red alejado
del agua. Si el Grabador de Vídeo de Red se moja,
apáguelo inmediatamente.
Do not place the Network Video Recorder in high
humidity environments. Ne placez pas le magnétoscope de réseau dans un
environnement très humide. No coloque el Grabador de Vídeo de Red en entornos
con mucha humedad.
Do not place the Network Video Recorder around
the heat sources, such as television or oven. Ne placez pas le magnétoscope de réseau à
proximité d’une sources de chaleur, comme un
téléviseur ou un four.
No coloque el Grabador de Vídeo de Red junto a
fuentes de calor, como por ejemplo televisores u
hornos.
Do not drop the Network Camera.
Tenez le magnétoscope de réseau éloigné de la
lumière directe du soleil.
Mantenga el Grabador de Vídeo de Red alejado de
la luz directa del so
PLEASE NOTE: VIVOTEK does not provide warranty or technical support for third party application software that
users additionally install and run on the NR9681.
No intente quitar o desinstalar el software en la
memoria ash montada.
Do not attempt to remove or uninstall the software on
the mounted ash memory. Ne tentez pas de retirer ou de désinstaller le logiciel
sur la mémoire ash montée.
5
Package Contents / Vérier le contenu de l’emballage / Compruebe el contenido del embalaje
NVR Rack Ears AC Power Cord
x 8
HDD Mounting
Screws
Rubber Feet Quick Install
Guide
MouseSATA HDD Cable
6
x6
Reinstall the mounting the cover and the six (6) cover screws.
PRINTER’S INSTRUCTIONS:
INSTR, QUICK START GUIDE, LNVR1-08P/16P, LINEAR - P/N: 10030185 Rev-B - INK: BLACK, CMYK - MATERIAL: 70 LB WHITE - SIZE: 390mm X 549mm - TOL ± .040” - SCALE: 1-1 - FOLD TO 195 x 274.5 mm
1 2
Apply the rubber feet if NVR will sit on desk or shelf. Not
required for rack mounting.
If adding a second HDD, insert four supplied screws into the HDD (leaving them loose).
Position the HDD screws through the large end of the slotted mounting holes on the bottom of the NVR chassis, slide it over,
then tighten the mounting screws.
Attach the SATA Power and Data cables to HDD.
The NVR can support two Hard Disk Drives. It comes
equipped with one HDD to add another HDD follow the
below instructions.
Remove the six (6) screws that attach the top cover and
slide the cover back to remove.
If adding a second HDD, attach the SATA Data cable to
the SATA2 connector on the NVR mother board.

Camera 01 Camera 02 Camera 03
Camera 04 Camera 06
Camera 05
Camera 07 Camera 08 Camera 09
AC100~240V
50/60Hz
LAN
USB 3.0
LAN/WAN
#1 ~ 8 or 16
PoE
VGA
HDMI
DIGITAL I/O
10
11
12
Please do not connect the NVR's PoE ports to non-PD* devices (such as an Ethernet switch LAN port). The Ethernet control circuits may not be compatible.
*PD = A Powered Device designed to receive power source from a PoE connection such as network cameras.
Secure the chassis to rack posts using two screws on
each side.
The front side USB port supports a wired keyboard,
mouse or a USB jump drive.
98
NVR ports and connections.
Congure using the onboard software.
Copyright © 2022 Nortek Security & Control LLC 10030185 Rev-B
Limited Warranty
This Nortek Security & Control LLC product is warranted against defects in
material and workmanship for twenty-four (24) months. This warranty extends only
to wholesale customers who buy direct from Nortek or through Nortek’s normal
distribution channels. Nortek Security & Control LLC does not warrant this product to
consumers. Consumers should inquire from their selling dealer as to the nature of the
dealer’s warranty, if any.
There are no obligations or liabilities on the part of Nortek Security & Control LLC for
consequential damages arising out of or in connection with use or performance of this
product or other indirect damages with respect to loss of property, revenue, or prot,
or cost of removal, installation, or reinstallation.
All implied warranties, including implied warranties for merchantability and implied
warranties for tness, are valid only until the warranty expires. This Nortek Security &
Control LLC Warranty is in lieu of all other warranties express or implied.
All products returned for warranty service require a Return Authorization Number
(RA#). Contact Nortek Security & Control Returns at 1-855-546-3351 for an RA# and
other important details.
The NVR comes with a default IP Address of 192.168.0.240.
For initial conguration please follow the below instructions:
1. There are two ways to congure the NVR, with a direct
Keyboard, Monitor & Mouse connected to the NVR or
using a browser to connect to the NVR over a network.
For conguration over the network open browser to the
default IP Address of 192.168.0.240
2. At initial boot up you will be prompted to create an
Admin password. Once created login to NVR.
3. Login and follow the screen prompts to set, Language,
Time Zone, Date and Time. Click "Continue".
4. The system will automatically search and display
cameras found on the network. The system will request
user name and password for each camera found. Click
"Continue".
5. Click on "Setup Gear" to go to setup screen.
6. On setup menu select Globe icon to set IP Address,
Subnet, Gateway and DNS appropriate for your network.
7. Navigate the other menu selections for additional setting.
8. Download User Manual from linear-solutions.com/
product-manuals/
Secure the Rack Ears to the sides of the chassis by
driving three (3) included screws.
©2022 Nortek Security & Control LLC. All rights reserved.
Linear is a registered trademark of Nortek Security & Control LLC.
USA & Canada Toll Free: 800-421-1587
or dial 760-438-7000 | www.linear-solutions.com
This manual suits for next models
1
