Nostalgia Electrics RTOV220AQ User manual

All products are trademarks of Nostalgia Products LLC.
Worldwide design & utility patented or patents pending.
© 2018 Nostalgia Products LLC.
www.nostalgiaproducts.com
(rev. 02/12/18 DL)

RTOV220AQ
Retro Toaster Oven
Four-Grilloir Retro
Horno tostador de Retro
Instruction Manual
Manuel d'instruction
Manual de instrucciones


ENGLISH
2
Make every day a party!
Visit www.nostalgiaproducts.com for more fun products.
CONTENTS
SAFETY . . . . . . . . . . . . . . . . . . . . . . . . . . . . . . . . . . . . . . . . . 3
IMPORTANT PRECAUTIONS . . . . . . . . . . . . . . . . . . . . . . . . . . . . . 3
IMPORTANT SAFEGUARDS . . . . . . . . . . . . . . . . . . . . . . . . . . . . . 3
INTRODUCTION . . . . . . . . . . . . . . . . . . . . . . . . . . . . . . . . . . . . 4
PARTS & ASSEMBLY . . . . . . . . . . . . . . . . . . . . . . . . . . . . . . . . . . 5
HOW TO OPERATE . . . . . . . . . . . . . . . . . . . . . . . . . . . . . . . . . . 6
HELPFUL TIPS . . . . . . . . . . . . . . . . . . . . . . . . . . . . . . . . . . . . . 8
CLEANING & MAINTENANCE . . . . . . . . . . . . . . . . . . . . . . . . . . . . 8
RECIPES . . . . . . . . . . . . . . . . . . . . . . . . . . . . . . . . . . . . . . . . . 9
RETURNS & WARRANTY . . . . . . . . . . . . . . . . . . . . . . . . . . . . . . . 13
SAFETY
Appliance Specications:
120 Volts, 60 Hertz
1500 Watts
THIS PRODUCT IS FOR USE IN 120V AC OUTLET ONLY.
Refer to www.nostalgiaproducts.com/user-manuals/ for the most updated manual.
Your safety and the safety of others are very important.
We have provided many important safety messages in this manual and
on your appliance. Always read and obey all safety messages.
This is the safety alert symbol.
This symbol alerts you to potential hazards that can
cause serious injury to you and others.
All safety messages will follow the safety alert symbol.
All safety messages will tell you what the potential hazard is, tell you how to reduce the
chance of injury, and tell you what can happen if the instructions are not followed.

ENGLISH
3
IMPORTANT PRECAUTIONS
1. NEVER immerse appliance in water.
2. NEVER use near water.
3. NEVER use an abrasive sponge or cloth on the appliance.
4. NEVER leave appliance unattended while in use.
5. NEVER place anything other than what is being cooked in or on the appliance.
6. Unplug unit from outlet when not in use and during cleaning.
7. DO NOT operate this appliance with a damaged cord or
plug, nor if the appliance ever malfunctions.
8. DO NOT place appliance in a dishwasher.
9. Keep out of reach of children.
10. This appliance is NOT A TOY.
11. Unsupervised young children and cognitively challenged
individuals should never operate this appliance.
12. Young children should be supervised while in proximity of the
appliance to ensure that they do not play with it.
IMPORTANT SAFEGUARDS
Basic safety precautions should always be followed when using
electrical appliances, including the following:
1. Read all instructions before operating this appliance.
2. To protect against electrical shock do not immerse cord, plug or
any part of this appliance in water or other liquids.
3. Close supervision is necessary when any appliance is used near children.
4. Unplug from outlet when not in use, before removing parts and before cleaning.
5. DO NOT operate any appliance with a damaged cord or plug, nor if
the appliance has been damaged in any manner. Return the appliance
to the nearest repair shop for examination or repair.
6. The manufacturer does not recommend the use of accessory
attachments. Use of accessory attachments may cause injuries.
7. DO NOT use outdoors.
8. DO NOT place on or near a hot gas or electric burner, nor in a heated oven.
9. DO NOT use the appliance for other than its intended use.
10. An appliance that is plugged into an outlet should not be left unattended while in operation.
11. Check appliance for presence of foreign objects prior to use.
12. DO NOT attempt to stick any utensils or other objects into
the toaster while appliance is plugged in.
13. A short power supply cord is provided to reduce the risk resulting

ENGLISH
4
from becoming entangled or tripping over a long cord.
14. Longer detachable power supply cords can be used if care is exercised in their use.
15. The marked electrical rating of an extension cord should be at
least as great as the electrical rating of the appliance.
16. This appliance has a polarized plug (one blade is wider than the other). To reduce the
risk of electrical shock, this plug is intended to t into a polarized outlet only one way.
SAVE THESE INSTRUCTIONS!
INTRODUCTION
Thank you for purchasing the RETRO TOASTER OVEN from Nostalgia™! Now
you can bake, toast, convection bake or broil a quick and energy ecient
meal. Make everything from quick snacks to pizzas to toast and more. Check
out the RECIPES section for tons of fun breakfast, lunch and dinner recipes!
Features Include:
• 1500 Watts
• 22 L capacity holds two 12" pizzas or 12 slices of toast
• Bake / Toast / Convection Bake / Broil functions
• Four stage heating selector: upper heating / lower
heating / upper & lower heating / OFF
• Adjustable temperature between 200°F - 450°F
• Aluminum baking pan, two nickel-plated racks & crumb tray
• Power light indicator

ENGLISH
5
PARTS & ASSEMBLY
PARTS
Your RETRO TOASTER OVEN is fully assembled.
Control Panel
Function Selector:
Bake - Both the upper and lower heating elements will heat.
Pizza/Toast - Both upper and lower heating elements will heat.
Convection Bake - Both upper and lower heating elements
will heat and hot air will circulate throughout the oven.
Broil - Only the upper heating element will heat.
Timer:
Adjustable timer from
0 - 60 minutes
Temperature Gauge:
Adjustable temperature from
200°F - 450°F (95°C - 230°C)
Crumb Tray
Wire Racks
Handle
Timer
Function Selector
Temperature Gauge
Baking Pan

ENGLISH
6
HOW TO OPERATE
Before you begin, wipe the outer housing and inner cavity wall with a damp
cloth. Clean the Wire Racks, Crumb Tray and Baking Pan in hot, sudsy water.
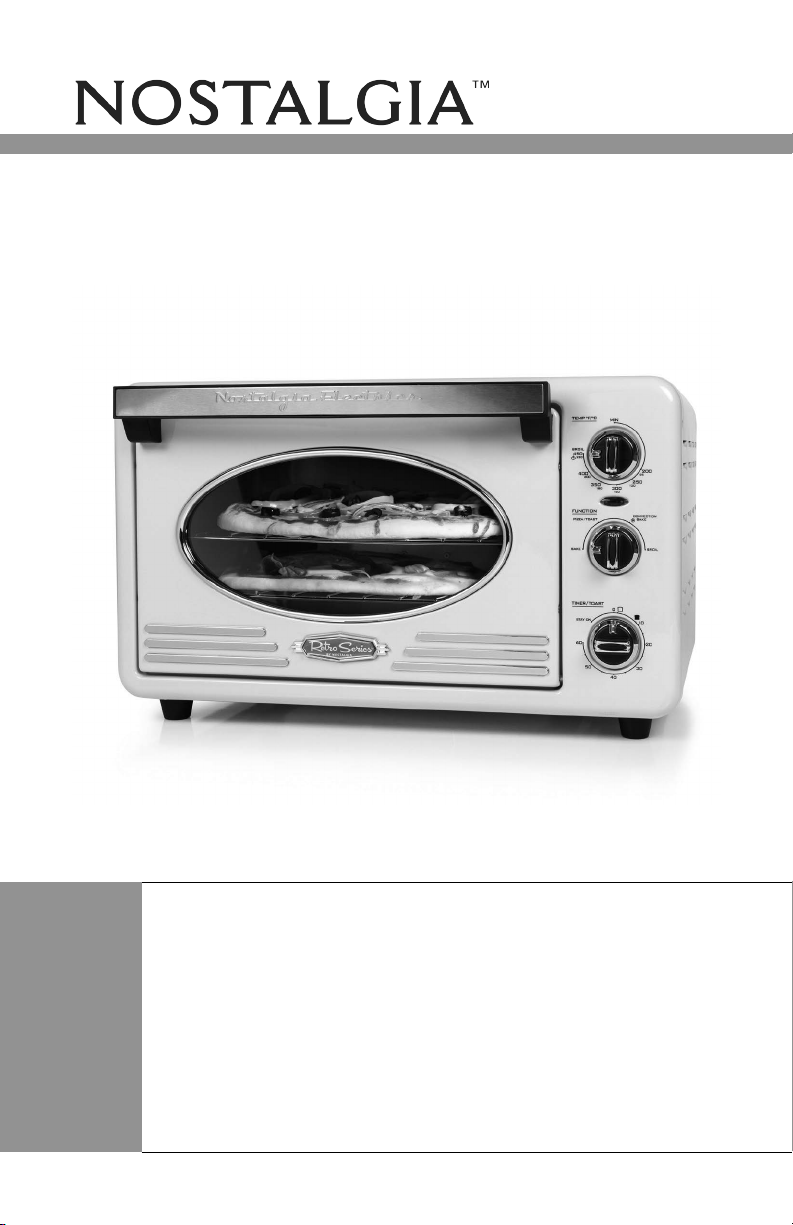
Place the RETRO TOASTER OVEN on a stable surface near an electrical
outlet before starting. Make sure that the cord is away from any water
source, then plug the appliance into an electrical outlet.
Bake Function
1. Open the oven door and insert the Grill Rack to the
suitable rack slot, then close the oven door.
2. Turn the Temperature Gauge to the desired temperature, then
turn the Function Selector to the "BAKE" position.
3. Turn the timer to 15 minutes to allow oven to preheat with the door closed.
4. Once oven is preheated, place food on the Baking Pan using a hot pad or oven mitt.
CAUTION: Interior of the toaster oven will be VERY HOT and contact may cause burns.
5. Turn the timer to the desired cooking time. After setting the
time, the power indicator light will illuminate.
6. When the timer has expired, the timer bell will ring and the dial will
be back to the "0"position. To stop the cycle at any time, simply turn
the Timer to the "0" position and the timer bell will ring.
7. Using a hot pad or oven mitt, carefully remove your food from the oven.
Pizza/Toast Function
1. Open the oven door, place the Grill Rack on the suitable rack slot, place up to
six pieces of bread or two pizzas on the Wire Rack, then close the oven door.
Bread should be evenly spaced on the Wire Rack so that it toasts evenly.
2. Rotate the Temperature Gauge clockwise to "450°F/230°C", and
the Function Selector to "PIZZA/TOAST" position.
3. Next, turn the Timer dial to the desired browning setting. A lighter toast corresponds to the
symbol, while darker toast corresponds to the symbol.
NOTE: Allow oven to preheat with the door closed for 15 minutes before putting
pizza in the oven. Rotate pizzas 180° half way through the cycle for even cooking.
4. After setting the timer, the power indicator light will illuminate. When the timer has
expired, the timer bell will ring and the dial will be back to the "0"position. To stop the
cycle at any time, simply turn the Timer to the "0" position and the timer bell will ring.
5. Using a hot pad or oven mitt, carefully remove your food from the oven.
Convection Bake Function
1. Open the oven door and insert the Grill Rack on the
suitable rack slot, then close the oven door.
2. Turn the Temperature Gauge to the desired temperature, then turn
the Function Selector to the "CONVECTION BAKE" position.
3. Turn the timer to 15 minutes to allow oven to preheat with the door closed.
4. Once oven is preheated, place food on the Baking Pan using a hot pad or oven mitt.
CAUTION: Interior of the toaster oven will be VERY HOT and contact may cause burns.

ENGLISH
7
5. Turn the timer to the desired cooking time. After setting the
time, the power indicator light will illuminate.
6. When the timer has expired, the timer bell will ring and the dial will
be back to the "0"position. To stop the cycle at any time, simply turn
the Timer to the "0" position and the timer bell will ring.
7. Using a hot pad or oven mitt, carefully remove your food from the oven.
Broil Function
1. Open the oven door and insert the Grill Rack on the
suitable rack slot, then close the oven door.
2. Turn the Temperature Gauge to the desired temperature, then
turn the Function Selector to the "BROIL" position.
3. Turn the timer to 15 minutes to allow oven to preheat with the door closed.
4. Once oven is preheated, place food on the Baking Pan using a hot pad or oven mitt.
CAUTION: Interior of the toaster oven will be VERY HOT and contact may cause burns.
5. Turn the timer to the desired cooking time. After setting the
time, the power indicator light will illuminate.
6. When the timer has expired, the timer bell will ring and the dial will
be back to the "0"position. To stop the cycle at any time, simply turn
the Timer to the "0" position and the timer bell will ring.
7. Using a hot pad or oven mitt, carefully remove your food from the oven.
By following these simple instructions, your RETRO TOASTER
OVEN will be fun for friends, family and kids of all ages!

ENGLISH
8
HELPFUL TIPS
OVERCOOKED / UNDERCOOKED FOODS
For overcooked or undercooked food, the temperature setting, time setting or
Wire Rack may need to be adjusted or repositioned. Also, it is best to prevent
heat loss while cooking and avoid opening the oven door frequently.
Keep in mind that the RETRO TOASTER OVEN is smaller than a regular
oven and will heat up faster and generally cook in shorter periods of time.
In addition, frozen foods and thick meat will take longer to cook.
BURNING/SMOKING
A burnt smell coming from your RETRO TOASTER OVEN, may be due to food build-up inside
the oven. Follow the directions under CLEANING & MAINTENANCE to clean the oven.
CLEANING & MAINTENANCE
Make sure the unit is unplugged and allow all parts to cool completely before cleaning.
To prolong the life of your RETRO TOASTER OVEN, please follow these simple
instructions for maintenance. Never place the appliance in a dishwasher.
• Wash the Wire Racks, Baking Pan, and Crumb Tray in warm, soapy water.
• Clean the outer surface with a soft, damp cloth.
• Dry all parts with a soft, non-abrasive towel or cloth.
• DO NOT use abrasive cleaning products as they may damage the unit.
• DO NOT wipe the heating elements.

ENGLISH
9
RECIPES
Use your RETRO TOASTER OVEN to prepare quick, easy-to-serve meals!
From breakfast to late night snacks, create your own masterpieces or
follow the recipes below to become a toaster oven connoisseur.
WHOLE WHEAT BLUEBERRY CORNBREAD MUFFINS
• ½ cup buttermilk
• 1 large egg
• 2 Tbsp. of sugar
• 2 Tbsp. of
unsweetened
applesauce
• / cup cornmeal
• / cup of whole
wheat flour
• 2 tsp. of baking
powder
• ¼ tsp. of salt
• ½ tsp. cinnamon
• ½ cup of fresh
blueberries
Using CONVECTION BAKE, preheat your RETRO TOASTER
OVEN to 350°F as directed under HOW TO OPERATE.
In a medium size bowl, mix together the our, cornmeal,
baking powder, cinnamon, and salt. Set aside.
In a small bowl, whisk together the buttermilk,
egg, applesauce, and sugar. Add the wet
ingredients to the dry ingredients.
Mix until just barely combined, then fold in the blueberries.
Divide mixutre into 6 mun cups
and put in the toaster oven.
Bake for 20 to 25 minutes.
BAKED APPLE BREAKFAST OATS
• 1 large apple
• / cup vanilla
Greek yogurt
• / cup rolled oats
• 1 Tbsp. peanut butter
• Cinnamon
Using BAKE, preheat your RETRO TOASTER OVEN
to 400°F as directed under HOW TO OPERATE.
Cup an apple into ½ inch chunks and
sprinkle generously with cinnamon.
Bake in the toaster oven for 12 minutes.
When apples are done baking, combine yogurt,
rolled oats, and baked apples chunks in a bowl.
Top with peanut butter and enjoy!

ENGLISH
10
BAKED EGGS
• 4 eggs
• Butter
• 10 grape or cherry
tomatoes
• 2 strips of bacon
• Cheese to grate
• ¼ tsp. Smoked
paprika
• Salt
• Pepper
Using BAKE, preheat your RETRO TOASTER OVEN
to 375°F as directed under HOW TO OPERATE.
Cook the strips of bacon on the stove.
Grease two ramekins with butter.
Cut the tomatoes in half and divide among the
dishes. Sprinkle with a little bit of salt.
When bacon is nicely browned, blot o excess
grease with paper towels and chop into small pieces.
Divide the bacon between the two dishes.
Grate the cheese into each dish and then
crack two eggs into each dish.
Sprinkle half of the smoked paprika on each
dish, along with a pinch of salt and pepper.
Place both ramekins on the Baking
Pan and then into the oven.
Cook until the egg whites turn opaque, roughly 15 minutes.
Enjoy!
OPEN FACED TUNA MELT
• 1 can (3 oz.) white
tuna in water, drained
• 2 Tbsp. chopped
cilantro
• 2 Tbsp. salsa
• 1 Tbsp. light
mayonnaise
• 1 English muffin,
split, lightly toasted
• 2 slices colby-
jack cheese
Using BAKE, preheat your RETRO TOASTER OVEN
to 350°F as directed under HOW TO OPERATE.
Combine tuna, cilantro, salsa and
mayonnaise in a small bowl.
Place English mun halves on the Baking Pan
and top with the tuna mixture and cheese.
Bake until cheese is melted, 2 to 3 minutes.
Enjoy!

ENGLISH
11
OVEN ROASTED ASPARAGUS
• 1 bunch asparagus
• 4 Tbsp. olive oil
• Kosher salt, to taste
• Freshly ground black
pepper, to taste
Using BAKE, preheat your RETRO TOASTER OVEN
to 425°F as directed under HOW TO OPERATE.
Wash and trim asparagus, then spread out the aspargus
in a single layer on the Baking Pan. Pat aspargus as dry as
you can to avoid "steaming" the asparagus in the oven.
Drizzle olive oil over the asparagus and then
sprinkle with kosher salt and black pepper.
Roast the asparagus for about 10 minutes.
Enjoy!
PESTO SALMON
• 1 ¼ lb. salmon filet,
cut into 4 pieces
• 2 Tbsp. white wine
• 2 Tbsp. toasted pine
nuts (optional)
• 1 lemon, halved
Using BROIL, preheat your RETRO TOASTER OVEN
to 450°F as directed under HOW TO OPERATE.
Cover the Baking Pan with foil, then
coat with canola cooking spray.
Place salmon lets, skin-side dow, on the foil-lined pan.
Squeeze one of the lemon halves over the
salmon, then drizzle with white wine, and
allow to marinate for 15 minutes.
Spread ½ Tbsp. of the pesto over each serving of salmon.
Broil until sh akes and esh is opaque and light
pink, or about 8 to 10 minutes per inch of thickness.
Cut the remaining lemon in thin slices, and
garnish with toasted pine nuts.
Enjoy!

ENGLISH
12
QUICK AND EASY BRUSCHETTA
• ½ French baguette
• 1 clove garlic
• 12 cherry
tomatoes, diced
• ¼ cup fresh
mozzarella
cheese, diced
• 4 large basil leaves,
chiffonade
• Extra virgin olive oil
• Salt and pepper,
to taste
Using PIZZA/TOAST, preheat your RETRO TOASTER
OVEN to 450°F as directed under HOW TO OPERATE.
Slice half of the baguette on the diagonal
into 12 ½-inch thick pieces.
Place the slices on a baking sheet and toast them on
the top rack of the toaster oven for 5 to 6 minutes,
until turning golden brown around the edges.
When the slices are cool enough to handle, rub them with
a clove of garlic, then drizzle with extra virgin olive oil.
Place the diced tomatoes, diced mozzarella and basil
together in a small bowl. Drizzle with olive oil and
season with salt and pepper, to taste. Stir to combine.
Spoon the mixture over the bruschetta
or serve on the side as a dip.
Enjoy!
FISH AND CHIPS
• 1 ¾ lbs. red or Yukon
gold potatoes, cut
into 1-inch chunks
• 4 Tbsp. olive oil
• 1 ¼ tsp. kosher salt
• 1 ¼ tsp. black pepper
• 8 sprigs fresh thyme
• 4 6-oz. pieces of cod
• 1 lemon, halved
• 1 clove garlic,
thinkly sliced
• 2 Tbsp. capers,
drained
Using BAKE, preheat your RETRO TOASTER OVEN
to 450°F as directed under HOW TO OPERATE.
Plate the potatoes, 2 Tbsp. of olive oil, 1 tsp. of salt, ¼ tsp. of
pepper, and 4 sprigs of thyme in a bowl and toss to coat.
Spread the potato mixture on the Baking Pan
in a single layer and bake, stirring occasionally,
until golden brown, 25 to 30 minutes.
Transfer to a large piece of aluminum
foil and wrap to keep warm.
Wipe the Baking Pan and place cod in the tray.
Thinly slice half the lemon. Top the cod with lemon
slices, garlic, capers and the remaining salt, pepper
and thyme sprigs. Drizzle with the remaining oil.
Bake cod until cooked through, 8 to 12
minutes, depending on size.
Transfer cod and potatoes to plates, squeeze the
remaining lemon half over the Baking Pan and return
to the oven until the juices are warmed through, about
5 minutes. Pour sauce over the sh and potatoes.
Enjoy!

ENGLISH
13
RETURNS & WARRANTY
SHOULD YOUR UNIT NOT WORK OR IF DAMAGED WHEN YOU FIRST TAKE IT OUT OF
THE BOX, PLEASE RETURN IT TO THE PLACE OF PURCHASE IMMEDIATELY.
RETRO TOASTER OVEN / RTOV220AQ
Should you have any questions, please contact us via email or at the customer service number listed
below between the hours of 8:00 AM and 5:00 PM, Monday through Friday, Central Standard Time.
Distributed by:
Nostalgia Products LLC
1471 Partnership Dr.
Green Bay, WI 54304-5685
Customer Service
Phone: (920) 347-9122
Web: www.nostalgiaproducts.com
Customer Service Inquiry
To submit a Customer Service inquiry, go to www.nostalgiaproducts.com and ll
out the Customer Service Inquiry form and click the Submit button.
A representative will contact you as soon as possible.
Product Warranty Terms
Nostalgia Products LLC (the “Company”) hereby warrants that for a period of one (1) year from the
date of original purchase, this product will be free of defects in material and workmanship under
normal home use, provided that the product is operated and maintained in accordance with the
operating instructions. As the sole and exclusive remedy under this warranty, the Company will
at its discretion either repair or replace the product found to be defective, or issue a refund on the
product during the warranty period. This warranty is only available to the original retail purchaser of
the product from the date of initial retail purchase, and is only valid with the original sales receipt, as
proof of purchase date is required to obtain warranty benets. All warranty claims must be brought
to the attention of the Company within the warranty period and no later than 30 days of the failure
to perform. This warranty does not cover normal wear or damage caused by shipping, mishandling,
misuse, accident, alteration, improper replacement parts, or other than ordinary household use.
You may be required to return the product (with shipping prepaid by you) for inspection and
evaluation. Return shipping costs are not refundable. The Company is not responsible for returns
damaged or lost in transit. Unless otherwise specically permitted by the operating instructions, this
warranty applies to indoor household use only. In order to obtain service under this warranty, please
contact the Company at the telephone number listed above or by lling out the Customer Service
Inquiry Form located at www.nostalgiaproducts.com. Warranty valid only in USA and Canada.
This warranty is in lieu of all other warranties, expressed or implied, including warranties of
merchantability and tness for a particular purpose, which are hereby excluded to the extent
permitted by law. In no event shall the Company be liable for any indirect, incidental, consequential,
or special damages arising out of or in connection with this product or the use thereof. Some
states, provinces or jurisdictions do not permit the exclusion or limitation of incidental or
consequential damages, so the foregoing exclusion or limitation may not apply to you.
This warranty does not apply to re-manufactured merchandise.
Please read the operating instructions carefully. Failure to comply
with the operating instructions will void this warranty.
For more information, visit us online at www.nostalgiaproducts.com.
Like us on Facebook at www.facebook.com/NostalgiaElectrics.
Follow our boards on Pinterest at www.pinterest.com/nostalgiaelctrx.
Tweet along with us on Twitter at www.twitter.com/NostalgiaElctrx.

14
FRANÇAIS
14
Faire une fête tous les jours!
Visiter le site Web www.nostalgiaproducts.com
pour d’autres produits agréables.
TABLE DES MATIÈRES
SÉCURITÉ . . . . . . . . . . . . . . . . . . . . . . . . . . . . . . . . . . . . . . . . 14
IMPORTANTES MESURES DE PRÉCAUTION . . . . . . . . . . . . . . . . . . . 15
IMPORTANTES MISES EN GARDE . . . . . . . . . . . . . . . . . . . . . . . . .15
INTRODUCTION . . . . . . . . . . . . . . . . . . . . . . . . . . . . . . . . . . . . 16
PIÈCES ET ASSEMBLAGE . . . . . . . . . . . . . . . . . . . . . . . . . . . . . . . 17
MODE DE FONCTIONNEMENT . . . . . . . . . . . . . . . . . . . . . . . . . . . 18
CONSEILS UTILES . . . . . . . . . . . . . . . . . . . . . . . . . . . . . . . . . . . 20
NETTOYAGE ET ENTRETIEN . . . . . . . . . . . . . . . . . . . . . . . . . . . . . 20
RECETTES . . . . . . . . . . . . . . . . . . . . . . . . . . . . . . . . . . . . . . . . 21
RETOURS ET GARANTIE . . . . . . . . . . . . . . . . . . . . . . . . . . . . . . . 25
SÉCURITÉ
Appliance Specications/Fiche technique de l'appareil :
120 V, 60 Hz
1500 Watts
CE PRODUIT DOIT ÊTRE BRANCHÉ UNIQUEMENT DANS UNE PRISE DE COURANT DE 120 V CA.
Reportez-vous à www.nostalgiaproducts.com/user-manuals/
pour la version la plus récente.
Votre sécurité tout comme celle des autres est importante.
De nombreux messages importants de sécurité se trouvent dans le présent manuel
et sur votre appareil. Toujours lire et respecter toutes les consignes de sécurité.
Ceci est le symbole d'avertissement de sécurité.
Ce symbole vous alerte des risques de danger potentiels pouvant
causer de graves blessures à vous et d'autres personnes.
Tous les messages de sécurité suivront le symbole d'avertissement de sécurité.
Tous les messages de sécurité indiqueront le danger potentiel et la façon de réduire
le risque de blessure et ce qui peut arriver si les consignes ne sont pas suivies.

15
FRANÇAIS
15
IMPORTANTES MESURES DE PRÉCAUTION
1. NE JAMAIS plonger l'appareil dans l'eau.
2. NE JAMAIS utiliser près d'une source d'eau.
3. NE JAMAIS utiliser une éponge ou un chion abrasif sur l'appareil.
4. NE JAMAIS laisser l'appareil sans surveillance pendant le fonctionnement.
5. NE JAMAIS faire cuire ou mettre autre chose dans l'appareil que ce qui est prévu.
6. Débrancher la prise de l'appareil lorsqu'il n'est pas utilisé et au moment du nettoyage.
7. NE JAMAIS utiliser cet appareil avec un cordon ou une prise
endommagée, ou si l'appareil fonctionne mal.
8. NE JAMAIS le mettre dans le lave-vaisselle.
9. Garder hors de la portée des enfants.
10. Cet appareil n'est PAS UN JOUET.
11. Les enfants laissés sans surveillance et les personnes ayant une
décience cognitive ne devraient jamais utiliser cet appareil.
12. Les jeunes enfants qui sont à proximité de l'appareil ne devraient pas être
laissés sans surveillance pour s'assurer qu'ils ne jouent pas avec celui-ci.
IMPORTANTES MISES EN GARDE
Des mesures de précaution de base devraient toujours être prises
pendant l'utilisation d'appareils électriques, notamment :
1. Lire toutes les consignes avant d'utiliser l'appareil.
2. Pour éviter de s'électrocuter, ne pas immerger le cordon électrique,
la prise ou l'appareil dans l'eau ou tout autre liquide.
3. Une surveillance étroite est nécessaire lorsque tout appareil
électrique est utilisé à proximité des enfants.
4. Avant de retirer les pièces et de les nettoyer, débrancher l'appareil lorsqu'il n'est pas utilisé.
5. NE PAS utiliser l'appareil avec un cordon ou une prise endommagée ni si
l'appareil est endommagé de quelque façon que ce soit. Retourner l'appareil
à l'atelier de réparation le plus près pour qu'il soit révisé ou réparé.
6. Le fabricant ne recommande pas l'utilisation d'accessoires. L'utilisation
de quelque accessoire pourra provoquer des blessures.
7. NE PAS utiliser à l'extérieur.
8. NE PAS placer sur un brûleur à gaz ou électrique ou à sa proximité, ou dans un four chaud.
9. NE JAMAIS utiliser cet appareil pour un usage autre que celui auquel il est destiné.
10. Un appareil qui est branché dans une prise de courant ne devrait pas être
laissé sans surveillance lorsqu'il est en cours de fonctionnement.
11. Vérier qu'il n'y a aucun corps étranger dans l'appareil avant l'utilisation.
12. NE JAMAIS mettre un ustensile ou tout autre objet dans la grille quand l'appareil est branché.

16
FRANÇAIS
16
13. Un cordon électrique court est fourni pour réduire le risque de
s'emmêler ou de trébucher sur un long cordon.
14. Une rallonge amovible peut être utilisée avec prudence.
15. La capacité nominale d'une rallonge doit être supérieure ou
égale à la puissance électrique de l'appareil.
16. Cet appareil possède une che polarisée (une lame est plus large que
l'autre). Pour réduire le risque d'électrisation, cette che est conçue
pour s'intégrer dans une prise polarisée que dans un sens.
CONSERVER CES CONSIGNES!
INTRODUCTION
Merci d'avoir acheté le FOUR-GRILLOIR STYLE RETRO de Nostalgia™. Maintenant,
vous pouvez faire cuire au four, faire grillé, cuire par convection ou griller
un repas rapidement et ecace en énergie. Faites des collations rapides,
de pizzas aux toasts et plus. Consultez la section de recettes pour une
multitude de recettes de petit-déjeuner, déjeuner et dîner amusants!
Caractéristiques incluses :
• 1 500 W
• D’une capacité de 22 l pouvant cuire deux pizzas de 12 po ou 12 tranches de pain
• Fonctions Cuire au four/Faire griller/Cuisson par convection/Griller
• Sélecteur de puissance de chauage à quatre niveaux : Élément du
haut/élément du bas/ éléments du haut et du bas/Éteint
• Température réglable de 93°C à 232°C (200°F à 450°F)
• Plaque de cuisson en aluminium, deux grilles nickelées et un ramasse-miettes
• Voyant d’alimentation

17
FRANÇAIS
17
PIÈCES ET ASSEMBLAGE
PIÈCES
Votre FOUR-GRILLOIR RETRO est livré complètement assemblé.
Panneau de contrôle
Sélecteur de fonctions :
Cuire au four - Les éléments du haut et du bas chaueront.
Pizza/Rôtir - Les éléments du haut et du bas chaueront.
Cuisson par convection - Les éléments du haut et du
bas chaueront et de l’air chaud circulera dans le four.
Broil - Seul l’élément du haut chauera.
Minuterie :
Minuterie réglable
de 0 à 60 minutes
Thermostat:
Température réglable de
95°C à 230°C (200°F à 450°F)
Ramasse-miettes
Grille
Poignée
Minuterie
Sélecteur de fonctions
Thermostat
Plaque de cuisson

18
FRANÇAIS
18
MODE DE FONCTIONNEMENT
Avant de commencer, essuyer l’extérieur du boîtier et les parois
internes avec un linge humide. Nettoyer les Grilles, le Ramasse-miettes
et la Plaque de cuisson dans de l’eau chaude savonneuse.
Placer le FOUR-GRILLOIR RETRO sur une surface stable près d'une
prise de courant. S'assurer que le cordon électrique est éloigné de
toute source d'eau, et brancher l’appareil dans une prise.
Fonction Cuire au four
1. Ouvrir la porte du four et insérer la Grille à la hauteur désirée, puis fermer la porte du four.
2. Régler le Thermostat à la température désirée, puis tourner le Sélecteur
de fonctions à la position « CUIRE AU FOUR » (BAKE).
3. Tournez la minuterie à 15 minutes pour permettre au
four de préchauer avec la porte fermée.
4. Une fois que le four est préchaué, placez les aliments sur la plaque de cuisson à
l'aide d'un dessous-de-plat ou des gants de cuisinier. MISE EN GARDE : L’intérieur
du four-grilloir sera TRÈS CHAUD et un contact peut causer des brûlures.
5. Mettre la minuterie selon le temps de cuisson désiré. Après
avoir réglé la minuterie, le voyant s'allumera.
6. Lorsque le temps de la minuterie est expiré, la sonnerie de la minuterie
s’activera et le cadran sera à nouveau de retour à la position « 0 ». Pour
mettre n au cycle à n'importe quel moment, il sut de ramener le
cadran à la position « 0 », la sonnerie de la minuterie s’activera.
7. À l’aide d’un dessous-de-plat ou des gants de cuisinier,
retirer avec précaution la nourriture du four.
Fonction Pizza/Rôtir
1. Ouvrir la porte du four et insérer la Grille à la hauteur désirée, poser 6 tranches de
pain ou 2 pizzas sur la grille, puis fermer la porte du four. Les tranches de pain doivent
être espacées régulièrement sur la grille de sorte qu'elles grillent uniformément.
2. Tourner le Thermostat dans le sens horaire è 230°C (450°F), et le Sélecteur
de fonctions à la position « PIZZA/RÔTIR » (PIZZA/TOAST).
3. Ensuite, Tourner la molette de Minuterie au niveau de brunissement désiré. Un rôtissage
blanc correspond au symbole s, alors qu’un rôtissage foncé correspond au symbole .
REMARQUE : Laisser le four préchaué pendant 15 minutes la porte fermée avant
de mettre la pizza. Tourner les pizzas de 180° à la moitié du temps de cuisson.
4. Après avoir réglé la Minuterie, le voyant d’alimentation s'allumera. Lorsque le temps
de la minuterie est expiré, la sonnerie de la minuterie s’activera et le cadran sera à
nouveau de retour à la position « 0 ». Pour mettre n au cycle à n'importe quel moment,
il sut de ramener le cadran à la position « 0 », la sonnerie de la minuterie s’activera.
5. À l’aide d’un dessous-de-plat ou des gants de cuisinier,
retirer avec précaution la nourriture du four.
Fonction de cuisson par convection
1. Ouvrir la porte du four et insérer la Grille à la hauteur désirée, puis fermer la porte du four.
2. Régler le Thermostat à la température désiré, puis tourner le Sélecteur
Table of contents
Languages:
Other Nostalgia Electrics Oven manuals