Novexx XLP 504 User manual
Edition 3 - 9/2016 - Translation of original version
USER MANUAL
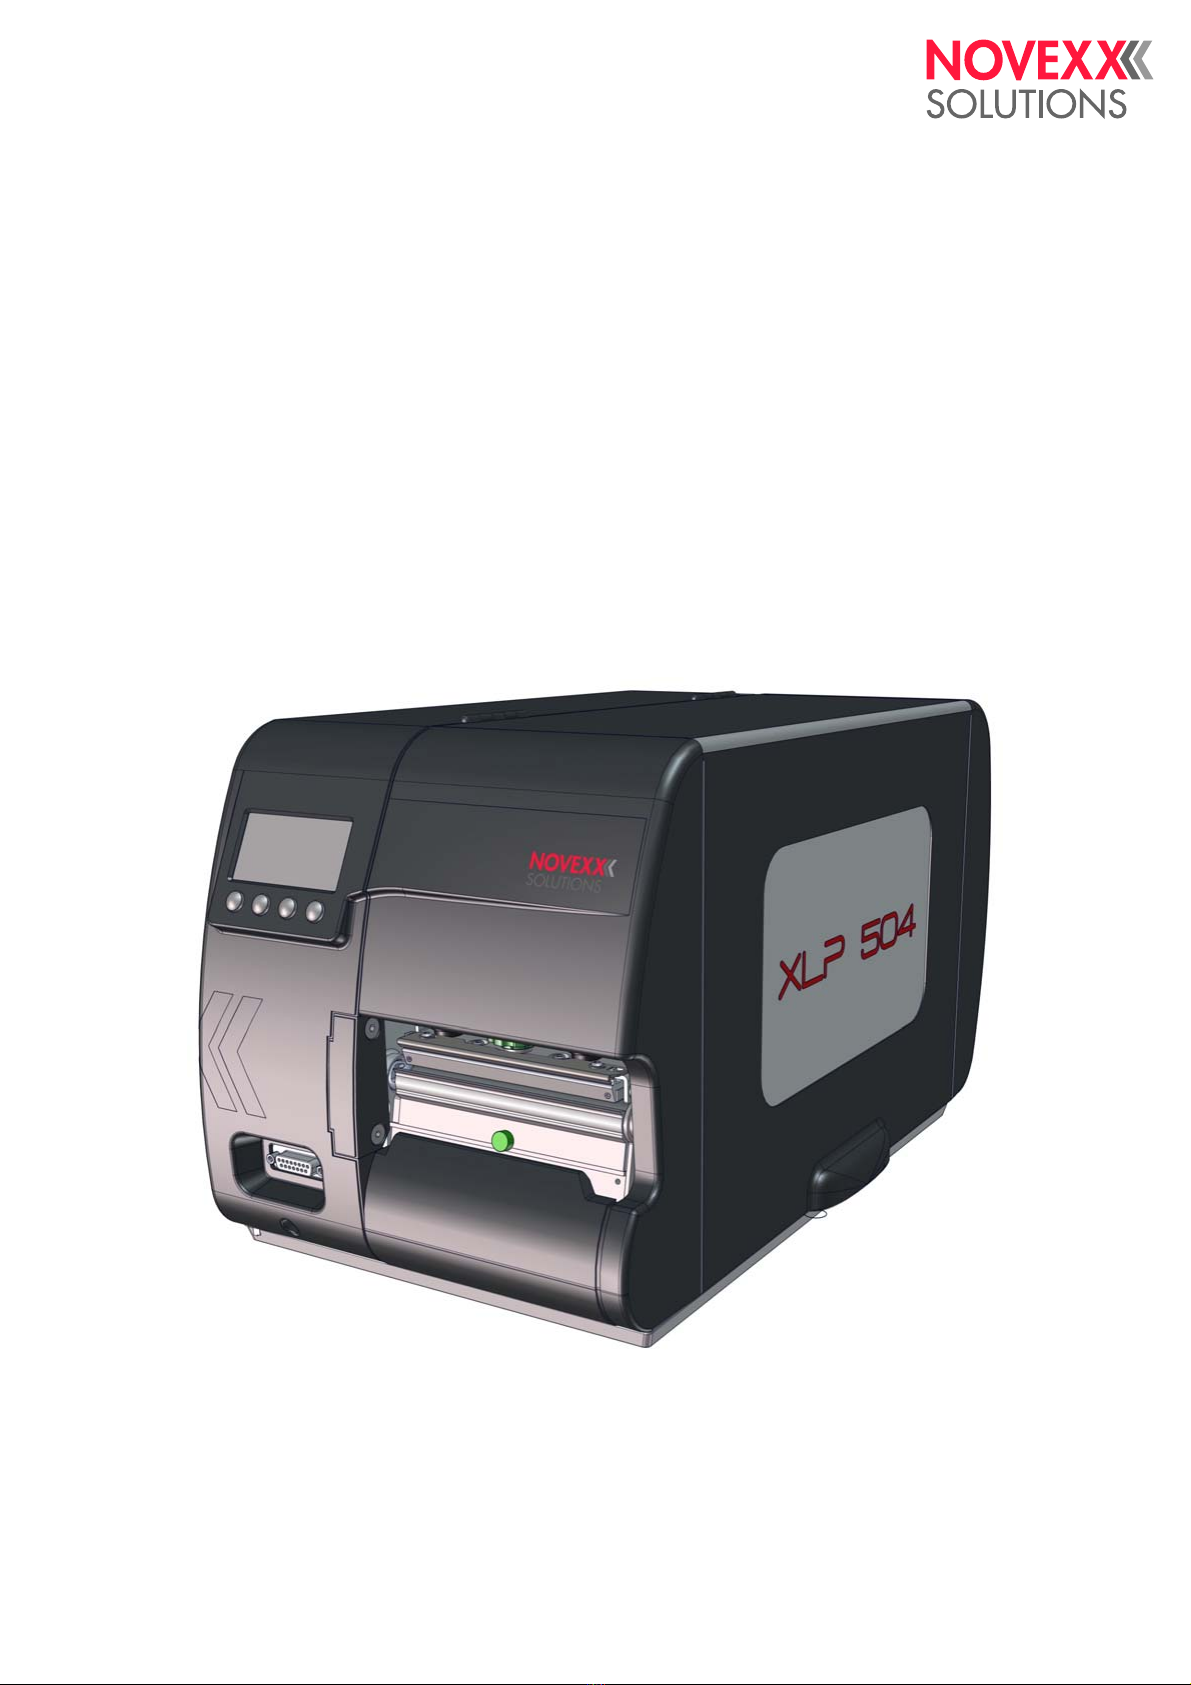
XLP 504
Label printer


User manual XLP 504
09/2016 3Inhalt
Content
Please note -6
General notes -6
Validity of this manual and required compliance -6
How information is represented -7
For your safety -9
Intended use -9
Safety notes -9
Product description -12
Overview -12
Intended Use -12
Functionality -12
Device types -14
Options -14
Ports and connections -15
Operating controls -16
Operation panel -20
Operating controls -20
Operating principle -20
Icons overview -22
Technical data -23
Dimensions -23
Performance Data -23
Label Stock -27
Thermotransfer Ribbon -28
Connections, device data -28
Interfaces -28
Electronic Configuration -28
Specifications only for XLP 504 dispenser -29
Ambient Conditions -29
Certificates and Markings -29
Parameter menu -30
Overview -30
Alphabetical Parameter list -33
Parameter Reference -35
Commissioning -92
Scope of delivery -92
Setting up the printer -93
Electrical connections -94
Connecting to the mains power supply -94
Connecting to a data host -95

User manual XLP 504
09/2016 4Inhalt
Basic settings -96
Language setting operation panel -96
Setting the realtime clock -96
Switching the rewind function on/off -96
Switching the dispense function on/off -97
Setting the dispense function -97
Operation -98
Choosing the Materials -98
Label Material -98
Thermal Transfer Ribbon -99
Insertion Diagrams -100
XLP 504 standard -100
XLP 504 with internal rewinder -100
XLP 504 with internal rewinder and dispensing edge -101
Inserting Label Material -102
XLP 504 Standard -103
XLP 504 with internal rewinder -105
XLP 504 with internal rewinder and dispensing edge -106
Inserting Ribbon -107
Inserting a new ribbon roll -108
Replacing the Ribbon Roll -108
Alternating use of different sorts of ribbon -109
Setting and monitoring the printer -110
Settings in parameter menu -110
Adjusting the degree of blackness -111
Printhead support for narrow labels -112
Monitoring functions -113
Printing -115
Creating print jobs -115
Installing the printer driver -115
Transferring a print job -115
Monitoring a printjob -118
Troubleshooting -119
Print misalignment using the internal rewinder -119
Malfunctions -120
Status Reports -120
General information about status reports -120
Reference of status reports -122
Cleaning & Maintenance -159
Cleaning instructions -159
Safety -159
Cleaning agents -159
Cleaning interval -159
General cleaning -160

User manual XLP 504
09/2016 5Inhalt
Printhead -161
Important Handling Notes -161
Finding out the printhead resolution -161
Cleaning the Printhead -162
Changing the Printhead -164
Print Roller -165
Cleaning the Print Roller -165
Changing the Print Roller -166
Punch Sensor -167
Material guiding: setting the movability -168
Disposal -169
Scrapping the printer -169
Before scrapping -169
Disposal measures -169
User Manual XLP 504
09/2016 | 02 6Please note
Please note
GENERAL NOTES
Validity of this manual and required compliance
Contents
The complete operating manual for the label printer XLP 504 consists of the following parts:
This operating manual refers exclusively to the machine type listed above. It is used for proper
operation and adjustment of the machine.
The machine must be properly installed and configured to allow for operation and settings.
For information about the required qualification, see section Qualifications required on page 9.
For information about installation and configuration, see the service manual.
For technical questions not covered in this operating manual:
Follow the instructions of the service manual
or
Request a service technician from our sales partner.
Our sales partner's customer service department is available especially for configuration settings
and malfunctions.
Technical release
Technical release: 8/2016
Software version: 7.70
Liability
NOVEXX Solutions reserves the right:
• to make changes in design, parts and software and to use equivalent parts instead of those
specified for the purpose of technological progress.
• to change information in this manual.
Any obligation to extend these changes to machines previously delivered is excluded.
Copyright
NOVEXX Solutions retains all rights to this manual and its appendices. Reproduction, reprint or any
other type of duplication, including parts of the manual, are permitted only with written approval.
Printed in Germany
Manual Target group Medium Availability
Quick reference guide,
Safety notes Operating personnel Printed Lieferung mit der
Maschine
User manual PDF file www.novexx.com
Service manual Service personnel Service-Docu-CD Muss separat bestellt
werden a
a) Only for certified and qualified service technicians or OEM partners.
Spare parts catalog PDF file www.novexx.com

User Manual XLP 504
09/2016 | 02 7Please note
Manufacturer
Novexx Solutions GmbH
Ohmstrasse 3
D-85386 Eching, Germany
Tel.: +49-8165-925-0
Fax: +49-8165-925-231
www.novexx.com
How information is represented
Explanation of symbols
To enhance readability and make information easier to find, different types of information are iden-
tified:
Instruction with no order of tasks assigned
1. Numbered instructions introduced by preceding text
2. The specified order must be followed!
Special note for action that must be performed.
Explanation of an error cause in the reference of error messages.
• Enumeration of features
• Other feature
The Experts symbol identifies activities that are reserved exclusively for qualified and spe-
cially trained personnel.
The information symbol identifies notes and recommendations as well as additional infor-
mation.
Notes about hazards and risks
Important instructions that must absolutely be followed are specially highlighted:
Illustrations
Illustrations appear in the text where required. References to these illustrations are shown in
[square brackets] containing the number of the illustrations. Uppercase letters after an illustration
number, for example [12A], refer to the corresponding item within the illustration.
Normally the machine is shown as the right version. The left version is only shown if there is a need
to make a distinction.
WARNING!
A warning symbol refers to risks that can result in severe or fatal injuries! The note contains safe-
ty measures to protect affected persons.
Instructions must be followed without exception.
CAUTION!
A caution symbol refers to risks that can result in property damage or personal injury
(minor injuries). The note contains instructions for preventing damage.
Instructions must be followed without exception.

User Manual XLP 504
09/2016 | 02 8Please note
Parameters
Parameters in the parameter menu are represented in the format Menu name > Parameter name in grey
type.

User Manual XLP 504
09/2016 | 01 9Please note
FOR YOUR SAFETY
Intended use
The XLP 504 label printer is designed for printing label material, using the thermal or thermal trans-
fer printing process. In addition, the dispenser version of the printer can dispense self-adhesive la-
bels and can rewind the remaining backing paper (ar alternatively the complete label material). It is
possible to use a wide range of label materials and thermal transfer ribbons. Label stock must be
in roll shape or fan-folded. The label web can optionally be pulled-in from outside the printer through
the slots in the rear side or bottom plate.
Observe the technical specifications of the printer, see Technical data on page 23. Any other type
of or more extensive application will be considered abnormal use.
NOVEXX Solutions shall assume no liability for damage resulting from non-intended use of the ma-
chine.
Safety notes
Follow the instructions
Safe and efficient operation of the printer can only be guaranteed if you observe all necessary in-
formation.
• Before operating the printer, read the operating instructions and all other notes carefully.
• Observe the additional safety and warning notes on the printer.
Qualifications required
• Trained staff is required for inserting and changing foils and material.
• Users need to be instructed in the use of the printer so they can work safely and independently.
• Users should be able to resolve minor operational issues and faults by themselves.
• At least two users should be instructed.
Requirements for safe operation
• Only use the printer in enclosed areas with environmental conditions matching the values given
in the technical specifications!
• Only operate the printer on a plane, solid support.
• Make sure that the power supply socket for the printer is readily accessible!
• Only trained and authorized personnel should operate the printer!
• During operation, the printhead can become hot! Care should be taken when touching the print-
head!
• Do not make any modifications or any additional casing for the printer!
• Do not allow any liquids to enter into the printer!
• Repairs to the printer may only be performed by authorized specialists who are aware of the
risks involved!
• Lay the power supply cable, data cables and compressed air hoses (if applicable) in a way that
nobody can stumble over it.
• In case of emergency, switch off the printer and disconnect the power supply cable!
• Only use original accessories!

User Manual XLP 504
09/2016 | 01 10 Please note
Protection against injuries by electrical current
• Only operate the printer using the system voltage indicated on the nameplate!
• Only connect the printer to a grounded power socket fitted to authorized standards!
• Connect only devices to the interfaces at the printer that fulfil SELV (safety extra-low voltage)
circuit requirements according to EN 60950!
Protection against injuries by mechanical action
• Only operate the printer when the cover is closed!
• Don´t wear loose long hair (if necessary, wear a hairnet).
• Keep loose jewellery, long sleeves, etc. away from rotating parts of the printer!

User Manual XLP 504
09/2016 | 01 11 Please note
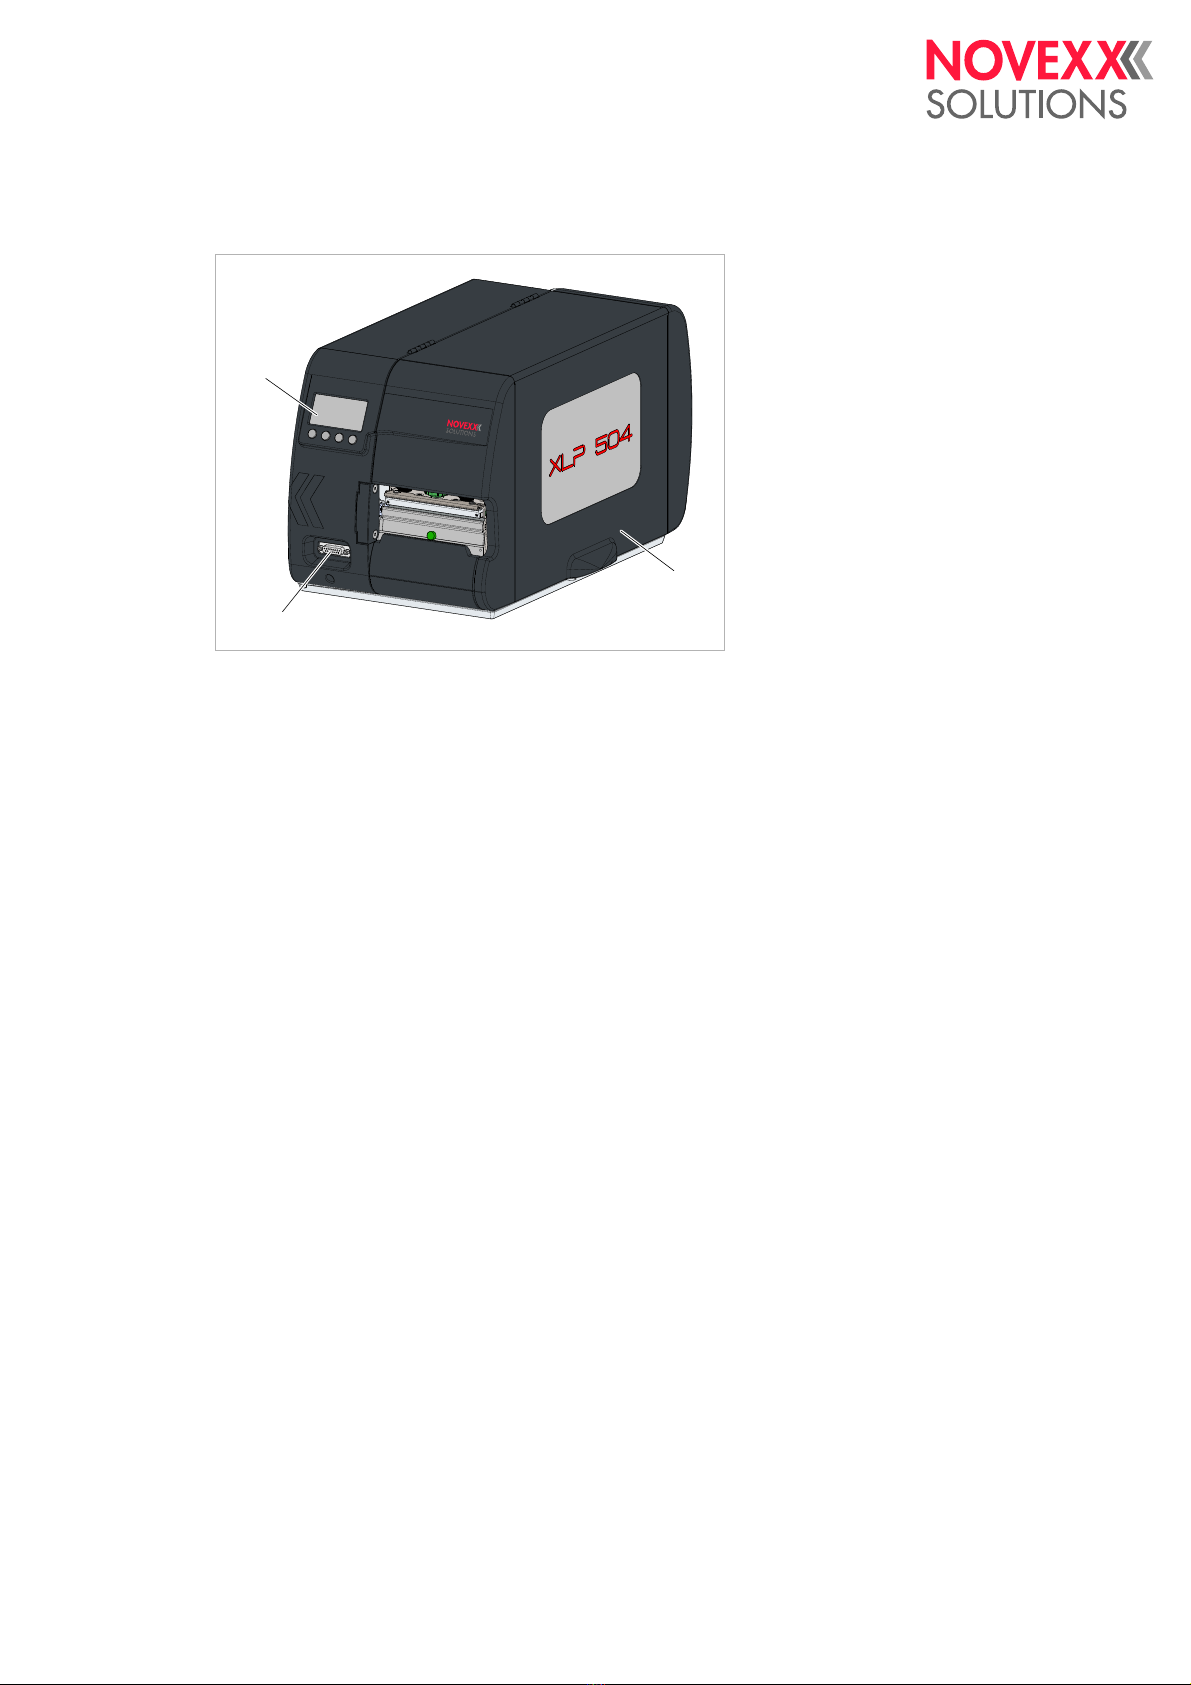
Warning notes on the machine
[1] Warning notes on the XLP 504.
CAUTION!
Warning notes on the printer provide important information for the operating personnel.
Do not remove warning notes.
Replace missing or illegible warning notes.
Warning note Meaning Article no.
The ´Pinch point´ warning note warns you of the danger po-
sed by the machine´s rotating parts; they can trap items and
draw them in.
A5346
The "Hot surface" symbol warns of a burn hazard if the sur-
face is touched. Allow the device to cool off before touching it. A5640
The blue label ´Read manual´ demands that operators read
the user manual. A5331
[Tab. 1] Meaning of the warning notes.

User manual XLP 504
09/2016 | 01 12 Product description
Product description
OVERVIEW
Intended Use
The XLP 504 printer is designed for printing label material, using the thermal or thermal transfer
printing process. In addition, the dispenser versions of both printer types can dispense self-adhe-
sive labels and can rewind the remaining backing paper (ar alternatively the complete label mate-
rial). It is possible to use a wide range of label materials and thermal transfer ribbons. Label stock
must be in roll shape or fan-folded. The label web can optionally be pulled-in from outside the print-
er through the slots in the rear side or bottom plate.
Any other use or use going beyond this shall be regarded as abnormal use.
NOVEXX Solutions assumes no liability for damage due to abnormal use of the printer.
Functionality
XLP 504 without dispenser
[2] Material and foil path inside the XLP 504.
APrinthead
BFoil unwind mandrel
CFoil rewind mandrel
DMaterial unwinder
EPrint roller
The printing principle is based on the thermal printhead [2A]. The core piece of the printhead, the
thermal edge, consists of a row of dot elements, which can be controlled and heated separately.
Each heated dot element leaves a black dot on the label material.
With thermo printing, the black dot results from the reaction of the thermosensitive label material.
With thermo transfer printing, the black colour is transferred from the thermotransfer foil to the label
material.
1
2
3
4
5
60
A
B
CC
E

User manual XLP 504
09/2016 | 01 13 Product description
In order to add the dot lines to an image, the label material has to be passed underneath the print-
head during printing. This material feeding is accomplished by the print roller [2E], which is motor
driven. By moving the label material, it is unwound from the label roll [2C].
When using thermotransfer printing, the thermotransfer foil is fed together with the label material
underneath the printhead. The foil position is between label material and printhead, the colour side
facing the label material. The full foil roll is plugged on the foil unwinder [2B]. After passing the print-
head, the used foil is wound onto the foil rewinder [2C], which is motor driven. If the foil roll is com-
pletely rewound, a new roll has to be inserted.
Material end and foil end are detected by sensors and are displayed on the operation panel (op-
tionally by a sound signal).
The label beginning is detected by a light transmission sensor with punched label material and by
a reflex sensor (option) with endless material.
XLP 504 dispenser
The XLP 504 dispenser allows freshly printed labels to be dispensed or rewound in the printer en-
closure.
• When used as a dispenser, the label material is drawn around the dispensing edge and only
the backing paper is rewound (Prerequisites: Dispensing edge + Rewinder).
• When used as a rewinder, the printed label is guided across a baffle plate and rewound togeth-
er with the backing paper (Prerequisites: Baffle plate + Rewinder).
The electronic components in the rewinder control the tensile force on the release paper so that the
same force is applied for all winding diameters. This is controlled independently of the material
width and printing speed. The controller can be set automatically or manually depending on the set-
tings in the parameter menu.
The manual setting is only necessary in special cases and may only be performed by qualified,
authorised service personnel.
After switching on the printer, the rewinder is initialised and the backing paper is tightened.
Once a print job is received, the printer searches for the first label start marking at reduced printing
speed. To do this, the label material is moved by at least the distance between the label sensor and
the printhead (70 mm). This distance is used by the rewinder controller to calculate the diameter of
the previously wound backing paper. To allow the controller to calculate the diameter even with
endless material, in this case printing also does not start until the material has moved 70 mm. The
print job is carried out at the speed that has been set in the parameter menu or as specified by the
print job.
If a fault occurs during operation, the rewinder shuts off automatically.
Once the maximum diameter of the backing paper has been reached, a message appears on the
display and the rewinder shuts off automatically.
The following operating modes are available for the dispenser:
•Dispenser mode with dispenser sensor:
The material feed ends at the dispensing edge, i.e., the label to be dispensed remains hanging
on the dispensing edge (set dispensing position). The printer waits until the label is removed
before moving the next empty label beneath the printhead and then printing and dispensing it.
•Dispenser mode with foot switch:
Pressing the foot switch releases the label for printing and dispensing. Afterwards, the next
empty label is positioned beneath the printhead.

User manual XLP 504
09/2016 | 01 14 Product description
Device types
The XLP 504 is available in the following versions:
Basic
XLP 504 equipped with serial, USB and Ethernet interface and SD card slot. Possible upgrade to
„peripheral“ version.
The following options can be integrated:
• Reflex sensor (bottom side)
• I/O board (signal interface and additional serial interface)
Peripheral
Like the XLP 504 basic, but with capability to add the following options:
• External rewinder
•Cutter
Options
Internal Options
…should be factory-fitted or installed by a service engineer:
•Internal rewinder kit: To retrofit the internal rewinder
•Internal rewinder + dispenser kit: To retrofit the internal rewinder and the dispensing edge
•Reflex sensor kit: Light barrier fitting that apart from the transmission sensor, also contains a
reflex sensor (detects reflex marks on the material bottom side).
•Label sensor for short labels. Recommended for label length < 30 mm.
•I/O board: RS- 422/485 interface, signal interface
External Options
…do not require any special alterations to the printer:
•Cutter (prerequisite: XLP 504 „peripheral“)
•(External) rewinder for material rolls with 38 mm (1.5”), 75 mm (3”) or 100 mm (4”) cores (pre-
requisite: XLP 504 „peripheral“)
•Keyboard for comfortable data input in standalone mode
•Foot switch for foot-operated single label dispensing
•Dispensing edge (prerequisite: XLP 504 „basic“ or „peripheral“ with internal rewinder)

User manual XLP 504
09/2016 | 01 15 Product description
Ports and connections
[3] The rear side of the XLP 504 with I/O board (option) installed.
AStart/stop signal input: Connections for a foot switch (signal starts printer) or stacker (signal
stops printer)
BMemory card slot: For SD cards where you can store fonts, logos, graphics, etc.
CUSB port (host): For USB sticks, keyboards, etc.
DUSB port (device): For serial transfer of printer data
ERS232 port: For serial transfer of printer data
FEthernet port: Interface for “Ethernet 10/100 Base T” network
GMains power switch: On/Off switch for printer
HMains socket: Mains socket for connection to mains using supplied cable
I(Option) Signal port: 4 inputs / 3 outputs on optionally available I/O board
J(Option) Serial port: RS232 or RS422/485 on optionally available I/O board
WARNING!
This unit operates at mains voltage! Contacting electrically live components can cause potenti-
ally lethal electrical shocks and burns.
Only connect the printer to devices that fulfil the SELV (safety extra-low voltage) circuit re-
quirements in accordance with EN 60950.
CAUTION!
Using poor quality auxiliary equipment can damage the printer.
Only connect original accessories.
A
I
J
B
C
D
E
F
G
H
User manual XLP 504
09/2016 | 01 16 Product description
Operating controls
Operating controls at the XLP 504
[4] Outside view of XLP 504 “peripheral”.
AControl panel:
LCD screen; 4 buttons; displays operating status of printer; allows parameter menu settings.
B(Only to XLP 504 “peripheral”) Connection for additional devices:
– Cutter („Cutter 2000“)
– Rewinder („Rewinder 2000“)
– Light barrier on the dispensing edge (Dispensing option)
CFront cover:
Open this to insert material and the ribbon.
A
B
C

User manual XLP 504
09/2016 | 01 17 Product description
[5] Operating controls of XLP 504.
ARibbon unwinding mandrel: Holds the new ribbon roll
BRibbon winding mandrel: Holds the cardboard core that rewinds the spent ribbon
CConnection flange for additional devices: You can fasten either a cutter or rewinder here. To do
this, you first have to remove the plastic cover.
DPressure elements: Set the printhead contact pressure by rotating the green dial (see chapter
Printhead contact pressure on page 112).
ESetting dial for printhead support: When using narrow labeling material, the printhead has to be
supported to get a uniform printing result (see chapter Printhead support for narrow labels on
page 112).
FPressure lever: Opening the pressure lever lifts the printhead. You do this to insert material/
ribbon or to clean the printhead/print roller.
GMaterial guiding
HAdapter rings: For adapting unwinder to core diameter of material roll.
IMaterial unwinder: This is where you install the roll with the label material.
JGuiding disk: Prevents material roll from sliding out sideways.
KMaterial strain relief: Allows the label material to unroll evenly.
LQuick reference guide: Booklet with the most important operating steps, inserted into a pocket
in the cover. Insertion diagram on the front page.
A
B
C
D
FGH
I
J
L
E
K

User manual XLP 504
09/2016 | 01 18 Product description
Operating controls at the XLP 504 with dispenser option
[6] Additional operating controls on XLP 504 dispenser.
ADispensing edge: This is where the labels are separated from the backing paper.
BPlugs: Connector for dispensing edge sensor.
CDispensing roll: This holds the material ribbon taut over the dispensing edge.
DButton for dispensing roll: Press the red button to remove the dispensing roll.
EDeflecting shaft: This deflects the backing paper.
FRewinder: This rewinds the backing paper.
A
B
C
DE
F

User manual XLP 504
09/2016 | 01 19 Product description
Operating controls of the XLP 504 with rewinding option
[7] Additional operating controls of XLP 504 with rewinding option.
ABaffle plate: Deflects the printed labels without dispensing any of them.
BDeflecting shaft: This deflects the labels.
CRewinder: Rewinds the label web.
A
B
C

User manual XLP 504
09/2016 | 01 20 Product description
OPERATION PANEL
Operating controls
The operation panel of the XLP 504 consists of a graphic display and four keys below the display.
The current functions of the keys are displayed by icons [8B] above the keys.
[8] Operation panel of the XLP 504.
AIcons that inform about the interface assignment (Tab. 4)
BIcons that show the key assignment (Tab. 3)
CKeys
Operating principle
Figure [9] shows, how to toggle between the screens:
[9] How to toggle between the screens with XLP 504
A„Home“ screen (cyan)
B„Setting“ screen (green)
C„Ready“ screen (white)
Ready
A
B
C
A
B C
D
Table of contents
Other Novexx Label Maker manuals


